1
Service Bulletin
Applies To:
06-011
March 14, 2006
2006 Civic 2/4-door – ALL
2006 Civic Hybrid – All
2006 Civic Si – All
Immobilizer System (Type 6)
All 2006 Civics have a Type 6 immobilizer system that
disables the vehicle unless a programmed ignition key
is used. The transponder ID code in the key or keyless
transmitter is a rolling-type code instead of a set code.
In this service bulletin, a programmed ignition key
refers to a transponder-type key or keyless transmitter
that has been cut to fit the ignition switch and whose
transponder ID code is recognized by the immobilizer
system. If you try to start the engine without a
programmed ignition key, the engine cranks, but it
doesn’t start.
IMMOBILIZER TRANSPONDER KEYS AND
KEYLESS TRANSMITTER DESCRIPTIONS
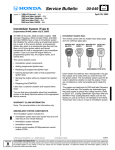
Some models come with three immobilizer transponder
keys (two master keys [black grip] and one valet key
[gray grip]).
This service bulletin covers:
• Immobilizer system components
• Immobilizer transponder keys and keyless
transmitter descriptions
EX, Si, and
HYBRID
• System descriptions
• Add and delete keys or keyless transmitters
• Replacing the immobilizer-keyless control unit
• Replacing the ECM/PCM
• Replacing the under-dash fuse/relay box (MICU)
• Troubleshooting the immobilizer system
You can find more information about the immobilizer
system in the Body Electrical section of the appropriate
Civic service manual.
NOTE: There is not currently a Honda Type 5
immobilizer system.
WARRANTY CLAIM INFORMATION
None. This service bulletin is for information only.
IMMOBILIZER SYSTEM COMPONENTS
The immobilizer system includes:
• Immobilizer transponder keys
• Immobilizer system indicator
• Immobilizer-keyless control unit
• ECM/PCM
• Under-dash fuse/relay box (MICU)
LX
MASTER KEY (BLACK)
DX
VALET
KEY
(GRAY)
Each master key and valet key has electronic circuits
that output a rolling-type code (activated by the
immobilizer-keyless control unit) when you insert the
key into the ignition switch. The immobilizer system
uses this code to determine whether to start the
engine.
The DX comes with two master keys and one valet key,
which have the immobilizer transponders built into the
keys.
Different from previous systems, master keys with a
keyless transmitter have the transponder built into the
transmitter. A transmitter may be replaced
independently from the key. When the keyless
transmitter or the complete key is replaced, or an
additional key is added, you must use the HDS to
rewrite the immobilizer-keyless control unit. See
ADDING OR DELETING KEYS OR KEYLESS
TRANSMITTERS. This procedure also programs the
vehicle to work with the keyless transmitter.
Both master and valet keys used with this system are
sidewinder-type keys and are stamped with a V on the
shank. You need a special key cutting machine to cut
key blanks. Refer to S/B 01-077, Cutting SidewinderType Keys With the MATRIX H Key Cutting Machine.
Because of the rolling code characteristics of the
Type 6 immobilizer system, you cannot use the Ilco
© 2006 American Honda Motor Co., Inc. – All Rights Reserved
ATB 30998 (0603)
1 of 11
CUSTOMER INFORMATION: The information in this bulletin is intended for use only by skilled technicians who have the proper tools, equipment,
and training to correctly and safely maintain your vehicle. These procedures should not be attempted by “do-it-yourselfers,” and you should not assume
this bulletin applies to your vehicle, or that your vehicle has the condition described. To determine whether this information applies, contact an
authorized Honda automobile dealer.
Immobilizer Key Code Duplicator or Ilco programmable
(T5) key blanks with this system.
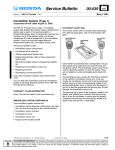
The keys for DX models do not contain batteries or
other serviceable parts. The master keys for all other
models have a battery-operated remote transmitter
built into the grip that lets you lock and unlock the
vehicle. EX, Si, and Hybrid models also have a trunk
release. The batteries in these keys are for keyless
functions only. The immobilizer function of the key
does not require a battery.
EX, Si, and Hybrid shown;
LX is similar.
SYSTEM DESCRIPTIONS
Immobilizer System Indicator
The immobilizer system indicator is on the instrument
panel. If you insert a programmed ignition key (master
or valet) into the ignition switch, and turn the switch to
ON (II), the indicator comes on for 2 seconds and then
goes off. The immobilizer system allows the vehicle to
start normally. Unlike previous immobilizer systems,
when you turn the ignition switch to LOCK (0), the
indicator does not come on.
Upper Display:
GAUGE CONTROL MODULE
(SPEEDOMETER)
Lower Display:
GAUGE CONTROL MODULE
(TACHOMETER)
SCREW
IMMOBILIZER SYSTEM INDICATOR
If you insert a nonprogrammed ignition key into the
ignition switch and turn the switch to ON (II), the
indicator comes on for 2 seconds and then starts to
blink. The immobilizer system results vary, depending
on how quickly you turn the key.
BATTERY
Civic 2/4-door and Civic Si:
• If the ignition switch is turned quickly from LOCK (0)
to START (III), the engine will start and run for about
1 second, then shut off.
TAB
• If the ignition switch is turned to ON (II), then you
pause before turning to START (III), the starter will
crank the motor, but the engine will not start.
Civic Hybrid:
• During normal air temperatures, if the ignition switch
is turned START (III), the gauges and gauge warning
indicators come on, but the engine will not crank.
• During extremely cold conditions (about 0°F or
lower) or a low IMA battery:
- If the ignition switch is turned quickly from LOCK
(0) to START (III), the engine will crank using the
starter motor, not the IMA motor, and run for about
1 second, then shut off.
- If the ignition switch is turned to ON (II), then you
pause before turning to START (III), the starter
motor, not the IMA motor, will crank the motor, but
the engine will not start.
Unlike the previous immobilizer system, when a
nonprogrammed key is used, and the ignition switch is
returned to LOCK (0), the indicator blinks 10 times.
2 of 11
06-011
Immobilizer-Keyless Control Unit
The immobilizer-keyless control unit is inside the bezel
around the ignition switch. It uses electromagnetic
induction to energize the electronic circuits in the key.
There is no direct electrical connection. Once the
electronic circuits are energized, the key sends its ID
code to the immobilizer-keyless control unit that checks
the code against the codes stored in its memory. If the
code matches, the control unit sends a unique serial
code to the ECM/PCM. But if the transponder ID code
does not match, no serial code is sent.
IGNITION SWITCH
IMMOBILIZER KEYLESS CONTROL UNIT
Engine Control Module (ECM)/Powertrain Control
Module (PCM)
The ECM/PCM is an integral part of the immobilizer
system. When the ECM/PCM receives the unique
serial code from the immobilizer-keyless control unit, it
communicates or “handshakes” with the immobilizerkeyless control unit by sending back its own unique
serial code. If the serial codes are mutually recognized
during this handshaking process, the ECM/PCM
energizes the fuel supply system and the ignition
system so the engine can start.
ADDING AND DELETING KEYS OR KEYLESS
TRANSMITTERS
This vehicle originally comes with three programmed
ignition keys. The immobilizer-keyless control unit
accepts a total of six transponder codes, so three more
codes can be stored in its memory. Use the following
procedures to add a key, to add multiple keys, replace
programmed keys, or to clear the codes of lost keys.
This procedure also programs the vehicle to work with
the keyless transmitter.
06-011
Adding a Key
Use the Honda Diagnostic System (HDS) with Honda
key blanks to add a key or keyless transmitter. Make
sure you use only key blanks with a V stamped on the
shank. The HDS rewrites the immobilizer-keyless
control unit, storing the transponder code of the new
key in the memory of the immobilizer-keyless control
unit.
Preparation
To add a key with the HDS, you need these items:
• Immobilizer Key blank (master) (DX):
P/N 35118-SDA-A01, H/C 7198906
or
Immobilizer & Transmitter Key blank (master) (LX):
P/N 35111-SVA-305, H/C 8057606
or
Keyless Transmitter (key not included) (LX):
P/N 72147-SNA-A01, H/C 8053183
or
Immobilizer & Transmitter Key blank (master) (EX/Si/
Hybrid): P/N 35111-SVA-306, H/C 8057614
or
Keyless Transmitter (key not included) (EX/Si/
Hybrid): P/N 72147-SNA-A11, H/C 8053191
or
Immobilizer Key blank (valet):
P/N 35119-SDA-A01, H/C 7198898
• One programmed ignition key (master or valet) for
the vehicle
• Key code for the vehicle (if cutting by code)
• MATRIX H Key Cutting Machine
• HDS with 2.002.006 or later software
NOTE: Make sure the setup and time are correct
before you use the HDS. Select the F12 key in the
upper right corner to get the Set-up Details screen.
Make sure Market: is set to USA. Select the time
display in the lower right corner to get the Date/Time
Properties pop-up window. Make sure the date and
time are correct. For details, refer to the Honda
Diagnostic System (HDS) Setup Instructions
listed under Tool Information in ISIS.
• 1st Password (This five-character code is available
on the iN. Go to SERVICE, and select Vehicle
Information from the left column, then select
Immobilizer Code Inquiry.)
3 of 11
Procedure
1. Use an appropriate key blank and the MATRIX H
Key Cutting Machine to cut a new ignition key (see
S/B 01-077, Cutting Sidewinder-Type Keys With
the MATRIX H Key Cutting Machine).
2. Connect the HDS to the 16P data link connector
(DLC).
3. Insert a programmed ignition key into the ignition
switch, and turn the switch to ON (II). Turn on the
HDS.
4. At the screen prompts, enter the VIN and the
odometer reading, and then verify the correct date
and time.
5. From the System Selection Menu screen, select
IMMOBI.
6. From the Mode Menu screen, select Immobilizer
Setup.
7. From the Immobilizer Test Mode Menu screen,
select Add and Delete Keys.
8. From the Add and Delete Keys screen, select Add
1 Key.
9. From the Add 1 Key screen, select Begin to add 1
key.
10. From the 1st Password screen, enter the 1st
Password, and then follow the screen prompts.
When you are finished, turn the ignition switch to
LOCK (0), and then turn off and disconnect the
HDS.
Adding Multiple Keys
Use the HDS with Honda key blanks to add multiple
keys. Make sure you use only key blanks with a V
stamped on the shank. The HDS rewrites the
immobilizer-keyless control unit, storing the
transponder codes of the new keys in the memory of
the immobilizer-keyless control unit.
Preparation
To add multiple keys with the HDS, you need these
items:
• Immobilizer Key blank (master) (DX):
P/N 35118-SDA-A01, H/C 7198906
or
Immobilizer & Transmitter Key blank (master) (LX):
P/N 35111-SVA-305, H/C 8057606
or
Keyless Transmitter (key not included) (LX):
P/N 72147-SNA-A01, H/C 8053183
or
Immobilizer & Transmitter Key blank (master) (EX/Si/
Hybrid): P/N 35111-SVA-306, H/C 8057614
or
Keyless Transmitter (key not included) (EX/Si/
Hybrid): P/N 72147-SNA-A11, H/C 8053191
or
Immobilizer Key blank (valet):
P/N 35119-SDA-A01, H/C 7198898
• All of your customer’s programmed ignition keys
(master and valet) for the vehicle
• Key code for the vehicle (if cutting by code)
• MATRIX H Key Cutting Machine
• HDS with 2.002.006 or later software
NOTE: Make sure the setup and time are correct
before you use the HDS. Select the F12 key in the
upper right corner to get the Set-up Details screen.
Make sure Market: is set to USA. Select the time
display in the lower right corner to get the Date/Time
Properties pop-up window. Make sure the date and
time are correct. For details, refer to the Honda
Diagnostic System (HDS) Setup Instructions
listed under Tool Information in ISIS.
• 1st Password (This five-character code is available
on the iN. Go to SERVICE, and select Vehicle
Information from the left column, then select
Immobilizer Code Inquiry.)
4 of 11
06-011
Procedure
1. Use the appropriate key blanks and the MATRIX H
Key Cutting Machine to cut new ignition keys (see
S/B 01-077, Cutting Sidewinder-Type Keys With
the MATRIX H Key Cutting Machine).
Replacing All Programmed Ignition Keys
2. Gather up all of your customer’s programmed
ignition keys (master and valet) for the vehicle.
If your customer has none of the programmed ignition
keys, you need to replace the ignition keys and rewrite
the immobilizer-keyless control unit with the HDS. The
HDS clears all transponder codes from the memory of
the immobilizer-keyless control unit and stores the
transponder codes of the replacement ignition keys.
3. Connect the HDS to the 16P data link connector
(DLC).
Preparation
To replace all keys, you need these items:
4. Insert a programmed ignition key into the ignition
switch, and turn the switch to ON (II). Turn on the
HDS.
• Immobilizer Key blank (master) (DX):
P/N 35118-SDA-A01, H/C 7198906
or
Immobilizer & Transmitter Key blank (master) (LX):
P/N 35111-SVA-305, H/C 8057606
or
Keyless Transmitter (key not included) (LX):
P/N 72147-SNA-A01, H/C 8053183
or
Immobilizer & Transmitter Key blank (master) (EX/Si/
Hybrid): P/N 35111-SVA-306, H/C 8057614
or
Keyless Transmitter (key not included) (EX/Si/
Hybrid): P/N 72147-SNA-A11, H/C 8053191
5. At the screen prompts, enter the VIN and the
odometer reading, and then verify the correct date
and time.
6. From the System Selection Menu screen, select
IMMOBI.
7. From the Mode Menu screen, select Immobilizer
Setup.
8. From the Immobilizer Test Mode Menu screen,
select Add and Delete Keys.
9. From the Add and Delete Keys screen, select
Delete or Add Multiple Keys.
10. From the Delete or Add Multiple Keys screen,
select Begin to Delete or Add Multiple Keys.
11. From the 1st Password screen, enter the 1st
Password, and then follow the screen prompts.
When you are finished, turn the ignition switch to
LOCK (0), and then turn off and disconnect the
HDS.
• Immobilizer Key blank (valet):
P/N 35119-SDA-A01, H/C 7198898
• Key code for the vehicle
• MATRIX H Key Cutting Machine
• HDS with 2.002.006 or later software
NOTE: Make sure the setup and time are correct
before you use the HDS. Select the F12 key in the
upper right corner to get the Set-up Details screen.
Make sure Market: is set to USA. Select the time
display in the lower right corner to get the Date/Time
Properties pop-up window. Make sure the date and
time are correct. For details, refer to the Honda
Diagnostic System (HDS) Setup Instructions
listed under Tool Information in ISIS.
• PCM Code (This four-digit code is available on the
iN. Go to SERVICE, and select Vehicle Information
from the left column, then select Immobilizer Code
Inquiry.)
Procedure
1. Use the appropriate key blanks and the MATRIX H
Key Cutting Machine to cut the requested number
of ignition keys (see S/B 01-077, Cutting
Sidewinder-Type Keys With the MATRIX H Key
Cutting Machine).
2. Connect the HDS to the 16P data link connector
(DLC).
3. Insert a newly cut ignition key into the ignition
switch, and turn the switch to ON (II). Turn on
the HDS.
06-011
5 of 11
4. At the screen prompts, enter the VIN and the
odometer reading, and then verify the correct date
and time.
5. From the System Selection Menu screen, select
IMMOBI.
6. From the Mode Menu screen, select Immobilizer
Setup.
7. From the Immobilizer Test Mode Menu screen,
select Add and Delete Keys.
8. From the Add and Delete Keys screen, select All
Keys Lost.
9. From the All Keys Lost screen, select Begin to
register keys.
10. From the PCM-Code screen, enter the PCM Code,
and then follow the screen prompts. When you are
finished, turn the ignition switch to LOCK (0), and
then turn off and disconnect the HDS.
Clearing Transponder Codes Of Lost Programmed
Ignition Keys
If your customer has lost one or more (but not all) of the
programmed ignition keys, you should rewrite the
immobilizer-keyless control unit with the HDS to
prevent the lost keys from starting the engine. The
HDS clears the transponder codes from the memory of
the immobilizer-keyless control unit and then stores the
transponder codes of your customer’s remaining keys.
This process, in effect, clears the codes of the lost
keys, so they could not start the engine.
Preparation
To clear the transponder codes of lost programmed
ignition keys, you need these items:
• All of your customer’s remaining programmed
ignition keys (master and valet) for the vehicle
• HDS with 2.002.006 or later software
NOTE: Make sure the setup and time are correct
before you use the HDS. Select the F12 key in the
upper right corner to get the Set-up Details screen.
Make sure Market: is set to USA. Select the time
display in the lower right corner to get the Date/Time
Properties pop-up window. Make sure the date and
time are correct. For details, refer to the Honda
Diagnostic System (HDS) Setup Instructions
listed under Tool Information in ISIS.
• 1st Password (The five-character code is available
on the iN. Go to SERVICE, and select Vehicle
Information from the left column, then select
Immobilizer Code Inquiry.)
Procedure
1. Gather up all of your customer’s remaining
programmed ignition keys (master and valet) for
the vehicle.
2. Connect the HDS to the 16P data link connector
(DLC).
6 of 11
3. Insert a programmed ignition key into the ignition
switch, and turn the switch to ON (II). Turn on the
HDS.
4. At the screen prompts, enter the VIN and the
odometer reading, and then verify the correct date
and time.
5. From the System Selection Menu screen, select
IMMOBI.
6. From the Mode Menu screen, select Immobilizer
Setup.
7. From the Immobilizer Test Mode Menu screen,
select Add and Delete Keys.
8. From the Add and Delete Keys screen, select
Delete or Add Multiple Keys.
9. From the Delete or Add Multiple Keys screen,
select Begin to Delete or Add Multiple Keys.
10. From the 1st Password screen, enter the 1st
Password, and then follow the screen prompts.
When you are finished, turn the ignition switch to
LOCK (0), then turn off and disconnect the HDS.
REPLACING THE IMMOBILIZER-KEYLESS
CONTROL UNIT
If you replace the immobilizer-keyless control unit, you
must rewrite it with the HDS or the engine cannot start.
NOTE: On the following models, the gauge control
module (tachometer) does not contain the supporting
data for immobilizer reprogramming.
2006 Civic EX 2-door:
From VIN 2HGFG1.8.6H500001 thru
2HGFG1.8.6H534281
2006 Civic LX 2-door:
From VIN 2HGFG1.6.6H500001 thru
2HGFG1.6.6H534534
2006 Civic Si:
From VIN 2HGFG2...6H700001 thru
2HGFG2...6H702894
On these vehicles, you must replace the gauge control
module (tachometer) before replacing the ECM/PCM.
Refer to service bulletin 06-008, Immobilizer-Keyless
Control Unit or ECM/PCM Cannot Be Rewritten.
Preparation
To replace the immobilizer-keyless control unit, you
need these items:
• Replacement immobilizer-keyless control unit
• All of your customer’s programmed ignition keys
(master and valet) for the vehicle
• HDS with 2.002.006 or later software
NOTE: Make sure the setup and time are correct
before you use the HDS. Select the F12 key in the
upper right corner to get the Set-up Details screen.
Make sure Market: is set to USA. Select the time
display in the lower right corner to get the Date/Time
Properties pop-up window. Make sure the date and
time are correct. For details, refer to the Honda
Diagnostic System (HDS) Setup Instructions
listed under Tool Information in ISIS.
06-011
• PCM Code (This four-digit code is available on the
iN. Go to SERVICE, and select Vehicle Information
from the left column, then select Immobilizer Code
Inquiry.)
On these vehicles, you must replace the gauge control
module (tachometer) before replacing the ECM/PCM.
Refer to service bulletin 06-008, Immobilizer-Keyless
Control Unit or ECM/PCM Cannot Be Rewritten.
Procedure
Preparation
To replace the ECM/PCM, you need these items:
• Replacement ECM/PCM
1. Replace the immobilizer-keyless control unit. Refer
to the Body Electrical section of the appropriate
Civic service manual, or online, enter keyword
IMMOBI, and select Immobilizer-Keyless Control
Unit Replacement from the list.
2. Gather up all of your customer’s programmed
ignition keys (master and valet) for the vehicle.
3. Connect the HDS to the 16P data link connector
(DLC).
4. Insert a programmed ignition key into the ignition
switch, and turn the ignition switch to ON (II). Turn
on the HDS.
5. At the screen prompts, enter the VIN and the
odometer reading, and then verify the correct date
and time.
6. From the System Selection Menu screen, select
IMMOBI.
7. From the Mode Menu screen, select Immobilizer
Setup.
8. From the Immobilizer Test Mode Menu screen,
select Replace Immobilizer Receiver/Control
Unit.
9. From the Replace Immobilizer Receiver/Control
Unit screen, select Begin to register Keys in the
new Immobilizer Receiver/Control Unit.
10. From the PCM-Code screen, enter the PCM Code,
and then follow the screen prompts. When the
process is complete, turn the ignition switch to
LOCK (0), and then turn off and disconnect the
HDS.
• One programmed ignition key for the vehicle
• HDS with 2.002.006 or later software
NOTE: Make sure the setup and time are correct
before you use the HDS. Select the F12 key in the
upper right corner to get the Set-up Details screen.
Make sure Market: is set to USA. Select the time
display in the lower right corner to get the Date/Time
Properties pop-up window. Make sure the date and
time are correct. For details, refer to the Honda
Diagnostic System (HDS) Setup Instructions
listed under Tool Information in ISIS.
• PCM Code (The four-digit code is available on the
iN. Go to SERVICE, and select Vehicle Information
from the left column, then select Immobilizer Code
Inquiry.)
Procedure
1. Make sure you have the anti-theft code for the
audio and navigation system, then write down the
audio presets.
2. Connect the HDS to the 16P data link connector
(DLC).
3. Insert the programmed ignition key into the ignition
switch, and turn the ignition switch to ON (II). Turn
on the HDS.
4. When the HDS comes on, select the HDS button.
HDS BUTTON
REPLACING THE ECM/PCM
If you replace the ECM/PCM, you must use the HDS to
instruct the new ECM/PCM and the immobilizer
keyless control unit to recognize the other’s unique
serial code or the engine cannot start.
NOTE: On the following models, the gauge control
module (tachometer) does not contain the supporting
data for immobilizer reprogramming.
2006 Civic EX 2-door:
From VIN 2HGFG1.8.6H500001 thru
2HGFG1.8.6H534281
2006 Civic LX 2-door:
From VIN 2HGFG1.6.6H500001 thru
2HGFG1.6.6H534534
2006 Civic Si:
From VIN 2HGFG2...6H700001 thru
2HGFG2...6H702894
06-011
7 of 11
5. Select the Start a New Vehicle Diagnosis button.
NOTE: If the HDS does not communicate with the
vehicle, refer to DLC Circuit Troubleshooting in the
appropriate service manual. If the troubleshooting
indicates a faulty ECM/PCM, go to step 16, and
then after you replace the ECM/PCM, make sure
you replace the engine oil and filter, clean the
throttle body, and replace the automatic
transmission fluid (if equipped).
START A NEW VEHICLE DIAGNOSIS BUTTON
14. Follow the prompts to READ DATA. This saves the
transmission oil life percentage from the original
PCM into the HDS so you can later download it into
the replacement PCM.
NOTE: If you are unable to do this step, make sure
you replace the engine oil and filter, clean the
throttle body, and replace the automatic
transmission fluid after you replace the PCM.
15. Exit to the Vehicle Details screen, then click on the
SCS Menu button to short the SCS line, and leave
it shorted.
SCS MENU BUTTON
6. At the screen prompts, enter the VIN and the
odometer reading, and then verify the correct date
and time.
7. From the System Selection Menu screen, select
PGM-FI.
16. Turn the ignition switch to LOCK (0).
17. Remove the battery.
18. Remove the ECM/PCM cover.
8. From the Mode Menu screen, select Inspection.
ECM/PCM
COVER
9. Select ETCS (TAC) Test, and do the TP Position
Check.
NOTE: If the throttle body needs cleaning, do this
before replacing the ECM/PCM. Refer to Throttle
Body Cleaning in the appropriate service manual,
and do steps 1 thru 4.
ECM/PCM
10. On the HDS, exit to the Mode Menu screen, then
select REPLACE ECM/PCM.
11. Follow the prompts to READ DATA. This saves the
engine oil life percentage from the original ECM/
PCM into the HDS so you can later download it into
the replacement ECM/PCM.
NOTE: If you are unable to do this step, make sure
you replace the engine oil and filter, clean the
throttle body, and replace the automatic
transmission fluid (if equipped) after you replace
the ECM/PCM.
BOLTS
12. If the vehicle is equipped with an automatic
transmission, exit to System Selection Screen,
then select AT. If the vehicle has a manual
transmission, go to step 15.
13. Select REPLACE TCM/PCM.
8 of 11
CONNECTORS
06-011
19. Remove the three ECM/PCM mounting bolts, then
disconnect the three ECM/PCM connectors.
20. Replace the ECM/PCM:
• Connect the three connectors to the replacement
ECM/PCM.
• Install the mounting bolts, and torque them to
9.8 N·m (7.2 lb-ft).
• Reinstall the ECM/PCM cover.
21. Reinstall the battery. Connect the positive battery
cable and then the negative cable.
22. On the HDS, click on the SCS Menu button to
remove the short in the SCS line (it may already be
off).
23. Turn the ignition switch to ON (II).
NOTE: DTC P0630 will be set. You will clear this
DTC in step 36.
24. Select the Start a New Vehicle Diagnosis button.
The HDS may ask, Are you sure you want to
change vehicle? If it does, click on the green
check mark to confirm yes. This will allow you to
enter the VIN and odometer reading into the
replacement ECM/PCM.
START A NEW VEHICLE DIAGNOSIS BUTTON
25. Manually enter the VIN and the odometer reading
into the HDS. The HDS will ask you to confirm the
VIN. When you select the green check mark to
confirm the VIN, the HDS writes it into the
replacement ECM/PCM.
29. If the vehicle is equipped with an automatic
transmission, exit to System Selection Screen,
then select AT. If the vehicle has a manual
transmission, go to step 32.
30. Select REPLACE TCM/PCM.
31. Follow the prompts to WRITE DATA. This writes
the transmission oil life from the original PCM into
the replacement PCM.
NOTE: If you are unable to do this step, make sure
you replace the engine oil and filter, clean the
throttle body, and replace the automatic
transmission fluid after you replace the PCM.
32. Exit to System Selection Screen, then select
IMMOBI.
33. Select REPLACE ECM/PCM.
34. From the PCM-Code screen, enter the PCM Code,
and then follow the screen prompts.
35. Exit to System Selection Screen, then select
PGM-FI.
36. Select ECM/PCM Reset. This clears the code set
in step 23.
37. Exit to the HDS main screen, then select the
reprogramming button.
REPROGRAMMING BUTTON
38. Make sure the battery is fully charged.
26. Select PGM-FI.
27. Select REPLACE ECM/PCM.
28. Follow the prompts to WRITE DATA. This writes
the engine oil life percentage from the original
ECM/PCM into the replacement ECM/PCM.
NOTE: If you are unable to do this step, make sure
you replace the engine oil and filter, clean the
throttle body, and replace the automatic
transmission fluid (if equipped) after you replace
the ECM/PCM.
06-011
9 of 11
39. Make sure you have the latest software in the HDS,
then update PGM-FI, A/T (CVT) (if equipped), and
Hybrid (IMA) IMA Motor and IMA Battery sections
(if equipped) on the ECM/PCM. Refer to S/B 01023 Updating Control Units/Modules.
• PCM Code (The four-digit code is available on the
iN. Go to SERVICE, and select Vehicle Information
from the left column, then select Immobilizer Code
Inquiry.)
Procedure
1. Replace the under-dash fuse/relay box (MICU).
• Follow the procedure in the Body Electrical
section of the appropriate Civic service manual,
or
• Online, enter keyword FUSE BOX, and select
Under-dash Fuse/Relay Box Removal and
Installation from the list.
2. Connect the HDS to the 16P data link connector
(DLC).
3. Insert the programmed ignition key into the ignition
switch, and turn the ignition switch to ON (II). Turn
on the HDS.
40. Do the idle learn procedure:
• Make sure all electrical items (A/C, audio unit,
defogger, lights, etc.) are turned off, and then
start the engine.
• Let the engine reach its normal operating
temperature (the cooling fans cycle twice).
• Let the engine idle (throttle fully closed and with
all electrical items off) for 10 minutes.
4. At the screen prompts, enter the VIN and the
odometer reading, and then verify the correct date
and time.
5. From the System Selection Menu screen, select
IMMOBI.
41. Enter the anti-theft code for the audio and
navigation system, then enter the audio presets.
6. From the Immobilizer Test Mode Menu screen,
select Replace MPCS/MICU/IMOES, and follow
the screen prompts to register the IMOES unit.
7. From the PCM-Code screen, enter the PCM Code,
and then follow the screen prompts. When the
process is complete, turn the ignition switch to
LOCK (0), and then turn off and disconnect the
HDS.
42. On vehicles without a navigation system, set the
clock (it is automatically set on vehicles equipped
with a navigation system).
TROUBLESHOOTING THE IMMOBILIZER SYSTEM
REPLACING THE UNDER-DASH FUSE/RELAY BOX
(MICU)
When you replace the under-dash fuse/relay box
(MICU), you must use the HDS to register the IMOES
unit with the immobilizer-keyless control unit. If this
procedure is not done after MICU replacement, the
engine will not start.
Preparation
To replace the under-dash fuse/relay box (MICU), you
need these items:
• Replacement under-dash fuse/relay box (MICU)
• One programmed ignition key for the vehicle
• HDS with 2.002.006 or later software
NOTE: Make sure the setup and time are correct
before you use the HDS. Select the F12 key in the
upper right corner to get the Set-up Details screen.
Make sure Market: is set to USA. Select the time
display in the lower right corner to get the Date/Time
Properties pop-up window. Make sure the date and
time are correct. For details, refer to the Honda
Diagnostic System (HDS) Setup Instructions
listed under Tool Information in ISIS.
10 of 11
Engine Does Not Start
1. Insert the programmed ignition key into the ignition
switch, and turn the ignition switch to START (III).
Does the starter crank the motor?
Yes - Go to step 2.
No - The immobilizer system is OK. Refer to the
Engine Electrical section of the appropriate Civic
service manual to troubleshoot the starting system.
2. Cycle the ignition switch to LOCK (0) then back to
ON (II). Make sure that when you turn the ignition
switch to ON (II), the indicator comes on for 2
seconds and then goes off. Turn the ignition switch
to LOCK (0); the indicator should not come on.
Does the immobilizer system indicator function
properly?
Yes - The immobilizer system is OK. Refer to the
Fuel and Emissions section of the appropriate Civic
service manual for additional troubleshooting.
No - Go to step 3.
06-011
3. Use the HDS to check for DTCs in the PGM-FI and
Body Electrical sections.
Are there any DTCs?
Yes - Use the appropriate Civic service manual to
troubleshoot the DTCs found.
No - Go to step 4.
4. Using the HDS, go to Immobilizer Menu, and
select System Check.
5. Read the message on the screen.
• If the message says Immobilizer system is
normal, look for other possible causes.
• If the message says Immobilizer system is not
normal, do this:
- Fix the problem using the displayed info, or
- Refer to the Body Electrical section of the
appropriate Civic service manual to
troubleshoot the immobilizer system, or
- Online, enter the keyword IMMOBI, and select
Immobilizer System Check from the list.
Engine Does Not Start Intermittently
1. A customer description of the immobilizer indicator
characteristics can be helpful. Ask the customer if
the indicator flashed 10 times when the ignition key
was turned to LOCK (0) after the engine would not
start.
3. Using the HDS, go to Immobilizer Menu, and
select Status Log. There will be a list of status log
numbers and a list of occurrences. Click on the one
with the highest occurrence. A list of possible
problems appears on the right side of the screen.
Refer to the Body Electrical section of the
appropriate Civic service manual to troubleshoot
the immobilizer system. If all columns show 0, the
immobilizer system is not the problem. Refer to the
service manual and continue troubleshooting.
4. Check the status log count. You’ll see the list, the
status log codes, and the number of occurrences in
two columns.
• If all the status codes show 0 occurrences, the
immobilizer system is okay. Continue with normal
troubleshooting.
• If a status shows one or more occurrences,
highlight that column, and you’ll see an
explanation of the code and a list of possible
failures. Do this
- Fix the problem using the displayed info, or
- Refer to the Body Electrical section of the
appropriate Civic service manual to
troubleshoot the immobilizer system, or
- Online, enter the keyword IMMOBI, and select
Immobilizer System Check from the list.
Does the immobilizer indicator flash 10 times when
the ignition switch is turned to LOCK (0)?
Yes - Go to step 2
No - The immobilizer system may be OK. Refer to
the Fuel and Emissions section of the appropriate
Civic service manual for additional troubleshooting.
If the customer is unsure, go to step 2.
2. Use the HDS to check for DTCs in the PGM-FI and
Body Electrical sections.
Are there any DTCs?
Yes - Use the appropriate Civic service manual to
troubleshoot the DTCs found.
No - Go to step 3.
06-011
11 of 11