1
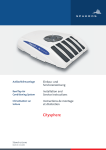
Roof-top
air-conditioning system
Installation and service instructions
Easysphere
(prefilled)
Stand: 09/2010
Ident Nr. 1103757B
Roof-top air-conditioning system Easysphere
CONTENTS
1. INTRODUCTION
4
1.1. Scope and purpose
4
1.2. Meanings of warnings, cautions and notes
4
1.3. Additional documentation required
4
1.4. Safety information and regulations
4
1.5. Certification
5
1.6. Corrections and improvements
5
2. GENERAL DESCRIPTION
6
2.1. Roof-top air-conditioner unit
6
2.2.
9
Electrical components
2.3. Principle of operation of the air-conditioning system
2.4. Design, purpose and principle of operation of the assemblies
3. TECHNICAL DATA
9
11
13
3.1. Air-conditioning system
13
3.2. Electrical fuses
13
3.3. Compressor
14
3.4. Circuit diagram for basic version
15
3.5. Circuit diagram for deluxe version
16
4. INSTALLATION INSTRUCTIONS
17
4.1. Safety precautions
17
4.2. Installation kit
17
4.3. The following are not included in the installation kit and must be produced on site
17
4.4. Required equipment, special tools and accessories
17
4.5. Preparations on vehicle / cabin roof
18
4.6. Preparation of sealing frame
19
4.7. Make electrical connections
22
5. STARTUP
23
5.1. Safety precautions
23
5.2. Operator instructions
23
5.3. Controls and indicators
23
5.4. Putting into service for the first time
23
5.5. Operation
24
5.6. Operation of the air-conditioning system (deluxe version)
24
Page 2 / 30
Roof-top air-conditioning system Easysphere
6. MAINTENANCE
25
6.1. Safety precautions
25
6.2. General
25
6.3. Maintenance and care
25
6.4. Maintenance and service checklist
26
6.5. Inspections before repair
26
6.6. Troubleshooting
27
6.7. Repairs
28
6.8. Post-repair procedures and testing
29
6.9. Visual inspection
29
7. WARRANTY CLAIMS PROCESSING
30
Page 3 / 30
Roof-top air-conditioning system Easysphere
1.
INTRODUCTION
1.1.
Scope and purpose
This installation and service manual contains important information to assist trained personnel in the
installation, operation and maintenance of the roof-top air-conditioning system CC8.
1.2.
Meanings of warnings, cautions and notes
WARNINGS, CAUTIONS and NOTES in this manual have the following meaning:
WARNING
This heading is used to highlight that non-compliance with instructions or
procedures may cause injuries or fatal accidents.
IMPORTANT
This heading is used to highlight that non-compliance with instructions or
procedures may cause damage to equipment.
NOTE
This heading is used to highlight and draw specific attention to information.
1.3.
Additional documentation required
a)
Operating manual, roof-top air-conditioning system CC4E
1.4.
Safety information and regulations
The roof-top air-conditioning system CC4E has been designed and built in accordance with EC Directives.
The system can be operated safely when installed and used correctly, in accordance with the installation
and service instructions.
If the vehicle height specified in the vehicle's licensing documents is exceeded by installation of the roof-top
air-conditioning system, this must be legalized by an official acceptance inspection in accordance with
Section 19 of the German Road Traffic Licensing Regulations (StVZO).
The following general and operational safety regulations for the prevention of accidents have to be observed
at all times:
– Safety regulations for the manufacture and operation of earth-moving machinery published by the
foundation works association (Technischer Aufsichtsdienst (Technical Supervisory Services),
Landsberger Str. 309, 80687 München)
– DIN ISO 3471 Roll-over protective installations
– DIN ISO 3449 Protective installations against falling objects
– DIN ISO 3411 Machine operator's body size, minimum working space
– Guidelines, safety rules, general rules and principles, and the data sheets issued by the committees of
the Central Health and Safety Office - BG7 - of the Central Association of Manufacturing Employers'
Liability Insurance Associations (published by: Carl Heymanns Verlag KG, Luxemburger Strasse 449,
D-50939 Köln).
"General safety regulations" beyond the scope of these regulations are detailed below.
The specific safety regulations applicable to this manual are highlighted in the individual chapters by
WARNINGS, CAUTIONS and NOTES.
General safety regulations
Non-compliance with the installation manual and its procedures will void the Webasto warranty. The same
applies to unskilled repairs or repairs not using original spare parts.
Electrical wiring and operating elements of the air-conditioning system must be arranged in the vehicle in
such a way that their correct functioning cannot be impaired under normal operating conditions.
Page 4 / 30
Roof-top air-conditioning system Easysphere
Safety instructions for maintenance
If faults develop in the refrigerant circuit, the system must be tested and repaired by an authorized specialist
repairshop. Under no circumstances may refrigerant be discharged into the atmosphere (refer to Section 8
of the regulation dated 6 May 1991 banning CFCs and halones).
Never heat refrigerant cylinders with a naked flame.
Liquid refrigerant must never be allowed to come into contact with the skin.
Always wear protective clothing and goggles when handling refrigerant.
WARNING
Do not perform soldering or welding directly on components of the closed
refrigerant circuit or in its vicinity. The heating will cause a rise in the circuit
pressure. There is a danger of explosion.
Before performing any work allow the system to cool down completely. Risk
of injury due to burns on the condenser, compressor and hoses.
Installation, maintenance and repair work must be carried out by duly
qualified personnel. Such work may only be undertaken with the engine off
and the power supply switched off.
The battery must be disconnected before opening the roof-top airconditioner, removing the compressor or starting any work on the electrical
wiring.
Do not wear metal jewellery (bracelets, watches, necklaces, rings) when
working on the air-conditioning system.
1.5.
Certification
a)
The electro-magnetic compatibility (EMC) has been checked
b)
to meet the EN 45014 standard requirements.
c)
The CE mark has been affixed to the roof-top air-conditioning system.
1.6.
Corrections and improvements
Complaints, improvements and suggestions for correcting this manual should be addressed to:
Spheros GmbH
Friedrichshafener Straße 9-11
D-82205 Gilching
Tel. +49 (0) 8105 7721 887
Fax +49 (0) 8105 7721 889
www.spheros.de l [email protected]
Page 5 / 30
Roof-top air-conditioning system Easysphere
2.
GENERAL DESCRIPTION
The roof-top air-conditioning system CC4E (1) contains all the documents required for installation and
operation. Electric power is supplied by the on-board vehicle supply via cables (2). The system is designed
for operation with 24 V.
The roof-top air-conditioning system is designed for the cooling / air-conditioning of buses as well as the airconditioning of the driver’s area in buses.
The system is prefilled with refrigerant (R134a) and need only be connected to the on-board power supply
when installed.
Easysphere
1
2
Fig. 2.1
2.1.
Roof-top air-conditioner unit
The roof-top unit is shown in Fig. 2.2.
It comprises:
– Hood (1) as external contour element, with openings and protective grilles for air inlet and outlet.
– Baseplate (8) as the load-bearing structural element.
The following are integrated into the baseplate:
–
–
–
–
–
–
–
–
–
–
–
–
–
–
Radial fan (5)
Receiver-drier (13) with sight glass (14) and pressure switch (15)
Condenser (3)
Evaporator (6) with mist separator (7)
Expansion valve (11)
Anti-icing switch (12)
Screw connections (9, 10)
Relay (16) and holder (17) for blade-type fuses
Cable harness with grommet (26)
Axial fan (4)
Electric motor (28)
Compressor (27)
Refrigerant hoses (29/30)
Connecting pins (+/-) (31)
Page 6 / 30
Roof-top air-conditioning system Easysphere
1
Direction
of travel
Fahrtrichtung
3
3
5 24
4
8
17
25 6
7
5
6
28
10
31
9
31
27
16
1
15 14 13 12 26
11
30 29
Fig. 2.2
Page 7 / 30
Roof-top air-conditioning system Easysphere
The air distribution panel (Fig. 2.3) is not included in the scope of supply.
The following operating elements: ON / OFF rocker switch (1) and fan rocker switch (2) can be integrated
into the air distribution panel.
An electronic room thermostat is additionally integrated into the roof-top unit in the deluxe version. A setpoint potentiometer (3, Fig. 2.3) is supplied for setting the temperature and can be integrated into the air
distribution panel..
Fig. 2.3
(1) Air-conditioning system ON / OFF
(2) 3-position rocker switch
(3) Setpoint potentiometer (optional)
Page 8 / 30
Roof-top air-conditioning system Easysphere
2.2.
Electrical components
Electrical connections for the equipment are made as shown in the circuit diagrams Figs. 3.1 and 3.2.
The roof-top air-conditioning system is equipped with a protective circuit to prevent total exhaustion of the
battery. The system is switched off automatically if the power supply drops below 20 V for more than 10
seconds. It is restarted by repeatedly switching on.
If the system is only to be operated when the engine is running, a working contact relay must be installed
and connected via terminal D+/61 from the alternator (see circuit diagram on page 16).
The electronic system for the motor includes a soft-start function to prevent current peaks being transmitted
to the on-board supply. In addition, the electric motor is switched off automatically in the event of overloads
(i.e. current consumption > 80 A for more than 1 second) due to possible system damage.
Restarting is effected by repeatedly switching on the system.
The electric motor is switched off automatically to prevent damage to the electronics at temperatures of less
than +5 °C or more than +96 °C.
2.3.
Principle of operation of the air-conditioning system
When the air-conditioning system is switched on via the ON / OFF rocker switch, the electric motor starts
up and drives the compressor via a poly-V-belt. The compressor compresses the refrigerant gas and
delivers it to the condenser (3) where it condenses and gives off heat.
The resultant condensation heat is transferred to the outside air flowing through the condenser (19 and 20,
Figs. 2.4 and 2.5). Two axial fans (4) maintain a sufficient air flow even when the vehicle is stationary.
The liquid refrigerant flows through the receiver-drier (13) to the expansion valve (11), where it expands as
a result of the controlled pressure drop and then reverts to the gaseous state in the evaporator (6),
absorbing heat at the same time.
The hot air (21) circulating in the driver's cab is drawn in by the radial fan (5), cooled in the evaporator, dried
and returned to the cab via the air-distribution panel (22). The resultant condensation water is collected and
discharged into the atmosphere via the drain outlet (25).
During operation, the refrigerant circuit is monitored by the anti-icing switch (12) (S4, see circuit diagram
Fig. 3.1 or 3.2) and the pressure switch (15) (S3, see circuit diagram Fig. 3.1 or 3.2). The electric motor and
consequently also the compressor are monitored via these two switches.
When the air-conditioning system is switched off via the ON / OFF rocker switch, the electric motor and the
fan motors are de-energized. The refrigerant circuit and recirculating-air circuit are switched off.
Rainwater entering the roof-top system is discharged via the drain outlet (24, Fig. 2.2).
Page 9 / 30
Roof-top air-conditioning system Easysphere
6
14
18
20
24
19
19
4
Page 10 / 30
Fig. 2.4
Roof-top air-conditioning system Easysphere
20
19
21
22
Fig. 2.5
2.4.
Design, purpose and principle of operation of the assemblies
Condenser
The condenser (3, Fig. 2.2) consists of a continuous pipe coil and fins interconnected to form a large heat
exchanger surface.
It cools the hot refrigerant gas so that the latter liquefies and undercools. At the same time, it transfers the
condensation heat to the outside air flowing through it via the fins.
Receiver-drier
The receiver-drier with sight glass (13, Fig. 2.2) is an expansion and storage reservoir for refrigerant. Its
lower part contains a granulated desiccant which extracts and chemically binds small amounts of water from
the refrigerant. During operation, the level can be checked in the sight glass (14, Fig. 2.2) to ensure that
there is sufficient refrigerant in the circuit.
Thermostatic block valve
The thermostatic block valve (11, Fig. 2.2) regulates the flow of refrigerant to the evaporator as required
and in accordance with the temperature in the evaporator. The thermostatic expansion valve represents
the control element between high and low-pressure part of the refrigerant circuit.
Evaporator
The evaporator (6, Fig. 2.2) is basically of the same design as the condenser. The refrigerant flowing
through the pipe from the expansion valve changes from the liquid to the gaseous state and superheats in
the evaporator.
The required evaporation heat is extracted from the cabin air flowing through the fins and is transmitted
through the pipe to the refrigerant. The air dries as it cools and condensation water is drained overboard.
The mist separator (7, Fig. 2.2) prevents droplets of condensation being drawn in by the radial fan and
entering the interior of the vehicle.
Page 11 / 30
Roof-top air-conditioning system Easysphere
Pressure switch
The pressure switch (15, Fig. 2.2) includes a high-pressure and a low-pressure switch. It monitors the
pressure in the high-pressure part of the refrigerant circuit and switches off both the electric motor and the
compressor if the pressure is too low (e.g. due to loss of refrigerant) or too high (e.g. due to overheating in
the condenser).
Anti-icing switch
The anti-icing switch (12, Fig. 2.2) is a temperature switch. It measures the temperature between the
evaporator fins and switches off the power supply to the electric motor if there is any risk of ice forming
(approx. 0 °C) and back on again at approx. 3 °C.
Axial fan
The two axial fans (4, Fig. 2.2) comprise a DC motor, fan wheel, housing and protective grille. When the
air-conditioning system is switched on, they draw a constant supply of power from the on-board system via
relay K1 (Fig. 3.1) and supply the condenser with the required outside air.
Radial fan
The radial fan (5, Fig. 2.2) is of the multi-speed type. It draws the cabin air through the evaporator and blows
the air back into the cabin via the nozzles in the air-distribution panel (Fig. 2.3).
Compressor
The compressor (27, Fig. 2.3) comprises a swashplate compressor and a magnetic coupling with belt pulley.
It is driven at constant speed by an electric motor (28, Fig. 2.2). When in operation, it compresses the
refrigerant to the required condensation pressure.
Electronic room thermostat (optional)
An electronic room thermostat and temperature sensor are integrated in the deluxe version. The intake air
temperature is measured. The electric motor is switched off when the temperature set on the setpoint
potentiometer is reached.
Electric motor
The electric motor (28, Fig. 2.2) drives the compressor via a poly-V-belt. The electronic system in the motor
includes a soft-start function to prevent current peaks being transmitted to the on-board supply. In addition,
the electric motor is switched off automatically in the event of undervoltage (< 20 V for more than 10
seconds) or overload (current consumption > 80 Amp for more than 1 second). It is restarted by repeatedly
switching on the system.
The electric motor is switched off automatically at temperatures of less than +5 °C or more than +96 °C.
Page 12 / 30
Roof-top air-conditioning system Easysphere
3.
TECHNICAL DATA
3.1.
Air-conditioning system
Designation
Type Easysphere
Dimensions, roof-top unit
Length x width x height
1.110 mm X 774 mm X 215 mm
Weight
approx. 55 kg
Operating voltages (depending on vehicle's electr.
system)
24 Volt DC
Current consumption
Total current consumption
max. 68 A
– Electric motor
– Condenser fan
– Compressor fan
53 A
10 A
5A
Switching points, low-pressure switch
2.0 ± 0.2 bar
2.1 ± 0.3 bar
– Off
– On
Switching points, high-pressure switch
– Off
– On
26.5 ± 2 bar
20 ± 2 bar
Refrigerant, max. ambient temperature 45 °C
R134a
Power rating at 46% rel. humidity,
inside temperature 27 °C, outside temperature 35 °C
3.5 kW
Evaporator air flow rate (air flow unobstructed)
550 m3/h
Switching point, anti-icing thermostat
–
–
Off
On
Refrigerant capacity (R134a) (prefilled)
3.2.
1 °C ± 1
3.5 °C (Max)
900g + 50g
Electrical fuses
Protected components
Fuse
Designation
Ratings
F2
F3
-
15 A
15 A
75 A
24 V
– Radial fans + compressor
– 2 axial fans
– Electric motor
Page 13 / 30
Roof-top air-conditioning system Easysphere
3.3.
Compressor
Designation
Type Sanden 5D5 H09
Dimensions (length x width x height)
183 mm X 124 mm X 124 mm
Sense of rotation
clockwise
Stroke volume per revolution
87 cm3
Lubricating oil for refrigerating compressors
(type, quantity)
PAG 150 cm3
Refrigerant connections
– Delivery side (standard)
– Intake side (standard)
3/4" O-ring
7/8" O-ring
Installation position, range of tilt
– About longitudinal axis
– About lateral axis
max. ± 30°
max. ±10°
Magnetic clutch
– Power supply
– Power consumption
– Connector type
Page 14 / 30
24 Volt DC
max. 34 Watt
DIN 46343 - AMP 6.3
Roof-top air-conditioning system Easysphere
3.4.
Circuit diagram for basic version
4
30 86
85 87 87a
4
ge
ge
br
sw
br
vio
br
gr
Coupling
gn
EC
mot.
87
87a
0
0
30
A
A
86 85
Nomenclature
Fuse
Fuse socket, 4-fold
Pos
F1,F2
Cable size (vehicle side)
+
15 A, 15 A
81676
LP/HP (HD/ND) switch S3
66553
Anti-icing switch
S4
65345
Relay
K1
34098
Rocker switch
S1,S2
66596,66595
Axial fan
M1,M2
64506
Radial fan
M3
80866
Prot. against reversed
polarity
F3
75 A
Plus pin Bboth sides
M10 dia.
Plus pin
B+
both
sides
M8 dia.
24 V
FA
16
HD ND
rot
16
rot
ge
ge
F3
24 V version
16 mm
LxI
A=
Kappa x U
Ground
=
2
16 mm
2
12 meters x 70 amps
56 x 1.0 volt
Compressor
2.5 mm2
= 15 mm2
selected standard cross-section = min. 16 mm2
LxI
A=
Kappa x U
=
20 meters x 70 amps
56 x 1.0 volt
= 25 mm2
selected standard cross-section = min. 25 mm2
A = cable cross-section
L = cable length in meters
I = max. current
Kappa = specific conductivity of copper cables
U = max. permissible voltage drop
Fig. 3.1
Page 15 / 30
Roof-top air-conditioning system Easysphere
3.5.
Circuit diagram for deluxe version
ge
ge
4
B
Out
30 86
P
85 87 87a
or 0
or 0
vio/bl 0,5
vio/bl 0,5
vio
ge
br 0
ge
br
4
br
P
B
B
4
Mot. On
Coupling
EC
mot.
gn
gr
ge
ge
F3
rot
rot
30
15A 15A
Plus pin
Plus pin BB+
both sides
both
M10 dia.
sides
M8 dia.
86 85
Nomenclature
Pos
24 V
Temp.selector
B3
83051
Thermostat module
B2
66784
Temperature sensor
B1
Philips KTY 81-110
Fuse
F1,F2
Fuse socket 4-fold
FA
81676
LP/HP (HD/ND) switch S3
66553
Anti-icing switch
S4
65345
Relay
K1
34098
Rocker switch
S1,S2
66596,66595
Axial fan
M1,M2
64506
Radial fan
M3
80866
Prot. against reversed
polarity
F3
75A
16
0
0
16
HD ND
87
87a
Cable size (vehicle side)
24V version
+
Ground
Compressor
16mm2
16mm2
2.5mm2
15A, 15A
LxI
A=
Kappa x U
=
12 meters x 70 amps
56 x 1.0 volt
= 15 mm2
selected standard cross--section = min. 16 mm2
LxI
A=
Kappa x U
=
20 Meter x 70 Ampere
56 x 1,0 Volt
= 25 mm2
selected standard cross--section = min. 25 mm2
A = cable cross-section
L =cable length in meters
I = max. current
Kappa = specific conductivity of copper cables
U = max. permissible voltage drop
Fig. 3.2
Page 16 / 30
Roof-top air-conditioning system Easysphere
4.
INSTALLATION INSTRUCTIONS
4.1.
Safety precautions
The safety instructions set out in chapter 1.4 must be read and noted before starting work.
Installation should be performed by someone well versed in auto mechanics.
IMPORTANT
Transmitter units (e.g. radio antennas), that are located in a distance of less
than 1m from the roof-top unit, can under unfavourable circumstances generate an electro-magnetic radiation, which tops the limits according to the
European standard 72/245/EEC and thus can cause damage to the motor.
The cable routing is to be chosen in such a way, that a sufficient distance
to the transmitter unit is ensured. In addition, the electrical wires
(+ plus/ - minus) shall be routed together as bundle.
4.2.
Installation kit
In addition to the main components, i.e. the
- roof-top air-conditioning unit
the basic scope of supply also includes the following parts and materials:
a)
For mounting the roof-top air-conditioning unit with air-distribution panel
–
–
–
–
4.3.
10 self-tapping screws
Sikaflex sealing compound
3 Armaflex sealing strips
9 silent blocks with bolts and nuts
The following are not included in the installation kit and must be produced on site
–
–
–
–
Air duct frame between roof and air-distribution panel
Connecting cables and elements (vehicle side) (see Fig. 3.1 or 3.2)
Fastening elements for routing the connecting cables
Reinforcing elements, hoops inside the roof to ensure sufficient roof stability Transfer stiffness > 640 N/mm
4.4.
Required equipment, special tools and accessories
a)
The system is already prefilled (R134a)
– Sheet metal cutter for breakthroughs in vehicle / cabin roof
– Mechanics tool kit
b)
For service (evacuation, filling and testing the refrigerant circuit)
–
–
–
–
–
–
–
–
Servicing / recycling station for refrigerant R134a
Vacuum pump, suction rate min. 5 m3/h, final pressure 1 mbar
Filler hoses with quick-disconnect couplings for R134a
Leakage tester
Digital thermometer
Refrigerant R134a
PAG oil for A/C compressors
Test fittings with intake-pressure and high-pressure gauges
Page 17 / 30
Roof-top air-conditioning system Easysphere
4.5.
Preparations on vehicle / cabin roof
– Installation depends on the type of vehicle. The vehicle manufacturer's instructions must
therefore be observed.
– Fig. 4.1 shows the installation dimensions and the mounting hole pattern of the roof-top unit. The
breakthroughs for the air intake and discharge openings are located off-centre in the baseplate.
IMPORTANT
During preparation of air intake and exhaust openings structural parts (e.g.
roof bows, stiffeners) must not be cut through.
Kontur Haube
Direction of travel
Contour of baseplate
Drilling pattern (viewed from above, onto the roof of the vehicle)
Fig. 4.1
NOTE
The breakthroughs for the air intake and discharge opening are located offcentre.
– Cut template out of packaging material.
– Remove intermediate roof / insulating material around the air ducts.
– Mark the air duct openings (shaded areas, Fig. 4.1) on the roof and cut them out.
Page 18 / 30
Roof-top air-conditioning system Easysphere
– Align the template or roof-top air-conditioning unit (without hood) with the marked point and drill
nine holes with dia. 9 mm.
Attention
In the area of the attachment holes the roof must have a transfer stiffness
of more than 640 N/mm. This can be verified by applying the Impact Hammer Testing method. For reasons of noise transmission the attachment holes are to be placed into roof bows or welded reinforcements.
An attachment of the system only through the roof cladding is not
permitted.
– Remove template or roof-top unit as applicable.
– Deburr / smooth the cut edges of the openings and drilled holes and coat with corrosion-proofing
paint.
– Prepare inner roof so that the air-distribution panel can be installed under the roof (see Fig. 4.3).
4.6.
Preparation of sealing frame
a)
The height of the sealing frame must be cut / adapted to the roof contour (beads/gutters/camber) in
such a way as to seal the contours as shown in Fig. 4.2.
The sealing strips should be compressed by approx. 20% - 40% in height when fitting the air-conditioning unit.
b)
Affix the sealing profile to the roof with the Sikaflex 221 included in the installation kit as shown in
Fig. 4.3.
Installation proposal for CC4E with Armaflex
(viewed from above, onto the vehicle roof)
Direction of travel
Cut edges and top and bottom surfaces bonded
with SIKAFLEX 221 to ensure they are watertight
Cut edges
Contour of baseplate
Fig. 4.2
c)
Coat the top of the sealing profile with Sikaflex sealing compound.
Page 19 / 30
Roof-top air-conditioning system Easysphere
NOTE
The curing time of 3-5 hours must be observed when using Sikaflex 221 for
installation of the roof-top air-conditioning system. Mount the baseplate
before Sikaflex has cured. Do not expose seal to moisture before Sikaflex
has cured.
Mounting the baseplate
a)
Place the baseplate on the roof (sealing frame) and align it. Place silent blocks under the eight
fastening points and insert the nine M8 bolts (with washers) into the holes (Fig. 4.3).
Rainwater drain
Condensation water
Armaflex
Sealing frame
Vehicle roof
Luftkanalrahmen
Intermediate roof
Air distribution panel
Self-tapping screw
Bottom view
Fig. 4.3
b)
Check that the baseplate has been positioned correctly and screw it tightly into place with the
washers, serrated washers and nuts included in the installation kit (tightening torque 9 Nm).
IMPORTANT
Ensure that moisture can escape between the vehicle roof and the
baseplate. When sealing the sealing frame, care must be taken to ensure
that the drains for condensation and rainwater remain free. Others seals
in addition to those described here using Sikaflex 221 and the Armaflex
sealing frame are therefore not permitted.
Page 20 / 30
Roof-top air-conditioning system Easysphere
Pre-assembly of air-distribution panel
The rocker switches and the setpoint potentiometer (if applicable) must be installed in the air-distribution
panel, depending on the individual version and scope of supply.
Rocker switch
Setpoint
potentiometer
(optional)
Installation of the operating
element
Right!
Wrong!
Fig. 4.4
Installation of the rocker switches:
Locate rocker switches in rectangular cut-outs of air distributor panel so that they engage (Fig. 4.4).
Installation of the setpoint potentiometer:
Insert the setpoint potentiometer in the hole in the air distribution panel as shown in Fig. 4.4.
The wiring harness is prepared for connection to the command value switch potentiometer (mechanical).
Simply pull on connector housing to unplug the connector. By pulling on the cable loom the terminal plug
is arrested (self-locking).
NOTE
The light conductor must make contact with the rotary selector.
Installation of air distribution panel
a)
Prepare the air duct frame (if necessary) so that it creates an effective seal on all sides and the top
of the intake and delivery area between the vehicle roof and the intermediate roof.
b)
Secure the air duct frame to the roof. Ensure that the fitted roof-top air-conditioning system is not
damaged when drilling holes.
c)
Connect cables between the air distribution panel (S1 and S4 in circuit diagram, Fig. 3.1 or 3.2) and
the baseplate.
d)
Position the air distribution panel as shown in Fig. 4.3 and secure it with ten self-tapping screws to
the intermediate roof or to suitable self-made brackets if necessary. If the optional recirculating-air
filter has also been ordered, it must be inserted in the intake area of the air distribution panel.
Page 21 / 30
Roof-top air-conditioning system Easysphere
NOTE
The air distribution panel must not be aligned with the centre of the air
intake opening. The air distribution panel must cover the air intake opening
in the vehicle roof.
4.7.
Make electrical connections
The system must be adequately protected by fuses on the vehicle side. The cable cross-section must be
determined by the customer in accordance with the cable length.
Refer also to "Copper cables for use in motor vehicles" DIN VDE 0298 Part 4.
a)
Disconnect vehicle battery.
IMPORTANT
– Note the vehicle manufacturer's instructions when connecting the
power supply for the air-conditioning system.
– Only adequately dimensioned cables approved for use in motor
vehicles may be used (see Fig. 3.1 or 3.2).
– Work on the electrical system may only be performed by authorized
personnel.
– Rubber grommets must be used when routing cables through metal
sheets.
b)
Make and connect the cables as shown in Fig. 3.1 or 3.2.
– Route cables through protective sleeves and secure them appropriately with cable ties.
– The power supply for the system must be connected to the bulkhead (Fig. 2.2) with the cable
bolts provided for this purpose.
IMPORTANT
Correct polarity must be ensured without fail (+ pole: M8 cable bolt,
- pole: M10 cable bolt). The electronic control will be destroyed if the
polarity is reversed!
– Use strain relief material.
NOTE
If the operating elements are not installed in the air distribution panel, the
optionally available cable set for external installation of the operating
elements can be used to extend the connecting cables.
Page 22 / 30
Roof-top air-conditioning system Easysphere
5.
STARTUP
5.1.
Safety precautions
The safety instructions in chapter 1.4 must be observed.
IMPORTANT
The system may only be started when the hood has been fitted. Risk of
injury due to motor fans, belts and the compressor coupling.
5.2.
Operator instructions
IMPORTANT
The air-conditioning system can only be put into operation with the vehicle
engine running.
5.3.
Controls and indicators
The roof-top air-conditioning system is operated via the two rocker switches (Fig. 5.1):
– Air-conditioning system ON / OFF (1)
– 3-position rocker switch (2) .
AUS
EIN
Fig. 5.1
5.4.
Putting into service for the first time
a)
Start the vehicle engine as described in the owner's manual.
b)
Switch on system using ON / OFF switch. Operate system at maximum fan power (3-position rocker
switch in position stage 3). Cold air must emerge from the air distribution panel after at least
2 minutes.
c)
Reduce fan speed and check airstream.
Page 23 / 30
Roof-top air-conditioning system Easysphere
5.5.
Operation
NOTE
Note the instructions in chapter 5.2.
Prior to operation ensure that:
- air conditioning system is in serviceable condition.
- air inlets and outlets are unobstructed (no leaves, etc.)
- condensation water drain holes are unobstructed.
Operation of the system:
a)
The system is controlled by means of the rocker switches ON / OFF and the fan switch.
b)
The interior of the vehicle is cooled in recirculation mode, in keeping with the set fan speed 1, 2 or 3.
c)
The temperature of the air-conditioning system CC4E without electronic room thermostat is
controlled via the anti-icing thermostat in the system, which switches off the electric motor when the
temperature at which ice forms on the evaporator is reached. The evaporator and condenser fans
continue to run. The electric motor is switched on again when the threshold temperature of the antiicing thermostat is exceeded.
d)
Manual control of the cooling performance may be achieved by means of fan power stage selection.
Stage 1:
low cooling performance at low air outlet temperature and low fan power
Stage 2:
mid cooling performance at mid air outlet temperature and mid fan power
Stage 3:
high cooling performance at somewhat higher air outlet temperature and maximum fan
power
NOTE
In order to cool and dehumidify the interior of the vehicle after standing for
a long time in high outside temperatures and direct sunlight, it is advisable
to switch the fan to speed 3 at first. It can then be turned down to speed 2
or 1, depending on the outside temperature, when a pleasant temperature
has been achieved inside the vehicle.
5.6.
Operation of the air-conditioning system (deluxe version)
Operation is as described in 5.5 for the basic version.
In addition, the temperature can be selected via a setpoint potentiometer (optional) with knob. The electric
motor is switched off when the set temperature is reached. The electric motor is switched on again when
the temperature increases again by approx. 2 °C.
Page 24 / 30
Roof-top air-conditioning system Easysphere
6.
MAINTENANCE
6.1.
Safety precautions
The safety instructions and regulations in chapter 1.4 must be observed.
6.2.
General
a)
Work on the refrigerant circuit may only be carried out by qualified personnel from duly authorized
specialist repairshops.
b)
The special equipment, tools and accessories listed in chapter 4.5 are required and must be used
for maintenance work on the refrigerant circuit.
c)
Like all parts of the vehicle, the air-conditioning system is subject to constant stresses. The
specified maintenance work must be carried out regularly in order to ensure troublefree operation
of the system and avoid damage to the components.
d)
Proper handling of the system and a complete record of all the required scheduled maintenance are
essential for acceptance of possible warranty claims concerning damaged components subject to
maintenance.
e)
To prevent not only the shaft seals of the refrigerant compressor drying out, but also moving parts
in the refrigerant circuit from seizing up due to resinification of the oil, the air-conditioning system
must be switched on for approx. 15 minutes at least once per month when it is not in regular use.
Requirement: Minimum outside temperature > 5 °C or heated hall.
6.3.
Maintenance and care
a)
Regardless of the following schedule, all screw connections securing the roof-top air-conditioning
system must be checked within four weeks of using the system for the first time in order to ensure
that they are secure.
b)
Even if the air-conditioning system is not operated, individual components are subject to wear due
to normal ageing or stress due to vehicle operation. All checks listed in the maintenance and
servicing plan must therefore be performed regardless of the system operating hours.
c)
Even if hose connections do not leak, refrigerant may be lost regardless of operating hours. Due to
the structure of the material used for the refrigerant hoses, their diffusion rate can vary depending
on ambient temperature. However, a leak must be assumed to exist somewhere in the system if
relatively large quantities of refrigerant are lost at short intervals.
d)
Slight contamination of evaporator and condenser fins is removed with compressed air applied
against normal direction of air flow. Major contamination or greasy deposits must first be removed
with soapy water or a suitable cleaning solvent (not aggressive for copper or aluminum) before
cleaning with compressed air or a water jet.
e)
The receiver-driver must be replaced at least once per year and whenever work has been
performed on the refrigerant circuit.
f)
The filter mat must be replaced at regular intervals
IMPORTANT
Refrigerant must never be discharged into the atmosphere (refer to
Section 8 of the regulation dated 6 May 1991 banning the use of CFCs and
halones).
Page 25 / 30
Roof-top air-conditioning system Easysphere
6.4.
Maintenance and service checklist
System component
Maintenance task
Frequency
m
6m
a
Refrigerant circuit
–
–
–
–
–
–
Hoses
Connections
Refrigerant quantity
Condenser
Receiver-drier
Condensation water
drain
– Roof-top airconditioner unit
Check for chafing and general condition
Test for leaks with leak tester
Check refrigerant level in sight glass
Check condition of fins (must be cleaned if soiled)
Replace
Check that opening is clear and clean if necessary
X
X
X
X
X
X
X
Check overall condition and secure attachment of
connections
Compressor
–
–
–
–
Magnetic clutch
Compressor
Poly-V-belt
Mounting bracket
Check engagement without slip / compressor start-up
Check noiseless operation
Check serviceability and tension
Check condition and secure attachment
X
X
Check undamaged condition
Check undamaged condition and secure attachment
Check for signs of oxidation
X
X
X
X
Electrical connections
– Wiring
– Connections
– Motor connections
Abbreviations: m – monthly, a – yearly (a – every six months if operated throughout the year)
6.5.
Inspections before repair
In order to avoid unnecessary disassembly or duplication of work, the overall condition of the airconditioning system must be checked before starting any repairs.
Visual inspection
a)
Outer condition of roof-top unit:
–
–
–
–
–
b)
Hood without cracks and no damage to paint finish
Air inlets and outlets clean and undamaged
Attachment points secure and without corrosion
Hose and wiring connections serviceable
Openings in metal undamaged.
Condition of air distribution panel
– Attachment points / screws secure
– Ventilation switches serviceable
– Circulating air inlet / outlet screen undamaged and clean.
c)
Condition of compressor
– Hose connections undamaged and secure
– Attachment parts / screws secure.
Poly-V-belt correctly tensioned
Poly-V-belt and V-belt pulleys undamaged
Electrical connection undamaged
Page 26 / 30
Roof-top air-conditioning system Easysphere
6.6.
Troubleshooting
General
a)
A systematic approach is advisable for troubleshooting. Appropriate action must be undertaken as
described below for faults of a general nature or when normal conditions are not obtained during
the pressure test.
b)
Certain faults can only be located and remedied by skilled personnel using special tools.
c)
If the compressor is damaged (e.g. defective valve plates) it is absolutely essential to replace the
expansion valve as a possible cause of the malfunction.
Cause of faults in the electrical system
The individual circuits must be systematically checked with the aid of the circuit diagram (see
Fig. 3.1) and the fault localized. Above all plug connections, switches, relays, etc., should be
checked for continuity.
The following possibilities must always be checked and excluded as a possible cause of the
malfunction:
–
–
–
–
–
–
Defective fuses
Corrosion of plug contacts
Loose contact in plug connectors
Wrong crimping on connector
Corrosion on wiring and fuses
Corrosion on battery poles
Cause of faults in the air-conditioning system
– Defective evaporator or condenser fan
– Contaminated or clogged air filters, evaporator or condenser fins
– Shortage of refrigerant in the system
If the system is deactivated continuously, we recommend that it be checked by an authorized
workshop.
Dealing with problems in the refrigerant circuit
If faults arise in the refrigerant circuit, the system must be inspected and repaired by an authorized
specialist repairshop. Refrigerant must never be discharged into the atmosphere (refer to Section 8
of the regulation dated 6 May 1991 banning the use of CFCs and halones).
Cause of faults making it impossible to reach the required states during pressure tests
Divergences from the required state during pressure tests (chapter 6.8) may be due to the following causes.
These causes must be checked, the trouble located and defective components repaired or replaced.
High pressure gauge reading too high:
– Condenser air flow restricted
– Too much refrigerant
High pressure gauge reading too low:
– Not enough refrigerant (check sight glass)
– compressor speed too low (e.g. by slippage of V-belt)
– Compressor defective
Low pressure gauge reading too high:
– Expansion valve defective
– Compressor speed too low (e.g. by slippage of V-belt)
– Compressor defective
Page 27 / 30
Roof-top air-conditioning system Easysphere
Low pressure gauge reading too low:
–
–
–
–
–
Intake or delivery line restricted, e.g. by kinks
Expansion valve defective
Not enough refrigerant (check sight glass)
Evaporator air flow restricted
Clogged filter drier
6.7.
Repairs
IMPORTANT
Refrigerant must never be discharged into the atmosphere (refer to
Section 8 of the regulation dated 6 May 1991 banning the use of CFCs and
halones).
NOTE
The safety precautions and regulations contained in chapter 1.4 and 6.2
must be observed.
Only genuine spare parts may be used for repairs and the original condition
must be restored.
a)
Always use genuine spare parts or standard parts for repairs.
b)
The system's original condition must always be restored when performing repairs.
c)
Before opening / disassembling components in the refrigerant circuit, the refrigerant must be
drained into the recycling station provided and disposed of properly or reused.
d)
After completing repairs on the refrigerant circuit, the system must be
– evacuated in accordance with the operating instructions of the recycling station
– filled with refrigerant on the high pressure side, with the system at rest
– tested, see chapter 6.8.
Page 28 / 30
Roof-top air-conditioning system Easysphere
6.8.
Post-repair procedures and testing
Check refrigerant pressures and pressure switches function tests
a)
General
As a rule, every air-conditioning system filled with refrigerant is a pressurized system. The pressure
is the same throughout the system circuit and depends on ambient temperature.
During operation of the system, the working pressure on the intake side differs from that on the
delivery side of the compressor. The pressures differ and are influenced by the compressor
operating speed, the temperature inside the vehicle, the outside air temperature and relative
humidity. Abnormal working pressures indicate that there is a fault in the system.
The working pressure should be tested with an on-board power supply of 24-26 V and at air
temperatures between 20 °C and max. 40 °C. The fan must be operated at full power stage 3. The
hood must be fitted for the pressure test since the air pressure of the heat exchangers has a
decisive influence on whether or not the operating pressure is reached.
The following values must be obtained:
Outside air
temperature
Low pressure gauge
High pressure gauge
27 °C
3.0 bar abs ± 0.2 bar
10 bar abs ± 2 bar
30 °C
3.2 bar abs ± 0.2 bar
11 bar abs ± 2 bar
35 °C
3.5 bar abs ± 0.2 bar
13 bar abs ± 2 bar
40 °C
3.9 bar abs ± 0.2 bar
15 bar abs ± 2 bar
If different pressure values are obtained, an authorized repair shop must be consulted to investigate
the reasons.
When the pressure test is complete, disconnect the pressure gauges and refit the sealing caps.
b)
Testing the high-pressure monitor
–
–
–
–
–
–
c)
Connect pressure gauges to system.
Remove fuse F3 (condenser fan) and fit the hood.
Switch on the air-conditioning system.
Check whether compressor switches off at a pressure of 26.5 ± 2 bar.
Remove the hood and refit fuse F3 (condenser fan).
Check that compressor switches on again when pressure drops to 20 ± 2 bar.
Perform complementary steps.
IMPORTANT
If the high pressure switch is not working properly, switch off the airconditioning system immediately to prevent undue refrigerant pressure
buildup .
Replenishing partially filled systems with refrigerant
A sight glass is integrated into the circuit at the receiver-drier to check the refrigerant level. When
correctly filled, refrigerant will flow through the sight glass without air bubbles roughly 5 minutes after
starting the air-conditioning system. Occasional bubbles are meaningless. If gas bubbles are visible,
the refrigerant quantity in the system has fallen below the minimum fill level.
6.9.
Visual inspection
The system must be inspected visually as described in chapter 6.5 when the repairs are complete.
Page 29 / 30
Roof-top air-conditioning system Easysphere
7.
WARRANTY CLAIMS PROCESSING
a)
Parts subject to natural wear or which have been handled incorrectly are excluded from the
warranty. The warranty period is not extended by repairs or delivery of replacement parts.
b)
In the event that a warranty claim arises, contact your local distributor/dealer in charge and provide
the following:
– part under warranty
– warranty card
– warranty claim form.
Page 30 / 30