1
INSTANT TIRE REPAIR
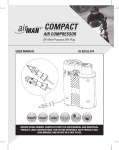
RAPID 12 V AIR COMPRESSOR
WITH DUNLOP TIRE SEALANT
OWNER’S MANUAL
MODEL NUMBER: 200401
TOLL-FREE NUMBER:
1-866-9AIRMAN (1-866-924-7626)
www.activeproducts.com
Thank you for purchasing your AirMan product.
With the AirMan Instant Tire Repair system you can continue on your journey even after
experiencing a flat tire. The compressor and sealant effectively seals most typical tire
punctures up to 6 mm. You can drive up to 300 KM/180 Miles at a maximum speed of
80 KMH/50 MPH on a sealed tire to get you to the nearest service station.
Some punctures or flat tires CANNOT be repaired as the damage may be too severe.
Sidewall punctures or tears CANNOT be repaired.
You can also use AirMan for all of your everyday inflation needs. With the supplied adaptors,
you can inflate easily and quickly your inflatables, sporting goods, bicycle tires, and more!
Please read and understand the instructions before storing the AirMan in your trunk.
NOTES:
TABLE OF CONTENTS
– Park your car at the side of the road when
using AirMan so as not to impede the flow
of traffic and so you can use AirMan without
being in danger. Keep your vehicles’ lights
on or use a warning triangle to make others
around you aware of your presence.
– Do not remove any foreign objects
(nails/screws /debree) that may have got stuck
in the tire.
– Leave the engine running as the compressor
may drain the battery. Do not run your
vehicle’s engine INDOORS.
– Never leave AirMan unattended while in use.
– Use ONLY AirMan replacement Tire Sealant.
– Do not use the AirMan Tire Sealant after
it’s expiry date. Replace with a new AirMan
Tire Sealant.
Notes . . . . . . . . . . . . . . . . . . . . . . . . . . . . . . . . . . ii
Introduction . . . . . . . . . . . . . . . . . . . . . . . . . . . . . 1
Tire Repair Operating Instructions . . . . . . . . . . . 2
Air-only Operation Instructions. . . . . . . . . . . . . . 6
Parts Diagram and
List for the AirMan . . . . . . . . . . . . . . . . . . . . . . . . 8
Parts Diagram and
List for Dunlop Tire Sealant Bottle . . . . . . . . . . . 9
ii
INTRODUCTION
With the AirMan Tire Repair Kit you stay mobile
even after experiencing a tire puncture. The combination of air compressor and sealing compound effectively seals typical punctures in the
tire up to a size of approximately 6 mm. You can
drive on to a car repair shop (up to 300 km) at a
maximum speed of 80 km/h. The integrated lamp
and the illuminated pressure gauge allow for
convenient use even in adverse conditions.
CAUTION Do not use the tire repair kit if the tire was
severely damaged (for example, if the tire
has bulges, cuts, cracks or similar defects).
Only seal punctured areas located well
within the tread region of the tire. Damage
to the sidewall cannot be repaired.
It is possible that some tires sustaining greater
damage cannot be sealed. Use with caution.
WHAT TO DO WHEN A TIRE IS PUNCTURED
This instruction manual shows you step-by-step
how to repair the puncture using AirMan. Read the
section “What To Do When A Tire Is Punctured”
and save this manual together with the tire repair
kit in the pouch.
The puncture is repaired in two stages. First, you
pump the sealing compound and air into the tire,
and drive a short distance to spread the compound in the tire. Afterwards, you check the inflation pressure and, if necessary, pump more air
into the tire. Continue your journey safely for up
to 300 km, at a speed no more than 80 km/hr.
SAFETY NOTES
Read Thoroughly Before Use
WARNING – Before using AirMan, read this instruction
manual thoroughly!
– Read the precautionary advice shown
on AirMan.
– Use AirMan only between -30˚C and +70˚C.
– Park your car at the side of the road so that it
does not impede the free flow of traffic, and so
that you can work with the AirMan Tire Repair
Kit without being in danger. Put up a warning
triangle in a prominent place to make other
road users aware of your location, or keep
your hazard lights on.
– Do not use AirMan under the
following conditions:
• Cuts or piercings in the tire larger than 6mm.
• Tire damage caused by driving with
considerably reduced pressure or
deflated tires.
• A damaged rim.
Do not continue your journey AirMan cannot
be used in such situations. Call for assistance
immediately.
– Do not remove any foreign objects – such as
nails or screws – that are stuck in the tire.
– Provided the car is outdoors, leave the engine
running. Otherwise operating the compressor
for a long time could drain the car battery.
– Do not bend the hoses.
– Never leave the Tire Repair Kit unattended
while it is being used.
– Do not leave the compressor running for
more than 10 minutes at a time. There is a
risk of overheating.
If the engine is left running in a badly
ventilated area, or in an unventilated
location (for example, inside a building)
there is a danger of suffocation!
CAUTION During the pumping operation do not stand
next to the damaged tire. Check the sidewall
of the tire for unusual bulges or deformation.
Discontinue the pumping operation and
deflate the tire by pressing the deflating
button. If any unusual behaviour of the tire
is noticed discontinue use immediately.
1
TIRE REPAIR OPERATING INSTRUCTIONS
STEP 1
Remove AirMan from its pouch. Make sure the
yellow switch is in the “OFF” (O) position.
Connect the 12-volt cord (A) to your vehicle’s
12-volt receptacle (also known as the cigarette
lighter receptacle). Make sure your vehicle is
running (outdoors) so as not to drain the battery.
Make sure your vehicle’s hazard lights are on.
Peel off sticker (E) and affix it to the instrument
panel or steering wheel in the driver’s field of
view. This is to remind the driver of the 80 KMH/
50 MPH speed limit as well as to get the tire
checked as soon as possible.
2
TIRE REPAIR OPERATING INSTRUCTIONS – CONTINUED
STEP 2
Loosen the safety catch (C) and rotate the
AirMan Tire Sealant Chamber (D) upwards to a
90˚ vertical position until it clicks into place to
show Red Valve Cap (J). Remove Red Valve
Cap (keep for later use) to reveal sealent nozzle.
Connect the Air Compressor Hose (B) to the
nozzle. Secure tightly by threading nozzle
clockwise until completely secure.
STEP 3
Connect the RED AirMan Sealant Hose nozzle
(F) to flat tire’s valve stem. Secure by screwing
nozzle tightly clockwise onto Valve stem. Slight
hissing may occur until nozzle is fully tightened
onto tire’s valve stem. Double-check that both
connections are secure and tight.
3
TIRE REPAIR OPERATING INSTRUCTIONS – CONTINUED
STEP 4
Turn AirMan to “ON” position (I). Pressure will spike
and gradually decrease. Time will vary depending
on size of tire and ambient temperature.
CAUTION When the Tire Sealant is being pumped
through the tire, the pressure gauge
will show a reading of over 60 – 70 PSI.
This is normal. It will drop once all the
Tire Sealant has been pumped through.
CAUTION Some Sealant MAY leak out through the
Tire’s puncture. THIS IS NORMAL.
After a few minutes, monitor gauge until desired
tire pressure is reached. Please follow car manufacturer’s recommended tire pressure which can
be found in the car’s owner’s manual.Inflate 5 PSI
over the vehicle manufacturer’s recommended
tire pressure to account for escaped air during
the sealing process. Otherwise, make sure the
gauge has stabilized within the YELLOW shaded
zone of the gauge. Turn off compressor to get an
accurate tire pressure reading.
Make sure the pressure of the tire has reached at
least the YELLOW shaded zone. If the YELLOW
shaded zone is not reachable, the tire may be too
severely damaged and you should not continue
to drive on it. Contact a vehicle repair shop or
service network for further assistance.
4
TIRE REPAIR OPERATING INSTRUCTIONS – CONTINUED
STEP 5
Once desired Tire Pressure has been reached,
turn AirMan to “OFF” position (O).
Unplug and replace 12-volt cord. Remove air
compressor hose and store in compartment.
Remove RED Sealant Hose and connect to
Yellow Sealant nozzle (K) to avoid any dripping
of the sealant.
Put Red Valve cap onto the repaired tire’s Valve
as a reminder to fix tire immediately.
CAUTION Drive away immediately to ensure proper
sealing. Do not exceed 80 KMH or 50 MPH.
After at least 3 KM/2 Miles, check the pressure of
the Sealed Tire as soon as possible to ensure
that proper sealing has taken place and pressure
has stabilized. If more air is required, then follow
instructions in the next section for inflating your
tire without the sealant function.
If the tire pressure falls below 20 PSI, then do
not continue to drive. Contact a vehicle repair
shop or service network for further assistance.
5
AIR-ONLY OPERATION INSTRUCTIONS
How do you use AirMan to
maintain proper tire inflation?
You should make it a habit to check your tire pressures once every two weeks.
Proper tire inflation is crucial to your car’s performance. Proper tire inflation can increase fuel
economy by 30% and increase tire life by 50%. It
also affects how your car handles, rides and feels
on the road.
1. Remove AirMan from its pouch. Make sure
the yellow switch is in the “OFF” (O) position.
Connect the 12-volt cord (H) to your
vehicle’s 12-volt receptacle (also known as
the cigarette lighter receptacle). Make sure
your vehicle is running (outdoors) so as not
to drain the battery.
CAUTION 2. Read Tire Pressure from the AirMan’s
pressure gauge.
Each tire and vehicle model and make has
recommended tire pressures. Generally,
this figure can be located either on the car’s
doorsill, or, in the service manual of your
vehicle. NEVER inflate beyond the tire
manufacturer’s recommended maximum
tire pressure.
3. If tire pressure is lower than recommended,
turn the AirMan to the “ON” position until the
desired Tire Pressure is reached.
4. If tire pressure is higher than recommended,
press the AirMan’s Deflate button until the
desired Tire Pressure is reached.
DEFLATE BUTTON
CAUTION You can quickly and easily deflate your
tire by securing the air compressor hose
to your tire’s valve and depressing the
deflate button.
Tire pressure readings should always be
taken when tires are cold. Hot tires, or
tires that have been driven on, will give
inaccurate readings. Try to read pressure
before you drive too far, or, after you have
let the car sit for at least an hour.
How do you use AirMan to
inflate sporting equipment such
as basketballs, footballs, etc.?
The AirMan comes with several needle adaptors,
making it a great tool for inflating balls.
1. Remove AirMan from its pouch. Make sure
the yellow switch is in the “OFF” (O) position.
Connect the 12-volt cord (H) to your vehicle’s
12-volt receptacle (also known as the
cigarette lighter receptacle). Make sure your
vehicle is running (outdoors) so as not to
drain the battery.
2. Use correct Adaptor by screwing adaptor
(located on the back of the AirMan unit) onto
the AirMan Air Nozzle.
3. Moisten needle and insert into ball.
Turn on unit and inflate until ball reaches
desired firmness.
6
AIR-ONLY OPERATION INSTRUCTIONS – CONTINUED
How do you use AirMan to inflate
high volume, low pressure inflatables
such as rafts, toys, and beds?
WARRANTY
ActiveTools warrants to the original purchaser
that their AirMan inflators will be free from
defects in material and workmanship for three
years after date of purchase. This limited warranty does not cover conditions resulting from normal wear and tear. The limited warranty does not
apply in the event of misuse or abuse of the
products. ActiveTools reserves the right to substitute products or components of equal or better
quality if identical products or components are
not available at the time of repair or replacement
under this limited warranty. This limited warranty
is non-transferable.
The AirMan is great for inflating beds, rafts, and
toys when you use the AirMan High Volume
Accelerator, or the other supplied nozzles. The
High Volume Accelerator makes inflating high
volume low pressure inflatables up to 3 times
faster than a regular air compressor.
1. Remove AirMan from its pouch. Make sure
the yellow switch is in the “OFF” (O) position.
Connect the 12-volt cord (H) to your vehicle’s
12-volt receptacle (also known as the
cigarette lighter receptacle). Make sure your
vehicle is running (outdoors) so as not to
drain the battery.
2. Remove the High Volume Accelerator from
it’s socket (it’s located on the back of the
AirMan unit. Screw it tightly onto the AirMan
Air Nozzle.
3. Turn on unit. High Volume/low-pressure air
will come out of the nozzle.
4. Alternatively, use the other supplied nozzles
for other inflatable applications.
HIGH VOLUME ACCELERATOR
This handy accessory increases the air flow
by 250%. Ideal for low pressure, high volume
applications such as mattresses, rafts, etc.
7
PARTS DIAGRAM AND LIST FOR THE AIRMAN
D
C
E
A
F
B
I
G H
PARTS LIST
ITEM NO.
QUANTITY
PART NAME
A
1
12-volt cord
B
1
Air Compressor Hose
C
1
Safety Catch
D
1
Tire Sealant Chamber
E
1
Warning Sticker
F
1
Red Sealant hose
G
1
Sport adapter
H
1
Ball adapter
I
1
High Volume Accelerator
FRONT:
BACK:
8
PARTS DIAGRAM AND LIST FOR DUNLOP TIRE SEALANT BOTTLE
L
F
K
J
PARTS LIST
ITEM NO.
QUANTITY
PART NAME
F
1
Red Sealant Hose
J
1
Red Valve Cap
K
1
Yellow Sealant Nozzle
L
1
Tire Sealant Bottle
9