Download 5spd Short Shifter Adapter w/Shifter Bushings
Transcript
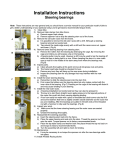
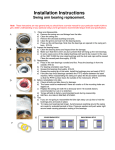
5spd Short Shifter Adapter w/Shifter Bushings This Short shifter adapter is not designed for use with the optional factory short shifter. Please check factory shifter before performing installation. The factory short shifter is very small diameter (size of pinky finger) and gold in color. Please read all instructions before performing installation. SPECIAL NOTES: • • The short shifter is adjustable by changing the placement of the adapter. Make sure to tight bolt, or shifter may come loose while driving. Included with Short shifter are PERRIN Shifter bushings. A slight increase in vibration may be felt in shifter after installation, this is completely normal. Parts Included with PERRIN Short Shifter Adapter w/Bushings: • • • • • (1) PERRIN WRX Short shift adapter (2) PERRIN 5spd shifter bushings (2684) (1) M8x20mm SS socket cap screw (1) M6 Allen wrench (1) Grease packet INSTALLATION 1. 2. Remove OEM shift knob by unscrewing shifter counter clockwise. Remove shifter trim piece following directions below for your specific model. • 2002-‐2007 cars need to remove trim panel from around E-‐brake first. Pull it straight up. Unplug wire harnesses that are attached to the switch covers. Next, remove shifter bezel from around the shifter lever by pulling up and toward the rear of the car. • 2008+ cars need to remove E-‐brake boot first by pulling straight up, then remove screw towards left front of console. Locate and remove (2) screws in rear arm rest compartment. Carefully pull console straight up from car and move towards rear of car. Remove Shifter bezel from shifter by pulling up and back. NOTE: Make sure to unplug wire powering STI emblem on STI models. Some models may have a rubber boot covering up shifter assembly. Simply remove plastic screws holding down and discard. NOTE: This may be reinstalled, but can inter with shifter if adjusted to shortest throw. With shift rod exposed, remove 12mm nut and bolt that attaches linkage to shifter lever. Spin stock shift lever around 180 degrees. The bend should now point toward back of car. Remove steel pin and two plastic bushings from stock shift lever and reinstall them into PERRIN short shifter. • 3. 4. 5. 6. 7. 8. 9. Slide the PERRIN short shifter over the stock shifter lever. NOTE: Sometimes the fit can be tight going over the OEM shifter. This is due to small burs on beginning of shaft. A small metal file or sand paper will work to remove the burs. Reattach linkage to new PERRIN short shifter using the 12mm nut and bolt. Adjust PERRIN short shifter to the desired height using supplied 6mm wrench. Recommended heights are as follows: shortest throw = 48mm Longest throw = 61mm . Measured from top of the stock shifter body down to the top of the PERRIN short shifter. For the shortest throw pry up on steel trim ring surrounding the shifter lever lower boot. To do this, remove 12mm bolt and nut to move the linkage out of the way. Use large Crescent wrench to pry front left corner of metal trim ring up to clear linkage. 10. Once desired height is found, tighten all nuts, bolts and fasteners. 11. Run the shifter through all gears and check for clearance. Reinstall shift boot trim plate, then e-‐brake trim plate, making sure to install plugs removed earlier. Shifter Bushing INSTRUCTIONS: 1) 2) 3) 4) 5) 6) Raise vehicle onto jack stands or use commercial vehicle hoist. NOTE: NEVER WORK ON A VEHICLE SOLELY SUPPORTED BY A JACK! Support transmission, and lower transmission braces using jack. Remove bolts securing transmission braces to chassis. Use both 17mm, and 14mm sockets to remove bolts. Locate Lower Shifter linkage on back of transmission. This linkage attaches to tranny and to chassis. Remove (2) 12mm bolts securing linkage to rubber bushing on chassis. Lower Transmission down to expose lower shifter bushing. Loosening the engine pitch-‐stop mount will aid in dropping the transmission. This mount is located under intercooler, between engine and firewall. Once Lower shifter linkage is exposed, remove linkage from tranny. Remove 12mm nut and flat washer from bushing bracket. Slide lower shift linkage and bushing off of bracket. Pry bushing out of lower linkage. Once bushing is removed from lower linkage, install bushings on each side of lower linkage. o 7) 8) Reinstall lower shifter linkage back onto tranny, and retighten nut or bolt. (5spd customers, tighten nut to 13ft-‐lbs) 9) Raise tranny with tranny supports back to chassis, and tighten bolts. 17mm bolts, tighten to 103ft-‐lbs and 14mm bolts, tighten to 51ft-‐lbs. Tighten pitch-‐stop mount if loosened in earlier step. 10) Install (2) 12mm bolts securing linkage to rubber bushing on chassis. Tighten bolts to 13ft-‐lbs. 11) Double check tightness of all hardware and connections, and double check for smooth shifter action. 12) Lower vehicle from jack stands, and proceed to test drive car.


