1
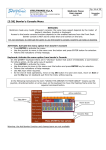
“A” & “A-2” Plug-In Motor Start Relay
12-862203-000
Packaging
(1) 12-862203-000 Plug-In Motor Start Relay Package, contains:
(1) 11-696644-000 Relay
(1) 11-696645-000 Relay Base
(2) 11-696684-000 Relay Clips
(2) #6-32 x 5/8” Pan Head Screw
(2) 11-176005-001 Keps Nut
(10) Fork Terminals
Instructions for “A” Pinsetter
WARNING! Remove power to the pinsetter by turning off the circuit breaker and
unplugging the main power cord to the electrical box.
Please refer to the wiring schematic in the Automatic Pinsetter Service Manual P/N 12-900900-000,
(Figures 53-54) for wire locations to the original motor start relay. Additionally attached is a simplified
wiring diagram to assist with installation.
The original motor start relay shown on the wiring digram in the service manual will be labeled with
contact locations A,B,C,D,E,F and two coil wire locations. The new Motor Start Relay base will be
labeled 1,2,3,4,5,6,7,8,9,10,11.
1. Remove the relay (P/N 11-696644-000) from the relay base (P/N 11-696645-000). Refer to
Figure 1.
Figure 1
2. In the electrical box, remove the screw from the bottom of the box that is securing the original
motor start relay. Do not remove any of the wires that are soldered to the relay at this time.
3. On page 2, match the appropriate wiring chart with electrical box. Follow the steps provided in
the chart to transfer the wires from the existing relay to the new relay base. See page 3 for
simplified wiring diagram.
© Brunswick Bowling & Billiards Corp. 2010. All rights reserved.
February 2010
1
12-900058-000
2
from
from
from
n/a
n/a
n/a
Remove Wire
Remove Wire
Remove Wire
Step 6:
Step 7:
Step 8
Coil
Coil
F
E
D
C
B
install on
install on
install on
install on
install on
install on
install on
install on
11
10
4
7
5
8
6
9
New Relay
Base
Terminals
from
from
from
from
from
n/a
n/a
n/a
n/a
n/a
Remove Wire
Remove Wire
Remove Wire
Remove Wire
Remove Wire
Step 3:
Step 4:
Step 5:
Step 6:
Coil
Coil
D
C
B
A
from
n/a
Remove Wire
Step 2:
Wire ID
Step 1:
Start
Old Relay
RL2
Terminals
install on
install on
install on
install on
install on
install on
11
10
5
8
6
9
New Relay
Base
Terminals
"A" Standard Electrical Box with Deltrol Motor Contactor
from
from
n/a
n/a
Remove Wire
Remove Wire
Step 4:
from
n/a
Remove Wire
Step 3:
Step 5:
from
n/a
Remove Wire
Step 2:
A
from
n/a
Remove Wire
Wire ID
Step 1:
Start
Old Relay
RL2
Terminals
the other end of the wire should be at
the other end of the wire should be at
the other end of the wire should be at
the other end of the wire should be at
the other end of the wire should be at
the other end of the wire should be at
the other end of the wire should be at
the other end of the wire should be at
the other end of the wire should be at
the other end of the wire should be at
the other end of the wire should be at
the other end of the wire should be at
the other end of the wire should be at
the other end of the wire should be at
One of Two Motor Contactor Coil Terminals
Two of Two Motor Contactor Coil Terminals
Manager Control Cannon Plug
One of Two Motor Contactor Coil Terminals
Manager Control Cannon Plug
TS2-9 Low Voltage Terminal Strip
C
TS1-B High Voltage Terminal Strip
n/a
TS2-6 Low Voltage Terminal Strip
TS2-1 Low Voltage Terminal Strip
Other End
of
Wire
TS2-9 Low Voltage Terminal Strip
C
TS1-H High Voltage Terminal Strip
n/a
TS1-B High Voltage Terminal Strip
n/a
TS2-6 Low Voltage Terminal Strip
TS2-1 Low Voltage Terminal Strip
Other End
of
Wire
NOTE: When removing wires from the original motor start relay, verify wires have enough length to connect to the new relay base. Remove the wire
from the old relay terminal and prepare the end to be fitted with the crimp-on fork terminals provided in the kit. Due to previous maintenance in the
electrical box it is common for the wires to vary in length from the original equipment. If the existing wires are not long enough, lengthen by splicing in
a suitable extension of stranded 18 gauge machine tool wire, connected with any common insulated crimp-on 18 gauge splice connector.
"A" Standard Electrical Box with Allen Bradley or Federal Pacific Motor Contactor
“A” Wire Transfer Guide
3
4. Determine a suitable location for the new relay base (P/N 11-696645-000) in the electrical box.
Electrical components can vary in location within each box, it is important the base and wires
do not interfere with other components, and the location allows for easy access to the new relay.
Refer to Figure 2 for optional location.
Figure 2.
5. Once a suitable location is determined, mark the screw holes onto the box. Drill the holes for the
#6-32 x 5/8 pan head screws. Install the base into the box utilizing the
(2) #6-32 x 5/8 pan head screws and (2) 11-176005-001 keps nuts.
6. Insert 11-696644-000 relay into base and secure the clips over the top of the relay. Refer to
Figure 3.
Figure 3
4
Instructions for “A-2” Pinsetter
WARNING! Remove power to the pinsetter by turning off the circuit breaker and
unplugging the main power cord to the electrical box.
Please refer to the wiring schematics in the Automatic Pinsetter Service Manual P/N 12-752828-000,
(Figures 1-85 through 1-91) for wire locations to the original motor start relay. Additionally attached is a
simplified wiring diagram to assist with installation.
The original motor start relay will be labeled with contact locations A,B, E,F and two coil wire locations
G and H. The new Motor Start Relay base will be labeled with contact locations 1,2,3,4,5,6,7,8,9,10,11.
1. Remove the relay (P/N 11-696644-000) from the relay base (P/N 11-696645-000). Refer to
Figure 4.
Figure 4
2. In the electrical box, remove the screw from the bottom of the box that is securing the original
motor start relay. Do not remove any of the wires that are soldered to the relay at this time.
3. On page 6, match the appropriate wiring chart with electrical box. Follow the steps provided in
the chart to transfer the wires from the existing relay to the new relay base. See page 7 for simplified wiring diagram.
5
6
from
from
12
54
Remove Wire
Remove Wire
Step 7:
Step 8
from
from
from
from
from
from
from
16
33
7
19
36
12
54
Remove Wire
Remove Wire
Remove Wire
Remove Wire
Remove Wire
Remove Wire
Remove Wire
Step 2:
Step 3:
Step 4:
Step 5:
Step 6:
Step 7:
Step 8
H coil
H coil
G coil
G coil
F
E
B
A
from
41
Remove Wire
Wire ID
Step 1:
Start
H coil
H coil
G coil
G coil
F
E
B
Old Relay
RL2
Terminals
"A-2" Universal Electrical Box
from
from
18
Remove Wire
Step 5:
35
from
7
Remove Wire
Step 4:
Remove Wire
from
33
Remove Wire
Step 3:
Step 6:
from
16
Remove Wire
Step 2:
A
from
41
Remove Wire
Wire ID
Step 1:
Start
Old Relay
RL2
Terminals
install on
install on
install on
install on
install on
install on
install on
install on
install on
install on
install on
install on
install on
install on
install on
install on
11
11
10
10
4
7
9
6
New Relay
Base
Terminals
11
11
10
10
4
7
9
6
New Relay
Base
Terminals
the other end of the wire should be at
the other end of the wire should be at
the other end of the wire should be at
the other end of the wire should be at
the other end of the wire should be at
the other end of the wire should be at
the other end of the wire should be at
the other end of the wire should be at
the other end of the wire should be at
the other end of the wire should be at
the other end of the wire should be at
the other end of the wire should be at
the other end of the wire should be at
the other end of the wire should be at
the other end of the wire should be at
the other end of the wire should be at
TD1-14 Terminal 14 of Time Delay
TS2-9 Low Voltage Terminal Strip
CN1-A Ball Lift Cannon Plug
SW1-2 On/Off Switch
TS1-E High Voltage Terminal Strip
RL3-6 Motor Contactor Coil
TS2-9 Low Voltage Terminal Strip
TS2-1 Low Voltage Terminal Strip
Other End
of
Wire
TD1-14 Terminal 14 of Time Delay
TS2-9 Low Voltage Terminal Strip
CN1-B Ball Lift Cannon Plug
CN3-C Manager Control Cannon Plug
TS1-H High Voltage Terminal Strip
RL3-6 Motor Contactor Coil
TS2-9 Low Voltage Terminal Strip
TS2-1 Low Voltage Terminal Strip
Other End
of
Wire
NOTE: When removing wires from the original motor start relay, verify wires have enough length to connect to the new relay base. Remove the wire
from the old relay terminal and prepare the end to be fitted with the crimp-on fork terminals provided in the kit. Due to previous maintenance in the
electrical box it is common for the wires to vary in length from the original equipment. If the existing wires are not long enough, lengthen by splicing in
a suitable extension of stranded 18 gauge machine tool wire, connected with any common insulated crimp-on 18 gauge splice connector.
"A-2" Standard Electrical Box
“A-2” Wire Transfer Guide
7
4. Determine a suitable location for relay base in the electrical box. Electrical components will
vary in location within each box, it is important the base and wires do not interfere with other
components, and the location allows for easy access to the new relay. Refer to Figure 5 for
optional location.
Figure 5
5. Once a suitable location is determined, mark the screw holes onto the box. Drill the holes for the
#6-32 x 5/8 pan head screws. Install the base into the box utilizing the (2) #6-32 x 5/8 pan head
screws and (2) 11-176005-001 keps nuts.
6. Insert 11-696644-000 relay into base and secure the clips over the top of the relay. Refer to
Figure 6.
Figure 6
8