1
English
Fitting Instructions:
Tiger XR, Tiger XRT, Tiger XRX, Tiger XC, Tiger XCA, Tiger XCX, Tiger 800 and
Tiger 800XC
A9780014
Thank you for choosing this Triumph genuine accessory kit. This accessory kit is the product of Triumph's use of proven
engineering, exhaustive testing, and continuous striving for superior reliability, safety and performance.
Completely read all of these instructions before commencing the installation of the accessory kit in order to become
thoroughly familiar with the kit’s features and the installation process.
These instructions should be considered a permanent part of your accessory kit, and should remain with it even if your
accessory-equipped motorcycle is subsequently sold.
1
2
5
4
3
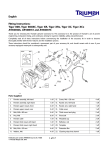
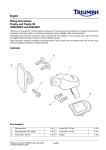
Parts Supplied:
1.
Left hand upper frame protector
1 off 4.
Right hand lower frame protector
2.
Right hand upper frame protector
1 off 5.
Cable tie
3.
Left hand lower frame protector
1 off
Publication part number A9900599 issue 5, DC 71806
© Triumph Designs Ltd. 2015
1 of 7
1 off
16 off
Warning
This accessory kit is designed for use on Triumph
Tiger XR, Tiger XRT, Tiger XRX, Tiger XC, Tiger XCA,
Tiger XCX, Tiger 800 and Tiger 800XC motorcycles only
and should not be fitted to any other manufacturer’s
motorcycle. Fitting this accessory kit to any other
manufacturer’s motorcycle will affect the performance,
stability and handling of the motorcycle. This may affect
the rider’s ability to control the motorcycle and could
cause an accident.
Warning
1.
Place the motorcycle on a paddock stand.
2.
Remove the upper radiator panels as described in the
service manual.
3.
Remove the fuel tank infill panels as described in the
service manual.
Caution
Ensure both the frame and heel guards are clean and dry
prior to fitting the frame protectors. Dirt or dust trapped
between the frame protectors and the frame or heel
guards will result in damage to the paintwork.
Caution
Always have Triumph approved parts, accessories and
conversions fitted by a trained technician of an authorised
Triumph dealer. The fitment of parts, accessories and
conversions by a technician who is not of an authorised
Triumph dealer may affect the handling, stability or other
aspects of the motorcycle’s operation, which may result in
loss of motorcycle control and an accident.
Warning
Always ensure that the frame protector or its fixings do
not chafe against other parts of the motorcycle such as the
brake lines, coolant hoses, electrical cables and fuel lines.
These conditions are hazardous and could give rise to a
dangerous riding condition, resulting in a loss of
motorcycle control and an accident.
Warning
Throughout this operation, ensure that the motorcycle is
stabilised and adequately supported to prevent risk of
injury from the motorcycle falling.
Warning
A torque wrench of known accurate calibration must be
used when fitting this accessory kit. Failure to tighten any
of the fasteners to the correct torque specification may
affect motorcycle performance, handling and stability. This
may result in loss of motorcycle control and an accident.
2 of 7
Before using any degreasing or cleaning agents, always
test a small area of paintwork first, especially if applying to
fresh paintwork. Some degreasing or cleaning agents may
damage the paintwork.
Upper Frame Protectors
5.
Left Hand Side
4.
Place three cable ties from the kit through the loops on
the frame protector.
•
Position the cable tie (1) to the frame, making
sure the radiator top hose (left hand side) does
not become trapped.
•
Position the cable tie (2) to the upper frame,
making sure the wiring harness (left hand side) or
brake lines (right hand side) do not become
trapped.
•
Position the cable tie (3) to the frame at the rear
of the RSU reservoir bracket (left hand side),
making sure the main harness and RSU pipe do
not become trapped.
Progressively tighten the three cable ties until the
frame protector is positioned against the frame as
shown below. Do not fully tighten at this stage.
1
2
3
1. Lower front cable tie
2. Centre cable tie
3. Lower rear cable tie
6.
2
1
Place a cable tie from the kit around the frame to the
rear of the seat bridge. Position it to the rear of the
frame protector as shown below. Do not fully tighten at
this stage.
3
Cable Tie Orientation (Left Hand Shown)
1. Frame protector (left hand shown)
2. Cable tie
3. Seat bridge
3 of 7
7.
Place a cable tie from the kit around the front of the
frame making sure not to trap the wiring harness (left
hand side) or the brake lines (right hand side). Position
it to the front of the frame protector as shown below.
Do not fully tighten at this stage.
3
Caution
Care must be taken when cutting the frame protector
cable ties. Ensure the cable ties’ sharp edges are
positioned away from the brake components, coolant
hoses, electrical cables, frame or the fuel lines as damage
may occur.
Warning
2
When cutting the cable ties, always use the correct tools
and personal protection equipment. Failure to use these
may result in personal injury.
4
1
9.
Cut any excess length from the cable ties and then
rotate until the ratchet head is not visible.
10. Repeat steps four to nine for the right hand side.
1.
2.
3.
4.
Cable tie
Frame protector (left hand shown)
Fuel tank
Wiring harness
Caution
When securing the frame protectors with cable ties,
ensure they are fully tight. Ensure there is no free
movement in the cable ties. Failure to do so may result in
damage to the paintwork.
8.
Fully tighten the five cable ties whilst making sure the
frame protector is clamped to the frame.
1
1
1. Cable ties (left hand shown)
4 of 7
Lower Frame Protectors
5.
Left Hand Side
1.
Place three cable ties from the kit through the loops on
the lower frame protector.
2.
Loosen but do not fully remove the heel guard bolts.
3.
Position the cable ties to the frame as shown below, do
not fully tighten at this stage.
Progressively tighten the cable ties whilst making sure
the frame protector and heel guard are correctly
positioned to the frame. Do not fully tighten at this
stage.
3
1
2
1. Lower frame protector (left hand shown)
2. Heel guard
3. Frame
6.
Caution
Cable Tie Orientation (Left Hand Shown)
4.
Position the locating flange on the frame protector
between the frame and the heel guard, as shown
below.
When securing the frame protectors with cable ties,
ensure they are fully tight. Ensure there is no free
movement in the cable ties. Failure to do so may result in
damage to the paintwork.
Caution
3
1
Tighten the heel guard fixings to 12 Nm.
2
Care must be taken when cutting the frame protector
cable ties. Ensure the cable ties’ sharp edges are
positioned away from the brake components, coolant
hoses, electrical cables, frame or the fuel lines as damage
may occur.
Warning
2
When cutting the cable ties, always use the correct tools
and personal protection equipment. Failure to use these
may result in personal injury.
3
1. Lower frame protector (left hand shown)
2. Heel guard
3. Locating flange
7.
5 of 7
Fully tighten the three cable ties, cut away the excess
length and rotate around the frame until the ratchet
head is not visible.
Right Hand Side
Caution
1.
Remove the two screws and then remove the heel
guard.
2.
Place three cable ties from the kit through the loops on
the lower frame protector.
3.
Position the cable ties to the frame as shown below, do
not fully tighten at this stage.
When securing the frame protectors with cable ties,
ensure they are fully tight. Ensure there is no free
movement in the cable ties. Failure to do so may result in
damage to the paintwork.
Caution
Care must be taken when cutting the frame protector
cable ties. Ensure the cable ties’ sharp edges are
positioned away from the brake components, coolant
hoses, electrical cables, frame or the fuel lines as damage
may occur.
1
Warning
When cutting the cable ties, always use the correct tools
and personal protection equipment. Failure to use these
may result in personal injury.
1
7.
1. Cable ties
4.
Progressively tighten the three cable ties whilst making
sure the frame protector is aligned correctly to the
frame. Do not fully tighten at this stage.
5.
Refit the heel guard ensuring the locking tag on the
heel guard engages with the locating flange on the
frame protector, as shown below.
Fully tighten the three cable ties, cut away the excess
length and rotate around the frame until the ratchet
head is not visible.
1
1
2
1. Cable ties
1. Locating flange (frame protector)
2. Locking tag (heel guard)
6.
8.
Refit the fuel tank infill panels as described in the
service manual.
9.
Refit the upper radiator panels as described in the
service manual.
10. Remove the motorcycle from the paddock stand.
Tighten the heel guard fixings to 12 Nm.
6 of 7
Warning
Warning
If, after fitment of this accessory kit, you have any doubt
about the performance of any aspect of the motorcycle,
contact an authorised Triumph dealer and do not ride the
motorcycle until the authorised dealer has declared it fit
for use. Riding a motorcycle when there is any doubt as to
any aspect of the performance of the motorcycle may
result in loss of control of the motorcycle leading to an
accident.
Warning
Never ride an accessory-equipped motorcycle at speeds
above 80 mph (130 km/h).
The presence of accessories will cause changes in the
stability and handling of the motorcycle. Failure to allow
for changes in motorcycle stability may lead to loss of
control or an accident.
Remember that the 80 mph (130 km/h) limit will be
reduced by the fitting of non-approved accessories,
incorrect loading, worn tyres, overall motorcycle condition
and poor road or weather conditions.
7 of 7
The motorcycle must not be operated above the legal
road speed limit except in closed-course conditions.
Warning
Only operate this Triumph motorcycle at high speed in
closed-course on road competition or on closed-course
racetracks. High speed operation should only be
attempted by riders who have been instructed in the
techniques necessary for high speed riding and are
familiar with the motorcycle’s characteristics in all
conditions.
High speed operation in any other circumstances is
dangerous and will lead to loss of motorcycle control and
an accident.