Download TSG-416 Service Manual (Sec. 2)
Transcript
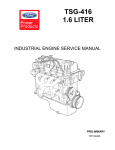
TSG-416 ENGINE - PRELIMINARY
INDEX
Subject
Page
General Information
Special Tools............................................................................................................................................. 02 - 3
Description ................................................................................................................................................ 02 - 5
Component Location ................................................................................................................................. 02 - 6
Engine Repair
Valve Cover - Removal ...........................................................................................................................
Valve Cover - Installation ........................................................................................................................
Camshaft- Removal.................................................................................................................................
Camshaft - Installation.............................................................................................................................
Valve Stem Seal - Removal ....................................................................................................................
Valve Stem Seal - Installation .................................................................................................................
Intake Manifold - Removal.......................................................................................................................
Intake Manifold - Installation....................................................................................................................
Exhaust Manifold - Removal ...................................................................................................................
Exhaust Manifold - Installation ................................................................................................................
Cylinder Head - Removal ........................................................................................................................
Cylinder Head - Installation .....................................................................................................................
Oil Pump - Removal ................................................................................................................................
Oil Pump - Installation .............................................................................................................................
Crankshaft Rear Oil Seal - Removal .......................................................................................................
Crankshaft Rear Oil Seal - Installation ....................................................................................................
Camshaft Follower / Hydraulic Lash Adjuster - Removal ........................................................................
Camshaft Follower / Hydraulic Lash Adjuster - Installation .....................................................................
Oil Pan - Removal ...................................................................................................................................
Oil Pan - Installation ................................................................................................................................
Pick-up Tube / Deflector - Removal ........................................................................................................
Pick-up Tube / Deflector - Installation .....................................................................................................
Crankshaft Main Bearings - Removal......................................................................................................
Crankshaft Main Bearings - Installation...................................................................................................
Connecting Rod Bearings - Removal ......................................................................................................
Connecting Rod Bearings - Installation ...................................................................................................
Piston - Removal .....................................................................................................................................
Piston - Installation ..................................................................................................................................
Flywheel - Removal.................................................................................................................................
Flywheel - Installation..............................................................................................................................
Timing Chain and Sprockets - Removal..................................................................................................
Timing Chain and Sprockets - Installation...............................................................................................
Oil Level Indicator - Removal ..................................................................................................................
Oil Level Indicator - Installation ...............................................................................................................
Oil Filter and Adapter - Removal .............................................................................................................
Oil Filter and Adapter - Installation ..........................................................................................................
02 - 10
02 - 10
02 - 11
02 - 12
02 - 13
02 - 14
02 - 15
02 - 15
02 - 16
02 - 16
02 - 17
02 - 19
02 - 21
02 - 22
02 - 23
02 - 23
02 - 24
02 - 24
02 - 25
02 - 25
02 - 26
02 - 26
02 - 27
02 - 27
02 - 28
02 - 28
02 - 29
02 - 30
02 - 31
02 - 31
02 - 32
02 - 33
02 - 35
02 - 35
02 - 36
02 - 36
Disassembly .................................................................................................................................................. 02 - 37
Subassemblies
Cylinder Block .........................................................................................................................................
Piston - Disassembly...............................................................................................................................
Piston - Assembly....................................................................................................................................
Cylinder Head - Disassembly ..................................................................................................................
Cylinder Head - Assembly.......................................................................................................................
02 - 44
02 - 45
02 - 45
02 - 46
02 - 47
Assembly ....................................................................................................................................................... 02 - 48
Specifications................................................................................................................................................ 02 - 58
02-1
02
TSG-416 ENGINE - PRELIMINARY
NOTE: For engine diagnosis, refer to Section 01.
02-2
TSG-416 ENGINE - PRELIMINARY
GENERAL INFORMATION
Special Tools
Valve Spring Compressor
T81P-6513-A or Equivalent
Seal Remover
T92C-6700-CH or Equivalent
Piston Ring Compressor
D81L-6002-C or Equivalent
Dial Indicator with Bracketry
TOOL-4201-C or Equivalent
Camshaft Bearing Set
T65L-6250-A or Equivalent
Cylinder Ridge Reamer
T64L-6011-EA or Equivalent
Connecting Rod Guide Tool
T93P-6136-A or Equivalent
Vibration Damper Remover
Adapter
T82L-6316-B or Equivalent
Crankshaft Damper Remover
T58P-6316-D or Equivalent
Feeler Gauge
D81L-4201-A or Equivalent
02-3
TSG-416 ENGINE - PRELIMINARY
Special Tools
Impact Slide Hammer
T50T-100-A or Equivalent
Valve Seal Tool 21-024 or
Equivalent
Pound/Inch Torque Wrench
Purchase from Local Tool
Dealer
Extra space
Spring Tester
303-006 or
TOOL-6513-DD or Equivalent
Extra space
Valve Clearance Measuring
Tool 100-002 or
TOOL-6505-E or Equivalent
Extra space
Spring Testing Fixture
21-024 or Equivalent
Extra space
02-4
TSG-416 ENGINE - PRELIMINARY
Description
Cylinder Head
The 1.6L 4 cylinder Zetec Rocam engine has been
developed with the highest technology. Its main
characteristics are:
The Zetec Rocam engine cylinder head is entirely made
of aluminum which improves the thermal characteristics
and reduces weight. The assembly is attached using a
multi layer steel gasket and 12 bolts.
•
electronic controlled multipoint sequential injection
•
roller finger follower camshaft
Oil Pan
•
intake manifold made of aluminum
•
high resistance aluminum cylinder head
•
steel oil pan.
The Zetec Rocam engine oil pan is made of steel. The
gasket must always be replaced whenever the oil pan is
removed.
Engine ID
FPP04115
Engine Identification Number
The engine identification number is marked on the right
side of the cylinder block as shown.
Fuel System
The electronic fuel injection (EFI) system is
electronically controlled by an ECM module which
carefully controls fuel-air mixture along with spark
timing, depending on information received from various
sensors.
Intake Manifold
The intake manifold is made of aluminum. It consists of
two pieces.
02-5
TSG-416 ENGINE - PRELIMINARY
Component Location
Oil Level Indicator
Camshaft Position
(CMP) Sensor
Positive Crankcase
Ventilation (PCV)
Valve
Cylinder Head
Assembly
Timing Chain
Tensioner Arm
Coolant Flow
Control Module
Oil Pressure Switch
Cylinder Block
Crankshaft Position (CKP) Sensor
Water Pump
Piston Assembly
Chain Guide
02-6
TSG-416 ENGINE - PRELIMINARY
Component Location
Throttle Body
TMAP
Sensor
PCV Hose
Intake Manifold
Exhaust
Manifold
Gasket
02-7
TSG-416 ENGINE - PRELIMINARY
Component Location
Oil Pan
Gasket
Oil Pick-up tube
Oil Deflector
Main Bearings - Lower
Main Bearing Cap
Rear Seal Retainer
Crankshaft Sprocket
Oil Pump
Crankshaft
Main Bearings - Upper
Cylinder Block
Timing Chain
02-8
TSG-416 ENGINE - PRELIMINARY
Component Location
Spark Plug Wires
DIS Ignition Coil
PCV Valve
Valve Cover
PCV Hose
Camshaft Sprocket
Bearing Caps
Tension Arm
Camshaft
Roller Follower
Lash Adjuster
Cylinder Head
Chain Guide
Timing Chain
Gasket
Valve Assembly
Hydraulic Tensioner
02-9
TSG-416 ENGINE - PRELIMINARY
ENGINE REPAIR
Valve Cover - Installation
Valve Cover - Removal
1. Contact surfaces must be clean and free of oil.
1. Remove any necessary wiring and vacuum hoses.
Mark connections and routing as necessary to
assure they are returned as they were removed.
2. Install a new gasket and valve cover.
CMP Sensor
PCV Valve
Wiring Harness
Valve Cover
Vacuum Hose
3. Install bolts. Tighten to 7 lb.ft. (9 Nm). (?any
sequence ?).
2.
4. Install DIS coil - refer to Section 03.
3.
5.
4. Remove DIS coil and set aside - refer to Section 03.
6.
5. Remove bolts.
7. Reconnect any wiring and vacuum hoses removed.
6. Remove valve cover and gasket.
02-10
TSG-416 ENGINE - PRELIMINARY
Camshaft- Removal
5. Remove camshaft, lower bearings, roller followers
and lash adjusters.
NOTE: Store components to ensure assembly in the
same order as they were removed.
1. Remove valve cover -- Refer to“Valve Cover Removal” on page 10.
Bearing Caps
Roller
Follower
2. Using tool 15-030A to lock camshaft sprocket,
remove bolt.
Camshaft
Lash
Adjuster
Locking Tool
15-030A
6. ?
7. ?
Refer to Section 01 for camshaft and bearing service.
CAUTION: During camshaft removal, the camshaft
sprocket and chain must remain engaged and the
chain tensioned in order to keep timing links
aligned. If chain is allowed to slacken or disengage
with sprocket, the oil pump will have to be removed,
and the timing chain realigned - refer to timing
chain assembly xxx.
3. Separate camshaft sprocket and chain from
camshaft while maintaining tension on the chain.
4. Remove bolts and camshaft bearing caps evenly in
the sequence shown.
1
2
5
6
9
10
8
7
4
3
02-11
TSG-416 ENGINE - PRELIMINARY
Camshaft - Installation
NOTE: All components must be clean and assembled in
the same positions as removed. Lubricate contact
surfaces with clean engine oil.
1.
2.
3. Install lash adjusters.
7. Install camshaft sprocket with chain onto camshaft
while maintaining tension on the chain.
CAUTION: The camshaft sprocket and chain must
remain engaged and the chain tensioned in order to
keep timing links aligned. If chain is allowed to
slacken or disengage with sprocket, the oil pump
will have to be removed, and the timing chain
realigned - refer to timing chain assembly xxx.
8. Using tool 15-030A, install bolt and tighten to 52-59
lb.ft. (70-80 Nm).
4. Install roller followers.
Bearing Caps
Roller
Follower
Camshaft
Locking Tool
15-030A
Lash
Adjuster
NOTE: The chamfer on the camshaft bearing caps must
be facing the chain housing. Rotate camshaft so
keyway will align with sprocket.
9. Install valve cover -- Refer to“Valve Cover Installation” on page 10.
5. Carefully install camshaft, bearings, caps and bolts
finger tight.
6. Tighten bolts in the sequence shown in 3 steps to 67 lb.ft. (8-10 Nm).
9
10
7
8
1
2
5
6
3
4
02-12
TSG-416 ENGINE - PRELIMINARY
Valve Stem Seal - Removal
NOTE: If the valve or valve seat has not been damaged,
the valve spring, seal, retainer or keys may be replaced
by holding the affected valve closed using compressed
air.
5. Turn on air supply and pressurize cylinder. Air
pressure may rotate the crankshaft until the piston
reaches the bottom of the stroke.
Rotunda
Pressurization Kit
014-00705
Use an appropriate air line tool installed in the spark
plug hole. A minimum of 965 kPa (140 psi) line pressure
is required. If air pressure does not hold the valve shut,
the valve is damaged or burned and the cylinder head
must be removed and serviced.
1. Remove valve cover -- Refer to“Valve Cover Removal” on page 10.
2. Rotate the camshaft so the roller follower for the
valve to be serviced is on the heel of the cam.
3. Using a suitable valve spring compressor tool,
compress and hold down the valve spring. Slide out
the roller follower over the lash adjuster.
6. Using a suitable valve spring compressor, compress
the valve spring and remove the keys and retainer.
Remove and discard the stem seal.
Roller Follower
Key
Retainer
Lash Adjuster
Spring
Valve Seal
FPP04076
4. Replace spark plug for cylinder being serviced with
an air line adapter. Mark location so spark plug is
returned to the same cylinder.
CAUTION: The crankshaft may rotate when air
pressure is applied. Remove all objects from fan
area such as lights, extension cords, etc.
7. If air pressure has forced the piston to the bottom of
the cylinder, any removal of air pressure will allow
the valve(s) to drop into the cylinder. Wrap a rubber
band, tape or string around the end of the valve stem
in such a way to prevent the valve from falling in and
to allow enough travel to check the valve for binds.
8. Inspect the valve stem for damage. Rotate the valve
and check the stem tip for eccentric movement.
Move the valve up and down through normal travel
in the valve guide and check the stem for any
binding. If the valve has been damaged, it will be
necessary to remove the cylinder head as outlined in
this section.
02-13
TSG-416 ENGINE - PRELIMINARY
Valve Stem Seal - Installation
NOTE: All components must be clean and assembled in
the same positions as removed. Lubricate contact
surfaces with clean engine oil.
CAUTION: Valve stem seal can be cut by grooves in
valve stem. A damaged seal will leak causing oil
burning and valve fouling.
1. Carefully slide oil seal over valve stem.
2. Install new valve seal using special tool 21-024
(optional T95P-6565A) ??protective cap??.
4. Release air pressure and remove air adapter. Install
spark plug in proper cylinder.
5. Grease contact surfaces of roller follower with Ford
Multi-purpose Grease D0AZ-19584-AA, or
equivalent, meeting Ford specification ESRM1C159-A.
6. Using spring compressor, compress and hold down
the valve and spring. Slide the roller finger follower
into place over valve and lash adjuster. Release
spring.
Special Tool 21-024
Roller Follower
Lash Adjuster
FPP04076
7. Install valve cover -- Refer to“Valve Cover Installation” on page 10.
NOTE: Apply a small amount of Ford Multi-purpose
Grease D0A2-19584-AA, or equivalent, meeting Ford
specification ESR-M1C159-A to valve spring retainer
key to hold in place during installation.
3. With cylinder pressurized and using a suitable spring
compressor tool, install valve spring, retainer and
locks.
Key
Retainer
Spring
02-14
TSG-416 ENGINE - PRELIMINARY
Electronic Throttle Body
TMAP Sensor
Gasket
Intake Manifold
PCV Hose
Bolt
Gasket
Intake Manifold - Removal
Intake Manifold - Installation
1. Remove any necessary wiring and vacuum hoses.
Mark connections and routing as necessary to
assure they are returned as they were removed.
NOTE: All contact surfaces must be clean and free from
any old gasket material.
2. Relieve fuel pressure.
2. Install bolts and nuts. Tighten to 6 lb.ft. (8 Nm).
3. Disconnect fuel lines from fuel rail.
3.
4. Disconnect air intake tube.
4.
5.
5. Connect air intake tube.
6.
6. Connect fuel lines to fuel rail.
7. Remove bolts, nuts and intake manifold assembly.
7. Install any wiring and vacuum hoses that were
removed. Connect and route as they were removed.
1. Install a new gasket and intake manifold assembly.
02-15
TSG-416 ENGINE - PRELIMINARY
Exhaust Manifold
Gasket
Outlet Flange
Exhaust Manifold - Removal
Exhaust Manifold - Installation
1. Remove any necessary wiring and vacuum hoses.
Mark connections and routing as necessary to
assure they are returned as they were removed.
NOTE: All contact surfaces must be clean and free from
any old gasket material.
2. Disconnect exhaust at outlet flange.
2. Install nuts. Tighten to 11 lb.ft. (15 Nm).
3.
3.
4.
4.
5. Remove nuts, exhaust manifold and gasket.
5. Connect exhaust at outlet flange.
1. Install a new gasket and exhaust manifold.
6. Tighten flange nuts to xx lb.ft. (xx Nm).
7. Install any wiring and vacuum hoses that were
removed. Connect and route as they were removed.
02-16
TSG-416 ENGINE - PRELIMINARY
Cylinder Head - Removal
12.Rotate camshaft sprocket using tool 15-030A until
the 2 copper links on timing chain are at 12 o’clock.
1. Drain engine oil - refer to Operator Handbook.
2. Drain engine coolant - refer to Section 05.
Copper Links
3. Remove any necessary wiring and vacuum hoses.
Mark connections and routing as necessary to
assure they are returned as they were removed.
12 O’clock
4. Remove valve cover -- Refer to“Valve Cover Removal” on page 10.
5. Remove spark plugs and wires.
6. Remove the coolant flow control module - refer to
Section 05.
Coolant Flow
Control Module
Timing Mark
13.Using tool 15-030A to lock camshaft sprocket,
remove bolt.
CAUTION: During cylinder head removal, the timing
chain must be held up with a wire with constant
tension in order to keep timing links aligned at
crankshaft. If chain is allowed to slacken or
disengage with sprocket, the oil pump will have to
be removed, and the timing chain realigned - refer
to timing chain assembly xxx.
7. Remove bolts and nuts holding intake manifold to
cylinder head. Move aside.
14.Remove camshaft sprocket from chain while
maintaining tension on the chain using a wire.
8. Remove heat shield ??.
15.Remove the M11 cylinder head bolts in 3 phases in
the sequence shown.
9. Remove nuts at exhaust manifold. Move aside.
10.Remove oil level indicator tube bolt at cylinder head.
11.Remove timing chain hydraulic tensioner.
Hydraulic
Tensioner
02-17
1
7
9
5
4
6
10
8
3
2
M8
M8
TSG-416 ENGINE - PRELIMINARY
CAUTION: Be careful to avoid the bolts falling into
the timing chain compartment.
16.Remove 2 M8 bolts, cylinder head and gasket.
M8 Bolts
Cylinder Head
Gasket
Dowels
17.Carefully remove cylinder head and gasket while
maintaining tension on timing chain.
Gasket
Timing Chain
02-18
TSG-416 ENGINE - PRELIMINARY
Cylinder Head - Installation
3. Install new bolts using the sequence shown in the
following 3 steps:
NOTE: The contact surface of the cylinder head and
block must be clean and free of oil. Use new cylinder
head bolts and lubricate the threads.
•
•
•
1. Rotate crankshaft so all pistons are below top dead
center (TDC).
CAUTION: During cylinder head installation, the
timing chain must be held up with a wire with
constant tension in order to keep timing links
aligned at crankshaft. If chain is allowed to slacken
or disengage with sprocket, the oil pump will have
to be removed, and the timing chain realigned refer to timing chain assembly xxx.
Step 1 - tighten M11 bolts to 29.5 lb.ft. (40 Nm)
Step 2 - tighten M8 bolts to 11 lb.ft. (15 Nm) + 45°
Step 3 - tighten M11 bolts additional 120°
10
4
2
6
1
3
8
M8
2. Carefully install dowels, a new gasket and cylinder
head to the engine block while maintaining tension
on the timing chain.
7
M8 Bolts
5
9
M8
Cylinder Head
Tightening Sequence
4. Carefully install sprocket into timing chain aligning
timing mark with 2 copper links.
Copper Links
Gasket
12 O’clock
Dowels
Timing Mark
CAUTION: Be careful to avoid the bolts falling into
the timing chain compartment.
02-19
TSG-416 ENGINE - PRELIMINARY
11.Install the coolant flow control module - refer to
Section 05.
5. Using tool 15-030A, install camshaft sprocket bolt.
Tighten to 92 lb.ft. (125 Nm).
Coolant Flow
Control Module
Locking Tool
15-030A
12.Install spark plugs and wires - refer to Section 03.
6. Install hydraulic tensioner and tighten to 30 lb.ft. (40
Nm).
13.Install valve cover -- Refer to“Valve Cover Removal” on page 10.
14.Install and route any wiring and vacuum hoses
removed.
15.Fill engine with correct type and quantity of coolant refer to Section 05.
Hydraulic
Tensioner
16.Fill engine with correct type and quantity of engine
oil - refer to Operator Handbook.
7. Install oil level indicator bolt. Tighten to 15 lb.ft. (20
Nm).
8. Install exhaust manifold and nuts. Tighten nuts to 11
lb.ft. (15 Nm).
9. Install heat shield ??.
10.Install bolts and nuts holding intake manifold to
cylinder head. Tighten to nuts and bolts to 13 lb.ft.
(18 Nm).
02-20
TSG-416 ENGINE - PRELIMINARY
Oil Pump - Removal
CAUTION: The oil pump, pulley and sealer are
provided as an assembly kept together by a clip (no.
BF9A-6606-AA). Do not remove clip until oil pump is
installed. If pulley is pushed out of the oil pump
prior to oil pump installation, it will have to be
??repaired?? or replaced.
1. Remove drive belt - refer to xx.
2.
3. Remove water pump - refer to Section 05.
4. Insert retaining clip # BF9A-6606-AA between
crankshaft pulley and oil pump to prevent pulley
axial movement.
Retaining Clip
BF9A-6606-AA
Oil Pump
5. Remove crankshaft pulley bolt.
NOTE: Identify oil pump bolts so they may be returned
to their original positions.
6. Remove 6 oil pump bolts, oil pump and gasket.
02-21
TSG-416 ENGINE - PRELIMINARY
Oil Pump - Installation
4. Remove clip.
NOTE: Contact surfaces of the oil pump and block must
be clean and free of oil.
5. Install oil pump housing bolts finger tight.
CAUTION: The oil pump, pulley and sealer are
provided as an assembly kept together by a clip (no.
BF9A-6606-AA). Do not remove clip until oil pump is
installed. If pulley is pushed out of the oil pump
prior to oil pump installation, it will have to be
??repaired?? or replaced.
1.
CAUTION: The oil pump housing must be
positioned during tightening of the oil pump
housing bolts, so that the sealing flange of the oil
pump housing is within ± 0.008 in. (0.20 mm) of the
block bottom sealing flanges.
6. Tighten 2 outer oil pump housing bolts to 15 lb.ft. (20
Nm).
Assemble gasket onto oil pump housing guiding it
with 2 outer bolts.
Outer Bolts
Oil Pump
Gasket
CAUTION: Do not apply oil to shaft or seal. Sealing
lip along with all contact surfaces must be free of
oil.
7. Tighten remaining oil pump housing bolts to 15 lb.ft.
(20 Nm).
2. Place oil pump and gasket onto crankshaft.
3. Install pulley bolt and tighten to 92 lb.ft. (125 Nm).
Pulley Bolt
Remaining Bolts
02-22
TSG-416 ENGINE - PRELIMINARY
Crankshaft Rear Oil Seal - Removal
Crankshaft Rear Oil Seal - Installation
1. Remove flywheel - refer to xx.
1. Install new rear seal and retainer using tool 21-046.
2. ??Remove oil pan - refer to xx.??
Special Tool
21-046
3. Remove bolts and rear oil seal retainer.
Rear Oil Seal
and Retainer
Rear Seal Retainer
2. ??Install oil pan - refer to xx.??
3. Install flywheel - refer to xx.
02-23
TSG-416 ENGINE - PRELIMINARY
Camshaft Follower / Hydraulic Lash
Adjuster - Removal
Camshaft Follower / Hydraulic Lash
Adjuster - Installation
NOTE: All components must be kept clean and
lubricated with clean engine oil.
1. Remove valve cover -- Refer to“Valve Cover Removal” on page 10.
2. Rotate the camshaft so the roller follower for the
valve to be serviced is on the heel of the cam.
3. Using a suitable valve spring compressor tool,
compress and hold down the valve spring. Slide out
the roller follower over the lash adjuster.
Roller Follower
Special Tool 21-024
Lash Adjuster
FPP04076
1. Rotate the camshaft so the roller follower for the
valve to be serviced is on the heel of the cam.
2. Install the hydraulic lash adjuster.
3. Using a suitable valve spring compressor tool,
compress and hold down the valve spring. Slide in
the roller follower over the lash adjuster.
4. Lift out the hydraulic lash adjuster.
4. Install valve cover -- Refer to“Valve Cover Removal” on page 10.
02-24
TSG-416 ENGINE - PRELIMINARY
Oil Pan - Removal
2. Install the oil pan and bolts finger tight.
3. Align oil pan with rear portion of engine block.
1. Remove bolts.
2. Remove oil pan.
Gasket
Straight Edge
Block
Oil Pan
Oil Pan
FPP04088
3. Remove all gasket material from pan.
CAUTION: Be careful not to contact surfaces.
Oil Pan - Installation
CAUTION: The contact surfaces of oil pan, gasket
and block must be free of oil. Do not wait more than
5 minutes to install the oil pan gasket after sealer
has been applied.
4. Tighten oil pan bolts in 3 steps in the sequence
shown:
1. Apply WSEM-A4 sealer (Loctite 5910) to the 4
positions as shown.
•
•
•
enough for gasket settlement
5 lb.ft. (7 Nm)
7 lb.ft. (10 Nm)
Front of Engine
Sealer Rope
4 places
3-5mm
60° ± 3°
Tightening Sequence
10-15mm
02-25
TSG-416 ENGINE - PRELIMINARY
Pick-up Tube
Oil Deflector
Pick-up Tube / Deflector - Removal
Pick-up Tube / Deflector - Installation
1.
1. Install oil deflector.
2.
2. Install pick-up tube.
3. Remove oil pan -- Refer to“Oil Pump - Removal” on
page 21.
3. Install 4 nuts and tighten to 14 lb.ft. (19 Nm).
4. Remove 4 nuts and1 bolt.
4. Install bolt and tighten to 7 lb.ft. (9.5 Nm).
5. Remove pick-up tube.
5. Install oil pan -- Refer to“Oil Pump - Installation” on
page 22.
6. Remove oil deflector.
6.
7.
02-26
TSG-416 ENGINE - PRELIMINARY
Crankshaft Main Bearings - Removal
NOTE: To check bearing clearances or to select new
bearings, refer to Section 01.
1. Remove oil pan -- Refer to“Oil Pan - Removal” on
page 25.
2. Remove pick-up tube & deflector -- Refer to“Pick-up
Tube / Deflector - Removal” on page 26.
NOTE: Replace one bearing at a time, leaving the other
bearings securely fastened. Note location of studs for
deflector installation.
Lower Bearing
Stud Positions
Cap
Stud & Nut
Bolt
Crankshaft Main Bearings - Installation
NOTE: All components must be clean and dried with
compressed air or a lint free cloth. Lubricate bearing to
crankshaft contact surfaces with clean engine oil.
1. Place upper bearing on crankshaft and rotate into
place. Oil holes must align.
3. Remove first main bearing cap bolts.
4. Remove cap and lower bearing.
5. Press on end of upper bearing without tang to start it
out.
6. Rotate bearing out from between crankshaft and
cylinder block.
2. Place lower bearing into cap.
NOTE: Main bearing cap arrow must point to the front
of the engine.
3. Install bearing cap.
CAUTION: Use new main bearing cap bolts.
4. Lightly oil new main bearing bolts or studs and install
in same positions as removed. Alternately tighten in
3 steps to 70 lb.ft. (95 Nm).
5. Check crankshaft end play as outlined in Section 01.
6. Install pick-up tube and deflector -- Refer to“Pick-up
Tube / Deflector - Installation” on page 26.
7. Install oil pan -- Refer to“Oil Pan - Installation” on
page 25.
02-27
TSG-416 ENGINE - PRELIMINARY
Connecting Rod Bearings - Removal
Connecting Rod Bearings - Installation
1. Remove oil pan -- Refer to“Oil Pan - Removal” on
page 25.
NOTE: Make sure bearing bore of connecting rod and
cap and bearing journal are clean. Lubricate wear
surfaces with clean engine oil.
2. Remove pick-up tube and deflector -- Refer to“Pickup Tube / Deflector - Removal” on page 26.
1. Insert upper bearing into connecting rod.
3. Remove spark plug for cylinder being serviced.
2. Insert lower bearing into cap.
4. Rotate crankshaft until connecting rod and bearing
to be serviced is placed at the bottom of its stroke.
CAUTION: Do not scratch journal with connecting
rod bolts.
5. Remove two connecting rod nuts.
3. Install cap and bolts. Tighten bolts in 2 steps:
6. Remove connecting rod cap with lower bearing.
• Step 1 - 9 lb.ft. (12.5 Nm)
• Step 2 - 22 lb.ft. (30 Nm) (41-94°???)
4. Install deflector and pick-up tube -- Refer to“Pick-up
Tube / Deflector - Installation” on page 26.
5. Install oil pan -- Refer to“Oil Pan - Installation” on
page 25.
3
5
2
1
4
Lower
Bearing
Cap
Bolts
FPP04072
7. Push piston and connecting rod assembly up into
bore.
8. Remove upper bearing from connecting rod.
NOTE: For bearing service refer to Section 01.
02-28
TSG-416 ENGINE - PRELIMINARY
Piston - Removal
6. Remove 2 bolts, connecting rod cap and lower
bearing.
1. Remove oil pan -- Refer to“Oil Pan - Removal” on
page 25.
2. Remove pick-up tube and deflector -- Refer to“Pickup Tube / Deflector - Removal” on page 26.
3. Remove cylinder head assembly -- Refer to“Cylinder
Head - Removal” on page 17.
CAUTION: Never cut into the ring travel area in
excess of 0.8mm (1/32 inch) when removing ridges.
4. Turn crankshaft until piston to be removed is at the
bottom of its travel and place a cloth on the piston
head to collect the cuttings.
Lower
Bearing
5. Remove any ridge and/or deposits from the upper
end of the cylinder bores using a ridge cutter. follow
the instructions furnished by the tool manufacturer.
Cap
Cylinder Ridge
Reamer
T64L-6011-EA
Bolts
FPP04072
CAUTION: Avoid damage to the crankshaft journal
or the cylinder wall when removing the piston and
rod.
7. Push piston assembly out the top of the cylinder with
the handle end of a hammer.
Piston Assembly
Upper Bearing
NOTE: Make sure all caps are marked so that they can
be installed in their original positions.
8. Remove upper bearing from connecting rod.
NOTE: For piston and bearing service - refer to Section
01.
02-29
TSG-416 ENGINE - PRELIMINARY
Piston - Installation
NOTE: Crankshaft journal should be at its lowest point.
All components should be clean and dried with
compressed air or a lint free cloth.
4. Install connecting rod caps with bearings (lubricate
wear surface) and tighten bolts in 2 steps:
•
•
Step 1 - 9 lb.ft. (12.5 Nm)
Step 2 - 22 lb.ft. (30 Nm) (41-94°???).
1. Set piston ring gaps as follows:
• lower oil ring gap aligned with piston pin.
• center ring gap at 90° from the oil ring gap.
• top ring gap at 180° from the oil ring gap.
2. Lubricate piston, bearing wear surface, crankshaft
journal and cylinder wall with clean engine oil.
3. Carefully install pistons with bearings into cylinder
bores using a piston ring compressor and a hammer
handle. Avoid damage to the crankshaft bearing
journals. The arrow of the piston must point to the
front of the engine. The connecting rod has the
cylinder number identified in the base.
Lower
Bearing
Hammer Handle
Cap
Piston Ring
Compressor Tool
Bolts
FPP04072
5. ??Check connecting rod side clearance??.
6. Install cylinder head assembly -- Refer to“Cylinder
Head - Installation” on page 19.
7. Install pick-up tube and deflector -- Refer to“Pick-up
Tube / Deflector - Installation” on page 26.
CAUTION: Use new connecting rod cap bolts and
lubricate threads with clean engine oil.
8. Install oil pan -- Refer to“Oil Pan - Installation” on
page 25.
02-30
TSG-416 ENGINE - PRELIMINARY
Flywheel - Removal
3. Check flywheel runout at clutch disc surface:
•
1. Remove bolts.
maximum runout 0.005 in. (0.13 mm)
2. Remove flywheel.
3.
Dial
Indicator
4.
Flywheel
4. Check flywheel runout at gear surface:
•
maximum runout 0.024 in. (0.6 mm)
Dowel
Dial
Indicator
Flywheel - Installation
1. Install flywheel using special locking tool 21-168.
2. Lubricate bolt threads with clean engine oil and
tighten to 49 lb.ft. (67 Nm).
Flywheel Locking
Tool T84P-6375-A
(??21-168??)
02-31
TSG-416 ENGINE - PRELIMINARY
Timing Chain and Sprockets - Removal
8. Remove the hydraulic tensioner.
1.
2.
Hydraulic
Tensioner
3.
4. Remove oil pump assembly -- Refer to“Oil Pump Removal” on page 21.
5. Remove valve cover -- Refer to“Valve Cover Removal” on page 10.
6. oil pan, water pump, ???
7. Check to see if coppered links on the timing chain
are still visible. If not, identify them as follows:
•
•
•
Turn engine until timing mark on camshaft
sprocket is at 12 o’clock.
Mark the two chain links left and right of that timing mark.
Mark the single chain link that is positioned on
the crankshaft sprocket timing mark.
9. Using tool 15-030A to lock camshaft sprocket,
remove bolt and camshaft sprocket.
Copper Links
Timing Mark
Locking Tool
15-030A
Timing Mark
Copper Link
02-32
TSG-416 ENGINE - PRELIMINARY
10.Remove timing chain and crankshaft sprocket.
11.Remove tensioner arm and chain guide if necessary.
2. Install crankshaft sprocket with key at 12 o’clock
position.
3. Assemble drive chain through chain housing cavity
from top of engine and onto crankshaft sprocket.
Align timing mark with coppered link on drive chain.
Crankshaft Sprocket
Timing Chain
Timing Mark
12 O’clock Position
Tensioner Arm
Coppered Link
Chain Guide
Camshaft Sprocket
4. Insert camshaft sprocket into chain and assemble to
camshaft. Position camshaft key at 12 o’clock and
align timing mark between 2 coppered links on drive
chain.
Timing Chain and Sprockets - Installation
NOTE: All components must be clean and dried with
compressed air or a lint free cloth. Lubricate with clean
engine oil.
12 O’clock Position
Coppered Links
1. Install the (if removed) chain guide and the tensioner
arm from the top of the engine. Install bolts finger
tight.
Tensioner Arm
Chain Guide
Timing Mark
5. Install camshaft sprocket bolt and hydraulic
tensioner finger tight.
02-33
TSG-416 ENGINE - PRELIMINARY
6. Tighten guide and tensioner arm bolts to 18-21 lb.ft.
(24-28 Nm).
Tensioner Arm
8. Tighten hydraulic tensioner to 27-32 lb.ft. (36-44
Nm).
Chain Guide
Hydraulic
Tensioner
7. Using ?? locking tool ??, tighten camshaft sprocket
bolt to 52-59 lb.ft. (70-80 Nm).
9. oil pan, water pump, ???
10.Install valve cover -- Refer to“Valve Cover Installation” on page 10.
11.Install oil pump assembly -- Refer to“Oil Pump Installation” on page 22.
Locking Tool
15-030A
12.
13.
14.
15.
02-34
TSG-416 ENGINE - PRELIMINARY
Oil Level Indicator
Tube
Sealer
Oil Level Indicator - Removal
Oil Level Indicator - Installation
1.
1. Apply sealer WSK-M2G 349-A4 (Loctite 648) to
lower end of oil level indicator tube.
2. Remove bolt.
3. Remove oil level indicator & tube.
2. Install tube immediately into bore.
3. Install bolt and tighten to 15 lb.ft. (20 Nm).
4.
02-35
TSG-416 ENGINE - PRELIMINARY
Adapter
Gasket
Oil Filter
Oil Filter and Adapter - Removal
Oil Filter and Adapter - Installation
NOTE: Place oil drain pan under oil filter to catch oil
drainage.
1. Install a new gasket.
2. Remove oil filter.
2. Lubricate oil seal on a new filter and install to
adapter. Tighten 1 1/2 to 1 3/4 turns after first
contact.
3. Remove 3 bolts.
3. Install filter/adapter to block.
4. Remove adapter and gasket.
4. Install 3 bolts and tighten to 15 lb.ft. (20 Nm).
1.
5.
02-36
TSG-416 ENGINE - PRELIMINARY
DISASSEMBLY
3. Loosen the tensioner pulley and remove the drive
belt.
1. Install engine on an engine stand.
Tension Pulley
Generator
FPP01527
2. Drain the engine oil.
NOTE: Record drive belt routing and direction of travel
for use during assembly.
4. Disconnect wiring at generator.
5. Remove the generator.
6. Remove the generator support.
Water
Pump
Crankshaft
Idler
Generator
FPP02537
02-37
TSG-416 ENGINE - PRELIMINARY
7. Remove oil level indicator tube.
10.Remove the coolant flow control module.
8. Remove the ?return connector?.
Coolant Flow
Control Module
Oil Level Indicator
Coolant Return
Connector
11.Remove the intake manifold assembly.
NOTE: Record routing of wiring harnesses and vacuum
tubes so they may be returned to their original positions
during assembly.
9. Remove any vacuum hoses and wiring.
Wiring Harness
Vacuum Hose
02-38
Intake Manifold
Assembly
TSG-416 ENGINE - PRELIMINARY
12.Remove the oil filter and support assembly.
16.Remove the valve cover assembly.
Gasket
PCV Valve
CMP Sensor
Valve Cover
Oil Filter Assembly
13.Remove oil pressure switch.
14.Remove crankshaft position (CKP) sensor.
CKP Sensor
17.Loosen the crankshaft pulley bolt.
Oil Pressure Switch
Crankshaft Pulley
15.Remove the flywheel and flywheel plate.
Flywheel
Bolt
Plate
02-39
TSG-416 ENGINE - PRELIMINARY
22.Remove 4 nuts, 1 bolt, oil pick-up tube and oil
deflector.
18.Remove 3 bolts and the water pump pulley.
Water Pump
Oil Pick-up Tube
Pulley
Oil Deflector
19.Remove 3 bolts, water pump and gasket.
Gasket
Water Pump
23.Insert retaining clip # BF9A-6606-AA between
crankshaft pulley and oil pump to prevent pulley
axial movement.
24.Remove crankshaft pulley bolt.
NOTE: When removing oil pan, always keep the engine
in its normal upright position to avoid contamination.
NOTE: Identify oil pump bolts so they may be returned
to their original positions.
25.Remove 6 oil pump bolts, and oil pump.
20.Remove bolts, gasket and oil pan.
Retaining Clip BF9A-6606-AA
Gasket
Oil Pump
Oil Pan
Gasket
FPP04089
21.Turn the engine over 180°.
02-40
TSG-416 ENGINE - PRELIMINARY
28.Using tool 15-030A to lock camshaft sprocket,
remove bolt and camshaft sprocket.
26.Check to see if coppered links on the timing chain
are still visible. If not, identify them as follows:
•
•
•
Turn engine until timing mark on camshaft
sprocket is at 12 o’clock.
Mark the two chain links left and right of that timing mark.
Mark the single chain link that is positioned on
the crankshaft sprocket timing mark.
Locking Tool
15-030A
Copper Links
Timing Mark
29.Remove timing chain and crankshaft sprocket.
30.Remove tensioner arm and chain guide.
Crankshaft Sprocket
Timing Chain
Timing Mark
Tensioner Arm
Copper Link
27.Remove the hydraulic tensioner.
Chain Guide
Hydraulic
Tensioner
02-41
Camshaft Sprocket
TSG-416 ENGINE - PRELIMINARY
33.Remove crankshaft rear seal retainer.
CAUTION: Keep cylinder head in the vertical
position during removal to avoid warping and
damage to the sealing surfaces.
Oil Seal Retainer
31.Remove the M11 cylinder head bolts in 3 phases in
the sequence shown.
1
7
9
5
3
M8
FPP04078
4
6
10
8
2
NOTE: Mark piston and cap so they may be returned to
their original positions.
M8
34.Remove 2 bolts, lower connecting rod bearing and
cap. Push piston assembly out of the engine block.
Repeat for other three cylinders.
Bolts
Cap
32.Remove 2 M8 bolts, cylinder head and gasket.
M8 Bolts
Lower
Bearing
Cylinder Head
Gasket
Dowels
02-42
TSG-416 ENGINE - PRELIMINARY
NOTE: Keep caps and bearings in order so they may be
returned to their original positions.
36.Carefully remove the crankshaft and install it
vertically on the flywheel to avoid warp running-out.
35.Remove bolts, caps and crankshaft lower main
bearings in the sequence shown.
Crankshaft
Caps
Flywheel
Lower Bearings
Crankshaft
37.Remove the 5 upper main bearings and the 2 thrust
washers.
Upper Main Bearings
Thrust Washers
1
5
9
8
4
2
6
10
7
3
Front of Engine
02-43
TSG-416 ENGINE - PRELIMINARY
SUBASSEMBLIES
Clean crankcase and all subassemblies of all foreign
material. Scrape or wire brush RTV sealant from mating
surfaces. Surfaces must be kept oil free for good
adhesion of fresh RTV seal (during reassembly).
3. Check the engine block for warpage, cracks or any
other damage.
NOTE: For cleaning and service information on
crankcase, cylinder head, camshaft, crankshaft and
bearings, Refer to Section 01.
Discard gaskets and O-Rings and replace with new
ones unless otherwise instructed.
Cylinder Block
1. Remove the core plugs, if necessary.
4. Coolant and oil galleries must be free of dirt and
deposits.
2. Remove oil gallery plugs.
5. Refer to Section 01 for cleaning & servicing cylinder
block and core plug installation.
6. Reinstall oil gallery plugs.
Oil Gallery Plugs
02-44
TSG-416 ENGINE - PRELIMINARY
Piston - Disassembly
Piston - Assembly
NOTE: Store components to ensure assembly with the
same rod and installation in the same cylinders from
which they were removed. Refer to Section 01 for piston
inspection and servicing.
NOTE: Apply a light coat of clean engine oil contact
surfaces.
1. Remove the connecting rod bearing from the
connecting rod and cap.
2. Install piston rings using a suitable piston ring
expander.
1. Assemble piston to connecting rod using ?????????
2. Remove the piston rings using a suitable piston ring
expander.
Ring Expander
Tool
NOTE: Check piston ring end gap and side clearance refer to Section 01.
3. Remove piston pin???????????????????
4.
3. Install bearings into connecting rods and caps. Make
sure lock slots align.
CAUTION: Make sure bearings and connecting rod
bore are clean. foreign material under the inserts
will distort the bearing and cause a failure.
02-45
TSG-416 ENGINE - PRELIMINARY
Cylinder Head - Disassembly
6. Remove all valve components using a suitable valve
spring compressor.
NOTE: Store components to ensure assembly in the
same order as they were removed.
1. Remove bolts and camshaft bearing caps evenly in
the sequence shown.
Key
Retainer
1
5
9
8
Spring
4
Valve Seal
2
6
10
7
3
Loosening Sequence
Cylinder Head
2. Remove camshaft.
3. Remove roller followers.
Valve
4. Remove lash adjusters.
Refer to Section 01 for:
5. Remove spark plugs.
Bearing Caps
Roller
Follower
Camshaft
•
servicing valve components, valve guide and valve
seat.
•
camshaft and bearing service.
•
cylinder head cleaning and inspection.
Lash
Adjuster
02-46
TSG-416 ENGINE - PRELIMINARY
Cylinder Head - Assembly
5. Check that spring installed height is 35.2 ± 1mm.
NOTE: All components must be clean and assembled in
the same positions as removed. Lubricate contact
surfaces with clean engine oil.
Spring
Installed
Height
1. Check that valves move freely in valve guides.
2. Install intake and exhaust valves.
3. Install new valve seals using special tool 21-024
(optional T95P-6565A).
Special Tool 21-024
6. Install lash adjusters.
Bearing Caps
Roller
Follower
Camshaft
4. Using a suitable spring compressor tool, install valve
springs, retainers and locks.
Key
Retainer
Lash
Adjuster
7. Install roller followers.
NOTE: The chamfer on the camshaft bearing caps must
be facing the chain housing.
8. Carefully install camshaft bearings, camshaft and
bearing caps with bolts finger tight.
Spring
NOTE: Rotate camshaft so key is at 12 O’clock position.
Valve Seal
9. Tighten bolts in the sequence shown in 3 steps to 67 lb.ft. (8-10 Nm).
9
7
1
5
3
Cylinder Head
10
Valve
8
2
6
Tightening Sequence
02-47
4
TSG-416 ENGINE - PRELIMINARY
ASSEMBLY
NOTE: All components must be clean and dried with
compressed air or a lint free cloth. For information on
bearings & piston inspection and selection - Refer to
Section 01.
1. Install upper main bearings and thrust washers to
cylinder block. Lubricate the wear surfaces with
clean engine oil. Make sure oil holes align.
NOTE: The main bearing caps are numbered and must
be assembled to corresponding numbers. The arrow on
the main bearing caps must point to the front of the
engine.
CAUTION: Use new main bearing cap bolts.
4. Install main bearing caps in the same positions as
removed.
NOTE: Check the position of studs as shown.
Upper Main Bearings
Stud Positions
Thrust Washers
2. Carefully install the crankshaft onto the upper
bearings.
3. Assemble the lower main bearings into caps.
Lubricate the wear surfaces and the bolt threads
with clean engine oil.
5. Tighten main bearing cap bolts/studs in sequence
shown and in three steps to 70 lb.ft. (95 Nm).
Front of Engine
Caps
Lower Bearings
9
5
1
4
8
10
6
2
3
7
Crankshaft
NOTE: Check crankshaft end play as outlined in
Section 01.
02-48
TSG-416 ENGINE - PRELIMINARY
10.Install a new rear seal and retainer using tool 21046.
6. Set piston ring gaps as follows:
• lower oil ring gap aligned with piston pin.
• center ring gap at 90° from the oil ring gap.
• top ring gap at 180° from the oil ring gap.
7. Lubricate piston, bearing wear surface, crankshaft
journal and cylinder wall with clean engine oil.
Special Tool
21-046
8. Carefully install pistons with bearings into cylinder
bores using a piston ring compressor and a hammer
handle. Avoid damage to the crankshaft bearing
journals. The arrow of the piston must point to the
front of the engine. The connecting rod has the
cylinder number identified in the base.
Hammer Handle
Rear Seal Retainer
Piston Ring
Compressor Tool
NOTE: Rear seal retainer comes on a plastic sleeve.
Link plastic sleeve to crankshaft (?? 34mm ??) and
push retainer to crankshaft. Plastic pins at rear side of
retainer must fit to corresponding block bores. Remove
plastic sleeve when done.
11.Turn engine 180° to prepare for cylinder head
installation.
NOTE: The contact surface of the cylinder head and
block must be clean and free of oil. Use new cylinder
head bolts and lubricate the threads.
12.Rotate crankshaft so all pistons are below top dead
center (TDC).
CAUTION: Use new connecting rod cap bolts and
lubricate threads with clean engine oil.
9. Install connecting rod caps with bearings (lubricate
wear surface) and tighten bolts in 2 steps:
•
•
13.Install dowels and new cylinder head gasket to the
engine block.
14.Carefully install the cylinder head onto the gasket.
Step 1 - 9 lb.ft. (12.5 Nm)
Step 2 - 22 lb.ft. (30 Nm) (41-94°???).
Cap
M8 Bolts
Bolts
Lower
Bearing
Gasket
Dowels
02-49
Cylinder Head
TSG-416 ENGINE - PRELIMINARY
17.Install crankshaft sprocket with key at 12 o’clock
position.
15.Install new bolts using the sequence shown in the
following 3 steps:
•
•
•
Step 1 - tighten M11 bolts to 29.5 lb.ft. (40 Nm)
Step 2 - tighten M8 bolts to 11 lb.ft. (15 Nm) + 45°
Step 3 - tighten M11 bolts additional 120°
18.Assemble drive chain through chain housing cavity
from top of engine and onto crankshaft sprocket.
Align timing mark with coppered link on drive chain.
Timing Mark
10
4
2
6
8
12 O’clock Position
M8
Coppered Link
7
5
1
3
9
M8
Tightening Sequence
16.Install the chain guide and the tensioner arm from
the top of the engine. Install bolts finger tight.
19.Insert camshaft sprocket into chain and assemble to
camshaft. Position camshaft key at 12 o’clock and
align timing mark between 2 coppered links on drive
chain.
12 O’clock Position
Tensioner Arm
Coppered Links
Chain Guide
Timing Mark
20.Install camshaft sprocket bolt and hydraulic
tensioner finger tight.
02-50
TSG-416 ENGINE - PRELIMINARY
21.Tighten guide and tensioner arm bolts to 18-21 lb.ft.
(24-28 Nm).
Tensioner Arm
23.Tighten hydraulic tensioner to 27-32 lb.ft. (36-44
Nm).
Hydraulic Tensioner
Chain Guide
22.Using locking tool, tighten camshaft sprocket bolt to
52-59 lb.ft. (70-80 Nm).
CAUTION: The oil pump, pulley and sealer are
provided as an assembly kept together by a clip (no.
BF9A-6606-AA). Do not remove clip until oil pump is
installed. If pulley is pushed out of the oil pump
prior to oil pump installation, it will have to be
??repaired?? or replaced. (?can this pump be
rebuilt?)
Clip
Locking Tool
15-030A
Do Not Remove Clip Until Installed!
02-51
TSG-416 ENGINE - PRELIMINARY
24. Assemble gasket onto oil pump housing guiding it
with 2 outer bolts.
29.Tighten 2 outer oil pump housing bolts to 15 lb.ft. (20
Nm).
Outer Bolts
Oil Pump
Gasket
CAUTION: Do not apply oil to shaft or seal. Sealing
lip along with all contact surfaces must be free of
oil.
30.Tighten remaining oil pump housing bolts to 15 lb.ft.
(20 Nm).
25.Place oil pump and gasket onto crankshaft.
26.Install pulley bolt and tighten to 92 lb.ft. (125 Nm).
Pulley Bolt
Remaining Bolts
27.Remove clip.
28.Install oil pump housing bolts finger tight.
CAUTION: The oil pump housing must be
positioned during tightening of the oil pump
housing bolts, so that the sealing flange of the oil
pump housing is within ± 0.008 in. (0.20 mm) of the
block bottom sealing flanges.
02-52
TSG-416 ENGINE - PRELIMINARY
31.Install water pump.
35.Install oil deflector.
32.Install bolts and tighten to 7 lb.ft. (10 Nm).
36.Install oil pick-up tube.
Gasket
Oil Pick-up Tube
Water Pump
Oil Deflector
33.Install water pump pulley.
34.Install bolts and tighten to 9 lb.ft. (12 Nm).
Water Pump
Pulley
37.Tighten nuts to 14 lb.ft. (19 Nm). Tighten bolt to 7
lb.ft. (9.5 Nm).
38.Apply WSEM-A4 sealer (Loctite 5910) to the 4
positions as shown.
Sealer Rope
4 places
3-5mm
60° ± 3°
10-15mm
CAUTION: The contact surfaces of oil pan, gasket
and block must be free of oil. Do not wait more than
5 minutes to install the oil pan gasket after sealer
has been applied.
02-53
TSG-416 ENGINE - PRELIMINARY
39.Install the oil pan and bolts finger tight.
40.Align oil pan with rear portion of engine block.
42.Install the oil pan drain plug. Tighten to 18 lb.ft. (25
Nm).
43.Install flywheel using special locking tool 21-168.
Flywheel
Straight Edge
Block
Dowel
Oil Pan
41.Tighten oil pan bolts in 3 steps in the sequence
shown:
•
•
•
enough for gasket settlement
5 lb.ft. (7 Nm)
7 lb.ft. (10 Nm)
44.Lubricate bolt threads with clean engine oil and
tighten to 49 lb.ft. (67 Nm).
45.Check flywheel runout at clutch disc surface:
•
maximum runout 0.005 in. (0.13 mm)
Dial
Indicator
Front of Engine
Tightening Sequence
02-54
TSG-416 ENGINE - PRELIMINARY
50.Install oil filter support with new filter. Tighten bolts to
15 lb.ft. (20 Nm).
46.Check flywheel runout at gear surface:
•
maximum runout 0.024 in. (0.6 mm)
Gasket
Oil Filter
Support
Dial
Indicator
47.Install valve cover and gasket. Tighten bolts to 7
lb.ft. (9 Nm).
CMP Sensor
PCV Valve
51.Install oil pressure switch and tighten to 15 lb.ft. (20
Nm).
CKP Sensor
Oil Pressure Switch
Valve Cover
48.Apply grease WSD-M13P8-A1 (? kluberpaste?
HEL46-450 ? anti-seize? ) or equivalent to spark
plug threads.
52.Install crankshaft position sensor and tighten to 3
lb.ft. (4 Nm).
49.Install spark plugs and tighten to 10-13 lb.ft. (13-17
Nm).
02-55
TSG-416 ENGINE - PRELIMINARY
53.Install intake manifold and gasket. Tighten bolts and
nuts to 6 lb.ft. (8 Nm).
55.Apply sealer WSK-M2G 349-A4 (Loctite 648) to
lower end of oil level indicator tube. Install
immediately and tighten bolt to 15 lb.ft. (20 Nm).
Intake Manifold
Assembly
Oil Level
Indicator
Tube
Sealer
54.Install coolant flow control module and gasket.
Tighten bolts to 7 lb.ft. (10 Nm).
Coolant Flow
Control Module
56.Apply sealer WSK-M2G 349-A7 (Loctite 243) to
threads of coolant return connector. Install and
tighten to 15 lb.ft. (20 Nm).
Coolant Return
Connector
02-56
TSG-416 ENGINE - PRELIMINARY
59.Pry tensioner pulley as shown and install drive belt.
57.Install generator support. Tighten bolts to? lb.ft. (?
Nm).
Tension Pulley
Generator Support
58.Install generator and electrical connectors. Tighten
bolts to? lb.ft. (? Nm).
60. Install engine wiring and vacuum hoses.
Wiring Harness
Generator
Electrical Connector
Vacuum Hose
NOTE: Drive belt must be installed in the same direction
of rotation as when removed.
61.Fill engine with clean engine oil of the correct type
and quantity.
NOTE: Ford Power Products industrial engines are
designed to perform with engine oils that are licensed
by the American Petroleum Institute (API) and oils
carrying the most current API classification should be
used.
02-57
TSG-416 ENGINE - PRELIMINARY
SPECIFICATIONS
GENERAL SPECIFICATIONS
Engine Type:
4 cylinder, 4 stroke spark ignition 90°
Overhead Valve (OHV) chain driven,
overhead camshaft operating the valves via
roller cam followers.
Liter/CID:
1.6 / 97.5
Bore: mm (inch)
82.070 mm (3.23 in.)
Stroke: mm
(inch)
75.480 mm (2.97 in.)
Number of
cylinders:
4
Compression
Ratio:
9.5 : 1
ELECTRICAL SYSTEM
Polarity:
Negative to earth (ground)
Generator Drive
Belt Tension (8K
Poly Belt):
Tension is within specification if the tensioner
is within the indicator markings
IGNITION
FUEL SYSTEM
LPG
Type:
Fuel
Specification:
Liquefied Petroleum Gas
NG
Type:
Fuel
Specification:
Natural Gas
GAS
Type:
Fuel
Specification:
Gasoline (petrol)
Electronic Fuel Injection
Unleaded 87 or 89 Octane (Gasoline blends
not to exceed 10% Ethanol by volume Octane
Index of 87 or 89).
Fuel Pump
Pressure
Normal:
Max:
(Part #ZU1L-9350-AA)
40 psi
?? psi
EN589 (European) (USA)
Spark
Plug
Ford Part Number: XS6F-12405-A1A (NGK TR6B-10)
Gap: 0.95 - 1.05 mm
Firing
Order
1-3-4-2
CRANKSHAFT
Main journal-standard diameter
2.243 - 2.244
(56.980 - 57.000 mm)
Main journal-undersize diameter
2.233 - 2.234
(56.726 - 56.746)
Width-main journal bearing shell
Pin Journal standard
38.7 MJ/m3 (UK) 39.0 MJ/m3 (USA)
LUBRICATION SYSTEM
Max. Oil
Pressure:
Hot@2500 rpm: 275.79 - 413.69 kPa (40-60
psi)
Oil Type:
SAE 5W30 WSS-M2C205-A (API
classification: SJ)
Service Oil fill
capacity
(including filter):
4.2 Liter (4.44 quarts)
Oil filter Type:
X56E-6714-D1A
COOLING SYSTEM
Thermostat:
Type: Wax element
Commences opening: 82.2°C (180°F)
Fully open:94.5°C (202°F)
Coolant
50% Motorcraft Super Plus 2000 plus 50%
clear water
Ford Specification: WSS-M97B44-D or ESEM97B44-A
02-58
ITEM
Nm
FT. LB.
LB. IN.
Oil Pan Drain
Plug
25
18
221.3
Spark Plugs
13-17
9.6-12.5
115-150.5
Oil Filter
11-15
8-11
97.4-132.7


