1
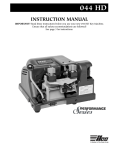
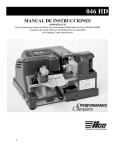
040 HD
INSTRUCTION MANUAL
IMPORTANT! Read these instructions before you use your new 040 HD Key Machine.
Ensure that all safety recommendations are followed!
See page 3 for instructions.
This manual applies specifically to the 040 HD
Performance Series key machine. It properly identifies
your model and assures you will receive correct parts, if
and when you require replacement parts. Retain this
manual in a safe place. If ownership of this machine is
transferred, this service manual should accompany the
machine.
When seeking service information about this machine,
refer to Model No. 040 HD and the part number desired
(see pages 6 to 8). Note that many parts are not interchangeable with other KABA ILCO machines.
CONTENTS
Warranty ..............................................................................2
Safety Information ................................................................3
Introduction to the 040 ........................................................4
Operating Parts (illustrated) ................................................5
Exploded View ..................................................................6-7
Exploded View Parts List ......................................................8
How to Duplicate Keys....................................................9-10
The Cutting Operation ..................................................11-12
Replacements and Adjustments ..................................13 -14
ONE YEAR LIMITED WARRANTY
KABA ILCO warrants to the original buyer of any
new model 040 HD machine that it will repair or
replace, at its option, any part of any machine which
proves, to the reasonable satisfaction of KABA ILCO,
to have defects arising from the faulty manufacture
of the machine or from defective material or components, during a period of one (1) year from the date
of shipment of the machine by KABA ILCO, provided that the machine is returned by prepaid transport
to KABA ILCO or to its authorized representative
before the expiry of the warranty period together
with a detailed description of the alleged defect(s).
KABA ILCO may, at its discretion, elect to refund the
purchase price allowable to the part affected, or to
issue a credit if the price therefore remains unpaid.
KABA ILCO sells precision-made machines. The
buyer assumes all risks, and KABA ILCO shall not be
liable for any reason, if the machine has been subjected to improper installation, improper use,
improper or inadequate maintenance, negligence, if
any unauthorized modification or alteration is made
to the machine, or in case of accident. For greater
certainty, any machine not operated in accordance
with KABA ILCO printed instructions or operated
beyond its rated capacity shall not be covered by this
or any other warranty.
2
Any and all warranties made by KABA ILCO on any
machine, product, or component thereof shall be effective only if and for so long as the buyer complies with
all payment obligations pursuant to the buyer’s accepted and acknowledged order. Failure to meet such payment obligations shall void all warranties and not
extend the period of time for which such machine,
product of component thereof is warranted irrespective
of whether or not payment is eventually made.
These warranties are in lieu of and not in addition to
any other warranty of condition, expressed or implied,
including without limitation merchantability, fitness
for a particular purpose or latent defects. The buyer
releases KABA ILCO from any liability for any reason
other than a breach of its warranties hereunder.
The liability of KABA ILCO shall in no case, including negligence, exceed the purchase price of the
defective machine, nor shall KABA ILCO be liable for
any personal injuries, property damage or consequential damages.
Use only genuine KABA ILCO replacement parts on
this machine!
Serial number : _______________________________
WARNING – SAFETY NOTICE
IMPORTANT - Please read carefully before operating machine.
Safety begins with education, and continues with proper
application. All personnel who operate your machine
should read the supplied Operator’s Manual for information on how to properly operate it. The likelihood of accidents and miscuts will be greatly reduced.
General safety
• Safety glasses must be worn to reduce the possibility
of eye injury while operating or in the immediate
vicinity of key cutting equipment.
• Always turn machine off before making adjustments
or inserting or removing keys.
• Machine should be located in an area accessible only
by authorized operators. Location must be such that
customers and other personnel are not subject to
potential injury from “flying chips”.
• Do not defeat safety features built into your machine.
Removal or modification of safety shields, cutter
guards, and other safety devices should be strictly forbidden.
• At no time should the mechanically-driven parts of
the machine be touched while it is in operation. The
operator should take care to ensure that loose-fitting
clothing, long hair, etc. are kept from the area of
machine operation.
• Your machine has been specially designed and built
for key cutting purposes only and should be operated
according to the Operator’s Manual. All other uses are
strongly discouraged as potentially dangerous, and
should not be attempted! Such use will immediately
void the machine’s warranty.
• Some states have specific age restriction concerning
the operation of certain types of equipment. Check
local and state ordinances for compliance.
Electrical safety
• (115 Volt models) Your machine is designed to operate using 120 Volt A. C. 60 Hz. electrical current. It is
supplied with a three-prong power plug which should
be used with a properly grounded three-prong outlet
only. Do not defeat the safety purpose of the plug by
modifying or using with non-grounded outlets!
• To reduce risk of fire or electrical shock, do not expose
or operate machine in damp or wet locations.
• Electrical problems should be referred to qualified
repair technicians. If the machine is under warranty,
contact KABA ILCO at the address printed on the
cover. (KABA ILCO also offers repair service for outof-warranty machines. Contact KABA ILCO for
details.)
• Always unplug the machine before removing the hood
or changing the cutter wheel.
Grounding instructions
• In the event of a malfunction or breakdown, grounding provides a path of least resistance for electric current to reduce the risk of electric shock. This machine
is equipped with an electric cord that has an equipment-grounding conductor and a grounding plug. The
plug must be plugged into a machine outlet that is
properly installed and grounded in accordance with
all local codes and ordinances.
• Do not modify the plug provided - if it will not fit the
outlet, have the proper outlet installed by a qualified
electrician.
• Improper connection of the equipment grounding
conductor can result in a risk of electric shock. The
conductor with insulation that has a green outer
surface (with or without yellow stripes) is the equipment-grounding conductor. If repair or replacement of
the electric cord or plug is necessary, do not connect
the equipment grounding conductor to a live terminal.
• Check with a qualified electrician or service personnel
if the grounding instructions are not completely
understood, or if in doubt as to whether the machine
is properly grounded.
• Use only 3-wire extension cords that have 3-prong
grounding plugs and 3-pole receptacles that accept
the machine’s plug.
• Repair or replace damaged or worn cords immediately.
3
INTRODUCTION / UNPACKING
Congratulations!
You’ve purchased a superior key cutting machine.
The Model 040 HD Auto/Manual Performance Series
key machine you've just purchased is a dual function: 1)
it will duplicate keys automatically at the press of a button
and 2) it will duplicate keys manually. This dual capability gives you the freedom to select the type of action best
suited for the key being duplicated.
The 040 HD is a proven approach to a long time problem
in the retail store - how to handle a customer’s needs
while having to cut keys at the same time. With the 040
HD, the operator can depress a button and walk away,
returning later to get the finished key. It will turn waiting
time into product time, permitting your people to wait on
customers more quickly and to ring up that cash register
more frequently.
For those occasions when manual cutting of a key is
required, such as a worn or broken key, you can use the
040 HD by operating it as a conventional manual duplicator, There are no complicated or involved procedures to
follow for either the manual or the automatic mode.
Featuring exclusive Super Jaw 3 four-way vise jaws, the
model 040 HD is designed to accommodate virtually any
standard cylinder key without the need for adapters. Even
double-sided automotive keys can be duplicated with
ease; the four-way jaws include stations ideally suited to
gripping these keys and is capable of gripping them in the
groove or milling for enhanced clamping performance
when necessary. (See illustration on page 11)
UNPACKING INSTRUCTIONS
Your 040 HD key machine has been shipped to you in a
sturdy, specially cushioned container to prevent the possibility of damage during handling and shipment. Once
the machine is removed from the carton, it should be set
up on a level workbench and wiped free of all rustproof-
ing oil. The machine is adjusted at the factory and test
keys have been cut on it, but it is recommended that you
check the adjustments to make sure they have not
slipped or shifted during transit (see page 13 “Adjusting
for Depth of Cut”).
SAFETY
The 040 HD has been engineered to duplicate cylinder
(paracentric) keys. It is not intended or designed for any
other purpose. The machine operator assumes all liability when using this machine in a manner inconsistent with
its stated design purpose. Refer to page 3 for complete
safety information before operating the machine.
when in the vicinity of the machine while it is being operated. Protective eye wear prevents injuries! The machine
should be turned off before loading or unloading keys.
When the key machine is operating, be careful not to
contact the vise jaw or carriage against the cutting wheel
as this will cause damage to the cutter, jaw, or carriage.
KABA ILCO strongly recommends the use of protective
eye glasses or goggles when operating this machine, or
CAUTION!
4
DO NOT DESTROY OR DISCARD THIS SPECIAL SHIPPING CARTON.
STORE IT CAREFULLY IN A SAFE PLACE. THIS CARTON SHOULD BE USED
WHENEVER THE MACHINE IS MOVED OR SHIPPED.
REPLACEMENTS AND ADJUSTMENTS
REPLACING THE CUTTER
Figure 8
The P-CU20 cutter used on this machine is 2 1/4” in
diameter, .250” thick (1/4”) and has a 1/2” hole. It’s a
milling cutter, made out of high speed steel. It has a flat
left side, which is excellent for making deep cuts, when
these cuts are next to the shoulder, such as on GM,
Chicago, etc. No warranty is place on the cutter.
Operators should treat it with care and avoid harsh
usage. Do not force the carriage up, causing the key
blank to bank into the cutter, and do no apply heavy
pressure when cutting. Also, do not let the cutter run
into the vise jaw; this will dull the cutter quickly.
As with any metal cutting instrument, the P-CU20 will
dull with usage. There are three ways to tell when a cutter is dull and required replacing:
1. Time - a dull cutter takes longer to make the cuts.
2. Sound - a dull cutter will emit a shrill sound as it
runs across the key blank.
3. Burrs - a dull cutter will not cut away the metal but
will roll it away. When this occurs, there will be a
buildup of metal burrs on the underside of the key.
If this buildup is heavy, the cutter is dull. A sharp
cutter leaves little or no burrs.
To replace the cutter, use two wrenches, one 3/4” wrench
for the cutter nut and one 1/2” wrench for the cutter
shaft. Set the two wrenches in position and loosen the
cutter nut. Note that the cutter nut has a reverse thread
and turns “downward” to loosen. Remove the spacer
washers and the dull cutter. Install the new cutter, the
washers and the nut in the order they were removed.
ADJUSTING FOR DEPTH OF CUT
To ensure safety, UNPLUG machine from its power
source before adjusting for depth of cut. It's imperative
that the key guide and the cutter be in the same plane,
that is, aligned to each other. If the cutter guide protrudes
further than the cutter, the resulting cuts in a key blank
will be too shallow and the duplicate key will not work.
Likewise, if the cutter guide is behind the cutter, the cuts
in the key will be too deep (see Fig. 8).
Adjustment is
correct when
both key
blanks touch
of the cutter before changing adjustment. There will be a
high point on the cutter; the adjustment should be made to
the high point. If the cutter does not touch the key blank
after one rotation, proceed to change the adjustment.
To adjust the cutter guide, loosen the binding screw on
top of the cutter guide
Depth
Figure 9
slightly. (see Fig. 9 & 10).
Dial
Once you have loosened
this screw, the depth
Binding adjustment dial can be
Plate rotated to the left (to
decrease depth of cut) or
Binding
to the right (to increase
Screw
depth of cut). Again, propCarriage er adjustment will be
achieved when the cutter
Stop
just barely grazes the key
blank before it while the cutter guide is in contact with
the other key blank. Retighten the binding screw once
the calibration process is completed. Recheck after tightening to assure that adjustment did not shift.
Figure 10
Binding
screw
To check the depth adjustment, insert two identical key
blanks into the vise jaws, setting them flat in each vise.
(It is not necessary to align the blanks.) Then, raise the
carriage, positioning the left blank against the cutter
guide and the right blank against the cutter. Next, turn
the machine pulley by hand and note the right key blank.
The cutter should just barely graze the key blank when
the adjustment is correct.
No cutter is perfectly round so make one complete rotation
Depth Adjustment
Dial
Carriage stop
adjusting screw
13
THE CUTTING OPERATION
9.
Move the carriage to line up the cutter guide with the
shoulder of the pattern key, then shift slightly away
from the shoulder. Do not permit the cutter to touch
the shoulder of the key blank.
10. Press in on the carriage, while guiding it to the left.
Carefully trace the cuts of the pattern key with the
cutter guide. The cutter will make corresponding
cuts in the key blank.
11. When the cut closest to the tip of the pattern key has
been traced, retrace the cuts by guiding the carriage
to the right. This will clear away any metal not
removed on the initial pass over the key blank.
Figure 7
DUPLICATING PROCEDURE Automatic Mode
WARNING: Do not install or remove keys unless
the off/on switch is in the off position.
1. Install the pattern key and key blank in the vise
jaws as described in steps 1-6 of “Manual
Mode”.
2. Slide the carriage all the way to the right.
3. Press the off/on power switch to its “on” position.
4. Pull down on the carriage handle while pulling
out on the carriage trigger (Fig. 7). This will
enable the carriage tension spring to lift the carriage into cutting position. (EASE the carriage
into cutting position. DO NOT allow it so
“slam” forward.) Once eased into position,
remove your hand from the carriage handle; the
12
5.
6.
7.
8.
9.
carriage spring will supply the necessary pressure to cut a key.
Depress the auto start switch and hold it
depressed for a least two seconds. The drive
motor will start and the carriage will begin moving to the left.
The carriage will make only one pass in front of the
cutter. When it has completed this pass, the drive
motor will turn off.
Press the off/on power switch to its “off” position.
Pull down on the carriage handle to lower the carriage. When the carriage snaps into its latched position, remove the cut key from the right vise jaw.
Depress the off/on power switch, which will cause
the demurring brush and cutter to rotate. Press the
cut key against the rotating brush to remove any
burrs of chips that may be present.
THE CUTTING OPERATION
DUPLICATING PROCEDURE Manual Mode
Figure 4
WARNING: Do not install or remove keys unless
the off/on switch is in the off position.
Super Jaw 3
vise jaw shown
gripping a typical
automotive key
Using standard position
Using X position
Use this procedure when the manual mode is selected:
1. Slide the carriage to its extreme right position.
2. Rotate both vise jaws to the station suitable for the
key being duplicated.
3. Insert the blank key in the right vise and tighten the
wing nut. Be sure the key is laying flat in the vise jaw
and is not tilted up or down.
4. Lower the key gauge and move the blank key so that
the shoulder of the key contacts the right finger of the
key gauge. Leave the key gauge in this position (Fig. 5)
Figure 5
Using wide position
Using narrow position
GENERAL OPERATING SEQUENCE
WARNING: Do not install or remove keys unless
the off/on switch is in the off position.
The 040 HD key machine can be used in either a manual or automatic mode simply by altering steps in the
operating procedure. For either manual or automatic
operation, the pattern key and blank key are loaded
using the same steps.
To duplicate keys using the manual mode, press the
off/on switch to the “ON” position. Then the cutting
operation is performed with the operator holding the carriage up to the cutter guide and cutter while moving the
carriage sideways. The cutting operation should begin at
the cut closest to the head of the key with the operator
carefully tracing each cut in turn until they have traced
the cut closest to the tip.
Aligning Shoulder of Keys with Key Gauge
5.
6.
7.
8.
Insert the pattern key into the left vise jaw, pushing
it into the jaw until it’s shoulder butts against the left
finger of the key gauge. Tighten the wing nut to
secure the pattern key.
Lift the key gauge to its up position.
Press the off/on switch to the “manual” position.
Lift the carriage with both hands (Fig 6.)
Figure 6
To duplicate using the automatic mode, load the pattern
and blank key, then pull down on the carriage while
pulling gout on the carriage trigger. This will enable the
operator to ease the carriage up into cutting position with
cutting pressure automatically applied. With the off/on
switch in the auto position, the cutting operation will
begin once the automatic actuator switch is depressed.
Duplicate
by tracing
from head
to tip of key
11
HOW TO DUPLICATE KEYS
ALIGNING KEYS IN THE VISE JAWS
Both the pattern key and key blank must be aligned to
each other and must be securely clamped in the vise
jaws. To do this, slide the machine carriage towards the
right and clamp the appropriate blank key in the right
jaw and tighten the wing nut (Do NOT over-tighten).
Lower the key gauge and position the blank key so the
shoulder of the key contacts the left side of the right
hand key gauge finger (See Fig. 1). Insert the pattern key
in the left vise jaw until it’s shoulder contacts the left key
gauge finger. Tighten the wing nut (do NOT over-tighten). You can now proceed to cut.
Figure 1
“Best” and “Falcon” type keys to not have a conventional shoulder but have a recessed tip and the key gauge is
used to align the recessed tips. After clamping the blank
key, the carriage is moved to the left so that the key
gauge can be lowered to contact the recessed tip surface.
The pattern key is aligned in the left vise jaw and positioned to contact the edge of the key gauge in the same
manner.
USING THE SUPER JAW 3
FOUR-WAY VISE JAWS
Your 040 HD is equipped with the KABA ILCO versatile
Four-way, Super Jaw 3 vise jaws. They feature four
unique clamping surfaces to securely grip virtually any
typical cylinder key (see Fig. 3).
Figure 3
Rotate both top and
lower jaws as a set
Aligning Shoulder of Keys with Key Gauge
On keys such as the Ford double-sided key, which do
not have conventional shoulder, the tip of the key is used
as the aligning point (see Fig. 2). Clamp the blank key in
first and move the machine carriage to the left. Lower the
key gauge and position the carriage so the tip of the
blank key touches the key gauge. Install and align the
pattern key in the left vise jaw in the same manner.
Figure 2
SHOULDER
TIP
RECESSED TIP
Use of gauge with various key types
10
Standard - for holding regular cylinder keys, such as
house keys, single-sided automotive keys, padlock keys,
with one or two shoulders.
Narrow - for holding the 1092B and other narrow width
keys.
Wide - for holding the Ford double-sided keys and similar types, either primary or secondary. When positioning
the keys in the vise jaws, lay the key so that its center
ledge is flat against the top surface of the jaw.
X - Ideal for holding most double-sided convenience
keys used on most current automobiles. Grip these keys
by the grooves rather than the blade edge where the cuts
are located (see Fig. 4 on next page).
To reposition the vise jaws, as from Standard to Wide,
first loosen the wing nuts. Then lift upward on the top
and bottom of each vise jaw as a complete unit to raise
them above their seat in the carriage. Rotate the jaws
until the chosen vise position is facing toward the rear of
the machine and lower the jaws back into contact with
the carriage. Both left and right vise jaws should be rotated to the same position.
HOW TO DUPLICATE KEYS
OPERATING HANDLES
TEST KEYS
The 040 HD key machine is shipped completely assembled except for the carriage handle. Upon unpacking the
machine, locate the handle and thread it into the carriage. Note that the handle threads into the carriage in
the area directly above the trigger assembly. Then, cut
the nylon band holding the carriage rigid and let the carriage drop to its down position. At this point, you should
be able to slide the carriage right to left easily. If there is
any binding that prevents the carriage from sliding sideways, do NOT force the carriage. Instead, plug in the
power cord and depress the ON button to start the cutter
rotating. This will relocate the automatic cam (which
may have been creating the binding action) to the starting position and thus free the carriage.
A series of cut keys are supplied with your machine. These
keys were cut on your machine and represent the result of
our quality inspectors' work before approving your
machine for shipment. The keys are reproductions of factory dimensioned pattern keys and are accurate to .002" or
less. Save these keys and use them as standards to check
the accuracy of cuts in the keys you make. By measuring
across the cuts with a micrometer, you’ll be able to see if
your machine is cutting too deep or too shallow thus indicating that an adjustment of the key guide is necessary.
PROPER KEY CUTTING TECHNIQUES
Even though your 040 HD key machine is designed to
make key cutting fast, efficient and accurate, operator
skill is important. The actual mechanics of placing keys
within the vise jaws is simple to learn, but there are some
basics that must be followed. A properly adjusted key
machine used by someone who ignores good key cutting
techniques will NOT produce a good key. The way a person clamps a key into the vise jaws is critical to the accuracy of the duplicated key.
Remember - the real purpose of a duplicate key is to
operate the lock for which it was intended. If customers
return keys, you should re-examine your cutting techniques and adjustment of the machine.
Here are some important operating tips:
1. Vise jaws - clean them regularly so that no metal
chips lie under the keys. It is essential that both
keys lie flat across the entire width of each vise
jaw. Neither key should be tilted.
2. Do NOT use pliers or other tools to tighten the vise
jaws. Firm hand pressure is sufficient.
3. Keep the carriage shaft free of metal chips. A thin film
of oil can be applied to it. The carriage should be free
to move without binding.
4. NEVER touch the shoulder of a key to the side of the
cutter guide. This will cause the shoulder of the key
blank to touch the side of the cutting wheel. When
this happens, some of the metal will be cut away from
the shoulder of the key blank. If the resulting duplicated key is duplicated two, three, four times over, an
error will accumulate and cause a non-operating key.
Do not grind away the shoulder.
5. Don't run the cutter into the vise jaw; this will dull the
cutter, and reduce cutter efficiency.
6. Keep the cutter clean. Don't let any foreign objects or
instruments blunt it. This cutter is a precise cutting
tool and should be handled with care.
7. Lubrication requirements for your new “HD”
Performance Series key machine are minimized through
the use of sealed, permanently lubricated cutter spindle
bearings. The carriage shaft however, should be inspected on a routine basis, and wiped with a dry, clean cloth
to remove any chip buildup that occurs. After cleaning,
application of a dry film lubricant is recommended for
maximum service life; spray type lubricants that dry
completely once applied are fine. Depending on usage,
the machine’s 1/4 hp motor may require lubrication
once annually. Refer to the label on the motor for lubrication details and recommended interval.
9
EXPLODED VIEW PARTS LIST
Refer to pages 6-7 for illustration
Ref.
Part no.
Description
1
1X
2
3X
040HD-1
040HD-1X
025-2
045HD-3X
Carriage
Carriage assembly
Carriage stud
Vise jaw assembly (Super Jaw 3)
4
6X
8
9X
025-4
025-6X
025-8
040-9X
11
11X
16
17
Part no.
Description
87
90
91
92
040HD-87
025-90
040-91
040-92
Safety shield
Nut, #10-32
Power cord
motor cable
Vise jaw spring
Thrust bearing set
Wing nut
Carriage handle
98
100
101
106
040-98
040HD-100
025-101
040-106
Cam motor screws
Cutter spacer; right
Set screw, 1/4-20x1/4”
Chip tray
040-11
040-11X
040-16
025-17
Trigger Pin
Trigger Assembly
Carriage torsion spring
Washer
108
109
110
123
040-108
025-109
025-110
040-123
Carriage Bumper
Bearing washer
Wave washer
Screw, #4-40x1/2”
18
20
21
22
025-18
040HD-20
025-21
040-22
Screw. 10-32 x 1/2”
Cutter shaft bearings
Carriage shaft bushing, right
Carriage shaft bushing, left
129
135
137
138
040-129
040-135
040-137
040-138
Locking nut (8-32)
Cam
Set screw, #10-32 x 3/16”
Gear motor (115V)
23
24
36
37
040HD-23
040-24
025-36
025-37
Carriage shaft
Friction Reducer
Cutter nut, N-4
Cutter spacer; left
140
141A
144
146
040-140
040-141A
040HD-144
040-146
Gear motor cam
Micro switch plate
Automatic cycle switch
Strain relief for power cord
38
40
41
43
P-CU20
040HD-40
040HD-41
025-43
P-CU20 cutter
Cutter shaft
Cutter shaft pulley (2”)
Nylon brush
150
151
153
158
040-150
040-151
040HD-153
040-158
Switch screw (6-32 x 1/4")
Set screw (8-32 x 3/8")
Switch panel label
Key gauge label
45
46A
47
48
025-45
025-46A
025-47
040HD-48
Brush bolt washer, 5⁄16
Hex head screw, 5⁄16-18 x 3⁄4
Motor pulley 2" - 3L
V-Belt, 3L160
160
161
162
163
025-160
040-161
040-162
045-163
Caution label
Key Gauge guard
Key Gauge guard Screws
Hood Screw
49
50
52
53
040-49
040-50
040-52
040-53A
Cutter guide (stylus)
Carriage stop
Socket hd. screw 8-32 x 1-1/2"
Cutter guide binding plate
164
165
166
169
040-164
040-165
044-166
040-169
Cam follower block
3932 x 1/2 dowel pin
Cam follower pin
Carriage Label
54
55
56
58
59
60
62
65
045-54
045-55A
040-56
040-58
025-59
025-60
025-62A
040HD-65
Cutter guide binding screw
Adjusting screw
Key gauge
Key gauge dowel pin
Key gauge housing
Cap screw, 8-32 x 1⁄2"
On/Off switch
Base machined
171
181
183
184
025-171
024B-181
040-183
040-184
Cutter pulley set screw, 3⁄8" -18
Key Gauge Spacer - Left
1/4-20 Lockwasher
1/4-20 Hex Nut
186
187
188
189
045-186
045-187
045-188
045-189
6-32 x 3/8" set screw
dowel
dowel spring
Adjustment dial
68
69
70
74
040-68
040-69
040-70
040-74
Electrical cover
Set Screw 10-24 x 3/8”
Rubber mount
Truss head screw, 8-32
190
191
192
193
045-190
040-191
040-192
040-193
Cutter guide
Switch plate
Switch plate
Switch plate
040-75
040-79
024B-84
040HD-86X
Motor, 1⁄4hp,115V C/S
Key gauge spring
Crescent ring
Safety hood assembly
194
195
NS
045-194
045-195
040HD-IM
#10 flat washer
10-32 x 1/2" Button hd. screw
040 HD Instruction Manual
75
79
84
86X
8
Ref.
label
(adjustable)
screws
washer
EXPLODED VIEW
7
EXPLODED VIEW
6
OPERATING PARTS
Safety shield
Safety hood assembly
Key gauge
Nylon
brush
Wing nut
Carriage
Handle
Carriage
shaft
Trigger
Assembly
On / Off
power switch
Operating Parts Identification
Part no.
Identification
040-1
025-3X
025-8
Carriage
Vise jaw assembly
Wing nut
040-9X
040-11X
040-23
Carriage Handle
Trigger
Carriage shaft
CU20
814-00-51
040-49A
P-CU20 cutter
Nylon brush
Cutter guide (stylus)
040-50
040-56
040-62
Carriage Stop
Key gauge
On/Off power switch
040-86X
040-87A
040-144
Safety hood assembly
Safety shield
Auto Start Switch
5
REPLACEMENTS AND ADJUSTMENTS
Each calibration mark on the depth adjustment dial is
equivalent to approx. .0015” (1 1/2 thousandths of an
inch). As you can see, this system can allow for very precise adjustment of your new key machine. In fact, if you
have a key micrometer or dial caliper available, you can
adjust your machine with “factory accuracy”. To do this,
you would simply duplicate a key and measure cuts on
both the “pattern key” and the duplicate key for comparison. This would show any deviation that existed and
whether the duplicate cuts were too deep or too shallow
and by how much. With this information, you can use
the depth adjustment dial on your machine to calibrate
your machine for best possible accuracy. This is very
important as many locks are designed with close fit tolerances and the keys you duplicate are often themselves
copies; functional but just barely so. The more accurate
your key machine is adjusted, the closer your duplicates
will match their originals, resulting in fewer non-functional miscuts!
It is very important to understand that adjusting your
machine is not a “one time” procedure. As the cutter on
your machine wears down, the machine must be adjusted to compensate. It is good shop practice to check your
machines’ depth adjustment every 2-4 weeks, based
upon your store’s key cutting volume and readjust as
necessary. You will find that re-calibration is seldom
needed, but by checking and correcting BEFORE customers begin returning miscut keys, you will create a reputation for your store as a “good place” to have keys
duplicated.
14
ADJUSTING FOR SPACING
There is no adjustment for spacing. However, if a key
gauge assembly is ever replaced, the key gauge must be
fitted to the machine after it has been installed. To do
this, first install a pattern key and key blank and align
these against the cutter guide and cutter. Then lower the
key gauge and file the appropriate finger of the gauge to
allow contact with the shoulder of both keys.
ADJUST THE CARRIAGE STOP
The purpose of the carriage stop is to prevent the cutter
from hitting into the right vise jaw. The stop is a nut and
bolt and is adjustable. To check the adjustment, raise
carriage (without keys in vise jaws) and rotate the cutter
by hand. The cutter should not contact the vise jaw.
When the carriage stop is properly adjusted, there
should be a space of .008" between the vise jaw and the
cutter (this is about the thickness of an ordinary business card). Do not allow a greater distance since this
many affect the depth of cut.
CLEANING
Your machine should be kept clean of all filings and
dust. The most critical areas are the carriage jaws and
shafts. A one inch paint brush is ideal to brush these
areas of the machine. The shafts should be wiped periodically with a lightly oiled cloth. We suggest brushing
the jaws often as even a single filing can alter the accuracy of the machine.
15
Kaba Ilco Corp.
P O Box 2627 (27802)
400 Jeffreys Rd., Rocky Mount, NC 27804
Tel.: (252) 446-3321 • Fax: (252) 446-4702
www.kaba-ilco.com
16
Printed in USA
125189