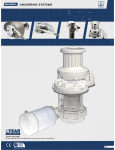
1
500 VW
OWNERS MANUAL
Ó
COPYRIGHT 1991 MAXWELL MARINE LTD
ALL RIGHTS RESERVED.
PATENTS PENDING.
PRINTED IN NEW ZEALAND.
Manual Product
Code No: P103114
11/02/10
MAXWELL MARINE INTERNATIONAL Ltd
reserves the right to make engineering
refinements on all products without notice.
Illustrations and specifications not binding
as to detail.
500 VW
OWNERS MANUAL
CONTENTS
1
INTRODUCTION
2
SPECIFICATIONS
3
PERSONAL SAFETY WARNINGS
4
APPLICATION
7
INSTALLATION
8
8
9
9
9
9
10
11
12
13
13
14
Location - Windlass
- Footswitches
- Reversing Solenoids
- Breaker Isolator Panel
- Remote Control
Control Circuits
Main Electrical System
Preparation of Mounting
Preparing the Windlass
Mounting the Windlass
Assembling the chainwheel
OPERATION OF THE CONTROL SYSTEM
15
OPERATING THE WINDLASS
16
MAINTENANCE
18
18
19
Servicing of Gearbox
Servicing of Motor
ORDERING SPARE PARTS
19
INSTALLATION DRAWINGS
20
20
21
23
24
Typical Greasing Instructions
Wiring Diagram (Dual Direction)
Wiring Diagram (Single Direction)
500 VW Overall Dimensions
Assembly Drawings and Parts
500VW Windlass
Gearbox 56:1
Additional Resources
Deck Cutout Details
Warranty Form
Contact Details (On Back Cover)
25
25
27
30
30
32
_______________________________________________________________________
INSTALLATION, OPERATING INSTRUCTIONS AND SERVICE MANUAL
500VW WINDLASS
INTRODUCTION
You now own a Windlass from MAXWELL’S premier range, designed for automatic anchor
handling.
Used in conjunction with MAXWELL’S Remote Control, you will have complete command of the
anchor raising or lowering.
The compact deck saving vertical design allows 180-degree wrap of the chain ensuring maximum
engagement with the chainwheel, and allows working of mooring or docking lines from any
direction.
A clutch allows manual control for lowering the anchor under free fall and independent operation
of the drum.
** IMPORTANT **
FAILURE TO ADHERE TO THE CORRECT APPLICATION, INSTALLATION, OPERATION AND
TO CARRY OUT THE MAINTENANCE SERVICE AS DESCRIBED HEREIN, COULD
JEOPARDISE YOUR SAFETY AND INVALIDATE THE WARRANTY.
Your MAXWELL Windlass is a precision engineered product. Please read these instructions
carefully.
________________________________________________________________________
500 VW Windlass
2
_______________________________________________________________________
SPECIFICATIONS
PULL AT CHAINWHEEL
CHAIN SIZE
RATE AT NO LOAD
RATE AT NORMAL WORKING LOAD
225 kg Max (500 lbs)
Short Link Max 6mm (¼”)
25 m/min (80 Feet/min)
18-21 m/min (60-70 Feet/min)
POWER OPTIONS
Product Code
P100457
P100458
12 V D.C.
24 V D.C.
12 V
24 V
80 -120 Amps
40 - 60 Amps
CURRENT
Normal Working Load
SUPPLY CABLES
See Page 11
WEIGHT (Nett)
Product code
P100457
P100458
10.20 kg
10.20 kg
22.50 lb
22.50 lb
________________________________________________________________________
500 VW Windlass
3
_______________________________________________________________________
IMPORTANT
PERSONAL SAFETY WARNINGS
WHEN USING YOUR WINDLASS AT ALL TIMES PRACTICE GOOD SEAMANSHIP AND AVOID
ANY LIKELIHOOD OF INJURY OR ACCIDENT BY ADHERING TO THE FOLLOWING RULES.
AT ALL TIMES KEEP HANDS, FEET, LOOSE CLOTHING AND HAIR WELL CLEAR OF THE
WINDLASS.
NEVER USE THE WINDLASS UNDER POWER WITH THE LEVER INSERTED IN THE CLUTCH
NUT.
WHEN THE WINDLASS IS NOT IN USE, MAKE SURE THE WINDLASS IS ISOLATED FROM
THE POWER SUPPLY BY TURNING THE WINDLASS ISOLATOR SWITCH TO “OFF”.
NEVER OPERATE THE WINDLASS FROM A REMOTE STATION WITHOUT A CLEAR VIEW
OF THE WINDLASS AND HAVING MADE SURE THAT EVERYONE IS WELL AWAY FROM
THE WINDLASS.
IF YOUR WINDLASS DOES NOT HAVE A REMOTE CONTROL STATION AND IS OPERATED
FROM THE FOOTSWITCHES ONLY, ALWAYS IMMEDIATELY AFTER USE, TURN THE
WINDLASS ISOLATOR SWITCH TO “OFF”. THIS WILL PREVENT ACCIDENTAL WINDLASS
OPERATION IF YOU OR PASSENGERS ACCIDENTALLY STAND ON FOOTSWITCHES.
________________________________________________________________________
500 VW Windlass
4
_______________________________________________________________________
** IMPORTANT HINTS FOR SAFE USE OF WINDLASS **
BE SURE YOUR WINDLASS HAS BEEN CORRECTLY SPECIFIED AND INSTALLED, YOURS
AND OTHERS SAFETY MAY DEPEND ON IT. THE WINDLASS SHOULD BE USED IN
CONJUNCTION WITH A CHAINSTOPPER OF THE APPROPRIATE SIZE. FOR AUTOMATIC
OPERATION TO BE POSSIBLE, THE ANCHOR MUST BE SELF LAUNCHING.
MAXWELL WILL NOT IN ANY WAY BE HELD RESPONSIBLE FOR SELECTION OF A
WINDLASS BY OTHERS, INCLUDING DISTRIBUTORS AND AGENTS. IF IN DOUBT, SEND
FULL DETAILS OF YOUR CRAFT TO OUR SALES DEPARTMENT FOR APPRAISAL AND
WRITTEN RECOMMENDATION.
1. Run the engine whilst raising or lowering the anchor. Not only is this a safety
precaution, it also helps minimise the drain on the batteries.
2. Always motor up to the anchor while retrieving the chain. Do not use the Windlass to
pull the boat to the anchor.
3. If the anchor is fouled, do not use the Windlass to break it out. With the chainstopper
taking the load, use the boats engine to break the anchor loose.
4. Do not use the Windlass as a Bollard.
In all but the lightest conditions, engage the chainstopper after completing the anchoring
manoeuvre.
5. In heavy weather conditions, always use a heavy anchor snub from the chain directly to
a Bollard or Sampson Post.
6. DO NOT USE THE CHAINSTOPPER OR WINDLASS AS A MOORING POINT.
7. ALWAYS TURN THE ISOLATOR SWITCH “OFF” BEFORE LEAVING BOAT.
8. When using the Windlass DO NOT SWITCH IMMEDIATELY FROM ONE DIRECTION TO
THE OTHER WITHOUT WAITING FOR THE WINDLASS TO STOP AS THIS COULD
DAMAGE THE WINDLASS. Abuse is not covered by Warranty.
9. The Circuit Breaker and Isolator Switch Panel provides high current protection for the
main supply cables and also the means to isolate the circuit. When the Isolator Switch is
“ON” (red indicator light shows) the system can be activated at either the footswitches
or the remote control station. When the system is not being used, ensure that the
Isolator Switch is turned “OFF”.
10.Never proceed at speed with a bow mounted self launching anchor in position, without
first ensuring that your winch clutches are fully engaged, and having made fast the
anchor and engaged your chainstopper.
________________________________________________________________________
500 VW Windlass
5
_______________________________________________________________________
DO NOT DEPEND ON THE WINDLASS TO HOLD THE ANCHOR IN ITS BOW ROLLER. A
NYLON LINE SHOULD BE USED TO SECURE THE ANCHOR INTO ITS STOWED
POSITION WHEN UNDERWAY AND WILL NEED TO BE REMOVED BEFORE OPERATION
OF THE WINDLASS. ALTERNATIVELY, A PIN THROUGH THE BOW ROLLER AND THE
SHANK OF THE ANCHOR CAN BE USED FOR SECURING.
Most Windlass models have clutches for the manual pay out of ground tackle
in the event of a loss of power. It is therefore prudent to secure the anchor to the boat by
the means described above.
________________________________________________________________________
500 VW Windlass
6
_______________________________________________________________________
APPLICATION
THE MAXWELL 500 VW WINDLASS IS DESIGNED FOR ALL CHAIN SYSTEMS USING UP TO
A MAXIMUM CHAIN SIZE OF 6MM (¼”) SHORT LINK CHAIN.
** WARNING **
BE SURE YOUR WINDLASS HAS BEEN CORRECTLY SPECIFIED BEFORE INSTALLATION,
YOURS AND OTHERS SAFETY MAY DEPEND ON IT.
MAXWELL WILL NOT IN ANY WAY BE HELD RESPONSIBLE FOR SELECTION OF A
WINDLASS BY OTHERS, INCLUDING DISTRIBUTORS AND AGENTS. IF IN DOUBT, SEND
FULL DETAILS OF YOUR CRAFT TO OUR SALES DEPARTMENT FOR APPRAISAL AND
WRITTEN RECOMMENDATION.
Your Windlass should have a rating of approximately 3 times total combined weight of the anchor
and chain.
The ground tackle should have been selected taking into account:
a) Boat size, displacement and windage.
b) Conditions of operation such as maximum depth of water, type of bottom and weather
conditions.
c) Holding power and size of anchor, taking special note of the manufacturers’
recommendations.
CHAIN FIT
CORRECT FIT OF CHAIN TO CHAINWHEEL IS ESSENTIAL FOR THE WINDLASS TO
OPERATE PROPERLY.
A range of chainwheels is available to suit your Windlass.
The correct fit can only be guaranteed where a standard chain known to us is used. Alternatively
a 450mm (18”) or 12 links (whichever is longer) sample must be forwarded to us to match fit.
Where patterns to suit are not held by us we are able to manufacture to instructions and reserve
the right to charge cost thereof.
CHAINSTOPPER
THE WINDLASS SHOULD BE USED IN CONJUNCTION WITH A MAXWELL CHAINSTOPPER
OF THE APPROPRIATE SIZE.
________________________________________________________________________
500 VW Windlass
7
_______________________________________________________________________
INSTALLATION
WHERE TO LOCATE THE WINDLASS
The MAXWELL 500 VW Windlass operates in dual direction power UP/DOWN.
“UP” is clockwise rotation when looking down on the Windlass.
The deck plate should be mounted pointing in the direction of the incoming chain. This
arrangement allows the chain to have maximum engagement with the chainwheel.
The Windlass must be positioned to allow the chain to have a clear run from the fairlead or
bow roller on to the chainwheel.
The bow roller should have a vertical groove to suit the profile of the chain. This will align
the chain so that it enters the chainwheel without twisting.
If it can be arranged the chain locker bulkhead should pass between the chain outlet in the
deckplate and the Windlass gearbox. This will keep the gearbox, motor and wiring away form
flaying chain. Access for servicing from inside the cabin area can usually be arranged through a
locker.
The chain locker must be of such a size that the chain will heap up and feed out naturally
without fouling.
NOTE: Make sure you securely fasten the end of the chain to the boat.
** IMPORTANT **
FOR AUTOMATIC OPERATION TO BE POSSIBLE, THE ANCHOR MUST BE SELF
LAUNCHING. That is, once the Windlass is operated to reverse out the chain, the anchor must
free fall, or the bow roller arrangement be such that the anchor is automatically launched.
Allow access for conveniently connecting the supply lines under deck after the Windlass is
bolted in position.
It should be noted that the gearbox can be indexed through different positions in relation to
the deckplate (refer overall dimensionsdrawing). Be sure to select the most convenient position
and allow for the best run for the chain to clear the motor.
________________________________________________________________________
500 VW Windlass
8
_______________________________________________________________________
WHERE TO LOCATE THE FOOTSWITCHES
Careful consideration should be given to the possibility of accidental operation of footswitches
whilst operating the Windlass, particularly in Capstan warping of anchor rope or mooring line. It is
therefore recommended that footswitches are placed well beyond “arms reach” from the Windlass,
say a minimum of ¾ metre (30”).
THE BELOW DECK PORTION OF THE FOOTSWITCH SHOULD NOT BE EXPOSED TO
WATER OR WET ENVIRONMENT AND THE BREATHER HOLES MUST BE KEPT CLEAR.
Ideally, they should be external to the chain locker.
The arrows on the footswitches should be arranged to indicate the direction of operation.
WHERE TO LOCATE THE REVERSING SOLENOID
This unit is used ONLY when a Dual Direction control system is being installed. (Refer
drawing P101842/P101841). The Reversing Solenoid should be located in a dry area in close
proximity to the Windlass.
IT MUST NOT BE LOCATED IN THE WET ENVIRONMENT OF THE CHAINLOCKER.
Locating close by the Windlass considerably shortens the total length of the main power supply
conductors required.
WHERE TO LOCATE THE BREAKER/ISOLATOR PANEL
The Maxwell Breaker/Isolator Panel is used when either the Dual Direction system (Refer drawing
P101842/P101841) or the “Single Direction” System (Refer drawing P101844) is used.
The Breaker/Isolator Panel is selected to provide limited protection only for the motor and
full protection for the supply cables.
This unit also provides the means for isolating the electrical system from the battery (refer Drawing
P101841,P101842 and P101844).
This should be mounted in a convenient and accessible dry location within 1.8 metres (72”)
of cable length from battery.
This equipment or equivalent is mandatory to meet U.S.C.G. requirements.
WHERE TO LOCATE THE CONTROLS
The remote control stations can be positioned as required, i.e. Bridge, Helm, Cockpit or Foredeck
to suit your requirements.
Mount the panels where the terminals project into a dry area and if mounted in an area where
the face is exposed to the weather, i.e. Fly Bridge, the mounting must be bedded down with
sealant.
They may be wired directly to, or linked together in series to the Reversing Solenoid (Refer
P101841/P101842).
________________________________________________________________________
500 VW Windlass
9
_______________________________________________________________________
CONTROL CIRCUITS
Footswitches (if required) and remote control circuits are to be wired using 1.5mm²
(16AWG) cable.
A manually resettable ignition proof fuse or breaker is to be fitted within 1 metre (40”) of the
power source on line 2 of the control cable conductor.
The above requirements are mandatory to meet USCG, ABYC, and NMMA.
After all connections have been made and system tested, seal terminals against moisture
by spraying with CRC2043 “Plasti-Coat”, CRC3013 “Soft Seal” or CRC2049 “Clear Urethane”.
Refer to drawing P101842, P101841 or P101844 for wiring details.
________________________________________________________________________
500 VW Windlass
10
_______________________________________________________________________
MAIN ELECTRICAL SYSTEM
Cable lengths given are from the battery terminal to the terminal on the windlass motor via the
solenoid box and back to the battery.
Where a portion of cable runs through the engine room, a size increase should be made as
indicated.
After all connections have been made and system tested, seal terminals against moisture by
spraying with: CRC2043 “Plasti-Coat”, CRC3013 “Soft Seal” or CRC2049 “Clear Urethane”.
All installations must be carried out in accordance with USCG, ABYC, NMMA or other local
electrical requirements.
Recommended conductor sizes allow for a maximum 10% voltage drop over the total length
12v systems
Total Cable Length From Battery
to Winch Back to Battery
Up to 10 m (33’)
10m – 15m (33’ – 49’)
7m – 20m (49’ – 65’)
10m – 25m (65’ – 82’)
Cable Length
mm²
AWG
14
6
22
4
26
3
34
2
Engine room Size
Correction
mm²
AWG
22
4
-
24v systems
Total Cable Length From Battery
to Winch Back to Battery
Up to 25 m (82’)
Cable Length
mm²
AWG
8.5
8
Engine room Size
Correction
mm²
AWG
-
* Engine Room size correction is based on the ambient temperature of the engine room to
be 60° C.
________________________________________________________________________
500 VW Windlass
11
_______________________________________________________________________
PREPARATION OF MOUNTING
Standard units will accommodate deck thickness up to 55mm (2 1/6”).
** IMPORTANT **
1. IT IS IMPERATIVE THAT THE DESIGNER/INSTALLER ENSURES THAT THE DECK AND
UNDERDECK PAD ARE OF SUFFICIENT THICKNESS AND STRUCTURAL STRENGTH
TO SUSTAIN THE LOADS CAPABLE OF BEING IMPOSED ON OR BY THE WINDLASS.
THE UNDERDECK PAD SHOULD SPREAD THE LOADS AS WIDELY AS POSSIBLE AND
IF USE CAN BE MADE OF A BULKHEAD OR CROSS MEMBER TO PROVIDE
STIFFENING, THIS SHOULD BE DONE.
2. IT IS VERY IMPORTANT THAT THE ABOVE DECK PAD TOP SURFACE OR DECK AREA
COVERED BY THE GASKET SUPPLIED, AND THE UNDERDECK AREA AGAINST WHICH
THE LOAD WASHERS SEAT, ARE SMOOTH, FLAT AND GENERALLY PARALLEL.
3. The gasket supplied with the Windlass can be used for accurately spotting the mounting holes
and marking the cut outs. After spotting, bore the necessary holes. These must be drilled
parallel to each other and square to the mounting face.
DON’T SPOT THROUGH THE GASKET WITH THE DRILL. THIS WILL DAMAGE THE
GASKET.
NOTE: For boats of steel or aluminium construction, it is very important that the deckplate is
insulated from the deck with the non conductive gasket provided that the mounting studs pass
through insulators and that the underdeck fixings are insulated from the deck. It is also important
that the anchor and chain is insulated from the hull, including rubber lining, the chain locker and
insulating the fixing for the end of the chain to the hull.
Without these precautions severe electrolysis can occur.
It is not necessary to separately earth the Windlass, as the electric motor is of the isolated earth
type.
________________________________________________________________________
500 VW Windlass
12
_______________________________________________________________________
PREPARING THE WINDLASS
4. Remove the Windlass from the packaging.
Refer to the appropriate assembly drawing provided for the Windlass being installed and
proceed as follows:
5. Remove deckplate studs, washer and nuts.
MOUNTING THE WINDLASS
** ATTENTION**
Please note, when installing winch and in particular the chain wheel. The shaft and bronze
clutch cones MUST be coated in Shell Nautilus NLG12 Marine Grease, Castrol Boating
Grease, Valvoline Val Plex EP or equivalent grease. See “Typical Greasing Instructions”.
6. Clear the underside of the deckplate. Make sure the mounting area on the deck is properly
prepared and is clean.
7. Use the Deck Cutout Details drawing as a guide for marking and cutting the holes.
Tip: On GRP boats, running the drill in reverse first will reduce chipping of the gel coat.
Using hole saws, cut the holes for the spacer tube and chain pipe.
8. On GRP or wooden decks, seal the edges of the holes with epoxy to avoid ingress of moisture.
9. Remove the gearbox from the spacer tube by undoing the Locknut and quick-release clip. With
gearbox held horizontally, check that oil is showing half way up the sight glass. If necessary,
top up with SAE 90 (Shell Omala 320, Castrol Alpha SP320 or equivalent), by removing the
sight glass and adding the required amount. DO NOT OVER FILL!
10. Use the gasket supplied to seal the windlass to the deck. For aluminium boats fit a nonconductive gasket to insulate the deckplate from the deck to prevent electrolysis.
11. Fasten the windlass to the deck using the nuts and washers supplied.
Tighten the nuts progressively and evenly. Do NOT use power tools.
Make sure the installation is firm, but do not over tighten the nuts.
12. Smear a coating of grease on the shaft and spacer tube. Fit the
gearbox/motor assembly to the bottom of the spacer tube to engage with
the teeth on the spacer tube. Orientate the motor away from the incoming
chain and then tighten the plastic locknut by hand.
Note:
If the unit is going to be mounted in such a way, that it may be tilted,
ensure the drainage slot on the gearbox is at the lowest point to prevent
excess water etc. sitting around the seals. (See also gearbox assembly
drawing)
Drainage Slot
________________________________________________________________________
500 VW Windlass
13
_______________________________________________________________________
13. Rotate the shaft by hand (or by using the manual crank handle) to align
the keyway in the shaft with the keyway in the gearbox. Insert the key into
the keyway.
14. Fit the quick-release clip into the groove in the bottom of the shaft to
secure the key. Make sure the eyelets are facing down and away from the
keyway.
15. When tightening the cables to the motor, ensure the lower nut is secure
against turning when tightening the upper nut. This will prevent damage
occurring within the motor.
Upper Nut
Lower Nut
ASSEMBLING THE CHAIN WHEEL
Refer Fig 2 – 500 VW windlass assembly drawing
1. With a pen knife or similar, carefully remove the cap.
2. Remove the screw and retaining washer.
3. Remove the clutch nut, drum and upper clutch cone.
4. Remove the chain wheel.
5. Grease the two clutch faces of the chain wheel.
6. Assemble the components in the reverse order they were removed and ensure the side of the
chain wheel with the two holes facing upward.
IMPORTANT NOTE TO BOAT BUILDERS
After completing installation we suggest that you spray the top works of the winch with CRC3097
“Long Life”.
Also protect the winch by wrapping with plastic film and tape.
Experience has shown that on long ocean deliveries as deck cargo sulphur from the ships
exhausts settles and severely damages the chrome plating and stainless steel by breaking down
the chrome oxide protective film.
PLEASE LET YOUR CUSTOMER RECEIVE THE WINDLASS FROM YOU IN THE SAME TOP
QUALITY CONDITION THAT YOU RECEIVED IT FROM US.
________________________________________________________________________
500 VW Windlass
14
_______________________________________________________________________
OPERATION OF THE CONTROL SYSTEM
DUAL DIRECTION SYSTEM (Refer drawing P101842 or P101841)
This system provides means of controlling the Windlass via a Reversing Solenoid which is
actuated by a self centering UP/DOWN toggle switch type remote control or the footswitches.
An indicator light on the remote control glows when the power is “ON” and the system can be
operated.
SINGLE DIRECTION SYSTEM (Refer drawing P101844)
Turning the Isolator Switch “ON”, on the panel, readies the system for use. The windlass can now
be operated by the footswitch.
WARNING: When using the Windlass DO NOT SWITCH IMMEDIATELY FROM ONE
DIRECTION TO THE OTHER WITHOUT WAITING FOR THE WINDLASS TO STOP AS THIS
COULD DAMAGE THE WINDLASS. Abuse is not covered by Warranty.
The Breaker/Isolator Panel provides protection for the main supply cables and means to
isolate the circuit.
WARNING: When the Isolator Switch is “ON” the system can be activated at either the
footswitches or the remote.
When the system is not being used, ensure that the Isolator Switch is turned “OFF”.
WARNING: This system provides protection for the motor from excessive current and
short circuit. It does not provide protection against excessive heat build up due to
prolonged operation or repeated operation under overload conditions. Make sure you give
the motor time to cool. Abuse is not covered by Warranty.
________________________________________________________________________
500 VW Windlass
15
_______________________________________________________________________
OPERATING THE WINDLASS
LOWERING THE ANCHOR UNDER POWER
Proceed as follows:
1. Insert the lever into the clutch nut and check that the clutches are tightened down firmly by
turning the nut clockwise.
REMOVE THE LEVER
2. The Windlass may be operated under power by using the switch on the Remote Control
Station. Hold the switch “DOWN” until the required amount of chain is out.
RAISING THE ANCHOR UNDER POWER
Proceed as follows:
1. Carry out step 1 above.
2. The Windlass may be operated under power by using the switch on the Remote Control
Station. Hold the switch “UP” until the required amount of chain has been brought in.
Care should be taken when docking the anchor. Jog in the last metre (few feet)
carefully seating the anchor home.
LOWERING THE ANCHOR UNDER MANUAL CONTROL
This method is generally used in tight anchorages or an emergency situation, where a fast dump
is required.
Proceed as follows:
1. Insert the lever into the clutch nut.
Standing well clear, slowly back off the clutch nut. This will release the chain. Regulate the
speed at which the chain goes out by tightening to slow, or easing to increase.
** CAUTION **
DO NOT ALLOW THE CHAINWHEEL TO FREE WHEEL AS THIS WILL ALLOW
DANGEROUSLY HIGH CHAIN SPEEDS TO BUILD UP.
2. When the required amount of chain is out, tighten the clutch nut firmly, remove the lever and
stow.
________________________________________________________________________
500 VW Windlass
16
_______________________________________________________________________
USING THE WARPING DRUM
The vertical Capstan can be used independently of the chainwheel.
This is ideal for handling mooring lines, docking lines or a second anchor.
To use proceed as follows:
1. Insert the lever into the clutch and back off in a counter clockwise direction until it stops.
The capstan will now operate whilst the chainwheel remains stationery.
2. Take several turns of line around the drum in a clockwise direction.
Whilst pulling on the tail have someone operate the Remote Control Station by holding the
switch “UP”. The capstan will rotate in a clockwise direction.
Increasing or decreasing the load on the tail, whilst the Remote switch is held, will
increase/decrease the rate at which the line will be hauled in.
Extra turns around the drum will increase the grip and require less load on the tail.
CAUTION: ENSURE THAT FOOTSWITCH IS NOT OPERATED ACCIDENTALLY WHILST
EXTRA TURNS ARE BEING TAKEN. KEEP FINGERS CLEAR.
DON’T PUT SO MANY TURNS ON THE DRUM THAT EASING THE LOAD ON THE TAIL
WILL NOT ALLOW THE ROPE TO SLIP ON THE DRUM.
________________________________________________________________________
500 VW Windlass
17
_______________________________________________________________________
MAINTENANCE
Carrying out the following simple maintenance procedures will provide years of trouble-free
service from the windlass and will ensure that the warranty remains valid.
Service Intervals
Every trip
3 monthly
12 monthly
3 yearly
Ensure clutch is adjusted correctly
Strip and grease clutch
Remove windlass components, grease
with suitable lubricant
Split gearbox from spacer tube, clean and
re-grease mating faces
Spray fresh water into drainage slot on
gearbox, to breakdown and flush away any
build up of salt/debris, that may have
accumulated
Service motor
Remove gearbox, replace oil and seals
Recommended Lubricants
Gearbox Oil:
Capacity: 70ml (2.4 fl oz)
Type: SAE viscosity grade 90 -110,
( e.g. Shell Omala 320, Castrol Alpha SP 320 or other
approved equivalent)
Mainshaft & Bearing:
Marine Grease, Lithium based or Lithium complex based, e.g.
Duckhams ‘Keenol’; ‘Castrol LMX’. Do not use soap based grease.
Above deck components: CRC 3097 Spray.
Topworks
The above-deck parts of the windlass should be washed down with fresh water regularly.
Every three months, remove the chainwheel set and lubricate the clutch faces and shaft bore
inside the deckplate with marine grease.
Gearbox
The gearbox is a self-contained sealed unit.
We recommend that the gearbox be removed and serviced by an authorised Maxwell service
technician every three years. Visit our website (www.maxwellmarine.com) for a list of service
centres and agents.
Check the gearbox oil level every six months using the sight glass.
________________________________________________________________________
500 VW Windlass
18
_______________________________________________________________________
Motor
For maximum protection, we recommend that the motor and electrical connections be sprayed
periodically with CRC Soft Seal.
The motor should be serviced by a qualified electrician annually (or more frequently in commercial
applications).
ORDERING SPARE PARTS AND TECHNICAL SUPPORT
Please refer back cover for your nearest MAXWELL distributor
or visit our website www.maxwellmarine.com.
When ordering spare parts and for technical support, please quote the following:
Windlass Model…………………………….
Serial Number………………………………
Power Supply 12V, 24V
Drawing Reference Number……………..
Item No………………………………………
Part No………………………………………
Description…………………………………
Quantity Required…………………………
________________________________________________________________________
500 VW Windlass
19
_______________________________________________________________________
Typical Greasing Instructions
Note: Picture shows typical winches, greasing instructions apply to all types using this motor
gearbox and spacertube arrangement.
Apply
grease here
Apply
grease here
Apply
grease here
Apply
grease here
Apply
grease here
Apply
grease here
Apply
grease here
Apply
grease here
Grease must be applied to motor face, gearbox locating lugs,
spacer tube, gearbox thread, shaft and clutch cone faces where shown.
Use CRC 3097 (or equivalent) spray to coat all under deck components to help guard against
corrosion. Failure to do so will void warranty.
Apply
grease here
Apply
grease here
Apply
grease here
Apply
grease here
Apply
grease here
Apply
grease here
________________________________________________________________________
500 VW Windlass
20
_______________________________________________________________________
________________________________________________________________________
500 VW Windlass
21
_______________________________________________________________________
________________________________________________________________________
500 VW Windlass
22
_______________________________________________________________________
________________________________________________________________________
500 VW Windlass
23
_______________________________________________________________________
________________________________________________________________________
500 VW Windlass
24
_______________________________________________________________________
________________________________________________________________________
500 VW Windlass
25
_______________________________________________________________________
500 VW Windlass Parts
Component
description
Item No.
Qty
Part to order
Includes items
1
Cap
1
P101651
2
Label - 500
1
3356
3
Clutch Nut 500
1
P101652
2,3
4
Screw - 3/8" x 1"
1
P101651
1,4,5,9,22(x2)
5
Washer
1
P101651
1,4,5,9,22(x2)
6
Drum 300 500 VC VW
1
6016
7
Clutch Cone
2
P101653
8
Chain Wheel
1
3132
9
A Ring Seal V28
1
P101651
1,4,5,9,22(x2)
10
Retaining Collar
1
P101663
10,26,30
11
Screw M6x12
1
P101654
10,11,12,13,14,16(x3),17(x3),18(x3),19(x3),26,30
12
Spring Washer M6
1
P101654
10,11,12,13,14,16(x3),17(x3),18(x3),19(x3),26,30
13
Stripper Arm 500 VW
1
P101654
10,11,12,13,14,16(x3),17(x3),18(x3),19(x3),26,30
14
Deckplate 300 500 VC VW
1
P101654
10,11,12,13,14,16(x3),17(x3),18(x3),19(x3),26,30
15
Gasket 300 500 VC VW
1
6474
16
Stud M8x83
3
P101654
10,11,12,13,14,16(x3),17(x3),18(x3),19(x3),26,30
17
Washer
3
P101654
10,11,12,13,14,16(x3),17(x3),18(x3),19(x3),26,30
18
Spring Washer
3
P101654
10,11,12,13,14,16(x3),17(x3),18(x3),19(x3),26,30
19
Nut M8
3
P101654
10,11,12,13,14,16(x3),17(x3),18(x3),19(x3),26,30
20
Clutch Nut Lever
1
3381
20
21
Shaft 500 VW 50TDC
1
6475
21
22
Key
2
P101651
1,4,5,9,22(x2),
23
Key 6.35x6.35x57
1
P101619
23,24,25,35
24
Circlip
1
P101619
23,24,25,35
25
Quick Change Clip
1
P101619
23,24,25,35
26
Bearing
1
P101663
10,26,30
27
Locknut
1
P100088
27,28,29
28
O-Ring
1
P100088
27,28,29
29
Collar
1
P100088
27,28,29
30
Spacer Tube 300 500 50TDC
1
P101663
10,26,30
31
Gearbox 500 1500 56:1
1
P102730
31
32
Bolt - Hex Hd M8x25
2
P12487
32(x2),33(x2),34(x2),35(x1)
33
Washer - Spring - M8
2
P12487
32(x2),33(x2),34(x2),35(x1)
34
Washer - Flat - M8
2
P12487
32(x2),33(x2),34(x2),35(x1)
35
O-Ring
1
P12487
32(x2),33(x2),34(x2),35(x1)
36
Tension Pin
1
P101619
23,24,25,35
PM Motor DM717M 12V
1
P10068
36
PM Motor DM718M 24V
1
P10069
36
38
Bush
1
SP3518
38
39
Plug
1
SP3519
39
37
1,4,5,9,22(x2),
2
6
7(x2)
8
15
________________________________________________________________________
500 VW Windlass
26
_______________________________________________________________________
Drainage
Slot
Serial number
location
________________________________________________________________________
500 VW Windlass
27
_______________________________________________________________________
Gearbox 56:1 Parts
Item No.
Component description
Qty
Parts to order
Includes items
40
Oil Seal
2
P90006
40(x2),42,45,46,54
41
Gearbox Top
1
P101624
41,43
42
O - Ring
1
P90006
40(x2),42,45,46,54
43
Bush
2
3145
43
44
Worm Wheel 56T
1
3584
44
45
Sight Glass
1
P90006
40(x2),42,45,46,54
46
O-Ring
1
P90006
40(x2),42,45,46,54
47
Wormbox
1
P101625
43,47
48
Capscrew - M6 x 40
4
SP0159
38
49
Bearing
1
P90007
49,51,52,53
50
Worm 56:1
1
3400
51
Bearing
1
P90007
49,51,52,53
52
Circlip
1
P90007
49,51,52,53
53
Circlip
1
P90007
49,51,52,53
54
Oil Seal
1
P90006
40(x2),42,45,46,54
50
________________________________________________________________________
500 VW Windlass
28
LIMITED WARRANTY
Warranty: Maxwell Marine International Ltd provides a three year limited warranty on all windlasses for pleasure boat usage, and a one year limited
warranty for those systems used on commercial or charter vessels. Warranty, service and parts are available around the world. Contact your
nearest Maxwell office for a complete list of service centres and distributors.
This warranty is subject to the following conditions and limitations:
1.
This Warranty will be null and void if
(a) there is any neglect or failure to properly maintain and service the products.
(b) the products are serviced, repaired or maintained improperly or by unauthorised persons.
(c) loss or damage is attributed to any act, matter or omission beyond the reasonable control of
Maxwell or the purchaser.
2.
Maxwell’s liability shall be limited to repair or replacement (as determined by Maxwell) of the goods or parts defective in materials or
workmanship.
3.
Determination of the suitability of the product and the materials for the use contemplated by the buyer is the sole responsibility of the buyer,
and Maxwell shall have no responsibility in connection with such suitability.
4.
Maxwell shall not be liable for any loss, damages, harm or claim attributed to:
(a) Use of the products in applications for which the products are not intended.
(b) Corrosion, wear and tear or improper installation.
(c) Improper use of the product.
5.
This Warranty applies to the original purchaser of the products only. The benefits of the Warranty are not transferable to subsequent
purchasers.
6.
Maxwell shall not be responsible for shipping charges or installation labour associated with any warranty claims.
7.
There are no warranties of merchantability, fitness for purpose, or any other kind, express or implied, and none shall be implied by law. If
any such warranties are nonetheless implied by law for the benefit of the customer they shall be limited to a period of three years from the
original purchase by the user.
8.
Maxwell shall not be liable for consequential damages to any vessel, equipment, or other property or persons due to use or installation of
Maxwell equipment.
9.
This Warranty sets out your specific legal rights allowed by Maxwell; these may be varied by the laws of different countries. In addition, the
purchaser may also have other legal rights which vary from country to country.
10.
To make a claim under this Warranty, contact your nearest Maxwell Marine office or distributor. Proof of purchase and authorisation from
Maxwell will be required prior to any repairs being attempted.
To be eligible for warranty protection, please either complete
the form below at the time of purchase and return it to the
appropriate retailer or supplier of the goods,
or fill out the electronic Warranty Form on our website,
www.maxwellmarine.com
Purchaser
Name:
Telephone:
Address:
Facsimile
Supplier / Dealer
Name:
Telephone:
Address:
Facsimile
Windlass Model
Date of Purchase
Serial Number
Boat Type
Windlasses Supplied
With boat
Name
L.O.A.
Fitted by boat yard/dealer
Built by
Purchased from dealer/chandler