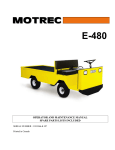
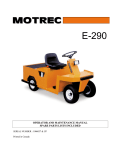
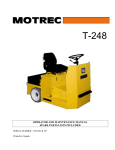
1
E-290HD
OPERATOR AND MAINTENANCE MANUAL
SPARE PARTS LISTS INCLUDED
SERIAL NUMBER : 1038265 & UP
Printed in Canada
One Year Limited Warranty
Effective April 25, 2005, MOTREC, Inc. (MOTREC) hereby warrants to the Original Retail Purchaser (Owner) that any of its
vehicles shall be free from any defect in materials for a period of 90 DAYS while in the possession of such Original Retail
Purchaser. This warranty IS NOT TRANSFERABLE to any subsequent Buyer.
The warranty period is extended to one year or one thousand (1,000) hours, which ever first occurs, on the electric motor,
differential (parts that bathe in oil) and the electronic speed controller. MOTREC makes no warranty or representation with
respect to the internal combustion engine, tires and batteries, since their respective manufacturers cover such parts.
Accessories (light, gage, horn, etc), electrical contacts (switch, solenoid, contactor, relay), diodes & fuses, belts & pulleys,
filters & spark plugs, lubricants, brake linings & shoes, brake drums & discs, seals, seats, trim and other items subject to
wear are not included in this warranty; nor is any item that in MOTREC sole opinion, shows evidence of neglect, misuse,
abuse, collision or alteration.
This warranty shall not apply to normal maintenance requirements as described in the User Manual, and to damages during
shipment. The latter is the carrier's responsibility. No compensation will be allowed for delays.
To initiate warranty coverage on any MOTREC vehicle, the Dealer must complete and return the “Sales/Installation Report”
to MOTREC within 30 days after delivery to the Original Retail Purchaser; or within 90 days after the delivery date to the
Dealer, which ever occurs first. Failure to follow these procedures will result in considering the warranty coverage effective
as of the shipment date from the factory.
The defective vehicle must be returned, at the Owner's expense, to an authorised MOTREC Dealer within 30 days after
failure. The Owner will not be charged for parts and labour required for warranty repairs, which must be performed by an
authorised MOTREC Dealer only. The vehicle will be returned at the owner’s expense. The Warranty Claim Forms must be
completed and returned with the defective part(s) to MOTREC within 30 days after repair was done. No compensation will be
allowed for damages caused by vehicle downtime.
It is the responsibility of the owner of the vehicle to make sure that the driver is properly trained and instructed in the safety
features and operation of the vehicle, including vehicle stability, as required by OSHA and ANSI-B56. Operators shall read,
understand and follow the safety and operating instructions in MOTREC Manual before driving the vehicle. Operators shall
not be permitted to drive the vehicle unless a complete and adequate training has been provided. Driving a vehicle
constitutes a hazard. The driver is responsible for the control of the vehicle while driving and must always evaluate and care
for all peculiar situations that he or she may meet while driving. The driver assumes the inherent hazards related to this
activity. The vehicle is designed for off-road use only. MOTREC disclaims any liability for incidental or consequential
damages, to include, but not be limited to, personal injury or property damage arising from vehicle misuse, lack of
maintenance or any defect in the vehicle.
It is the responsibility of the Owner of the vehicle to make sure that the service technicians are properly trained as required
by OSHA and ANSI-B56. Service technicians shall read, understand and follow instructions in the MOTREC manual before
servicing the vehicle. Only qualified and authorized personnel shall be permitted to maintain, repair, adjust and inspect the
vehicle.
MOTREC prohibits, and disclaims responsibility for, any vehicle modification altering the weight distribution and stability,
increasing the speed or affecting the safety of the vehicle. Such modifications can cause serious personal injury or property
damage for which MOTREC disclaims any responsibility.
For Owners that are located outside North America, the warranty period starts the date of shipment from the factory, and the
defective parts must be returned at the Owner's expense to MOTREC prior to warranty repair.
21/01/2008
Table of contents
TABLE OF CONTENTS
INSTRUCTIONS
SAFETY WARNINGS FOR OPERATORS
OPERATING INSTRUCTIONS
MAINTENANCE
SAFETY WARNINGS FOR SERVICE TECHNICIANS
DECALS AND LABELS
PERIODIC MAINTENANCE CHECKLIST
ACCELERATOR
BELT INSTALLATION AND TENSIONING
HYDRAULIC BRAKES
FRONT AXLE AND STEERING
BATTERY MAINTENANCE
BATTERY CHARGER
ELECTRICAL TROUBLESHOOTING
CURTIS SPEED CONTROLLER
WIRING : STANDARD CONFIGURATION
DIAGNOSTICS AND TROUBLESHOOTING
TROUBLESHOOTING CHART
LED DIAGNOSTICS
PROGRAMMING PARAMETERS – E-290HD, E-348, E-480, E-500, E-660, T-248, T-448
SPARE PARTS
BODY
FORD F-150 DIFFERENTIAL
BRAKE CONTROLS
STEERING
MOTOR AND DRIVE
ELECTRICAL DIAGRAM – SEPEX MAIN CIRCUIT
ACCESSORIES – DC/DC CONVERTER
BUILT-IN /PORTABLE 25A CHARGER
BUILT-IN/PORTABLE CHARGER MODEL 16510
DELTA-Q HF CHARGER
MOTREC ILLUSTRATED ACCESSORIES
CONVERTER INSTALLATION
BATTERY DISCHARGE INDICATOR (HOBBS)
-3-
4
5
6
7
8
10
11
12
13
14
15
16
18
19
22
25
26
27
28
29
30
31
32
34
35
37
38
39
41
42
43
46
48
49
Instructions
INSTRUCTIONS
-4-
Instructions
SAFETY WARNINGS FOR OPERATORS
FAILURE TO OBEY THE FOLLOWING SAFETY RULES MAIN RESULT IN SEVERE INJURY.
It is the responsibility of the owner of this vehicle to train operators to ensure that they understand the operating
characteristics of this vehicle, including training in vehicle stability, and obey the following safety rules and
guidelines. Owner shall comply with OSHA and ASME/ANSI B56.8 & B56.9 regulations for vehicle use,
safety rules, operator training and certification. Do not drive this vehicle unless you are a qualified operator.
Do not drive this vehicle under the influence of drugs or alcohol.
Do not drive this vehicle on public roads and highways. This vehicle is designed to be driven in buildings.
The electrical system of this vehicle will make sparks which can ignite inflammable materials. Never use the
vehicle in hazardous areas where there are inflammable materials, explosive dust or fumes in the air.
Have your vehicle inspected regularly by trained personnel, and cease operation if a malfunction occurs.
Do not open battery compartment to prevent battery explosion, acid splashing, severe damage to eyes or skin.
Do not open motor compartment. Keep clear from moving, rotating(wheels, sheaves, etc) or lifting parts.
Never carry more passengers than number allowed for this vehicle. Wait until all occupants are seated and
holding on before moving. Always keep all body parts inside vehicle. Keep both hands on steering wheel.
Do not exceed the vehicle cargo load capacity and gross trailing weight capacity, rated for flat hard even surface.
Different operating conditions such as loose terrain or ramps reduce vehicle capacity.
Avoid loose, unbalanced or top-heavy loads to keep a good stability and prevent overturn. Do not load cargo that
can fall off the vehicle. Do not carry cargo that is longer, wider or higher than this vehicle.
Always depress slowly the accelerator for smooth acceleration. Avoid stunt driving or horseplay.
Avoid sharp turns, always slow down before turning, to prevent vehicle overturn or trailer jack knife. Vehicle is
more sensitive to overturn and jack knife when traveling on inclines or when carrying a heavy load.
Always drive straight up and down the face of an incline, never across the face, to prevent overturn and trailer
jack knife. Drive slower and start applying brakes sooner on inclines to adjust for longer stopping distance.
Use extra care and drive slowly in reverse, in congested areas or on wet or slippery ground.
Keep to the right under normal conditions. Maintain a safe distance from all objects.
Slow down and sound the horn when approaching a corner or other blind intersections.
Before leaving the vehicle, park on a level ground flat surface, turn off all switches, set the forward/reverse
switch to neutral, set the parking brake, remove the key. Do not park the vehicle on an incline.
Before battery charging, park the vehicle in a well ventilated area set for. Do not operate it when charging. To
interrupt a charging cycle, disconnect the AC plug; disconnecting the DC plug or a battery terminal, or operating
the vehicle, could damage the charger and produce a spark, battery explosion and acid splashing.
Use another driver to steer this vehicle while it is towed. Be sure the driver uses brakes when you slow or stop
the towing vehicle. Do not exceed 5 MPH or carry any passenger while towing this vehicle.
-5-
Instructions
OPERATING INSTRUCTIONS
It is the responsibility of the owner of this vehicle to ensure that the operator understands the
operating characteristics of this vehicle, and obeys the safety instructions (ANSI B56).
Do not drive this vehicle unless you are a certified operator as required by OSHA.
BEFORE USING VEHICLE
Before turning on key switch: set to neutral, check for any visible damage, check brake pedal.
BATTERIES
Never open the battery compartment unless you have received proper training for battery maintenance.
Batteries emit explosive hydrogen gas that can be ignited by a spark or loose terminal. Battery acid
causes severe damage to eyes or skin. Flush the contaminated area immediately with water.
BATTERY CHARGER
Park the vehicle in a well ventilated area for battery charging. Most battery chargers come with an
electronic control that starts when the charger is plugged and stop when the battery is fully charged. To
interrupt the charging cycle, disconnect the AC-plug, do not disconnect the DC plug.
BATTERY DISCHARGE INDICATOR
The green light moves from right to left as batteries are being discharged. When the green light is at the
last position on the left the batteries must be recharged. A flashing light warns the operator that further
discharge will damage batteries. See HOBBS indicator instructions
KEYSWITCH
Depress brake pedal and turn the key switch clockwise for on position. Always turn off all switches, set
the F/R selector to neutral, set the parking brake, remove the key before leaving the vehicle.
HORN
Depress the horn button on the steering column or handle bar.
F/R SWITCH
Three positions with neutral at center. Depress the front part of the rocker switch for forward direction.
Depress the rear part of the rocker switch for reverse direction. Always set switch to neutral, turn off all
switches, set the parking brake, remove the key before leaving the vehicle.
ACCELERATOR PEDAL
It is designed for right foot operation only, and controls the speed of the vehicle.
FOOT BRAKE PEDAL
It is designed for right foot operation only. The brake force is proportional to the pressure on the pedal.
PARKING BRAKE
Pull handbrake lever to apply. Never park the vehicle on an incline. Always turn off all switches, set
the F/R selector to neutral, set the parking brake, remove the key before leaving the vehicle.
-6-
Maintenance
MAINTENANCE
-7-
Maintenance
SAFETY WARNINGS FOR SERVICE TECHNICIANS
FAILURE TO OBEY THE FOLLOWING SAFETY RULES MAIN RESULT IN SEVERE INJURY.
Owner shall comply with OSHA and ASME/ANSI B56.8 & B56.9 regulations for vehicle maintenance.
Only qualified and authorized personnel shall be permitted to maintain, repair, adjust and inspect
carriers, vehicles, tractors, and batteries.
Before any maintenance work, park the vehicle on flat level surface, turn off all switches, remove key,
lift wheels off the ground and secure with jack stands of adequate capacity. Don’t connect charger.
Keep clear from moving parts such as tires, sheaves and motor.
Follow the maintenance instructions applicable to the type of repair, maintenance, or service.
Always wear a face shield and gloves when working around batteries.
Before opening the battery compartment, disconnect the charger, turn off all switches and remove the
key. Batteries emit highly explosive gases which greatly increase when charging; do not disturb
connections or produce sparks around batteries to avoid a battery explosion and acid splashing. Battery
acid causes severe damage to eyes or skin. Flush contaminated area immediately with water.
Use insulated tools to avoid sparks that can cause battery explosion and acid splashing.
Use two counteracting tools, double-wrench technique, when disconnecting or tightening terminals on
the battery and the speed controller to avoid cracking the terminal or battery post welds.
Before cleaning or replacing a battery, charger, speed controller, contactor, relay, diode, or any other
component in the power circuit, always disconnect the charger, turn off all switches, remove the key,
wear a face shield and gloves, identify battery polarity and disconnect battery leads, discharge the
capacitor in the controller with a 10 ohms, 25 W resistor for a few seconds across B+ and B-.
After cleaning, the power must not be reapplied until terminal areas are thoroughly dry.
On EE-Rated vehicles make sure that the control box is sealed, the static strap makes good contact with
the ground, the motor is sealed by bands, the cable protectors are properly installed.
Keep cables and wires clear from mechanical and rubbing action. Make sure that cable insulation is
free from cutting or visible damage. Make sure that EE-Rated cable protectors are properly installed.
Before replacing a fuse or circuit breaker, identify the cause of failure and repair.
Programmable controllers must be programmed using the parameter settings in this service manual,
before connecting the motor, to avoid sudden vehicle movement and accident.
-8-
Maintenance
Do not try to increase motor speed by changing parameter settings in the speed controller; it can cause
accident and severe damage to the motor.
SEPEX speed controls are protected by a diode in the power circuit to filter inductive loads in the event
of a sudden power interrupt. Some speed controllers require a diode to filter inductive loads on the KSI
input. Removing the diodes will cause the speed control failure.
Before resuming maintenance operations, inspect safety warnings stickers and replace any if damage is
found and part of the text can’t be read.
-9-
Maintenance
DECALS AND LABELS
! CAUTION !
The images included in this section depict the decals/markings installed on the vehicle. It is of
the utmost importance that theses decals/markings remain unaltered and readable. Else, the
sticker or the part baring the marking has to be replaced.
Dashboard security warning label:
General security warning label:
Respectively, key switch markings, forward/reverse selector markings and light switch marking:
- 10 -
Maintenance
PERIODIC MAINTENANCE CHECKLIST
! WARNING !
Maintenance operations must be made by properly trained service technicians.
Keep clear from moving parts such as tires, sheaves and motor.
Check for all EE protections, when applicable, and keep cables and wires clear from mechanical and rubbing action
Batteries contain sulphur acid that can cause severe burns on skin or eyes.
When working around batteries, wear acid proof protective equipment: face shield and gloves.
Use electrically insulated tools to avoid sparks that can cause battery explosion.
Before any maintenance work, park the vehicle on a flat level surface, turn off all switches, remove the key, lift the wheels off the
ground and secure with jack stands of adequate capacity, identify and disconnect battery leads. Don’t connect the charger.
PERIOD DAY
CHECK/PERFORM
HOURS
MECHANICAL DAMAGE, OIL LEAKS
X
REVERSE ALARM, DEADMAN SWITCH
X
STATIC STRAP, min 2” contact with ground
X
TIRE PRESSURE, pressure rating on tire
CHECK/FILL BATTERIES, add distilled water to cover
plates. Fill to recommended level after batteries have
been fully charged.
WARNING DECALS & MARKINGS
EE-Rated CABLE PROTECTORS, SEALED MOTOR,
SEALED CONTROL BOX, STATIC STRAP.
MASTER CYLINDER FLUID (DOT 3)
BRAKE PEDAL TRAVEL
2” (50 mm) maximum travel
STEERING FOR PLAY
PARKING BRAKE LEVER
requires 10 lbs. (5 kg) force to apply
BELTS AND PULLEYS
-10 lbs (5kg). force for 1/8” (3mm) deflexion;
-pulleys alignment, see procedure.
CLEAN/TIGHTEN WIRE TERMINALS
WASH BATTERY TOP WITH WATER
MOTOR BRUSHES FOR WEAR
-brushes must exceed holders
ACCELERATOR ADJUSTMENT
-1/8” (3 mm) travel to activate micro-switch;
-0 to 50 ohms when micro-switch activated;
-4500 to 5500 ohms with pedal down.
HYDR. BRAKE LINES FOR LEAK
STEERING ASSEMBLY, as instructed
BRAKE MECHANICAL LINKAGES
for wear & play
BRAKE LININGS FOR WEAR
1/16” (1.5 mm) minimum lining thickness.
LUBRICATE (GREASE EP-2) brake pedal pivots,
steering column, ball joints and kingpins.
OIL (SAE 30) LEVEL IN DIFFERENTIAL
Before adding oil, check oil seals for leaks.
FRONT WHEEL BEARINGS PLAY
TIGHTEN NUTS/BOLTS, electric terminals; drive;
steering; brakes; suspension; body.
WEEK
20
MONTH
50
QUART.
200
YEAR
1000
2 YEARS
2000
X
X
X
X
X
X
X
X
X
X
X
X
X
X
X
X
X
X
X
X
X
REPLACE DIFFERENTIAL OIL(SAE 30)
CLEAN AND RE-PACK FRONT HUBS
SERVICE DIFFERENTIAL, replace the three oil seals,
wheel bearings, oil (SAE 30)
X
X
X
- 11 -
Maintenance
ACCELERATOR
GEAR
Remove the cover.
Backlash between gears must be reduced to a minimum by sliding holder; use locktite 262
to lock the three screws.
When the plastic gear is fully depressed a small backlash must remain between the gears.
When the plastic gear is released its rear portion must not exceed the pedal case.
MICRO-SWITCH
The micro-switch must deactivate the on/off solenoid when the accelerator is released; turn the
adjusting screw (shown on figure below) to adjust the micro-switch height.
POT
Remove the terminals 2 and 3 on PMC to measure resistance signal.
When the micro-switch is activated the signal must be less than 50 ohms. When the front
portion of the pedal is fully depressed the signal must be more than 4600 ohms.
To modify the resistance, turn the adjusting screw to change the micro-switch height (see
figure below).
Proceed with the same verifications after the accelerator cover is on and then connect terminals 2 and 3.
- 12 -
Maintenance
BELT INSTALLATION AND TENSIONING
INSTALLATION
Adjust the sprockets using a straight edge. Slide up the edge on the larger pulley until it contacts the
smaller pulley. Properly adjusted pulleys will provide three points of contact. Properly aligned pulleys
will provide four points of contact. Tighten setscrews and recheck alignment.
TENSIONING
Check the force F required to provide a deflection of 1/8 in. If the measured force is less than 15 lbs
then lengthen centre distance C.
- 13 -
Maintenance
HYDRAULIC BRAKES
DRUM BRAKES
Remove brake drums and check linings wear; the linings should have a thickness exceeding 1/16" (1.5
mm). Turn the brake adjustment to reduce the clearance between lining and drum but avoid contact or
drag when the wheels are turned and the pedal is released.
DISC BRAKES
Check pad linings for excessive wear; the linings should have a thickness exceeding 1/16" (1.5 mm).
Disc brakes are self-adjusting.
BRAKE PEDAL
If the brake pedal becomes soft or spongy, air may have entered the hydraulic system and the brake system
has to be bled:
1. fill the master cylinder with brake fluid (DOT-3);
2. bleed front callipers one at a time by having someone applying a steady pressure on the brake
pedal, and close the bleeder before allowing the brake pedal to return to up position;
3. fill the master cylinder with brake fluid (DOT-3);
4. bleed rear wheel brakes one at a time, following the same procedure;
5. fill the master cylinder with brake fluid (DOT-3);
6. clean every fitting and line, remove traces of oil;
7. apply a continuous pressure on the brake pedal for about five minutes ;
8. Finally, inspect brake lines and fittings for leaks ;
- 14 -
Maintenance
FRONT AXLE AND STEERING
! CAUTION !
Before maintenance, turn off all switches, set to neutral, set parking brake, remove the key,
and raise the front end of the vehicle supporting it with two jack stands of adequate capacity
STEERING INSPECTION
Check tire inflation pressure, suspension components, tie rods straightness, tie rod ends play
(wear), play (wear) in wheel bearings, kingpins and bushings.
REPLACING & ADJUSTING THE STEERING GEAR
Remove the pitman arm;
The steering box makes 6.5 turns, center the steering gear (3.25 turns from either side);
Align the front wheel straight. Install the pitman arm.
TOE-IN ADJUSTEMENT
With the wheels in straight forward direction, measure the inside (left to right) distance between
the front tires, at the front and rear of the tires;
Turn the rear tie rod until the distances are equal and tighten the two lock nuts on the tie rod.
REMOVING & GREASING OF FRONT HUBS, required once-a-year
Remove dust cap and cutter pin, unscrew nut, remove hub;
Inspect bearings and races for wear and replace worn bearings;
Replace the seal;
Pack the hub with wheel bearing grease and re-assemble.
ADJUSTING FRONT HUBS
Tighten spindle nut to 30 ft-lb to seat the bearing and back off the nut to the next slot;
Install a new cutter pin and the dust cap.
- 15 -
Maintenance
BATTERY MAINTENANCE
! WARNING !
It is the responsibility of the owner of this vehicle to ensure that the service technicians are
properly trained, read and obey the safety rules and guidelines in this manual (ANSI B56).
Maintenance operations must be made by properly trained service technicians only.
Before any maintenance work, park the vehicle on a flat level surface, turn off all the
switches, set to neutral, remove the key, lift the wheels off the ground and secure with jack
stands of adequate capacity.
Keep charger disconnected while doing any maintenance work.
Always wear a face shield and scarf when working around batteries.
Battery emits highly explosive gases; do not produce sparks to avoid battery explosion and
acid splashing. Battery acid causes severe damage to eyes or skin. Flush contaminated area
immediately with water.
Use insulated tools to avoid sparks that can cause battery explosion and acid splashing.
Use two counteracting tools, double-wrench technique, when disconnecting or tightening
battery posts.
Before cleaning or replacing a battery, discharge the capacitor in the controller with a 10
ohms, 25 W resistor for a few seconds across B+ and B-, identify battery polarity and
disconnect battery leads.
After cleaning, the power must not be reapplied until terminal areas are thoroughly dry.
BATTERY LEADS AND CONNECTORS
Check for loose connections, damaged cables, acid spill, loose terminal posts, quarterly.
BATTERY POST CORROSION
If corrosion is present on battery posts, remove the cable connectors, use a wire brush to remove
particles, and then clean them with a cloth that has been moistened with ammonia.
ELECTROLYTE LEVEL
Does not apply to sealed battery.
Disconnect battery connectors on roll-out or lift-out installations.
Make sure the battery roll-out tray is provided with stops before rolling out.
Fill with distilled water.
Daily charged batteries normally require watering once a week. Under watering leads to a
shortened battery life. Over watering leads to battery corrosion. Be careful not to overfill any cell to
avoid electrolyte to be forced out while charging.
Fill each cell to plate level with distillated or de-ionized water, before battery charging. When the
battery is charged, the fluid expands and can seep out if overfilled. Refill each cell after full charge,
when the fluid has expanded to its maximum level.
Reinstall battery caps before charging.
- 16 -
Maintenance
BATTERY MOUNTING
A loose battery increases damaging effects of vibrations and is more prone to short out.
BATTERY DISCHARGE LIMIT
Discharging below a 20% state of charge cuts down the battery life and the number of cycles available.
At 20% state of charge, specific gravity of 6V battery should be 1180; and 1220 for industrial battery.
CHARGING AREA
Always charge battery in a well ventilated area set for and approved for charging.
Never leave a charger connected for more than 20 hours.
FREQUENCY OF CHARGE
When a battery is discharged to its 20% state of charge, it is best to charge immediately.
Batteries require a low current equalization charge (min 4 hours) at least every week, to equalize
battery cells, improve battery performance and life in number of cycles.
Never leave a charger connected for more than 20 hours.
STORAGE
Keep the battery from getting cold, it would loose its capacity.
Let the battery warm up before charging.
Charge batteries in “stored” vehicles every month.
DEFECTIVE BATTERY
Check specific gravity of each cell; if a cell is shorted, voltage drop may occur only when there is
current.
- 17 -
Maintenance
BATTERY CHARGER
! WARNING !
Always unplug the AC and DC electrical cords before attempting any repairs to the charger.
CHARGER DOES NOT TURN ON:
Dc cord of portable chargers must be disconnected from batteries after every charge to restart;
Check dc fuse links;
Check battery voltage at the battery connector;
Check ac outlet and cordset;
Replace electronic control ;
RELAY CLOSES AND TRANSFORMER HUMS BUT AMMETER DOES NOT REGISTER:
Check dc fuse links;
Check the continuity of the dc output cord, ammeter, diodes and all connections in the dc
circuit;
Check diodes;
Check capacitor(rapidely increasing resistance);
SINGLE CHARGER FUSE BLOWS:
Disconnect and check diodes;
BOTH FUSE LINKS BLOW:
Check the battery pack and battery connector polarity;
Disconnect and check diodes.
CHARGER OUTPUT IS LOW:
Disconnect and check diodes;
Can be caused by a transformer failure.
AMMETER READS 30 AMPS FOR MORE THAN 30 MINUTES:
Check the battery pack;
CHARGER DOES NOT TURN OFF:
Check specific gravity in each battery cell;
As much as 16 hours may be required to properly charge heavely discharged new or cold
batteries;
Replace electronic control.
AC LINE FUSE OR CIRCUIT BREAKER BLOWS:
Check ac cordset;
Check ac line fuse rating;
Replace electronic control;
Can be caused by a transformer failure.
- 18 -
Maintenance
ELECTRICAL TROUBLESHOOTING
! WARNING !
Maintenance work must be performed by trained service technicians only.
It is the responsibility of the owner of this vehicle to ensure that the services technicians are properly
trained, understand and obey the safety rules and guidelines (ANSI B56).
All service technicians must read and understand the maintenance warning section in this manual.
! WARNING !
Before any maintenance work, park the vehicle on a flat level surface, turn off all switches, remove the
key, lift the wheels off the ground, secure with jack stands of adequate capacity, disconnect charger.
Always wear safety glasses.
Batteries emit highly explosive gases that can be ignited by a spark. Before disconnecting a high
current terminal, turn off all switches, disconnect battery charger, disconnect batteries.
Keep clear from moving parts such as tires, sheaves and motor.
PMC SELF DIAGNOSTIC
If your PMC comes with a status led, use the flashing code to help troubleshooting.
BATTERY VOLTAGE
Make sure batteries are securely connected. Measure voltage between + and - terminals. We will call
this value B+ or full battery voltage.
ACCESSORIES NOT WORKING
Check the fuses on the batteries and the DC/DC converter.
Check voltage across + and – terminals on the battery gage; if not B+, check wiring.
Turn the key switch ON, check voltage between output terminal on the key switch and the terminal on the battery gage; if not B+, replace the key switch.
Check voltage across DC/DC converter output terminals; if not 12-Volt, replace the converter.
Depress the accessory switch, check voltage across accessory terminals. If not 12-Volt, replace the
switch. If 12-Volt, replace the accessory.
FORWARD ONLY
On a SEPEX motor control, check the reverse signal input on the controller.
On a series wound motor control, a bad reverse contactor is the most probable cause of the problem.
Switch to reverse and check voltage on the reverse control wire. If not B+, replace the F/R switch. If
B+, turn off the key switch, disconnect batteries, disconnect power terminals on the F/R contactors,
check the resistance across N.C. power terminals of the reverse contactor. If not 0 ohm, change the
reverse contactor. If 0 ohms, switch to forward and check the resistance across the forward N.O. power
terminals. If not 0 ohms, change the forward contactor.
- 19 -
Maintenance
REVERSE ONLY
On a SEPEX motor control, check the forward signal input on the controller.
On a series wound motor control, a bad forward contactor is the most probable cause of the problem.
Switch to forward and check the voltage on the forward control wire. If not B+, replace the F/R switch.
If B+, turn off the key switch, disconnect batteries, disconnect power terminals on the F/R contactors,
check the resistance across N.C. power terminals of the forward contactor. If not 0 ohm, change the
forward contactor. If 0 ohms, switch to reverse and check the resistance across the reverse N.O. power
terminals. If not 0 ohms, change the reverse contactor.
TRAVEL AT REDUCED SPEED
Check batteries.
Turn off all switches and disconnect charger. Wear face shield and gloves. Do not disturb any
battery connection to avoid sparks. Check the specific gravity of each cell. Cold batteries,
highly discharged batteries or dead cells are the most frequent causes of reduced travel speed.
Check potentiometer.
Turn off the key switch, disconnect potentiometer terminals. Check the resistance between
terminals.
Other causes of lower speed:
dragging brakes;
cold temperature (higher differential oil viscosity).
INTERMITTENT OPERATION
A bad potentiometer is the most probable cause of the following:
acceleration is not constant;
maximum speed is erratic;
sudden stop after a bump or shock;
erratic starts, requiring several pedal cycles.
A bad F/R contactor is also a probable cause of the following:
sudden stop after a bump or shock;
would not start to move at times.
Erratic starts could also be the cause of a misadjusted potentiometer or micro-switch; the pot signal
must be less than 50 ohms when the micro-switch turns on.
PMC has an HPD safety feature that prevents the vehicle from moving if the accelerator pedal is
depressed before the key switch is ON and seat switch is activated.
PMC may also have an SRO safety feature that prevents the vehicle from moving if the F/R switch is
activated before turning on the key switch and activating the seat switch.
The vehicle stops on a steep and long ramp or while towing a heavy load: the circuit breaker has open
to prevent motor overheating and will reset automatically after one minute. The PMC is also equipped
with an internal thermal protection that cutback the current until the PMC has cooled down.
- 20 -
Maintenance
NO MOTION
Make sure that the PMC surface is clean and dry; check the terminal areas. Dust Particles or acid
contamination, can create current leaks and cause a PMC malfunction.
Check F/R switch
Turn on the key switch and set to forward. Check voltage between the forward terminal and the
– terminal on the battery gage, check voltage between the reverse terminal and the – terminal on
the battery gage; if both B+, replace the F/R switch.
Check switches and wiring
Disconnect control terminals on the PMC and check all control signals. If a switch pin does not
read B+, check wiring or replace the switch.
Check potentiometer
Turn the key switch to OFF, disconnect potentiometer terminals. Check the resistance across
terminals: if not within the recommended limits, adjust or replace the potentiometer. Check for
shorts between potentiometer wires and vehicle frame; resistance should read at least 1
megohm.
Check main contactor or solenoid
Check voltage across power terminals; if not B+, check circuit breaker or replace the solenoid.
Turn to on the key switch and activate the seat switch. Check voltage across the coil terminals;
if not B+, check wiring and interlock switches. Check resistance across power terminals; if not
0 ohms, replace the solenoid.
Check circuit breaker and SEPEX DIODE
Before replacing the circuit breaker, check for shorts in the power circuit and check the SEPEX
diode in the power circuit using a diode tester. If no such instrument is at hand, use an
ohmmeter: the reading should be weak in one direction and strong in the other way.
Check the resistance across the circuit breaker. If not 0 ohms, replace the circuit breaker.
Check PMC
First disconnect battery B+ and B-, then PMC B+ and M-. Check the internal diode between B+
and M- terminals using a diode tester. If no such instrument is at hand, use an ohmmeter: the
reading should be weak in one direction and strong in the other way. If the internal diode is
defective, the PMC must be replaced.
Check the Motor
First disconnect battery B+ and B-, disconnect power terminals and check the motor armature
and field for opens.
- 21 -
Curtis Speed Controller
CURTIS SPEED CONTROLLER
- 22 -
MODEL
MANUAL
12 4 3
Generation 2
MultiMode™
MOTOR CONTROLLER
© 2002 CURTIS INSTRUMENTS, INC.
DESIGN OF CURTIS PMC 1200 SERIES
CONTROLLERS PROTECTED BY U.S.
PATENT NO. 4626750.
CURTIS INSTRUMENTS, INC.
200 Kisco Avenue
Mount Kisco, NY 10509 USA
Tel: 914-666-2971
F a x : 914-666-2188
www.curtisinst.com
1243GEN2 Manual, p/n 37044
Rev. A: October 2002
- 23 -
2 — INSTALLATION & WIRING: Controller
for the M8 bolts. The maximum bolt insertion depth below the surface of the
bus bar is 1.3 cm (1/2"). B olt shafts exceeding this length may damage the controller.
The torque applied to the bolts should not exceed 16.3 N·m (12 ft-lbs).
Two 1/4" quick connect terminals (S1 and S2) are provided for the
connections to the motor field winding.
WIRING: Standard Configuration
F igure 3 shows the typical wiring configuration for most applications. For
walkie applications the interlock switch is typically activated by the tiller, and
an emergency reverse switch on the tiller handle provides the emergency reverse
signal.
For rider applications the interlock switch is typically a seat switch or a
foot switch, and there is no emergency reverse.
EMERGENCY
REVERSE
FORWARD
5 kΩ POT
THROTTLE
(TYPICAL)
S1
B-
MODE
SELECT
2
MODE
SELECT
1
REVERSE
S2
16
8
9
1
M-
B+
INTERLOCK
ELECTROMAGNETIC
BRAKE
KEY
SWITCH
MAIN
CONTACTOR
COIL
POLARITY
PROTECTION
DIODE
CONTROL
FUSE
MAIN
CONTACTOR
A
A2
A1
S2
S1
POWER
FUSE
B+
B-
emergency reverse wiring check (optional)
Fig. 3 Standard wiring configuration, C urtis 1243GEN2 controller.
Curtis 1243GEN2 Manual
- 24 -
7
7 — DIAGNOSTICS & TROUBLESHOOTING
7
DIAGNOSTICS AND TROUBLESHOOTING
The 1243GEN2 controller provides diagnostics information to assist technicians
in troubleshooting drive system problems. The diagnostics information can be
obtained by observing the appropriate display on the handheld programmer, the
fault message displayed on the S pyglass gauge, the fault codes issued by the
S tatus LED, or the fault display driven by the controller’s fault outputs (Fault 1
and Fault 2). R efer to the troubleshooting chart (Table 7) for suggestions
covering a wide range of possible faults.
PROGRAMMER DIAGNOSTICS
The handheld programmer presents complete diagnostic information in plain
language. Faults are displayed in the S ystem Faults Menu, and the status of the
controller inputs/outputs is displayed in the Monitor Menu.
A ccessing the programmer’s Fault H istory Menu provides a list of the
faults that have occurred since the fault history file was last cleared. Checking
(and clearing) the fault history file is recommended each time the vehicle is
brought in for maintenance.
For information on 1311 programmer operation, see A ppendix B. If you
are using the older 1307 programmer, refer to existing documentation.
SPYGLASS DIAGNOSTICS
The eight-character LCD on the S pyglass displays a continuous sequence of
hourmeter, battery state-of-charge, and fault messages.
Fault messages are displayed using the same codes that are flashed by the
LED (see Table 8). For example, the LED flashes 3,2 for a welded main
contactor:
¤¤¤ ¤¤
(3,2)
¤¤¤ ¤¤
(3,2)
¤¤¤ ¤¤
(3,2)
and the corresponding S pyglass message is:
CODE 32
When a fault message is being displayed, the red Fault LED (labeled with
a wrench symbol) flashes to catch the operator’s attention.
The LCD also displays a warning when either service timer expires. The
service warning is not considered a fault and the red Fault LED does not flash.
The word SERVICE is displayed for about 20 seconds on each key-on, after the
hourmeter is displayed.
The S pyglass is available in 3-LED and 6-LED models; see Figure 21.
Curtis 1243GEN2 Manual
- 25 -
71
7 — DIAGNOSTICS & TROUBLESHOOTING
Table 7
LED
CODE
PROGRAMMER
LCD DISPLAY
TROUBLESHOOTING CHART
FAULT
CATEGORY
POSSIBLE CAUSE
FAULT CLEARANCE
0,1
NO KNOWN FAULTS
0
n/a
n/a
1,1
CURRENT SHUNT FAULT
1
1. Abnormal vehicle operation causing
high current spikes.
2. Current sensor out of range.
3. Controller failure.
Cycle KSI. If problem
persists, replace controller.
1,2
HW FAILSAFE
1
1. Noisy environment.
2. Self-test or watchdog fault.
3. Controller failure.
Cycle KSI. If problem
persists, replace controller.
1,3
M- SHORTED
1
1. Internal or external short of M- to B-.
2. Incorrect motor wiring.
3. Controller failure.
Check wiring; cycle KSI.
If problem persists,
replace controller.
1,4
SRO
3
1. Improper sequence of KSI, interlock,
and direction inputs.
2. Interlock or direction switch circuit open.
3. Sequencing delay too short.
4. Wrong SRO or throttle type selected.
5. Misadjusted throttle pot.
Follow proper sequence;
adjust throttle if necessary;
adjust programmable
parameters if necessary.
2,1
THROTTLE WIPER HI
1
1. Throttle input wire open or shorted to B+. When Throttle Wiper High
2. Defective throttle pot.
input returns to valid range.
3. Wrong throttle type selected.
2,2
EMR REV WIRING
1
1. Emergency reverse wire or check wire
open.
Re-apply emergency reverse
or cycle interlock.
2,3
HPD
3
1. Improper sequence of KSI, interlock,
and throttle inputs.
2. Misadjusted throttle pot.
3. Sequencing delay too short.
3. Wrong HPD or throttle type selected.
5. Misadjusted throttle pot.
Follow proper sequence;
adjust throttle if necessary;
adjust programmable
parameters if necessary.
SRVC TOTAL
3
1. Total maintenance timer expired.
Reset with programmer.
SRVC TRAC
3
1. Traction maintenance timer expired.
Reset with programmer.
TOTAL DISABLED
3
1. Total disable timer expired.
Reset with programmer.
TRAC DISABLED
3
1. Traction disable timer expired.
Reset with programmer.
2,4
THROTTLE WIPER LO
1
1. Throttle pot wire open or shorted to B+.
2. Wrong throttle type selected.
3. Defective throttle pot.
When Throttle Wiper Low
input returns to valid range.
3,1
FIELD SHORT
1
1. Main contactor coil shorted.
2. Field winding shorted to B+ or B-.
3. Field resistance too low.
Check contactor coil and
field winding; cycle KSI.
3,2
MAIN CONT WELDED
1
1. Main contactor stuck closed.
2. Main contactor driver shorted.
Check wiring and contactor;
cycle KSI.
3,3
FIELD OPEN
1
1. Field winding connection open.
2. Field winding open.
Check wiring and cycle KSI.
3,4
MISSING CONTACTOR
1
1. Main contactor coil open.
2. Main contactor missing.
3. Wire to main contactor open.
Check wiring and cycle KSI.
Curtis 1243GEN2 Manual
- 26 -
72
7 — DIAGNOSTICS & TROUBLESHOOTING
Table 7 TROUBLESHOOTING CHART, cont’d
LED
CODE
PROGRAMMER
LCD DISPLAY
4,1
LOW BATTERY VOLTAGE
2
1. Battery voltage < undervoltage cutback.
2. Corroded battery terminal.
3. Loose battery or controller terminal.
When voltage rises above
undervoltage cutoff point.
4,2
OVERVOLTAGE
2
1. Battery voltage >overvoltage shutdown.
limit.
2. Vehicle operating with charger attached.
When voltage falls below
overvoltage cutoff point.
4,3
THERMAL CUTBACK
2
1. Temperature >85°C or < -25°C.
2. Excessive load on vehicle.
3. Improper mounting of controller.
Clears when heatsink
temperature returns to
within acceptable range.
4,4
ANTI-TIEDOWN
3
1. Mode switches shorted to B+.
2. Mode Select 1 “tied down” to select
Mode 2 or Mode 4 permanently.
Release Mode Select 1.
MOTOR HOT
3
1. Field resistance > motor hot setpoint.
When resistance < setpoint.
MOTOR WARM
3
1. Field resistance > motor warm setpoint.
When resistance < setpoint.
Fig. 21 Curtis 840
Sp yglass, 3-LED
and 6-LED models.
FAULT
CATEGORY
POSSIBLE CAUSE
3-LED Spyglass
FAULT CLEARANCE
The hourmeter LED lights when the LCD
is displaying hourmeter data.
The BDI LED lights when the LCD is
displaying BDI%. It flashes when BDI%
drops to <10%.
The Fault LED flashes to indicate an
active fault, and the fault code appears on
the LCD.
8-character LCD display
The word SERVICE is displayed at key-on
if either service timer has expired.
Hourmeter LED (green)
Fault LED (red)
BDI LED (yellow)
6-LED Spyglass
The three green BDI LEDs function as a
bargraph showing BDI% between 52% and
100%.
Yellow LED = 36% – 51% BDI.
Red LED steady = 20% – 35% BDI.
Red LED flashing = 0 – 19% BDI.
The Fault LED flashes to indicate an
active fault, and the fault code appears on
the LCD.
The word SERVICE is displayed at key-on
if either service timer has expired.
Curtis 1243GEN2 Manual
- 27 -
Fault LED (red)
8-character LCD display
red
yellow
0
1
green
BDI 0–100% LEDs
73
7 — DIAGNOSTICS & TROUBLESHOOTING
STATUS LED DIAGNOSTICS
A Status LED is built into the 1243GEN2 controller. It is visible through a
window in the label on top of the controller. This Status LED displays fault
codes when there is a problem with the controller or with the inputs to the
controller. During normal operation, with no faults present, the Status LED
flashes steadily on and off. If the controller detects a fault, a 2-digit fault
identification code is flashed continuously until the fault is corrected. For
example, code “3,2”—main contactor welded—appears as:
¤¤¤ ¤¤
(3,2)
¤¤¤ ¤¤
(3,2)
¤¤¤ ¤¤
(3,2)
The codes are listed in Table 8.
Table 8 STATUS LED FAULT CODES
LED CODES
EXPLANATION
LED off
solid on
no power or defective controller
controller or microprocessor fault
0,1
■
¤
controller operational; no faults
1,1
1,2
1,3
1,4
¤
¤
¤
¤
¤
¤¤
¤¤¤
¤¤¤¤
current sensor error
hardware failsafe fault
M- fault or motor output short
static return to off (SRO)
2,1
2,2
2,3
2,4
¤¤
¤¤
¤¤
¤¤
3,1
3,2
3,3
3,4
¤¤¤
¤¤¤
¤¤¤
¤¤¤
4,1
4,2
4,3
4,4
¤¤¤¤
¤¤¤¤
¤¤¤¤
¤¤¤¤
¤
¤¤
¤¤¤
¤¤¤¤
¤
¤¤
¤¤¤
¤¤¤¤
¤
¤¤
¤¤¤
¤¤¤¤
throttle wiper high
emergency reverse circuit check fault
high pedal disable (HPD), or expired timer
throttle wiper low
contactor driver overcurrent or field winding short
main contactor welded
field winding open
missing contactor
low battery voltage
overvoltage
thermal cutback, due to over/under temp
anti-tiedown fault, or overheated motor
Note: Only one fault is indicated at a time, and faults are not queued up. Refer
to the troubleshooting chart (Table 7) for suggestions about possible causes of
the various faults. Operational faults—such as a fault in SRO sequencing—are
cleared by cycling the interlock switch or keyswitch.
Curtis 1243GEN2 Manual
- 28 -
74
Curtis Speed Controller
PROGRAMMING PARAMETERS – E-290HD, E-348, E-480, E-500, E-660, T-248, T-448
! WARNING !
The owner of this vehicle shall ensure that the service technicians are qualified, properly trained and obey
the safety rules and guidelines in OSHA and ANSI B56 regulations, and in this manual.
Before installing and/or programming the PMC, park the vehicle on a flat level surface, lift the wheels off
the ground and secure with jack stands of adequate capacity. Don’t connect charger.
Programmable controllers must be programmed using the parameter settings in this service manual, before
connecting the motor, to avoid sudden vehicle movement and accident.
Do not try to increase motor speed by changing parameter settings in the speed controller; it can cause
accident and severe damage to the motor.
VOLTAGE
NOMINAL BATTERY VOLTAGE, IN VOLTS
4
THRO. DEADBAND
Thr. Neutral deadband % of 5kohms pot
6
M1 DRIVE C/L
MODE 1 DRIVE CURRENT LIMIT, IN AMPS
300
THROTTLE MAX
Thr. Input req`d for 100%PWM %5kohm pot
90
M2 DRIVE C/L
MODE 2 DRIVE CURRENT LIMIT, IN AMPS
300
M1 THRTL MAP
MODE 1 THROTTLE MAP, AS %
30
M3 DRIVE C/L
MODE 3 DRIVE CURRENT LIMIT, IN AMPS
300
M2 THRTL MAP
MODE 2 THROTTLE MAP, AS %
30
M4 DRIVE C/L
MODE 4 DRIVE CURRENT LIMIT, IN AMPS
300
M3 THRTL MAP
MODE 3 THROTTLE MAP, AS %
30
M1 BRAKE C/L
MODE 1 BRAKING CURRENT LIMIT, IN AMPS
150
M4 THRTL MAP
MODE 4 THROTTLE MAP, AS %
30
M2 BRAKE C/L
MODE 2 BRAKING CURRENT LIMIT, IN AMPS
150
FIELD MIN
MIN. FIELD CURRENT, IN AMPS
7
M3 BRAKE C/L
MODE 3 BRAKING CURRENT LIMIT, IN AMPS
150
FIELD MAX
MAX. FIELD CURRENT, IN AMPS
30
M4 BRAKE C/L
MODE 4 BRAKING CURRENT LIMIT, IN AMPS
150
FIELD MAP START
Armature current at wich FIELD MAP takes effect, amps
70
M1 THRT BRK %
MODE 1 THROT. BRAKING, AS % OF BRAKE C/L
50
FIELD MAP
Field Winding Current, as % of Armature Current
50
M2 THRT BRK %
MODE 2 THROT. BRAKING, AS % OF BRAKE C/L
50
CURRENT RATIO
CURRENT RATIO:FACTOR OF 1, 2, 4 OR 8
1
M3 THRT BRK %
MODE 3 THROT. BRAKING, AS % OF BRAKE C/L
50
RESTRAINT
RAMP RESTRAINT: 1 TO 10
3
M4 THRT BRK %
MODE 4 THROT. BRAKING, AS % OF BRAKE C/L
50
LOAD COMP
LOAD COMPENSATION: 0 TO 25
0
M1 ACCEL RATE
MODE 1 ACCELERATION RATE, IN SEC.
4
HPD
HIGH PEDAL DISABLE (HPD) TYPE
1
M2 ACCEL RATE
MODE 2 ACCELERATION RATE, IN SEC.
4
SRO
STATIC RETURN TO OFF (SRO) TYPE
1
M3 ACCEL RATE
MODE 3 ACCELERATION RATE, IN SEC.
4
SEQUENCING DLY
SEQUENCING DELAY, IN SEC.
M4 ACCEL RATE
MODE 4 ACCELERATION RATE, IN SEC.
4
MAIN CONT INTR
MAIN CONTACTOR INTERLOCK: ON OR OFF
DECEL RATE
DECELERATION RATE, IN SEC.
MAIN OPEN DELAY
MAIN CONTACTOR DROPOUT DELAY, IN SEC.
1
M1 BRAKE RATE
MODE 1 BRAKING RATE, IN SEC.
3
WELD CHECK
MAIN CONTACTOR WELD CHECK: ON OR OFF
ON
M2 BRAKE RATE
MODE 2 BRAKING RATE, IN SEC.
3
MAIN CHECK
MAIN COIL OPEN CHECK: ON OR OFF
ON
M3 BRAKE RATE
MODE 3 BRAKING RATE, IN SEC.
3
AUX ENABLE
AUXILIARY ENABLE: ON OR OFF
OFF
M4 BRAKE RATE
MODE 4 BRAKING RATE, IN SEC.
3
EM BRAKE
ELECTROMAGNETIC BRAKE ON OR OFF
OFF
QUICK START
QUICK START THROTTLE FACTOR
1
AUX DELAY
AUXILIARY DRIVER DROPOUT DELAY, IN SEC.
TAPER RATE
Regen brak. Decrease rate when apporch. 0spd,
1/32s
32
AUX CHECK
AUXILIARY COIL OPEN CHECK: ON OR OFF
OFF
M1 MAX SPEED
MODE 1 MAX. SPEED, AS % PWM OUTPUT
40
EM BRAKE DELAY
ELECTROMAGNETIC BRAKE DELAY, IN SEC.
0
M2 MAX SPEED
MODE 2 MAX. SPEED, AS % PWM OUTPUT
100
EM BRAKE CHECK
ELECTROMAG. BRAKE OPEN CHECK: ON OR OFF
OFF
M3 MAX SPEED
MODE 3 MAX. SPEED, AS % PWM OUTPUT
40
REV DRVR CHECK
REVERSE SIGNAL OPEN CHECK: ON OR OFF
OFF
M4 MAX SPEED
MODE 4 MAX. SPEED, AS % PWM OUTPUT
40
CONT PULL IN
CONTACTOR COIL PULL-IN VOLTAGE, AS %
100
M1 CREEP SPEED
MODE 1 CREEP SPEED, AS % PWM OUTPUT
0
CONT HOLDING
CONTACTOR HOLDING VOLTAGE, AS %
100
M2 CREEP SPEED
MODE 2 CREEP SPEED, AS % PWM OUTPUT
0
EMR REV ENABLE
EMERGENCY REVERSE FUNCTION : ON OR OFF
OFF
M3 CREEP SPEED
MODE 3 CREEP SPEED, AS % PWM OUTPUT
0
EMR REV C/L
EMERGENCY REVERSE CURRENT LIMIT, IN AMPS
M4 CREEP SPEED
MODE 4 CREEP SPEED, AS % PWM OUTPUT
0
EMR REC CHECK
EMERGENCY REV. WIRING CHECK : ON OR OFF
OFF
REGEN SPEED
Min. speed for regen braking, as % of vehicle speed
25
ANTI-TIEDOWN
ANTI-TIEDOWN: ON OR OFF
OFF
CTRL MODE
CONTROL MODE
1
FAULT CODE
ON OR OFF
ON
THROTTLE TYPE
THROTTLE TYPE
3
PEDAL INTERLOCK
THREADLE, PB-6, CHECK WIRING
OFF
PRECHARGE
ON OR OFF
ON
2.5
- 29 -
1
ON
0
50
Spare Parts
SPARE PARTS
- 30 -
Spare Parts
BODY
REF. PART NO
1
2
3
4
5
6
7
8
9
10
11
12
13
14
15
16
6106290003
280003
1005003
240501
280502
2405003
2405002
240503
240502
2301001
2500007
2500008
283001
283002
2807001
280105
280101
280107
280108
2801008
2400036
2392240003
2800011
2100021
2100027
DESCRIPTION
BODY
CARGO DECK
BUCKET SEAT
SEAT
BLACK CLOTH SEAT
RIGHT PIVOT
LEFT PIVOT
BACKREST FRAME
BACKREST SEAT
FRONT BUMPER
FRONT PROTECTOR
CABLE PROTECTOR
4.80 X 8 PNEUMATIC WHEEL, 5 BOLT
4.80 X 8 FOAMFILLED WHEEL, 5 BOLT
16” O.D. N.M. SOFT WHEEL, 5 BOLT
BAR
7” REAR FOOTSTEP
12” REAR FOOTSTEP
REAR BUMPER WITH HITCH
REAR BUMPER WITH PLATE
SEAT SPRING KIT
SEAT SWITCH KIT
LIFT-OUT BOX, NO BATTERY
PLATE, FOOT SWITCH
SPACER, FOOT SWITCH
- 31 -
Spare Parts
FORD F-150 DIFFERENTIAL
- 32 -
Spare Parts
- 33 -
Spare Parts
BRAKE CONTROLS
REF
PART NO
DESCRIPTION
QTY
REF PART NO
DESCRIPTION
QTY
1
5
6
7
8
9
10
11
12
242801
242816
2416006
242831
242817
Rubber
Spring
Lever
Pivot
Lubrication fitting
Clevis pin 3/8 x 1
Yoke
Master cylinder
Bolt 3/8-NC x 3
1
1
1
2
1
1
1
1
2
30
31
32
33
34
35
36
37
8 in. Handbrake lever
Cable
Clip
Cable stop
Handbrake band (cable side)
Handbrake band
Spring 20 lbs.
Yoke
1
1
1
1
1
1
1
1
122813
362805
- 34 -
3616013
362831
362832
362833
3616014
3616012
3616015
2416009
Spare Parts
STEERING
- 35 -
Spare Parts
REF.
PART NO
DESCRIPTION
1
2
3
4
5
6
7
8
9
10
11
12
13
14
15
16
17
18
19
20
21
22
23
481453
481452
481451
COVER
NUT 3/4-NF
STEERING
PROTECTOR
FLANGE BLOC 3/4
BOLT 5/16-NC X 1
WASHER 5/16
LOCK WASHER 5/16
NUT 5/16-NC
STEERING SHAFT
PIN
SCREW
GEAR BOX
BUSHING
WASHER 3/8
LOCK WASHER 3/8
BOLT 3/8-NC X 4 1/2
PITMAN ARM
LOCK WASHER
NUT
CASTELLADTED NUT
FRONT TIE ROD
LEFT AXLE
RIGHT AXLE
OIL SEAL
TAPER BEARING
HUB, 5 BOLTS
WHEEL BOLT
WASHER
CASTELLADTED NUT
DUST CAP
ROD END, LEFT HAND
ROD END, RIGHT HAND
NUT, LEFT HAND
NUT, RIGHT HAND
REAR TIE ROD
BOLT 1/4-NC
WASHER 1/4
NUT 1/4-NC
PIVOT
THRUST BEARING
BUSHING
AXLE BEAM
CASTELLADTED NUT 3/4-NF
24
25
26
27
29
30
31
32
33
34
35
36
37
38
39
40
41
42
2530001
2530002
481454
481466
481467
2530010
2530009
481470
481471
2530007
2530005
2530006
241002
241003
281004
241005
261422
261423
401409
401423
481435
481436
2530008
481413
481414
481437
2530004
481473
- 36 -
Spare Parts
MOTOR AND DRIVE
COMMON PARTS
REF
DESCRIPTION
1
2
3
4
5
6
PULLEY
V BELT
PULLEY
BELT, EAGLE
MOTOR BASE, GM
BELT TENSIONER, LONG
BELT TENSIONER, SHORT
7 PIVOT
PART #
RE DESCRIPTION
F
262424
242431
3651001
3651002
Contact manuf.
2452005
2452003
2452002
PART #
8 MOTOR BASE, FORD
BELT TENSIONER
9 SEAL
10 BEARING
11 SNAP RING
12 NUT WASHER PACK
15 WAVY WASHER
19 HEADBAND
EE HEADBAND KIT
Contact manuf.
2152002
484001
484003
484004
484006
484013
484015
A91-107A
SPECIFIC
REF
13
14
16
17
18
DESCRIPTION
MOTOR ASS’Y
BRUSH SPRING
BRUSH PLATE
LEAD ASSY.
BRUSH
LEAD AND BRUSH ASSY.
A89
B98
A00
484000
484010
484011
484017
484009
N/A
204050
484010
484011
484017
484009
N/A
2450002
2450006
2450007
N/A
N/A
2450008
- 37 -
D00 SEPEX
2450003
2450006
2450007
N/A
N/A
2450008
DC3 SEPEX
3112210001
2450006
2450007
N/A
N/A
3112210004
DANA DRIVE
3112230001
2450006
2450007
N/A
N/A
2450008
Spare Parts
ELECTRICAL DIAGRAM – SEPEX MAIN CIRCUIT
DIAGRAMME ÉLECTRIQUE – CIRCUIT PRINCIPAL SEPEX
- 38 -
Spare Parts
ACCESSORIES – DC/DC CONVERTER
ACCESSOIRES – CONVERTISSEUR DC/DC
- 39 -
Spare Parts
PARTS LIST
NO
A2
A3
B1
B2
B3
E1
E2
F1.A,B
F3
F4.A,B
F5
G1
G2
M2
M3
P1
R1
R4
S1
S3
S6
S7
S8
S10
S12
S15
U1
X1
X2
X5
Y1
Y2.A,B
DESIGNATION
SEPEX SPEED CONTROL
SERIES SPEED CONTROL, 350A
STROBELIGHT
HORN
REVERSE ALARM
HEADLIGHT
TAIL/BRAKE LIGHT
FUSE, 15A
CIRCUIT BREAKER, 150A
DIODE
DIODE BRIDGE
BATTERY
BATTERY CHARGER
SEPEX MOTOR
SERIES MOTOR
INDICATOR (BDI), HOUR METER
ACCELERATOR
MICROSWITCH
POTENTIOMETER
PLASTIC GEAR
SPRING
RESISTANCE, 250 OHMS
KEY SWITCH
SEAT SWITCH, MICRO-SWITCH
SEAT SWITCH, SEAT MOUNTED
CONNECTOR
FOOT SWITCH
FOWARD/REVERSE SELECTOR
LIGHT SWITCH, ROCKER TYPE
HORN BUTTON
BRAKE LIGHT SWITCH
HYDRAULIC BRAKE LIGHT SWITCH
EMERGENCY PUSH BUTTON
EMERGENCY PUSH BUTTON LABEL
DC-DC CONVERTER
HOUR METER CONNECTOR
SPEED CONTROL CONNECTOR
BATTERY CHARGER CONNECTOR
MAIN CONTACTOR – 36V
MAIN CONTACTOR – 48V
F/R CONTACTOR – 36V
F/R CONTACTOR – 48V
F/R BUSSBARS
STATIC STRAP
* Consult Motrec Illustrated parts
- 40 -
REF
1244-5451
1205X-5301
*
*
*
*
*
246108K
3107000002
367012
3669027
*
2142100001
367002
367003
367015
2462008
367014
246205
3109100002
3109000003
3109000004
1269003
266211
1269004
*
246207
3669004
3109800001
3109800006
3104236001
486222
366217
486217
2469003
2450001
QTY
1
1
1
1
1
1
1
2
1
3
1
1
1
1
1
1
1
1
1
1
1
1
1
1
1
1
1
1
1
1
1
1
1
1
1
1
1
1
1
2
2
1
1
Spare Parts
BUILT-IN / PORTABLE 25A CHARGER
Parts list for LESTRONIC II charger MODEL 09695
TYPE 48LC25-8ET 115 VAC 60 Hz
PART NO
DESCRIPTION
09727S
09696S
16354S
04127S
09664S
02390S
08776S
02028S
02506S
08512S
14973S
8020S
08607S
10536S
08224S
08313S
02957S
CASE ASSEMBLY
TRANSFORMER ASSEMBLY
HEATSINK ASSEMBLY, WITH DIODES
AMMETER
ELECTRONIC TIMER ASSEMBLY (RELAY – 03735S)
CAPACITOR, 6.0 MFD, 660 VAC
FUSE ASSEMBLY
BUSHING, 7W-2, INSULATOR FOR CORDSETS
CORDSET, AC
CORDSET, DC, NO PLUG
CORDSET, DC, WITH SILICONE PLUG
CORDSET, DC, WITH LESTER PLUG
CORDSET, DC, WITH 50 AMP ANDERSON PLUG
CORDSET, DC, WITH 50 AMP EZ GO PLUG
CORDSET, DC, WITH 175 AMP ANDERSON PLUG
PLUG ASSY, DC, 50 AMP ANDERSON PLUG
PLUG ASSY, DC, 175 AMP ANDERSON PLUG
- 41 -
Spare Parts
BUILT-IN/PORTABLE CHARGER MODEL 16510
Parts list for MODEL 16510
TYPE 48EL20-8ET
100-125 or 200-250 VAC / 50-60 Hz
PART NO
QTY.
DESCRIPTION
21149S
15945S
16369S
16595S
18696S
21249S
21152S
02028S
02008S
21147S
25248S
28113S
29052S
21146S
05322S
16499S
17558S
21333S
1
1
1
1
1
2
1
1
1
1
1
1
1
1
1
2
1
1
CASE ASSEMBLY
TRANSFORMER ASSEMBLY
AMMETER
ELECTRONIC TIMER ASSEMBLY
SHUNT ASSEMBLY
HEATSINK ASSEMBLY, W/ SCR
CONTROL CABLE ASSEMBLY
BUSHING, INSULATOR, 7W-2, FOR AC CORDSET
BUSHING, INSULATOR, 8P-2, FOR DC CORDSET
CORDSET, AC, 14/3,W/ PLUG
CORDSET, AC, 1.5mm3, HARMONIZED, NO PLUG
CORDSET, DC, SY120 PLUG, GRAY
CORDSET, DC, LESTER PLUG, GRAY
CORDSET, DC, NO PLUG
FUSEHOLDER
FUSE, 15 AMP, MDA-15
SWITCH, ROCKER, DPDT
CIRCUIT BREAKER, 40 AMP
- 42 -
Spare Parts
DELTA-Q HF CHARGER
1
2
NO
PART NO
1
3102240002
3102240003
3102302001
3102302002
3102480002
3102480003
2
3119000011
DESCRIPTION
24V CHARGER ( U.S. BATTERY )
24V CHARGER ( LIFELINE BATTERY )
36V CHARGER ( U.S. BATTERY )
36V CHARGER ( LIFELINE BATTERY )
48V CHARGER ( U.S. BATTERY )
48V CHARGER ( LIFELINE BATTERY )
CONNECTOR C13
- 43 -
Spare Parts
- 44 -
Spare Parts
- 45 -
Spare Parts
MOTREC ILLUSTRATED ACCESSORIES
Strobelight, polemount
Amber 12-80V: 3116000001
Red 12-80V:
2469001
Blue 12-80V:
3690008
Red Tail/Brake light
Housing:
3069012R
Bulb 12V:
3117240001
Headlight
Left:
Right:
Bulb H/L:
Bulb Turn:
Bulb Mark:
3111480003
3111480004
3117480001
3117480003
3117480002
Horn button VIP
2330014
Horn button, column mount
246210
Strobelight, cab mount
Amber 12-48V: 3116250001
Red 12-48V:
3069026
Blue 12-48V:
3069014
Amber 72-80V:3116720001
Red 72-80V: 3116720002
Blue 72-80V: 3116720003
Back-up lamp
Grommet:
12V:
24V:
Red Tail/Brake light
Grommet:
3269001
Plug:
246012A
12V :
2469021
24V :
2469022
246050
Horn button, dash mount
266210
Clear lamp
12V:
Bulb 12V:
Amber turn lamp
12V:
3069020
Bulb 12V:
3069021
Multi-LED amber turn lamp
Round Light: 3111000010
Grommet:
3111000008
Plug:
3111000009
Turn signal switch
3269001
3669012
3669012A
3069012
1269008
Pedestral head lamp
12V:
2569001
Bulb 12V:
2569001B
Bulb 24V:
4469001
Headlight
Left:
Right:
Bulb H/L:
Bulb Turn:
Bulb Mark:
3111480003
3111480004
3111480006
3111480008
3111480007
Multi-LED Red Tail/Brake
Light:
3111000006
Grommet:
3111000008
Plug:
3119000009
Horn button
3109250001
Limit switch
3030015
Multi-LED Back-up
Light:
3111000007
Strobe light: 3111000013
Grommet:
3111000008
Plug:
3119000009
Horn
12V:
24V:
Red Tail/Brake light
12V:
386002
- 46 -
246003
246013
Spare Parts
Analog Voltmeter
12V :
3069007
24V :
2469002
36-48V :
3669002
Wiper motor
12V:
24V:
Wiper arm
HOBBS Gauge
24V:
36V:
48V:
2469026
3069038
4869037
Wiper blade
14” Blade:
18” Blade:
3113000001
486211
2800000001
2800000002
2800000003
Pantograph wiper blade
246233
Headlamp 12V: 3111250002
Cab heater
12V:
36V:
48V:
3103300001
3669008
4869020
12V Dome light
3669006
Headlamp
12V:
Bulb 12V:
Red Pilot light
12V:
Bulb 12V:
3111300001
3111300002
246212
246212B
DC-DC converter, 10A
12-48V:
3069019
Pantograph wiper arm
246233A
12V Fan
DC-DC Converter, 25A
12-48V:
3124000002
72-80V:
3124880001
- 47 -
3669013
Back-up alarm or
Motion beeper
12-48V :
3100000001
72-80V :
3105720001
12-24V Adjustable:
3100000002
Spare Parts
CONVERTER INSTALLATION
- 48 -
Spare Parts
BATTERY DISCHARGE INDICATOR (HOBBS)
This indicator monitors :
the residual capacity of batteries;
operating hours;
status of service down counter.
The residual capacity of the battery is monitored via an 8-LED bar display. When the left red LED
lights, the batteries must be charged to avoid damage. The LED display starts flashing as a pre-warning
signal. The lower voltage limit is adjustable via potentiometer “M” on the rear.
A
1,57
B
1,63
C
1,68
D
1,73
E
1,78
F
1,82
G
1,84
H
1,86
I
1,89
J
1,91
K
1,93
In order to activate a new adjustment, the unit has to be reset :
2.35V/cell reset voltage with battery remaining in vehicle;
2,09V/cell reset voltage after battery has been disconnected.
To maintain a good battery performance, it is recommended to limit the discharging to 80% of the
battery capacity. The recommended setting for 6V batteries is F and the recommended setting for an
industrial battery is K.
An internal relay can prevent overdischarging and damaging the batteries. The relay can be wired to
cut off the reverse direction, or energize an N.C. relay and alarm.
Turning off and on the vehicle will override the protection for 30 sec.
The current status (remaining operating hours before maintenance) of the service down counter is
indicated for a period of 5 seconds after the key switch is turned on. When it is down to 0, the display
flashes. After the maintenance, reset the counter: depress the button “R” on the rear. The service
counter is factory programmable only.
24V UNIT #: 2469026
36V UNIT #: 3069038
48V UNIT #: 4869037
2- Orange, key switch
3- Relay +
4- Relay 5- Black, battery –
6- Blue, hour counter
8- White, battery +
- 49 -