1
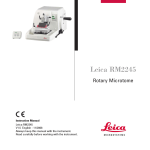
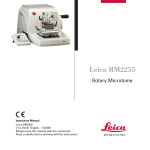
Leica RM2235
Rotary Microtome
Instruction Manual
Leica RM 2235
V1.1 English - 02/2005
Always keep this manual with the instrument.
Read carefully before working with the instrument.
NOTE
The information, numerical data, notes and value judgments contained in this manual represent the current state of scientific knowledge
and state-of-the-art technology as we understand it following thorough investigation in this
field.
We are under no obligation to update the
present manual periodically and on an ongoing
basis according to the latest technical developments, nor to provide our customers with additional copies, updates etc. of this manual.
For erroneous statements, drawings, technical
illustrations etc. contained in this manual we
exclude liability as far as permissible according
to the national legal system applicable in each
individual case. In particular, no liability whatsoever is accepted for any financial loss or consequential damage caused by or related to
compliance with statements or other information in this manual.
Statements, drawings, illustrations and other
information as regards contents or technical
details of the present manual are not to be considered as warranted characteristics of our
products.
These are determined only by the contract provisions agreed between ourselves and our customers.
Leica reserves the right to change technical
specifications as well as manufacturing processes without prior notice. Only in this way is it
possible to continuously improve the technology and manufacturing techniques used in our
products.
This document is protected under copyright
laws. Any copyrights of this document are retained by Leica Microsystems Nussloch GmbH.
Any reproduction of text and illustrations (or of
any parts thereof) by means of print, photocopy,
microfiche, web cam or other methods – including any electronic systems and media –
requires express prior permission in writing by
Leica Microsystems Nussloch GmbH.
For the instrument serial number and year of
manufacture, please refer to the name plate at
the back of the instrument.
© Leica Microsystems Nussloch GmbH
Published by:
Leica Microsystems Nussloch GmbH
Heidelberger Str. 17 - 19
D-69226 Nussloch
Germany
Phone: +49 (0)6224 143-0
Fax:
+49 (0)6224 143-200
Internet: http://www.histo-solutions.com
Leica RM2235
3
Table of contents
1. Important notes ................................................................................................................................ 6
2. Safety ................................................................................................................................................. 7
2.1
2.2
2.3
Safety notes ......................................................................................................................................... 7
Warnings .............................................................................................................................................. 7
Integrated safety devices ................................................................................................................ 10
3. Instrument components and specifications ............................................................................. 12
3.1
3.2
3.3
Overview - instrument components ............................................................................................... 12
Instrument specifications ................................................................................................................ 13
Technical data ................................................................................................................................... 14
4. Startup ............................................................................................................................................. 15
4.1
4.2
4.3
4.4
4.5
Standard delivery .............................................................................................................................. 15
Installation site requirements ......................................................................................................... 15
Assembling the handwheel ............................................................................................................. 16
Inserting the universal cassette clamp ......................................................................................... 17
Inserting the knife holder ................................................................................................................. 18
5. Operation ......................................................................................................................................... 19
5.1
5.1.1
5.1.2
5.1.4
5.1.3
5.1.5
5.2
5.3
5.4
5.5
5.6
5.7
5.8
Operating elements and their functions ........................................................................................ 19
Section thickness setting ................................................................................................................ 19
Coarse driving wheel ........................................................................................................................ 19
Mechanical trimming function ........................................................................................................ 20
Specimen retraction ......................................................................................................................... 20
Specimen holder with precision orientation ................................................................................ 21
Adjusting the clearance angle ........................................................................................................ 22
Fine adjustment of the mass balance ............................................................................................ 23
Clamping the specimen .................................................................................................................... 24
Clamping the knife / disposable blade ........................................................................................... 24
Sectioning .......................................................................................................................................... 25
Changing the specimen or interrupting sectioning ..................................................................... 26
Finishing daily routine ...................................................................................................................... 26
6. Optional accessories .................................................................................................................... 27
6.1 Installing the fixture for specimen clamps .................................................................................... 27
6.1.1 Non-orienting fixture f. spec. clamps ............................................................................................ 27
6.1.2 Orienting fixture f. specimen clamps .............................................................................................. 27
6.1.3 Fixture for specimen clamps with precision orientation ............................................................ 28
6.1.4 Quick-clamping system .................................................................................................................... 29
4
Instruction manual V 1.1 – 02/2005
Table of contents
6.2
6.2.1
6.2.2
6.2.3
6.2.4
6.2.5
6.2.6
6.2.7
6.3
6.3.1
6.3.2
6.3.3
6.4
6.5
6.7
6.6
6.8
Specimen clamps and holders ....................................................................................................... 30
Standard specimen clamp ............................................................................................................... 30
Vee insert ........................................................................................................................................... 30
Foil clamp type 1 ................................................................................................................................ 31
Foil clamp type 2 ................................................................................................................................ 32
Universal cassette clamp ................................................................................................................ 32
Super Mega cassette cla mp .......................................................................................................... 33
Holder for round specimens ............................................................................................................ 34
Knife holder base and knife holder ................................................................................................ 35
Knife holder base, without lateral movement feature ................................................................. 35
Knife holder E/E-TC ........................................................................................................................... 36
Knife holder N/NZ ............................................................................................................................. 38
Section waste tray ............................................................................................................................ 40
Backlighting ....................................................................................................................................... 40
Freezer pack ...................................................................................................................................... 41
Tray ..................................................................................................................................................... 41
Ordering information ........................................................................................................................ 42
7. Trouble shooting ............................................................................................................................ 44
7.1 Possible faults ....................................................................................................................................... 44
7.2 Instrument malfunctions ...................................................................................................................... 44
8. Cleaning and maintenance .......................................................................................................... 45
8.1
8.2
8.3
Cleaning the instrument ................................................................................................................... 45
Maintenance instructions ............................................................................................................... 47
Lubricating the instrument .............................................................................................................. 48
9. Warranty and service ................................................................................................................... 49
Leica RM2235
5
1. Important notes
Symbols in the text and their meanings
Dangers, warnings and cautions appear in a gray box and are marked
by a warning triangle .
Notes, i.e. important user information appear in a gray box and are
marked by an information symbol
.
(5)
Intended use of instrument
The Leica RM 2235 is a manually operated rotation microtome for creating thin sections of
specimens of varying hardness for use in routine and research laboratories in the fields of
biology, medicine and industry.
They are designed for cutting soft paraffin
specimens as well as harder specimens, as
long as they are suitable for being cut manually.
Any other use of the instrument is considered
improper!
Numbers in parentheses refer to
item numbers in illustrations.
Qualification of personnel
Instrument type
• The Leica RM 2235 may be operated by
trained laboratory personnel only.
All information provided in this manual applies
only to the instrument type indicated on the cover page.
An identification label indicating the instrument
serial number is attached at the left side of the
instrument.
• All laboratory personnel designated to operate the Leica instrument must read this
instruction manual carefully and must be
familiar with all technical features of the
instrument before attempting to operate it.
Fig. 1
6
Instruction manual V 1.1 – 02/2005
2.
Safety
Be sure to comply with the safety instructions and warnings provided in this chapter.
Be sure to read these instructions, even if you are already familiar with the operation and
use of other Leica products.
2.1
Safety notes
This instruction manual contains important
instructions and information regarding the operational safety and maintenance of the instrument.
The instruction manual is an important part of
the product, which must be read carefully prior
to startup and use and must always be kept
near the instrument.
If additional requirements on accident prevention and environmental
protection exist in the country of operation, this instruction manual
must be supplemented by appropriate instructions to ensure compliance with such requirements.
This device has been built and tested in accordance with the directive for machines, 98/37/EC,
and the safety regulations governing laboratory
apparatus.
The following standards serve as a basis:
•
•
•
•
DIN EN ISO 12100-1: 2003
DIN EN ISO 12100-2: 2003
DIN EN 61010-2-101: 2002
DIN EN ISO 9001: 2000.
In order to maintain this condition and ensure
safe operation, the operator must observe all
the instructions and warnings contained in this
instruction manual.
The protective devices on both instrument and accessories may neither be removed nor
modified. Only service personnel qualified by Leica may repair the instrument and access
the instrument’s internal components.
2.2 Warnings
The safety devices installed in this instrument by the manufacturer only constitute the basis for
accident prevention. Primarily responsible for accident-free operation is above all the owner
of the instrument and, in addition, the designated personnel who operates, services or cleans
the instrument.
To ensure trouble-free operation of the instrument, make sure to comply with the following
instructions and warnings.
Leica RM2235
7
2. Safety
Warnings - Safety instructions / warning labels attached to the instrument
• Safety instruction labels on the instrument marked with a warning triangle indicate that the
correct operating instructions (as described in this manual) must be followed when operating
or replacing the instrument component bearing the label.
Failure to adhere to these instructions may result in an accident, personal injury, damage to
the instrument or accessory equipment.
Warnings - Transport and installation
• Once removed from the crate, the instrument may only be transported in an upright position.
• Do not transport the instrument by holding it by the handwheel grips, coarse driving wheel or
the knob for setting the section thickness.
• The protective devices on both instrument and accessories must neither be removed nor
modified.
Warnings - Working at the instrument
• Take care when handling microtome knives and disposable blades. The cutting edge is
extremely sharp and can cause severe injury!
• Always remove the knife / blade before detaching the knife holder from the instrument. Always
put the knives back into the knife case when not in use!
• Never place a knife anywhere with the cutting edge facing upwards and never try to catch a
falling knife!
• Always clamp the specimen block BEFORE clamping the knife.
8
Instruction manual V 1.1 – 02/2005
2.
Safety
Warnings - Working at the instrument
• Prior to manipulating the knife and specimen, or changing the specimen or knife, and during
breaks, always lock the handwheel and cover the cutting edge with the knife guard!
• ALWAYS rotate the handwheel clockwise. Otherwise, the locking mechanism will not work
properly.
• Always wear protective glasses when sectioning brittle specimens. Specimen may splinter!
• Specimen blocks must not be oriented during the retraction phase! If a block is oriented during
retraction, the block will advance by the retraction value PLUS the selected section thickness
before the next section. This may cause damage to both specimen and knife!
Warnings – Cleaning and maintenance
• Always lock the handwheel before cleaning!
• Do not use any solvents containing acetone or xylene for cleaning!
• Ensure that no liquids enter the interior of the instrument when cleaning!
• When using detergents please comply with the safety precautions of the manufacturer and
with the applicable laboratory regulations.
Leica RM2235
9
2. Safety
2.3 Integrated safety devices
Locking the handwheel
There are two ways of locking the handwheel
(12):
Using the lever (3) on the right side of the microtome base plate, the handwheel can be braked
in almost any position.
• To brake, rotate the lever in a counterclockwise direction to position .
5
Caution!
The braking lever (3) must be exactly in position , so that the handwheel brake is applied correctly.
If the lever is moved beyond this
point, it is possible that the handwheel is no longer braked.
12
• To unlock the handwheel brake turn the
lever (3) back to its original position. Position
.
• To lock the handwheel, press the lever (5)
outwards and continue to turn the handwheel slowly until it locks exactly in the
12 o’clock position.
3
In either case, the yellow LED in the LOCK field
(4) lights up and the instrument cannot be started.
Fig. 2
10
If both braking systems are used
simultaneously, always bring the
lever (3) into position first to
release the brakes. Otherwise it is
possible that the lever (5) cannot be
unlocked.
Instruction manual V 1.1 – 02/2005
2. Safety
Knife guard on the knife holder
Knife holder N
7
8
7
Each knife holder is equipped with a tightly
mounted knife guard (8, 9). This makes it possible to cover completely the cutting edge in
every knife or blade position.
Knife holder N/NZ
Fig. 3
Knife holder E/E-TC
Knife holder E
11
9
The knife guard (8) of the knife holder N/NZ can
be easily positioned via the two buttons (7)
(Fig. 3).
To cover the knife edge, push both cover strips
of the knife guard to the center.
The knife guard on knife holder E/E-TC consists
of a red foldaway handle (9). To cover the cutting edge, fold the knife guard handle (9)
upwards as illustrated in Fig. 4.
10
The clamping levers on the knife
holder E are not interchangeable.
The two clamping levers (10, 11)
must remain in the position shown
at all times, as otherwise isolated
malfunctions of the knife holder can
occur.
Clamping lever for the blade (10) at
the right, clamping lever for the lateral displacement (11) at the left.
Knife holder E-TC
9
Fig. 4
Leica RM2235
11
3.
Instrument components and specifications
3.1 Overview - instrument components
Tray
Universal
cassette clamp
Handwheel
locking
mechanism
Knife holder base,
without lateral
movement feature
Smooth-turning
handwheel
Lever for
activating the
handwheel brake
Removable section
waste tray
Clamping lever
of the knife
holder base
Window for
displaying the
section
thickness
Directional
fixture for specimen
clamps
Adjusting knob
for setting the
section
thickness
Coarse
driving wheel
Lever for
activating the
mechanical
trimming function
Clamping lever for
lateral movement
function of knife holder
12
Knife holder E
Fig. 5
Instruction manual V 1.1 – 02/2005
3. Instrument components and specifications
3.2 Instrument specifications
Basic Instrument with mechanical trimming, with lateral coarse feed
(clockwise (CW) or counter clockwise (CCW)) without specimen orientation
The Leica RM2235 rotary microtome features low-maintenance and backlash-free precision micrometer feed system with horizontal feed and vertical stroke mechanism based on self-lubricating cross roller bearings.
For increased user safety, the instrument isequipped with two independent handwheel lockingsystems.
The instrument is equipped with a Leica-patented operator-adjustable
force balancing system with spring compensation of the forces which occurduring the sectioning process.
Advantages: no need of a heavy counter balance in the handwheel and
possibility to adapt the spring force to specimen clamps and specimens of
different weights.
A patented specimen retraction system can be switched ON/OFF by the
operator, a feature, which provides the full advantage of an instrument
with specimen retraction while at the same time making it easy to operate
the instrument in the ‘rocking mode’ (if the in strument is used in the ‘rocking mode’, we recommend to switch the specimen retraction OFF).
The coarse feed wheel is within easy reach of the operator.
(more information to direction of rotation see chapter 5.1.2)
Leica RM2235
13
3.
Instrument components and specifications
3.3 Technical data
General
Approvals:
Operating temperature range:
Storage temperature range:
Relative humidity:
Humidity in storage loaction:
Section thickness range:
The instrument-specific marks are located on the
rear panel of the instrument next to the name plate
+10 °C to +35 °C
+5 °C to +55 °C
max. 80%, non-condensing
< 80 %
1.0 - 60.0 µm
Section thickness settings :
from 1.0 - 10.0 µm in 1.0 µm increments
from 10.0 - 20.0 µm in 2.0 µm increments
from 20.0 - 60.0 µm in 5.0 µm increments
Specimen feed:
Vertical stroke:
Maximum sectioning area w/o retraction:
Maximum sectioning area with retraction:
The specimen retraction:
approx. 30 mm
70 mm
69 mm (without specimen orientation 1 µm)
62 mm
200 µm; can be turned off manually.
Dimensions and weight
Width (including handwheel):
Depth (including waste tray):
Height (total):
Working height (knife blade):
Weight (without accessories)
413 mm
618 mm
305 mm (with tray on the housing)
168 mm (measured from the table)
approx. 37 kg
Optional equipment and optional accessories
Specimen orientation (option)
horizontal:
8°
vertical:
8°
Angle of rotation:
± 90°
14
Trimming stages :
10 µm, 50 µm
Repositioning of knife holder base
north-south:
± 25 mm
Instruction manual V 1.1 – 02/2005
4. Startup
4.1 Standard delivery
The Leica RM 2235 standard delivery includes:
1 Leica RM2235 basic instrument
1 Handwheel, complete
1 Section waste tray
1 Tool set consisting of:
1 Allen key with handle, size 5
1 Allen key with handle, size 4
1 Allen key size 3
1 Screwdriver 3 x 50, 186 long
1 Bottle (50 ml) of oil for drives, type 405
1 Dust protective cover
1 Brush with magnet
1 Operating manual G/E/F/S
The accessories ordered are included in a separate box.
Carefully check the delivery against
the packing list and the delivery
note. Should there be any discrepancy, please contact the Leica selling unit handling your order.
0500 38181
0502 37931
0500 38600
0194 04760
0194 04782
0222 04138
0170 11568
0336 06086
0212 30350
0183 40426
0700 37115
4.2 Installation site requirements
• Stable, vibration-free laboratory bench with
horizontal and even stage plate; practically
vibration-free floor.
• No other instruments nearby which might
cause vibrations.
• Room temperature permanently between
+ 10 °C and + 35°C.
• Obstruction-free access to the handwheel.
Never operate the instrument in
rooms with explosion hazard.
Leica RM2235
15
4.
Startup
Setting up the instrument
5
Do not transport the instrument by
holding it on the handwheel shaft,
the object head or the housing!
6
• By holding the instrument (5) at the front by
the baseplate, and at the rear by the recessed grip (Fig. 6), lift it out of the molded
cushion (6) of the packaging and place it on
a stable laboratory table.
• The two sliding elements (9) located on the
rear of the base plate make it easier to move
the instrument on the table.
9
Fig. 6
• To move the instrument, hold it by the front
of the base plate, lift it up gently and slide it
on its slides.
4.3 Assembling the handwheel
The handwheel has to be assembled before
attempting to use the instrument.
The necessary parts and tools can be found in the
toolkit supplied together with the instrument.
4
3
1
2
2a
Abb. 7
16
The feather key (4) is loosely
placed in the handwheel shaft (1)
and fixed in place with a tie-rap
during transport.
• Remove the cable tie (3).
Caution!
Make sure not to lose the
feather key!
• Place the handwheel (2) on the
handwheel shaft (1) as shown.
• Tighten the screw (2a) located
in the center hole of the handwheel with an Allen key size 4
(5).
• Remove the cover foil from the
self-adhesive cover disk and
fix the cover disk on the handwheel.
5
Instruction manual V 1.1 – 02/2005
4. Startup
4.4 Inserting the universal cassette clamp
There are two versions of the specimen holder,
one with and one without specimen orientation,
which are interchangeable.
The object orientation allows for simple position
correction of the specimen surface when the
specimen is clamped into place.
60
You can use the quick clamping system (64) to
hold all available accessory specimen clamps
(for more information, see Chapter 6 “Optional
accessories“).
12
To do so, proceed as follows:
• Move the object head (60) to the upper end
position by turning the handwheel (12) and
engage the handwheel lock.
60
62
64
• To release the clamping system, turn the
screw (61) of the quick clamping system (64)
counterclockwise using an Allen key size 4
(71).
• Push the guide (63) of the universal cassette
clamp (62) from the left into the quick clamping system (64) as far as it will go.
61
71
63
• To clamp the cassette clamp turn the screw
(61) clockwise as far as it will go.
Fig. 8
Since all stage clamps available as accessories are equipped with the same kind of
guide on the back, they are inserted in the same way described here using the example of
the cassette clamp.
Leica RM2235
17
4. Startup
Setting up the knife holder base
4.5 Inserting the knife holder
• Release the clamping lever (50) by rotating it
counterclockwise.
• Insert the knife holder base (51) using the
notch (52) on the bottom into the T-piece (55)
of the microtome base plate (53).
• To secure the knife holder base, turn the
clamping lever (50) clockwise.
55
53
The knife holder base (51) can be moved back
and forth on the microtome base plate. This
allows bringing the knife holder to optimal cutting position in relation to the specimen.
There is a scale (54) on the right side of the microtome base plate. This enables faster and
better positioning of the knife holder at the
specimen if various combinations of standard
specimens and specimen holders are used. The
rear edge of the knife holder base (51) functions
as the scale reference.
50
52
Enlarged detail:
Scale for better
repositioning of the
knife holder for
varying specimen
heights.
51
54
Fig. 9
56
71
Inserting the knife holder
• Release the screw (58) with the size 4 Allen
key (71) (part of the delivery package) so that
the knife holder (57) can be moved.
• Place the knife holder (57) with the underside groove onto the T-piece (56) of the knife
holder base (51).
57
• To clamp, retighten the screw (58).
58
Fig. 10
18
Instruction manual V 1.1 – 02/2005
5. Operation
5.1 Operating elements and their functions
The section thickness is set by turning the adjusting knob (33) at the front of the microtome
on the right.
The adjusting knob has a notch for each value
that can be set.
Setting range: 1 - 60 µm
from
1 - 10 µm in 1 µm increments
from
10 - 20 µm in 2 µm increments
from
20 - 60 µm in 5 µm increments.
38
33
5.1.1 Section thickness setting
34
The section thickness set in each case is displayed in the window (34).
The selected section thickness (on the scale)
must agree with the red pointer (38)
5.1.2 Coarse driving wheel
Fig. 11
The instrument can be ordered with clockwise
or counterclockwise rotation. The given direction of rotation means “forwards” and relates to
the feed movement of the specimen towards the
knife.
The coarse motion serves for a fast horizontal
forwards movement of the object - towards the
knife - and backwards - away from the knife.
When reaching the rear/front end positions, the
coarse driving wheel can only be turned with
difficulty. In the front end position, no more feed
motion takes place.
The coarse driving wheel also turns
during sectioning. Therefore it must
not block whilst the handwheel is
being turned during sectioning; otherwise, no feed motion can take
place and thus also no sectioning.
Fig. 12
Leica RM2235
19
5. Operation
5.1.3 Specimen retraction
Magnet for
holding the
wrench
size 4
For turning the retraction
Off, turn the slot into the
horizontal position (off).
For turning the retraction
On, turn the slot into the
vertical position (on).
The specimen retraction serves for protecting the
knife and the specimen. When the retraction is
switched on, the object is drawn back 200 µm into
the upper end position after the sectioning stroke
during the return movement. Before the feed
motion of the new section thickness, the feed
motion for the retraction value takes place.
The specimen retraction can be switched off
manually at the back of the instrument (Fig. 13), if
required, using the slotted-screwdriver supplied
with the delivery.
Before switching the specimen retraction On and
Off, run the object head to the upper end position
by turning the handwheel.
Fig. 13
5.1.4 Mechanical trimming function
The RM 2235 is fitted with a mechanical trimming function. The trimming lever has 3 notching positions (0,10 µm, 30 µm).
The points (36) mark the two trimming stages:
= 10 µm
= 30 µm
36
Fig. 14
20
• For activating the trimming function, press the lever downwards
into one of the two notching positions and keep depressed. After
each rotation of the handwheel, a feed motion of 10 µm or 30 µm
takes place.
• After letting go of the lever, it automatically springs back to its
original position (zero position). The trimming function is thereby
deactivated.
The section thickness that has been set is not added to
the selected trimming value.
If the section thickness that has been set is greater than
the selected trimming value, the section thickness is
fed.
Instruction manual V 1.1 – 02/2005
5. Operation
5.1.5 Specimen holder with precision orientation
In the quick clamping device of the specimen holder fixture with precision orientation, all
object clamps available as optional accessories can be used (implemented).
30
The object orientation allows for simple position
correction of the specimen surface when the
specimen is clamped into place.
32
32
Orienting the specimen
Specimen blocks must not be oriented during the retraction phase!
If a block is oriented during retraction, the block will advance by the
retraction value PLUS the selected
section thickness before the next
section.
This may cause damage to both
specimen and knife!
31
29
Fig. 15
Display of the zero position
For better display of the zero position, the orientation has two red indicators (32).
When both indicators are visible and both setscrews are in zero position at the same time
(notch point, white marking on ““), the specimen is in zero position.
When the large standard clamp
(50 x 55 mm) is used, the specimen
orientation of 8° in north-south
direction is no longer possible.
The usable angle is only about 4° in
this case.
Leica RM2235
• Raise the object head to the upper end position and activate the handwheel lock.
• To release the clamp, turn the eccentric lever (29) forwards.
• Turn setscrew (30) to orient the specimen in
north-south direction. Turn setscrew (31) to
orient the specimen in east-west direction.
Each complete turn of the screw inclines the
specimen by 2°. A total of 4 complete turns =
8° are possible in every direction. The accuracy is approximately ± 0.5°.
For ease of estimation, there is a white
marking on the handle and a notch point that
is noticeable during turning.
• To lock the current orientation, turn the eccentric lever (29) backwards.
21
5. Operation
5.2 Adjusting the clearance angle
• The index marks (0°, 5° and 10°) for adjustment of the clearance angle (59.1) are located on the right side of the knife holder (57).
57
• There is also an index mark (51) on the right
side of the knife holder basis (59.2) which
serves as a reference point when adjusting
the clearance angle.
51
• Release the screw (58) with the size 4 Allen
key (71) so that the knife holder (57) can be
moved.
Enlarged detail:
Index marks for
adjusting the
clearance angle.
58
• Move the knife holder until the index mark of
the desired clearance angle coincides with
the reference line on the knife holder base.
Example:
Enlarged detail showing a clearance angle
setting of 5°.
The recommended clearance angle
setting for knife holder E is approx.
5°.
59.1
59.2
71
• Hold down the knife holder in this position
and retighten the screw (58) for clamping.
Fig. 16
22
Instruction manual V 1.1 – 02/2005
5. Operation
5.3 Fine adjustment of the mass balance
33
Fig. 17
Important!
Never turn
the screw
any more as
½ rotation at
once.
If a specimen clamp which is lighter or heavier
than the previous specimen clamp is mounted
to the object head (33), it is necessary to check
whether the force balancing system must be readjusted.
Checking the correct balance adjustment:
• Mount the new clamp and clamp the specimen.
• Turn the handwheel until the specimen head
is located in center position (halfway up); let
go of the handwheel (Fig. 17).
If the specimen head remains exactly in position, the setting is correct.
If the specimen head moves upwards or downwards, a fine adjustment is necessary.
If the force balancing system is notadjusted correctly, work injuries
may be the result.
The adjustment is carried out via screw (34),
which is located on the underside of the microtome base plate and can be accessed by removing the section waste tray. Use the 5 mm Allen key
(with handle) to adjust the screw.
34
Fig. 18
Leica RM2235
• If the specimen head has moved downward,
rotate the screw clockwise through approx.
½ turn and check whether the specimen head
remains stable.
• If the specimen head has moved upward, rotate the screw counterclockwise through
approx. ½ turn and check whether the specimen head remains stable.
• Continue turning the screw until the specimen head remains exactly in position.
23
5.
Operation
5.4 Clamping the specimen
Always clamp the specimen block BEFORE clamping the knife.
Lock the handwheel and cover the knife edge with the knife
guard prior to any manipulation of knife or specimen, prior to
changing the specimen block and during all work breaks!
• Rotate the handwheel until specimen clamp is in the uppermost position.
• Block the handwheel (allow lever (5) Fig. 2 to notch) and activate the
brake.
• Insert a specimen block into the specimen clamp.
A detailed description for inserting the specimen into various
object clamps and specimen holders is provided in Chapter 6,
“Optional accessories”.
5.5 Clamping the knife / disposable blade
Be very careful when handling microtome knives or blades.
The cutting edge is extremely sharp and can cause severe injury!
• Carefully insert knife or disposable blade into the knife holder and
clamp.
• Make sure that the blade is clamped parallel to the upper edge of the
pressure plate.
(For more information see Chapter 6.2.2, Fig. 28)
A detailed description for inserting the blade or the knife into
the individual knife holders is provided in Chapter 6, “Optional
accessories”.
24
Instruction manual V 1.1 – 02/2005
5. Operation
5.6 Sectioning
Always rotate the handwheel clockwise at a uniform speed.
Otherwise, the locking mechanism will not work correctly.
The rotation speed of the handwheel must be adapted to suit
the hardness of the specimen.
For harder specimens, use a slower speed.
Cutting into the specimen (trimming)
• Run the specimen to the rear end position by turning the coarse driving
wheel.
• Push the knife holder on the knife-holder base almost until it is just
before the object.
• Orientate the position of the specimen surface (only in the case of
specimen holders that can be orientated).
• Release the handwheel lock, or handwheel brake, respectively.
• Using the trimming lever select the required trimming stage.
• Begin the cutting process by turning the handwheel.
• Stop the cutting process when the required specimen level has been
reached.
• Let go of the trimming lever.
Remove the sections
• Set the required section thickness, or check the value setting on the
display, respectively.
Always use a different area of the cutting edge for trimming and cutting.
• To do so, laterally displace the blade or knife in the knife holder.
When using the knife holder E with lateral movement, it is sufficient to
move the knife holder sideways.
• For sectioning, turn the handwheel evenly in a clockwise direction.
Take care not to block the coarse driving wheel when turning
the handwheel!
Otherwise there will be no feed motion of the section thickness
and thus no sectioning will occur.
• Pick up the sections and mount them on microscope slides.
Leica RM2235
25
5.
Operation
5.7 Changing the specimen or interrupting sectioning
Lock the handwheel and cover the knife edge with the knife
guard prior to any manipulation of knife or object head, as well
as prior to changing the specimen block and during all work
breaks!
• Raise the specimen to the upper end position and activate the mechanical handwheel lock.
• Cover the cutting edge with the knife guard.
• Remove the specimen from the specimen clamp and mount a new
sample to continue.
• Run the object clamps with the coarse driving wheel back far enough
until the new specimen can start being cut.
5.8 Finishing daily routine
• Raise the specimen to the upper end position by turning the handwheel
and engage the handwheel lock.
Always remove the knife / blade before detaching the knife
holder from the instrument.
Always put the knives back into the knife case when not in
use!
Never place a knife anywhere with the cutting edge facing upwards and never try to catch a falling knife!
• Remove the blade from the knife holder and insert it in the receptacle
at the bottom of the dispenser, or remove the knife from the knife holder and put it back in the knife case.
• Remove the specimen from the specimen clamp.
• Push all section debris into the section waste tray and empty the tray.
• Switch off the instrument main switch.
• Clean the instrument (see Chapter 8.1).
26
Instruction manual V 1.1 – 02/2005
6. Optional accessories
6.1 Installing the fixture for specimen clamps
Depending on each invididual order, the basic instrument is delivered with either an orienting or
non-orienting fixture for specimen clamps, which needs to be installed on the microtome by the
user. Both fixtures are compatible with all specimen clamps available as accessories.
Prior to installing the fixture on the specimen arm, lock the handwheel locking mechanism.
6.1.1 Non-orienting fixture f. spec. clamps
2
• Fasten the non-orienting fixture for specimen
clamps (4) to the specimen head (3):
Remove screw (1), place fixture (4) onto the
specimen head (3) from the the front and tighten screws (2) with the 3 mm Allen key.
Then insert screw (1) from the side and tighten
slightly with the 4 mm Allen key.
4
3
5
Fig. 19
1
5
5a
5b
Do not remove the rubber ring before
the fixture has been fastened to the
specimen head.
6
6.1.2 Orienting fixture f. specimen clamps
3
•
•
7+8
•
2
•
1
•
7+8
Fig. 20
•
9b 9b 10 4
9a 9a
Finally, place dove tail guide (2) onto fixture and
tighten 4 screws (1) with a 3 mm Allen key.
Leica RM2235
•
•
Loosen eccentric bolt (6) rotating it counterclockwise.
With a screw driver, unscrew pressure device
(5) completely and pull it out together with
spring (5a) and pin (5b).
Completely unscrew adjusting screws (3) and
(4).
Place orienting fixture onto specimen head as
shown on the left.
Insert screws (7+8) into bore (2 screws (8) can
be accessed through bore (9a)) and tighten
screws evenly with 3 mm Allen key.
Insert spring (5a) and pin (5b), with the flatter
side facing forward into pressure device (5).
Tighten pressure device (5) completely with a
screwdriver.
Retighten adjusting screws (3+4) completely.
27
6.
Optional accessories
6.1.3 Fixture for specimen clamps with
precision orientation
• Prior to installing the fixture with precision
orientation, loosen 4 screws (10) (3 mm Allen
key) and carefully detach the fixture for
specimen clamps from base plate (9).
10
9
12
11
11
• Fasten the base plate to specimen head (12)
with a 3 mm Allen key and 4 screws (11) (delivered together with fixture with precision
orientation).
• Now fasten the fixture with precision orientation to the specimen head with 4 screws
(10) and 3 mm Allen key.
When the fixture with precision orientation is not in use, store the base
plate, 4 screws (11) and fixture with
precision orientation together in the
same place.
Fig. 21
28
Instruction manual V 1.1 – 02/2005
6.
Optional accessories
6.1.4 Quick-clamping system
The quick-clamping system is a specimen
clamp used together with either the fixture for
specimen clamps with precision orientation and
zero reference point indicators or with the orienting fixture for specimen clamps.
• Use a 2.5 mm Allen key to insert and tighten
4 screws (13) in bore A.
A
13
A
Fig. 22
Leica RM2235
29
6. Optional accessories
6.2 Specimen clamps and holders
All object clamps available as accessories can be integrated into either the directional or
non-directional specimen holder fixture.
6.2.1 Standard specimen clamp
66
The standard object clamps are available in two
sizes: 40 x 40 mm and 50 x 55 mm.
It is designed for direct clamping of rectangular
blocks. In addition, it accommodates the foil
clamps.
67
68
• Turn the knurled screw (66) counterclockwise to move the movable jaw (68) downward.
• Mount the sample (67) as required.
• Turn the knurled screw (66) clockwise to
move the movable jaw upward against the
fixed jaw to securely clamp the sample.
Fig. 23
6.2.2 Vee insert
66
69
70
67
68
Fig. 24
30
The vee insert (70) is mounted in the hole provided in the lower movable jaw of the standard
specimen clamp.
This enables to clamp round specimens in the
standard specimen clamp.
• Turn the knurled screw (66) counterclockwise to move the movable jaw (68) downward.
• Insert the pin (67) of the vee insert (70) in the
hole (69) of the lower jaw (68).
• Mount the sample as required.
• Turn the knurled screw (66) clockwise to
move the movable jaw with the vee insert
upward against the fixed jaw to securely
clamp the sample.
Instruction manual V 1.1 – 02/2005
6.
6.2.3 Foil clamp type 1
This foil clamp is appropriate both for clamping
very small foil pieces and flat, angular samples.
It is mounted in the standard specimen clamp.
66
74
73
72
Optional accessories
Clamping of foil pieces
• Move the movable jaw (74) to the right as required by turning the set screw with an Allen
key size 4 (71).
• Place the foil (72) between the movable jaw
(74) and the fixed jaw (73).
• To clamp the foil, screw the movable jaw (74)
against the fixed jaw (73) by using the Allen
key.
• Insert the foil clamp (75) in the standard
specimen clamp as shown.
• Turn the knurled screw (66) clockwise to
clamp the foil clamp in the standard specimen clamp.
71
75
Fig. 25
73
74
76
77
67
Clamping of flat samples
To clamp angular samples, replace the long set
screw (76) with the short set screw (77) provided with the foil clamp.
• Unscrew the long set screw (76) on the left
with an Allen key size 4 (71).
• Screw the short set screw (77) in the hole.
• Place the sample (67) between the movable
jaw (74) and the fixed jaw (73).
• To clamp the sample, screw the movable
jaw (74) by turning the set screw (77) against
the fixed jaw (73).
• Insert the foil clamp in the standard specimen clamp as shown.
• Turn the knurled screw (66) clockwise to
clamp the foil clamp in the standard specimen clamp.
Fig. 26
Leica RM2235
31
6. Optional accessories
6.2.4 Foil clamp type 2
This foil clamp is appropriate for large foil ribbons.
It is mounted in the standard specimen clamp.
• To open the jaws (78) and (79) lightly loosen
the 3 screws (81) with an Allen key size 4
(71).
• Insert the foil (72) from behind to position it
between the movable jaw (79) and the fixed
jaw (78).
• To clamp the foil, first tighten the screw in
the middle and then the other two screws
(81) with the Allen key (71).
• Place the foil clamp (82) in the standard
specimen clamp so that the beveled surface
(80) on the back of the foil clamp points to
the right or left.
• Turn the knurled screw (66) clockwise to securely clamp the foil clamp in the standard
specimen clamp.
66
72
78
79
80
82
81
71
Fig. 27
6.2.5 Universal cassette clamp
The universal cassette clamp (UCC)
is designed to for horizontal or vertical clamping of all kinds of commercial cassettes.
60
• Push the lever (60) to the left.
• Mount the cassette (65) horizontally or vertically as required.
• To clamp the cassette, push the lever (60) to
the right.
65
Fig. 28
32
Instruction manual V 1.1 – 02/2005
6.
Optional accessories
6.2.6 Super Mega cassette cla mp
2
3
4
5
1
Fig 29
Installing the SuperMega cassette clamp
The SuperMega cassette clamp should preferably be used together withthe non-orienting fixture for specimen clamps.
To install the SuperMega clamp, proceed as follows:
First, install the clamp on the specimen head, then remove the rubber ring (5) (do not remove the rubber ring first!).
• Screw the non-orienting fixture for specimen clamps (4) onto the specimen head (3):
Remove screw (1), then put fixture (4) on specimen head (3) from the
front. Tighten screws (2) with Allen key no. 3.
Insert screw (1) from the side and tighten slightly with Allen key no. 4.
• Insert the SuperMega cassette clamp from the left side into the dovetail guide of the non-orienting fixture for specimen clamps and tighten
screw (1) completely.
If the orienting fixture for specimen clamps is used with the
knife holder base without lateral adjustment, the orientation
mechanism must be in position „0“ and the cover of the backlighting must be removed (otherwise, the different parts will
collide).
Never use the SuperMega cassettes together with the backlighting system!
Leica RM2235
33
6.
Optional accessories
6.2.7 Holder for round specimens
The holder for round specimens is designed to accommodate cylindrical samples.
Inserts for specimens of 6, 15 and 25 mm diameter are available.
• To mount the required insert (89.1-3) turn the
clamping ring (90) counterclockwise and
remove.
92
89.1
• Place the required insert into the tension
ring (90) and screw the tension ring (91) onto
the thread by turning it clockwise.
89.2
• Mount the sample (67) and fix by turning the
clamping ring (90) clockwise.
91
90
• To orient the inserted sample, insert the pin
(92) into the bore (93) and rotate it counterclockwise to release the clamp. You can
now rotate the specimen so that the side you
want faces upwards.
89.3
67
93
• To lock it in the position you have chosen,
tighten the pin (92) by turning it clockwise.
Fig. 30
34
Instruction manual V 1.1 – 02/2005
6. Optional accessories
6.3 Knife holder base and knife holder
The plastic handles of all clamping levers on the
instrument and knife holders can be turned to
the position that is most convenient for each
user.
Pull the grip (94) out of the lever, hold it in this
position, and rotate it to the desired position. It
will then lock automatically when released.
94
Fig. 31
6.3.1 Knife holder base, without lateral
movement feature
Repositioning the knife holder base
The one-piece knife holder base (rigid) (51) can
be moved forwards and backwards on the
microtome base plate.
This vertical displacement allows bringing the
knife holder into the optimal cutting position in
relation to the specimen.
51
• To release, rotate the clamping lever (50) on
the right side of the microtome base plate
counterclockwise.
• Reposition the knife holder together with the
knife holder base forward or backward as
appropriate.
• Secure the clamping mechanism by rotating
the lever (50) clockwise.
50
Fig. 32
Leica RM2235
35
6.
Optional accessories
6.3.2 Knife holder E/E-TC
The knife holder E-TC is designed
for the Leica TC-65 tungsten carbide
blades.
Prior to inserting the blade, both
knife holder and knife holder base
must have been installed on the instrument!
Inserting the blades, knife holder E and E-TC
Knife holder E-TC
• Fold knife guard (9) downward.
• To insert the blade, flap the right clamping
lever (10) forward and down.
• Carefully insert the blade from the side.
Make sure that the blade is clamped parallel
to the upper edge of the pressure plate.
9
• To clamp the blade, rotate clamping lever
(10) back upwards.
10
Fig. 33
The knife holder E is designed for conventional disposable blades from all current manufacturers. It is available in two models: one for narrow-band blades and one for broadband blades. The knife holder has a lateral movement, so that the entire width of the
blade can be used.
The clamping levers on the knife
holder are not interchangeable. The
two clamping levers (10, 11) must
remain in the position shown at all
times, as otherwise isolated malfunctions of the knife holder can occur.
Clamping lever for the blade (10) at
the right, clamping lever for the lateral displacement (11) at the left.
Knife holder E
10
11
9
Fig. 34
36
Instruction manual V 1.1 – 02/2005
6. Optional accessories
Messerhalter E
10
13
11
B
A
12
Fig. 35
Note on knife holder E:
Lateral displacement (only for kife holder E)
The lateral movement feature of the knife holder
base enables the use of the entire length of the
blade or knife, eliminating the need for readjusting the knife holder. The knife holder E consists
of the segment arc A (with lever (11)), the
clamping top B (with lever 10) and ejection lever
(13)).
The extreme left and right positions as well as
the center position are each marked with a
notch point.
• To release the clamping mechanism, rotate
the lever (11) on the left side of the knife holder
forwards.
• Move the knife holder sideways.
• To clamp, rotate the lever (11) back.
The knife holder E is an important precision component, the quality and
precise adjustment of which have a lasting effect on the entire function of
the microtome.
In cases of malfunction or damage to the clamping top, it is necessary to replace the entire clamping top, including its clamping levers.
For cases of malfunction or damage occurring after the warranty has expired,
Leica Microsystems offers new clamping tops at a special price.
In this way, perfect function of the device can be ensured over the course
of many years.
Adjusting the clamping power of the clamping top on the segment arc
To ensure good sectioning results, clamping top
B must be securely clamped on segment arc A.
Eccentric lever (11) is used for clamping. The
clamping power is adjusted via screw (12) on
the underside of the segment arc. The clamping
power is correctly adjusted, when increasing
resistance is noted when turning the clamping
lever upwards to the limit stop.
Leica RM2235
To adjust the clamping power, first adjust screw
(12) (with 2.5 mm Allen key) so that the lever
slips, i.e. does not lock. Next, rotate screw (12)
about 1/4 of a turn to the left or right and check
whether the lever clamps correctly (it should
not slip but should not get jammed before it gets
to the upper limit stop position either).
(There is also an excellent instruction video on the
CD that comes with the manual).
37
6.
Optional accessories
6.3.3 Knife holder N/NZ
The knife holders N and NZ are appropriate for standard steel and tungsten carbide
knives, profile c and d, up to 16 cm long. The integrated height adjustment feature allows
you to also use knives that have been resharpened numerous times.
Mounting the knife support bar
• Push knife guard (8) to the center.
• Set the knife support bar (46) onto the height adjustment screws (not
visible) as shown. The flat ends of the height adjustment screws must
be located in the slots at each end of the knife support bar.
Prior to inserting the knife, both knife holder and knife holder
base must have been installed on the instrument!
Enlarged detail:
Knife inserted and
height-adjusted.
49
Knife holder NZ
For holding conventional and hard
metal knives up to 16 cm in length.
Knife pressure plate (56) for extreme
stability and full utilization of the
knife blade.
39
Knife holder N
For holding
conventional knives up
to 16 cm in length.
8
47
56
49
48
46
Fig. 36
38
Instruction manual V 1.1 – 02/2005
6. Optional accessories
Inserting the knife
• Rotate the knurled nuts (48) on the right and left of the knife holder forward in opposite directions, lowering the knife support bar to the lowest possible position, thus ensuring that the knife edge will not be damaged when inserting the knife.
• Unscrew the clamping screws (49) as far out as possible (rotate counterclockwise).
• Hold the knife (47) at the knife back and carefully insert it in the holder
from the side as shown with the cutting edge facing upward.
Knife height adjustment
When adjusting the clearance angle, the knife edge should be positioned
as exactly as possible in the actual center of rotation of the knife holder.
Edge (39) of the rear clamping jaws serves as a reference position for correct knife height adjustment. The knife edge should be parallel with the
locating edges.
• Rotate the knurled nuts (48) uniformly and backwards until the knife
blade is parallel to the lay-on edge (39) (see detailed illustration) of the
rear clamping chucks.
• To clamp the knife (47) evenly screw the two knife clamping screws
(49) inward (rotate clockwise).
Lateral repositioning of the knife
•
•
•
•
Leica RM2235
Push knife guard (8) to the center.
Loosen the clamping screws (49) by turning them counterclockwise.
Push the knife (47) to the left or right as required.
To clamp the knife (47), always tighten the clamping screw (49) first
which is located on the side to which the knife has been repositioned
by turning it clockwise.
39
6.
Optional accessories
6.4 Section waste tray
• Push the section waste tray (18) from the
front to the microtome base plate (53) until it
is held in place by the two magnets (39) (on
the front of the microtome base plate).
To remove the section waste tray, lift it
slightly and pull it off towards the back.
53
39
18
Fig. 37
6.5 Backlighting
1
1
The backlighting system is inserted
into the one-piece knifeholder base
from the front.
2
5
3
4
• Remove the two screws (1) using a slotted
screwdriver and then remove the cover
plate (2).
• Insert backlighting (3) into the recess.
• Connect the plug (4) of the backlighting system into the socket (5) on the microtome.
Plug the power supply unit into the mains
socket.
The backlighting illuminates once the microtome is turned on with the mains switch.
Fig. 38
NEVER use the backlighting device
in conjunction with the SuperMega
cassette clamp.
40
Instruction manual V 1.1 – 02/2005
6. Optional accessories
6.6 Tray
The tray is mounted on the hood of the microtome so that the small feet on the underside fit
into the cutouts on the hood.
It is for storage of the utensils used during
sectioning as well as the sectioned specimens.
Fig. 399
6.7 Freezer pack
The freezer pack consists of the cooling plate
(98) and the insulation jacket (99). It serves for
cooling paraffin specimens (or keeping them
cool, resp.). Up to 35 standard cassettes can be
cooled at the same time. The specimens require
approx. 20 min. for being cooled from room temperature (approx. 20 °C) to “sectioning temperature“.
The cooling performance depends on the ambient temperature and the volume of the specimens being cooled.
The insulation jacket can be placed on the hood
of the microtome in the same manner as the
tray, or it can be placed next to the instrument.
98
98
When using the freezer pack on the
instrument the tray (Fig. 33) must be
removed.
99
Fig. 40
Leica RM2235
• Remove the freezer plate from the insulation
jacket and place it in a deep freezer, ideally
overnight (but for at least six hours) at approx. -23 °C.
• Reassemble the freezer plate and insulation
jacket and place them on the bench or the
instrument.
41
6.
Optional accessories
6.8 Ordering information
Fixture for specimen clamps, non-orienting, silver-colored .............................................. 050238160
Fixture for specimen clamps, orienting, silver-colored ...................................................... 050238949
Fixturfor specimen clamps, orienting, silver-colored,
with 2 zero reference point indicators .................................................................................. 050237717
Quick clamping system, assy. ................................................................................................. 050237718
Knife holder base non-orienting, silver-colored .................................................................. 050237962
Knife holder N RM22xx, silver-colored .................................................................................. 050237993
Knife holder NZ RM22xx, silver-colored ............................................................................... 050237994
Knife holder E, for low-profile blades, RM22xx, silver-colored .................................(old) 050237958
Knife holder E for low-profile blades, RM22xx, silver-colored,
with ejection lever ........................................................................................................ (new) 050240508
Knife holder E for high-profile blades, RM22xx, silver-colored .................................(old) 050237961
Knife holder E for high-profile blades, RM22xx, silver-colored,
with ejection lever ......................................................................................................... (new) 050240509
Knife holder E, for low profile blades, with section floating bath RM22xx ...................... 050238961
Knife holder E, for high profile blades, with section floating bath RM22xx ..................... 050239114
Knife holder E-TC RM22xx, silver-colored ............................................................................ 050237997
Standard specimen clamp w/adapter, 50 x 60, silver-colored ........................................... 050238005
Standard specimen clamp w/adapter, 40 x 40, silver-colored ........................................... 050237998
Vee insert for standard specimen clamp, silver-colored ................................................... 050238000
Univ. cassette clamp w/one hand operation, w/adapter, RM22xx, silver-colored ........ 050237763
Universal cassette clamp, ice-cooled ................................................................................... 050237793
SuperMega clamp, assy., RM22xx, silver-colored .............................................................. 050238967
Foil clamp - type I, black-colored ........................................................................................... 040209307
Foil clamp - type 2, black-colored .......................................................................................... 040226922
Round specimen holder, silver-colored ................................................................................ 050238001
Round specimen holder with adapter and 3 clamping chucks silver-colored ............... 050238002
Clamping chuck, 6 mm diameter ............................................................................................ 035608322
Clamping chuck, 15 mm diameter .......................................................................................... 035609200
Clamping chuck, 25 mm diameter .......................................................................................... 035608320
42
Instruction manual V 1.1 – 02/2005
6. Optional accessories
Fixture for EM specimen holders, blaci ................................................................................. 050229968
Universal specimen holder for EM specimens .................................................................... 035610868
Flat specimen holder for EM specimens ............................................................................... 035510405
Special wrench for EM holders .............................................................................................. 035610869
Backlighting assy. ..................................................................................................................... 050238719
External power supply, assy. .................................................................................................. 050031244
Wrist cushion ............................................................................................................................ 050238768
Hand rest for waste tray .......................................................................................................... 050238770
Freezer pack (freezer plate / insulation jacket), complete ................................................. 050238325
Section waste tray .................................................................................................................... 050237931
Section waste tray RM2265..................................................................................................... 050339060
Demo Box RM22xx series ........................................................................................................ 050238930
Storage tray ............................................................................................................................... 050237932
‘Leica’ brush w/magnet ........................................................................................................... 018340426
Leica RM2235
43
7.
Trouble shooting
In the following table there is a list of the most common problems which can arise while
working with the instrument, along with possible causes and troubleshooting procedures.
Problem
Possible cause
Corrective action
7.1 Possible faults
1. Thick/thin sections
The sections alternate between
being thick and thin. In extreme
cases, there are no sections whatsoever.
2. Section compression
The sections are very compressed,
show folds or are squeezed together.
• The blade is not clamped properly.
• Reclamp the blade.
• The blade is dull.
• Laterally displace the knife holder
or insert a new blade.
• The pressure plate is damaged or
incorrectly adjusted.
• Insert a new pressure plate or use a
new knife holder.
• Readjust the pressure plate.
• Clearance angle of the knife/blade
too small.
• Methodically experiment with larger
clearance angle settings until you
have found the optimum angle.
• The blade is dull.
• Use another area of the blade or a
new blade.
• The specimen is too warm.
• Cool the specimen before sectioning.
• The sectioning speed is too fast.
• Reduce the sectioning speed.
3. “Stripes“ in sections
For knife holder E
• There is an accumulation of paraffin • Remove paraffin from this area on a
regular basis.
on the rear pressure plate of the
knife holder.
4. Noises during sectioning
The knife “sings” when sectioning
hard specimens. The sections show
scratches or chatter marks.
• The sectioning speed is too fast.
• Turn the handwheel at a slower
speed.
• The clearance angle is too wide.
• Methodically reduce the clearance
angle setting until you have found
the optimum angle.
• Insufficient clamping of object and/
or knife holder.
• Check all screw and clamp connections on the object holder system
and the knife holder. If necessary,
tighten the levers and screws.
• The front end position has been
reached.
• Run the specimen back by turning
the coarse driving wheel.
• Too great of a sectioning force was
applied.
• Adjust the sectioning speed and/or
section thickness when trimming.
Select a smaller section thickness,
rotate the handwheel more slowly.
7.2 Instrument malfunctions
1. There is no further feed motion and
thus no sectioning.
2. High blade consumption
44
Instruction manual V 1.1 – 02/2005
8. Cleaning and maintenance
8.1 Cleaning the instrument
Always remove the knife / blade before detaching the knife holder from the instrument.
Always put the knives back into the knife case when not in use!
Never place a knife anywhere with the cutting edge facing upwards and never try to
catch a falling knife!
When using cleaners, comply with the safety instructions of the manufacturer and the labor-safety regulations of your laboratory!
When cleaning the outer surfaces, do not use xylene or solvents containing acetone or
xylene. Xylene or acetone will damage the finished surfaces!
Ensure that liquids do not enter the interior of the instrument during cleaning!
Before each cleaning carry out the following preparatory steps:
• Raise the specimen clamp to the upper end position and activate the
handwheel lock.
• Switch the unit off and unplug it.
• Remove the blade from the knife holder and insert it in the receptacle
at the bottom of the dispenser, or remove the knife from the knife holder and put it back in the knife case.
• Remove knife holder base and knife holder for cleaning.
• Remove the specimen from the specimen clamp.
• Remove section waste with a dry brush.
• Remove specimen clamp and clean separately.
Instrument and outside surfaces
If necessary, the varnished outside surfaces of the control elements can
be cleaned with a mild commercial household cleaner or soap water and
then be dried with a moist cloth.
To remove paraffin residue, xylene substitutes, paraffin oil, or paraffin
removers such as “Para Gard” (Polysciences) can be used.
The instrument must be completely dry before it can be used again.
Cleaning the knife
When cleaning the knife, always wipe from the knife back towards the cutting edge,
NEVER the other way round. Risk of injury!
For cleaning, use alcohol-based detergents or acetone.
Leica RM2235
45
8.
Cleaning and maintenance
Knife holder E
Take the knife holder apart for cleaning. To do
so, proceed as follows:
10
9
• Fold knife guard (9) downward.
11
• Rotate the clamping lever (11) of the lateral
displacement forwards and pull it out sideways.
83
• Push the knife holder base plate (86) with the
pressure plate (83) until it can be removed
from the segment arch (87).
86
Fig. 41
11
• Rotate the blade clamping lever (10) downward and pull it out sideways.
• Remove pressure plate (83).
• Clean all parts of the knife holder.
When cleaning several knife holders at the same time, be sure not to
mix up the individual parts.
87
For cleaning and removal of paraffin, do not use xylene or cleaning
fluids containing alcohol (e.g. window cleaner).
86
• Dry knife holder and reassemble.
• After cleaning the moving parts, apply a thin
coat of oil for driving parts (see also Chapter
8.3).
83
• When installing the pressure plate (83), ensure that the upper edge is parallel to and
level with the rear edge of the knife holder
base (86) (see also Fig. 28, Page 30).
10
Fig. 42
46
Instruction manual V 1.1 – 02/2005
8. Cleaning and maintenance
Universal cassette clamp
60
13
Fig. 43
• Detach cassette clamp for a thorough cleaning, removing all paraffin
residues (13).
• For cleaning, do not use xylene. Use xylene substitutes or paraffin
removers such as “Para Gard.”
• The cassette clamp (13) can also be placed in an oven heated to a
maximum of 65 °C, until the liquid wax escapes.
• Remove paraffin residues with a dry cloth.
• After such a cleaning procedure in an oven, always be sure to lubricate the axle and spring of the clamping lever (60) (see also chapter
8.3).
8.2 Maintenance instructions
Only authorized and qualified service personnel may access the internal components of
the instrument for service and repair!
The instrument is basically maintenance-free.
To ensure trouble-free operation of the instrument over a long period of time, the following is recommended by Leica:
1. Thoroughly clean the instrument on a daily
3. Have the instrument inspected on a regular
basis.
basis by a qualified service technician authorized by Leica.
2. Enter into a service contract at the latest at
the end of the warranty period. For more inThe intervals depend on how heavily the information, please contact your local Leica
strument is used.
technical service center.
We recommend the following inspection intervals depending on the general workload of the instrument as defined in the two categories listed below:
Category I
Category II
Number of sections per day:
> 8.000 sections per day
< 8.000 sections per day
Workload (hours per day):
> 5 hours per day
< 5 h/day
Sectioning speed:
Predominantly high sectioning speed
Slow to medium sectioning speed.
Specimen material:
Working with soft and hard specimens
Working mostly with soft specimens.
Maintenance:
Every 12 months
Every 24 months
Leica RM2235
47
8.
Cleaning and maintenance
8.3 Lubricating the instrument
95
Once a month, lubricate the following parts with
the included drive parts oil No. 405 (1- 2 drops
are enough).
96
Instrument and specimen holder :
• The clamping key (95) of the quick clamping
system.
• The T-piece (55) on the microtome base
plate.
• Guide rails (96) for the knife holder base on
the microtome base plate.
• On the knife holder base the T-piece (56)
55
56
Knife holder E:
• Clamping lever (11) for the lateral displacement.
• T-piece (88) and guide (97) of the knife holder for the lateral displacement.
• Clamping lever (10) for the blade.
11
88
10
97
91
Knife holders N and NZ:
• Sliding surfaces of the finger guard (8).
• Knurled nuts (73) for measuring height adjustment.
8
90
Universal cassette clamp:
• Shaft (90) and flat coil spring (91) of the
clamping lever of the cassette clamp. After
lubrication, move the lever back and forth
several times.
73
Fig. 44
48
Instruction manual V 1.1 – 02/2005
9. Warranty and service
Warranty
Leica Microsystems Nussloch GmbH guarantees that the contractual
product delivered has been subjected to a comprehensive quality control
procedure based on the Leica in-house testing standards, and that the
product is faultless and complies with all technical specifications and/or
agreed characteristics warranted.
The scope of the warranty is based on the content of the concluded
agreement. The warranty terms of your Leica sales organization or the
organization from which you have purchased the contractual product
shall apply exclusively.
Service information
If you are in need of technical customer service or spare parts, please
contact your Leica representative or the Leica dealer where you
purchased the unit.
Please provide the following information:
•
•
•
•
Model name and serial number of the instrument.
Location of the instrument and name of the person to contact.
Reason for the service call.
Delivery date
Decommissioning and disposal
The unit or parts of the unit must be disposed of according to existing
local applicable regulations.
Leica RM2235
49
Notes
50
Instruction manual V 1.1 – 02/2005