1
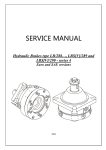
SERVICE MANUAL
Hydraulic Brakes type LB/288…, LBS[V]/289 and
LBS[V]/290 - series 4
Euro and SAE versions
2008
Service Manual
Hydraulic Brake type LB/288…
-2-
Service Manual
Hydraulic Brake type LBS[V]/289…
-3-
Service Manual
Hydraulic Brake type LBS[V]/290…
-4-
Service Manual
Disassembly
Hydraulic Brake type LB/288…,
LBS[V]/289… and LBS[V]/290…
Instructions in this manual are for brakes type
LB…
Cleanliness is extremely important when
repairing these brakes. Work in clean area!
Before disassembly, drain oil from brake.
If there is castellated nut, washer or key, they
have to be removed from the shaft.
Although not all drawings show the brakes in
disassembly devise, we recommend that you
keep brake clamped during disassembly.
For LBS[V]/289 and LBS[V]/290:
1. Unscrew plugs (3 pcs. for LB/288 and
LBS, 4 pcs. for LBV) using S6 Allen head
spanner and set them in order aside incl. seals.
Fig. 2
4. Remove piston from housing. Use special
tool with two screws M5x20 screwed in M5
holes to rest in advance and using a puller. Take
the O-rings and the Back up rings out of piston
and bushing grooves. The piston will come out
with inner rim of bearing, adjustment washer and
dick springs (see Fig.2).
5. Remove from housing groove O-ring
114,2х1,78.
Fig.1
2. Place the brake in disassembly devise
(plate with central hole ø83 for LB/288, 289 or
ø125 (ø127) for LBS(LBV)/290 with two pins
opposite staved into it) with the output shaft
directed downwards. Unscrew screws (8 pcs.)
using Allen head spanner.
Fig. 3
6. Take the O-ring 109,5х3 and the Back up
ring 109х114,2х1,4 out of housing groove (see
Fig.3).
Note: Unscrew the screws uniformly,
diametrically, successively to prevent breaking
the screw heads in result of the spring pressure.
Remove flange incl. shaft seal and outer rim
of bearing (see Fig. 1).
7. Remove bushing carefully out of the brake
housing using a puller with slight swivelling
motions. Remove from bushing groove O-ring
71х3 and Back up ring 71х76,2х1,4.
3. Remove from flange shaft seal. Do not
dismount outer rim of bearing from flange.
8. Take the O-ring 109,5х3 and the Back up
ring 109х114,2х1,4 out of housing groove (see
Fig.3).
-5-
Service Manual
Disassembly
Hydraulic Brake type LB/288…,
LBS[V]/289… and LBS[V]/290…
9. Remove from housing whole assembly
contained shaft, inner rims of front ant rear
bearings, steel disks, sinter disks and support
rings (see Fig.4). Separate the rims from shaft.
Check the friction elements for defects
(availability of wearing marks and checking the
weight) and replace with new ones.
1. CLEANING:
Wash all parts (except seals) in a weak
solvent on carbon base and then degrease.
2. MEASURING AND REPLACEMENT:
Measure all parts and compare their actual
dimensions with the nominal ones given in the
technical documentation. Replace any parts
with scratches or burrs that could cause leakage
or damage with new ones. Use new seals and
washers when reassembling the motor.
3. LUBRICATION:
Lubricate all friction parts, which should
be reassembled with light film of petroleum
jelly.
Fig.4
10. With a small screwdriver remove dust
seal from housing.
Knock the shaft seal out of housing using a
soft bushing and a plastic hammer (see Fig. 5).
Do not remove ftom housing outer bearing rim!
Fig. 5
Seal Kits:
Euro version
SK 41 5127 8032 for LB/288-series 4
SK 41 5127 8000 for LBS[V]/289 and LBS[V]/290
- series 4
SAE version
SK 41 5128 9500 for LB/288 - series 4
SK 41 5128 9544 for LBS/289 and LBS/290 series 4
SK 41 5128 9619 for LBV/289 and LBV/290 series 4
-6-
Service Manual
Reassembly
1. Place lubricated shaft seal (5 bar) in the
housing and firmly push with Seal driver (see
Fig.6).
Hydraulic Brake type LB/288…,
LBS[V]/289… and LBS[V]/290…
9. Mount lubricated O-ring 71х3 with back up
ring 71х76,2х1,4 into bushing grooves. (see
Fig.7)
Fig.6
2. If dismounted, stave the outer bearing
rim of the front tapered bearing into the housing
(with the bigger diameter orientated to the
housing) using a bushing made from nonferrous metal (bronze, brass) and sizes
ø55xø61x50 and a 2000daN press. Fix the
housing in reassembly devise (plate with an ø83
hole for LBS[V]/289 or ø125 (ø127) for
LBS[V]/290 and two pins on ø106).
Fig.7
10. Assemble together the lubricated piston
and bushing. Mount assembly in brake housing
using a hand-power press with guaranteed
rectilinear movement.
3. Stave to the rest over the front part of
shaft the inner bearing race and the roller
retaining ring of the front tapered roller bearing.
Use a small press and an ø36xø42x90 bushing.
Arrange correct the sinter disks beginning and
finishing with the steel disk and engaging the
sinter disks inner teeth with the shaft outer teeth.
Place support disks over friction pack. See
Table 1 for correct number of disks.
Place a slightly oiled safety metal cap (for
protecting the shaft seal ring lips) on the
assembled shaft. Mount carefully the shaft
assembly into the housing to the rest!
ATTENTION: Before mounting grease
well each friction dick. The external 3 teeth of
all steel disks should coincide with the grooves
milled in the housing!
4. Mount lubricated O-ring 109х114,2х1,4
(2 pcs.) with back up ring 109,5х3 (2 pcs.) into
housing grooves. (see fig.7)
ATTENTION: Orient O-ring to the arch
sector of back-up ring.
Fig.8
11. Install adjustment washer and disk springs
(see Fig. 8).
IMPORTANT! The size of adjustment washer
should ensure opening pressure as shown in Table
1 (after mounting of flange the dimension over
disk springs should be 9±0,1 mm) (see Fig.8).
12. On rear part of shaft stave the inner
bearing race of the rear bearing incl. the roller
retaining ring. Outer rim is staved in flange.
13. Lubricate and install O-ring 114,2х1,78 in
the housing seal groove.
-7-
Service Manual
Reassembly
Hydraulic Brake type LB/288…,
LBS[V]/289… and LBS[V]/290…
14. Lubricate slightly the internal surface of
the flange and orient it as follows:
2. Separate O-ring 82x2 from flange (see
Fig.9). There are no rear bearing and shaft seal.
- drain port in flange should be rotated 110
left of release port in housing (see Fig.1).
- line up the bolt holes of housing and
flange.
3. After dismounting of piston and bushing
turn the brake unit with open side downwards.
Shake it slightly on soft surface. Support rings,
sinter disks and steel disks will drop out.
15. Mount flange to housing with 8 screws
М8 and alternately torque them to 2,5÷3,0
daNm using S6 Allen head spanner (see Fig.1).
4. Reposition brake with output shaft up.
ATTENTION: The axial clearance
between front and rear tapered bearing should
be 0,04±0,1 mm. It can be realized by
decreasing the flange thickness.
16. Install seal on plug and torque to 2,5÷3,0
daNm using S6 Allen head spanner (see Fig.1).
For LBS plugs are 3 pcs. and for LBV – 4 pcs.
17. Lubricate flange seal groove and
external surface of shaft. Place lubricated shaft
seal (high pressure) in the flange and firmly
push with Seal driver.
18. Reposition brake assembly with output
shaft up. Lubricate dust seal and install in
housing seal groove.
19. Install key in shaft key groove. For cone
shafts install washer and screw castellated nut.
Fig. 10
Remove from housing shaft seal (see Fig.10).
Remove the retaining rings using utility pliers
for holes and shaft.
5. Place the brake in disassembly devise
(plate with central hole ø83 with two pins
opposite staved into it) with the output shaft
directed downwards. Separate shaft from housing
using a small press. Remove bearing from shaft.
Disassembly and reassembly of LB/288:
Follow the same disassembly and
reassembly procedures as for LBS[V]/289 and
LBS[V]/290 except following:
Disassembly:
1. The plugs are mounted in housing, not in
flange.
Reassembly:
6. Using a small press and bushing made from
non-ferrous metal (bronze, brass) stave to rest the
radial bearing over the front part of shaft.
Mount the retaining ring in shaft in front of
the bearing (see Fig.10).
7. With a small press sstave the assembled
shaft in front part of the housing. Mount the
retaining ring in housing (in front of the bearing).
Note: The retaining rings are correct mounted
when could be rotated over shaft axes.
Fig. 9
8. Place a safety cap over the shaft journal to
protect the seal lips against breaking. With seal
driver stave in the housing shaft seal (see Fig.11).
-8-
Service Manual
Reassembly
Hydraulic Brake type LB/288…,
LBS[V]/289… and LBS[V]/290…
9. Turn the housing and place it in an
assembling fixture (plate with a central hole ø83
and two pins of ø106 diametrically). Arrange the
steel and sinter disks successively in the housing
along the shaft teeth.
10. After mounting the flange to housing
insert lubricated O-ring 82х2 into flange seal
groove and place face seal to protect flange
surface.
Fig. 11
ATTENTION:
1. ** In all brakes, friction disks and separators should be lubricated. Space is filled with 50 ÷
120 cm3 mineral oil HLP (DIN 51524) or HM (ISO 6743/4).
2. Hydraulic brake is delivered without oil (it is lubricated only).
** For LB/288 fill oil after hydraulic motor assembly.
Table 1
Brake type
Steel
disk
Sinter
disk
Support
ring
Opening Pressure
Static torque
min
max
PSI [bar]
in.-lb. [daNm]
58÷116
4350
531÷708
[4÷8]
[300]
[6÷8]
116÷232 4350
1150÷1327
[8÷16]
[300]
[13÷15]
LB/288-7
3
2
4
LB/288-14
3
2
4
3
2
4
246÷333
[17÷23]
4350
[300]
1770÷1947
[20÷22]
4
3
3
246÷333
[17÷23]
4350
[300]
2743÷3009
[31÷34]
5
4
2
246÷333
[17÷23]
4350
[300]
3628÷3982
[41÷45]
7
6
-
246÷333
[17÷23]
4350
[300]
5310÷5753
[60÷65]
LB/288-21
LBS/289-21
LBS/290-21
LB/288-32
LBS/289-32
LBS/290-32
LB/288-43
LBS/289-43
LBS/290-43
LB/288-63
LBS/289-63
LBS/290-63
-9-
Service Manual
Service Handbuch
Hydraulic Brake Type LBS(LBV)/314, 315 (Euro and SAE versions)
Hydraulische Bremse Typ LBS(LBV)/314, 315 (Euro und SAE Versionen)
14
Service Manual
Service Handbuch
Item
Part to remove
Pos.Nr. Zerlegbare Teile
11 Castellated Nut
Kronenmutter
12
Washer
9
Scheibe
Parallel Key
Paßfeder
6,
4,
30,
5,
29
Seal Plug G ¼,
Plug G 3/8,
Plug G ¼,
Washer 17x21,
Washer 13x17
35
Stopfen G ¼,
Stopfen G 3/8,
Stopfen G ¼,
Dichtring 17x21,
Dichtring 13x17
Safety Cap
31,
32
Stützkappe
Washer
Ring A90,
Scheibe
Ring A90,
33
26
LBS(LBV)/314, 315 Dismantling
LBS(LBV)/314, 315 Demontage
Comments
Beschreibung
On tapered shaft motors only.
Remove it by S=46 mm socket spanner or unscrew it manually.
***
Nur für Motoren mit Keilwellen.
Die Mutter mit Hand oder mittels Steckschlüssels S=46 mm lösen.
Take it out along the brake shaft.
***
Entlang der Bremswelle herausnehmen.
Take it out using a little chisel and a plastic hammer. Knock the parallel
key slightly several times (along the brake shaft) on the front side.
***
Mit einem Meißel und Kunststoffhammers die Paßfeder herausschlagen.
Auf der Stirnfläche der Paßfeder entlang der Bremsachse schlagen.
Place the brake with the output shaft downwards directed in assembly
fixture (plate with central hole ø126 for LBS(LBV)/314 or ø161 for
LBS(LBV)/315 with two pins opposite staved into it). Unscrew seal plug
using a socket spanner or manually. Plug G 3/8 is unscrewed by an Allen
head spanner S=19 mm; plug G ¼ is screwed by an Allen head spanner
S=6 mm. Place parts in order aside.
***
Die Bremse mit der Ausgangswelle nach unten im Haltewerkzeug
spannen (Halteplate mit Zentrierbohrung ø126 für LBS(LBV)/314 oder
ø161 für LBS(LBV)/315 mit zwei gegenüber eingeschlagenen Stiften).
Stopfen G 3/8 wird mit Steckschlüssel S=19 mm und Stopfen G ¼ mit
Steckschlüssel S=17 mm losgeschraubt. Die Teile seitwäts ordnen.
Remove it manually or by screwdriver.
***
Mit Hand oder Schraubenzieher entfernen.
Take out retaining ring using pliers for holes.
Remove washer.
***
Den Ring mit Zange für Bohrungen ausziehen.
Die Scheibe entfernen.
Screw M10 (8 pcs.) Unscrew them by a S8 Allen head spanner.
ATTENTION: Valid for last two screws: unscrew them uniformly,
diametrically, successively to avoid breaking the screw
heads which can be caused by spring pressure.
***
Zylinderschrauben Die Schrauben mittels Steckschlüssels S=8 mm lösen.
Geltend für die letzten zwei Schrauben: diese langsam,
M10 (8 St.)
ACHTUNG:
kreuzweise
losschrauben,
um
Zerreißen
der
Schraubenköpfe infolge Federpresskraft zu vermeiden.
Take it out upwards incl.shaft seal ring, item 7 and bearing, item 25 using
Flange
two screwdrivers.
***
Den Flansch, inkl. Wellendichtring, Pos.7 und Lager, Pos.25 nach oben
Flansch
herausziehen. Dafür zwei Schraubenzieher verwenden.
15
Service Manual
Service Handbuch
Item
Part to remove
Pos.Nr. Zerlegbare Teile
25 Bearing
Lager
24
Shaft Seal
Wellendichtring
23
O-ring
O-Ring
22, 34 Springs
20
Kraftfeder
Balance Plate
Kolben
21
Washers
Scheiben
16, 18, Thrust Ring,
17, 19 O-ring
10,
14,
15,
13,
8
Stützring, O-ring
Shaft,
Sinterdiscs,
Lamelles,
Locking Bushing,
Bearing
3,
7,
2,
Welle,
Sinterlamellen,
Lamellen,
Rastbuchse,
Lager
Housing,
Shaft Seal Ring,
Retaining Ring,
LBS(LBV)/314, 315 Dismantling
LBS(LBV)/314, 315 Demontage
Comments
Beschreibung
Place the flange on a plate with hole min. ø95 as flange face to be leaned
on plate. Knock out the bearing by assembly bushing with external
diameter max.ø58 and a plastic hammer from opposite side.
***
Den Flansch auf Platte mit Bohrung min. ø95 stellen, so daß seine
Stirnfläche die Platte berührt. Den Lager mit Hülse (Außendiameter
max.ø58) und Kunststoffhammer von der Gegenseite ausschlagen.
Knock out the shaft seal ring using a bushing with with external diameter
ø 71 and a plastic hammer.
***
Den Wellendichtring mit einer Hülse mit Außendiameter ø 71 und
Kunststoffhammer ausschlagen.
Take it out of its seat in the Flange.
***
Den O-Ring aus seinem Sitz im Flansch herausziehen.
Remove the springs consequtively out of their seats in balance plate.
***
Die Feder nacheinander aus Kolben entfernen.
Take the balance plate out of brake housing, using two screws M6x20,
screwed in advance in M6 holes to rest and using puller. Use slight
swivelling motions
***
In der Bohrungen M6 des Kolbens zwei Schrauben M6x20 bis zum
Anschlag einschrauben. Den Kolben dann mit Abzieher und leichten
Drehebewegungen herausnehmen.
Turn balance plate with spring holes downwards and spring washers will
drop out.
***
Den Kolben mit den Federlöchern nach unten kippen, damit die Scheiben
herausfallen.
Take them out of the balance plate housing.
***
Die O-Ringe aus den Kolbennuten herausziehen.
Take the complete unit (consisting of shaft, bearing bushing staved on it
and roller-retainer ring, 6 pcs. sinterdiscs with internal teeth, 7 pcs.
lamelles and locking bushing) out of housing. Pull the bearing out by
puller. Order friction elemnts pack aside for testing defects. (availability
of wear and weight checking).
***
Die komplette Baugruppe, bestehend aus Welle, Lagerhülse und
Lagerkäfig, 6 St.Stirnlamellen, 7 St.Lamellen und Rastbuchse aus Gehäse
entfernen. Die Lager mittels Abziehers herausziehen. Die Friktionselemente auf Verschleiß prüfen und das Gewicht kontrolieren.
Place housing with flange upwards on surface.Open retaining ring and
take it out by pliers for holes. Pull shaft seal ring out of its seat by bushing
and plastic hammer. Dismantling of bearing external race is not allowed.
16
Service Manual
Service Handbuch
LBS(LBV)/314, 315 Dismantling
LBS(LBV)/314, 315 Demontage
Item
Part to remove
Pos.Nr. Zerlegbare Teile
8
Bearing
Gehäuse,
Wellendichtring,
Sicherungsring,
Lager
1. CLEANING:
2. MEASURING
AND
REPLACEMENT
3. LUBRICATION:
1. REINIGEN:
2. MESSEN UND
AUSWECHSELN:
3. SCHMIERUNG:
Comments
Beschreibung
ATTENTION: For absolute effectiveness it is recommended changing
of:
A) all seal elements;
B) lamelles (7 pcs.) and sinterdiscs (6 pcs.)
C) springs Item 22 because of material fatigue
D) washers Item 21 to reach parameters for separtion,
engagement and control of static (frictional) moment.
***
Das Gehäuse mit dem Flansch nach oben kippen. Den Sicherungsring mit
einer Spezialzange herausziehen. Den Wellendichtring mit einer Buchse
und Kunststoffhammer ausschlagen. Die äußere Laufscheibe nicht
demontieren.
Damit die einwandfreie Funktion der Bremse
ACHTUNG:
gewährleistet werden kann, empfielt sich die folgenden
Teile zu ersetzen:
A) Dichtungselemente;
B) Lamellen (7 St.) und Sinterlamellen (6 St.);
C) Feder, Pos.22 inforlge Materialermüdung;
D) Scheiben, Pos.21, um die Parameter des Bremseingriffs
und -auslösens zu erreichen. Dadurch wird auch das
statische (Friktions-) Bremsmoment kontrolliert.
All parts (except the seals) should be washed in a weak solvent on carbon base
and then degreased.
All parts should be measured and the actual dimensions should be compared
with the nominal ones given in the technical documentation. Replace worn out
parts with new ones. Replace all rubber and plastic parts.
Lubricate all parts which should be assembled with grease or Vaseline film.
***
Alle Teile (ausser Dichtungen) werden mit einem schwachen Lösungsmittel
auf Kohlenstoffbasis gereinigt und entfettet.
Alle Teile werden gemessen, um ihre Konformität mit den in der technischen
Dokumentation genannten Abmessungen zu prüfen. Die Verschleißteile
auswechseln. Alle Gummi - und Kunststoffteile ersetzen.
Alle einzubauenden Teile nach der Messung mit einer dünnen Schicht Fett
oder technischer Vaseline schmieren.
17
Service Manual
Service Handbuch
Item
Part to mount
Pos.Nr. Montageteile
3,
Housing,
8
Bearing Race
Gehäuse,
Lageraußenring
2,
7
Retainig Ring
Shaft Seal (5bar)
Sicherungsring,
Wellendichtring
10,
8,
13,
14,
15
Shaft
Bearing,
Locking
Bushing,
Lamelles,
Sinterdiscs
Welle,
Lager,
Rastbuchse,
Lamellen,
Sinterlamellen
16, 18, O-rings,
17, 19 Thrust Rings,
LBS(LBV)/314, 315 Reassembly
LBS(LBV)/314, 315 Montage
Comments
Beschreibung
Stave external bearing race on front tapered bearing (with the bigger
diameter to the housing cavity) by bushing made from non-ferous metl
(bronze, brass) with sizes ø 80x ø94x50 and 2.000 daN press. Place the part
with internal cavity upwards on mounting/dismantling plate with hole ø126
(for LBS(LBV)/314) or with hole ø162 (for LBS(LBV)/315) and two pins
ø12 ( for LBS(LBV)/314) or ø16 (for LBS(LBV)/315).
***
Mit Hilfe einer Buntmetallbuchse (Bronze, Messing) - ø80xø94x50 und
einer Presse 2.000 daN den Lageraußenring des vorderen Kegelrollenlagers
(mit dem größeren Durchmessers zur Gehäuseaushölung gerichtet)
einschlagen. Den Teil mit der Aushölung nach oben in einer Montageplatte
mit Bohrung ø126 (für LBS(LBV)/314) oder ø162 (für LBS(LBV)/315) und
zwei Stiften ø12 ( für LBS(LBV)/314) oder ø16 (für LBS(LBV)/315)
befestigen.
Place retaining ring in housing groove by pliers for holes. Stave the light
externlly oiled shaft seal ring in its housing seat (oiled) from the internal
housing cavity by bushing and plastic hammer.
***
Den Sicherungsring in seinem Platz mit Sonderzange im Gehäuse montieren.
Den Wellendichtring (leicht geschmiert) von außen mittels Buchse und
Kunststoffhammer in seinem Sitz einschlagen.
Stave the internal bearing race, incl. roller-retainer ring of front tapered
bearing to rest. Use 2.000 daN press and bushing ø61xø68x120.
Then carefully order locking bushing and lamelles as starting and finishing
the pack with steel discs. Internal teeth of sinterdiscs are engaged with
external shaft teeth. Place a slightly oiled safety metal cap (for protecting
shaft seal ring “lips” Item 7). Stave the shaft carefully in brake housing to
rest).
ATTENTION: External 3 teeth of all 7 metal lamelles should correspond
to splined housing grooves!
***
Lagerhülse und Lagerkäfig des vorderen Kegelrollenlagers bis zum
Anschlag auf der Welle einschlagen. Presse 2.000 daN und Buchse
ø61xø68x120 verwenden. Dann die Rasrbuchse und die Lamellen montiere,
indem die Reihenfolge der Lamellenmontage einhalten (die Innenzähne der
Sinterlamellen greifen in den Außenzähnen der Welle). Auf den
Wellenzapfen Schützkappe (leicht geschmiert) legen, um die Lippen der
Dichtung, Pos.7 vom Brechen zu schützen. Die Welle vorsichtig bis zum
Anschlag im Gehäuse einbringen.
Die 3 Außenzähne der sieben Stahllamellen sollen mit den
ACHTUNG:
gefrästen Nuten in Eingriff sein!
Assemble consequtively well oiled O-rings and thrust rings. O-rings should
fit well in well oiled arc-shaped parts of thrust rings. Place them in grooves
from their external face of balance plate.
***
18
Service Manual
Service Handbuch
Item
Pos.Nr.
20
21,
22
23,
26,
24,
33
25,
31,
32
LBS(LBV)/314, 315 Reassembly
LBS(LBV)/314, 315 Montage
Part to mount
Montageteile
O-Ringe,
Stützring
Comments
Beschreibung
Die geschmierten O-Ringe und den Stützring in den Kolbennuten
nacheinander einbauen. Die O-Ringe gehen in den bogenförmigen Bereich
des Stützrings hinein. Die Stützringe in den Nuten von der Fase her
montieren.
Slightly oil housing cylindrical and balance plate surfaces. Insert balance
Balance Plate
plate with rings in housing by carefully knocking.
***
Die Zylinderflächen im Gehäuse und Kolben schmieren und den Kolben mit
Kolben
den bereits eingebauten Dichtungen leicht schlagend im Gehüuse einbringen.
Assemble the necessary number of springs to reach a static (frictional)
Washers,
moment access, (see Application 1.)
Springs
ATTENTION: Washers with width 0,3; 0,5 and 0,8 (Item 21) are
assembled only if the static (frictional) moment and
pressure of separation are lower than the pointed out in
Application 1.
***
Im Kolben die gewünschte Zahl Feder (um das statische Bremsmoment zu
Scheibe,
erreichen) hineinbringen, Anhang 1.
Feder
Die Scheiben, Pos.21 (Breite 0.3, 0,5 und 0.8 mm dann
ACHTUNG:
montieren, wenn das Bremsmoment und die Öffnungsund Schleßdruck niedriger als die im Anhang 1
angegebenen !
Place
the
O-ring
(oiled
in advance) in flange slot. Stave shaft seal ring to rest
O-ring,
into the internal flange socket using a relevant bushing or plastic hammer.
Flange,
Shaft Seal Ring, (External surface of shaft seal ringand flange socket are oiled in advance).
Orient flange with rivet holes towards the name plate, Item 28 to the axis of
Screwes M10
assembling possition and the inlet port of the brakes. The four holes have to
be positioned at 110 left to it.
Screw the eight screws into the holes uniformly, diametrically and
consequtively by a socket wrench with tightening torque of 6 ÷ 6,5 daNm.
***
Den vorgeschmierten O-Ring in Flanschnute einbringen. Im inneren Sitz des
O-Ring,
Flansches den Wellendichtring mittels Buchse und Kunststofhammer bis
Flansch,
Wellendichtring, zum Anschlag einschlagen. Wellendichtring und Sitz vorschmieren.
Schrauben M10 Den Flansch wie folgt orientieren: zu den Typenschildlöchern (Pos.28). Die
4 Bohrungen befinden sich in 11o links vom Flansch gegenüber die
Montageposition und Zufuhrleitung der Bremse. Dann die 8 St.Schrauben
gleichmäßig kreuzweise mit Steckschlüssel S=8 mm und Anzugsmoment 6 ÷
6,5 daNm festziehen.
Mount on shaft the bearing internal ring with separator by bushing ø65xø56
Bearing,
and hammer to rest. Stave the external bearing ring in flange hole by
Washer,
bushing ø 88 x ø 78. Place a regulating washer on the bearing and then place
Ring A90
the ring A90 in flange groove using pliers for safety rings.
Check the bearing axial clearance by movement the shaft into its end
position usin a measuring device ( clearance recommended 0,004 ÷ 0,10
mm).
19
Service Manual
Service Handbuch
Item
Pos.Nr.
Part to mount
Montageteile
Lager,
Scheibe,
RingA90
5,
29,
4,
6,
30
Washer,
Seal Plugs,
Plugs
Scheibe,
Stopfen
9
Parallel Key
Paßfeder
1, 35 Safety cap
Schützkappe
LBS(LBV)/314, 315 Reassembly
LBS(LBV)/314, 315 Montage
Comments
Beschreibung
ATTENTION: Technological assembly should be made in first brake
mounting and when setting the real bearing axial clerance
as follows:
Insted of regulating washer, put an assembly one by
which bearing clearance is measured; in this way it is
defined the real thickness of regulating washer.
Dismantle the assemby washer and finally place the
corresponding washer
***
Lagerhülse und Lagerkäfig bis zum Anschlag mittels Buchse ø65xø56 auf
Welle einschlagen. Den Außendichtring des Lagers in der Flanschbohrung
mit Buchse ø88xø78 einschlagen. Die Scheibe auf Lager einlegen; den
Ring A90 mit Sonderzangen in Flanschnuten montieren.
Durch Vor- und Rücklauf der Welle in Endlagen den Axialspiel in den
Lagern (Istwert 0,04 ÷ 0,10 mm) durch Messuhr prüfen.
Bei Erstmontage der Bremse und wenn Ist-Axialspiel
ACHTUNG:
der
Lager
festzustellen
ist,
technilogischer
Zusammenbau
ausführen,
uzw.:
anstatt
der
Einstellscheibe, Montagescheibe für Lageraxialspiel
einbringen und die eigentliche Dicke der Scheibe
feststellen. Die Montagescheibe ausbauen und die
jeweilig bestimmte Einstellscheibe montieren
Place washers into the relevant housing and flange holes and screw seal
plugs as follows:
2 pcs. G 3/8 - use S=19 mm socket spanner and torque 2,5÷3 daNm;
3 pcs. G ¼ (4 pcs. for LBV/...) Allen head spanner S=6 mm and torque
2÷2,3 daNm.
Screw 2 pcs.seal plugs manually.
***
Die Scheiben in den entsprechenden Gehäuse- und Flanschbohrungen
einbringen und die Stopfen anziehen:
2 St. G 3/8 - mit Steckschlüssel S=19 mm und Anzugsmoment
2,5÷3 daNm;
3 St.G ¼ (4 St. für LBV/...) - mit Steckschlüssel S=6 mm und
Anzugsmoment 2÷2,3 daNm.
Die zwei Stopfen mit Hand festziehen.
Place it on shaf by knocking with plastic hammer.
***
Die Paßfeder mit Kunststoffhammer auf Welle einsschlagen.
Mount them on spigot ends
***
An Wellenzapfen montieren.
20
Service Manual
Service Handbuch
LBS(LBV)/314, 315 Reassembly
LBS(LBV)/314, 315 Montage
Appendix 1
Anhang 1
Spring/Feder Spring/Feder Opening Pressure* Static torque
item/Pos.22 item/Pos.34
Öffnungsdruck*
Statisches
pcs./St.
pcs./St.
Drehmoment
min
max
59113 604 00 59113 605 00
bar
daNm
LBS(LBV)/… - 21
9
300
4÷5
18÷23
LBS(LBV)/… - 29
12
300
6÷7
28÷33
LBS(LBV)/… - 43
6
300
9÷10
42÷46
LBS(LBV)/… - 65
9
300
13÷15
61÷70
LBS(LBV)/… - 85
12
300
18÷20
83÷92
LBS(LBV)/… - 110
15
300
20÷25
108÷118
LBS(LBV)/… - 130
18
300
27÷29
126÷136
* These values indicate the differences between brake inlet pressure and drainage cavities
pressure.
Diese Werte bezeichnen die Differenzen zwischen Zufuhrdruck der Bremse und
Dränageräumen.
Brake
Bremse
ATTENTION:
1. In all brakes, friction discs and separators should be lubricated. Space is filled with 150 ÷ 300
3
cm mineral oil HLP (DIN 51524) or HM (ISO 6743/4).
2. Hydraulic brake is delivered without oil ( it is lubricated only).
ACHTUNG:
1. Für einwandfreie Funktion aller Bremsen sind die Reibscheiben und Lamellen zu schmieren.
Den Raum mit 150 ÷ 300 cm3 Mineralöl HLP (DIN 51524) or HM (ISO 6743/4) füllen.
2. Die Bremse wird ohne Oil geliefert.
21