1
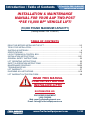
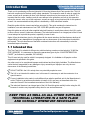
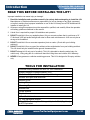
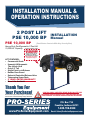
Installation Manual &
Operation Instructions
2 Post Lift
PSE 10,000 BP
PSE 10,000 BP
Installation
Manual
(Push Button Controls With Key Security Box)
Heavy-Duty DualSymmetric 2 Post Lift
10,000 LB. Capacity Call Your Distributor Today!
EXTENDED
WARRANTY
Protect Yourself For An
Additional 12 Months
Contact Distributor For Details!
Warranties Go Away
Equipment Stays!
Lift Features:
• Commercial Grade
• Symmetric AND Asymmetric
Two Lifts In One!
• Only 9’2” Tall
• Single Point Lock Release
• Rubber Door Guard
• Solenoid Controlled Release Valve
• Telescoping Screw Pads
• 5 Year LIMITED Warranty
• More Lifts Available!
Thank You For
Your Purchase!
We reserve the right to make changes in specifications
without notice and without making changes retroactive.
Read this manual completely before installing lift!!! KEEP
THIS MANUAL NEAR THE MACHINE AT ALL TIMES AND MAKE SURE ALL
USERS HAVE READ THIS MANUAL BEFORE OPERATING THIS MACHINE.
P.O. Box 734
Franklin, Indiana 46131
1-800-708-2988
www.ProSeriesEquipment.com
Volume: 03.03.2010 01:37 PM
Email: [email protected]
Information about this lift:
Model No.:
Capacity:
2 Post Lift: PSE 10,000 BP
Installation manual
PSE 10,000 BP
10,000 lbs.
Serial No.:
Installation Date:
Distributor:
Dist. Phone Number:
Installer:
Installer Phone Number:
www.ProSeriesEquipment.com
Volume: 03.03.2010 01:37 PM
2 of 40
Introduction / Table of Contents
2 Post Lift: PSE 10,000 BP
Installation manual
INSTALLATION & MAINTENANCE
MANUAL FOR YOUR AAP TWO-POST
“PSE 10,000 BP” VEHICLE LIFT!
(10,000 POUND MAXIMUM CAPACITY)
(Catalog Number: PSE 10,000 BP)
TABLE OF CONTENTS
READ THIS BEFORE INSTALLING THE LIFT........................................................................ 2-3
TOOLS FOR INSTALLATION.......................................................................................................3
SHIPPING & PARTS BOX............................................................................................................4
SPECIFICATIONS.................................................................................................................... 5-6
LAYOUT DRAWING & CONTROL BOX.......................................................................................7
INSTALLATION INSTRUCTIONS.......................................................................................... 8-21
GENERAL SAFETY INSTRUCTIONS........................................................................................22
LIFT OPERATING INSTRUCTIONS..........................................................................................22
SAFETY & OPERATION INSTRUCTIONS................................................................................23
MAINTENANCE SCHEDULE............................................................................................... 24-25
TROUBLESHOOTING...............................................................................................................26
LIFT WARRANTY.......................................................................................................................27
DIAGRAMS & ILLUSTRATIONS............................................................................................ 8-18
LIFT WARRANTY ACTIVATION FORM.....................................................................................29
Read this manual
completely before
installing lift!!!
DISTRIBUTED BY:
PRO SERIES EQUIPMENT
1-800-708-2988
Web: www.ProSeriesEquipment.com
E-mail: [email protected]
www.ProSeriesEquipment.com
Volume: 03.03.2010 01:37 PM
1 of 40
Introduction
2 Post Lift: PSE 10,000 BP
Installation manual
Thank you for purchasing an Electro-Hydraulic Lift from the Advance Auto Parts product line. This Lift
has been constructed to the best quality safety standards. This manual is made in order to supply the
owner, as well as all operators & users, with the basic instructions for the correct use of this lift. It is
important that the owner, installers, and all users adhere to the guidelines set forth in this manual to
ensure the correct, safe, use of this equipment, as well as ensure a long functional life for this product
as well. It is recommended that this product is installed by a PSE authorized installer.
Read this guide with the utmost care before using the lift. This guide contains the instructions for
installation, use and maintenance of our PSE 10,000 BP hydraulic two post lift systems.
Keep this guide as well as all other supplied technical literature in a safe place close to the Lift in order
to allow users to consult it whenever necessary. The technical literature is an integral part of the Lift and
it must always be kept with the product, especially in case of sale.
Again, follow the directions given by this guide with the utmost attention: the Manufacturer declines all
responsibility for any damage due to negligence and non-observance of the instructions found within
this manual. The non-observance of herewith-contained instructions will automatically involve the
immediate lapse of warranty.
1.1 Intended Use
This Two-Post Lift is suitable for lifting motor vehicles having a maximum total weight of 10,000 lbs.
(PSE 10,000 BP). It is necessary to respect the parameters given by the “LOAD DISTRIBUTION
CHART” (as foreseen by standard, EN 1493/98)
This Lift must only be used for which it is expressly designed. It is forbidden to lift people or other
equipment not specified in this guide.
Any other use is to be considered improper and irrational and thus highly forbidden. The Manufacturer
cannot be held responsible for any damage or injury caused by an improper use or by the nonobservance of the following instructions:
DO NOT INSTALL the Lift in windy sites or a potentially explosive room.
The Lift, is not intended for outdoor use. In this case it is necessary to ask the constructor for a
special version.
For any installation to be made in a site different than what is specified, ask for the Manufacturer’s
advice. Failure to get written authorization to install a Lift in any way not described within this
manual will result in the immediate termination of the Lift’s Warranty!
! The technical literature is an integral part of the Lift. Read this guide carefully before using the Lift,
because it contains very important safety rules for use and maintenance.
KEEP THIS AS WELL AS ALL OTHER SUPPLIED
TECHNICAL LITERATURE IN A SAFE PLACE
AND CONSULT WHENEVER NECESSARY.
www.ProSeriesEquipment.com
Volume: 03.03.2010 01:37 PM
2 of 40
2 Post Lift: PSE 10,000 BP
Installation manual
Introduction
READ THIS BEFORE INSTALLING THE LIFT!
Improper installation can cause injury or damage!
1. Read this installation and operation manual in its entirety before attempting to install the Lift.
Manufacturer or Distributor assumes no responsibility for loss or damage of any kind, expressed
or implied, resulting from improper installation or use of this Lift. Always use a PSE Authorized Lift
Installer to install your Lift.
2. All persons using this equipment must be responsible, qualified, and carefully follow the operation
and safety guidelines contained in this manual.
3. A level floor is required for proper Lift installation and operation.
4. DO NOT install this Lift on any asphalt surface. Only on concrete surface that is a minimum of 4” 6” thick and 3,000 psi tensile strength with steel or fiber mesh reinforcement. A Lift can only be as
strong as its foundation!
5. DO NOT install this Lift over concrete expansion joints or cracks. (Check with your building
architect.)
6. DO NOT install this Lift on an upper floor without written authorization from your building architect.
This Lift should only be installed on the ground / basement floor.
7. DO NOT attempt to Lift only part of a vehicle. This Lift is intended to raise the entire body of a
vehicle only. Lifting only part of a vehicle will bend the Lifting Arms and void the Lift’s Warranty.
8. NEVER Lift any persons or vehicles containing persons. This Lift is designed to lift empty vehicles
only.
TOOLS FOR INSTALLATION
Concrete Rotary Hammer Drill with 3/4” inch Carbide Bit
Rubber Hammer & Sledge Hammer (2 lb.)
Chalk Line & Square for creating a layout drawing
Sockets and Open End Wrenches
Ratchet Driver
Locking Pliers
Measuring Tape
Screwdrivers
Torque Wrench
Step Ladder
4’ Foot Bubble Level
12” Inch Adjustable Wrench
AW – 32 Non-Foaming Non-Detergent Hydraulic Fluid (3 gallons)
or ATF Equivalent
www.ProSeriesEquipment.com
Volume: 03.03.2010 01:37 PM
3 of 40
2 Post Lift: PSE 10,000 BP
Installation manual
Introduction
Shipping Container Contents
After removing the wrapping on your lift, you will find these components:
•
•
•
•
•
2 Posts (attached to End Plates - used for shipping only)
1 Base Plate
2 Three Stage Short Arms
2 Two Stage Long Arms
Parts Box (contents listed below)
Parts Box Contents
105½”(Approx.)
HYDRAULIC HOSE
(Runs Underneath
Base Plate Cover)
(#5 to #5)
8’ (96”) HYDRAULIC HOSE
FOR POWER UNIT (#5 to #6)
#5
PARTS BAG
(CONTAINS CUT OFF
SWITCH, BOLTS &
NUTS FOR MOUNTING
SHEAVES, WIRE TIES,
VIBRATION RUBBER
FOR POWER UNIT)
Base Plate
CYLINDER
FITTINGS
(C5305 x 5)
#5
PULLEY SHEAVES
3/4”
ANCHOR
BOLTS
(10 pcs.)
#6
Approx.
105½”
Approx.
103”
Approx.
252”
#5
GREASE KIT FOR SLIDE
BLOCKS INSIDE COLUMN
4 ARM PINS
& 4 C-CLIPS
www.ProSeriesEquipment.com
Volume: 03.03.2010 01:37 PM
3-WAY(T CABLE)
2 WIRE CABLE
FOR SAFETY
RELEASE
LOCKS
ELECTRIC
CONTROL
BOX
(See Page
13 For Cable
Descriptions)
4 of 40
2 Post Lift: PSE 10,000 BP
Installation manual
PSE 10,000 BP Specifications
11’ 3½” (135½”)
10’ 6” (126”)
3’ 10”
2’ 1”
3’
4’ 8”
6’ 2”
5’ 10”
9’ 2” (110”)
9’ 4” [112”]
11’ 3½” (135½”)
FIGURE 1 (Specifications Drawing)
www.ProSeriesEquipment.com
Volume: 03.03.2010 01:37 PM
5 of 40
2 Post Lift: PSE 10,000 BP
Installation manual
PSE 10,000 BP Specifications
WORKBENCH
AREA
2’
(610 mm)
11’ 6”
(3,505 mm)
CENTER LINE
FRONT SIDE
OF LIFT
(For this installation, we
used a 25’ Foot Install Bay
Length, If your’s varies,
recalculate the distance
to your midline.)
Column Foot Print
15½” X 19½”
23’
(7,010 mm)
(394 mm X 496 mm)
19½”
MIDLINE
MIDLINE
(496 mm)
BASE LINE
9¾”
11’ 6”
(3,505 mm)
(248 mm)
9¾”
(248 mm)
Approach Side
Of The Lift
67¾”
(1,721 mm)
67¾”
(1,721 mm)
Note for Figure 2 We recommend 12”
(INCHES) between
the Lift Columns and
the nearest wall.
FIGURE 2 (Layout Drawing)
www.ProSeriesEquipment.com
Volume: 03.03.2010 01:37 PM
6 of 40
2 Post Lift: PSE 10,000 BP
Installation manual
Introduction
Power Unit
Side Column
This is the Column
that the Power Unit
will be mounted to. It
is commmonly placed
on the Driver’s Side
of the Installation
Bay, but can be on
the Passenger Side
if preferred by just
switching sides.
Power Unit
Column
Key Safety Control Box
(PSE 10,000 BP)
ALL
W
36”
ide Arm
’s S nt
ver ge Fro
i
r
D ta
3-S
Base
e r
Sid r A
r’s ea
ive age R
r
D St
2-
W
ALL
Plate
ide
’s S rm
ger ront A
n
e
s
F
Pas tage
3-S
m
Approach
e
Sid m
er’s ar Ar
g
n
e
sse R
Pa Stage
2-
108”
36”
ALL
W
PSE 10,000 BP Controls:
1. Power LED - Light is on when key is turned to “ON”.
1
2
3
2. Key Switch - Must be in “ON” position for the Power Unit to be
powered on.
3. UP Button - Used to raise the Lift
4. LOCK Button - Use this button to lower the Lift to the locking
point.
5. DOWN Button - Used to lower the Lift. When up, push the down
button making the Lift first rise and then the locks will open and
the Lift will come back down.
4
www.ProSeriesEquipment.com
Volume: 03.03.2010 01:37 PM
7 of 40
2 Post Lift: PSE 10,000 BP
Installation manual
Installation
STEP 1: Unloading Lift & Checking For Defects
Unload the Lift and place it near the intended installation location. Remove shipping bands and packing
materials to allow the Arms and Base Plate to be unpacked. Remove the packing brackets and bolts
holding the Columns to the end plates (the end plates are shipping purposes only).
The Lift should be installed on a level floor with a minimum 4” - 6” of 3,000 psi concrete (sufficiently
cured). Visually inspect the floor, the Lift should not be installed on cracked concrete or over
expansion joints. The installed Lift will only be as strong as the foundation on which it is installed. It
is best to test drill where the Lift is to be installed to verify the depth of the concrete. The Lift must be
installed on basement level or ground level of building.
STEP 2: Measuring Lift Area & Positioning
Note: For illustration purposes (in Figure 2) we used a 25’ Foot Installation Bay (or installation area).
Your installation area may vary.
1. Snap a chalk line down the center and the full length of the installation bay. This will be your Center
Line.
2. Snap a chalk line across your installation bay where you want the center of your Columns to be.
This is the Midline (See Figure 2). Make sure this Midline mark is parallel to the front and back of
your door or installation area, as all other measurements are based on correct positioning of the
Midline.
3. From the Midline, measure 67¾” to one side and make a mark, then measure from the marked line
135½” to the other side and make another mark. (See Figure 2).
4. Measure 7 7/8” from the front and rear of the midline on both sides and snap two parallel lines (as in
Figure 2). The line located at the “Back Side” of the Lift is the Base Line. (See Figure 2).
You should have a square layout area exactly like Figure 2. This is where you will install the Lift now.
STEP 3: Positioning & Leveling Columns,
Installing Cable Sheaves
This Lift requires a minimum 9’ 2” ceiling height (you should allow as much room as possible though,
this is the height of the Columns themselves, and does not account for the roof height of the vehicle
which you will be lifting!). NOTE: The 9’2” height is the Column itself, when raised to the highest
setting, the Carriage on the PSE 10,000 BP will protrude several inches out of the top of the Column.
First, before you stand the Columns up, bolt the Pulley Mounts to the top of each Column (this can be
done after the Columns are stood up, but is much easier while they are laying down. The Pulley should
be on the same side as the Cable Anchor Eyelet on the Carriage (see pictures below).
Continued Next Page
This is how the Pulley Mount
should be attached to each Column,
so that the Pulley is on the same side
as the Cable Anchor Eyelet.
(Do not install the Cables at this time)
www.ProSeriesEquipment.com
Volume: 03.03.2010 01:37 PM
8 of 40
2 Post Lift: PSE 10,000 BP
Installation manual
Installation
STEP 3: Positioning & Leveling Columns,
Installing Cable Sheaves (Continued)
While the Columns are laying down you should also
mount the Power Unit. For instructions, see Page 14.
Raise the Columns to vertical. Position them on either end of the layout square (See Figure 2). The
Power Unit Column will be on the right side (passenger side) of the layout square for standard settings
or the driver’s side if needed. (The passenger side is recommended for easy operation.
Examine the area where the Base Plates of the Columns are going to be anchored to the floor.
Anchor holes in the Base Plates should be at least 4” from any expansion joints or large cracks
in the floor.
Stand the Columns up so that the Power Unit side will be on the vehicle passenger side. (See Figure
2). Use your four foot level, and the provided ¾” Flat Washers and Shims, shim the Columns level,
front-to-back and side-to-side. Re-check the Columns to see that they are facing each other square.
If not, rotate the Columns as needed and be sure to keep the Column Base Plates even within your
layout square.
Position the steel Base Plate between the posts in the mounting slots (Figure 3), do this to ensure
Columns are correct distance apart before anchoring. This step is to ensure the Base Plate will slide
into position later in the installation process.
Check for clearance in the front and rear to be sure that when a car is on the Lift the garage door will
open (we recommend a 23’ foot clear area) (See Figure 2).
Leave the Base Plate
in place, while drilling
and installing in the
anchor holes.
This will ensure the proper distance
between Columns and prevent the
Columns from shifting while anchoring.
FIGURE 3 (Correct positioning of the Base Plate)
DOUBLE-CHECK
EVERYTHING NOW
THE NEXT STEP IS PERMANENT!
www.ProSeriesEquipment.com
Volume: 03.03.2010 01:37 PM
9 of 40
Installation
2 Post Lift: PSE 10,000 BP
Installation manual
STEP 4: Installing Anchor Bolts & Re-Leveling Columns
You will need a rotary hammer drill with a ¾” carbide masonry bit (most rental outlets carry them). The
concrete floor must be at least 4” - 6” thick and a minimum of 3,000 psi. Drill through the fourteen 1-inch
holes into the concrete, drilling all the way through the floor. Install the nut and flat washer on the
Anchor bolt before putting them in the holes. Be careful not to move the columns when drilling.
One-way to avoid this, is to drill the holes and place the bolts in, one at-a-time, saving the inside hole
for last.
Note: After you put the anchor into the drilled hole to keep the sleeve on the anchor from
pulling up through the plate on the bottom of the lift place 1 “U” shaped shim between the
Bottom Plate of the Lift and the cement around the Anchor. The Shim will keep the Sleeve
from pulling up when you tighten the Anchor. In some cases the threads on the Anchors will
be exposed above the base of the Lift 2” – 2 ½” when they are tightened, this is normal.
Recheck the level of each Column and place Shims around each Anchor and wherever they’re needed.
If ½ inch or more of Shim is required, either refinish concrete or use steel plates and extra long
anchor bolts (FOR EXTRA PLATES OR LONGER ANCHORS CALL YOUR LIFT DISTRIBUTOR).
Tighten anchor bolts and recheck for level and plumb. Hammer the Anchor Bolts all the way down.
Tighten Anchor Bolts using a torque wrench to 125 ft. / lbs. (DO NOT use an air,
electric or battery impact gun when tightening the Anchor Bolts!)
NOTE: 4” - 6” of reinforced concrete is the minimum requirement for installation area.
Recheck the level of the Columns. If the Columns are off level at this point, loosen the Anchors and
use a pry bar to tilt the Columns and Shim as needed. Retighten and check again. When satisfied as
to level, tighten all the Anchor Bolts. It is best to hold the top of the Anchor Bolts, with vice type pliers to
then tighten down. You must re-torque your anchors every 30 days to insure they are tight.
After all Anchors are installed, remove the center Base Plate out of
the way so you can run the Cables, Hose & Safety Lock Wire.
www.ProSeriesEquipment.com
Volume: 03.03.2010 01:37 PM
10 of 40
2 Post Lift: PSE 10,000 BP
Installation manual
ATTENTION!
ATTENTION!!!
PLEASE READ!
ENSURE THAT THE FITTING BELOW IS SEATED
PROPERLY BEFORE PROCEEDING WITH INSTALLATION
The fitting at the bottom of each Column needs to be checked before operating this Lift. When
transported, or when you raise up the carriages, there will be a small chance that the cylinder may
move from its proper location. The fitting shifts up from its proper position and rests on the lip of the
Column’s slot, as noted in the picture below. The fitting attaches directly to the bottom of the cylinder,
to reset the fitting, simply shift the cylinder over until the fitting drops into proper position. Cracked or
broken fittings are not covered under your warranty, make sure you follow these steps.
This Fitting will come
preinstalled onto the
Cylinder in each Column.
When the Alignment Pin pictured on the cylinder above
is inside the hole at the bottom of the Floor Plate (as it
should be), the bottom of THIS fitting will rest directly
on top of the Floor Plate!
Make sure this
Alignment Pin is
inside the hole in
on bottom of the
Base Plate.
Alignment Pin
The bottom of thIS
fitting may get stuck
on this ledge! Make
sure to check this
before operating
the lift!
There should be NO gap
between the bottom of the
fitting and the Floor Plate
(the picture to the left is
INCORRECT!), it should
rest on the surface of the
Base Plate!
In the picture above, the Cylinder is seated
onto the Floor Plate correctly.
www.ProSeriesEquipment.com
Volume: 03.03.2010 01:37 PM
11 of 40
2 Post Lift: PSE 10,000 BP
Installation manual
Installation
STEP 5: Installing & Adjusting Equalizer Cables
The installation of the Sheaves on the PSE 10,000 BP is very simple. Using at least two people, lift
each carriage to the second or third Lock. Allow each carriage to rest on the Lock and measure each
side to be sure they are at the same height. In some cases remove the two ¾” inch lock nuts from the
Cables. Place the Nuts on each carriage for easy access when needed. Be sure each carriage is
at the same height by measuring from the top of the base plate to the bottom of the carriages.
This dimension must be within ¼” inch on each side.
Take one Cable and run it straight across to the other Column.
NOTE: The Cables should never cross. If the Cable is on the backside of the Lift, it will be
on the backside of the Lift on the opposite side as well.
Run the Column under the Pulley at the bottom of the Column, straight up the Column to the top Pulley,
route the Cable around this Pulley then straight back down to the Anchor Eyelet on top of the Carriage.
Pull the end of the Cable through the hole. Make sure the other cable end is now sitting in the hole in
the other carriage. If you see less than 2” of the Cable end sticking up, you can install a Flat Washer
and Nut, otherwise go back to the left side and tighten the Nut more, to take up the slack. Install the
other Cable in the same fashion, running it under the bottom Pulley, to the opposite side.
THE CABLES DO
NOT CROSS!!!
READ STEP 5 ON PAGES
12 & 13 FOR INSTRUCTIONS
ON RUNNING THESE
CABLES!
TOP
ANCHOR
BOTTOM
ANCHOR
C
A
R
R
I
A
G
E
A
B
B
CABLE #2 FINISH
Anchor to the top
of the Carriage
PULLIES AT THE TOP
OF EACH COLUMN
Starts at base of
Carriage (Cable
ships attached here)
Starts at base of
Carriage (Cable
ships attached here)
through Eyelet
CABLE #1 START
A
CABLE #1 START
PULLIES AT THE BASE
OF EACH COLUMN
(2 ON EACH)
CABLE #2 FINISH
Anchor to the top
of the Carriage
through Eyelet
FIGURE 4
Note for Figure 4: Do not over tighten cables. This will cause the lift to lose carrying capacity and could
damage the sheaves or cables.
www.ProSeriesEquipment.com
Volume: 03.03.2010 01:37 PM
12 of 40
Installation
2 Post Lift: PSE 10,000 BP
Installation manual
STEP 5: Installing & Adjusting Equalizer Cables (Continued).
Note for Figure 4: Do not over tighten Cables. This could damage the Sheaves or Cables.
With both Cables in place, you are ready to adjust. Start on the left side. With a pair of locking pliers,
grab the bottom of the Cable end with the threads pointing down. Place a ¾” or 11/16” socket or wrench
on the Nut and tighten it until the opposite carriage raises a ¼”. Tighten the other side the same way
until it comes back down ¼”, then give it one full turn. Both Cables should now have the same tension,
much like a banjo string. When the Lift is in operation, the Locks should click at the same time, or close
to each other. If not, adjust the Cables as necessary. Ensure all Cables are on all Pullys at all times.
NOTE: IT IS THE CUSTOMER’S OR THE END USER’S RESPONSIBILITY TO MAINTAIN
THE PROPER TENSION ON THE EQUALIZER AND/OR OVERHEAD SAFETY RELEASE
CABLES. ASKING A PSE QUALIFIED LIFT TECHNICIAN TO RETURN, IN THE FUTURE
TO MAINTAIN THE CABLE ADJUSTMENTS, AFTER THE LIFT IS INSTALLED WOULD
NOT BE COVERED UNDER WARRANTY, FOR THE ADJUSTMENTS.
www.ProSeriesEquipment.com
Volume: 03.03.2010 01:37 PM
13 of 40
2 Post Lift: PSE 10,000 BP
Installation manual
Installation
Step 6: Assembly Of Power Unit, Hoses, Wiring,
Height Cut-Off Switch & Switch Box
CARRIAGE CUT OFF SWITCH
Using the four provided screws, secure the Cut Off Switch to the Power Unit Column as pictured below. The
two short Screws are used on the Cable side, and the 2 long Screws are used to secure the Switch side.
Power Unit mount
SEE PAGE 16
Cut-off Switch mount
W/ 8” Pigtail Cable
Secure to Mounting Block using these 4
provided Screws. You may need to adjust
this switch to ensure that the back of the
carriage makes contact. NOTE: It is
very important to install this cut-off,
especially in a low ceiling environment,
this helps to prevent the Carriage from
coming out the top of the Column and
damaging the ceiling or a vehicle. The
wires will be connected to the wires feeding
out the bottom of the Switch Box, later in the
installation.
Switch Box
mount
Mount the Switch box using
the 4 provided Screws.
Remove Cover, and install
Screws as pictured below.
www.ProSeriesEquipment.com
Volume: 03.03.2010 01:37 PM
14 of 40
2 Post Lift: PSE 10,000 BP
Installation manual
Installation
Running Hydraulic Hose & Safety Lock Cable
Lay out the 105½” Hydraulic Hose between the Columns. Remove the caps, attached to the Fitting at the base of
each Cylinder. Using 2 wrenches, attach the Angled Fittings to either end of the Hydraulic Hose so that they are
tight. Now attach both sides of the Hose to the Cylinder fittings, again using 2 wrenches to ensure that they are
tight.
Once installation of the Hose is finished, run the 21’ (252”) Safety Lock Wire Cable down the Column (one end of
this Cable/Wire has 2 Plastic Harnesses wired to it, this side will be connected to the Plastic Harness Clip.
Position 8’ 9½” (105½”) Hydraulic Hose between the Columns
This Hose will run underneath the Base Plate. Also, remove the Caps from the
Fittings at the base of each Hydraulic Cylinder as pictured to the right.
Attach Hose
to the base of
each Cylinder
using provided
Angled Steel
Tubing
Use 2 wrenches as
pictured here and
ensure that the Hose
is attached tightly.
Run 21’ (252”) Safety
Lock Wire Cable to
Column opposite the
Power Unit
This Connector runs
under the steel Base
Plate to opposite
Column’s Safety Lock
Connector under the
Blue Cover Box.
These Connectors
run up the Power
Unit Column and
connects to both
the Switch Box
and Safety Lock
Connectors under
the blue cover.
Approx.
21’
(252”)
Run the Single Connector
side down the Power Unit side
Column, through the Cylinder
Fitting cut out, around the
Cylinder and under the Base
Plate to the opposite Column,
and back up to the Safety Lock
the same way. Use wire ties to
attach to Hydraulic Hose.
When finished, secure the Wire to the Hose
using the provided Wire Ties
Make sure that the wire to the Safety Lock has a little bit of
slack, this will ensure that it will not be pulled out while Lift is in
operation. Also make sure that there is plenty of wire to run up
the Power Unit Column and attach to the Connector coming out
of the Gray Electrical Control Box (which is installed in the next
step on Page 16).
REINSTALL SAFETY LOCK COVERS ON EACH SIDE
& SECURE Base Plate IN BETWEEN COLUMNS.
www.ProSeriesEquipment.com
Volume: 03.03.2010 01:37 PM
15 of 40
2 Post Lift: PSE 10,000 BP
Installation manual
Installation
Wiring The PSE 10,000 BP
Use the pictures below for reference on pages 17-20.
ALL WIRING SHOULD BE DONE BY A QUALIFIED
ELECTRICIAN
Power Unit is mounted
here using 4 sets
of 8mm Bolts, Nuts,
Washers & Lock
Washers, do not use
the 4 rubber Vibration
Bolts pictured below.
This DIN Connector may come pre
attached to the Power Unit. If it is not,
simply remove the red plug from the
male connector on the Power Unit and
connect the DIN connector and tighten
the phillips screw on top of the DIN
connectors (This DIN will only connect
one way).
The Matching Male Connector runs out
of the Gray Electrical Control Box with
a 3’ 5” (41”) Cable and the larger plastic
electrical connector.
Mount the Electrical
Cut-Off Switch w 8”
Pigtail Here.
(See Pg. 14)
Gray Electrical
Control Box is
mounted here
(using 4 screws
provided in the
parts box or
attached to the
Column here).
Approx.
21’
(252”)
1’ 8 1/2”(20 1/2”)
4’ 1” (49”)
3’ 5 1/2” (41 1/2”)
4’ 2” (50”)
15’ 4”(184”)
This Male Connector is attached to the
matching Female connector on the 21’ 8”
(260”) Cable on the side with the 2-Way fitting.
(See Page 15).
This 4’-1” (49”) Cable w/ Male Connector is attached
to the matching Female connector running off of the
Power Unit (See description above).
These 2 Male Connectors are Attached White to White,
Black to Black, to the matching Female Connectors
running off of the Cut Off Switch (See Page 14 for
instructions on mounting the Cut Off Switch).
The 4’ 2” (50”) Electrical Cable is wired to the
Power Unit (See Pages 17-20).
The 15’ 4” (184”) Electrical Cable is for your main
power supply. The SL 10,000 BP requires a dedicated
220 V Single Phase 30 Amp power supply. (See Page
17 for more details). WARNING: 3 Phase & Stinger
applications contact a qualified electrician.
www.ProSeriesEquipment.com
Volume: 03.03.2010 01:37 PM
16 of 40
2 Post Lift: PSE 10,000 BP
Installation manual
Installation
Mounting The Control Box
In order to mount the Electrical Control Box, you must first remove the Gray Electrical Control Box cover by
loosening the 4 Phillips screws with plastic heads. Then, using the second set of provided screws (These will be
found in the parts box or screwed into the Mounting Plate on the Power Unit Side Column), screw one into each
of the 4 holes, securing the Box to the Column. Once this is finished, reattach the Cover to the Gray Electrical
Control Box, by tightening the 4 screws, with plastic heads (Snugly - DO NOT OVER TIGHTEN!). Reference the
pictures on page 14 for details.
Connecting Wires From The Control Box
There are 5 cables running out of the bottom of the Control Box. The 15’-4” (184”) Electrical Cable is for your main
power supply to your main power source (this should be wired to a Male Plug or Junction Box by your electrician).
The 4’-2” (50”) Electrical Cable will be connected to the Power Unit, as explained on Pages 19 & 20.
The other three Cables can be quickly attached to their matching connectors. (See Pictures Below) The 21’-8”
(160”) Cable which was ran in the last step, to the opposite Safety Lock, under the Blue Cover, is now connected
to the Connector coming out of the Gray Electrical Control Box (Picture A at the bottom of this page). Next,
there is a 3’-5½” (41½”) Cable, which has 2 separate Metal Connectors (Picture C below) which needs to be
connected to the Cut-Off Switch, mounted to the Column as explained on page 14 (White Wire to White Wire,
Black Wire to Black Wire). The final 4’-1” (49”) cable, with the large plastic connector, (Picture B below) is
connected to the matching connector, running out of the Valve Control, on the side of the Power Unit (See Pages
19 & 20 for details).
USE THE PICTURES
TO THE RIGHT
TO FIND THE
LOCATION OF EACH
CONNECTOR.
The 5 Cables that run out of the
bottom of the Gray Electrical
Control Box should be connected
as pictured to the right. Follow the
instructions above and use these
pictures to ensure that the Cables
are properly connected.
Picture “D” Shows the electrical
hook up for the Power unit.
Refer to pages 19 & 20 for more
information!
D
A
B
B
C
A
C
C
SAFETY
SWITCH
“D” NOT PICTURED ABOVE
SEE PAGE 16 FOR MORE DETAILS
ON CABLE/WIRE LOCATIONS)
D
A
THIS IS THE 3-WAY
CABLE RAN UNDER
THE BASE PLATE
ON PAGE 15, IT WILL
BE CONNECTED
TO 1 CONNECTOR
COMING OUT OF THE
GRAY ELECTRICAL
CONTROL BOX
AND 1 CONNECTOR
COMING OUT OF
THE SAFETY LOCK
(UNDER THE BLUE
COVER) ON THIS
COLUMN.
REMOVE COVER ON POWER
UNIT (SEE PG. 19 & 20)
www.ProSeriesEquipment.com
Volume: 03.03.2010 01:37 PM
17 of 40
2 Post Lift: PSE 10,000 BP
Installation manual
Installation
Wiring The Power Unit
The 15’-4” (184”) Electrical Cable will be wired to a Male Plug or Junction Box. The PSE 10,000 BP requires a
Dedicated 220 V Single Phase 30 Amp Power Supply. The 4’-2” (50”) Electrical Cable will be wired into the Power
Unit (See Pages 19 & 20 for details). ALL PSE 10,000 BP WIRING SHOULD BE DONE ONLY BY A QUALIFIED
ELECTRICIAN! Power should not be ran to the Power Unit until all other wiring has been completed and the
Reservoir has been filled with hydraulic oil. Use (AW-32 Hydraulic Oil or Dexron III Automatic Transmission Fluid
or Equivalent). The Lift should be cycled all the way to the top and back down 2 or 3 times to make sure all parts
operate smoothly under load, all of the air is pushed out of the Hydraulic Hoses, and that all Safety Locks work
properly.
Mount Power
Unit to Main
Column
Secure to mounting block
using 4 sets of 8mm Bolts,
Nuts, Washers & Lock
Washers. Do not use the
Rubber Vibration Bolts
pictured below.
½
”
THICKNESS
(QTY. OF 4 REQUIRED)
IT IS IMPERATIVE THAT
THE POWER UNIT HAS ½”
SPACERS BENEATH ALL
FOUR MOUNTING BOLTS
www.ProSeriesEquipment.com
Volume: 03.03.2010 01:37 PM
18 of 40
Solenoid Controlled Power Units
2 Post Lift: PSE 10,000 BP
Installation manual
Do you have this style
hydraulic power unit?
If so, see notes below!
“P” Port
Fill Here
Fill Line
Fill to this line, takes
approx. 3 gallons.
“P”
Port
Monarch
Fill Here
“P” Port
Do not hold the
Down Button or the
Release Lock Handle
Button more than 30
seconds to let the lift
down. This will cause
the coil to burn up
from getting to hot
which will void the
warranty.
SPX
(Installation
of
the
ELECTRICAL TO THE Power
Unit is to be done only by a
certified electrician. Before
the Power Unit is installed,
have the electrician wire a
quick disconnect between
the main power breaker
box
and
the
control
box, then have this quick
disconnect mounted to the
side of the column next to
the Power Unit).
Remove the junction box cover on the
motor by removing the short screw. Run
your electrical power wires from the main
breaker box with 220 volt single phase on
a Dedicated 20 Amp Breaker.
Remove the knock out hole on the side/
top (depending on the type of Power unit)
electrical box on the motor. Line the hole
with a Strain Relief. Now run your main
power wires through the knock out hole
on the side/top of the Motor Junction Box
(commonly refererred to as the “Pecker
Head”) to make the electrical connection
to the switch wires inside the box.
See Page 17 or 18 for wiring to switch, Depending on
if you have A KEY SECURITY control box.
Attach the Green wire to the ground screw
on the motor in the back of the Power Unit
junction box.
The SPX Power Unit’s “P” Port may be
referenced in the manual, if you have
an SPX Power Unit, it may or may not be
labeled, use this picture to locate it.
Put the junction box cover back on after
the wiring is complete.
www.ProSeriesEquipment.com
Volume: 03.03.2010 01:37 PM
19 of 40
Manual Release Handle Power Unit
SPX
2 Post Lift: PSE 10,000 BP
Installation manual
do you have this style
hydraulic power unit?
iF so, see notes below!
Fill Here
Fill Line
Fill to this line, takes
approx. 3 gallons.
Monarch
Fill Here
Ground Wire
(Installation of the ELECTRICAL
TO THE Power Unit is to be done
only by a certified electrician.
Before the Power Unit is
installed, have the electrician
wire
a
quick
disconnect
between the main power
breaker box and the control
box, then have this quick
disconnect mounted to the
side of the column next to the
Power Unit.)
Remove the junction box cover on the Motor.
Run your electrical power wires from the Main
Breaker Box with a 220 Volt Single Phase on
a Dedicated 20 Amp Breaker.
Remove the knock out hole on the side/top
(depending on the type of Power unit) of the
Junction Box on the Motor. Line the hole with
a Strain Relief. Now run your main power
wires through the knock out hole on the
side/top of the Motor Junction Box to make
the electrical connection to the switch wires
inside the box.
See Page 17 for wiring to switch.
Attach the Green Wire to the Ground Screw
on the Motor in the back of the Motor Junction
Box.
Put the Junction Box Cover back on after the
wiring is complete.
www.ProSeriesEquipment.com
Volume: 03.03.2010 01:37 PM
20 of 40
2 Post Lift: PSE 10,000 BP
Installation manual
Installation
STEP 7: Installing Lifting / Swing Arms
For standard setting, slide the Two Stage Long Lifting (Swing) Arms between the end of the C Bracket on
the Carriage closest to the vehicle approach side of the Lift, and slide the 3 Stage Short Lifting (Swing)
Arms onto the Carriage front C Brackets at the front of the Lift. Slide in the 4 long Steel Arm Pins. Attach
one or the other (Snap Rings, C-Clips or Roll Pins to the Arm Pins) to ensure that the Pins do not back out
of the Lifting Arms in the future. Attach 4 Arm Safety Restraint Gears with the 3 Bolts and Lock Washers to the
arms. Ensure they are meshing together correctly & locking the Arms into place. Adjust as necessary to ensure
each of the 8 arm restraint gears are locking together to keep the Arms from moving when the Pad is not touching
the proper points on the bottom of the vehicle. Review and adjust gears daily or as necessary. Arm restraints are
only for holding the Arms in place till the Pad is centered on the proper manufacturers lifting points of the vehicle
being lifted.
STEP 8: Installing Swivel Pads & Checking Height Adapters
Should the Pads not be attached to the Arms, drop the four Swivel Pads onto the Arms and test to see
that they screw up and down smoothly. The Snap Rings will act as stops to stop the Screw Pads from
screwing out.
Note: Truck Adapter Extensions are available in 4” or 6” heights through your lift dealer. In some cases, they
are needed on special vehicles or special applications for keeping the vehicle leveled during lifting. Never
lift any vehicles without using Truck Adapters when the screw up pad will not reach the proper manufacuters
lifting points. When this happens, always use the proper Truck Adapters.
STEP 9: Hooking Up Electrical
Please reference the electrical diagram at the end of this manual for the electrical hook-up. It should be
done ONLY BY A CERTIFIED ELECTRICIAN. The normal power unit requires 208-220 volts, single phase,
on a 30 amp circuit breaker.
STEP 10: Testing & Adjusting Lift
With the power properly hooked up and hydraulic oil in the pump reservoir, push the Red Up button to raise
the Lift until it is stopped by the Cut Off Switch contacting the Carriage. Pressing the Green Lock button will
lower the Carriages until the first Lock is engaged. To Lower the Lift, press the Red Down button.
NOTE: Pressing the Red Down button will cause the Lift to go up 5”-6” inches before lowering,
this is normal and is so that the Locks can be disengaged.
Cycle the Lift several times all the way to the top, then back down, this will get all of the air out of the
hydraulic lines, you will see the tank at the bottom of the Power Unit bubbling. When the Lift has hit the
ground, hold the down button for 10 seconds, this will cause air to bleed into the tank.
While running the Lift, listen to the Safety Locks clicking. Each side should click simultaneously or with-in a
½ second of each other. If they are not clicking together, then adjust the Cables to compensate by tightening
the side that is clicking last at the Cable Bolt at the top of the Carriage. The one that is behind is the one you
tighten until you get it clicking simultaneously.
REMEMBER NOT TO OVER TIGHTEN CABLES - THEY SHOULD BE FIRM, MUCH LIKE A BANJO
STRING OR A FAN BELT IN A CAR.
www.ProSeriesEquipment.com
Volume: 03.03.2010 01:37 PM
21 of 40
Safety & Operation Instructions
GENERAL SAFETY INSTRUCTIONS
•
•
•
•
•
•
•
•
•
•
•
•
•
•
•
•
•
•
•
•
•
•
2 Post Lift: PSE 10,000 BP
Installation manual
BY A AUTHORIZED PSE LIFT INSTALLER
ALWAYS make sure the Lift is on the Locks before going under the vehicle and vehicle is level.
NEVER allow anyone to go under the Lift when raising or lowering.
Care must be taken, as burns can occur from touching hot parts.
Do not operate equipment with a damaged cord or if the equipment has been dropped or damaged until a
qualified serviceman has examined it.
To reduce the risk of fire, do not operate equipment in the vicinity of open containers of flammable liquids.
Adequate ventilation should be provided when working.
Keep hair, loose clothing, fingers, and all parts of the body away from moving parts.
To reduce the risk of electrical shock, do not use on wet surfaces or expose to rain.
Use only as described in this manual.
Use only Manufacturer’s Recommended Parts & Authorized Installer.
ALWAYS WEAR SAFETY GLASSES.
NEVER allow unauthorized personnel to operate Lift.
ALWAYS know the gross weight of vehicle.
NEVER EXCEED CAPACITY OF (10,000 LBS.) ON THIS LIFT.
NEVER use the Lift to raise one end or one side of vehicle. This will bend the Lifting Arms and void your
warranty.
ALWAYS keep unqualified people away from area, while loading, unloading, raising, or lowering the Lift.
NEVER allow anyone to ride in the vehicle, while raising, or lowering the Lift.
ALWAYS keep the area clean and free of water grease, and oil,
ALWAYS remove wheel chocks, tools, hoses, etc. before loading, unloading, raising, or lowering the Lift.
NEVER operate the Lift if the Safety Locks are not working properly!
NEVER operate the Lift without the Stop Snap Rings secured on the Screw-up Lifting Pads.
Ensure Round Pads or Truck Adapter Pads are evenly centered on the Lifting Frame. Pads that are bent or
broken due to misuse or not centered are not covered by Warranty.
LIFT OPERATING INSTRUCTIONS
Swing the Front Arms to the front and the Rear Arms to the rear. Once arms are in position, pull a car
into the bay. A general rule of thumb is to stop the car with the center of the wheelbase even with the
center of the Columns. (*NOTE: Some vehicles will be heavier in the front due to the engine. In these
cases, position the vehicle so that the vehicle’s weight distribution on the Lift’s Columns is 50% Front
to Rear of the vehicle. *REMEMBER, the DualSymmetric Arms on the PSE 10,000 BP allows for either
50/50 or 30/70 vehicle distribution!) Swing the four Lifting Arms under the vehicle and position the
Lifting Pads under the appropriate lifting points. (If you are not sure of the proper lifting points, you
should check the vehicle’s service manual or contact the vehicle manufacturer).
Adjust the Screw Pads so they all hit their lifting points at the same time, with full contact to the center
of the Pad. This will allow the car to be level when rising. With the Pads in their proper locations and no
obstructions around the Lift or vehicle, you may now press the UP Button on the Power Unit or the UP
Button on the Key Security Control Box (depending on the type of Lift you have) to raise the vehicle.
Raise the vehicle so that the tires are 6” inches off the ground. Walk to the back of the vehicle and push
up and down on the bumper. The vehicle will rock, but should not, at any time, lose contact with the
Lifting Screw Pads. If the vehicle is bouncing off the Pads or feels at all unstable, you should lower it
back to the ground and reposition the Arms & Pads to balance the load. Repeat this process until the
vehicle is completely stable. When the vehicle is stable, you may raise the Lift all the way to the top.
Listen to Safety Locks clicking evenly and adjust if necessary (Never adjust the Cables without it setting
on the Locks).
www.ProSeriesEquipment.com
Volume: 03.03.2010 01:37 PM
22 of 40
2 Post Lift: PSE 10,000 BP
Installation manual
Safety & Operation Instructions
CORRECT POSITIONING OF LIFTING ARMS:
Follow the instructions on the previous page for operating your Lift. Make sure to always extend the Arms in the
correct order, never extend a later stage of the Arm before all of the stages before it are extended all the way
out. Also, NEVER put more of a vehicle’s weight on the Front Arms than on the Rear
Arms!
Stage 2 MUST
be COMPLETELY
Extended before
extending Stage 3!
X
End Stage 2
End Stage 1
Rear Arm
Front Arm
End Stage 3
End Stage 1
NEVER Extend Stage 3 of the Front Arm Before Stage 2 is
Fully Extended! The Arms are to be extended in order to reach
vehicle manufature lifting points. Extend Stage 2 FIRST, and
ONLY extend Stage 3 AFTER Stage 2 has been fully extended
and more length on the Front Arm is still needed!
End Stage 2
X
End Stage 3
The 3 Stage Front Arm should NEVER be extended
out farther than the 2 Stage Rear Arm! NEVER lift a
vehicle with the arms in this configuration!
Correctly Using the Lifting Pads:
This Lift’s Lifting Pads extend in 3 Stages by screwing up or down. It is important to use the Pads correctly when
operating this Lift. ALWAYS makes sure that the Pad’s screws are raised in the correct order: ALWAYS extend
Stage 2 BEFORE extending Stage 3! NEVER Extend Stage 3 without fully extending Stage 2!
Operators must make sure to position the Lifting Pads to the Vehicle Manufacturer’s Recommended Lifting
Points correctly! The Manufacturer’s Lifting Points MUST BE CENTERED on the Lifting Pad. NEVER lift a vehicle
when the Lifting Pad only makes contact with the Lifting Point at the edge of the Pad! Always, CENTER the
Manufacturer’s Lifting Points on the Pad! If the Lifting Pads do not Screw Up high enough to reach the vehicles
Manifacture’s Lifting Points you should use Truck Adapters to make up the voided space. Truck Adapters can
be purchased through your Lift Distributor. Never lift a vehicle without the Pads touching the Manufacturer’s
Recommended Lifting Points.
Correctly Raising & Lowering Screw-Up Pads:
Stage 3
Stage 2
Stage 1
Stage 1
Stage 2
Stage 3
Correctly Centering Weight Onto The Screw-Up Pads 6” or 4”:
P
X
SE
0 0 0 BP
Li
10,
ft
i
g!
W
n
ro
Pad
Manufacturer’s
Recommended
Lifting Point
WRONG
ng
0 0 0 BP
Li
10,
ft
i
Pad
ü
SE
Off Center:
ng
Correct
P
Centered:
Manufacturer’s
Recommended
Lifting Point
Operators must ensure that the Vehicle Manufature lifting points are
CENTERED on the Lifting Pad EVERY TIME they lift a vehicle ON ALL 4 PADS!
www.ProSeriesEquipment.com
Volume: 03.03.2010 01:37 PM
23 of 40
Maintenance Instructions
2 Post Lift: PSE 10,000 BP
Installation manual
THE PROPER OPERATION OF THE LIFT REQUIRES THAT ANY TIME YOU RAISE A VEHICLE TO
WORK ON IT, YOU MUST LOWER THE LIFT ONTO THE SAFETY LOCKS. This is done by raising
the vehicle to the desired height and lowering the Lift by pressing the Red Button (on the PSE 10,000
BP) until the carriage stops on the next available Safety Lock. Note: The Power Unit is not made to hold
the load and may bleed down on the locks - this is normal, ALWAYS let the Lift down onto the Safety
Locks. To lower the vehicle, you must first raise the Lift off of the Locks using the UP Button on the
Control Box. Then, engage and hold the Red Button on the Key Security Control Box, until the Lift is
on the ground. You must pull the Safety Lock Handle to release the Locks after raising up off the Locks
then lower the vehicle.
NEVER WORK UNDER OR NEAR THIS LIFT WITHOUT THE LOCKS BEING ENGAGED. THE
POWER UNIT IS NOT DESIGNED TO BE A LOAD-HOLDING DEVICE. NOT USING THE LOCKS
COULD RESULT IN A PREMATURE FAILURE OF THE CYLINDERS, PUMP AND/OR CABLES
AND CAN CAUSE SERIOUS PROPERTY DAMAGE OR PERSONAL INJURY! FAILURE TO
HEED THIS WARNING WILL RESULT IN IMMEDIATE TERMINATION OF YOUR WARRANTY.
MAINTENANCE SCHEDULE
The following maintenance is recommended and required in these intervals; accumulated hours
or monthly period, whichever comes sooner. If you hear a noise or see any indication of possible
failure - cease operation immediat 0ely and correct and/or replace parts as required. Following these
maintenance procedures is the key to prolonging the useful life or your Lift.
AT ANY TIME, IF YOU ARE NOT SURE OF THE SAFE OPERATION OF THE LIFT, DISCONTINUE
USING IT AND CALL YOUR CHSSI AUTHORIZED LIFT INSTALLER FOR ASSISTANCE. WARNING:
OSHA AND ANSI REQUIRE USERS TO INSPECT LIFTING EQUIPMENT AT THE START OF EVERY
SHIFT. THESE AND OTHER PERIODIC INSPECTIONS ARE THE RESPONSIBILITY OF THE USER /
Operator.
DAILY PRE-OPERATION CHECK BY OPERATOR
The user should at least perform the following checks daily and not use the Lift if anything is not correct.
• Daily check of all Safety Locks & Arm Restraints - the discovery of device failure could save you
from expensive property damage, lost production time, serious personal injury and even death.
• Check Safety Locks for free movement and full engagement with Lift, make sure the Arm Restraint
Gears mesh together completely and are working 100% each and every time the Lift is used. If not,
do not use the Lift.
• Check Hydraulic Connections, and Hoses for leakage.
• Insure Snap Rings at all Rollers, Sheaves and on all Screw-up Pads & optional Truck Adapters are
correct and safe.
• Check All Bolts, Nuts, and Screws and tighten.
• Check Wiring & Switches for damage and that they all work correctly.
• Keep Floor Plate free of dirt, grease or any other corrosive substances.
• Check for any stress cracks in the concrete floor near the Anchor Bolts which, if present, could
cause the Anchor Bolts to loosen and pull out of the floor. Do not use the Lift if this is apparent.
• Check daily Anchor Bolts torque to 125 ft-lbs. Do NOT tighten using impact gun. NEVER use the Lift
with loose Anchor Bolts! All Anchor Bolts should be the correct torque specifications.
• Ensure all Cables are on all Pulleys at all times.
• Check Equalization Cables: The Cables keep both sides of the Lift equal, allowing the Safety Locks
to catch together. If one side of your Lift is running ahead of the other, it is most likely time to adjust
your Cables. Follow this simple procedure. Refer to Pages 13 Step 5 for adjustment! So the Locks
are always locking everytime.
• All of the Pulleys / Sheaves on your Lift should be sprayed with a light oil, such as WD-40 or similar
lubricant, two to three times a year.
www.ProSeriesEquipment.com
Volume: 03.03.2010 01:37 PM
24 of 40
Maintenance Instructions
2 Post Lift: PSE 10,000 BP
Installation manual
WEEKLY MAINTENANCE
•
•
•
•
•
•
Check anchor bolt torque daily to 125ft. lbs.
Check floor for stress cracks near anchor bolts
Check hydraulic oil level.
Check and tighten all bolts, nuts, and all screws.
Check all Cables are on all the proper Pulleys at all times.
Grease the inside of the Columns, where the Carriages run up and down.
YEARLY MAINTENANCE
•
•
•
•
All of the Pulleys / Sheaves on your Lift should be sprayed with a light oil, such as WD-40 or
similar lubricant, two to three times a year.
Check all Cables are on all the proper Pulleys each time you use your Lift.
Change the hydraulic fluid - good maintenance procedure makes it mandatory to keep
hydraulic fluid clean. No hard fast rules can be established; - operating temperature, type of
service, contamination levels, filtration, and chemical composition of fluid should be
considered. If operating in dusty environment a shorter interval may be required.
Grease the inside of the Columns, where the Carriages run up and down.
All repairs should only be performed by a PSE Authorized Lift
Installer.
•
•
•
•
•
•
Replacement of Hydraulic Hoses.
Replacement of Cables and Sheaves.
Replacement or rebuilding Hydraulic Cylinders.
Replacement or rebuilding Power Unit Pumps / Motors.
Checking Hydraulic Cylinder Rods and Rod Ends (threads) for deformation or damage.
Checking Cylinder Mounting for looseness and /or damage.
Relocating or changing components may cause problems. Each component in the system must
be compatible; an undersized or restricted line will cause a drop in pressure. All Valve, Pump, and
Hose connections should be sealed and/or capped until just before use. Air Hoses can be used to
clean Fittings and other components. However, the air supply must be filtered and dry to prevent
contamination. Most important - cleanliness - contamination is the most frequent cause of malfunction
or failure of Hydraulic Equipment.
www.ProSeriesEquipment.com
Volume: 03.03.2010 01:37 PM
25 of 40
2 Post Lift: PSE 10,000 BP
Installation manual
Troubleshooting
Problem
Possible Causes
Suggested Solution
Motor won’t run
•
•
•
•
•
Fuse or circuit breaker.
Incorrect voltage to motor
Wiring connections
Burned out micro switch
Burned out motor windings
•
•
•
•
•
Replace blown fuse or reset circuit breaker
Supply correct voltage to motor
Check and repair or insulate all connections
Replace micro switch
Replace motor
Motor runs, won’t raise Arms
•
•
•
•
•
Open lowering valve
Pump is sucking air
Suction tube is off of Power Unit
Low oil level
Pressure adjust to low
•
•
•
•
•
Repair or replace lowering valve
Tighten all hydraulic line fittings
Adjust or replace suction tube
Top-off tank
Call Technical Service
3.
Motor runs, Arms raise but not vehicle
•
•
•
•
•
Motor is running on low voltage
Debris in lowering valve
Improper relief valve adjustment
Overloading of Lift
Pressure adjust to low
4.
Lift settles down slowly
• Debris in check valve
• Debris in lowering valve
• External oil leaks
• Clean check valve
• Clean lowering valve
• Check for and repair any leaks
5.
Lift goes up unevenly
• Equalizer cables not properly adjusted
• Lift installed on uneven floor
• Adjust cables according to manual
• Shim column (not more than 1/2”) or adjust
swivel pads to compensate
6.
Anchor bolts won’t stay tight or are
pulling out of floor
• Cement thickness or strength is insufficient
• Holes are too big for anchors
• Remove bad cement, pour new pad per Lift
specs in manual
• Relocate Lift using the proper size drill bit,
or pour anchoring cement into holes to
secure anchors
7.
Safety latches don’t work
• Safety not adjusted properly
• Safety spring not connected or weak
• Flat washer bent too far, squeezing release
cable
• Safety latch is rusted or frozen
• Raise Lift until safety adjusting bolt appear
in window and adjust as necessary
• Reconnect or replace safety spring
• Bend flat washer away from release cable
until it moves freely
• Spray penetrating oil on latch and work the
latch until it moves freely
8.
Cylinder whines or chatters
• Dry or tight cylinder seals
• Replace seals or hydraulic cylinder
•
•
•
•
• The piston seal of the cylinder is out.
Rebuild the cylinder
• The rod seal of the cylinder is out. Rebuild
the cylinder
• If leaking around the tank-mounting flange,
check the oil level in the tank. The level
should be two inches below the flange of
the tank. Check with a screwdriver
• Rebuild the Cylinder
1.
2.
9.
Oil Leaks
10. Lift jerks going up and down
Breather End of Cylinder
Rod End of Cylinder
Power unit
Seals bad or rolled
• Air in hydraulic system
• Dry or tight Seals
•
•
•
•
Supply correct voltage to motor
Clean lowering valve
Call Technical Support
Check vehicle weight or balance load
properly
• Call Technical Service
• Raise Lift all the way to top and return
to floor. Repeat 4-6 times. Do not let this
overheat Power Unit!
• Use for 60 day break in period
www.ProSeriesEquipment.com
Volume: 03.03.2010 01:37 PM
26 of 40
Warranty
2 Post Lift: PSE 10,000 BP
Installation manual
LIMITED LIFT WARRANTY
This limited warranty is not transferable
from the original retail purchaser.
No warranty exists until each piece of equipment is completely
paid in full and the Lift Warranty Sheet has been returned to the
manufacture or master distributor.
Power Units are covered for defects in workmanship for one (1) year. Any misuse of Power Unit
will void this Warranty. For Power Unit Warranty repairs the original purchaser needs to provide
the following information: (1) Date code of the Power Unit, (2) Serial Number of the Power Unit,
and (3) Model Number. In cases of Power Unit replacements, you will be sent a replacement
Power Unit after billing your charge card. It is the Original Purchaser’s responsibility to properly
drain and box the defective Unit, tag it, and call UPS to pick it up and have it shipped back to
us. After receiving the Power Unit back to our facility, an inspection will be made to the Unit to
ensure it was defective from the Manufacturer. If it is the manufacturer’s defective Unit, we will
credit your credit card back, less any shipping. Failure to follow these procedures will void the
Power Unit warranty, and any credit to your credit card.
Any wearable Lift part is not covered under warranty, such as Cables, Slide Blocks, Arms, Pullies,
Pins, Adapters, Pads, Switches, Hoses, & Fittings unless authorized by the manufacturer, and
which was not found to have been abused, will be repaired or replaced (at the Manufacturer’s
option). Defects caused by ordinary wear and tear, abuse, misuse, overloading, accident
(including shipping damages), improper maintenance and alterations are not approved by the
Manufacturer or Master Lift Distributor are specifically excluded.
The Manufacturer reserves the absolute right to decline responsibility for repair work made or
attempted by any Company or Person not associated with, or approved beforehand, by the
Manufacturer. This Lift must be installed by a PSE Authorized Installer. Not having this Lift
installed by an PSE Authorized Installer could possibly void the Warranty.
WARRANTY LABOR IS NOT INCLUDED under
warranty. unless expressly approved by
the manufacturer, In Writing, before the
repairs are attempted.
www.ProSeriesEquipment.com
Volume: 03.03.2010 01:37 PM
27 of 40
Notes
2 Post Lift: PSE 10,000 BP
Installation manual
www.ProSeriesEquipment.com
Volume: 03.03.2010 01:37 PM
28 of 40
Notes
2 Post Lift: PSE 10,000 BP
Installation manual
www.ProSeriesEquipment.com
Volume: 03.03.2010 01:37 PM
29 of 40
2 Post Lift: PSE 10,000 BP
Installation manual
Parts Breakdown
Lift Overview
No.
Designation
Number
QTY
1
Master Post Assembly
A6010000
1
3
Slave Post Assembly
A6020000
1
2
Base Cover
A6030000
1
4
Control Box
A1010500
1
5
Front Arm Assembly
A1030000
1
6
Rear Arm Assembly
A1040000
1
4
5
1
3
6
2
www.ProSeriesEquipment.com
Volume: 03.03.2010 01:37 PM
30 of 40
2 Post Lift: PSE 10,000 BP
Installation manual
Parts Breakdown
3
25
22
30
5
Master Column Assembly
6
26
4
31
27
11
28
12
29
10
33
19
13
17
14t x 50 x 121
A1010004
1
Ø25 x 110
A1010006
1
12
Lock Release Spring
Ø30 x Ø2 x 15C
A1010005
1
13
Safety Solenoid
-
P1902001
1
14
Height Limit Switch
-
P1204001
1
15
BP Wire Wheel
Ø80 x 26
A6010007
2
16
Cylinder Linkage Block
-
A1010600
1
17
Lock Safety Cover
1.6t x 183W
x 105H x 365L
A1010007
1
18
Snap Ring
Ø20
P0901020
2
19
Snap Ring
No.
Designation
20
Round Head Bolt
21
Plain Washer
22
Spring Washer
23
Round Head Bolt
Ø25
P0901025
2
Dimensions
Number
QTY
M8-10
P1070810
6
M10
P0301110
8
M10
P0302010
8
M10-15
P01031015
4
16
8
2
1
24
9
Designation
15
18
21
Dimensions
Number
QTY
1
Master Post Assembly
-
A6010100
1
2
Carriage Assembly
-
A6010300
1
3
BP Hydraulic Cylinder
-
A6010400
1
4
Cylinder Support Bracket
-
A6010500
1
5
Cylinder Upper Roller
Bracket
-
A6010600
1
6
Upper Wire Bracket
-
A6010700
1
7
Remote Controller Hanger
2.3t x 25 x 117.4
A6010003
1
8
Truck Adaptor Support
5t x 115 x 90
A6010006
2
Designation
Dimensions
Number
QTY
Ø20 x 70
A6010009
1
9
Lock Axis
14
7
No.
Safety Lock
11
32
20
No.
10
Base Chain Fixing Panel
23
24
Hexagon Nut
M20
P0201020
2
25
Hexagon Bolt
M10-30
P01011030
4
26
Hexagon Nut
M10
P0201010
4
27
Plain Washer
M8
P0301108
3
28
Spring Washer
M8
P0302008
3
29
Hexagon Bolt
M8-25
P01010825
3
30
Hexagon Nut
5
31
DU Bearing
32
33
M8
P0201008
DU2515
P2302015
1
Rear Arm Assembly
-
A1040000
1
Front Arm Assembly
-
A1030000
1
www.ProSeriesEquipment.com
Volume: 03.03.2010 01:37 PM
31 of 40
2 Post Lift: PSE 10,000 BP
Installation manual
Parts Breakdown
Carriage Assembly
1
10
2
9
7
3
8
4
5
6
NO.
Designation
1
Carriage
2
Door Protection Rubber
3
Arm Fixing Pin
4
Arm Lock Gear Pin
5
Arm Lock Gear
6
7
8
9
10
Dimensions
Number
Qty
6t x 355 x 1115
A6010302
1
36 x 36 x280
Q0309001
1
-
A1060100
2
25 x 274
A1010014
2
36t x 50 x 55
A1010013
2
Spring Pin
6 x 50
P0903001
2
Spring Pin
6 x 40
P0903002
2
Arm Gear Spring
4 x 31 x 170
P0901035
2
Strenghen Carriage Guide
29 x 38 x 76
A1010012
2
Carriage Guide
29 x 38 x 76
A1010011
2
www.ProSeriesEquipment.com
Volume: 03.03.2010 01:37 PM
32 of 40
2 Post Lift: PSE 10,000 BP
Installation manual
Parts Breakdown
Equalization Cable Pulley Assembly
5
3
6
4
2
1
No
Description
Dimensions
1
Upper Wire Wheel Bracket
2
Upper Wire Wheel Axis
Number
Qty
9t X 100 X 300
A6010701
1
Ø20 X 80
A6010004
1
3
Upper Wire Pipe
Ø30 X 24
A6010005
1
4
BP Wire Wheel
Ø80 X 26
A6010007
1
5
Snap Ring
Ø20
P0901020
2
6
DU Bearing
DU2025
P2302001
1
7
Upper Wheel Fixing
8t X 70 X 256
A6010702
1
www.ProSeriesEquipment.com
Volume: 03.03.2010 01:37 PM
33 of 40
2 Post Lift: PSE 10,000 BP
Installation manual
Parts Breakdown
Chain Roller Assembly
2
5
4
1
3
No
Dimensions
Number
Qty
Upper Roller Bracket
12t X 75 X 304
A6010601
1
2
Cylinder Upper Roller
Ø110 X 51
A6010002
1
3
Cylinder Upper Roller Pin
Ø35 X 97
A6010003
1
4
DU Bearing
DU3050
P2302014
1
5
Snap Ring
Ø35
P0901035
2
1
Description
www.ProSeriesEquipment.com
Volume: 03.03.2010 01:37 PM
34 of 40
2 Post Lift: PSE 10,000 BP
Installation manual
Parts Breakdown
3 stage front arms (Qty of 2)
5
9
8
3
1
7
6
4
2
No
Description
Dimensions
Number
Qty
1
Cylinder Horning Pipe
Ø60 x 1064L
A6010601
1
2
2900F Cylinder Trail Cover
3
Cylinder Rod Bar
4
5
Ø60 x 49L
A6010002
1
Ø40 x 1104L
A6010003
1
2900F Cylinder Piston
Ø50 x 53L
P2302014
1
2900F Head Cover
Ø60 x 51L
P0901035
2
6
Wearing
7
Unpacking
8
Wearing
9
Dust Seal
Ø40 x Ø45 x 10L
P0901035
2
B7 Ø50 x Ø40 x 6
P0901035
2
Ø45 x Ø50 x 10L
P0901035
2
PU6 x 45 x 48.6 x 53
P0901035
2
www.ProSeriesEquipment.com
Volume: 03.03.2010 01:37 PM
35 of 40
2 Post Lift: PSE 10,000 BP
Installation manual
Parts Breakdown
2 stage Rear arms (Qty of 2)
13
12
11
10
1
9
5
4
8
7
14
3
6
2
15
No
Dimensions
Number
Qty
1
Description
Arm Locking Gear
16t x 111
A1030002
1
2
Adjustable Arm Socket-1
Ø80 x 40
A1030401
1
3
Adjustable Arm Socket -2
Ø48 x 73
A1030401
1
4
Adjustable Pad Support Plate
Ø133 x 13t
A1030404
1
5
Arm Support Rubber
25t x 120 Ø
A1030405
1
6
Snap Ring
Ø45
P0901045
1
7
Snap Ring
Ø40
P0901040
1
8
Snap Ring
Ø25
P0901025
1
M8-25
P01060825
1
M10
P0301110
4
9
Sarah Bolt
10
Plain Washer
11
Spring Washer
12
Round Head Bolt
M10
P0302010
4
M10-15
P01031015
1
13
Hex Bolt
14
1st Rear Arm
M10-30
P01011030
1
6t x 120 x 100 x 740
A1040101
1
15
2nd Rear Arm
6t x 100 x 75 x 740
A1040201
1
www.ProSeriesEquipment.com
Volume: 03.03.2010 01:37 PM
36 of 40
2 Post Lift: PSE 10,000 BP
Installation manual
Parts Breakdown
3 stage front arms (Qty of 2)
12
15
13
14
2
16
8
7
11
1
10
6
9
5
3
4
No
1
Description
1st Front Arm
2
Front Half Round Gear
3
2nd Front Arm Pipe
Dimensions
Number
Qty
6t x 120 x 100 x 400L
A1030101
1
16t x 111
A1030002
1
6t x 100 x 75 x 440
A1030201
1
4
3rd Front Arm Support
6t x 120 x 390
A1030302
1
5
Adjustable Arm Socket 1
Ø80 x 40
A1030401
1
6
Adjustable Arm Socket 2
Ø48 x 73
A1030401
1
7
Adjustable Arm Support
Ø133 x 13t
A1030404
1
8
Arm Support Rubber
25t x 120 Ø
A1030405
1
9
Snap Ring
Ø45
P0901045
1
10
Snap Ring
Ø40
P0901040
1
11
Snap Ring
Ø25
P0901025
1
12
Plain Washer
M10
P0301110
5
13
Spring Washer
M10
P0302010
5
14
Round Head Bolt
M10-15
P01031015
2
15
Hexagon Bolt
M10-30
P01011030
3
16
Sarah Bolt
M8-25
P01060825
1
www.ProSeriesEquipment.com
Volume: 03.03.2010 01:37 PM
37 of 40
2 Post Lift: PSE 10,000 BP
Installation manual
Parts Breakdown
Control Box
15
15
15
15
15
15
15
15
15
No
Description
1
2
Dimensions
Number
Qty
Contractor
A1030101
1
Power Switch
A1030002
1
3
Up Switch
A1030201
1
4
Bottom Switch
A1030302
1
5
Direct Switch
A1030401
1
6
Power Lamp
A1030401
1
7
Control Board
A1030404
1
8
Control Case
230 x 140 x 2 0
A1030405
1
9
Control Box Cover
230 x 140 x 7 5
P0901045
1
www.ProSeriesEquipment.com
Volume: 03.03.2010 01:37 PM
38 of 40
WARRANTY ACTIVATION FORM
2 Post Lift: PSE 10,000 BP
Installation manual
ATTENTION: MAIL TODAY TO ACTIVATE YOUR WARRANTY !
WARRANTY IS NON-TRANSFERABLE
Company Name: ________________________________________________________
Owner / Shop Manager: __________________________________________________
Address: ______________________________________________________________
Phone: (
) _____________Fax: (
) _____________Cell: (
) ______________
City/State/Province/Zip: _ _________________________________________________
E-mail: _ ______________________________________________________________
PSE 10,000 BP
Model No.: PSE 10,000 BP
Capacity: 10,000 lbs.
Serial No.:
Date:
Purchased From: ____________________________________ Purchase Date: _______
Address: _______________________________________________________________
City: ________________________________State: ___________________ Zip: _ _____
Office Phone: (
) ____________________ Cell Phone: (
) __________________
www.ProSeriesEquipment.com
Volume: 03.03.2010 01:37 PM
39 of 40
Pro-Series Equipment
P.O. Box 734
Franklin, IN
Place
Stamp
Here
Pro-Series Equipment
P.O. Box 734
Franklin, Indiana
ATTN.: Warranty Dept.
- - - - - - - - - - - - - - - - - - - - - - - - - - - - - - - - - - - - - - -- - - - - -- - - -- - - - -- - - - - - - - -