1
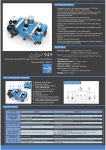
essential 100k mile parts list
1)
2)
3)
4)
5)
6)
7)
8)
9)
10)
timing belt: 13028AA120
cam seals x2: 806732150 (updated)
front main crank seal: 806733030
water pump assy: 21111AA033
water pump gasket: 21114AA051 (updated)
thermostat: 21200AA072 (updated)
water neck gasket: 21236AA010
oil pump o-ring: 806919050
upper radiator hose: 45167PA000
lower radiator hose: 45167PA020
optional parts list
1) oil pump assy (includes front crank seal): 15010AA133
2) timing belt idlers. Very expensive.
tool list
1)
2)
3)
4)
5)
6)
cam sprocket wrench to hold cam sprockets while torquing the cam sprocket bolts
(or removing the cam sprocket bolts). Napa has one for $35. You can also make
one for yourself.
2" dia PVC pipe to tap in cam seals
PVC pipe to tap in crank shaft seal
c-clamp to position t-belt tensioner
[optional]: three-arm gear puller for removing crankshaft sprocket. May be needed
if replacing the water pump.
[optional]: three-arm gear puller with at least 5.25” span for removing harmonic
damper. May be needed if harmonic damper does not easily slide off.
torque specs (per factory service manual)
cam sprocket bolts: 80-94 ft-lbs
harmonic damper bolt: 108-123 ft-lbs
timing belt idler pulleys: 30 ft-lbs
****
immortal_suby's modified t-belt replacement procedure
1)
2)
3)
4)
Drain and remove radiator.
Take off front belts.
Break crank pulley bolt loose. (see options below)
Slide off crank pulley (should wiggle/slide off. If not, use a gear puller with at least
5.25" span.)
5) Take off power steering idler pulley bracket.
6) Take off A/C idler pulley bracket.
7) Remove plastic timing belt covers. Careful, some of the bolts on the outer covers
attach to inner cover and can break the inner cover when you try to loosen those
bolts.
8) Rotate engine until all timing marks line up (see diagram) and use chalk or marker
to mark belt and pulleys just to make sure. Is can take quite a few turns.
9) If you are planning to replace the camshaft seals, then now is the time to loosen
the cam sprocket bolts. See options below.
10) Remove the timing belt tensioner.
11) Remove idler pulley for tensioner
12) [optional] Replace crank seal. See method below.
13) [optional] Replace water pump. Replace water pump while crank sprocket is off.
See method below.
14) [optional] Replace oil pump. Generally not necessary. Replace oil pump while
crank sprocket is off.
15) Use a vise to compress timing belt tensioner and put small allen wrench in hole in
tensioner to keep it compressed. The tensioner consists of a moderately strong
spring and a hydraulic damper that allows the piston to move very slowly. When
compressing the tensioner, compress it slowly. According to the FSM, it should
take over three minutes to fully compress the tensioner. If you put too much load
on the tensioner as you compress it, you could destroy the damper.
16) Put tensioner on.
17) Put idler pulley for tensioner back on.
18) Slide timing belt on. Install first on cam sprockets. Use c-clamps to hold belt onto
sprockets. Install last onto one of the smooth idler pulleys. I slid it last onto the
idler pulley to the left of the crank sprocket.
19) Make sure timing belt is lined up correctly.
20) Remove allen bolt from tensioner.
21) Put plastic covers on. Make sure that the covers properly seal up the timing belt
area. Water or oil leaks into the timing belt area could cause problems. If the
seals were exposed to oil, chances are that they swelled and may not align
properly. Take the time to make them fit properly.
22) Put the rest of the stuff back on. This would be a good time to inspect the radiator,
and flush out both the interior and exterior. Flush interior with water, use whatever
is needed to clean exterior area.
23) Fill radiator. See options below.
Drive!
harmonic damper removal options
A)
[best option]: Puts the least amount of stress on the crank shaft. Put a little Liquid
Wrench or PB Plaster between the bolt and the damper and let it sit for a few
minutes (or hours). Then, put breaker bar securely on bolt and orient breaker bar
B)
C)
so that it points straight up. Using a 2 lb hammer, whack the bar from right to left
just like an impact wrench. It may take a few tries, but the bolt will eventually spin
loose.
AT cars: block the engine from moving by placing a flathead screwdriver in the
torque converter teeth and use a breaker bar.
MT cars: stick the car in 5th gear and pull the handbrake tight. Then use breaker
bar.
****
****
crank seal replacement
1)
2)
3)
4)
5)
6)
Remove crank sprocket (if it doesn't slide/wiggle off, see options below)
Remove the half-moon key from crank sprocket first
Drill two small holes in crank seal face or use a mechanics pick to the holes in the
seal face. Be careful not to damage the sealing surface on the crankshaft.
Use mechanics pick to pull crank seal out (stick it through the hole that you drilled)
Put grease or oil on new seal and tap it in evenly using a follower such a piece of
PVC pipe.
If replacing water pump, proceed to water pump replacement. Otherwise, replace
crank sprocket and half-moon key.
crank sprocket removal options if the sprocket does not easily slide off
A)
B)
[best option]: Tap holes in sprocket and use a flywheel puller.
Use a gear puller to remove the crank sprocket. Easy to damage the sprocket by
this method.
****
****
water pump replacement
1)
2)
3)
4)
5)
6)
7)
8)
9)
9)
Remove idler pulley attached to water pump body.
Remove water pump neck from water pump body.
Note orientation of thermostat but no need to remove thermostat.
Disconnect hoses from side of water pump body.
Remove the 10 (or so) bolts attaching water pump to the engine case.
Pull water pump away from engine case. It might be necessary to tap the pump to
break it loose.
Use a new water pump gasket, thermostat, and thermostat seal.
Install new water pump onto engine case. The small hoses tend to get in the way.
The metal water pump gasket is a PITA to align properly. Take your time and
make sure its correctly aligned.
Install thermostat and thermostat seal.
Clean up any corrosion on the water pump neck and reinstall neck.
10) Reattach other items that were removed.
****
****
cam seal replacement
1)
3)
3)
4)
5)
Loosen and remove cam sprockets (see options below)
Drill two small holes in face of cam seal or punch holes using a straight mechanics
pick. Be careful not to damage the camshaft sealing surface.
Use a curved mechanics pick to pull came seal out (stick it through the hole that
you drilled)
Put grease on new seal and tap it in evenly using a follower such a piece of PVC
pipe.
Reinstall cam sprockets and torque to 80-94 ft/lbs (per SVX factory service
manual).
cam sprocket removal options
1)
2)
3)
[best option]: Put a little Liquid Wrench or PB Plaster between the bolt and the
cam sprocket and let it sit for a few minutes (or hours). Then, put breaker bar
securely on the bolt and orient breaker bar so that it points straight up. Using a 2
lb hammer (actually, I did it with a 1 lb framing hammer), whack the bar from right
to left just like an impact wrench. It may take a few tries, but the bolt will eventually
spin loose. Be sure to hold the breaker bar so that when the bolt comes loose, the
bar doesn’t smack anything.
One method for holding the sprocket stationary is to get a piece of steel with long
bolts going through that fit into the space in the cam sprocket.
Before you take the timing belt off, put a 17mm wrench on one pulley bolt and put
your big cheater type 17mm socket on the other pulley bolt and rotate things until
the wrench on one pulley is jammed against something solid. (I used a cheater
against the floor) Then break loose the first bolt. Reverse the procedure for the
other bolt. This will retighten the one you just broke loose but it won't be nearly as
tight. Go back to the bolt you just retightened and put the wrench on it and smack
the wrench with a soft hammer. Viola! Both bolts broken loose and no damage to
the cam pulleys. (Boundsie's method)
****
****
oil pump replacement tips
1) oil pump replacement is optional (per Beav and red95svx)
2) use hylomar for sealing the pump against the engine case (per Beav)
****
****
filling the radiator
--
---
--
---****
Maximum cooling performance is achieved by using Redline Water Wetter and the
minimum amount of antifreeze needed to keep the coolant from freezing in your
climate.
Water Wetter improves the heat transfer into water, and it also contains anticorrosion agents. It contains on silicates or phosphates.
Use an antifreeze that is silicate-free. Phosphates are a good anti-corrosion agent
for aluminum, but the anti-corrosion layer supposedly inhibits heat transfer to the
water. Silicates are thought by the Japanese to accelerate water pump seal wear.
Avoid 2-EHA Organic Acid Technology (OAT) based antifreeze. These types of
antifreeze are commonly called "Dex-Cool" compatible antifreeze. The 2-EHA anticorrosion agent has been shown to soften seals which will contribute to water
pump seal failure and leaks in other sealing gaskets (e.g. head gasket). The
newer sebacate acid-based OAT antifreezes do not have this problem. OAT anticorrosion agents are not fast acting, and thus it is necessary to add some sort of
fast acting protection for the water pump impeller and other places where bubbles
may form and collapse. Toyota, Honda, and Subaru all now use a long life
antifreeze with sebacate acid OAT and phosphate based anti-corrosion agents.
So, your best bet for antifreeze is to use Subaru brand or Toyota brand antifreeze.
I have heard that both antifreezes have the same composition.
Some newer Subaru service manuals recommend adding a bottle of "Subaru
Cooling System Conditioner". This stuff was designed to fix leaky head gasket
problems with certain post 1998 Subaru motors. This stuff fixes leaks by filling in
holes in the leaky gasket. I have heard from one major Subaru dealer that this
stuff is also causing clogging radiators. So, its best not to use this stuff on an SVX.
When filling the radiator, use deionized (demineralized) water. The ionic minerals
in tap water contribute to the corrosion process.
Flush the cooling system with deionized water several time prior to filling it. Be
sure to flush with deionized water.
Freeze protection chart is shown below.
****
Diagrams
Fig. A -- Timing belt alignment