1
Installation and Operation Guide
KleenSteam® Systems • Models BB & CT
Read these important points before installing this KleenSteam® System:
1. Always use a minimum 3/8” O.D. copper tubing from the outlet of the KleenSteam unit to your steamer.
2. Use the water from the KleenSteam unit only on steamer feed and make-up water.
DO NOT USE TO TREAT CONDENSATE COOLING WATER.
3. For many years, Everpure has worked closely with all major foodservice equipment manufacturers to assure the highest possible degree of
compatibility and optimal performance of the KleenSteam System with their steamers.
To help ensure satisfactory operation, we recommend that you obtain and read the equipment manufacturer’s operating and maintenance
instructions for your specific steamer model. Follow the manufacturer’s instructions and procedures for installation, maintenance and cleaning.
Or consult with the manufacturer’s representative or technical service personnel for guidance regarding any differences between their
directions and those included with the KleenSteam System. Failure to do so may affect equipment performance and/or warranty coverage.
Installation instructions
Do not make any disconnections until you have inspected the contents
of the KleenSteam unit carton. You should have:
• KleenSteam plate-mounted system consisting of:
-Quick-change filter head with 7CB5 Filter Cartridge
(BB System) or 4CB5 Filter Cartridge (CT System)
- AR-X Housing
- ScaleStick SS-10
- Dip Tube for ScaleKleen delimer
• (2) ScaleKleen 2.2 lb. packets (BB System)
• (2) ScaleKleen 7 oz packets (CT System)
If you do not have these components, do not attempt to install this
system!
Contact your local Everpure Master Distributor for assistance.
1. Shut off power to the steamer.
2. Shut off the inlet water to the steamer at the supply valve.
3. Attach the plate-mounted KleenSteam system to a suitable
structure in an accessible location. Mounting holes are provided on
the mounting plate. THE KLEENSTEAM BB WEIGHS 25 POUNDS IN
SERVICE. THE KLEENSTEAM CT WEIGHS 15 POUNDS IN SERVICE.
4. Attach the inlet of the KleenSteam unit to a COLD water supply line
only. Hot water will damage the KleenSteam unit and will void the
warranty. Use a minimum of 3/8” tubing.
5. Attach only copper or stainless steel tubing from the outlet of the
KleenSteam system to the inlet feed/makeup water connection on
your steamer. Keep the tubing run to the steamer under 20 feet. DO
NOT CONNECT TO CONDENSATE COOLING LINE.
6. Install 7CB5 or 4CB5 Filter Cartridge into the quick-change filter
head as instructed on the cartridge label.
7. Unscrew the clear bowl and insert the SS-10 ScaleStick into the
center port of the AR-X head. The friction fit between the cartridge
and port should allow the cartridge to be suspended while placing
the clear bowl over the cartridge and threading it into place on the
head. NOTE: The cartridge must be replaced when the level of the
white material drops below 1/4” in depth. Take care not to block the
KleenSteam unit from view when installing.
8. With the supply water to the KleenSteam unit off, rotate the inlet
valve handle to the open position.
9. Attach tubing to the outlet of the flushing valve and open the valve.
10.Turn on the inlet supply water and flush the 7CB5 or 4CB5 cartridge
to drain (or bucket) at full force for several minutes. This will flush
incidental carbon fines and any trapped air.
11.After flushing, close the flushing valve handle until the water stops.
12.Depress red pressure relief button on the AR-X head until water
flows out and around the red button.
13.Inspect KleenSteam unit for leaks, and correct as required.
14.Turn on power to steamer.
Deliming Instructions
In addition to reducing harmful chlorine and controlling limescale
build-up, the KleenSteam system may be used to conveniently
introduce deliming material into the steamer without disturbing
existing piping.
Use only Everpure ScaleKleen deliming material. ScaleKleen is a highly
effective, safe and environmentally friendly de-scaling product. Its
routine maintenance usage removes built-up scale in steam equipment
easily and quickly. This enhances steamer performance, reduces
operating costs and helps prevent costly repairs and unexpected
downtime. Other deliming products may contain harsh acids that can
damage the housing materials or clog orifices. Generally, use one
2.2 lb (1 kg) package to delime most countertop units and two 2.2 lb
packages to delime most boiler-based units.
1. Turn off the power switch on the steamer.
2. Blow down steamer. Blow down is done automatically on some
steamers when power is turned off. Manually blow down the
steamer if it is not automatic.
3. Turn off inlet water to Kleensteam system.
4. Depress the red relief button located on top of the AR-X head to
relieve system pressure.
5. Unscrew the clear bowl and remove the cartridge. Dispose of
the exhausted cartridge in normal trash and empty bowl of any
remaining water.
6. R
emove the dip tube from it’s holding clip, located on the backplate.
Insert the tube. O-ring first, into the center port of the AR-X head
until the dip tube bottoms out.
7. Open one kilogram (2.2 lb) package of ScaleKleen™ and empty it into
the clear bowl. Wipe off any excess ScaleKleen™ material which
may be on the bowl threads or O-ring.
EV3111-58C Au07
8. Thread the bowl back into the head – hand tight only!
NOTE: The dip tube may become packed with ScaleKleen™. This is normal and will not affect the deliming procedure.
9. Turn on the inlet water to the KleenSteam unit by rotating the inlet valve handle.
10.Turn on the power to the steamer. NOTE: This action will quickly introduce the ScaleKleen™ material directly into the boiler chamber. If you are
deliming a countertop steamer, proceed to step 11. If you are deliming a boiler-base unit, monitor ScaleKleen™ level in bowl. When it drops to
1", quickly turn off inlet water at valve handle. Now relieve pressure and unscrew bowl from head. Add another kilogram of ScaleKleen™ to the
bowl and reintroduce the material into the boiler. Repeat this procedure until two (2) 2.2 lb packages of ScaleKleen™ have been introduced into
the boiler chamber.
11.With ScaleKleen™ material introduced into the boiler chamber and the inlet water turned on, make sure the boiler sump is flooded. Allow the
steamer (countertop or boiler-based) to come up to operating temperature and pressure, and hold for one hour.
12.Thirty minutes into the deliming procedure, turn on steam to cooking chamber(s) for one minute. This will delime the distribution lines, small
orifices, and steam solenoid valves.
13.After one hour of deliming the steamer at operating temperature and pressure, turn the steamer power switch to the off position.
14.Manually blow down the steamer if it is not done automatically when the power is turned off.
NOTE: Check the pH of the blow down water. If the pH is acidic (below 7.0), then the boiler has been completely descaled. If the pH is alkaline
(above 7.0), then there is still scale remaining in the boiler. Repeat steps 7 through 14 until the pH from the boiler blow down water is below 7.0.
15.Fill the boiler with fresh, clean water and repeat blow down until the water in the boiler is equal to the raw (incoming) water pH. This will
remove any unused ScaleKleen and undissolved loose scale remaining in the boiler.
NOTE: Depending on the steam generator fill probe configuration on your steamer, de-scaling compounds may leave residual foam bridging
probe electrodes. This can cause a false water level indication leading to “dry firing” of the boiler that can burn out heating elements.
To help ensure against incorrect probe operation, follow all of the instructions provided for de-scaling. This includes adding an additional 1 to 11⁄2
gallons of water to the de-scaling port(s) once automatic filling has stopped after the de-scaler drain cycle. This raises the water level above the
fill probes, permitting them to be flushed clean and drained with the following drain cycle.
16.After the second blow down, turn the steamer power switch to the off position, and turn off the inlet water at the valve handle on the
KleenSteam unit.
17.Relieve system pressure by depressing the red relief button on the head until all air is expelled and water begins to escape.
18.Unscrew the clear bowl and remove the dip tube from the head. BE SURE TO REPLACE THE DIP TUBE IN IT’S HOLDER ON THE BACKPLATE!
19.Install a new SS-10 cartridge into the head, and screw the bowl back into the head. Hand tighten only!
20.Turn on the inlet water. Relieve trapped air in the clear bowl by depressing the red relief button on the AR-X head until all air is expelled and
water starts to escape.
21.Turn the steamer power switch to the on position. Steamer is now ready to be placed back into service.
Replacement Parts
1. Contact your local Everpure dealer for filter cartridges or system replacement parts.
Description
Part Number
Dip tube assembly
4CB5 filter cartridge (6-pack)
7CB5 filter cartridge (6-pack)
ScaleStick SS-10 (12-pack)
ScaleKleen scale remover 2.2 lb. pkg. (4-pack)
EV3080-40
EV9617-16
EV9618-16
EV9799-02
EV9798-01
ScaleKleen remover 7 oz. pkg (24-pack)
EV9798-20
Dimensions and Specifications
Model BB
PN EV9797-00
Model CT
EV9797
Width of Mounting Plate
19.75"
14"
System Depth (front to back)
8.0"
8.0"
Overall Length
31.0"
(includes 2" for cartridge change)
18.25"
(includes 2" for Cartridge change)
Inlet Connection
3/8" FPT
3/8" FPT
Outlet Connection
1/2" MPT
3/8" FPT
Minimum Water Pressure
20 psi
10 psi
Maximum Water Pressure
125 psi (non-shock)
125 psi (non-shock)
Maximum Water Temperature
80°F
80°F
Net Shipping Weight
23 lbs.
10 lbs.
Operating Weight
25 lbs.
15 lbs.
Dip Tube
50
40
60
70
60
30
80
20
90
40
80
4
Water
Outlet
6
10
100
2
"[WDGHHIOZVLJFKFGIVNHKILMZIOEMPEBSPCNF[WDGHHIOZVLJFKFGIVNHKILMZEBSPCNGLEJGLGVFKEDGDLGEVHCEEDL
100
rDF[WDGHHIOZVLJFKFGIVNHKILMZIOEMPEBSPCN
rDF[WDGHHIOZVLJFKFGIVNHKILMZIOEMPEBSPCNGELJ
rDF[WDGHHIOZVLJFKFGIVNHKILMZIOEMPEBSPCNELEJGIELELLTTJJTL
rDF[WDGHHIOZVLJFKFGIVNHKILMZIOEMPEBSPCNELEMEàGLMááGHMG
rDF[WDGHHIOZVLJFKFGIVNHKILMZIOEMPEBSPCNWNGPJSKNSGEEGIGHX
rDF[WDGHHIOZVLJFKFGIVNHKILMZIOEMPEBSPCNHGLEGVGHLGEPGPKWMJFKETFJPELNTLEJP
8
20
120
PSI
NHKILMZIOEMPEBSPCN
VNHKILMZIOEMPEBSPCNGELJ
OEMPEBSPCNELEJGIELELLTTJJTL
NHKILMZIOEMPEBSPCNELEMEàGLMááGHMG
IOEMPEBSPCNWNGPJSKNSGEEGIGHX
PSI
SCALE REDUCING FEEDER
a
cezvcfg ghnyuk iejefhu mgjhklyhn
cezvcfg ghnyuk iejefhu jhklyhn
S
cezvcfg ghnyuk iejefhu mgjhklyhn
cezvcfg ghnyuk iejefhu mgjh
DF[WDGHHIOZVLJFKFGIVNHKILMZIO
DF[WDGHHIOZVLJFKFGIVKILMZIO
DF[WDGHHIOZVLJFKFGIVNHKILMZIO
DF[WDGHHIOZVLJFKFGIVNHKI
DF[WDGHHIOZVLJFKF
LGEMBEWJEMEMEPEMEMFFGPG
[WDGHHIOZVLJFKFGIVNGWGG
Inlet
Valve
WATER YOU CAN TRUST
WATER YOU CAN TRUST
cezvcfg ghnyuk ieje
kfdl advidl dldodldleefof
zvcfg ghnyuk iejefhu mf vff
AR-X Head
Flushing
Valve
QC71
WATER FILTER
31"
(Includes
2.5" for
cartridge
change)
7CB5
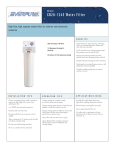
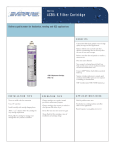
Replacement cartridge for the
QC7-CB5 Water Filter
t Effe
ctively fi
atter
as small lters particulate m e
as five microns in siz
t R ed
uces co
dors
and chlo mmon off tastes, o
rine.
t R ed
uces dirt and cloudiness.
t Pro
tects
against water-using equipment
wear and abrasion.
Inlet
Valve
t F lo
w rate: 2.5 gp
m (9.4 lpm)
t Wo
rking pressure
range: 10-125 psi
(0.7-8
t Cap .6 bar), non-shock.
ac
t Tem ity: 10,000 gal. (37,850L)
perature: 35-100°F (2-38°C)
4CB5
Cartridge
7CB5
Cartridge
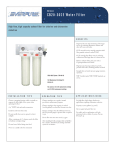
KleenSteam Model CT
KleenSteam Model BB
Important Note:
Water from KleenSteam System should only be connected to the
boiler feed, and not to the condenser connection of the steamer.
Limited Warranty
Commercial Water Treatment Equipment
You have just purchased one of the finest water treatment units made. As an expression of our confidence in Everpure products, this product is warranted
against defects in material and workmanship to the original end-user when installed in accordance with Everpure specifications. The warranty period
commences from the date of purchase and is administered as follows:
For a period of ONE YEAR
Replaceable elements (i.e., filter & water treatment cartridges)*
For a period of FIVE YEARSThe entire system (excluding replaceable elements)
*This is for material & workmanship, not filter or water treatment cartridge life.
The unit must be used in operating conditions that conform to Everpure’s recommended design guidelines. This warranty will not apply if the unit has been
modified, repaired or altered by someone not authorized by Everpure.
If a part described above is found defective within the specified period, you should notify Everpure technical service at the phone number listed below.
Any part found defective within the terms of this warranty will be repaired or replaced (at Everpure’s discretion) by your local dealer or Everpure technical
service. You pay only freight from our factory and local dealer charges. Any repaired or replaced warranty item will be incorporated under the original
warranty terms of the existing system.
We are not responsible for damage caused by accident, fire, flood, freezing, Act of God, misuse, misapplication, neglect, oxidizing agents (such as chlorine,
ozone, chloramines and other related components), alteration, installation or operation contrary to our printed instructions, or by the use of accessories or
components which do not meet Everpure’s specifications. Refer to the specifications section in the Installation and Operating manual for approved application
parameters.
Our product performance specifications are furnished with each water treatment unit. TO THE EXTENT PERMITTED BY LAW, EVERPURE DISCLAIMS ALL
IMPLIED WARRANTIES, INCLUDING WITHOUT LIMITATION WARRANTIES OF MERCHANTABILITY AND FITNESS FOR PARTICULAR PURPOSE; TO THE EXTENT
REQUIRED BY LAW, ANY SUCH IMPLIED WARRANTIES ARE LIMITED IN DURATION TO THE PERIOD SPECIFIED ABOVE FOR THE ENTIRE WATER TREATMENT
UNIT. As a manufacturer, we do not know the characteristics of your water supply or the purpose for which you are purchasing this product. The quality of
water supplies may vary seasonally or over a period of time, and your water usage rate may vary as well. Water characteristics can also differ considerably
if this product is moved to a new location. For these reasons, we assume no liability for the determination of the proper equipment necessary to meet your
requirements, and we do not authorize others to assume such obligations for us. Further, we assume no liability and extend no warranties, express or implied,
for the use of this product with a non-potable water source or a water source which does not meet the conditions for use described in the owner’s guide or
performance data sheet for this product. OUR OBLIGATIONS UNDER THIS WARRANTY ARE LIMITED TO THE REPAIR OR REPLACEMENT (AT EVERPURE’S
DISCRETION) OF THE FAILED PARTS OF THE WATER TREATMENT UNIT, AND WE ASSUME NO LIABILITY WHATSOEVER FOR DIRECT, INDIRECT, INCIDENTAL,
CONSEQUENTIAL, SPECIAL, GENERAL OR OTHER DAMAGES.
Some states do not allow the exclusion of implied warranties or limitations on how long an implied warranty lasts, so the above limitation may not apply to
you. Similarly, some states do not allow the exclusion of incidental or consequential damages, so the above limitation or exclusion may not apply to you. This
warranty gives you specific legal rights, and you may also have other rights which vary from state to state. Consult your telephone directory for your local
independently operated Everpure dealer, or write Everpure for warranty and service information.
For sales, replacement components, and service, contact your Everpure dealer or:
Everpure, LLC: 1040 Muirfield Drive • Hanover Park, Illinois 60133 • 800.323.7873
In Europe: Toekomstlaan 30 • B-2200 Herentals, Belguim
In Japan: Hashimoto MN Bldg. 7F • 3-25-1 Hashimoto Sagamihara-Shi • Kanagawa 229-1103, Japan
Printed in U.S.A.
Technical Service
800.942.1153
www.everpure.com
EV3111-58C AU07