1
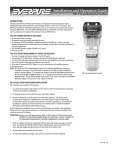
Installation and Operation Guide
High Flow CSR Filter Systems
Selecting A Mounting Location
1.Give consideration to the weight of the unit when operating (filled with water). Operating weights
of High Flow CSR Systems are:
• Twin System - 45 lbs (20.2 kg)
• Triple System - 47 lbs (21.2 kg)
• Quad System - 49 lbs (22.2 kg)
• Quad Plus System - 49 lbs (21.2 kg) + separate surge/storage tank @ 60 lbs (27.2 kg)
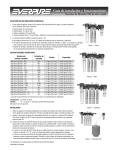
2. The location should allow for (See figures 1-8):
• Minimum clearance of 21⁄2" under the cartridge(s) so it can be lowered for removal and
replacement.
• Adequate space for “in” and “out” water line connections. Be near a drain for flushing and near
a 110V outlet if the optional Everguard™ Low Pressure Alarm is used.
• Additional mounting and floor space for the separate SR-X Feeder and surge/storage tank† (Quad
Plus).
Figure 1 – Twin
Operating Specifications*
Combined Model Name
High Flow CSR Twin - MC
High Flow CSR Twin - MC2
High Flow CSR Twin - XC
High Flow CSR Twin - XC2
High Flow CSR Twin - 4CB5
High Flow CSR Twin - 7CB5
High Flow CSR Triple - MC
High Flow CSR Triple - MC2
High Flow CSR Triple - XC
High Flow CSR Triple - XC2
High Flow CSR Triple - 4CB5
High Flow CSR Triple - 7CB5
High Flow CSR Quad - MC
High Flow CSR Quad - MC2
High Flow CSR Quad Plus - XC
High Flow CSR Quad Plus - XC2
Replacement
Cartridge
Flow Rate
Capacity
MC
MC2
XC
XC2
4CB5
7CB5
MC
MC2
XC
XC2
4CB5
7CB5
MC
MC2
XC
XC2
3.3 gpm (12.5 lpm)
3.3 gpm (12.5 lpm)
3.3 gpm (12.5 lpm)
3.3 gpm (12.5 lpm)
3.3 gpm (12.5 lpm)
5.0 gpm (18.9 lpm)
5.0 gpm (18.9 lpm)
5.0 gpm (18.9 lpm)
5.0 gpm (18.9 lpm)
5.0 gpm (18.9 lpm)
5.0 gpm (18.9 lpm)
7.5 gpm (28.5 lpm)
6.6 gpm (25.2 lpm)
6.6 gpm (25.2 lpm)
6.6 gpm (25.2 lpm)
6.6 gpm (25.2 lpm)
18,000 gal.(68,000 L)
18,000 gal.(68,000 L)
18,000 gal.(68,000 L)
18,000 gal.(68,000 L)
12,000 gal.(45,400 L)
20,000 gal.(75,700 L)
27,000 gal.(102,000 L)
27,000 gal.(102,000 L)
36,000 gal.(136,000 L)
36,000 gal.(136,000 L)
18,000 gal.(68,000 L)
30,000 gal.(113,550 L)
36,000 gal.(136,000 L) 36,000 gal.(136,000 L) 48,000 gal.(181,600 L)
48,000 gal.(181,600 L)
Figure 2 – Triple
* For individual cartridge specifications, refer to cartridge literature.
Temperature: 35-100°F (2-38°C)
Pressure:
10 - 125 psi (0.7 - 8.6 bar), non-shock
For cold water use only.
Installation
Figure 3 – Quad
1. U
se the predrilled mounting holes in the manifold bracket as guides. Mark and drill anchor holes.
Mount securely. See Figures 5-8.
2. S hut off power to equipment. If system is a High Flow CSR Quad Plus (separate SR-X Feeder and
surge/storage tank†), proceed to step 3b.
3a. Connect outlet ports of High Flow system to equipment served per the instructions below. Always
use NSF approved pipe dope or Teflon tape at all connections. Use a backup wrench on all fittings
while connecting to avoid stress on the system components.
• The cross fitting before the SR-X Feeder has a threaded outlet on top. Connect a minimum 1/2"
I.D. line from this outlet to fountain beverage equipment.
• The cross fitting has a flushing valve installed on the bottom. Connect tubing to the flushing valve
and run to drain. Note: Some municipal plumbing codes and good sanitary practices require an
air gap at the drain termination point.
Figure 4 – Quad Plus
Manufactured
by Everpure
EV3112-78 Rev E AP08
• Connect the outlet of the SR-X Feeder to the ice machine make-up water (not condenser water)
line and coffee brewing equipment. Proceed to step 4.
3b. For High Flow CSR Quad Plus System, connect outlet to equipment served per the instructions below. Always use a NSF approved pipe dope or Teflon tape at all connections. Use a backup wrench
on all fittings while connecting to avoid stress on the system components.
• Locate and mount the separate SR-X Feeder between the High Flow CSR system and the ice
machine. Make-up water (not condenser water) line and coffee brewing equipment.
• A tee fitting is located in the system header before the surge tank isolation and flushing valve.
Using minimum 1/2" I.D. line, connect the outlet of this tee to the fountain beverage and remote
SR-X Feeder line. Important: Install a tee in this service water line to separate the fountain
water feed from the ice machine/coffee brewer water feed.
In Massachusetts, a backflow preventer is required for this installation.
• Connect one branch of the service water tee to the fountain beverage equipment. Connect the
other branch of the tee to the inlet of the SR-X Feeder. Connect the outlet of the SR-X Feeder to
the ice machine make-up water (not condenser water) line and coffee brewing equipment.
• The surge tank isolation and flushing valve is located at the end of the system header. Using
fittings and hose provided, connect one branch of the valve to the surge/storage tank. Connect
a hose from the other (flushing) branch and run to drain. Note: Some municipal plumbing codes
and good sanitary practices require an air gap at the drain termination point.
25.80"
FOUNTAIN
OUTLET
3/4" FNPT
INLET
3/4" FNPT
ICE MACHINE/
COFFEE
OUTLET
3/4" FNPT
25.59"
Figure 5 – High Flow CSR Twin
30"
FOUNTAIN
OUTLET
3/4" FNPT
INLET
3/4" FNPT
ICE MACHINE/
COFFEE
OUTLET
3/4" FNPT
4. The surge/storage tank is pre-pressurized to 20 psi. Check pressure and adjust as necessary.
25.59"
5. Install a manual shut-off valve leading to the system for servicing and connect minimum 1/2" I.D.
(3/4" for quad) water line to the system inlet.
6. T he optional Everguard™ Low Pressure Alarm (LPA) consists of a pressure switch, audible/visual
alarm box and a power adapter. It is designed to detect a fixed low pressure (approx. 20 psi)
condition as an indication of loss of system outlet pressure either due to an intentional shut-down
or excess fouling of the water filters, thus indicating the need for filter cartridge change-out. If the
system is equipped with the LPA, follow these steps:
• Determine location of a convenient 110 VAC outlet to plug in the LPA power adapter.
• Remove the protective rubber cap from the pressure switch installed in the system header
assembly. Insert the wires from the LPA unit through the cap and connect them to the terminals
on the pressure switch. Either wire can be connected to either terminal. Replace the cap.
• Plug the LPA power adapter into an outlet. The audible alarm should activate. Push the reset
switch to silence.
• Unplug the LPA unit.
Figure 6 – High Flow CSR Triple
34"
FOUNTAIN
OUTLET
3/4" FNPT
INLET
3/4" FNPT
ICE MACHINE/
COFFEE
OUTLET
3/4" FNPT
25.69"
7. Shut off the system inlet valve located on the inlet of the prefilter head.
8. C
heck to be sure the o-ring on the prefilter housing is sufficiently lubricated. Use a good grade of
silicone lubricant, if needed. Position the EC210 prefilter cartridge on guide seat in the bottom of
the bowl. Then thread the bowl into the head by hand. Use a sump wrench to snug the bowl onto
the head.
Figure 7 – High Flow CSR Quad
31.38"
9. Install only genuine Everpure™ carbon filter cartridge(s) into the filter head(s) following directions
on the cartridge label or as shown in the Cartridge Change illustrations. Install the SS-10 Scale
Inhibitor cartridge into the SR-X housing.
INSERT TEE FITTING.
ONE OUTLET TO FOUNTAIN,
ONE OUTLET TO SRX.
INLET
3/4" FNPT
ICE MACHINE/
COFFEE
OUTLET
3/4" FNPT
OUTLET
3/4" FNPT
INLET
3/4" FNPT
10.Turn on inlet water to the filter system and check for leaks.
29.69"
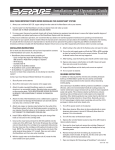
11.Open the flushing valve and flush the cartridge(s) by running water through at full force for five
minutes. This will set the filtering media and purge any air and fines, insuring maximum filter life.
See illustrations.
12.After flushing, close the flushing valve, turn on power to equipment and plug the LPA (if so
equipped) into the electrical outlet. The system is ready for operation.
FLUSHING
Figure 8 – High Flow CSR Quad Plus
For maximum life, all carbon filter cartridges must be flushed for five minutes at full flow before use. ALL
NEW CARTRIDGES MUST BE FLUSHED AFTER EACH CARTRIDGE CHANGE BEFORE BEING PUT INTO SERVICE!
If the cartridges are new, have been properly flushed and both needle and follower register inadequate pressure, or
the LPA is sounding, you may be experiencing inadequate water pressure or some restriction may exist in the inlet
water line. In either case, the incoming water pressure must be improved to receive optimum filter life.
COMPLETE CARTRIDGE CHANGE INSTRUCTIONS CAN BE FOUND ON THE FILTER CARTRIDGE LABEL.
Not for residential use. For food service applications only.
Check for compliance with state and local laws and
regulations. The Commonwealth of Massachusetts
Plumbing Code 248CMR shall be adhered to. Consult your
local licensed plumber for installation of this system. Do
not use with water that is microbiologically unsafe or of
unknown quality without adequate disinfection before or
after the system. Systems certified for cyst reduction may
be used on disinfected waters that may contain filterable
cysts.
Cartridge Change Determination
Replace the prefilter cartridge whenever it becomes excessively dirty (observed visually or by flow restriction). Follow the change instructions provided with
the cartridge. Replace carbon filter cartridges when capacity is reached or when flow becomes inadequate, but at least annually. All carbon filter cartridges
on multiple cartridge systems should be changed at the same time. Change the SS-10 cartridge when product level in the cartridge drops below 1/2" from
the bottom of the bowl.
The system pressure gauge or optional Everguard™ Low Pressure Alarm (LPA) provides a quick, simple means of determining when the filter cartridge(s)
should be checked. Installed on the system outlet manifold, the gauge or LPA can be used to monitor both dynamic (flowing) and static (line) pressure. The
cartridge(s) should be changed when the pressure gauge is in the red area while equipment is in operation, and yet the needle shows adequate line pressure
between cycles. Observe the needle during the next equipment on cycle. If the needle registers adequate pressure, it can be assumed that the temporary
low-pressure condition was caused by a brief power failure or other incoming pressure disruption. If the low pressure condition is not due to an external
condition, check/change the prefilter first. If the low pressure condition is still not corrected, change the carbon filter cartridges.
Pressure Gauges
Low Inlet
Pressure
Adequate Inlet
Pressure
Adequate Outlet
Pressure
Low Outlet
Pressure
Cartridge Change Procedure
3. C
lean bowl with filtered water only;
no special cleaners.
E-Series Prefilter Cartridge Change
1. S hut off power to equipment. Shut
off inlet water ahead of system.
2. P ush red relief valve. Unscrew
bowl. Remove prefilter cartridge.
Everpure Carbon Filter Cartridge
Change
2. O
pen flushing valve to relieve
pressure.
1. S hut off power to equipment. Shut
off inlet water ahead of system.
3.Hold head firmly and push upward.
Turn cartridge to left until it stops.
SR-X Feeder Cartridge Change
2. P ress red pressure relief button on
head.
4. F eel head o-ring. If dry, lubricate
with high quality silicone lubricant.
4. P ull cartridge downward and out of
head.
5. H
old head firmly. Align cartridge
lug with label. Insert new cartridge
firmly into head.
5. Install new prefilter cartridge in
bowl. Hand tighten bowl onto head.
6. T urn on water. Turn on power to
equipment.
Flushing
6. T urn cartridge right 90˚ until
rotation stops.
7. R
epeat steps 3-6 for remaining
cartridges.
8. W
ith flushing valve fully open, open
inlet water at full force for five
minutes. Close flushing valve.
9. Turn on power to equipment
8. Turn on water.
1. S hut off power to equipment. Shut
off inlet water ahead of system.
3. Unscrew bowl.
4. Remove old cartridge.
5. F eel bowl o-ring; if dry, lubricate
with silicone lubricant.
6. Install new SS-10 cartridge into
head.
9. P ress red pressure relief button
until water comes out of valve port.
7. Hand tighten bowl into head.
10.Turn on power to equipment.
For installations in Massachusetts, the Commonwealth of Massachusetts Plumbing Code 248 CMR shall be adhered to. Consult your licensed
plumber for installation of the system. This system and its installation must comply with state and local regulations.
Replacement Parts
Contact your local Everpure dealer for filter cartridges or system replacement parts.
Description
Part Number
Inlet/outlet pressure gauge
Inlet/flushing valve
O-ring for prefilter or SR-X
Prefilter bowl
SR-X bowl
LPA pressure switch
Wrench
EV3114-09
EV3114-07
EV3112-40
EV3112-38
EV3112-39
EV3016-41
EV3112-41
System Tested and Certified by NSF International against
NSF/ANSI Standards 42 and 53 for the reduction of:
Standard No. 42 —
Aesthetic Effects
Chemical Reduction
Taste and Odor
Chlorine
Mechanical Filtration
Particulate Class I: 99.2% reduction of particles
one-half micron and larger in size
Standard No. 53 —
Health Effects
Mechanical Filtration
Turbidity (MC, MC2 only)
Cyst (MC, MC2, XC, XC2 only)
Asbestos (MC, MC2 only)
Limited Warranty
Commercial Water Treatment Equipment
You have just purchased one of the finest water treatment units made. As an expression of our confidence in Everpure products, this product is warranted against defects in
material and workmanship to the original end-user when installed in accordance with Everpure specifications. The warranty period commences from the date of purchase
and is administered as follows:
For a period of ONE YEARReplaceable elements (i.e., filter & water treatment cartridges)*
For a period of FIVE YEARSThe entire system (excluding replaceable elements)
*This is for material & workmanship, not filter or water treatment cartridge life.
The unit must be used in operating conditions that conform to Everpure’s recommended design guidelines. This warranty will not apply if the unit has been modified, repaired
or altered by someone not authorized by Everpure.
If a part described above is found defective within the specified period, you should notify Everpure technical service at the phone number listed below. Any part
found defective within the terms of this warranty will be repaired or replaced (at Everpure’s discretion) by your local dealer or Everpure technical service. You
pay only freight from our factory and local dealer charges. Any repaired or replaced warranty item will be incorporated under the original warranty terms of the
existing system.
We are not responsible for damage caused by accident, fire, flood, freezing, Act of God, misuse, misapplication, neglect, oxidizing agents (such as chlorine, ozone,
chloramines and other related components), alteration, installation or operation contrary to our printed instructions, or by the use of accessories or components which do not
meet Everpure’s specifications. Refer to the specifications section in the Installation and Operating manual for approved application parameters.
Our product performance specifications are furnished with each water treatment unit. TO THE EXTENT PERMITTED BY LAW, EVERPURE DISCLAIMS ALL IMPLIED WARRANTIES,
INCLUDING WITHOUT LIMITATION WARRANTIES OF MERCHANTABILITY AND FITNESS FOR PARTICULAR PURPOSE; TO THE EXTENT REQUIRED BY LAW, ANY SUCH IMPLIED
WARRANTIES ARE LIMITED IN DURATION TO THE PERIOD SPECIFIED ABOVE FOR THE ENTIRE WATER TREATMENT UNIT. As a manufacturer, we do not know the characteristics
of your water supply or the purpose for which you are purchasing this product. The quality of water supplies may vary seasonally or over a period of time, and your water
usage rate may vary as well. Water characteristics can also differ considerably if this product is moved to a new location. For these reasons, we assume no liability for the
determination of the proper equipment necessary to meet your requirements, and we do not authorize others to assume such obligations for us. Further, we assume no
liability and extend no warranties, express or implied, for the use of this product with a non-potable water source or a water source which does not meet the conditions for
use described in the owner’s guide or performance data sheet for this product. OUR OBLIGATIONS UNDER THIS WARRANTY ARE LIMITED TO THE REPAIR OR REPLACEMENT
(AT EVERPURE’S DISCRETION) OF THE FAILED PARTS OF THE WATER TREATMENT UNIT, AND WE ASSUME NO LIABILITY WHATSOEVER FOR DIRECT, INDIRECT, INCIDENTAL,
CONSEQUENTIAL, SPECIAL, GENERAL OR OTHER DAMAGES.
Some states do not allow the exclusion of implied warranties or limitations on how long an implied warranty lasts, so the above limitation may not apply to you. Similarly,
some states do not allow the exclusion of incidental or consequential damages, so the above limitation or exclusion may not apply to you. This warranty gives you specific
legal rights, and you may also have other rights which vary from state to state. Consult your telephone directory for your local independently operated Everpure dealer, or
write Everpure for warranty and service information.
For sales, replacement components, and service, contact your Everpure dealer or:
Everpure, LLC: 1040 Muirfield Drive • Hanover Park, Illinois 60133 • 800.323.7873
In Europe: Toekomstlaan 30 • B-2200 Herentals, Belguim
In Japan: Hashimoto MN Bldg. 7F • 3-25-1 Hashimoto Sagamihara-Shi • Kanagawa 229-1103, Japan
Printed in U.S.A.
Technical Service
800.942.1153
www.everpure.com
EV3112-78 Rev E AP08