1
N6DHPACA
YE1170 YE1171
YE1174 YE1175
YE1176 YE1178
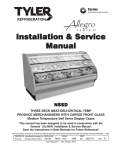
Installation & Service
Manual
N6DHPACLA, N6DHPACMA, N6DHPACHA
HIGH PERFORMANCE AIR CURTAIN MULTI-SHELF MERCHANDISER
Medium Temperature Self Serve Display Cases
This manual has been designed to be used in conjunction with the
General (UL/NSF) Installation & Service Manual.
Save the Instructions in Both Manuals for Future Reference!!
This merchandiser conforms to the American National Standard Institute & NSF International Health and Sanitation standard ANSI/NSF 7 - 2003.
PRINTED IN Specifications subject to REPLACES
IN U.S.A.
change without notice. EDITION
9/07
ISSUE
DATE
5/08
Tyler Refrigeration * Niles, Michigan 49120
PART
NO.
9305819
REV.
E.2
N6DHPAC(L, M, H)A
CONTENTS
Page
Specifications
N6DHPACLA / N6DHPACMA / N6DHPACHA Specification Sheets . 4
Pre-installation Responsibilities . . . . . (See General-UL/NSF I&S Manual)
Installation Procedures
Carpentry Procedures . . . . . . . . . . . . . . . . . . . . . . . . . . . . . . . . . . . 6
Case Pull-Up Locations . . . . . . . . . . . . . . . . . . . . . . . . . . . . . . . . . . 6
Refrigeration Procedures . . . . . . . . . . . . . . . . . . . . . . . . . . . . . . . . . 6
Electronic Thermostat Control . . . . . . . . . . . . . . . . . . . . . . . . . . . . . . 6
Electrical Procedures . . . . . . . . . . . . . . . . . . . . . . . . . . . . . . . . . . . . 7
Plumbing Procedures . . . . . . . . (See General-UL/NSF I&S Manual)
Defrost Information . . . . . . . . . . . . . . . . . . . . . . . . . . . . . . . . . . . . . 7
Defrost Control Chart . . . . . . . . . . . . . . . . . . . . . . . . . . . . . . . . . . . . 7
Installation Procedure Check Lists (See Gen.-UL/NSF I&S Manual)
Wiring Diagrams . . . . . . . . . . . . . . . . . . . . . . . . . . . . . . . . . . . . . . . . . . . . 7
N6DHPAC(L/M/H)A Domestic & Export (50Hz) Case Circuits . . 8
Cleaning and Sanitation . . . . . . . . . . . (See General-UL/NSF I&S Manual)
Component Removal and Installation Instructions for Cleaning 10
Shelves and Shelf Brackets . . . . . . . . . . . . . . . . . . . . . . . . . . . . . . 10
Bottom Trays . . . . . . . . . . . . . . . . . . . . . . . . . . . . . . . . . . . . . . . . . . 10
Front Air Ducts . . . . . . . . . . . . . . . . . . . . . . . . . . . . . . . . . . . . . . . . 10
Rear Duct Panels . . . . . . . . . . . . . . . . . . . . . . . . . . . . . . . . . . . . . . 10
Discharge Air/Ambient Air Honeycombs . . . . . . . . . . . . . . . . . . . . 10
Top Duct . . . . . . . . . . . . . . . . . . . . . . . . . . . . . . . . . . . . . . . . . . . . . 10
Front Cladding . . . . . . . . . . . . . . . . . . . . . . . . . . . . . . . . . . . . . . . . 11
Page 2
June, 2008
Installation & Service Manual
N6DHPAC(L, M, H)A
Page
General Information
Air Curtain Operating Information . . . . . . . . . . . . . . . . . . . . . . . . . . 11
NSF Product Thermometer Installation . . . . . . . . . . . . . . . . . . . . . 11
Egg Merchandiser Kit . . . . . . . . . . . . . . . . . . . . . . . . . . . . . . . . . . . 12
Service Instructions
Preventive Maintenance . . . . . . . (See General-UL/NSF I&S Manual)
Ballast and Lighting Locations . . . . . . . . . . . . . . . . . . . . . . . . . . . . . 12
Check Air Velocities . . . . . . . . . . . . . . . . . . . . . . . . . . . . . . . . . . . . . 12
Secondary Ambient Air Fan Replacement . . . . . . . . . . . . . . . . . . . 13
Removing Metal Edge Trim . . . . . . . . . . . . . . . . . . . . . . . . . . . . . . . .13
Parts Information
Cladding and Trim Parts List . . . . . . . . . . . . . . . . . . . . . . . . . . . . . . 14
Operational Parts List . . . . . . . . . . . . . . . . . . . . . . . . . . . . . . . . . . . . 16
Revision Log
. . . . . . . . . . . . . . . . . . . . . . . . . . . . . . . . . . . . . . . . .17
TYLER Warranty . . . . . . . . . . . . . . . . . (See General-UL/NSF I&S Manual)
The following High Performance Air Curtain Medium Temperature, Multi-Shelf Dairy, Deli,
Produce and Juice Merchandiser models are covered in this manual:
MODEL
DESCRIPTION
N6DHPACLA
6’, 8’ & 12’ HIGH PERF. AIR CURTAIN MERCHANDISER WITH 18” FRONT
N6DHPACMA 6’, 8’ & 12’ HIGH PERF. AIR CURTAIN MERCHANDISER WITH 22” FRONT
N6DHPACHA 6’, 8’ & 12’ HIGH PERF. AIR CURTAIN. MERCHANDISER WITH 26” FRONT
September, 2007
Page 3
N6DHPAC(L, M, H)A
SPECIFICATIONS
N6DHPAC(L, M, H)A High Perf. Air Curtain Med. Temp. Merchandisers
Page 4
June, 2008
Installation & Service Manual
June, 2008
N6DHPAC(L, M, H)A
Page 5
N6DHPAC(L, M, H)A
INSTALLATION PROCEDURES
Carpentry Procedures
Case Pull-Up Locations
All N6DHPACA models have four pull-ups at
each end of the case. Pull-ups A, B, C and D
are located as shown and should be installed
and tightened starting with A and finishing
with D.
See “General-UL/NSF I&S Manual” for
line-up assembly instructions.
3. Set the Heating/Cooling jumper blocks to
the “COOL” position.
4. Set the Cut-in at Setpoint/Cut-out at
Setpoint jumper blocks to the “Cut-out at
Setpoint” position.
5. Set the keypad Locked/Unlocked jumper
blocks to the “Unlocked” position.
6. Replace the electronic thermostat cover
and secure with four screws.
Refrigeration Procedures
Refrigeration system and superheat instructions can be found in the “General (UL/NSF)
I&S Manual”. Case electronic temperature
control information is listed below.
Electronic Temperature Control
Whenever an N6DHPACA uses an electronic
thermostat and solenoid valve for temperature
control, use the following instructions to
properly set-up the electronic thermostat.
Setting the Electronic Thermostat
1. Remove the four screws and cover from the
electronic thermostat.
2. Connect sensor wires to the common
(COM) and sensor (SEN) terminals of the
terminal strip located at the top left of the
printed circuit board. The sensor leads are
interchangeable.
Page 6
7. To adjust the setpoint:
a. Push the Menu Button. “SP” will flash
on the LCD display.
b. Push the Menu Button one more time
and a setpoint temperature will be displayed.
c. Push the Up or Down Button until the
desired setpoint is displayed.
N6DHPAC (w/shelving)
= 32°F
d. Push the Menu Button.
July, 2007
Installation & Service Manual
8. To adjust the differential:
a. Push the Menu Button. “SP” will flash
on the LCD display.
b. Push the Down Button until “DIF” is
shown on the LCD display.
c. Push the Menu Button one more time
and a differential number will be displayed.
d. Push the Up or Down Button until the
desired differential setting is displayed.
N6DHPACA (all applications) = 2°F
d. Push the Menu Button.
With the cooling mode selected, the
differential is ABOVE the setpoint. The relay
will energize and the LED indicator will
illuminate when the temperature reaches the
differential setting. When the temperature
drops to the setpoint, the relay and LED
indicator will de-energize and refrigeration
will stop.
The settings above are specific to TYLER
N6DHPACA cases. Other applications will
require different setpoints and differentials.
Electrical Procedures
Electrical Considerations
CAUTION
Make sure all electrical connections at
components and terminal blocks are tight.
This will prevent burning of electrical
terminals and/or premature component
failure.
NOTE
Raceway covers will be shipped loose.
See the “General-UL/NSF I&S Manual” for
raceway cover installation and removal
instructions.
N6DHPAC(L, M, H)A
Fluorescent Lamp Circuit
N6DHPACA case lighting is supplied by T-8
electronic ballast lights. The standard lighting
is 1-row of horizontal canopy lights. Case
lighting options include 2-rows of horizontal
canopy lights, up to 5 rows of shelf lights and
a nose light.
Defrost Information
See “General-UL/NSF I&S Manual” for
operational descriptions for each type of
defrost control.
Defrost Control Chart
Defrost
Type
Off Time
(w/ shelves)
Defrosts
Per Day
6
Defrost
Duration
(Min)
18*
* 18 minutes is for EPR only. Defrost
duration increases by 4 minutes when
controller methods do not include an
EPR valve.
WIRING DIAGRAMS
ELECTRICIAN NOTE - OVERCURRENT
PROTECTION
120V circuits should be protected by 15 or 20 Amp
devices per the requirements noted on the cabinet
nameplate or the National Electrical Code, Canadian
Electrical Code - Part 1, Section 28. 208V defrost
circuits employ No. 12 AWG field wire leads for field
connections. On remote cases intended for end to
end line-ups, bonding for ground may rely upon the
pull-up bolts.
The following wiring diagrams on pages 8
and 9 will cover the N6DHPACA case circuits.
The defrost and lighting circuits are covered
in the case circuit diagrams.
Case Fan Circuit
This circuit is to be supplied by an uninterrupted, protected 120V circuit. The case fan
circuit is not cycled.
May, 2008
Page 7
N6DHPAC(L, M, H)A Domestic & Export (50 Hz) Case Circuits (6' & 8' Cases)
Page 8
July, 2007
N6DHPAC(L, M, H)A Domestic & Export (50 Hz) Case Circuits (12' Cases)
July, 2007
Page 9
N6DHPAC(L, M, H)A
CLEANING AND SANITATION
Component Removal and
Installation Instructions for
Cleaning
Shelves and Shelf Brackets
1. Remove product from shelves.
2. If shelf has a light, unplug the light cord
from the socket in the rear duct panel.
Completely insert socket cover in the light
socket to protect the receptacle.
3. Push shelves back and then lift up and out
to remove them from the shelf brackets.
4. Remove shelf brackets from slots in rear
uprights.
5. After cleaning, replace in reverse order.
Bottom Trays
1. Remove product from bottom of case.
2. Grasp and lift out each of the bottom trays
from the case interior.
3. After cleaning, replace in reverse order.
Front Air Ducts
1. Remove lower trays, see this page.
2. Lift out front air duct sections.
3. After cleaning, replace in reverse order.
Rear Duct Panels
(w/o Shelf Light Sockets)
1. Remove shelves and bottom trays, see
above.
2. Remove mounting screws and rear duct
panels from case.
4. Slowly lift out rear duct panel until the shelf
harness connector near the top of the
panel can be accessed.
5. Disconnect shelf harness connector and
complete removing the rear duct panel.
WARNING
Rear duct panels with electrical receptacles
can be cleaned without removing the
electrical receptacles. Do not get moisture
on electrical wires when cleaning under
this cover. Moisture on wires could cause
premature product failure and/or personal
injury or death from electrical shock.
6. After cleaning, reconnect the shelf harness
connector: install the top socket assembly:
replace and secure rear duct panels in
reverse order.
Discharge Air/Ambient Air Honeycombs
1. Loosen screws securing rear retainer plate.
NOTE
Note position of the honeycomb grid during
removal so it can be reinstalled the same
way.
2. Slide rear retainer plate back until the
honeycomb grid sections can be removed
from the top duct.
If secondary air baffle behind the honeycomb grid section needs to be cleaned,
remove screws and secondary air baffle.
CAUTION
Improper installation of the honeycomb grid
section could result in improper air flow
and/or poor refrigeration.
3. After cleaning, replace and secure rear
duct panels in reverse order.
3. After cleaning, replace components in
reverse order, and secure with the rear
retainer plate and screws.
(with Shelf Light Sockets)
Top Duct
1. Remove shelves and bottom trays, see
above.
1. Remove shelves and shelf brackets, see
above.
2. For cases with 5 rows of lighted shelves,
remove screw above top shelf socket and
push socket assembly back through the
hole in the rear duct panel.
2. Remove screws, rear retainer plate and
honeycomb grid sections from top of case.
3. Remove mounting screws from rear duct
panel.
Page 10
3. Remove screws and top duct from case.
4. After cleaning, replace top duct and
remaining components in reverse order.
July, 2007
Installation & Service Manual
Front Cladding
1. Remove front kickplate and raceway
cover. (See General-UL/NSF I&S Manual.)
2. Remove color band, bumper and bumper
retainer from the case. (See GeneralUL/NSF I&S Manual.)
3. Remove screws for top and bottom of
front cladding and remove cladding.
4. After cleaning, replace front cladding
and remaining front components in
reverse order.
N6DHPAC(L, M, H)A
Secondary ambient air fans are mounted on
top of the case. These fans circulate air from
the store atmosphere that creates a wall of
air that keeps refrigerated air in the case
and warm air out of the case. The final
result is the most efficient operating case
in the industry.
NOTE
When case is installed under a soffit with
a facia, the facia must be removable to
provide service access to the secondary
ambient air fans.
GENERAL INFORMATION
NSF Product Thermometer
Installation
High Performance Air Curtain
(HPAC) Operating Information
1. Unwrap the thermometer and bracket
assembly shipped loose with the case.
NOTE
Recommended bottom tray position is with
the lips up.
2. Position bracket in front left corner of the
left-most bottom tray. Making sure the
bracket is flush with the left edge, use the
bracket holes as a template for where to
drill the holes.
3. Drill two .196” holes in the bottom tray.
NOTE
For ease of installation, position the washers and capnuts on the top side of the
bracket and bottom tray.
Tyler’s High Performance Air Curtain (HPAC)
reduces case refrigeration load and energy
usage. A secondary ambient air curtain acts
as a wall to reduce cold air spillage from the
primary air curtain and ambient air infiltration
from the store atmosphere.
July, 2007
4. Mount the bracket to the bottom tray with
two screws, washers and capnuts.
Page 11
N6DHPAC(L, M, H)A
Egg Merchandiser Kit Instruction
All light ballasts are located under the
canopy and mounted above or on the top
of the canopy light channel. This includes remote
ballasts for optional shelf lights and optional nose
lights. The canopy light(s)
are under the canopy light channel in the
top of the case. The optional shelf lights
are mounted under the top interior liner above
each shelf section.
Checking Air Velocities
All egg shelves come galvanized or stainless
steel. The upper egg shelves are 15” x 48” and
come with 82 degree fixed white brackets. The
brackets are available in one position only. The
upper egg shelves assemblies include a rear air
close-off.
Tilted base egg shelves come in 4’ modules.
They are designed and notched to fit inside the
existing 2’ bottom trays.
NOTE
Egg shelves are designed to catch and hold
spilled liquids so they can be cleaned up
before getting further into the case. If the tilted
base shelves are used upside down, improper
shelf support will result causing the middle of
each shelves to sag. Upside down usage also
allows drippage to get into the case making
cleaning very difficult. Good sanitation is
essential for egg merchandising.
SERVICE INSTRUCTIONS
See “General-UL/NSF I&S Manual” for T-8 lamp,
canopy ballast, fan blade and motor, and color
band and bumper replacement instructions.
Ballast and Lighting Locations
NOTES
• Be sure area above the case is clear!
• Conditioned air must circulate above the
case for secondary ambient air band intake!
• Do not block or restrict the top secondary
ambient air fan grids!
Check air velocities with an Alnor, Jr. Model 8100
Velometer with airscoop modification. Further
information on the Velometer can be obtained
from the TYLER Service Department.
N6DHPACA case air velocities should be
as follows:
To check the primary air velocity, the Alnor, Jr
scoop should be against the back edge of primary
air portion of the grid with the meter facing the
front of the case.
To check the secondary ambient air velocity, the
Alnor, Jr scoop should be turned 90° so the scoop
is perpendicular to the ambient air portion of the
grid and the meter faces the end of the case.
Cleaning Honeycomb
Since the honeycomb is a single honeycomb that
cover multiple air bands, it will require cleaning.
How often will depend on the amount of dust and
lint in the store air.
Need for cleaning can be determined by comparing clean honeycomb air velocities with what
velocities are being produced
when they are checked. See page 10 in
this manual for cleaning instructions.
Page 12
September, 2007
Installation & Service Manual
Secondary Ambient Air Fan Replacement
WARNING
Shut off or disconnect power supply to case
before servicing a fan. Automatic cycling of
fan or electrical power to wire ends could
cause personal injury and/or death.
N6DHPAC(L, M, H)A
3. Install new fan blade (8) on motor shaft (10) and
secure with new spring clips (9).
4. Replace fan motor assemblies in the top fan
panel. See step 5 in “Fan Motor Replacement”
on this page.
FACIA
Secondary ambient air fans are located on top of
the case near the front edge of the top panel. If
top of case is behind a facia, remove facia to gain
access to the fans.
Fan Motor Replacement
Removing Metal Edge Trim
For those who have chosen a metal trim option on
Tyler patch ends, the edge trim can be easily
removed and reinstalled, or replaced. The diagrams
below show the locations of two screws on the top
and bottom of each piece of metal trim. Locate and
unscrew the fasteners first, then carefully pull the
edge trim from the end.
1. Remove screw and top fan guard (1).
2. Remove three screws mounting brackets (2)
from top fan panel (3).
3. Carefully lift fan motor assembly (4) and
unplug wire connector (5).
4. Remove three screws, bracket mounting plate
(6) and mounting brackets (7) from top fan
motor (4).
NOTE
If replacement blades and/or motor are not
available, unplug motor and cover opening until
the replacement parts are available.
5. Replace new secondary ambient fan motor
assemblies in reverse order. Replace facia, if
removed to access the fans.
Fan Blade Replacement
1. Remove fan motor assembly from top fan
panel. See steps 1 thru 4 in “Fan Motor
Replacement” on this page.
2. To replace fan blades (8), remove spring clips
(9) and fan blade (8) from motor shaft (10).
Discard spring clips.
May, 2008
Page 13
N6DHPAC(L, M, H)A
PARTS INFORMATION
Cladding and Trim Parts List
Item
1
2
3
4
5
6
7
8
9
10
11
12
13
14
15
16
17
18
19
20
21
22
23
24
25
26
27
28
29
30
31
32
33
Description
Screw
Screw
End Cover
Canopy Joint Trim
Canopy Hood, Ptd.
Front Panel
Hand Rail/Bumper Retainer
Hand Rail Backer
Bumper End Trim
Color Band, Ptd.
Color Band Backer, Ptd.
Bumper Backer
Bumper
Front Cladding, Ptd.
(N6DHPACLA)
(N6DHPACMA)
(N6DHPACHA)
Raceway Cover
Raceway Cover Retainer
Screw (per retainer)
Screw
Raceway Cover End Trim
Raceway Cover Backer
Kickplate Joint Trim, Ptd.
Metal Kickplate, Ptd.
Shoulder Screw
Kickplate Support Assy.
Screw
Raceway Support
Raceway
Screw, Shoulder
Horizontal End Trim
Pop Rivet
Opt.Top Front Facia, Ptd.
(not shown)
Opt. Top LH Facia, Ptd.
(not shown)
Opt Top RH Facia, Ptd.
(not shown)
Page 14
6’
5183536 (4)
5183536 (8)
9305824 (2)
9029422
9025222
5636774
--------------9025316
--------------9023795
9040223
-----------------------------
8’
5183536 (6)
5183536 (8)
9305824 (2)
9029422
9025223
5203468
color per order
9025316
color per order
9023798
9040223
color per order
color per order
12’
5183536 (8)
5183536 (8)
9305824 (2)
9029422
9025224
5203469
--------------9025316
--------------9023800
9040223
-----------------------------
9025135
9025136
9025137
9025647
9025648
9025649
9300395
9025650
9025651
--------------- color per order --------------9023841 (2)
9023841 (4)
9023841 (6)
5183536 (2)
5183536 (2)
5183536 (2)
5183536 (7)
5183536 (9)
5183536 (12)
--------------- color per order ----------------------------- color per order --------------9039020
9039020
9039020
9324394
9324402
9324407
9025833 (6)
9025833 (8)
9025833 (8)
9043402 (3)
9043402 (4)
9043402 (4)
5183536 (8)
5183536 (12)
5183536 (16)
9041322 (4)
9041322 (6)
9041322 (8)
9300242
9300243
9300244
9025833 (12)
9025833 (16)
9025833 (24)
5211585
5211585
5211585
5105037 (5)
5105037 (10)
5105037 (14)
9055656
9055654
9055643
9055645
9055645
9055645
9055644
9055644
9055644
July, 2007
Installation & Service Manual
July, 2007
N6DHPAC(L, M, H)A
Page 15
N6DHPAC(L, M, H)A
Operational Parts List
Case Usage
Domestic
Electrical Circuit
Case Size
115 Volt 60 Hertz
6’
8’
12’
ECM Fan Motors
9025000
12 Watt
9025000
12 Watt
9025000
12 Watt
ECM Fan Motor Brackets
5205112
5205112
5205112
ECM Fan Blades
(8.75” 18° 5B)
9040682
9040682
9040682
ECM Sec. Fan Motor
9025002
8 Watt
9025002
8 Watt
9025002
8 Watt
ECM Sec. Fan Bracket
5197471
5197471
5197471
ECM Sec. Fan Blades
(7.75” 13° 5B)
9042245
9042245
9042245
Secondary Fan Motor Guard
5063030
5063030
5063030
Opt. Ballast (T-8 shelf lamps)
5966635
5966635
5966635
Opt. Ballast (5th row shelf lamp) 5991029
5991029
5991030
T-8 Shelf Lampholder
5232279
5232279
5232279
Light Switch
5100565
5100565
5100565
NSF Product Thermometer
5967100
5967100
5967100
Contact the TYLER Parts Department for information on operational parts not listed above .
Page 16
July, 2007
Installation & Service Manual
N6DHPAC(L, M, H)A
Revision Log
This log sheet is intended to track both major and minor revisions to this manual, and to describe what the
nature of the revision is. Revision identification is located in the lower right corner of the cover page.
Major revisions are lettered alphabetically, dated accordingly, and require reprinting for inclusion with the
product at shipment. Minor revisions are denoted after the major revision with a “period” followed by a
sequential number, and do not require a printed update. All manuals with any revision changes will be available in electronic PDF format on the Tyler Refrigeration website.
Content changes that determine the type of revisions are decided on a case-by-case basis by Tyler internal
management. This revision log was created in October of 2008.
REVISION TYPE
DATE
MAJOR
MINOR
DESCRIPTION
Oct 2008
E.1
Changed wiring diagrams ...
Update Service Instructions ...
Apr 2009
E.2
Updated fan blade info. on p.16...
October, 2008
RESULTS
... added terminal blocks to electrical.
... added metal edge trim replacement.
... ECM fan blade p/n’s & blade angle chg.
Page 17