1
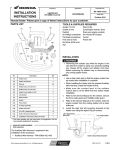
Accessory
INSTALLATION
INSTRUCTIONS
Application
Publication No.
MII 14607
BED EXTENDER
P/N 08L73-HL3-A00
SXS700M4/M2
Issue Date
January 2014
PARTS LIST
TOOLS AND SUPPLIES REQUIRED
Hex wrench (5 mm)
Hex wrench (6 mm)
Phillips screwdriver
Flathead screwdriver
Socket (10mm)
Socket extension
Torque wrench
Ratchet
Drill
7 mm (9/32 in) drill bit
Step drill bit up to 13 mm (1/2 in)
(1)
(3)
(4)
(5)
(2)
TORQUE CHART
Tighten all screws, bolts, and nuts to their specified
torque values. Refer to the Service Manual for the torque
values of the removed parts.
(7)
Item
6 mm bolt
N·m
kgf·m
Ibf·ft
12
1.2
8.9
8 mm bolt
18
1.8
13.3
10 mm bolt
39
4.0
28.8
(8)
(6)
USE AND CARE INFORMATION
(9)
No.
Description
Qty
(1)
Bed extender
1
(2)
Strap
2
(3)
Strap bracket
2
(4)
6 x 12 mm socket bolt
4
(5)
Tailgate bracket
2
(6)
Bed extender bracket
2
(7)
Threaded collar
2
(8)
6 mm collar bolt
2
(9)
Rubber stop
6
© 2014 Honda Motor Co., Ltd. - All Rights Reserved.
• Check the accessor y mounts frequently and
retighten if necessary.
• Replace this accessory with a new one if it is
damaged.
SPECIAL NOTE
• Follow all instructions for the SXS700M4 (4P) model.
• Skip steps 6, 7, 8, and 10 on the SXS700M2
(2P) model.
1 of 5
08L73-HL3-A001_JE
4.
INSTALLATION
1.
2.
Refer to the Service Manual for the vehicle, remove
the rear door (4P only), bedside, and inside cover
(4P only).
Remove the top 6 mm socket bolt from the rear
frame and save it for reuse.
Drill a 7 mm hole
through both sides of
the vertical frame.
6 mm SOCKET BOLT
5.
3.
Remove the 6 mm socket bolt and bed extender
bracket. Drill a 7 mm hole in the vertical frame at the
marked point.
• This hole will go through both sides of the
frame.
Place the bed extender bracket into the position
shown and temporarily install the 6 mm socket bolt.
Using the bracket as a template, mark the hole
location with a marker.
VERTICAL FRAME
Using the 7 mm hole as a pilot, increase the hole
size to 13 mm through the front face of the vertical
tube as shown.
• This hole should only go through the front
face.
13 mm HOLE
BED EXTENDER BRACKET
6 mm SOCKET BOLT
FRONT
Make a mark.
2 of 5
6.
8.
4P Only: Position the rear bedside and inside plastic
cover and tighten the lower phillips screw only.
4P only: Slide the rear bedside and inside plastic
cover forward.
BEDSIDE and COVER
9.
BED EXTENDER BRACKET
Swing the bed extender bracket in position and
install the collar and 6 mm flange bolt. Tighten the
6 mm socket bolt and the 6 mm flange bolt to the
specifications in the Torque Chart.
6 mm SOCKET BOLT
Install this screw only
7.
4P only: Loosely attach the bed extender bracket
with the 6 mm socket bolt and swing it out of the way.
6 mm SOCKET BOLT
COLLAR
3 of 5
6 mm FLANGE BOLT
10. 4P only: Slide the rear bedside and inside cover
back into position.
13. Repeat Steps 1-12 for the opposite side.
14. Install the rubber stops into bed extender holes at
the .
RUBBER STOP
11. Continue the rear bedside, inside cover (4P only)
and rear door (4P only) installation as instructed in
the Service Manual.
15. Holding bed extender assembly vertically, gently
lower it into the bed extender brackets.
Gently lower into the bed
extender brackets.
12. Remove the tailgate stay cable and replace the
bracket with the accessory tailgate bracket. Reinstall
the tailgate stay cable and tighten the 6 mm bolts to
the specification in the Torque Chart.
6 mm BOLT
ACCESSORY TAILGATE
BRACKET
TAILGATE STAY CABLE
4 of 5
16. Install the strap and the strap bracket to the bed
extender using 6 x 12 mm socket bolts.
6 x 12 mm SOCKET
CKET BO
BOLT
O
STRAP
STRAP BRACKET
5 of 5