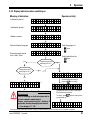
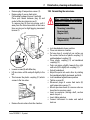
1
Leica CM3050 S Cryostat Instruction Manual Leica CM3050 S Cryostat English V1.1 02/2000 Always keep this manual near the instrument. Read carefully prior to operating the instrument. Important note Serial No.: .............. ...................................................... Year of Manufacture: ............................................... Country of Origin: Federal Republic of Germany The information contained in this document represents state-of-the-art technology as well as the current state of knowledge. Leica will not assume liability for errors that might be contained in this manual, nor for accidental damage or damage arising from the delivery, performance or use of this manual. Therefore, no claims can be made based on the text and illustrations in this instruction manual. Leica Microsystems Nussloch GmbH reserves the right to change technical specifications without notice since each of our products is subject to a policy of continuous improvement. This document is protected under copyright laws. Leica Microsystems Nussloch GmbH retains all rights related to this documentation. Any reproduction of text and illustrations - or any parts thereof - in form of printing, photocopying, microfiches, or other methods, including electronic systems, requires the prior written permission of Leica Microsystems Nussloch GmbH. Issued by: Leica Microsystems Nussloch GmbH Heidelberger Str. 17 - 19 D-69226 Nussloch Germany Phone: +49 6224 143-0 Fax: +49 6224 143-200 Internet: http://www.hbu.de Leica CM 3050 S Cryostat The serial number and the year of manufacture are specified on the nameplate at the back of the instrument. © Leica Microsystems Nussloch GmbH 3 Table of Contents 1. Important information .................................................................................................................. 7 1.1 1.2 1.3 Symbols used in this manual and ........................................................................................................... 7 Designated use .......................................................................................................................................... 8 Qualification of personnel ........................................................................................................................ 8 2.1 General information on instrument ........................................................................................................ 9 2. Safety .............................................................................................................................................. 9 2.2 Integrated safety devices ........................................................................................................................ 9 2.2.1 Locking the handwheel ......................................................................................................................... 10 2.2.2 Centering the handwheel grip .............................................................................................................. 10 2.2.3 Emergency stop function ...................................................................................................................... 11 2.2.4 Knife guard .............................................................................................................................................. 11 2.3 Safety instructions: handling and operation of the instrument........................................................ 12 2.3.1 Transport ................................................................................................................................................. 12 2.3.2 Site requirements ................................................................................................................................... 12 2.3.3 Electrical connections ........................................................................................................................... 12 2.3.4 Handling microtome knives/blades ..................................................................................................... 13 2.3.5 Knife guard/handwheel lock ................................................................................................................. 13 2.3.6 Motorized sectioning ............................................................................................................................. 13 2.3.7 Defrosting/ ............................................................................................................................................... 13 2.3.8 Frozen parts of the instrument and ...................................................................................................... 13 2.3.9 Infectious/radioactive material ............................................................................................................ 14 2.3.10 Disinfection and cleaning ................................................................................................................... 14 2.3.11 Removing/reinstalling the microtome ............................................................................................... 15 2.3.12 Display message Dry microtome ..................................................................................................... 15 2.3.13 Maintenance ......................................................................................................................................... 15 3. Installation................................................................................................................................... 16 3.1 3.1.1 3.1.2 3.2 3.3 Site requirements .................................................................................................................................... General site requirements .................................................................................................................... Electrical connections ........................................................................................................................... Unpacking and installation .................................................................................................................... Standard delivery .................................................................................................................................... 4 16 16 16 16 17 Instruction Manual V1.1 02/2000 Table of Contents 3.4 3.4.1 3.4.2 3.4.3 3.5 Installing/inserting accessories ........................................................................................................... 18 Installing the handwheel ....................................................................................................................... 18 Inserting the accessories ..................................................................................................................... 18 The footswitch ........................................................................................................................................ 19 Prior to switching on the instrument .................................................................................................... 19 4. Instrument Properties ................................................................................................................ 20 4.1 4.2 Overview ................................................................................................................................................... 20 Technical Data......................................................................................................................................... 22 5. Operation ..................................................................................................................................... 24 5.1 5.2 5.3 5.3.1 5.3.2 5.3.3 5.3.4 5.3.5 5.3.6 5.4 5.4.1 5.4.2 5.4.3 5.4.4 5.4.5 5.4.6 5.4.7 5.5 5.5.1 5.5.2 5.5.3 5.5.4 Operating the instrument for the first time .......................................................................................... 24 Switching on/fuses ................................................................................................................................. 25 Control panel 1 ......................................................................................................................................... 26 Key functions in control panel 1 ........................................................................................................... 26 Display functions in control panel 1 .................................................................................................... 26 Display indications when switching on .............................................................................................. 27 Menu functions: ...................................................................................................................................... 28 Status display .......................................................................................................................................... 31 Indication of refrigeration state, section thickness setting and counters .................................... 32 Control panel 2 ......................................................................................................................................... 33 Selecting a sectioning mode / .............................................................................................................. 34 Setting the sectioning window ............................................................................................................. 35 Selecting sectioning speed .................................................................................................................. 36 Emergency stop ...................................................................................................................................... 36 Coarse feed keys .................................................................................................................................... 37 Trimming and sectioning functions ..................................................................................................... 38 Setting the section thickness ............................................................................................................... 38 Daily operation of the instrument ......................................................................................................... 39 Freezing specimens onto specimen .................................................................................................... 39 Freezing specimens onto specimen .................................................................................................... 40 Optional accessories for freezing ........................................................................................................ 40 Inserting specimen discs into the ........................................................................................................ 41 Leica CM3050 S Cryostat 5 Table of contents 5.5.5 5.5.6 5.6 5.6.1 5.6.2 5.7 5.7.1 5.7.2 5.7.3 Specimen orientation ............................................................................................................................. 41 Trimming / sectioning ............................................................................................................................ 42 Finishing work .......................................................................................................................................... 43 Daily routine steps .................................................................................................................................. 43 Switching off the instrument for a ....................................................................................................... 43 Defrosting ................................................................................................................................................. 44 Automatic chamber defrost cycle ....................................................................................................... 44 Manual chamber defrost cycle ............................................................................................................ 45 Defrosting the specimen head ............................................................................................................. 45 6. Troubleshooting, applications tips ......................................................................................... 46 6.1 6.1.1 6.2 6.3 Displayed error messages ..................................................................................................................... 46 Other error indications .......................................................................................................................... 46 Potential problems - causes and remedies ........................................................................................ 47 Reference chart for temperature settings (in minus °C) .................................................................. 51 7. Disinfection, cleaning and maintenance .............................................................................. 52 7.1 7.2 7.3 7.4 7.5 7.5.1 7.5.2 7.5.3 7.6 Safety instructions .................................................................................................................................. 52 Spray disinfection with Leica Cryofect ................................................................................................ 52 Disinfection with conventional ............................................................................................................. 53 Cleaning .................................................................................................................................................... 53 Removing / reinstalling the microtome ................................................................................................ 54 Removing the microtome ...................................................................................................................... 54 Disassembling the specimen head ...................................................................................................... 54 Reinstalling the microtome ................................................................................................................... 55 Exchanging the fluorescent light lamp ................................................................................................ 56 8. Warranty and service ................................................................................................................ 57 8.1 8.2 8.2.1 8.3 Warranty ................................................................................................................................................... 57 Technical service information .............................................................................................................. 57 Important information for repairs / returns of cryostats .................................................................. 58 Shutdown and disposal of the instrument........................................................................................... 58 Appendix............................................................................................................................................... 59 6 Instruction Manual V1.1 02/2000 1. The chapters of the Leica CM3050 S cryostat instruction manual: Chapter 1 1.1 Symbols used in this manual and their meaning Structure of the manual: Table of contents Important information on this manual Chapter 2 Safety Read this chapter before operating the instrument! Chapter 3 Installation Unpacking and installation Standard delivery, information on accessories Instrument properties Overview Technical data Important information Warnings appear in a grey box and are marked by a warning triangle . Notes i.e. important user information appears in a grey box and is marked by an information symbol. Chapter 4 (5) Figures in brackets refer to item numbers in drawings or to the drawings themselves. Chapter 5 Operation Controls Setup, daily use and shut down (Fig.5) Chapter 6 Trouble shooting and applications tips Operating errors Instrument type: Display error messages Temperature reference chart Chapter 7 Disinfection, cleaning and maintenance Chapter 8 Warranty and service Appendix Electrohydraulic height adjustment Ordering information accessories EC Declaration of Conformity Alphabetical index Leica CM 3050 S Cryostat All information given in this instruction manual applies only to the instrument type indicated on the title page. A name plate, indicating the instrument serial number, is attached to the back of the instrument. Required information for all inquiries: For any inquiries please specify: Instrument type Serial number 7 1. Important information General 1.2 Designated use This instruction manual includes important instructions and information related to the operating safety and maintenance of the instrument. The instruction manual is an important part of the product. It must be read carefully before using the instrument for the first time and must always be kept with the instrument. The Leica CM3050 S is a powerful cryostat for routine as well as research applications in biology, medicine and industry. If additional requirements, which exceed the scope of this manual, are imposed by regulations and/or laws on accident prevention and environmental protection in the country of operation, appropriate instructions for compliance with such requirements must be added to this manual. Read this instruction manual carefully before attempting to use or operate the instrument. The instrument has been designed for rapid freezing and sectioning of tissue samples. The instrument has not been designed for unattended storage of tissue material. The instrument may only be operated within the scope of its designated use as described above and as per the instructions given in this manual. Any other use of the instrument is considered improper. 1.3 Qualification of personnel Please pay particular attention to chapter 2 (safety features, safety instructions). - Please read this information, even if you are already familiar with the operation and use of other Leica products. 8 The Leica CM3050 S may only be operated by trained laboratory personnel. All laboratory personnel designated to operate the instrument must carefully read the present instruction manual prior to starting work with the instrument. Instruction Manual V1.1 02/2000 2. Safety 2.1 General information on instrument design and safe handling 2.2 This instrument has been built and tested in accordance with the following safety regulations on electrical measuring, control, regulating and laboratory devices: The instrument is equipped with the following safety devices: DIN EN 292 Handwheel grip centering DIN EN 61010-1 Emergency stop function (instruments with sectioning motor only) EN 50082-1 EN 55011 IEC 1000-4 as well as according to the international quality standard DIN ISO 9001 In order to maintain this condition and to ensure safe operation, the operator must observe the instructions and warnings contained in this instruction manual. Leica CM3050 S Cryostat Integrated safety devices Handwheel lock Knife holder equipped with knife guard The safety devices installed by the manufacturer of the instrument only constitute the basis of accident prevention. Mainly responsible for accident-free operation is above all the institution which owns the instrument and, in addition, the designated personnel who operate, service or repair the instrument. 9 2. Safety 2.2.1 Locking the handwheel Always cover the cutting edge with the knife guard and lock the handwheel: Prior to doing any work on knife and/or specimen. Prior to exchanging specimens. During work breaks. The handwheel can be locked in 2 positions: with the grip in the uppermost position (left), with the grip in the lowest position (right). Instruments with sectioning motor: The sectioning motor is now blocked. All instruments: The message LOCKED in the display of control panel 1 indicates that the handwheel has been locked: C T - 3 0 ° C O T - 3 5 ° C L O C K E D Unlocking: To unlock, push locking pin (2) to the left into position (2a). Display indication LOCKED disappears. 2 Instruments with sectioning motor: The sectioning motor can now be activated again. 2.2.2 Centering the handwheel grip Locking: 2 Rotate handwheel, until grip (1) is in upper or lower position. To lock, press pin (2) to the right into position (2b). During motorized sectioning, for safety reasons always center the handwheel grip! To center grip (1), pull outwards and pivot into center of handwheel. When released, the grip locks into position. --> The upper locking position for pin (2) is marked by a black dot (4). 10 Instruction Manual V1.1 02/2000 2. Safety 2.2.3 Emergency stop function (instruments with sectioning motor only) 2.2.4 Knife guard The emergency stop is activated via the red emergency stop button in control panel 2 or via the footswitch All knife holders are equipped with a knife guard (--> see separate instruction manuals on knife holders). Control panel 2 Always cover the cutting edge with the knife guard: Prior to doing any work on knife and/ or specimen. Prior to exchanging specimens. During work breaks. Footswitch Activating the emergency stop function Press emergency stop button or step on footswitch forcefully. STOP (red) lights up. --> As soon as the emergency stop function is activated, the sectioning motor stops. Deactivating the emergency stop To deactivate, rotate emergency stop button in direction of arrow. If the emergency stop function has been activated by the footswitch, unlocking is not necessary (function is unlocked as soon as the footswitch is released). Leica CM3050 S Cryostat 11 2. Safety 2.3 Safety instructions: handling and operation of the instrument 2.3.1 Transport 2.3.3 Electrical connections To avoid severe damage to the instrument by running it while the compressor oil is displaced from its regular position: Do not tilt the instrument, only transport in an upright position. After transport, wait at least 4 hours before turning the instrument on. --> The compressor oil may have been displaced during transport and must settle to its original position before switchingthe instrument on. Otherwise, the instrument may be severely damaged. Do not use extension cords for connecting the instrument to mains. --> Fire hazard! --> Instrument malfunctions caused by voltage drop. 2.3.2 Site requirements Do not operate the instrument in rooms with explosion hazard. To ensure proper instrument function maintain a minimum distance of 10 cm between walls and/or furniture and all sides of the instrument! 12 During the start-up phase of the compressor, the nominal voltage must not drop below the values specified in chapter 4.2 Technical data! --> The compressor needs a start-up current at between 25 and 35 A (see chapter 4.2 Technical data) Ensure uniform current supply according to specifications. --> Electrical power supply deviating from specifications damages the instrument. Therefore, arrange for the electrical installations on site to be checked by a trained professional and make sure any necessary upgrades are installed! Have the circuit protected by a fuse of its own! Do not connect any other consumers to the same circuit. Prior to connecting the instrument to mains, make sure the electrical power supply in your laboratory corresponds to the values indicated on the instrument nameplate (located at the rear of the instrument)! Instruction Manual V1.1 02/2000 2. 2.3.4 Handling microtome knives/blades Danger! --> Microtome knives and disposable blades have extremely sharp cutting edges and can cause serious injuries. Therefore: Handle knives / blades with utmost care. Never leave any knives / blades in unprotected places! Never place a knife, no matter where, with the cutting edge facing upwards. Never try to catch a falling knife. Always insert the specimen before inserting the knife. 2.3.5 Knife guard/handwheel lock Always cover the cutting edge with the knife guard and lock the handwheel: Prior to doing any work on knife and / or specimen. Prior to exchanging specimens. During work breaks. 2.3.6 Motorized sectioning Do not interrupt sectioning / trimming by setting the sliding potentiometer to zero speed! --> This does not really switch the sectioning function off - it only operates at 0 speed. If the sliding potentiometer is accidentally moved, the instrument will resume sectioning immediately (risk of injury)! Safety 2.3.7 Defrosting/ Handling frozen tissue Never leave specimens unattended in the cryochamber over an extended period of time! --> In case of power failure or instrument failure, or during the automatic defrost cycle, tissue material can be destroyed. During the defrost cycle the cryochamber is partially warmed. - Therefore: Remove sensitive specimens from the chamber prior to defrosting. If automatic defrosting is programmed to take place during the night, remember to remove all specimens from the cryochamber prior to leaving work. 2.3.8 Frozen parts of the instrument and frozen accessories Prolonged contact of bare skin to frozen surfaces of the instrument or to frozen accessories (specimen discs, knife holder, shelves etc.) can cause frostbite. Wear protective gloves. During motorized sectioning, always center the handwheel grip! Leica CM3050 S Cryostat 13 2. Safety 2.3.9 Infectious/radioactive material 2.3.10 Disinfection and cleaning Danger! Use caution when working with potentially infectious specimens: -->Risk of infection! Prior to disinfection, switch the instrument off and unplug it from mains. When working with potentially infectious / radioactive specimens: Wear protective clothes (gloves, protective boots, mask, lab coat), in compliance with radiation safety regulations and/or in-house regulations on handling infectious / radioactive material. When working with radioactive specimens: Comply with applicable radiation safety regulations! Dispose of radioactive specimen waste according to applicable regulations. For removal of the microtome from the cryochamber see chapter 2.3.11 Removing the microtome. For disinfection, wear protective gear: (gloves, mask, lab coat etc.)! For disinfection, only use alcohol-based disinfectants! Do not use solvents (xylene, acetone etc.) for cleaning or disinfection! Do not spray disinfectants into the evaporator! --> Risk of icing! Explosion hazard when working with alcohol: Make sure the premises are appropriately ventilated! When using disinfectants and detergents, comply with all safety instructions supplied by the manufacturer of the product! Dispose of waste liquids from disinfection/ cleaning as well as of sectioning waste according to applicable regulations on disposal of special category waste! Disinfected accessories must be thoroughly dry when reinserting them into the chamber! --> Risk of icing! Make sure the chamber is completely dry before switching the instrument back on: --> Explosion hazard through alcohol vapors! --> Risk of icing! 14 Instruction Manual V1.1 02/2000 2. Safety 2.3.11 Removing/reinstalling the microtome 2.3.12 Display message Dry microtome Before removing the microtome: Switch instrument off. Unplug from mains. Place handwheel grip in lowest position and lock. --> When removing the microtome, the specimen head must always be lokked in the lowest position. Otherwise the upper part of the slot cover might be bent and consequently damaged! If the error message Dry Microtome is displayed in control panel 1, the following has happened: Cryochamber refrigeration has been interrupted for an extended period of time (e.g. power failure), causing the chamber temperature to rise into the positive digits. When removing the microtome: Wear gloves when removing the microtome while it is still frozen. --> Risk of frost bite! On instruments with specimen cooling: do not distort the refrigerating tube! If distorted it might break, causing extremely cold refrigerant to escape. - > Risk of frost bite! Before reinstalling the microtome: Microtome must be completely dry. >Humidity in the interior of the microtome freezes and causes microtome malfunctions and/or damage to the microtome. -- All accessories/tools removed from the cryochamber must be thoroughly dry before putting them back into the chamber! -->Risk of icing! Leica CM3050 S Cryostat If this message appears, do not switch on the instrument but remove the microtome from the chamber, disinfect, if necessary, and dry thoroughly before reinstalling it into the chamber (see chapter 7.1 to 7.5). 2.3.13 Maintenance Only technical service engineers authorized by Leica may access the internal components of the instrument for service and repair. The fluorescent light lamp (chamber illumination), unless broken or splintered, can be replaced by the user: Switch off mains switch! Unplug the instrument from mains! If the lamp is broken or splintered: Have lamp replaced by Leica Technical Service! --> Risk of injury! Use only those replacement lamps that correspond to technical specification (see chapter 4.2 Technical Data). 15 3. Installation 3.1 Site requirements Make sure to read and follow all safety instructions in chapter 2.3.2 Site requirements! 3.1.1 General site requirements No direct sunlight. Electrical power supply within distance (length of power cord = approx. 4 meters do not use extension cords!). No draft (caused by air conditioning etc.). Even floor surface. Practically vibration-free floor. Handwheel easily accessible. Room temperature constantly below +22 °C. Relative humidity of air maximum 60 %. 3.2 Unpacking and installation Unpacking instructions are always located in a transparent protective envelope on the outside of the instrument shipping crate. Make sure to read and follow all safety instructions provided in chapter 2.3.1 Transport and on the unpacking instructions! 3.2.1 Repacking We recommend to keep the original shipping crate and the unpacking instructions for the Leica CM3050 S. For repacking, proceed as per unpacking instructions, in reverse order. High ambient temperature and/or high air humidity negatively affect instrument cooling performance! 3.1.2 Electrical connections Make sure to read and follow all safety instructions in chapter 2.3.3 Electrical connections! 16 Instruction Manual V1.1 02/2000 3. 3.3 Standard delivery Together with the Leica CM3050 S instrument you receive a box containing the following standard accessories: 1 Handwheel (including screw, spring washer and cover disc) 1 Heat extractor, stationary 1 Low-temperature stabilizer for heat extractor 3 Specimen discs, 30 mm ø 1 Storage shelf, right 1 Storage shelf, left 1 Section waste tray 1 Rubber mat 1 Cover for quick-freeze shelf 2 Brushes (brush, fine and Leica brush) 1 Shelf for brushes 1 Tool set - 1 Allen key, size 4 - 1 Allen key, size 5 - 1 Allen key, size 6 - Single-ended open-jaw wrench 1 Bottle of embedding medium for cryosectioning, 125 ml 1 Bottle of cryostat oil No. 407, 100 ml 1 Instruction manual (German, English, French, Spanish) In addition to the above: Instruments with specimen cooling: 1 90° Prism for low temperature quick freezing Instruments with sectioning motor: 1 Footswitch with protective guard Configured instruments: 1 Knife holder base 1 Knife holder with accessories Leica CM 3050 S Cryostat Installation Further accessories: Further accessories which you ordered will be included in the box containing the standard delivery items. Knife holders are delivered with anti-roll guide, knife guard, and a separate instruction manual. In case of non-configured instruments, the knife holder is not a part of standard delivery but must be ordered separately. Check all delivered parts against the packing list and against your order to verify whether the delivery is complete! If there is any difference, contact your local Leica office immediately. Available models Basic instrument - with sectioning motor - without specimen cooling Basic instrument - without sectioning motor - with specimen cooling Basic instrument - with sectioning motor - with specimen cooling 17 3. Installation 3.4 Installing/inserting accessories 3.4.1 Installing the handwheel Insert pin (1) of the handwheel shaft into hole (2). Place spring washer (3) onto screw (4) as shown. Tighten screw (4) with an Allen key. Cover with selfadhesive disc (5). For purposes of transport (e.g. narrow doors), the handwheel can be removed. To remove the handwheel, proceed as described above but in reverse order. 18 3.4.2 Inserting the accessories Place the rubber mat on top of the housing. Insert the storage shelves into the cryochamber. Install the stationary heat extractor into the quick-freeze shelf (see also drawing in chapter 5.5.1 Freezing specimens onto specimen discs). Insert the low temperature stabilizer into the quick freeze shelf (it must be located in the pivoting range of the heat extractor - see also drawing in chapter 5.5.1 Freezing specimens onto specimen discs). Insert section waste tray and brush shelf. Install knife holder base onto microtome base plate and clamp. Install knife holder and clamp (see knife holder instruction manual for details). Place knife case with knife into chamber to precool. Place all tools needed for section preparation into the chamber. Close the sliding window. For a complete overview of all individual parts: --> see Chapter 4.1 Overview. Instruction Manual V1.1 02/2000 3. 3.4.3 The footswitch Installation Connecting the footswitch Insert footswitch into port (1) and secure. 1 Function The footswitch performs the same task as the RUN/STOP and RUN/ENABLE keys (activating/ deactivating motorized sectioning / trimming). In addition, the footswitch can be used to activate the emergency stop function. Models with footswitch: 3.5 Prior to switching on the instrument After transport, observe a waiting period of at least 4 hours before turning the instrument on! - See also safety instructions in chapter 2.3.1 Transport. All instruments with sectioning motor. Important note: In all instrument models that are delivered with footswitch, the footswitch must be installed! - Otherwise the instruments are not functional. Have you observed all safety instructions in chapters 2.3.2 Site requirements and 2.3.3 Electrical connections? If not: --> Please read chapters 2.3.2 and 2.3.3! Insert mains plug into wall outlet. Continue with chapter 5.1 Setting up the instrument. Leica CM 3050 S Cryostat 19 4. Instrument Properties 4.1 Overview 3 1 2 3 4 5 6 7 4 2 5 6 9 10 1 8 11 7 12 22 20 Cryostat CM3050 S Control panel 1 Control panel 2 Storage shelf, left Storage shelf, right Rubber mat Mains switch / Automatic cutout for instrument, Automatic cutout for sectioning motor, Footswitch port 8 Quick-freeze shelf 9 Stationary heat extractor 10 Mobile heat extractor 11 Specimen disc 12 Thermoblock (optional) 13 Section waste tray 14 Brush shelf 15 Specimen head w/o specimen cooling 16 Specimen head with specimen cooling (Option) 17 90° Prism (instruments with specimen cooling only) 18 Knife holder base 19 Knife holder CE 20 Knife holder CN 21 Knife holder CS 22 Footswitch with protective guard Instruction Manual V1.1 02/2000 4. Instrument Properties 15 16 11 11 13 17 14 21 20 19 18 Leica CM3050 S Cryostat 21 4. Instrument properties 4.2 Technical Data Operating temperature range (ambient temperature): + 18°C to + 40°C. All specifications related to temperature are valid only up to an ambient temperature of + 22°C and relative air humidity of less than 60%! Type Marks of conformity Nominal voltage Nominal frequency Power draw Max. start-up current for 5 sec Protective fuse Automatic cutout Pollution degree Overvoltage installation category Heat emission (max.) CM3050S-10 100 V AC ±10% 50 Hz 1800 VA 35 A eff. I T15A M3 2 II 1800 J/s Refrigeration system 50 Hz 60 Hz 0° C to -40°C (+ 2 K / - 0 K) Automatic hot-gas defrost cycle, programmable in 15-min increments; 1 automatic defrost cycle per 24 hours. Duration: 6 - 12 minutes Manual defrost cycle 690 W 3 280 g ±5g refrigerant R 404A * 0.6 l EMKARATE RL-22S, ICI * 0° C to -40°C (+2 K / - 0 K) Automatic hot-gas defrost cycle, programmable in 15-min. increments; 1 automatic defrost cycle per 24 hours. Duration: 6 - 12 minutes Manual defrost cycle 690 W 3 280 g ±5g refrigerant R 404A* 0.6 l EMKARATE RL-22S, ICI * Cryochamber Temperature selection range Defrosting Refrigeration capacity Safety factor Refrigerant Compressor oil CM3050S-1 230 V AC ±10% 50 Hz 1800 VA 25 A eff. I T10A T1 2 II 1800 J/s Quick-freeze shelf Maximum temperature - 43°C (+ 0 K / - 2 K) Number of quick-freeze stations 10 Specimen cooling (Option) Temperature range Defrosting Refrigeration capacity Safety factor Refrigerant Compressor oil 22 -10° C to -50°C ±3K Manual defrost cycle (electric) 320 W 3 185 g ±5g refrigerant R 404A * 0.4 l alpha 22, Kyodo * or RENISO E22, Fuchs * CM3050S-8 240 V AC ±10% 50 Hz 1800 VA 25 A eff. I T10A T1 2 II 1800 J/s CM3050S-9 100 V AC ±10% 60 Hz 1800 VA 30 A eff. I T15A M3 2 II 1800 J/s - 43°C (+ 0 K / - 2 K) 10 -10° C to -50°C ±3K Manual defrost cycle (electric) 320 W 3 185 g ±5g refrigerant R 404A * 0.4 l alpha 22, Kyodo * or RENISO E22, Fuchs * Instruction Manual V1.1 02/2000 4. Instrument properties *) Refrigerant and compressor oil to be replaced only by trained and authorized service personnel! CM3050S-3 c-UL 120 V AC ±10% 60 Hz 1800 VA 35 A eff. I T15A T1 2 II 1800 J/s CM3050S-6 208 V AC ±10% 60 Hz 1800 VA 30 A eff. I T12A T1 2 II 1800 J/s CM3050S-7 230 V AC ±10% 60 Hz 1800 VA 25 A eff. I T10A T1 2 II 1800 J/s Fluorescent light lamp (cryochamber illumination): 50 Hz version: 60 Hz version: Osram Dulux S 11 W/21 Light color LUMILUX hellweiß (brilliant white) Osram Dulux S 13 W/21 Light color LUMILUX hellweiß (brilliant white) Microtome Rotary microtome Section thickness setting 0.5 - 300 µm Overall specimen feed 25 mm Vertical stroke 59 mm Specimen retraction 50 µm Maximum specimen size 40 x 55 mm Specimen orientation 8° (x-, y-, z-axis) Trimming (6 thickness settings) 5 - 150 µm Motorized coarse feed - slow 500 µm/s - fast 1,000 µm/s Sectioning motor (Option): Sectioning speed - slow min. max. vmax - fast min. max. vmax 0.1 mm/s 100 mm/s 210 mm/s 0.1 mm/s 170 mm/s 210 mm/s Cryocabinet Dimensions Width (w/o handwheel) Width (including handwheel) Depth Height (arm rest level) Overall height 800 mm 882 mm 766 mm 840 mm 1040 mm Weight (incl. microtome, w/o specimen cooling) ca. 180 kg Leica CM3050 S Cryostat 1 according to IEC-1010, UL 3101 2 according to CECOMAF: Liquid temperature 45°C Evaporation temperature -25°C 23 5. Operation 5.1 Operating the instrument for the first time Prior to setting up the instrument, make sure to read the instruction manual carefully and in full. When setting up the instrument, please follow the individual chapters in the following order: 24 First, study chapters 1, 2, and 3 - install the instrument as described in chapter 3. The overview in chapter 4.1 is helpful during the unpacking and installation procedure in order to identify individual parts and place them in the correct location. Go on to chapter 5. Read chapters 5.1, 5.2, 5.3 and 5.4 to learn all about the controls. Next, start to work with the instrument (chapter 5.5). Follow the instructions in chapter 5.5. Chapter 5.5.2 applies to instruments with specimen cooling only. The temperature chart in chapter 6.3 is useful when it comes to selecting appropriate sectioning temperatures for different types of specimens. When disinfecting / cleaning the instrument and/or removing / reinstalling the microtome, please follow the instructions in chapter 7. In case of problems and malfunctions, please refer to chapters 6.1 and 6.2. These chapters list the most common types of problems which many times have simple causes that can be eliminated by the actual user. If you find Call Technical Service in the Remedy column, please do so. Never try to solve these problems yourself! Instruction Manual V1.1 02/2000 5. 5.2 Switching on/fuses Operation Automatic cutout for sectioning motor: The instrument is equipped with an automatic cutout (2) for the sectioning motor. If the sectioning motor is overloaded (e.g. when sectioning extremely hard specimens etc.) the automatic cutout (2) will be triggered. 2 (Automatic cutout for sectioning motor) 1 (Combination Mains switch /automatic cutout for the instrument) To make the instrument functional again after the automatic cutout (2) has been triggered: Push automatic cutout (2) inwards until it locks into position. Switching on To switch on the instrument, place switch (1) in upper lock-in position. Mains switch / automatic cutout for the instrument: In addition to its function as ON/OFF switch, switch (1) is also the automatic cutout for the instrument. If the automatic cutout has been triggered (e.g. caused by overcurrent): Put switch (1) back in upper lock-in position. Leica CM 3050 S Cryostat 25 5. Operation 5.3 Control panel 1 5.3.1 Key functions in control panel 1 ON/OFF key for cryochamber illumination. To select the menu items for setting / changing instrument parameters. In the status indication, pressing the arrow keys displays the individual current parameters. In the menu, pressing the arrow keys changes set values. As soon as a value is displayed, it is automatically stored. Activates the manual defrost cycle (cryochamber). This key is functional only when one of the menu items SET TEMP CT ... °C or SET TEMP OT ... °C (last one only applies to instruments with specimen cooling) has been selected first. Lock / unlock key: - Locks the display to protect against accidental changes of set parameters. - Activates / deactivates a number of functions. 26 5.3.2 Display functions in control panel 1 The display in control panel 1 combines several different functions: 1. When switching the instrument on: A series of standard indications is displayed, during which two basic parameters can be selected (with the arrow keys): Language (of display indications) and speed level of sectioning motor. See chapter 5.3.3 Display indications when switching on. 2. Menu function (activated via menu key): Via the menu key a number of parameters can be selected, then be activated /deactivated via the lock/unlock key and/or changed via the arrow keys. See chapter 5.3.4 Menu functions: Setting parameters of refrigeration, time and preset counter. 3. Status indication function: The actual status of selected parameters is indicated in the display screen. Some of those parameters are displayed automatically (e.g. sectioning stroke phase, coarse feed position, handwheel locked). Others can be displayed by pressing the arrow keys; e.g. selected section thickness, preset counter status etc. See chapter 5.3.5 Status indication and chapter 5.3.6 Displaying state of refrigeration, section thickness and counters. Instruction Manual V1.1 02/2000 5. Operation 5.3.3 Display indications when switching on Operator activity: Meaning of indication: Initialization phase 1 8 8 8 8 8 8 8 8 8 8 8 8 8 8 8 8 8 8 8 8 8 8 8 8 8 8 8 8 8 8 8 8 --- Initialization phase 2 n n n n n n n n n n n n n n n n n n n n n n n n n n n n n n n n --- C M3 0 5 0 S Software version E NG L I S H Selected display language Sectioning motor speed level slow / (fast) V s . X X . X X Select language via keys C U T T I N G MO T O R S L OW yes Temperature upon switching on ³ 0 °C Temperature prior to switching off < 0 °C Select speed level via keys no no C T . . . .°C P OW E R yes C T . . . .°C O T . . . . ° C D R Y M I C R O T OME --- *) If this indication is displayed: Do not switch on the instrument! Prior to switching on, both microtome and accessories must be completely dry! Remove microtome/accessories, disinfect if applicable, then dry thoroughly and reinstall. (--> See chapters 7.1 - 7.5). O T . . . . ° C F A I L U R E *) Acknowledge indication by once briefly. pressing C T . . . .°C O T . . . . ° C 1 2 : 0 0 *) Standard indication locked is displayed: (Display background dark) until the display backTo unlock: press ground lights up: C T . . . .°C n n H OM E O T . . . . ° C dd *) Indication in instruments with specimen cooling. Instruments without specimen cooling: only CT (centered) is displayed. Leica CM3050 S Cryostat 27 5. Operation 5.3.4 Menu functions: setting parameters of refrigeration, time and preset counter Once the instrument has gone through the initial sequence of indications, you can go on to the menu functions to select and/or change instrument parameters. If display is locked: Press key until display background lights up. Next, press the menu key. With each key stroke the following parameters will be displayed (display sequence as listed): 1. Specimen temperature (in instruments with specimen cooling only) (-10 - -50 °C) 2. Cryochamber temperature (0 - -40 °C) 3. Selected number of sections - preset counter (ON/OFF and setting selection from 1 to 999) 4. Maximum specimen temperature (ON/OFF) 5. Real time (in 1-minute steps) 6. Defrost time (starting time of automatic cryochamber defrosting) (in 15-minute steps) 7. Duration of defrost cycle (cryochamber defrosting) (6 to 12 minutes duration) 1. Specimen temperature: (instruments with specimen cooling only) Press key until menu item Set specimen temperature is displayed: S E T T EMP O T - - - ° C - - Press key briefly. The line in the specimen temperature field is replaced by an asterisk. S E T T EMP O T - - - ° C - d From this point on the refrigeration system is activated and the desired set temperature can be selected with one of the arrow keys. Press arrow key and release upon reaching the desired value. C T . . . .°C n n H O M E O T - 3 5 ° C - d Note on the arrow key function: Each time one of the arrow keys is pressed briefly, the value displayed in the menu will be changed one step up or down. If an arrow key is pressed and held, the value will change continually (auto-repeat function). When holding the key, scrolling speed will increase after a while. As soon as a value is displayed, it is at the same time automatically stored. Menu items 5 and 6 displayed on 24 hour clock. 28 Instruction Manual V1.1 02/2000 5. 2. Cryochamber temperature: Press key until menu item Set chamber temperature is displayed: --> Continue as described for specimen temperature. 3. Preset counter (instruments with sectioning motor only): Press key until menu item Preset counter is displayed: P R E S E T CO U N T E R d n - - - = Preset counter activated P R E S E T CO U N T E R d n 0 5 6 = Preset counter deactivated Preset counter function: The preset counter allows the user to carry out a predefined number of sections in the Continuous stroke sectioning mode. Once the preselected number of sections has been carried out (= section counter reading 0), the specimen head will stop automatically in the lower limit position. The reference value (i.e. the value from which the preset counter counts downward) can be selected in the corresponding menu item. In order to be able to set a reference value, the preset counter function must be active. If the preset counter is deactivated (see diagrams above), press to activate. Leica CM 3050 S Cryostat Operation Now there are two options: 1. Increase or decrease the actual reference value by pressing or . and simultaneously in order to 2. Press reload the former reference value (0 when setting up the instrument) and then press eior individually in order to select ther the desired reference value. Depending on where you start from and where you want to go, method 1 or method 2 is quicker (see examples). Example 1: Actual preset counter reading = 50 Former reference value = 300 New reference value of 65 to be selected. Method 1 is most convenient: . Increase from 50 to 65 by pressing Example 2: Actual preset counter reading = 50 Former reference value = 300 New reference value of 320 to be selected. Method 2 is most convenient: Press and simultaneously to reload old reference value (300): . Increase from 300 to 320 by pressing For further information on the preset counter, please refer to chapter 5.3.6, Item 4 Preset counter. 29 5. Operation 4. Quick-freezing at maximum specimen temperature* (instruments with specimen cooling only) The automatic defrost cycle takes place once every 24 hours at the selected defrost time. Press key until menu item Fast object freezing is displayed: Press key until menu item Defrost period is displayed: F A S T or F A S T O B J F R E E Z I N O F F O B J F R E E Z I N O N Press lock/unlock key to activate or deactivate (ON/OFF). 5. Real time Press key until menu item Time is displayed: T I ME 1 0 : 2 3 Use arrow keys ( or ) to set real time. Setting minutes as well as hours in 1-minute steps. Holding arrow button increases scrolling speed! 6. Starting time of automatic defrost cycle: Press key until menu item Defrost time is displayed: D E F R T I ME 4 : 3 0 (Time on display = start time of defrost cycle) Use arrow keys ( or sired defrost start time. ) to select the de- 7. Duration of defrost cycle: D E F R O S T P E R I O D C HAMB E R : 0 8 M I N Use defrost keys ( or ) to adjust defrost time. (Only if necessary - see below). Important information for setting the defrost parameters Starting time of defrost cycle: We recommend to program the automatic defrost cycle for a time outside regular working hours as a period of 4 hours should pass after the defrost cycle before work with the instrument is resumed (see also chapter 5.7.1 Automatic chamber defrost cycle). Defrost cycle duration: The duration of the chamber defrost cycle is set to 8 minutes in factory. This setting should only be changed, if the evaporator is not completely de-iced during the 8-minute cycle. In such cases, increase the defrost cycle duration gradually until the the evaporator is ice-free after defrosting. The selected defrost cycle duration is valid for both automatic and manual chamber defrost cycle. *) with 90° prism - see also chapter 5.5.2. 30 Instruction Manual V1.1 02/2000 5. Operation 5.3.5 Status display Each individual parameter is displayed in a certain area of the display screen. Upper line: In the menu (see chapter 5.3.4): indication of selected menu item. Standard indication: Chamber temperature (instruments with specimen cooling: chamber and specimen temperature) Standard indication upper line: Instruments with chamber and specimen cooling C T - 3 0 ° C n n H OM E Instruments with chamber cooling only C T - 3 0 ° C n n H O M E O T - 3 5 ° C dd d - Upper line 1 2 3 4 5 6 7 8 9 10 11 12 13 14 15 16 Lower line 1 2 3 4 5 6 7 8 9 10 11 12 13 14 15 16 Digits 1 and 2 Digits 3 - 6 Digits 7 - 16 indicate sectioning stroke position: indicate coarse feed position: indicate the following parameters: Rear limit position: HOME Front limit position: STOP Sectioning stroke (outside sectioning window) Retraction stroke n: [ ]: Sectioning stroke (inside sectioning window) ○ ○ ○ Sectioning stroke ○ ○ ○ ] ○ ○ ○ ○ ○ ○ nn ○ ○ ○ ○ ○ ○ ○ ○ ○ ○ ○ Sectioning window [ ○ ○ ○ ○ Retraction stroke ○ Indication of malfunction or handwheel locked: Microtome plug loose, implausible values etc.: Handwheel is locked: ???? Refrigeration status: Digit 15 = cryochamber Digit 16 = specimen Meaning of Refrigeration OFF refrigeration symbols: d Refrigeration ON d LOCKED Indication LOCKED completely overlays digits 3 through 16, i.e. while LOCKED is displayed, no other parameters will be displayed in digits 3 - 16 of the lower line. Further indications: see chapter 6.1 Error messages indicated in the display screen Defrosting active Section thickness (set value) Section counter (actual value) Indication of total section thickness (actual value) Preset counter Digits 7 - 16: Scroll via arrow buttons to display individual parameters Leica CM3050 S Cryostat 31 5. Operation 5.3.6 Indication of refrigeration state, section thickness setting and counters These parameters can be displayed via the arrow keys. , the parameters are disWhen pressing played in the sequence listed on this page; , they are displayed in rewhen pressing verse order. The display can be scrolled continuously, i.e. after the last parameter the display will automatically start again with the first. 1. Refrigeration state C T - 3 0 ° C n n H O M E O T - 3 5 ° C dd Meaning of the refrigeration symbols (asterisks): --> see chapter 5.3.5 Status indication. O T - 3 5 ° C µ 0 1 0 . 0 or The sectioning thickness is set with the key (see chapter 5.4.7 Setting the section thickness). 3. Section counter C T - 3 0 ° C O T - 3 5 ° C å n 0 0 0 Once displayed (via arrow keys), the section counter can be set to 0 at any time. . To set to 0 press If the section counter is not set to 0 by the user at some point, sections are counted up to 999 at which point the counter automatically switches back to 0. 32 C T - 3 0 ° C O T - 3 5 ° C å µ 0 0 0 0 . 0 key). Can also be set to 0 at any time (via If the total section thickness indication is not set to 0 manually, the instrument counts up to maximum 9999.5 µm at which point the counter will automatically switch back to 0. This indication shows the total thickness of all sections carried out since the counter was last set to 0. (All sections, in sectioning and trimming mode, are counted). 5. Preset counter C T - 3 0 ° C 2. Section thickness C T - 3 0 ° C 4. Total section thickness counter O T - 3 5 ° C d n 0 5 6 Setting preset counter to 0: Press key. can also be pressed while the continuous sectioning mode is in motion; in this case the preset counter is set to 0 and sectioning stops upon reaching the lower limit position. After it has been set to 0, the preset counter is inactive. Reloading the former reference value: Press and simultaneously. Reloading the former reference value is possible also while the continuous sectioning mode is in motion: Upon pressing both arrow keys, the instrument continues sectioning without interruption, starting to count down from the old reference value. Instruction Manual V1.1 02/2000 5. 5.4 Operation Control panel 2 Instruments without sectioning motor In instruments without sectioning motor, control panel 2 only consists of functional area B (see below) Instruments with sectioning motor In instruments with sectioning motor, the control panel is equipped with three functional areas: A, B and C (see large diagram). A Functional area A: Sectioning modes Sectioning window Sectioning speed Emergency stop function B Functional area B: Coarse feed Trimming Section thickness selection B Functional area B: Coarse feed Trimming Section thickness selection C Functional area C: Start / Stop sectioning Leica CM 3050 S Cryostat 33 5. Operation Functional areas A and C - Instruments with sectioning motor only 5.4.1 Selecting a sectioning mode / start and stop sectioning Start / stop motorized sectioning Three different sectioning modes can be selected for motorized sectioning: Simultaneously press and hold RUN/STOP and RUN/ENABLE or depress and hold footswitch. To stop the sectioning stroke, release the keys or the footswitch: The specimen head stops immediately. Sectioning mode 1 - Intermittent stroke: The specimen head travels up and down as long as the RUN/STOP and RUN/ENABLE keys are pressed simultaneously or as long as the footswitch is depressed. Sectioning mode 2 - Continuous stroke: The specimen head travels up and down until it is stopped by pressing RUN/STOP or RUN/ENABLE or by depressing the footswitch. Sectioning mode 3 - Single stroke: The specimen head carries out one sectioning stroke and then stops in the lower limit position. Activating a sectioning mode Press one of the three sectioning mode keys described above. While a sectioning mode is active, the LED in the corresponding key will be illuminated. 34 Sectioning mode 1 - Intermittent stroke: Sectioning mode 2 - Continuous stroke: Simultaneously press and release RUN/STOP and RUN/ENABLE or depress and release footswitch. To stop sectioning: Press and release RUN/STOP or RUN/ENABLE or depress and release the footswitch: The specimen head stops upon reaching the lower limit position. Sectioning mode 3 - Single stroke: Simultaneously press and release RUN/STOP and RUN/ENABLE or depress and release footswitch. The instrument carries out one complete section / retraction stroke and the specimen head stops upon reaching the lower limit position. While sectioning is in motion, LED RUN is illuminated. While the sectioning motor is deactivated, LED STOP is illuminated. Both LEDs are located in functional area C. Instruction Manual V1.1 02/2000 5. Operation Functional areas A and C - Instruments with sectioning motor only 5.4.2 Setting the sectioning window The term Sectioning window stands for a different (slower) speed setting in that part of the sectioning stroke where the specimen is actually cut, while the remaining sectioning stroke (above and below the specimen) as well as the retraction (return) stroke are carried out at a higher speed level (time-saving feature). If a sectioning window is set, speed inside the window is as set on the control panel. Outside the sectioning window the specimen head travels at a proportionately higher speed. Always set the sectioning window while in the sectioning stroke (specimen moves downward). Setting the window in retraction stroke (specimen travels upward) is not possible. Position lower edge of specimen approx. 3 mm above the knife edge (rotate handwheel clockwise). The value has been stored when the LED in the sectioning window key lights up briefly. If the LED flashes, the value has not yet been stored, because the user has tried to set a window margin outside the possible window range (the area in which the sectioning window can be set is slightly smaller than the total section stroke). In that case, repeat the step in question. . The sectioning window cannot be deleted. If need be, it can be set to maximum size (i.e. almost the entire sectioning stroke will be carried out at one and the same speed). Every time after the instrument is disconnected from mains, the sectioning window is set to maximum size upon switching back on. This also applies when the instrument is switched on for the first time. Press sectioning window key. Position upper edge of specimen just below the knife edge (continue to rotate the handwheel clockwise). Press sectioning window key once more. Leica CM 3050 S Cryostat 35 5. Operation Functional areas A and C - Instruments with sectioning motor only 5.4.3 Selecting sectioning speed 5.4.4 Emergency stop Sectioning speed is selected via the sliding potentiometer. Speed can be changed while sectioning is in motion. Activate by: either pressing the emergency stop button forcefully (must lock in position), or depressing the footswitch forcefully. Either way, sectioning is interrupted at once. Caution when working in continuous mode: If the slider is set to 0, the sectioning motion stops, however, the actual sectioning mode is still active - just operating at 0 speed. If the slider is accidentally moved, sectioning will be resumed! - Risk of injury! Therefore: Do not interrupt sectioning / trimming by setting the sliding potentiometer to zero speed! See also safety instruction in Chapter 2.3.6 Motorized sectioning. Vmax key As long as the button is pressed, the sectioning motion is carried out at maximum speed (210 mm/s). While Vmax is active, the sectioning window is inactive. When the Vmax key is released, the sectioning window becomes active again. 36 LED in functional In both cases, the red area A lights up, indicating that the emergency stop function has been activated. Simultaneously all 3 sectioning modes are deactivated (= all 3 LEDs off). To deactivate the emergency stop function, rotate the button in the direction of the arrow until it unlocks and slips upward into its original position. As soon as the emergency stop button has been LED is extinguished. unlocked, the red If the emergency stop function has been activated with the footswitch, unlocking is not necessary. As soon as the footswitch is released, the red LED is extinguished. To continue work, select one of sectioning modes 1 - 3 and restart the sectioning motion. See also chapter 2.2.3 Safety - Emergency stop function for further information on the emergency stop. Instruction Manual V1.1 02/2000 5. Operation Functional area B - all models 5.4.5 Coarse feed keys The four coarse feed keys in functional area B function as follows: Coarse feed fast backward - Travelling speed 1,000 µm/s key to activate. Press Specimen head travels backward (= away from knife): a. until it reaches the rear limit position, b. until it is stopped by pressing one of the coarse feed keys (to stop the function, any of the four coarse feed keys can be pressed). Coarse feed fast forward - Travelling speed 1,000 µm/s To activate the function, press and hold. The specimen head travels forward (= towards the knife) as long as the key is held. Coarse feed slow forward - Travelling speed 500 µm/s and hold. To activate the function, press The specimen head travels forward (= towards the knife) as long as the key is held. STOP-LED (located in key Coarse feed fast forward) Coarse feed slow backward - Travelling speed 500 µm/s To start, press and hold. Specimen head travels backward (= away from knife) as long as the key is held. LED HOME (located in key Coarse feed fast backward) As long as the forward coarse feed (both fast and slow) is in motion, the STOP LED is illuminated. Upon reaching the front limit position, the STOP LED starts flashing and the display in control panel 1 reads STOP. As long as the backward coarse feed (both fast and slow) is in motion, the HOME LED is illuminated. Upon reaching the rear limit position, the HOME LED starts flashing and the display in control panel 1 reads HOME. Leica CM 3050 S Cryostat 37 5. Operation Functional area B - all models 5.4.6 Trimming and sectioning functions Switching between trimming and sectioning Press this key to alternate between the two functions. illuminated: Trimming mode is active off: Sectioning mode is active. Selecting trimming thickness Activate trimming mode Select trimming thickness (= sectioning thickness at which trimming is carried out) or . by pressing The selected thickness is displayed in the cor: responding LED Motorized trimming 5.4.7 Setting the section thickness Activate sectioning mode ( C T . . . .°C off). O T . . . . ° C µ 0 1 0 . 0 or to select section thickness. Press Pressing one of these keys once makes the display in control panel 1 switch to section thickness indication (thickness value not yet or further being altered). Pressing starts to change the actual section thickness setting. Selectable section thickness settings: 0 2 10 20 60 100 2 µm - 10 µm - 20 µm - 60 µm - 100 µm - 300 µm in 0.5-µm in 1-µm in 2-µm in 5-µm in 10-µm in 50-µm steps, steps, steps, steps, steps, steps. Select Continuous stroke in functional area A. Activate trimming by pressing RUN/STOP and RUN/ENABLE (located in functional area C) simultaneously or by depressing the footswitch. To stop trimming press RUN/STOP or RUN/ ENABLE or depress the footswitch again. Trimming thickness can be changed while trimor . ming is in motion by pressing 38 Instruction Manual V1.1 02/2000 5. 5.5 Daily operation of the instrument Select chamber temperature and, in instruments with specimen cooling, specimen temperature according to the type of specimen to be sectioned (see also chapter 6.3 Reference chart for temperature settings). Do not continue with step 5.5.1 before the actual chamber / (specimen) temperature corresponds to the set value. This may take several hours (e.g. when operating the instrument for the first time or when the instrument had been switched off). Prior to operating the instrument , please read and observe the following safety instructions: Operation 5.5.1 Freezing specimens onto specimen discs with quick-freeze shelf and stationary heat extractor Size the specimen. Apply sufficient amount of embedding medium onto ambient temperature specimen disc. Inside the cryochamber, place the specimen onto the disc and orient. Place specimen disc with specimen into one of the 10 openings in the quick-freeze shelf (see below) and freeze. Integrated safety devices (Chapter 2.2) . Handling microtome knives / blades (Chapter 2.3.4) Knife guard / Handwheel lock (Chapter 2.3.5) Motorized sectioning (Chapter 2.3.6) Defrosting / handling frozen tissue (Chapter 2.3.7) Frozen instrument parts and accessories (Chapter 2.3.8) Infectious / radioactive material (Chapter 2.3.9) Leica CM 3050 S Cryostat 2 1 3 The freezing process can be sped up further by using the stationary heat extractor (1). Next to the low temperature stabilizer (2) (Parking station), 3 specimen discs (3) can be placed within its pivoting range. Place the heat extractor (1) directly onto the specimen surface. After approx. 30 seconds the specimen is completely frozen. 39 5. Operation 5.5.2 Freezing specimens onto specimen discs with 90 ° prism (Instruments w/specimen cooling only) In instruments with specimen cooling, the 90 ° prism, which is inserted into the specimen head, is an additional option to freeze specimens at maximum temperature . 4 Installing the 90 ° prism Loosen screw (3) at specimen head. Insert pin (1) of prism completely into receptacle (2) in the specimen head. Important: the entire rear surface of the prism must fit tightly against the specimen head surface! Retighten screw (3) at specimen head. The prism now forms a horizontal surface for quick specimen freezing. Freezing specimens with the 90 ° prism Apply sufficient amount of embedding medium onto ambient temperature specimen disc, add specimen and orient. Insert specimen disc with specimen into the receptacle (4) of the prism. Press to activate menu item Fast Object Freezing and activate function by pressing The specimen head is now automatically cooled down to the lowest temperature (-50 °C). Once the specimen is frozen, remove the disc from the prism and store it in the quickfreeze shelf until inserting it into the specimen head. Press again to activate menu item Fast Object Freezing and deactivate the function once again (see chapter by pressing 5.3.4 Menu functions item 4). The specimen head temperature now automatically returns to the previously selected set value. Loosen screw (3) at specimen head and remove prism (1). Store prism inside the cryochamber. 5.5.3 Optional accessories for freezing specimens onto specimen discs and for removing frozen specimens Mobile heat extractor In addition to the stationary heat extractor (part of standard delivery), a mobile heat extractor is available as an optional accessory - see Appendix Ordering information - accessories ): Store heat extractor in chamber to precool. Place onto specimen in quick-freeze shelf. Remove as soon as specimen is frozen. (see chapter 5.3.4 Menu functions item 4). 40 Instruction Manual V1.1 02/2000 5. Thermoblock The thermoblock makes it easy to remove frozen specimens from the specimen discs. Do not store the thermoblock inside the cryochamber - store at room temperature and only place into the chamber for removing specimens from discs. Place cap (9) on one of the two ends so that the correct size opening (7) for the disc to be inserted is exposed. Insert pin (6) of specimen disc (5) into the opening (7). After about 20 seconds remove the frozen specimen from the specimen disc (use tweezers). If cap (9) fits too loosely, readjust with screw (10). Do not tighten screw too much! Once the specimen has been detached from the disc, remove the thermoblock from the cryochamber. Operation 5.5.4 Inserting specimen discs into the specimen head Lock handwheel in upper position. If a knife has already been inserted into the knife holder, cover knife edge with knife guard! Loosen clamping screw (3). Insert specimen disc in opening (2) (rear surface of specimen disc must fit tightly against surface of specimen head). Tighten clamping screw (3). 5.5.5 Specimen orientation Open clamping lever (4) --> (4a). Orient specimen via orienting screws (1) and (5). Retighten clamping lever (4). Leica CM 3050 S Cryostat 41 5. Operation 5.5.6 Trimming / sectioning Inserting the knife Insert the knife / disposable blade into the knife holder. Select appropriate clearance angle at knife holder (settings between 4° and 6° are suitable for the majority of applications). For details on how to insert and adjust the knives, please refer to the separate instruction manual(s) for your knife holder(s). See also chapter 2.2 Integrated safety devices incl. subchapter 2.2.4 Knife guard. Manual trimming Adjust knife / knife holder relative to specimen (see Knife holder instruction manual). Use motorized coarse feed to bring specimen close to knife (see chapter 5.4.5 Coarse feed functions). Move anti-roll plate away from knife. --> Next steps: see chapter 5.4.6 Trimming. Sectioning Adjust knife / knife holder relative to specimen (see Knife holder instruction manual). Place anti-roll guide onto knife. Orient specimen, if necessary (see chapter 5.5.5 Specimen orientation). Select desired section thickness (see chapter 5.4.7 Setting the section thickness). Start sectioning at approx. 20 µm, reduce section thickness gradually until reaching the appropriate thickness for the type of specimen to be sectioned. Unlock handwheel. Use motorized coarse feed to bring specimen close to knife (see chapter 5.4.5 Coarse feed functions). Select desired section thickness (see chapter 5.4.7 Setting the section thickness). Move anti-roll plate away from knife. Rotate handwheel to trim specimen down to desired sectioning plane. Discard the first 2 to 3 sections cut at the desired section thickness. Motorized trimming For advice on appropriate Sectioning temperatures for different types of tissue, please refer to chapter 6.3 Reference chart for temperature settings. Adjust knife / knife holder relative to specimen (see Knife holder instruction manual). Unlock handwheel. Center handwheel grip (See chapter 2.2.2). 42 When sectioning manually, rotate the handwheel evenly and at uniform speed. For all details on motorized sectioning, please refer to chapters 5.4.1 to 5.4.4: Selecting a sectioning mode / Start and stop sectioning, Setting the sectioning window, Selecting sectioning speed, Emergency stop. Instruction Manual V1.1 02/2000 5. 5.6 Finishing work 5.6.1 Daily routine steps Remove all specimens from the cryochamber and store safely! See also corresponding safety instructions in chapter 2.3.7 Defrosting / handling frozen tissue! Lock handwheel. Remove knife from knife holder, disinfect, dry (see chapter 7 Disinfection, cleaning and maintenance) and store in the knife case. Use a cold brush to sweep frozen sectioning waste into the section waste tray. Empty section waste tray (dispose of sectioning waste according to the applicable regulations on disposal of special category waste!). If necessary, carry out a complete disinfection procedure (see chapter 7 Disinfection, cleaning and maintenance). Remove all specimens from the chamber and store safely. Close sliding window. Switch off cryochamber illumination. Use lock/unlock key to lock display in control panel 1 (Display background dark = locked): Operation 5.6.2 Switching off the instrument for a longer period of time If you do not plan to use the instrument for an extended period of time, it can be switched off. However, since this involves a lot of work (see below), it should be considered carefully whether switching off the instrument is really the better option. If the instrument is switched off, the microtome must be removed. Then the microtome, cryochamber and all accessories must be disinfected and dried! For that purpose, follow the instructions in chapters 7.1 through 7.5.3. C T . . . .°C O T . . . . ° C 1 2 : 0 0 Do not switch off mains switch / automatic cutout (see chapter 5.2 Switching on / fuses)! Leica CM 3050 S Cryostat 43 5. Operation 5.7 Defrosting The Leica CM3050 S has 3 (instruments without specimen cooling: 2) different defrosting options. - Automatic chamber defrost cycle - Manual chamber defrost cycle - Specimen head defrosting (manual) - instruments with specimen cooling only. Read the safety instructions in chapter 2.3.7 Defrosting / frozen specimens ! Make sure to remove sensitive specimens from the cryochamber before the defrost cycle starts! 5.7.1 Automatic chamber defrost cycle The specimen head refrigeration is automatically switched back on when: at least 4 hours have passed since the defrost cycle was completed; and the actual chamber temperature deviates less than 5 K from set value. After the specimen head refrigeration has been switched back on, the specimen head temperature rises briefly to +10 °C and then decreases until it reaches the set value. Switching specimen cooling back on immediately after defrosting: As soon as the chamber defrost cycle is completed, specimen cooling can be switched back on immediately: Press until menu item Set specimen temperature is displayed: S E T T EMP O T - 3 5 ° C d - T EMP O T - 3 5 ° C dd The automatic defrost cycle is carried out once every 24 hours at the preselected time. (For details see chapter 5.3.4 Menu functions items 6 and 7). Press During the defrost cycle, the corresponding asterisk is displayed inversely: Specimen cooling is switched back on. C T - 3 0 ° C n n H OM E O T - 3 5 ° C dd Once the defrost cycle is finished, the instrument automatically switches back to refrigeration. Instruments with specimen cooling: When defrosting starts, to avoid icing the specimen head is automatically adjusted to a temperature between -10 °C and -5 °C, i.e. the set temperature value is deactivated temporarily. 44 . S E T Despite the possibility of switching the specimen cooling system back on immediately after the automatic chamber defrost cycle, we recommend the automatic defrost cycle be set at a point in time when the entire procedure can be controlled automatically. (See also information on menu items 6 and 7 in chapter 5.3.4 Menu functions). Instruction Manual V1.1 02/2000 5. 5.7.2 Manual chamber defrost cycle In addition to the automatic defrost cycle, a manual chamber defrost cycle can be activated when necessary. Press until menu item Set chamber temperature is displayed: S E T T EMP C T - 3 0 ° C d - . A brief sound signals that the Press manual chamber defrost cycle has started: S E T T EMP C T - 3 0 ° C d - The manual defrost cycle ends either when the selected defrost cycle duration is over or when a chamber temperature of -5 °C is reached. To abort the manual defrost cycle: Go back to menu item Set chamber temperature and press again. Instruments with specimen cooling: Operation 5.7.3 Defrosting the specimen head (instruments with specimen cooling only) To activate specimen head defrosting: Press until menu item Set specimen temperature is displayed: S E T T EMP O T - 3 5 ° C dd . A brief sound signals that the Press manual chamber defrost cycle has started: S E T T EMP O T - 3 5 ° C dd Specimen head temperature increases to between +20 °C and +30 °C for a duration of 10 minutes, after which it returns to the set value. To abort specimen head defrosting: Press until menu item Set specimen temperature is displayed and press once more. When defrosting starts, to avoid icing the specimen head is automatically adjusted to a temperature between -10 °C and -5 °C, i.e. the set temperature value is deactivated temporarily. (same as with automatic defrost cycle - see chapter 5.7.1 Automatic chamber defrost cycle) 10 seconds after the manual chamber defrost cycle has been completed, the specimen head refrigeration is switched back on, cooling down to the set value. Leica CM 3050 S Cryostat 45 6. Troubleshooting, applications tips 6.1 Displayed error messages 4. Service The autodiagnosis function of the CM3050 S displays error messages in case of certain malfunctions. 1. Power failure This error message is displayed after the instrument had been disconnected from mains, either due to power failure or because the mains switch had been turned off. C T - 3 0 ° C P OW E R O T - 3 5 ° C F A I L U R E To acknowledge the message, press about 5 seconds. for 2. Coarse feed Coarse feed malfunction has occurred. C T - 3 0 ° C ? ? ? ? O T - 3 5 ° C This message is also displayed, if the coarse feed plug has not been reconnected properly after reinstallation of the microtome. 3. Temperature indications C T - # # ° C O T - # # ° C If the # symbol is displayed instead of chamber or specimen temperature indication, the corresponding temperature sensor is broken or a short circuit has occurred. 46 This message is displayed after a certain number of operating hours to remind the user to have a preventive maintenance done by Leica Technical Service. This message is displayed only, if the instrument is not regularly serviced by Leica Technical Service. We recommend a maintenance contract once the warranty period has expired! Contact your local Leica sales office for details! If one of the error messages listed under 2, 3 and 4 is displayed, please contact Leica Technical Service. 6.1.1 Other error indications (red ) in control panel 2 is illuminated: O T - 3 5 ° C or C T - 3 0 ° C C T - 3 0 ° C O T - 3 5 ° C S E R V I C E Emergency stop button accidentally activated. --> Unlock. Footswitch not properly connected. --> Check connection - connect properly, if applicable. Instruction Manual V1.1 02/2000 6. Troubleshooting, applications tips 6.2 Potential problems - causes and remedies Problem Causes Remedies - Cryostat is exposed to draft (open windows, doors, airconditioning). - Sliding window has been open for a long period of time at a very low chamber temperature. - Frost build-up caused by breathing into the cryochamber. - Eliminate draft sources or change place of installation of the cryostat. - Close sliding window. Sections smear - Specimen not cold enough. - Knife and/or anti-roll plate not yet cold enough - sections melt. - Select lower temperature. - Wait until knife and/or anti-roll plate have reached chamber temperature. Sections splinter Sections not properly flattened - - Frost on chamber walls and microtome Specimen too cold. Static electricity / draft. Specimen not cold enough. Large surface specimen. - Anti-roll plate poorly adjusted. - Anti-roll plate poorly aligned relative to knife edge. - Wrong clearance angle selected. - Knife blunt or damaged. Sections not properly flattened despite correct temperature and correctly aligned anti-roll plate Leica CM3050 S Cryostat - Knife and/or anti-roll plate dirty. - Edge of anti-roll plate damaged. - Blunt knife. - Consider wearing a mask. Select higher temperature. Eliminate cause. Select lower temperature. Trim specimen parallel; increase section thickness. - Readjust anti-roll plate. - Align correctly. - Set correct clearance angle. - Use different part of knife or replace knife. - Clean with dry cloth or brush. - Replace anti-roll plate. - Use different part of knife or replace knife. 47 6. Troubleshooting, applications tips Problem Causes Remedies Sections curl on anti-roll plate. - Anti-roll plate does not protrude far enough beyond the knife edge. - Readjust correctly. Scraping noise during sectioning stroke and specimen return stroke. - Anti-roll plate protrudes too far beyond the knife edge and is scraping against the specimen. - Readjust correctly. Ondulated sections. - Knife damaged. - Use different part of the knife or replace knife. - Replace anti-roll plate. - Edge of anti-roll plate damaged. Chatter marks form during sectioning. - Specimen insufficiently frozen onto specimen disc. - Specimen disc not clamped tightly enough. - Specimen holder ball joint not clamped. - Knife not clamped tightly enough. - Selected section thickness too thick - specimen has come off the specimen disc. - Specimen very hard and inhomogeneous. - Blunt knife. - Knife profile inappropriate for the type of specimen to be sectioned. - Wrong clearance angle. Condensation forms on anti-roll plate and knife during cleaning. 48 - Brush, forceps, cloth or other cleaning item too warm. - Refreeze specimen onto disc. - Check disc clamping. - Check ball joint clamping. - Check knife clamping. - Refreeze specimen onto disc. - Increase section thickness; if possible, reduce specimen surface. - Use different part of knife or replace knife. - Use knife with a different profile. - Readjust clearance angle setting. - Accessories and cleaning material to be used pre-cooled only. - Store on storage shelves inside the cryochamber. Instruction Manual V1.1 02/2000 6. Troubleshooting, applications tips Causes Remedies Anti-roll plate damaged after adjustment. - Anti-roll plate protrudes too far beyond the knife edge. Adjustment was done in the direction of the knife. - Replace anti-roll plate; in future, lift away from the knife when aligning. - Handle anti-roll plate more carefully. Thick/thin sections. - Wrong temperature for the tissue to be sectioned. - Select correct temperature. - Wait until correct temperature has been reached. - Use knife with different profile (c or d) or possible switch to disposable blade system. - Remove ice. - Adapt speed. Problem - Knife profile inappropriate for the specimen to be sectioned. - Ice build-up on the knife back. - Handwheel rotation not uniform or inappropriate rotation speed. - Knife not clamped tightly enough. - Specimen disc not clamped correctly. - Embedding medium poured onto cold specimen disc; specimen comes off the disc once frozen. - Blunt knife. - Incorrect clearance angle. - Specimen dried out. Tissue sticks to the anti-roll plate. Flattened sections curl up as soon as anti-roll plate is lifted from the knife. Leica CM3050 S Cryostat - Check knife clamping. - Check disc clamping. - Place embedding medium on luke-warm specimen disc, inside the cryochamber place the specimen onto the disc and freeze in quick-freeze shelf. - Use different part of knife or replace knife. - Set correct clearance angle. - Prepare new specimen. - Anti-roll plate too warm or incorrectly adjusted. - Static electricity. - Fat on corner or edge of antiroll plate. - Knife rusty. - Cool or readjust anti-roll plate. - Static electricity or draft. - Anti-roll plate too warm. - Eliminate cause. - Cool anti-roll plate. - Eliminate cause. - Remove fat (alcohol). - Remove rust. 49 6. Troubleshooting, applications tips Problem Sections tear. Causes Remedies - Temperature too low for the tissue to be sectioned. - Select higher temperature and wait for the new temperature to be reached. - Eliminate cause (--> see details on individual problems). - Exchange anti-roll plate. - Knife blunt, dirty, dusty, frosted or rusty. - Upper edge of anti-roll plate damaged. - Hard particles in the tissue. - Rear face of knife dirty. Inconsistent or insufficient specimen feed. - Microtome was not completely dry when refrigeration was switched on; ice build-up inside the micrometer mechanism. - Microtome defective. - If application permits, section at lower plane. - Clean. - Remove microtome from chamber and dry - possibly with hairdryer (hairdryer only to be used outside the cryochamber!) or at ambient temperature. - Call Technical Service. Specimen disc cannot be removed. - Specimen disc stuck to quickfreeze shelf or specimen head due to moisture on underside of specimen disc. - Apply strong alcohol to contact point or heat the specimen head. Cryostat inoperational. - Mains plug not properly connected. - Automatic cut-out has been triggered. - Check mains plug connection. Sectioning motor inoperational. - Footswitch not connected. - Automatic cut-out of sectioning motor has been triggered. - Motor defective. - Connect footswitch. - Reconnect automatic cut-out (push inwards until it locks in place). - Call Technical Service. No or insufficient refrigerating performance. - Stopper not placed properly into drain in bottom of cryochamber. - Compressor defective. - Leak in cooling system. - Close drain with stopper. 50 - Reconnect automatic cut-out (switch instrument back on). - Call Technical Service. - Call Technical Service. Instruction Manual V1.1 02/2000 6. 6.3 Troubleshooting, applications tips Reference chart for temperature settings (in minus °C) Tissue 10 - 15 Adrenal Bone marrow Brain Bladder Breast - fatty Breast - little fat Cartilage Cervical Fatty Heart and vascular Intestinal Kidney Laryngeal Lip Liver Lung Lymphoid Muscular Nose Pancreatic Prostate Ovarian Rectal Skin with fat Skin without fat Spleenal or bloody tissue Testicular Thyroid Tongue Uterus curettage Please note: 15 - 25 25 - 50 d d d d d d d d d d d d d d d d d d d d d d d d d d d d d d d d d d The recommended temperature settings are based on long-term experience. However, they can only be guidelines for general orientation, as each individual specimen may require particular adjustments. Leica CM3050 S Cryostat 51 7. Disinfection, cleaning and maintenance 7.1 Safety instructions on disinfection and cleaning When disinfecting the instrument, make sure to observe the following safety instructions: Disinfection and Cleaning (Chapter 2.3.10) Handling microtome knives / blades (Chapter 2.3.4) Defrosting / handling frozen tissue (Chapter 2.3.7) Frozen instrument parts and accessories (Chapter 2.3.8) Infectious / radioactive material (Chapter 2.3.9) 7.2 Spray disinfection with Leica Cryofect For practical spray disinfection, we recommend Leica Cryofect which is fully effective at temperatures in the negative range down to -20 °C. Set chamber temperature -20 °C or warmer. Remove specimens from the chamber and store safely. Carefully remove knife / blade from knife holder. Remove section waste tray from cryochamber and empty. Remove remaining section waste from cryochamber. Working accessories (brushes, specimen holders etc.) can be disinfected inside the cryochamber. Once the selected chamber temperature has been reached, spray Leica Cryofect on the surfaces and accessories to be disinfected. Allow to soak for 15 minutes. Use paper towels or another type of disposable cleaning cloths to wipe up disinfectant and remaining section waste. Dispose of paper towels together with section waste. If previously altered, set chamber temperature back to its former value. Put specimens back into the cryochamber. 52 Instruction Manual V1.1 02/2000 7 7.3 Disinfection with conventional disinfectants Switch the instrument off. Carefully remove knife / blade as well as specimens and accessories from the chamber. Remove section waste from the chamber and dispose of it. Remove sliding window (see chapter 7.6 Exchanging the fluorescent light lamp). Remove microtome (see chapter 7.5.1 Removing the microtome). Allow the microtome to thaw, disinfect and allow to dry thoroughly. Drying the microtome: Use a hairdryer: dry and before reinstalling into the chamber allow the microtome to cool down to room temperature. Disinfection, cleaning and maintenance Allow cryochamber to dry thoroughly. Reinstall microtome (see chapter 7.5.3). Only when they are completely dry, reinsert the disinfected accessories / tools into the cryochamber. Reinsert the sliding window. Switch the instrument back on. Once a suitable chamber temperature has been reached, return the specimens to the cryochamber. 7.4 Cleaning When necessary, the instrument surfaces can be cleaned with mild commercial household cleaners. Surfaces which are potentially contaminated (infectious germs) should always be cleaned with alcohol disinfectants! Allow to dry at room temperature (at least over night - longer, if necessary). Disinfect and dry disassembled parts (accessories and tools). Disinfect chamber walls with commercial alcohol disinfectant. Place an adequate container underneath the drain tube at the right side of the instrument. Pull stopper out of chamber bottom and drain off disinfecting solution into the container. Put stopper back into drain in cryochamber. Leica CM 3050 S Cryostat 53 7. Disinfection, cleaning and maintenance 7.5 Removing / reinstalling the microtome 7.5.1 Removing the microtome When removing the microtome make sure to observe the following safety instructions: 7.5.2 Disassembling the specimen head (instruments w/specimen cooling only) Use Allen key size 5 to remove screw (2) from the center of the specimen head (1). Removing / reinstalling the microtome (Chapter 2.3.11) Defrosting / handling frozen tissue (Chapter 2.3.7) Infectious / radioactive material (Chapter 2.3.9) Disinfection and cleaning (Chapter 2.3.10) · 54 Prior to removing the microtome, carry out preparation steps as per chapter 7.3 (switch instrument off, remove accessories etc.) Do not twist the refrigerating tube (see chapter 2.3.11 Removing / reinstalling the microtome). Hold hook (4) (part of standard delivery) in one of your hands and with your other hand rest refrigerating tube (3) on hook. Insert hook (4) with refrigerating tube (3) into the opening above mark (t). Instruction Manual V1.1 02/2000 7. Remove plug of temperature sensor (7). Remove plug of coarse feed motor: Pull bushing backward (arrow 1) and hold. Place your thumb between plug (6) and socket at the microtome (arrow 2). To remove plug (6) from microtome, pull it away from the microtome while at the same time carrying out a slight jogging movement (arrows 3). 7 6 9 8 2 3 3 1 Loosen screws (8) with Allen key. Lift microtome a little and pull slightly to the left. This loosens the plastic coupling (11) which connects the two axles. Remove the microtome from the chamber. Leica CM 3050 S Cryostat Disinfection, cleaning and maintenance 7.5.3 Reinstalling the microtome When reinstalling the microtome make sure to observe the following safety instructions: Removing / reinstalling the microtome (Chapter 2.3.11) Display message Dry Microtome (Chapter 2.3.12) Lock handwheel in lower position. Place microtome in chamber. Put one drop of cryostat oil per surface on the contact surfaces of plastic coupling (11) and handwheel coupling (12). Place plastic coupling (11) on handwheel coupling (12). Push microtome slightly towards the right until axle (9) fits tightly into coupling (11). Unlock handwheel. Adjust the parts into each other by rotating the handwheel slightly backward and forth. Lock handwheel again in lower position. Tighten screws (8). Reconnect plugs of coarse feed motor (6) and temperature sensor (7). Mount specimen head (in reverse order as described on previous page). Insert accessories (storage shelf, section waste tray etc.). Insert sliding window. Connect instrument to mains and switch back on. 55 7. Disinfection, cleaning and maintenance 7.6 Exchanging the fluorescent light lamp Prior to exchanging the lamp, please read and observe the following safety instructions: Maintenance (Chapter 2.3.13) Removal The lamp (3) is located behind the glare shield (4). Carefully hold lamp with both of your hands. Slightly pull the lamp downward at the left side to remove it from fastening clip (5). Pull the lamp towards the left to remove it from its socket (6). Removing the sliding window Hold sliding window (1) at grip bar (2), lift slightly and pull out towards yourself. Installing the replacement lamp Hold the lamp in correct position (see drawing below) and push towards the right until it locks into the socket. Push the lamp slightly upwards until it locks into the clip. Put the sliding window back in place. Reconnect the instrument to mains and switch it back on. 56 Instruction Manual V1.1 02/2000 8. 8.1 Warranty and service Warranty Leica Microsystems Nussloch GmbH guarantees that the delivered product was subjected to stringent quality control to ensure that the instrument complies with its technical specification. The warranty conditions of your local Leica sales company or dealer apply. Only authorized Leica technical service engineers may carry out repairs on the instrument. Any intervention on / modification of the instrument and any use of accessories other than those delivered by Leica is subject to prior approval by Leica, unless explicitly specified otherwise in this manual. Please note that any spare parts and accessories, which are not supplied by Leica, have neither been inspected nor have they been approved by Leica. Therefore, installation or use of such parts and/or accessories may impair the design features of the instrument. Leica assumes no liability for any damage caused by the use of non-original spare parts or non-original accessories. Warranty claims can be made only if the instrument has been operated according to its designated use and according to the instructions given in this manual. Damage resulting from improper use of the product and/or faulty operation invalidates the warranty. Leica will not assume liability for any such damage. 8.2 Technical service information If you require technical service or need replacement parts, please contact your Leica sales representative or dealer who sold the product. Please provide the following information: Model name and serial number of the instrument; Location of the instrument and name of the person to contact; Reason for the service call; Delivery date of the instrument. If not accompanied by an official return authorization form, Leica Microsystems Nussloch GmbH does not accept any returned merchandise. Leica CM3050 S Cryostat 57 8. Warranty and service 8.2.1 Important information for repairs / returns of cryostats If there is any risk that the instrument or parts of it are contaminated with infectious or radioactive substances, the customer must disinfect / decontaminate the instrument prior to returning it or to having it repaired on-site. The customer must expressly confirm disinfection / decontamination, indicating as well the disinfection / decontamination method used. a. On-site repairs: Leica Technical Service personnel is instructed to ask for proof of disinfection / decontamination and the method(s) that has/have been used. b. Returned instruments: Written statement confirming disinfection / decontamination and method(s) applied to be included in shipment! If instruments / parts for repair arrive at the Leica facility in a state which suggests that the instrument has not been properly disinfected / decontaminated, the instrument(s) / part(s) will be returned to the customer, at the customers expense! 8.3 Shutdown and disposal of the instrument The instrument or parts of the instrument must be disposed of in compliance with the local laws. The Leica CM3050 S contains a large number of recyclable components. For more information on the recycling program for our cryostats, please contact your Leica sales representative or dealer, or Leica Microsystems Nussloch GmbH, Germany. We will be glad to provide you with details on the recycling concept for our cryostats which meets todays environmental requirements. 58 Instruction Manual V1.1 02/2000 Appendix 1. Electrohydraulic height adjustment 1.3 Safety instructions An electrohydraulic lifting device for individual working height adjustment is available as an optional accessory for the CM3050 S cryostat series. Prior to operating the height adjustment device, make sure to read the present instruction manual. Pay special attention to the following safety instructions: 1.1 Designated use The electrohydraulic height adjustment device has been designed exclusively for adjustment of the instrument working level to the individual height of the user. It has been designed for use with the Leica cryostat series CM3050 S only and may under no circumstances be used to lift other instruments or persons. Damage resulting from improper use of the product and/or faulty operation invalidates the warranty. Leica will not assume liability for any such damage. Prior to connecting the height adjustment device to mains, check to make sure that the nominal voltage and frequency indications on the device name plate correspond to the actual mains voltage in your lab! 1.2 Standard delivery Do not move the height adjustment device with the Leica CM3050 S installed on the frame. If the place of installation needs to be changed, first take the Leica CM3050 S down from the height adjustment device and then move both devices separately. Electrohydraulic height adjustment device for cryostat series CM3050 S, complete outfit, consisting of a U-shaped frame on four height-adjustable feet and a two-key control unit. Never place your feet underneath the U-frame when lowering the height adjustment device! Risk of injury! The height adjustment device is available in 2 voltages: Only authorized Leica technical service engineers may carry out repairs on both the Leica CM3050 S and the height adjustment device. This applies especially to all work carried out on the hydraulic system of the height adjustment device. 1. 230 240 V / 50 Hz order no. 0443 26147 2. 230 240 V / 50 Hz order no. 0443 26147 Leica CM 3050 S Cryostat 59 Appendix 1.4 Installation Open the shipping box and remove all packing material including the Styrofoam pieces. Take the height adjustment device out of the box. At the place of installation, place the U-frame on the floor with the open side facing yourself. Adjust the U-frame parallel to the wall, maintaining a distance of approx. 10 cm between wall and U-frame. Push the (ab) button to lower the height adjustment device to the lowest possible position. In order to be able to move the instrument, use a fork wrench and unscrew the rollers on which the Leica CM3050 S moves by about 2 cm. Roll the cryostat onto the U-frame as far as it will go. The rear of the cryostat housing has to fit closely to the rear bar of the U-frame. Roll the cryostat onto the U-frame as far as it will go. The rear of the cryostat housing has to fit closely to the rear bar of the U-frame. When placing the instrument onto the U-frame, make sure the power cord does not get caught and thus crushed between U-frame and cryostat housing. 60 Plug the height adjustment device into the mains socket. The unit is now ready for use. Instruction Manual V1.1 02/2000 Appendix 1.7 Troubleshooting 1.5 Control keys The control keys are located on top of the control unit (see photograph). To lift the instrument, press . To lower the instrument, press . As long as a button is held, the instrument will go up or down until reaching the upper or lower limit. 1. Slight and uniform loss of height of the device in the course of several weeks is normal. Remedy: Correct the loss of height by pressing the button until the instrument is lifted back up to the desired working level. 2. The cryostat is in an inclined position due to an uneven upward movement of the lifting pistons. Difference of level among the four legs > 5 mm. Remedy: Have the instrument travel once up and down over the entire height adjustment distance: press until the instrument reaches the upper limit position and then until the instrument reaches the lowest possible position. Then lift the instrument back to regular working height.Should the problem reoccur several times, call Leica Technical Service. 3. The height adjustment device does not reach the maximum upper level or the instrument lowers itself by a relatively large distance (> 5 cm) within a short time. 1.8 Technical Data 1.6 Maintenance and care Protect the lifting pistons in the four legs of the height adjustment device against dust and water. Approximately every six months lubricate the legs with a thin coat of resin-free oil. Once every year have the height adjustment device checked by an authorized Leica service engineer. Leica CM 3050 S Cryostat Nominal voltage: Nomi nal frequency: Type of actuation: Total height of stroke: Carrying power: Dimensions: Width: Depth: Weigth: 230 - 240 V 100 - 115 V 50 Hz 60 Hz Elektrohydraulik 230 mm 200 kp 880 mm (without control unit) 1030 mm (with control unit) 555 mm approx. 30 kg 61 Appendix 2. Ordering information - accessories 2.1 Knife holders Knife-holder CN for reusable microtome knives´w/anti-roll guide, adjustable knife guard and knife support bars for slim and wide knives ............................................. 0419 18649 Knife support bar for knife holder CN, for slim knives .............................................................................. 0419 19426 Knife support bar for knife holder CN, for wide knives ............................................................................ 0419 19427 Knife-holder CE w/ glass anti-roll guide, for low profile disposable blades, with lateral displacement feature ................................................................................................................ 0419 30383 Knife-holder CE w/ glass anti-roll guide, for high profile disposable blades with lateral displacement feature ................................................................................................................ 0419 30390 Knife-holder CS for reusable knives, with one knife support (mounted optionally on the left or right), anti-roll guide and knife guard ............................................. 0419 19787 Auxiliary clamping device for knife holder CS (to be used instead of knife support, for increased stability) ................................................................. 0419 20971 Knife support bar for knife holder CS .......................................................................................................... 0419 25681 Knife holder base for knife holders CN, CE and CS ................................................................................... 0419 26140 Knife rest with section collecting tray for knife holder CS ...................................................................... 0419 18996 2.2 Specimen discs Specimen disc, 20 mm ø ................................................................................................................................ 0370 08636 Specimen disc, 25 mm ø ................................................................................................................................ 0416 19275 Specimen disc, 30 mm ø ................................................................................................................................ 0370 08587 Specimen disc, 40 mm ø ................................................................................................................................ 0370 08637 Specimen disc, 55 mm ø ................................................................................................................................ 0419 26491 Specimen disc, 50 x 90 mm ............................................................................................................................ 0419 26750 other sizes on request 2.2 Accessories 90° prism ........................................................................................................................................................... 0443 25949 Mobile heat extractor ..................................................................................................................................... 0443 26836 Thermoblock .................................................................................................................................................... 0398 18542 Glass anti-roll guide, complete assy., for knife holder CE ....................................................................... 0419 30402 Glass anti-roll guide upgrade kit, for retrofitting knife holders CN, CS (for C-profile knives) ...................................................................... 0419 30403 2.4 Consumables OCT embedding compound for freezing tissue specimens onto specimen discs, bottle of 125 ml ................................................................................................................................................. 0201 08926 Cryostat oil No. 407, bottle of 100 ml ............................................................................................................ 0336 06099 62 Instruction Manual V1.1 02/2000 Appendix EC Declaration of Conformity We herewith declare, in exclusive responsibility, that the Cryostat- Microtome Type CM3050 S was developed, designed and manufactured to conform with the Council Directive 89/392/EEC, Appendix II A (Machinery) Council Directive 73/23/EEC (Low Voltage), and Council Directive 89/336/EEC, Appendix I (Electromagnetic Compatibility), including their amendments up to the date mentioned below. The following harmonized standards were applied: DIN EN 292, DIN EN 61010-1, EN 50082-1, EN 55011 IEC 1000-4 The following national standards, guidelines and specifications were applied: MedGV In addition, the following in-house standards were applied: DIN EN 9001 A complete set of technical documentation is available. An instruction manual for subject product is available. Leica Microsystems Nussloch GmbH Postfach 1120 D-69222 Nussloch Germany July 21, 1999 Leica CM3050 S Cryostat ............................ Dag Graupner Managing Director 63 Alphabetical index A E Accessories 17, 40, 41, 60 Anti-roll guide (glass) 60 Automatic chamber defrost cycle 44 Automatic cutout for sectioning motor 20 Auxiliary clamping device for knife holder CS 60 Available models of the CM3050 S 17 EC Declaration of Conformity 59 Electrical connections 12, 16, 19 Emergency stop function 9, 11, 36 Exchanging the fluorscent light lamp 15, 56 B Brush shelf 20 C CE Mark (declaration of conformity) 59 Chamber defrost cycle (automatic) 44 Chamber defrost cycle (manual) 45 Cleaning 53 CM3050 S - overview 20 Coarse feed functions 37 Connecting the footswitch 19 Consumables 60 Continuous stroke 34 Control panel 1 20, 26, 27, 28, 29, 30, 31, 32 Control panel 2 20, 33, 34, 35, 36, 37, 38 cryochamber illumination - ON/OFF key 26 Cryochamber temperature 29 cryohamber illumination (exchange) 56 cryohamber illumination (safety instructions) 15 Cryostat CM3050 S (overview) 20 Cryostat oil No. 407 60 D Daily operation of the instrument 39 Daily routine steps when finishing work 43 Defrost key 26 Defrosting 13, 44, 45 Defrosting / Handling frozen tissue 13 Defrosting the specimen head 45 Designated use 8 Disassembling the specimen head 54 Disinfection and cleaning 14, 52, 53 Display message Dry microtome 15 Displayed error messages 46 Displaying parameters with arrow keys 32 Dry microtome 15, 27 Duration of defrost cycle (setting) 30 64 F Finishing work 43 Fluorescent light lamp 15, 56 Foot switch - use for emergency stop 11 Footswitch 11, 19, 20, 34, 36, 46, 50 Footswitch port 20 Freezing specimens onto specimen discs 39, 40 Frozen instrument parts / accessories 13 Frozen specimens 45 Fuses 25 G Glass anti-roll guide 60 H Handling microtome knives / blades 13 Handwheel grip centering 9, 10 Handwheel grip centering (motorized sectioning) 13 Handwheel lock 9, 10, 13, 31 I Infectious / radioactive material 14 Inserting specimen discs into the specimen head 41 Installing / inserting accessories 18 Installing the footswitch 19 Installing the handwheel 18 Instrument nameplate 3, 7 Integrated safety devices 9, 10, 11 Intermittent stroke 34 K Knife guard 9, 11, 13, 60 Knife guard / handwheel lock 13 Knife holder CN 20 Knife holder CS 20 Knife holder base for knife holders CN, CE and CS 20, 60 Knife holder CE 20 Knife holders CN, CE, CS 60 Knife rest with section collecting tray for knife 60 Knife support bar for knife holder CS 60 Knives / blades. Siehe Handling microtome knives / blades Instruction Manual V1.1 02/2000 Alphabetical Index L Leica CM3050 S - available models 17 Leica Cryofect - for spray disinfection 52 Lock / unlock key 26 M Mains switch / automatic cutout for instrument 20 Maintenance 15, 56 Manual chamber defrost cycle 45 Maximum sectioning speed (Vmax) 36 Menu functions 26, 28 Menu key 26 Mobile heat extractor 20, 40, 60 Motorized sectioning 13, 34, 36 Motorized sectioning - start / stop 34 Motorized trimming 38 O OCT compound for freezing tissu 60 Operating the instrument for the first time 24 Overview of the instrument 20 P Potential problems - causes and remedies 47, 48, 49, 50 Preset counter (indicating parameters) 32 Preset counter (setting parameters) 29 Prism (90°) 20, 40, 60 Q Qualification of personnel 8 Quick-freeze shelf 20, 39 Quick-freezing at maximum specimen temperature 30, 40 Quick-freezing specimens 39, 40 R Reference chart for temperature settings 51 Refrigeration parameters (indication) 32 Refrigeration parameters (setting) 28, 29, 30 Removing / reinstalling the microtome 15, 54, 55 Removing frozen specimens from specimen discs 40 Removing the sliding window 56 Repacking 16 Repairs / returns of cryostats (important info) 58 Rubber mat 20 S Safety instructions: handling and operation of the 13, 14, 15 Section thickness (indication) 32 Leica CM 3050 S - Cryostat Section thickness (setting) 38 Section thickness range 38 Section waste tray 20 Sectioning 42 Sectioning modes (single, continuous, intermittent 34 Sectioning speed selection 36 Sectioning window 35 Selecting a sectioning mode 34 Serial number 3, 7 Shutdown and disposal of the instrument 58 Single stroke 34 Site requirements 12, 16 Specimen discs 20, 41, 60 Specimen head w/o specimen cooling 20 Specimen head with specimen cooling (option) 20 Specimen orientation 41 Standard delivery 17 Start / stop motorized sectioning 34 Start of automatic defrost cycle (setting) 30 Stationary heat extractor 5, 20, 39 Status indication 31, 32 Storage shelf, left 20 Storage shelf, right 20 Switching between trimming and sectioning 38 Switching off the instrument for longer 43 Switching on the instrument 25 Symbols in this manual and their meaning 7 T Technical Data 22, 23 Technical service information 57 Temperature settings (reference chart) 51 Thermoblock 20, 41, 60 Time parameters (setting) 28, 30 Transport 12 Trimming 42 Trimming / sectioning 42 Trimming thickness 38 Troubleshooting 46, 47, 48, 49, 50 U Unpacking and installation 16 V Vmax key 36 W Warranty 57 65 Notes 66 Instruction Manual V1.1 02/2000