1
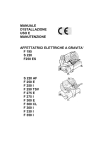
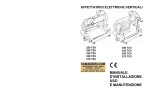
GRAVITY SLICERS
F 195
S 220
F250 ES
S 220 AF
F 250 E
F 250 I
F 250 TSV
F 275 E
F 275 I
F 300 E
F 300 CL
F 300 I
F 330 I
F 350 I
NOTES FOR THE USER
This manual consists of 28 pages as follows:
Title page with notes for the user (back side not printed);
Contents, page 1;
Page 2 to page 25 carrying progressive numeration (back of page 25 not printed).
CONTENTS
FOREWORD................................................................................................................... 2
SCOPE OF THIS MANUAL........................................................................................ 2
GENERAL INFORMATION............................................................................................ 2
LIMITS OF USE – SAFETY NORMS ......................................................................... 2
GENERAL SAFETY REGULATIONS ........................................................................ 2
MANUFACTURER'S WARRANTY AND LIABILITY .................................................. 3
PLATES – CONFORMITY MARKS............................................................................ 3
ENVIRONMENTAL CONDITIONS OF USE .............................................................. 3
PACKING ....................................................................................................................... 4
OPENING THE BOX .................................................................................................. 4
TECHNICAL DESCRIPTION AND PROPOSED CONDITIONS OF USE..................... 5
GENERAL DESCRIPTION......................................................................................... 5
MECHANICAL AND ELECTRICAL SAFETY DEVICES ............................................ 5
WARNING: RESIDUAL RISKS .................................................................................. 5
DIMENSIONS............................................................................................................. 6
MAIN TECHNICAL DATA .......................................................................................... 7
SUPPLIED LITERATURE AND ACCESSORIES ...................................................... 8
PRODUCTS THAT CAN BE SLICED ........................................................................ 8
PRODUCTS THAT MUST NOT BE SLICED: ............................................................ 8
MAIN COMPONENTS I.............................................................................................. 9
MACHINE COMMISSIONING AND FUNCTION TESTS............................................. 11
INSTALLING THE MACHINE................................................................................... 11
ELECTRICAL CONNECTION .................................................................................. 11
COMMANDS ............................................................................................................ 12
USING THE MACHINE ................................................................................................ 13
LOADING THE PRODUCT ON THE TRAY AND SLICING..................................... 13
CLEANING THE SLICER............................................................................................. 14
GENERAL ................................................................................................................ 14
DISASSEMBLING THE MACHINE FOR CLEANING .............................................. 14
REASSEMBLING THE MACHINE ........................................................................... 15
MAINTENANCE ........................................................................................................... 15
GENERAL ................................................................................................................ 15
BLADE SHARPENING ............................................................................................. 15
SHARPENING.......................................................................................................... 16
LUBRICATION ......................................................................................................... 18
ADJUSTING THE MOTOR BELT TENSION ........................................................... 19
TROUBLESHOOTING AND REMEDIES .................................................................... 20
DISMANTLING THE SLICER ...................................................................................... 21
ELECTRICAL DIAGRAM SIG. 97 (versions 195-220-250 E) .................................. 22
ELECTRICAL DIAGRAM 97 FA (for versions 250 I-300 E–275 I)........................... 23
ELECTRICAL DIAGRAM 97 FA (for versions 300 I – 350 I) ................................... 24
THREE-PHASE ELECTRICAL DIAGRAM 1893 (all versions) ................................ 25
1
FOREWORD
SCOPE OF THIS MANUAL
This manual contains all the necessary information to install, use and service the gravity
slicers for food (please see models in paragraph "Technical Description"). The scope of
this document, hereinafter the "manual", is to permit users, and especially end users, to
take all the cautions and provisions possible for using this machine safely and for a long
time.
GENERAL INFORMATION
LIMITS OF USE – SAFETY NORMS
These machine were designed and built to slice foodstuff in compliance to the
norms of the 89/392 - 89/336 Directive and following amendments CE 91/368 93/44 - 93/68 CE, EN 1974 directive 89/109.
GENERAL SAFETY REGULATIONS
The slicers must be used only by suitably trained personnel. Furthermore, this personnel
must have read this manual carefully.
In particular, please comply to the following instructions
Install the machine according to the instructions contained in the "Installation" section.
Do not remove the transparent protections, do not modify nor exclude the mechanical
and electrical safety devices.
Do no use the machine with improvised connections, or provisional or non insulated
cables.
Check the power cable and gland plate on the machine body regularly and when
necessary have them replaced by qualified personnel.
In case of anomalies, defective operation, incorrect movement, unusual noise, etc
stop the machine immediately.
Before cleaning or servicing, disconnect the machine from the mains.
Always use scratch-proof and non-slip gloves during cleaning or maintenance.
Lay or remove the goods to be sliced on the sliding plate only when the latter is
completely pushed back and the thickness control knob positioned to 0.
To move the carriage tray when slicing, use the handle or the product grip handle.
For extraordinary maintenance (to replace the sharpener wheels, the blade, or others)
please contact the manufacturer or qualified and duly authorized personnel.
Avoid running the slicers with no product on it
The slicers are equipped with a ventilated motor, except for the F 195 model for which
operating time must not exceed 15 minutes to avoid motor overheating. After a period
of rest, operation can be resumed.
WARRANTY: 1 YEAR except for the electrical parts
2
MANUFACTURER'S WARRANTY AND LIABILITY
The manufacturer's warranty covering the good functioning of the machines and
their compliance to the service for which they have been designed depends on
the correct application of the instructions contained in this manual.
The Manufacturer assumes no liability either direct or indirect deriving
from:
Failure to comply with the instructions contained in this manual;
Use of the machine by personnel who has not read or fully understood the
content of this manual;
Use not complying to the specific norms currently applicable in the country of
installation;
Unauthorized modifications and/or repairs;
Use of non original accessories or spare parts.
Exceptional events.
PLATES – CONFORMITY MARKS
The machines have been constructed in compliance with the European Directive
89/392 and subsequent amendments. All the parts making the machine meet the
terms of the Directive and the CE marks have been applied to substantiate this
compliance.
The plate carrying the Manufacturer's data, the machine data and the CE mark
are applied onto the machine base under the blade guard tie-rod knob.
This plate must never be removed and must always be legible.
In case of wear or damage, the user must replace it.
ENVIRONMENTAL CONDITIONS OF USE
- Temperature............................................................. from -5 °C to + 40 °C
- Relative humidity ........................................................................ max 95%
3
PACKING
OPENING THE BOX
On reception check packaging integrity, otherwise inform the forwarding agent or
the area agent immediately.
To unpack the machine, proceed as follows:
Open the box and remove your copy of the manual of use and maintenance, then
proceed according to the instructions found on that manual;
Lift the machine still wrapped in a transparent polyethylene sheet and extract it from
the box;
Now check the box content and make sure it corresponds to what shown on the
external label.
WARNING:
The packaging components (cardboard, polyethylene, and others)
are classified as normal solid urban waste and can therefore be
disposed of without difficulty. In any case, for suitable recycling,
we suggest disposing of the products separately
(differentiated waste)according to the current norms.
DO NOT DISCARD ANY PACKAGING MATERIALS IN THE
ENVIRONMENT!
4
TECHNICAL DESCRIPTION AND
PROPOSED CONDITIONS OF USE
GENERAL DESCRIPTION
The machine is essentially made of a base supporting a circular blade mounted in tilted
position. This blade is driven by an electrical motor to slice foodstuffs. The machine is
equipped with a carriage holding a product tray and sliding on tracks mounted under the
base top, parallel to the blade.
Slice thickness is adjusted by means of a gauge plate mounted in front of the blade. This
plate, against which rests the product to be sliced is moved transversally with respect to
the blade by a value corresponding to the desired slice thickness. The product is fed to
the machine (towards the gauge plate) by gravity.
All the machine components are made of polished and anodically oxidized aluminium
alloy, of stainless steel and food grade plastic material.
The blade is driven by an electrical motor, transmission is by means of a longitudinally
grooved belt.
The machine is started and stopped by a control button provided with auxiliary circuit
preventing accidental restarts after an outage.
Some of the machine models have a user-friendly and safe built-in blade sharpener.
MECHANICAL AND ELECTRICAL SAFETY DEVICES
The following mechanical safety devices were installed:
A series of aluminium and transparent plastic guards on the product carriage.
The following electrical safety devices were installed:
Start/stop button system requiring a voluntary restart of the machine in the
case of an outage or interruption of the power supply.
Safety micro-switch preventing the motor from starting when the blade guard
is removed (not available on the F 195, S 220 and F 250ES machines).
WARNING: RESIDUAL RISKS
Notwithstanding all the possible cautions taken during the design and the
construction of the machine, residual risks (cutting) still exist during use or during
cleaning or maintenance. Therefore be careful and PAY THE UTMOST ATTENTION
to what you are doing.
DO NOT use the machine if you are not in perfect psychological and physical
conditions. DO NOT ALLOW anyone near the machine when it is in use. ALWAYS
wear gloves that can resist cuts or tears when cleaning, lubricating or sharpening
the blade.
Slice only the products mentioned as sliceable. NEVER try to slice products that
have been mentioned as non sliceable.
5
DIMENSIONS
F 195
S 220
F250 ES
S 220 AF
F 250 E
F 250 I
F 250 TSV
F 275 E
F 275 I
F 300 E
F 300 CL
F 300 I
F 330 I
F 350 I
6
MAIN TECHNICAL DATA
GRAVITY SLICERS
0,20
S220
220AF
0,25
F250E
F250I
F250ES
0,30
0,35
195
220
250
300
300
300
0/15
0/15
0/16
Version
F195
Motor HP
Blade Ø
mm
Rpm
Min. slice
thickness
mm
cut: L x H
mm
A mm
B mm
C mm
D mm
E mm
Peso: Kg
F275E F275I
F300E F300I
F300CL F330I
F350I
0,30
0,35
0,35
0,50
0,35
0,50
0,50
250
275
275
300
300
300
330
350
300
300
300
300
280
300
280
260
0/16
0/16
0/16
0/16
0/16
0/16
0/16
0/16
160x140 210x160 240x190260x190240x190260x190260x220285x230310x220285x250325x260
255
345
360
520
315
10
280
290
415
440
405
425
580
620
340
370
13,5
15,5
Separate
Sharpenerseparate
Built-in
Built-in
340
465
480
630
440
21
290
440
440
620
390
16,5
340
465
495
640
440
22
340
465
495
650
440
23
410
530
540
770
465
30
350
570
560
870
500
27,5
410
530
550
770
465
32
415
580
585
890
480
36
Built-in Built-in Built-in Built-in Built-in Built-in Built-in Built-in
VERTICAL SLICERS
Version
Motor HP
Blade Ø mm
Rpm
Slice thickness mm
Cut: L x H
mm
A mm
B mm
C mm
D mm
E mm
Weight: Kg
Sharpener
F250TSV
F250TCV
0,35
250
300
0/16
F300TSV
F300TCV
0,50
300
280
0/16
F330TSV E
F330TCV E
0,50
330
260
0/16
F350TSV
F350TCV
0,50
350
260
0/16
F370TSV
F370TCV
0,50
370
260
0/16
260x190
260x200
250x210
300x265
290x275
360
460
520
530
500
24
Built-in
420
530
550
710
610
40
Built-in.
420
530
550
710
610
41
Built-in.
530
650
650
820
640
45
Built-in.
530
650
650
820
640
46
Built-in.
Intermittent service (5 min. pause every 15-20 min. of work) only for F 195. All the other
machines have a ventilated motor.
Supply voltage: Please see data plate on the machine base
7
SUPPLIED LITERATURE AND ACCESSORIES
If not otherwise defined at the moment of order, the machines are supplied together with
the following:
EU conformity declaration
Instructions manual for installation, use and maintenance.
PRODUCTS THAT CAN BE SLICED
All types of cold cuts (raw, cooked, smoked);
Meat without bone (raw or cooked, at a temperature not less than + 3 °C;
Cheese cuts (obviously types that can be sliced such as gruyere, fontina, etc.).
PRODUCTS THAT MUST NOT BE SLICED:
1.
2.
3.
4.
Frozen or deep-frozen food;
Food containing bones (meat or fish);
Vegetables (all types);
Any other non-food product.
8
MAIN COMPONENTS I
F 195
S 220
F250 ES
1.
2.
3.
4.
5.
6.
7.
8.
9.
10.
STARTUP BUTTON (GREEN)
STOP BUTTON (RED)
N.A.
SLICE THICKNESS CONTROL KNOB
ADJUSTABLE FOOT
CARRIAGE TRAY SUPPORT
BASE
PRODUCT TRAY
BLADE PLATE
PRODUCT GRIP
11. BLADE
12. PRODUCT GRIP HANDLE
13. MANUFACTURER
IDENTIFICATION
PLATE, MACHINE DATA AND UE MARKS
14. PRODUCT GRIP HAND PROTECTION
15. PRODUCT TRAY HAND PROTECTION
16. PRODUCT TRAY HANDLE
17. BLADE PLATE TIE-ROD
18. SUPPLY CORD
19. GAUGE PLATE
20. SHARPENER
9
MAIN COMPONENTS
S 220 AF
F 250 E
F 250 I
F 250 TSV
F 275 E
F 275 I
F 300 E
F 300 CL
F300 I
F 330 I
F 350 I
1.
2.
3.
4.
5.
STARTUP BUTTON (WHITE OR GREEN)
STOP BUTTON (RED OR BLACK)
N.A.
SLICE THICKNESS CONTROL KNOB
ADJUSTABLE FOOT
6. CARRIAGE TRAY SUPPORT
7. BASE
8. PRODUCT TRAY
9. BLADE PLATE
10. PRODUCT GRIP
11. BLADE
12. PRODUCT GRIP HANDLE
13. MANUFACTURER
IDENTIFICATION
PLATE, MACHINE DATA AND EU MARKS
14. PRODUCT GRIP HAND PROTECTION
15. PRODUCT TRAY HAND PROTECTION
16. PRODUCT TRAY HANDLE
17. BLADE PLATE TIE-ROD
18. SUPPLY CORD
19. GAUGE PLATE
20. SHARPENER
10
MACHINE COMMISSIONING AND FUNCTION TESTS
INSTALLING THE MACHINE
Position the machine on a well leveled, smooth and dry top suitably dimensioned
to withstand the machine weight.
ELECTRICAL CONNECTION
Install the machine near a EU compliant outlet derived from a system meeting the
current norms.
The user is responsible for ascertaining that the electrical system is suitably
dimensioned and functions correctly (supply line, outlet, distribution panel,
differential protecting breaker, grounding).
Before carrying out the connection ascertain that the mains characteristics
correspondent to those indicated on the machine plate.
11
COMMANDS
START AND STOP BUTTONS
Press the white or green button (1) to start running the blade.
The light turns on to indicate that the machine works correctly.
Press the red or black button to stop the blade.
Slice thickness can be adjusted by turning the graduated knob (4)
counterclockwise.
Thickness adjustment range: see paragraph "Technical description and
conditions of use”.
FUNCTIONING TEST AND BLADE ROTATION DIRECTION
Start the machine and check whether the light is on; make sure that the blade
rotates in the direction indicated by the arrow (counterclockwise if you look at the
machine from the blade plate side).
For machines with three-phase supply: if the blade rotates in the other
direction, stop the machine immediately and call qualified personnel to invert the
plug supply wires.
Ascertain that the carriage and the product grip slide correctly;
Ascertain that the gauge plate works and adjust thickness to desired value.
12
USING THE MACHINE
LOADING THE PRODUCT ON THE TRAY AND SLICING
Ascertain that the thickness control knob is correctly positioned to '0'.
Draw back the carriage completely (towards the operator) to loading position.
Lift the product grip by pulling it away by 10 cm from the blade and put it in rest
position.
Lay the product to be sliced against the wall on the operator side.
Secure by means of the product grip by exerting a slight pressure.
Adjust the thickness gauge. Start the blade by pressing on the green button.
Grip the handle affixed onto the plate and start the forward and backward cutting
movement. The product travels towards the gauge plate by gravity.
When the product weight or its dimensions do not provide a satisfactory cut by effect
of the gravity, use the product grip handle.
When finished, return the thickness control knob to '0' and draw the carriage back.
Stop the blade by pressing the red button.
13
CLEANING THE SLICER
GENERAL
The machine must always be accurately cleaned at least once a day, and more often if
necessary.
Always use protective gloves.
DISASSEMBLING THE MACHINE FOR CLEANING
Disconnect the plug from the mains;
Turn the gauge plate know to '0';
Remove the various components as described in the following paragraphs:
Unscrew (counterclockwise) the blade guard rod;
If the blade guard is blocked, press on the rod knob to move it a little;
Extract the rod and remove the blade guard using for this operation only the
side knobs.
Loosen and remove the two fixing screws with knurled head;
Remove the slice guard.
To clean the machine body and the blade use only a cloth damped with
water and biodegradable lathery detergent having 7-8 pH and at a
temperature not below + 30°C.
Do not clean the machine by using water or vapor spruìys or similar
systems.
WARNING:
Use scratch-proof and non-slip gloves to carry out the
following operations. Proceed carefully and pay attention to
what you are doing.
Danger of cutting!
14
REASSEMBLING THE MACHINE
Proceed as indicated for the previous operations but in reverse order.
MAINTENANCE
GENERAL
The operator is allowed to perform the following maintenance operations:
Blade sharpening: regularly (intervals and duration obviously depend on the
use of the machine, time of use and type of product sliced);
Lubrication of carriage sliding guides: once a week.
Lubrication of product grip sliding bar: once a week.
Adjustment of motor belt tension: as required.
Checking the power supply cord conditions and of the gland plate: from
time to time.
.
WARNING
Maintenance must always be carried out when the machine is
disconnected from the mains and if no other position is
specifically required, with the thickness control knob on '0'.
not specifically
The following maintenance operations are to be entrusted only to personnel
authorized by the manufacturer:
Replacing the blade;
Replacing the sharpener stones;
Replacing the motor transmission belt;
Replacing electrical system components under the machine base;
Repairing structural parts, repairing the components under the base.
BLADE SHARPENING
Before proceeding, clean the machine accurately as explained in the previous
paragraphs:
WARNING
Sharpening can be done only up to 12 mm of the blade diameter
value.
Beyond this value, the BLADE MUST BE REPLACED ONLY by
personnel AUTHORIZED BY THE MANUFACTURER.
15
SHARPENING
Models with separate sharpener
1. Clean the blade accurately using denaturized alcohol to degrease it.
2. Turn the graduated knob (1) towards the left to open completely.
3. Remove the sharpener from its box, unscrew the knurled knob and insert the
threaded metallic pin inside the hole (2) provided for on the product tray so that the
two emery wheels are turned towards the blade. Snap into place by pressing on the
lower wheel button (3). The lower wheel must remain inserted for a length equal to
half of its diameter between the blade on which it rests and the adjustment plate.
4. Insert the plug into the outlet and operate the switch while using the handle to block
the product tray then the sharpener in the above position (4);
5. Allow the blade to rotate for about 30 to 40 seconds then use the switch to stop it.
Brush a pencil lightly on the external side of the blade to check for a slight spud;
restart the blade by maintaining the wheel button (5) pressed for 10 seconds.
16
SHARPENING
Versions with built-in sharpener
To sharpen the blade periodically as soon as the cutting capacity decreases. Please
proceed as per the following instructions:
1. After disconnecting form the mains, clean the blade accurately using denaturized
alcohol to degrease it.
2. Loosen the knob (1) and turn the sharpener (2) by 180° and insert the whells on the
slicer blade. Relock the knob.
3. Operate the switch (3) and press the button (4);
4. Allow the blade to rotate for about 30 to 40 seconds then use the switch (3) to stop it.
Brush a pencil lightly on the external side of the blade to check for a slight spud;
We advise performing this operation with the utmost care as the blade is extremely
sharp.
5. If some spud is found, operate the switch (3) again for 3 to 4 seconds by pressing the
buttons 4 and 5 at the same time.
DO NOT PROLONG THIS OPERATION BEYOND THE FEW SECONDS MENTIONED
OTHERWISE THE BLADE EDGE WILL WARP.
6. After completing sharpening, we advise cleaning the wheels using a small brush and
alcohol.
7. Now return the sharpener to its original position.
17
LUBRICATION
Carriage sliding guides product grip (once a week)
Use only the oil provided, otherwise use white Vaseline oil.
DO NOT USE VEGETAL OILS.
Spread a small quantity of oil on the bar and move the assembly 3 or 4
times.
Clean as required to remove excess of oil.
18
ADJUSTING THE MOTOR BELT TENSION
After a given period of service an unusual noise may occur because of the belt
bedding. In this case, tighten the belt-stretcher on the side of the motor under the
machine base.
19
TROUBLESHOOTING AND REMEDIES
The table below indicates the most common problems that may arise during
slicing and the necessary remedies.
PROBLEM
POSSIBLE CAUSE
REMEDY
The machine does not start
when the green button is
pressed
No power supply
The blade guard is not
correctly positioned.
Defective electrical control
circuit.
Ascertain that the plug is is
correctly inserted.
Check
Call technical assistance
The machine does not
start, and there is
continuous noise like a
buzz (only in the case of
machines equipped with
three-phase motors.
The motor is running on
single-phase mode
Press the red button
immediately and have the
power supply cord and the
circuits upstream verified
by qualified personnel.
When the green button is
pressed, the machine stats,
but the white functioning
light is not on.
Defective indicator
Do not use the machine
when the pilot lamp is not
on. Call technical
assistance
The machine starts, but
there are vibrations. The
motor is very hot and there
is a bad smell.
Defective motor or
transmission.
Do no use the machine.
Call technical assistance.
Under strain, the machine
slows down or comes to a
stop.
Defective transmission
Call technical assistance
Excessive resistance to
product slicing.
The blade is blunt
Sharpen the blade
The slices are ragged
and/or shaped irregularly
The blade is blunt
The blade is excessively
worn out
Sharpen the blade
Call technical assistance
Unsatisfactory blade
sharpening
Worn wheels
Replace the wheels. Call
technical assistance
The product trayu does not
slide
Guides are insufficiently
lubricated
Lubricate
When the red button is
pressed, the machine does
not stop
Defective electrical control
circuit
Stop the machine, unplug
from mains and call
technical assistance
20
DISMANTLING THE SLICER
These machines are made of the following elements:
Aluminium frame;
Stainless steel fittings and others;
Electrical parts and cords;
Electrical motor;
Plastic materials, etc.
Whether dismantling is entrusted to third parties or done in-house (in that last
case you will have to separate the various materials) please note that disposal of
the materials can only be carried out by duly authorized businesses.
In any case, please comply to the current norms of your country.
WARNING
In any case, to remove the blade and dispose of it, you must
contact the manufacturer or personnel duly authorized by the
manufacturer.
NEVER DISPOSE OF WASTE IN AREAS WHERE ACCESS IS
NOT DELIMITED BY BARRIERS AND FORBIDDEN BY
WARNING SIGNS AS THIS WASTE REPRESENTS A SERIOUS
DANGER, ESPECIALLY FOR CHILDREN AND ANIMALS. ANY
RESPONSIBILITY ARISING OUT OF INCORRECT DISPOSAL
FALLS ON THE OWNER.
21
ELECTRICAL DIAGRAM SIG. 97 (versions 195-220-250 E)
22
ELECTRICAL DIAGRAM 97 FA (for versions 250 I-300 E–275 I)
23
ELECTRICAL DIAGRAM 97 FA (for versions 300 I – 350 I)
24
THREE-PHASE ELECTRICAL DIAGRAM 1893 (all versions)
25