Download 7 Adjustment facilities
Transcript
7
Adjustment facilities
7.1
Moving the seat position forwards or backwards
The disengaging lever for adjusting the seat is
located front right below the seat
•
Pull the lever (1) to disengage the seat.
•
Slide the seat forwards or backwards into the
required position.
•
Let go the lever again to lock the seat into its
required position.
39
7.2
Adjusting the armrest width
The hand wheels for releasing the armrests are located under the seat (1).
40
•
Turn the hand wheels to loosen the fixing for
the armrest.
•
Adjust the armrests to the required width.
•
Retighten the handwheels
7.3
Adjusting the armrest height
Requirements:
• Phillips screwdriver
•
Use the screwdriver to loosen and remove the
armrest fixing screw.
•
Adjust the armrests to the required height.
•
Reposition the screw and tighten again.
41
7.4
Adjusting backrest angle
The lever (1) for adjusting the backrest angle is
located on the right of the seat.
•
42
Pull the lever and adjust the backrest to the
required angle by leaning forwards or
backwards.
7.5
Adjusting the lordosis supports (CometHD only)
The lordosis support is the outward swell of the backrest which supports the lumbar region of the
spine. You can regulate the strength of the outward swell using an air pump to fit it individually.
Swelling the lordosis support more
•
Ensure that the air vent screw (1) is closed fully
clockwise.
•
Pump air into the lordosis support using the rubber
ball (2).
The lordosis support will swell outwards more.
Swelling the lordosis support less
•
Undo the air vent screw (1) anticlockwise and allow air
to escape out of the lordosis support.
The lordosis support will swell outwards less.
43
7.6
Disengaging the seat to rotate it or remove it
The seat can be turned to one side to make
getting in and out of the scooter easier. The seat
is also easier to remove from this position.
The lever for disengaging the seat is located
under the seat (1) on the left.
44
•
Pull the lever forwards to disengage the seat.
•
Turn the seat to the side.
•
If you want to remove the seat, hold it firmly
by the backrest and front edge and remove it
upwards.
7.7
Adjusting the seat height manually
Requirements:
• 2x open-ended spanners 17 mm
•
Remove the seat
•
Remove the battery and motor compartment cover.
•
Remove the seat pillar locking bolt using both openended spanners.
•
Adjust the seat height.
•
Reinsert the bolt and tighten.
45
7.8
Actuate the seat lifter (option)
The rocker switch (1) for adjusting the seat lifter is located on the
steering column.
•
46
Press the switch up or down. The seat lifter will raise or
lower.
7.9
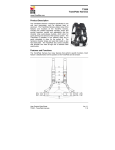
Postural belts
A postural belt is an option which can either be fixed to the wheelchair ex-works or can be
retrofitted by your specialist dealer. If your wheelchair is fitted with a postural belt, your specialist
dealer will have informed you about fitting and usage.
The postural belt is used to help the wheelchair user keep an optimum sitting position. Correct use
of the belt assists the user in sitting securely, comfortably and well-positioned in the wheelchair,
especially for such users who do not have such a good sense of balance while sitting.
NOTE:
We recommend using the postural belt whenever the wheelchair is used. The belt should be tight
enough to ensure that you are sitting comfortably and that your body is in the correct sitting
position.
7.9.1
Types of postural belts
Your wheelchair can be fitted with the following postural belt types ex-works. If your wheelchair has
been fitted with a different belt to those listed below, please ensure that you have received the
manufacturer's documentation with regard to correct fitting and use.
Belt with metal buckle adjustable on one side
The belt can only be adjusted on one side, which can
result in the buckle not being in the middle of the waist
(across pelvic area) after adjustment has taken place.
47
7.9.2
48
Adjusting the postural belt correctly
•
Ensure that you are sitting correctly, which means that you are sitting right at the back of the
seat, your pelvis is positioned erect and as symmetrically as possible, not to the front, to the
side or at one edge of the seat.
•
Position the postural belt so that your hipbones can be easily felt above the belt.
•
Adjust the belt length using one of the adjustment aids described above. The belt should be
adjusted so that you can fit a flat hand between the belt and your body.
•
The buckle should be positioned as centrally as possible. In doing so, please carry out
adjustments on both sides as much as possible.
•
Please check your belt every week to ensure that it is still in good working condition; to ensure
it has no damage or wear, and that it is fixed properly to the wheelchair. If the belt is only
fastened with a bolted connection, ensure that the connection has not loosened or undone.
You can find more information about maintenance work on belts in the service manual, which is
available from Invacare®.
7.9.3
Fixing the containment belt to the scooter
Requirements:
• jaw spanner 12 mm
• jaw spanner 13 mm
The fixing points (1) for attaching the belt are located under the seat (the figure shows only the left
hand side).
49
50
•
Take hold of the belt mounting and hold it in front
of the hole in the fixing.
•
Position the bolt (1), screw the nut on from the
other side and tighten with a jaw spanner.
•
Repeat the same procedure on the other side of
the seat. Check to ensure that the nut is tightened
properly on the bolt.
7.10
Adjusting the suspension
The Comet suspension can be individually adjusted. These adjustments should only be carried out
by trained specialists. Please contact your authorised Invacare specialist dealer.
7.10.1 Comet and CometAlpine
Adjusting the suspension harder
•
Rotate the adjustable spring plate (1) clockwise when
viewed from below in order to adjust the suspension
harder.
Adjusting the suspension softer
•
Rotate the adjustable spring plate (1) anticlockwise
when viewed from below in order to adjust the
suspension softer.
7.10.2 CometHD
In the case of the CometHD, the suspension can be quickly and simply adjusted using a lever on the
springs.
The position of the springs (1) is marked on the vehicle with a yellow sticker. The stickers also
show in which direction the lever needs to be turned to adjust the suspension harder or softer.
51


