1
INSTRUCTIONS
®
REV. 04-12-02
-J02583
Kit Number 56679-02
100TH ANNIVERSARY HANDLEBAR GRIPS
General
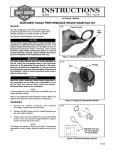
i04644
This kit fits all 1996 and later models.
1
NOTE
See the Service Parts Illustration on the last page of these
instructions for kit contents.
2
Remove and Install the Left Grip
1.
See Figure 1. Using a T27 TORX drive head, remove
the two screws with flat washers securing the handebar
clamp (3) to the clutch lever bracket. Remove the clamp
and position the clutch hand lever assembly away from
the handlebar
2.
Using a T25 TORX drive head, loosen but do not
remove the upper and lower switch housing screws (1).
2.
Remove the end cap from the existing left handlebar
grip if so equipped. Remove the grip by carefully cutting
it away from the handlebar using a sharp blade or knife.
1WARNING
Do not lubricate the left handlebar grip in any way
before installation. This could allow the grip to come off
while riding, which could result in loss of control and
death or serious injury.
NOTE
Make sure that the handlebar surface and the inside of the
grip are smooth, dry and thoroughly cleaned of all dirt or
adhesive residue.
3
5
4
2
1
2
3
Switch hsg. screws
Grooves
Handlebar clamp
1
4
5
Left handlebar grip
Larger flange
Figure 1. Left Handlebar Switch Housing
Remove and Install the Right Grip
3.
Position the new left grip (4) so the larger flange (5) is at
the bottom. Push the grip fully onto the handlebar.
NOTE
Right handlebar switch removal requires a Service Manual
for your model and year of motorcycle. A Service Manual
can be purchased from your Harley-Davidson Dealer.
4.
Fit the grooves (2) on the outboard side of the upper
and lower switch housing over the flanges on the end of
the grip, then loosely fasten the two screws.
1.
5.
Position the clutch hand lever assembly inboard of the
switch housing assembly, engaging the tab on the lower
switch housing in the groove at the bottom of the clutch
lever bracket.
Refer to the RIGHT HANDLEBAR SWITCH section of
the Service Manual for removal of the switch housing
assembly. This is necessary to access the throttle
cables.
2.
Align the holes in the handlebar clamp with those in the
clutch lever bracket, and loosely fasten the two screws
with flat washers. Adjust the switch housing and clutch
hand control position for rider comfort.
Refer to the THROTTLE CONTROL section of the
Service Manual to disconnect the throttle cables and
remove the existing right grip/throttle sleeve assembly.
After removal, make sure that the handlebar end is
clean and smooth.
3.
Using a T27 TORX drive head, tighten first the upper,
then the lower handlebar clamp screws to 60-80 in-lbs
(6,8-9,0 Nm).
Follow instructions in the Service Manual to install the
new right grip/throttle sleeve to the handlebar and connect the throttle cables.
4.
Verify that the right grip/throttle sleeve rotates and
returns freely and does not bind on the handlebar or
switch housing.
6.
7.
8.
Using a T25 TORX drive head, tighten first the lower,
then the upper switch housing screws to 35-45 in-lbs
(4,0-5,1 Nm).
1 of 2
®
Service Parts
Date 04/02
Part No. 56679-02
100th Anniv. Handlebar Grips
i04645
3
2
1
3
Item
1
2
3
-J02583
Description
Right grip/throttle sleeve (w/ end cap)
Left grip (w/ end cap)
Cap, end
Qty.
1
1
2
Part No.
56682-02
56681-02
56673-02
2 of 2