1
Shades Technics
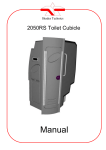
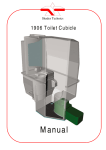
BOVA 5529CS Toilet Cubicle
Manual
Catalogue No. 746198
CONTENTS
CUBICLE OPERATING INSTRUCTIONS
3
CLEANING & HYGENE
5
CUBICLE MAINTENANCE
6-8
WARRANTY CLAIMS
9
SPARE PARTS CATALOGUE
•
•
•
•
•
•
•
•
•
•
•
•
•
•
Door
Sink
Vanity
Fridge
Drinks Boiler
Electrical Panel
Toilet Bowl
Worktop
Soil Tank
Handwash Tank
Cubicle Base
Cubicle Top
External
Legends
10
12
14
16
18
20
22
24
26
28
30
32
34
36
WIRING DIAGRAMS
37
PARTS REPLACEMENT INSTRUCTIONS
39
Cubicle Operating Instructions
To Switch The Cubicle On:
Engage the WC Master switch on the dashboard. The cubicle interior lamp will turn on
for 30 seconds and then switch off. The cubicle is now ready to use. (It is
recommended that the vehicle engine is running)
Cubicle Interior Light:
On entry, the interior lamp will come on automatically and illuminate the “Occupied”
lamp. The interior lamp is controlled by a movement sensor which will switch off the
light automatically shortly after the cubicle is vacated.
To Flush The Toilet:
Push the flush button
once to flush the toilet with a set quantity of water. Should a
further flush be required, wait for the flush cycle to complete then press the button
again. NOTE:
(When the holding tank is full, the dashboard LED
will illuminate and the
“Occupied” lamp will signal. The toilet is now out of use until the holding tank is emptied.
(When the clean water tank is empty the dashboard LED
will illuminate and the
“Occupied” lamp will signal. The toilet is now out of use until the water tank is re-filled.)
To Wash Your Hands:
Depress the handwash button
once to dispense a set amount of water.
(When the handwash tank is empty the dashboard LED
driver..)
will illuminate to alert the
Cubicle Extractor Fan:
The ventilator fan runs continuously when the master switch is ON but has the option to
only work when the light is activated.
Water Tank Filling & Emptying
Tanks are filled via the hose connectors located in the side locker. The holding tank is
emptied pneumatically by pushing a button in the locker. The park brake will need to be
engaged for this to work.
Maintenance and Spares Manual
3
Kitchen Operating Instructions
To Switch The Kitchen On:
Engage the Kitchen Master switch on the dashboard. The kitchen lamp will turn on, the
boiler LED panel will light and fridge fan will start. (It is recommended that the vehicle
engine is running)
Kitchen Hot Drinks System:
The water heater will take 20-30 minutes to reach temperature and the hot faucet
should start to drip. This is due to the expansion inside the boiler as it gets hot.
To dispense the hot water, place a cup inside the sink, push and hold the RED button
until finished.
Coolbox - Fridge:
The coolbox will take approximately 2 hours to get to 5 Deg C from warm but can go as
low as 3 Deg C during operation. This time depends on the contents of the fridge and
the times are based on it being empty. For best performance it is advisable to introduce
pre-chilled items into the fridge.
The unit is equiped with an ‘ECO’ mode which allows the unit to run on low power when
the vehicle is switched off and this can maintain a steady 5 Deg C.
The battery guard will detect low voltage in ‘ECO’ mode and cut power to the unit saving
the batteries.
Maintenance and Spares Manual
4
Cleaning & Hygiene
Cubicle Cleaning
The cubicle is manufactured from Glass Reinforced Plastic (GRP) with high gloss
interior and lightly textured exterior surfaces. This surface finish is delicate and must
only be washed down using a mild detergent. The use of a caustic or abrasive material
is not recommended, as this will affect the appearance.
Toilet Bowl Cleaning
To protect the finish of the GRP toilet bowl do not use abrasives of any kind. To clean
the bowl, use a mild anti-bacterial detergent and suitable brush.
Litter Bin
The cubicle features 45 litre plastic bin located in the locker. The bin is filled via two
openings, inside the toilet and outside in the aisle. The use of a bin liner is
recommended.
Soap Dispenser
To fill the dispenser, lift the lid of the dispenser and fill with liquid soap.
Toilet Roll
It is recommended that a high biodegradable paper is used at all times.
Cat No. = 800103 Pack of 36.
Domestric grade toilet paper is not recommended as this can block the system.
The toilet roll is located inside the lower vanity door. Unlock and open the door, slide the
roll onto the spindle.
Maintenance and Spares Manual
5
Maintenance
Daily Routine
•
Prior to the vehicle entering service the holding tank should be charged with an
additive to sanitise the effluent.
•
The recommended product is Shades Super Sani ECO, formulated from natural
essential oils, this formaldehyde-free formula is contained within a water soluble
membrane. A single 16 gram sachet contains the recommended dosage for 110
litre capacity holding tank and will function for a maximum of three days.
To apply:
1.
Ensure the holding tank is empty.
2.
Check the tank evacuation valve is closed
3.
Check the WC clean water tank is full.
4.
Switch on power to the cubicle (see page 3)
5. Press the flush button to open the toilet valve and drop the
complete sachet into the bowl.
Cat No. 800025 (Box 100) or Cat No. 800026 (Carton 1000)
Caution
Do not open the sachet .
•
It is recommended that the WC supply tank is drained and the holding tank is
emptied at the end of every day.
•
The hand wash tank should be emptied and re-filled dailey. To help maintain a
clean tank and freshwater the use of a sanitiser is recommended. Shades can
supply a suitable product that disinfects the water, that is safe to drink and nonirritable to the skin and eyes. Cat No. 800060
Weekly Routine
•
Check extractor fan function.
•
Inspect the security of the faucet, door hinges and toilet seat. Check the
operation of the cubicle door and lock function.
•
Open vanity door, check electrical and plumbing connections for security and
leaks.
•
Check water flow to the hand basin is smooth and constant.
Maintenance and Spares Manual
6
Maintenance
Quartely Routine
•
Flush out holding tank with clean water. (the holding tank must be empty and the
vehicle positioned so that the holding tank evacuation valve is over a sewage
drainage point)
To flush out:
1. Switch on the cubicle.
2. Connect a hosepipe to a mains water supply.
3. Push a hose pipe through the flap in the bottom of the
bowl and into the tank.
4. Turn on the water to the hose pipe and fill the holding
tank, being careful not to overfill. .
5. Switch off the water to the hose and open the evacuation
valve to empty the tank.
6. Press the flush button to open the valve and remove the
hosepipe.
•
Lubricate holding tank evacuation valve. (to be carried out immediately after
flushing through the holding tank).
Undo the four fixing bolts holding the soil valve assembly together and remove the
main body section. Lubricate the slide paddle using lithium grease or similar so
the open/close operation is smooth. Replace the valve body and bolt together.
Do not over tighten as this will restrict the operation of the valve.
•
Disinfect the hand wash tanks and flush through with clean water.
Maintenance and Spares Manual
7
Winterization
If the vehicle is to be parked in zero or sub-zero temperatures, it is imperative that all
water containers are completely drain beforehand.
Note
No warranty claims will be accepted on any winter damaged parts.
Jump Starting
When jump starting the vehicle, please ensure that the dashboard master
Switche, WC, is off!
Fault Reporting Procedure
1.
In the unlikely event of a fault occurring an emergency parts kit has been
supplied along with the enclosed comprehensive fault analysis flow chart
Using these charts, determine the cause of the fault and replace the faulty item
from the kit if possible.
To order a replacement kit or non-kit part contact the dealer as specified on the
contents page (Page 2) of this manual, quoting the cubicle serial number.
In order for replacement goods to dispatched a simple warranty procedure must
be followed.
2.
3.
4.
Notes:
•
Tampering, unauthorised involvement or preventable damage will result in
a charge being levied
Maintenance and Spares Manual
8
Warranty Claim Procedure
Shades Technics offer a comprehensive warranty cover for all products, valid
for 24 months from the vehicle’s date in service.
Contact the dealer or
supplier from where the
vehicle was purchased.
The dealer/supplier will then contact
Shades Technics who will fax a
warranty claim form to the customer.
Complete the warranty claim
form, ensuring all details are
filled in and fax back to
Shades Technics on
+44 (0)1992 501669
Shades Technics will dispatch any parts
required or organise rectification via one
of the service points listed at the back of
this parts & service manual
Please return any fault parts
which have been replaced
under warranty within 14
days or a charge may be
levied
Maintenance and Spares Manual
9
Cubicle Door Spares
Maintenance and Spares Manual
10
Cubicle Door Spares
2
Upper Pivot Toilet Door Hinges
Cat No: 661405
Lower Pivot Toilet Door Hinges
Cat No: 661406
4
5
6
Maintenance and Spares Manual
Coat Hook
Cat No. 661030
Door Lock for LH Cubicle
Cat No: 661205
Door Privacy Angle
Cat No: 661408
11
Cubicle Sink Spares
Maintenance and Spares Manual
12
Cubicle Sink Spares
1
Hand wash Button
Cat No: 714007
2
Faucet
Cat No: 701555
3
4
Maintenance and Spares Manual
Sink Drain
Cat No: 701552
½”BSP Back Nut
Cat No: 695504
13
Cubicle Vanity Spares
Maintenance and Spares Manual
14
Cubicle Vanity Spares
1
3
Litter Bin
Cat No: VB661040
Volvo Part No: 70371842
1
Retainer Ring
Cat No: 661218
Litter Bin Bracket
Cat No: VB661845
Volvo Part No:
2
Vanity Screw Fixing
Cat No: 661219
Litter Bin Catch
Cat No: VB661846
Volvo Part No:
Maintenance and Spares Manual
15
Fridge Spares
Maintenance and Spares Manual
16
Fridge Spares
2
Fridge Vent
Cat No: 703302
3
4
Fridge Door Hinges
Cat No: 661400
6
Lockable Handle
Cat No: 663020
7
9
Maintenance and Spares Manual
Fridge Grill
Cat No: BO661502
610mm Grab Handle
Cat No: 661160
Fridge Plant
Cat No: 703108
17
Drinks Boiler
Maintenance and Spares Manual
18
Drinks Boiler
2
Drinks Boiler
Cat No: 697010 (no drain)
Cat No. 697016 (with drain)
3
Drinks Filter (6month life)
Cat No: 722017
4
Filter Clip
Cat No: 713285
6
Support Leg
Cat No: 661978
7
Shut-Off Tap
Cat No: 747037
8
Maintenance and Spares Manual
Hose Connector
Cat No: 747027
19
Electrical Assembly
Maintenance and Spares Manual
20
Electrical Assembly
Maintenance and Spares Manual
1
PCB
Cat No: 730005
2
Isonic Valve
Cat No: 735714
3
PIR PCB (Light Controller)
Cat No: 712025
(Comes with sensing eye)
4
PCB Cover
Cat No: 730003
5
Screw Knob
Cat No: 713518
6
Cable Bushing
Cat No: 713519
21
Cubicle Toilet Seat Spares
Maintenance and Spares Manual
22
Cubicle Toilet Seat Spares
1
Seat & Lid
Cat No: 735101
2
Splash Shield
Cat No: 731270
3
Bowl Assy
Cat No: 731280
4
Water Jet
Cat No: 731290
5
6
Flap & Seal
Cat No: 731285
SS Hinges
Cat No: 735102
Seat, Lid & SS Hinges
Cat No: 735100
Maintenance and Spares Manual
23
Worktop Spares
Maintenance and Spares Manual
24
Worktop Spares
1
Worktop Assy
Cat No: 801350
2
Drinks Button
Cat No: 714007
3
4
5
Maintenance and Spares Manual
Engaged Lamp
Cat No: 712003
Sink Drain
Cat No: 701552
Faucet
Cat No: 663603
25
Soil Tank Spares
Maintenance and Spares Manual
26
Soil Tank Spares
Maintenance and Spares Manual
1
Soil Tank Assy
Cat No: 731005
3
Float Switch
Cat No: 714510
4
Overflow Fitting
Cat No: 747036
27
Hand Wash Tank Spares
Maintenance and Spares Manual
28
Hand Wash Tank Spares
Assembled Hand Wash Tank
with Fittings
Cat No: 733085
1
½” Swivel Hose Connector
Cat No: 744018
3
4
Tank Coupler 15mm
Cat No: 747028
9
10
11
Maintenance and Spares Manual
Overflow Fitting
Cat No: 747036
Float Switch
Cat No: 714510
Hand Wash Pump
Cat No: 702110
29
Cubicle Base Spares
Maintenance and Spares Manual
30
Cubicle Base Spares
2
Maintenance and Spares Manual
Drinks Button
Cat No: 714007
6
Ventilator Fan
Cat No: 727502
10
Adjustable Supports
Cat No: 661978
31
Cubicle Top Spares
Maintenance and Spares Manual
32
Cubicle Top Spares
2
Mirror
Cat No: 661825
3
Soap Dispenser
Cat No: 661660
610mm Grab Handle
Cat No: 661160
5
PIR Sensor (includes PCB)
Cat No: 712025
6
7
8
Maintenance and Spares Manual
Bayonet Bulb
Cat No: 712028
Bayonet Bulb Holder
Cat No: 712027
33
Cubicle External Spares
Maintenance and Spares Manual
34
Cubicle External Spares
Flush Pump
Cat No: 702140
Large Spigot (Cut to15mm)
Cat No: 735754
Gate Valve Assy
Cat No: 735753
Large Spigot (Cut to 25mm)
Cat No: 735755
6
Maintenance and Spares Manual
Large Grab Handle
Cat No: 661161
35
GEN
Emergency Alarm
Cat No:735566
A
M
ER
CY
No Standing
Cat No:735560
EM
Cubicle Legends
LA R
Shades Technics
Cat No:735568
No Smoking
Cat No:735563
S hades T echn ics
Tel: +44 (0)1992 501683
www.shades-technics.com
Door Lock LH
Cat No:735571
Door Lock RH
Cat No:735564
Flush
Cat No:735562
Hand wash
Cat No:735561
Toilet Roll
Cat No:735569
Hand Towel Dispenser
Cat No:735573
Soap Dispenser
Cat No:735572
Litter Bin
Cat No:735567
Full Set Of Labels
Cat No: 735570
Please specify LEFT or RIGHT hand cubicle when placing order for labels
Maintenance and Spares Manual
36
Cubicle Wiring
Maintenance and Spares Manual
37
Vehicle Wiring
Maintenance and Spares Manual
38
Service
The following section details where to find key components and how to replace
them.
Part = Bulbs
Location = Cubicle Top
Replacement….
1. DISCONNECT THE POWER TO THE CUBCILE
2. REMOVE PLASTIC LIGHT COVER – 4x NYLON SCREWS
3. DISCONNECT PIR CONNECTOR
4. TWIST BULB TO RELEASE AND REPLACE
Maintenance and Spares Manual
39
Service
Part = Hand Drier (Optional)
Location = Behind Upper Vanity Door
Replacement….
1. DISCONNECT THE POWER TO THE CUBICLE
2. UNLOCK AND OPEN THE UPPER VANITY DOOR
3. REMOVE 2x SCREWS ON THE UNDERSIDE OF THE HAND DRIER
4. REMOVE THE FRONT COVER OF THE HAND DRIER
5. REMOVE 2x RUBBER HOLE COVERS
6. REMOVE 3x SCREWS RELEASING THE UNIT FROM THE WALL
7. DISCONNECT THE 2 CABLES PASSING THROUGH THE OUTER WALL OF
THE CUBICLE MAKING SURE THEY DO NOT FALL DOWN THE BACK
8. RE-CONNECT A NEW UNIT AND SCREW TO THE WALL
9. MAKE SURE THE RUBBER HOLE COVERS ARE RE-FITTED AND FIT THE
COVER SECURING WITH BOTH SCREWS
FIXING HOLES
Maintenance and Spares Manual
40
Service
Part = Hand Wash & Flush Buttons
Location = Sink Vanity & Worktop
Replacement….
1. DISCONNECT THE POWER TO THE CUBICLE
2. UNLOCK LOWER VANITY DOOR
3. REMOVE TERMINALS FROM THE BACK OF THE BUTTON
4. UNSCREW THE COLLAR ON THE UNDERSIDE OF THE BUTTON
5. BUTTON SHOULD RELEASE FROM THE TOP
6. RE-FIT NEW BUTTON AND CONNECT THE TERMINALS
Use 2x outer
terminals
Maintenance and Spares Manual
41
Service
Part = Hand Wash & Flush Pump
Location = Locker
Replacement….
1.
DISCONNECT THE POWER TO THE CUBCILE
UNLOCK LOWER VANITY DOOR
2.
DRAIN FRESHWATER TANK
3.
DISCONNECT THE WIRES TO THE PUMP
4.
REMOVE FROM SECURING CLIP
5.
RELEASE INLET AND OUTLET PIPES
6.
RE-FIT NEW PUMP MAKING SURE THAT BOTH INLET AND OUTLETS
7.
ARE WATER TIGHT AND THE FLOW ARROW IS POINTING IN THE
CORRECT DIRECTION
RE-CONNECT THE POWER
8.
CLOSE THE DRAIN ON THE SUPPLY TANK
9.
RE-FILL TANK WITH FRESHWATER
10.
SWITCH ON POWER TO CUBICLE
11.
PRIME PUMP WITH 2-3 BUTTON PUSHES
12.
WIRING CONNECTIONS
OUTLET
INLET
OUTLET
INLET
Maintenance and Spares Manual
42
Service
Part = PIR Adjustment & Replacement
Location = Upper Vanity Cupboard – Circuit Board / Vanity - Sensor
Adjustment….
1. POWER ON
2. OPEN UPPER VANITY DOOR
3. ADJUST THE 2X BLUE VARIABLE RESISTORS AS SHOWN BELOW
+
Time
- +
-
Sensitivity
To replace the sensing eye unclip
from the vanity.
To replace the PCB unscrew the
board from the vanity & disconnect
the plug.
Maintenance and Spares Manual
43