1
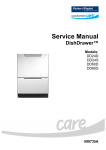
Service Manual
Dryers
Models:
DE09 / DG09
DE60FA / DG60FA
479536
479536
Fisher & Paykel Appliances Inc
5800 Skylab Rd,
Huntington Beach
California, CA92647
USA
Telephone: 888 936 7872
E-mail: [email protected]
Fisher & Paykel Appliances Canada Inc
2900 – 595 Burrard Street
Vancouver
BC, V7X 1J5
Canada
Telephone: 888 936 7872
E-mail: [email protected]
COPYRIGHT © FISHER & PAYKEL LTD 2008 - ALL RIGHTS RESERVED
2
479536
CONTENTS
1
INTRODUCTION...................................................................................................................... 5
1.1 Overview ............................................................................................................................. 5
1.2 Air Flow ............................................................................................................................... 5
2
INSTALLATION....................................................................................................................... 6
2.1 Electric Model Installation.................................................................................................... 6
2.2 Gas Model Installation....................................................................................................... 11
3
SPECIFICATIONS ................................................................................................................. 17
3.1 DE09 and DE60FA Specifications..................................................................................... 17
3.2 DG09 and DG60FA Specifications .................................................................................... 18
3.3 Serial Plate Location ......................................................................................................... 18
4
COMPONENT SERVICING ................................................................................................... 19
4.1 Top Disassembly ............................................................................................................... 19
4.1.1 Timer Replacement .................................................................................................... 20
4.1.2 Selector Switch Replacement..................................................................................... 21
4.1.3 Auto Dry PCB Replacement ....................................................................................... 22
4.2 Drum Removal .................................................................................................................. 22
4.2.1 Drum Rear Sleeve And Shaft Replacement ............................................................... 23
4.2.2 Drum Baffle Replacement .......................................................................................... 23
4.2.3 Front Bearing Assembly and Front Panel Component Replacement......................... 23
4.3 Cowl Replacement and Components ................................................................................ 24
4.3.1 Electric Model Cowl .................................................................................................... 24
4.3.2 Electric Cowl Wiring Diagram ..................................................................................... 24
4.3.3 Gas Model Cowl ......................................................................................................... 25
4.3.4 Gas Cowl Wiring Diagram .......................................................................................... 25
4.4 Gas Valve Assembly Replacement ................................................................................... 26
4.4.1 Flame Detect Thermostat Replacement..................................................................... 26
4.5 Motor, Outlet Thermostat, Jockey Pulley and Belt Switch Replacement........................... 27
4.5.1 Motor and Outlet Thermostat Wiring Diagrams .......................................................... 28
4.6 Power Supply Connections ............................................................................................... 29
4.6.1 Electric Terminal Block ............................................................................................... 29
4.6.2 Gas and Electric Model Cable .................................................................................... 29
5
OPERATION.......................................................................................................................... 29
5.1 Operating Instructions - Control Panel .............................................................................. 29
5.2 Using the Dryer ................................................................................................................. 30
5.3 Operational Control Sequence .......................................................................................... 32
5.3.1 Motor Operation.......................................................................................................... 32
5.3.2 Timer Operation.......................................................................................................... 33
5.3.3 Element Operation (Electric Models).......................................................................... 35
5.3.4 Thermostat Operation (Electric Model)....................................................................... 36
5.3.5 Gas Valve & Ignitor Circuit Operation (Gas Models) .................................................. 38
5.3.6 Thermostat Operation (Gas Model)............................................................................ 39
6
FAULT FINDING.................................................................................................................... 42
6.1 Fault Finding...................................................................................................................... 42
7
FLOW CHARTS .................................................................................................................... 45
7.1 Electric Flow Chart ............................................................................................................ 45
7.2 Gas Flow Chart ................................................................................................................. 46
8
WIRING DIAGRAMS ............................................................................................................. 47
8.1 Electric Wiring Diagram ..................................................................................................... 47
8.2 Gas Wiring Diagram .......................................................................................................... 48
9
SEQUENCE CHARTS ........................................................................................................... 49
9.1 Electric Timer Sequence ................................................................................................... 49
9.2 Gas Timer Sequence ........................................................................................................ 49
3
479536
9.3 Electric Selector Sequence................................................................................................49
9.4 Gas Selector Sequence.....................................................................................................50
4
479536
1
INTRODUCTION
This service manual is designed to show all components and servicing of the DE/DG09 and
DE/DG60FA Dryers.
These dryers are only sold in the USA and Canada.
1.1
Overview
These models are front-loading dryers, which run a semi analogue/electronic control system. All
switching for the dryer is carried out by the timer, selector switches, thermostats and motor, but the
auto-dry is controlled by the PCB assembly.
The motor is a single phase, single direction motor with a centrifugal start.
The electric models have a coil element design mounted to a cowl on the rear of the drum.
The gas models run a burner, from where the heat is ducted into the cowl. These can be run on
natural gas or can be converted to LP gas.
1.2
Air Flow
Air is pulled into the cabinet from the rear by the fan.
In gas models, air pulled through the burner assembly. The heated air then flows through the drum
cowl and into the drum.
In electric models, the air pulled from the fan is blown into the elements in the cowl and is heated.
It then flows into the drum.
Air from the drum is pulled through the clothes and into the lint filter. The air is then drawn into the
fan and them blown out the exhaust system. The blower is mounted directly to the motor shaft.
Air Flow
Drum Operation
5
479536
2
INSTALLATION
2.1
Electric Model Installation
6
479536
7
479536
8
479536
9
479536
10
479536
2.2
Gas Model Installation
11
479536
12
479536
13
479536
14
479536
15
479536
16
479536
3
SPECIFICATIONS
3.1
DE09 and DE60FA Specifications
Model Naming Convention DE09
DE
Dryer Electric
09
Iteration
DE
Dryer Electric
60
6 CU FT
F
Front Loader
A
Auto Timer
White
6 cu ft
Electric
Electronic + Timer
Stainless Steel
Height 40”
Width 27”
Depth 27”
Depth to door open 51 ¾”
120 + 240v
120 + 208V
With 240 V Supply
5600w
With 208 V Supply
4400w
With 240 V Supply
24amps
With 208 V Supply
22amps
Anti-clockwise only
47-51 RPM
R/hand from factory but reversible
Model Naming Convention DE60FA
Colour
Capacity
Heat Source
Control Type
Drum Material
Dimensions
Supply Voltage
Wattage
Amperage
Drum Rotation
Drum Speed
Door Hinging
Exhaust Duct Diameter
4”-100MM
Open
135F/57C
210F/99C
315F/157C
210F/99C
2
Wire Coil
208/240 Volts
19.2Ω Each
¼ HP 186w
4.8 amps
110-120 Volts
Thermostat Temps +/- 5°
Drum Outlet
Control Inlet
Hi Limit
Safety
Number of elements
Element Type
Element Voltage
Element resistance
Motor Power
Max Motor Amperage
Motor Voltage
17
Closed
125F/52C
180F/82C
250F/121C
180F/82C
479536
3.2
DG09 and DG60FA Specifications
Model Naming Convention DG09
DG
Dryer Gas
09
Iteration
DG
Dryer Gas
60
6 CU FT
F
Front Loader
A
Auto Timer
White
6 cu ft
Gas
Electronic + Timer
Stainless Steel
Height 40”
Width 27”
Depth 27”
Depth to door open 51 ¾”
120 Volts
7 Amps
Anti-clockwise only
47-51 RPM
R/hand from factory but reversible
Model Naming Convention DE60FA
Colour
Capacity
Heat Source
Control Type
Drum Material
Dimensions
Supply Voltage
Amperage
Drum Rotation
Drum Speed
Door Hinging
Exhaust Duct Diameter
4”-100MM
Open
135F/57C
210F/99C
300F/149C
22000 BTU
110/120 Volts
¼ HP 186w
4.8 amps
110-120 Volts
Thermostat Temps +/- 5°
Drum Outlet
Control Inlet
Safety
Burner Heat
Coil Voltage
Motor Power
Max Motor Amperage
Motor Voltage
3.3
Closed
125F/52C
180F/82C
260F/127C
Serial Plate Location
The serial Plate is located inside the door opening on the bottom right side. There is a secondary
sticker on the rear of the dryer.
Main Serial Plate
Secondary Sticker
18
479536
4
COMPONENT SERVICING
4.1
Top Disassembly
19
479536
Touch Pad requires heat to remove.
4.1.1
Timer knob just pulls off.
Timer Replacement
• Open the control box.
• Pull off the control knob.
• Remove the cover screw and unclip the
timer cover.
Cover Clips
Press down the location tab
and twist the timer anticlockwise to release it from
the console.
Twist
Location Tab
20
479536
Replace the wires from the old timer to the new timer wire for wire. If you think you have made a
mistake fitting the wires, see the diagram below for the wiring locations on the timer.
Reassembly is the reverse procedure.
4.1.2
•
•
•
•
•
Selector Switch Replacement
Open the console.
Undo the selector switch screws and remove switch assembly.
Unclip the cover from the selector switch.
Swap the wires from the old switch to the new switch, wire for wire.
If you think you may have made a mistake fitting the wires, check against the diagram below.
Reassembly is the reverse procedure.
21
479536
4.1.3
•
•
•
•
Auto Dry PCB Replacement
Open the console.
Unscrew and remove the PCB cover.
Disconnect the PCB connector.
Unclip PCB from its holding clips.
Reassembly is the reverse procedure
4.2
•
•
•
•
Drum Removal
Undo the console.
Remove the top deck.
Remove the heat shield.
Remove the front panel and disconnect the door switch wiring.
Door switch wiring
Belt Access
• Disconnect the belt from the motor. This can be done 2 ways:
• Remove the outlet duct from the back of the dryer, reach in through the duct hole in the back
panel and disconnect the belt off the motor pulley.
• Reach in through the hole in the front brace under the drum and run the belt off the motor
pulley.
• Pull the drum forward to disconnect the rear drum sleeve from cowl.
• Slide the drum out the front of the cabinet.
22
479536
4.2.1
•
•
•
•
Drum Rear Sleeve And Shaft Replacement
Remove the drum.
Remove the o-ring from bearing shaft.
Remove the sleeve.
Remove the three securing screws from
inside the drum to remove the shaft and
deflector.
Reassembly is the reverse procedure.
O-ring
Sleeve
Deflector
4.2.2
Drum Baffle Replacement
• Remove the drum.
• Remove the screws for the baffle and remove the baffle.
Reassembly is the reverse procedure
4.2.3
Front Bearing Assembly and Front Panel Component
Replacement
•
•
•
•
•
•
Remove the front panel from the cabinet.
Remove the light globe.
Unclip the top of the bearing holder from the top of the front panel.
Pull the holder away from the panel and pull upward to remove the holder.
To remove the slides, pull out the unclipped side and then unclip the other side.
To remove the drum felt, unhook the right side and pull out. The new felt is just pushed into
place and hooked to the right.
• To remove the light socket, disconnect the terminals off the light switch and sensor plug, and
then unscrew the socket.
• To remove the light switch, disconnect the terminals, keeping note of the positions, and unclip
the switch.
Reassembly is the reverse procedure.
23
479536
4.3
Cowl Replacement and Components
4.3.1
Electric Model Cowl
Control Inlet Thermostat
Safety Thermostat
Hi-limit Thermostat
Mounting Screws
• Remove the drum
• To remove the thermostats, remove the thermostat screws and unclip the thermostat from the
cowl.
• When replacing any thermostat, always replace wires in the same position as the original
thermostat. If you think it is wired incorrectly, see the cowl wiring diagram.
• Remove the element wires from the bottom of the cowl, keeping note of their position. When
refitting, if you think it is wired incorrectly, see the cowl wiring diagram.
• Undo the 4 mounting screws and remove the cowl from the rear panel.
• Undo the four screws that retain the drum-bearing retainer to remove the retainer.
Reassembly is the reverse procedure.
4.3.2
Electric Cowl Wiring Diagram
24
479536
4.3.3
Gas Model Cowl
Safety Thermostat
Control Inlet
Mounting Screws
• Remove the drum.
• To remove the safety thermostat, remove the thermostat screws and unclip the thermostat from
the cowl. To remove the control inlet thermostat, lever the leg of the thermostat towards the
centre with a flat screwdriver, then remove.
• When replacing any thermostat, always replace wires in the same position as the original
thermostat. If you think it is wired incorrectly, see the cowl wiring diagram.
• Undo the 4 mounting screws and remove the cowl from the rear panel.
• Undo the four screws that retain the drum-bearing retainer to remove the retainer.
Reassembly is the reverse procedure.
4.3.4
Gas Cowl Wiring Diagram
25
479536
4.4
Gas Valve Assembly Replacement
Flame Detect Thermostat
Burner
Gas Valve
•
•
•
•
•
Disconnect the power and gas supply.
Remove the drum assembly.
Disconnect the wiring harnesses from the gas coils.
Unscrew the bracket for the supply pipe from the back panel.
Unscrew the valve bracket and feed the entire gas burner and valve assembly out through the
opening in the front cabinet bracket.
• Remove the two screws securing the burner to the valve bracket.
• Remove the two screws securing the valve to the valve bracket.
• Remove the two screws securing the coils to the valve.
Reassembly is the reverse procedure.
4.4.1
•
•
•
•
•
•
Flame Detect Thermostat Replacement
Disconnect the power supply.
Remove the drum assembly.
Unscrew and remove the burner.
Disconnect the wires to the flame thermostat.
Undo the 2 screws securing the combustion chamber.
Turn the chamber to the left; undo the screws holding the thermostat and remove.
Reassembly is the reverse procedure.
26
479536
4.5
Motor, Outlet Thermostat, Jockey Pulley and Belt
Switch Replacement
Jockey Pulley
Belt Pulley
Connector
Motor
Outlet Thermostat
Fan Housing
• Disconnect the power supply.
• Remove the drum assembly.
• Remove the outlet screw securing the outlet thermostat. The thermostat can then be removed
from the fan housing. Replace the wires in the same order.
• Remove the connector from the motor.
• Remove the two screws that secure the motor bracket to the base at the rear of the motor.
• Remove the two long black screws that secure the fan housing to the front bracket of the
cabinet.
• Slide the motor and bracket assembly towards the rear of the cabinet.
• Remove the jockey pulley and arm assembly.
• Disconnect the wires to the belt switch.
• Disconnect the mains harness connector at the rear of the motor and feed out from under the
motor.
• Feed the door and sensor harness through the cabinet bracket and out from under the motor.
• Remove the motor and bracket assembly from the cabinet.
• Remove the fan from the motor.
• Remove the screw from the front motor clamp.
• Remove the spring clip holding the back of the motor to the bracket.
• Remove the motor from the bracket.
27
479536
• The belt switch is mounted to the left side of the motor bracket and can be removed by
removing its securing screws.
• Once the motor and bracket are removed from the cabinet, the fan housing can be unscrewed
and removed.
Reassembly is the reverse procedure
4.5.1
M2
Black
Motor and Outlet Thermostat Wiring Diagrams
M1
Brown/
Yellow
Motor Connector
M6
Pink
M4
Brown/
Yellow
Motor Direct Connector
Black
Orange
28
Pink
M5
Red
Ground
Green
479536
4.6
Power Supply Connections
4.6.1
Electric Terminal Block
•
•
•
•
Disconnect the power supply to the Dryer.
Undo the nuts holding the mains cables to the terminal block and remove the wires.
Undo the nuts holding the dryer supply cables keeping note of their positions.
Remove the screws securing the terminal block and remove the block.
Reassembly is the reverse procedure. Make sure the wiring is re-installed correctly or major
damage may be caused to the dryer. Refer to the installation instructions (Section 2).
4.6.2
Gas and Electric Model Cable
(Electric cable supplied in Canada Only)
• Disconnect the power supply to the Dryer.
• Remove the power plug.
• Either remove the exhaust duct or remove the drum to access the cord connections.
• Disconnect the terminals or connector from the cable.
• Push the cable bush through the cabinet and remove the cable.
Reassembly is the reverse procedure.
5
OPERATION
5.1
Operating Instructions - Control Panel
Automatic Drying Cycles
(Cycle automatically senses dryness)
There are two automatic dryness levels: MORE DRY (+) and LESS DRY (–).
These two settings dry the clothes to different degrees depending on the level of dryness desired.
Automatic Permanent Press – For synthetic blends.
Select MORE DRY (+) for heavier fabrics, LESS DRY (–) for light fabrics.
Automatic Permanent Press – For lingerie and special care fabrics.
Select MORE DRY (+) for larger fabrics, LESS DRY (–) for smaller fabrics.
Automatic Cottons – For cottons and most linens.
For most loads select the preferred Regular Setting marked with an *. Set towards MORE DRY (+)
for heavier fabrics, LESS DRY (–) for lighter fabrics.
29
479536
Fabric Care Settings
FLUFF – For items requiring drying without heat. Perfect for airing clothes or to freshen up
garments that have been packed in a suitcase or drawer.
COTTON REGULAR – For drying general cottons such as sheets, sweats and knits. This cycle
uses high heat to dry clothes quickly. Suitable for garments labelled “tumble dry”.
PERMANENT PRESS – For drying lightweight fabrics. A medium heat is used to reduce wrinkles.
Ideal for lightweight cottons, casuals and items labelled “tumble dry with a medium heat”. This
cycle automatically selects the DEWRINKLE option to reduce wrinkles.
KNITS DELICATES – For heat sensitive items, this cycle uses a low heat. Use this setting when
care labels recommend low heat settings or for garments with a synthetic fibre content, where
overheating could cause damage to fibres.
Timed Dry Cycles
(Cycles run for a selected time.)
The dryer has three timed cycles. These cycles have set drying times of either 40, 60 or 80
minutes and include a DAMP DRY and DEWRINKLE function. If selected, the dryer will dry for the
specified period of time.
TIMED DRY – Set the cycle selector at the desired drying time.
DAMP DRY – To leave items partially dry, set the cycle selector on DAMP DRY setting.
DEWRINKLE – For removing wrinkles from items that are clean and dry or that are slightly damp.
Set the cycle selector on to DEWRINKLE setting.
Note:
Drying times will vary according to the type of heat used (electrical or natural gas), size of load,
types of fabrics, wetness of clothes and condition of exhaust ducts.
5.2
Using the Dryer
Selecting a Cycle
The dryer has a number of FABRIC CARE CYCLES that can be used to dry different types of
garments:
Select an automatic or timed cycle. See the below cycle descriptions.
30
479536
Select a drying cycle that matches the type of load being dried. Different fabrics have different
drying requirements, so it is important to choose the cycle that best describes the load. If the load
contains mainly delicate items, it is best you select the KNITS DELICATES cycle.
If unsure of the temperature to select for a load, it is best to select a lower heat rather than a higher
heat, e.g. the KNITS DELICATES or PERMANENT PRESS cycle instead of the COTTON
REGULAR cycle.
Always follow manufacturer’s care label instructions when drying.
EXTRA CARE
Minimizes the likelihood of wrinkles forming in clothes if you are not able to unload the dryer
straight away.
CA
Selecting the Dryness Level
The desired dryness level can be altered. There are two dryness levels to choose between:
MORE DRY (+)
LESS DRY (–)
Refer to page 29 for dryness level descriptions.
At the end of the cycle, if the clothes are still damp or are too dry, next time just adjust the dryness
level on the timer to meet your personal preferences.
Selecting the Drying Process
There are two ways in which your dryer is able to dry clothes - by using the automatic drying cycles
or by using Timed Dry.
AUTOMATIC DRYING
When automatic drying is selected, the dryer automatically senses the dryness level of the load
and turns off when the clothes are dry. The dryer’s internal computer measures the moisture
content of the load using metal sensing bars, and together with a temperature sensor determine
when the clothes have reached the selected dryness level (Refer to above - Selecting the Dryness
Level).
For optimum clothes care, match the cycle to the load. Automatic drying often provides the best
results and leads to lower energy costs than Timed Dry.
As automatic drying cycles rely on items of the load contacting sensors, it will not work when the
drying rack accessory is used.
TIMED DRY
There are three timed cycles. There is a choice of 40, 60 and 80 minutes. A cool down period of
10 minutes is included in the three cycles.
To select a timed cycle, set the cycle selector at the desired drying time you want the dryer to run
for. Throughout the cycle, the cycle selector will rotate towards the end of the cycle.
During Timed Dry, the dryer does not sense when the clothes are dry. This may cause overdrying. We recommend that you dry the clothes for a slightly shorter time than you think they
need, or check on them regularly (to avoid over-drying).
Beginning The Drying Cycle
Once you have chosen all your desired settings, close the dryer door and press START (located
on the right-hand side of the control panel).
Opening the door during the operation will stop the dryer.
31
479536
To restart the dryer, close the door and press START to complete the cycle.
Stopping The Dryer
The dryer can be stopped during any stage of the drying process, to allow you to check on the load
or add/remove clothes. To do this, open the dryer door. There will be a slight delay as the drum
slows down and stops.
Note:
If the cycle is interrupted before it progresses into cool down, parts of the drum may be hot. To
start the dryer again, press START.
Changing Cycles During Operation
If you wish to change the drying cycle you have chosen after the machine has already begun
drying, press your new cycle selection on the control panel.
Fabric Softener Sheets
If you wish to use fabric softener sheets, you must ensure that they are labelled “dryer safe”.
Always follow the instructions on the packaging. Do not place them in a dryer with warm clothes,
as there is a chance the fabric softener may stain clothes. Only use a softener sheet once, then
discard it.
Beeps
At the end of the cycle, the dryer will beep to let you know that the load is finished. The drum will
automatically come to rest, allowing you to open the door and remove the load.
5.3
Operational Control Sequence
5.3.1
Motor Operation
The motor runs on the 120v circuit of the dryer. Power is supplied into the TB connection on the
timer. Power for the motor is fed first from the TC terminal on normal operation and from the TH
terminal on Extra Care. If on Extra Care, power is fed from TH on the timer, into terminal 2 on the
selector, out of terminal 4 and back to TC on the timer.
From the timer, power is switched through the hi-limit thermostat and to the start switch, which is
selector terminals 14 to 13. Power is then fed through both the start and run windings on the
motor. The centrifugal switch then disengages the start winding once the motor has started.
In the motors neutral circuit there is an internal overload. The neutral circuit then runs through the
door switch and to the mains terminal block.
32
479536
5.3.2
Timer Operation
The timer runs in 2 ways, Automatic and Timed Dry.
In automatic, the timer only advances when the PCB powers the timer motor.
Power is supplied into the TB connection on the timer. Power for the motor is fed first from the TC
terminal on normal operation and from the TH terminal on Extra Care. If on Extra Care, power is
fed from TH on the timer, into terminal 2 on the selector, out of terminal 4 and back to TC on the
timer.
From the timer, power is switched through the hi-limit thermostat and to the start switch, which is
selector terminals 14 to 13.
Power is then supplied from the start switch, which powers back from the motor feed, then goes
through the timer motor to the T terminal on the timer. The neutral for the timer motor then feeds
to the white wire to the PCB.
From the PCB, neutral is fed back to the S terminal on the timer then back to the mains terminal
block.
The PCB measures moisture across the sensing bars on the front duct assembly. As the clothes
slide past the bars, the PCB reads for a current across the bars. When the clothes are dry the
current ceases so the PCB advances the timer.
Auto Dry
33
479536
Sensing Bars
There should only be a minimum of 1Mohm across the bars when dry. The resistance should
lower when moisture tracks across the bars. To test the bars, check their resistance dry, then wet
your finger and place it across the bars and check for a change in resistance.
In Timed Dry, the timer motor is run direct through the timer. The neutral of the timer motor runs
onto terminal T and then comes out from X and to the mains terminal block.
Timed Dry
34
479536
5.3.3
Element Operation (Electric Models)
The element circuit has three thermostats and has a motor switch to stop the heating if the motor
should fail.
Power is supplied to the element circuit from terminal A. From the timer, power is supplied to
terminal 15 on the selector switch and then out of terminal 16. From the selector, power is sent
through the safety thermostat to the drum outlet thermostat.
After the outlet thermostat, power is split with one feed straight to one element and the other feed
to the control inlet thermostat. After the control inlet thermostat, power is then fed to the other
element. The neutral for the elements is then wired through the motor switch and to the L2
connection on the mains terminal block.
35
479536
5.3.4
Thermostat Operation (Electric Model)
There are three thermostats that control the temperature of the dryer and a hi-limit thermostat that
will shut the dryer down if it overheats.
The hi-limit thermostat is mounted on the heater cowl and is in circuit with the motor. If it shuts
down, the motor stops. There is a switch on the motor, which cut the neutral to the element when
the motor stops, so when the hi-limit trips, all dryer functions cease to operate.
The heating elements are controlled by the safety, inlet and outlet thermostats.
When the selector is set on No Heat/Fluff, no power is supplied from terminal 16 so there is no
element operation.
When the selector is set on Normal Heat/Cotton Regular, power is supplied only through the direct
element circuit (as shown in Section 5.3.3). Temperature is controlled by the safety thermostat,
which is located on the heater cowl.
When the selector is set on Med Heat/ Permanent Press, power runs through two circuits. Power
is supplied off terminal 16 to the element circuit. Power is also switched onto the control circuit for
control inlet thermostat. The control circuit for the control inlet thermostat has an active supply
from the L1 circuit for the element. The neutral of the control circuit is switched between terminals
8 and 7 (terminal 7 is the common neutral connection on the selector switch). The thermostat will
not operate unless there is power through the resistor in the thermostat. The resistor has a
resistance of 9 Kohms. This thermostat only switches one element.
When the selector is set on Low Heat/Knits Delicates, the element circuit and the control circuits
for the inlet and exhaust thermostats is used. Terminal 7 on the selector is the common neutral
connection and the exhaust thermostat is switched to it on terminal 6. The active supply for the
exhaust thermostat control is from the L2 line. The resistor has a resistance of 9 Kohms.
See the diagrams on the next page.
36
479536
No Heat
Normal Heat
Med Heat
Low Heat
Common Neutral for both Thermostats
Blue =
Red =
Yellow =
Green =
Element Circuit
Control Inlet Thermostat Resistor Circuit
Drum Inlet Thermostat Resistor Circuit
Thermostat Neutral Circuit
37
479536
5.3.5
Gas Valve & Ignitor Circuit Operation (Gas Models)
The gas valve system has 2 coils, a booster coil and a main coil, which are operated by
thermostats, and a safety coil. There are three thermostats that operate the temperature control of
the gas valve. There is also a flame detector that operates the coils and the ignitor.
Power is supplied from terminal A on the timer to terminal 15 on the selector. The circuit is
switched to terminal 16 and then looped to terminal 7. From the selector, power feeds through the
drum outlet thermostat and then the safety thermostat to the gas valve assembly.
The gas valve assembly operates in two modes, ignition and run. The safety coil is energised
during both modes.
When in ignition, the flame detect thermostat is closed. Power feeds through the booster coil and
the ignitor because these are in parallel circuit, causing ignition. When the flame has heated the
flame detect thermostat, it opens and the valve goes into run mode.
Ignition Circuit
When the flame detect thermostat opens, the booster coil and the main coil are in series circuit, so
power is dropped in the booster and is activated in the main. The ignitor is also dropped in
voltage, so stops igniting.
The neutral circuit runs through the inlet thermostat, through the motor switch and back to the main
neutral connection.
38
479536
Run Ciruit
The ignitor functioning and the flame can be seen through a viewer hole located in the base
of the dryer. Use a mirror as shown in these figures.
5.3.6
Thermostat Operation (Gas Model)
There are three thermostats in the gas valve circuit for temperature control, the safety, control inlet
and drum outlet.
When the selector is set on No Heat/Fluff, power is supplied to terminal 16 but terminates, so there
is no gas valve operation.
When the selector is set on Normal Heat/Cotton Regular, power is fed through the gas valve circuit
only so the safety thermostat controls temperature.
When the selector is set on Med Heat/ Permanent Press, power is fed through the gas valve circuit
but also from terminal 8 through the control inlet resistor circuit.
When the selector is set on Low Heat/ Knits Delicates, power is fed through the gas valve circuit,
from terminal 8 through the control inlet resistor circuit, and terminal 6 through the drum outlet
resistor circuit.
39
479536
No Heat/Fluff
Normal Heat/Cotton Regular
40
479536
Med Heat/Permanent Press
Low Heat/ Knits Delicates
Blue =
Red =
Green =
Coil Circuit
Control Inlet Circuit
Drum Outlet Circuit
41
479536
6
FAULT FINDING
6.1
Fault Finding
Fault
• No operation.
Cause
• No power to unit.
Repair
• Resupply power to the unit.
• No power at terminal C on • Replace timer.
timer.
• Hi-limit thermostat open circuit • Replace hi- limit thermostat &
check for possible overheating
(electric only).
issues (see overheating).
• No heat.
• Start button not operating.
• Replace selector switch
assembly.
• Idler switch open circuit.
• Check belt condition & replace if
necessary.
Check idler arm or pulley &
replace if necessary.
Check idler switch operation and
replace if necessary.
• Motor seized or open circuit.
• Check motor spins freely and
check windings. Replace if
necessary.
• Door switch open circuit.
• Replace door switch.
• Selector set on No Heat/Fluff.
• Reset selector.
• No power to terminal A on the • Replace the timer.
timer.
• No motor operation.
• See No Operation section.
• No Power from Terminal 16
on the selector.
• Replace the selector.
• The safety, inlet, or drum
outlet thermostat failure.
• Check thermostats for continuity
and resistance of the resistors.
Replace if necessary.
• The elements are open circuit
(electric model only).
• Replace elements.
• No gas valve operation (gas
model only).
• Check flame failure operation.
Check gas coil continuity.
Change gas valve assembly.
• Open circuit motor switch.
• Replace the motor.
42
479536
Fault
• Long dry times.
Cause
Repair
• Check operation of elements.
Check thermostat operation.
Check all electrical connections
in the element circuit.
• Low heat.
• Air flow restriction.
• PCB not
bars.
• Noisy operation
reading
• Check filter cleaned and filter
mesh not clogged.
Check installation and flow
through the household exhaust
ducting.
Check fan is properly secured to
motor shaft.
Check fan cowl and internal
ducting for a restriction.
sensing • Check behind sensing bars for
lint build up.
Check sensing bars are clean of
detergent or any residues.
Replace PCB.
• Timer jamming.
• Check power is supplied to the
timer motor (terminals D and T
on the timer).
Replace the timer.
• Slow motor operation.
• Check motor is getting full
power.
Replace the motor.
• Worn drum felt.
• Replace drum felt.
• Worn drum rear bearing.
• Remove drum and replace rear
sleeve. (Do not lubricate.)
• Idler pulley noisy.
• Check pulley is lubricated.
If worn replace the idler pulley.
• Loose or damaged fan.
• Worn front bearing slides.
43
• Re-secure fan to shaft or replace
fan.
Check motor bearings for
excessive wear.
• Relace front bearings.
Check drum has not rubbed or
damaged any other
components.
479536
Fault
• Black marks on clothes.
Cause
• Reaction with front bearings.
Note: Drum felt is now supplied with this kit.
44
Repair
• See technical bulletin below.
479536
7
FLOW CHARTS
7.1
Electric Flow Chart
45
479536
7.2
Gas Flow Chart
46
479536
8
WIRING DIAGRAMS
8.1
Electric Wiring Diagram
47
479536
8.2
Gas Wiring Diagram
48
479536
9
SEQUENCE CHARTS
9.1
Electric Timer Sequence
9.2
Gas Timer Sequence
9.3
Electric Selector Sequence
49
479536
9.4
Gas Selector Sequence
50
479536
51