1
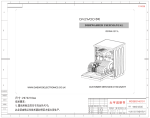
FILE NO.
SERVICE MANUAL
Automatic Washer
ASW U1100T
(MALAYSIA)
Product Code No .
300-849-85
240V
50 Hz
M3
H
TABLE OF CONTENTS
ITEM
PAGES
1) Specifications ...............................................................................1
2) Outer dimensions .........................................................................1
3) Water course diagram ...................................................................2
4) Electric circuit diagram ................................................................3
5) Method of operation ....................................................................4
6) Content of fully Automatic Washing program ..............................5
7) Operation of fully Automatic Washing...........................................6
8) Procedure of time presetting program ..........................................9
9) Indication and judgment of trouble................................................10
10) Inspection mode of service man .................................................11
11) Care of service..............................................................................12
12) Flow chart of trouble shooting .....................................................15
13) Trouble shooting of Bearing Ass y ..............................................19
14) Exploded view...............................................................................21
15) Part list ........................................................................................24
REFERENCE.No.SM930202
1. Specifications
ITEM
SPECIFICATION
Overall dimensions
Net weight
Washing method
Driving system
WASH
Pulsator
Revolution Speed
589(W) x 620(D) x 988(H)
Pulsator Diameter
SPIN
130 r.p.m
380mm (5 blades)
Motor AM V14JM
Capacitor Ass y
Pulsator Pulley
Motor Pulley
V- Belt
Gear box
Wash Load sensor
Spin-dry method
Vertical axis type,
Centrifugal Spin-Dry
Magnetic Valve
JWV-203G/ 220-240V
Driving system
V-Belt driving
Valve Ass y
Spin Tub
revolution speed
840 r.p.m
Spin Tub Drum
dimension
SWITCH
43 kg
Whirlpool
V-Belt + gear driving
ITEM
Safety Switch
Power switch
Printed circuit board
Standard water consumption
Standard per-cycle water
consumption
Child safety mode
Fuse Ass y
Response Switch KPS-59-C
SPECIFICATION
4 Poles- class E
8.0 F 444 V.AC
Outer diameter:
Outer diameter:
Type: M-20
110 mm
50 mm
Rate of Reduction Gear: 1/6.4
Signal from Wash Motor.
Required water pressure: 0.310 Kg.f/cm2
Max water flow: 25 L/min.
Driven by Magnetic Coil
250V- 5A
Automatically select one of 4
water levels.
460mm x 439mm(H)
Instruction Manual
Drain Hose
Feed Hose Ass y with
Magic Joint
Hose Band
Bottom Cover
Operates while
opening Washer Lid or
serious unbalance.
Relay system
IC; Transformer;
Buzzer; Push Switch;
Triac
62L
Power source
240V-50Hz
134L
Power consumption
410W
Washing time
Normal program: 43 min.
The most suitable program is
automatically selected
according to the type of fabric
and the volume of laundry.
The washer will stop
when the Washer Lid is
opened after setting
this mode
Accessories
Neuro and Fuzzy
2. Outer Dimensions (unit: mm)
-1-
3. Water course diagram
Water supply :
Magnetic Valve
Pour Inlet
1
Feed Hose Ass y
2
Magnetic Valve
3
Pour Inlet
4
Outer Tub Drum
5
Spin Tub Drum
6
Spin Tub Boss
7
Circulate Hose
8
Air Trap Hose
9
Drain Valve
10
Drain Hose
11
Overflow Hose
12
Lint Filter Ass y
Spin Tub Drum / Outer Tub Drum
Drainage :
Spin Tub Drum / Outer Tub Drum
Overflow :
Overflow Gate
Overflow Hose
Drain Valve
Spin Tub Drum
Outer Tub Drum
Spin Tub Drum bottom
Circulation :
Drain Valve
Drain Hose
Drain Hose
Circulate Hose
holes
Spin Tub Drum
Lint Filter Ass y
Air course diagram
01
Pump Ass y
02
Hose joint Ass y
03
Hose joint Ass y
Pum Ass y
Spin Tub Drum
-2-
Hose Joint Ass y
Outer Tub Drum
4. Electric circuit diagram
For the purpose of safety, please use only designated parts.
-3-
5. Method of operation
Name and function of buttons on control panel:
When you press those buttons, the setting program and indicators (LED) will change alternately.
BUTTON
POWER
SWITCH
START/PAUSE
ONE TOUCH
SELECT
SETTING PROGRAM
To turn the power ON and
OFF alternately.
Start or temporarily stop
wash operation.
Choose the desired washing
program : Normal, Heavy
Duty, Custom, Blanket, Dry
Care.
Used to set a variety of
wash programs.
SELECT/ SET
To preset the finish time,
washing time, rinsing mode
and spinning time.
WATER
LEVEL
OPTION
CHILD
SAFETY
INDICATION OF LED
When you press the power switch to turn power ON, NORMAL
indicator will light up. When power is turned off, NORMAL
indicator will black out.
When you press the START/ PAUSE button to start, the
indicator of the first process will blink. When pausing, LED
indicator will light up.
Normal
Heavy Duty
Setting Washing time:
OFF
Custom
1
Blanket
Dry Care
12
Setting Rinsing mode:
0 1(water saver) 1.(overflow) 2(twice water saver)
3.(3times overflow) 3(3times water saver) 2.(once
shower +
once
Setting Spinning time:
0
10
overflow)
Select the appropriate water
level that matches the load
volume. When this button
pressed, water level will be
changed alternately: HIGH,
MED, LOW 2 , LOW 1.
Normal/ Heavy Duty/ Custom course:
HIGH
MED
LOW 2
LOW1
Used to set a variety of
Soak program and Soft Spin
program
Press the water level button
for 4 seconds to choose
desired child safety.
While selecting the option function, the indicator will light up.
If the option function is not selected, the indicator blacks out.
Blanket:
HIGH
Dry Care:
MED
MED
HIGH
LOW2
When this function is selected, Washing course will stop if
Washer Lid is opened 5 seconds or more during washing.
Signals of buzzer:
Buzzer will sound in the following cases :
The button is pressed
Washing cycle end
Have a trouble
:
:
:
Buzzer sounds beep in 0. 6 second.
Buzzer sounds with beep tone ON -0.5 second & OFF- 0.5 second for 6 seconds.
Buzzer sounds with beep tone ON -0.3 second & OFF -0.3 second in 16 times.
How to cancel the cycle end buzzer :
Deleting : Turn on the POWER SWITCH and hold down the START / PAUSE button for 4 seconds.
Resetting : Turn on the POWER SWITCH and hold down the START / PAUSE button for 4 seconds.
In both cases, buzzer will sound to indicate that the program has been set.
About Automatic turn off function :
If you leave the washer turned on without starting the operation, the Power Switch will turn off
automatically after 10 minutes.
When washing operation finished, the POWER SWITCH will turn off in 5 seconds automatically.
-4-
6. Contents of fully Automatic Washing program
PROGRAM
WASH
RINSE
SPIN
TOTAL
NORMAL
*8 -10
Depending on the Wash load
and the kind of laundry.
Once shower.
4
Water saver.
*5 -6
40
HEAVY DUTY
*11 -13
Depending on the Wash load
and the kind of laundry.
3
Twice Overflow
*6 -7
52
CUSTOM
*6 -10
Depending on the Wash load
and the kind of laundry.
*7
49
3
Twice Overflow
8
50
1.5
Twice Overflow
2
34
*5 -6
85
Same as the normal
course.
12
BLANKET
6
DRY CARE
45
Soak
SOAK
*8 -10
Same as the normal
course.
The above chart indicates the standard time for each process.
For Data marked with (*), washing time, spinning time, rinsing method will change according to the signals
of sensors.
Spending time of Washing program:
PROCESS
WASH
RINSE1
RINSE2
SPIN
TOTAL
WATER
SUPPLY
SOAK
WASH
WATER
DRAIN
SPIN
WATER
SUPPLY
RINSE
WATER
DRAIN
SPIN
WATER
SUPPLY
RINSE
WATER
DRAIN
SPIN
COURSE
NORMAL
4 08
-
10
2
3 30
-
1 30
Shower
-
3 30
3 36
4
Water
saver
2
6
40 14
HEAVY
DUTY
4 08
-
13
2
3 30
3 36
3
Overflow
2
3 30
3 36
3
Overflow
2
7
51 20
BLANKET
4 08
-
12
2
3 30
3 36
3
Overflow
2
3 30
3 36
3
Overflow
2
8
50 20
DRY CARE
3 56
-
6
2
2
3 36
1 30
Overflow
2
2
3 36
1 30
Overflow
2
2
32 08
SOAK
4 08
45
10
2
3 30
-
1 30
Shower
-
3 30
3 36
4
Water
saver
2
6
85 14
Spending time for water supply and water drain depends on water pressure and draining condition.
Generally, spending time for water supply is about 4 08 (for High level), and for water drain is about 2 .
Standard time of Custom course is the same at of Normal course.
Drainage: After the water is left at the RESET water level (level of water level sensor gets reset) the
spending time of draining is about 1 .
Restarting Function: Washer can operate until the end of wash cycle interrupted by power failure if the
electric power returns within 4 hours.
Normal and Soak course has been programmed with Shower rinsing. If the water flow volume is less
than 5l/min., the washing machine automatically adds the water saver rinsing, so the remaining time
will be changed from 11 to 23 minutes.
-5-
7. Operation of fully Automatic Washing program
NORMAL, HEAVY DUTY, CUSTOM, SOAK Course:
Turn on the power switch (ON/ OFF)
Load the laundry into the washer
Press the ONE TOUCH SELECT to select the washing course
Press the START/ PAUSE button
PULSATOR ROTATES
WATER IS SUPPLIED
PULSATOR ROTATES
WASH
The washer begins rotating the Pulsator right then left two times
to check the volume of the laundry and select the most suitable
water level.
Water is supplied to the lowest water level LOW2.
The Pulsator rotates right and left in about 40 , in that time
sensor will determine type of fabric and select the most suitable
program, such as: Spinning time, Washing time, Rinsing mode,
water flow
Water is supplied to the selected water level.
WATER IS SUPPLIED
SOAK
In Soak course, the laundry is soaked for 45 minutes. During the
soaking, Pulsator will rotate intermittently 5 minutes per cycle to
stir the laundry.
Within 40 seconds from washing process, Pulsator rotates to
create flow water to confirm water level.
WASH
After 40
WATER IS SUPPLIED
WASH
DRAIN
SPIN
RINSE
WATER IS SUPPLIED
RINSE
40 seconds after starting washing, Pulsator stops in 4 seconds to
check the water level, if the water level is lower, the program will
automatically supply the water until the selected water level is
reached
1 minute after starting washing process, sensor will receive the
signals from revolution of laundry. Responding to the revolution
of laundry, microchip will determine the most suitable water
flows.
1 before completion of washing process, Pulsator will rotate to
create laundry disentanglement flow water.
After water level reaches reset point, draining course continues
for 1 40 .
In the first spinning, washer carries out 1 10 ON intermittent spin
dry cycle.
Before completion of spinning, electrical continuity of motor
breaks off and motor rotates continuously by inertia. The Brake
Ass y activates while Spin Tub revolution speed is slowing down.
During Spinning: If the clothes clump on one side or the Spin Tub
becomes unbalanced, the microchip will detect the unbalance
condition and automatically proceed the following corrective.
Water is supplied to the selected water level.
Water save rinse: Water is supplied to the selected water level
responding to the wash load, Pulsator rotates and water
supplying is stopped.
Overflow rinse: After water is supplied to the selected water level,
Pulsator rotates and water is continuously supplied.
-6-
DRAIN
SPIN
SPIN
After water level reaches reset point, draining course continues
for 1 40 .
Before completion of spinning, electrical continuity of motor
breaks off and motor rotates continuously by inertia. The Brake
Ass y activates while Spin Tub revolution speed is slowing down.
During Spinning: If the clothes clump on one side and/ or the
Wash/ Spin Tub becomes unbalanced, the microchip will detect
the unbalance condition and automatically proceed the following
corrective.
Same as the operation of the Rinsing course, Spin Tub Drum will
rotate intermittently. However, while selecting the soft spin
function, the operation of spinning course is different.
BLANKET Course:
Turn on the power switch (ON/ OFF).
Load the laundry into the washer.
Press the ONE TOUCH SELECT to select the BLANKET course for big size laundry.
Press the START/ PAUSE button
WATER IS SUPPLIED
WASH
WASH
DRAIN
SPIN
RINSE
WATER IS SUPPLIED
Water is supplied to HIGH water level.
Depending on the size of laundry, for best results, use MED
water level
Pulsator will rotate and select the suitable water flow.
After water level reaches reset point, Draining course continues
for 1 40 .
Water is supplied to the selected water level.
Intermittent spin cycle: 1 10 ON.
Continuous spin cycle: 2 20 ON.
During spinning, if unbalance condition occurs, safety switch will
activate.
RINSE
Water is supplied to HIGH level.
Overflow rinse: Twice overflow
DRAIN
After water level reaches reset point, Draining course continues
for 1 40 .
Intermittent spin cycle: 1 10 ON.
SPIN
SPIN
Continuous spin cycle: 2 20 ON.
During spinning, if unbalance condition occurs, safety switch will
activate.
Special usage:
Press the WATER LEVEL button before pressing
START/ PAUSE button.
The washer will operate with manual
set water level.
Pressing the START/ PAUSE button while there have
been water in Spin Tub Drum.
Water level in the Spin Tub Drum is lower than
LOW1 level.
Water level in the Spin Tub Drum is higher than
LOW1 level.
-7-
The washer will operate normally
The washer will operate with:
Water level: HIGH
DRY CARE Course:
Turn on the power switch (ON/ OFF).
Load the laundry into the washer.
Press ONE TOUCH SELECT to select the Dry Care course.
Press the START/ PAUSE button.
Water is supplied to MED level.
Depending on the volume of laundry, for best results,
use LOW2, HIGH water level.
Pulsator will rotate and select the suitable water flow
responding to DRY CARE course.
WATER IS SUPPLIED
WASH
WASH
After water level reaches reset point, draining course
continues for 1 40
Water is supplied to the selected water level.
DRAIN
Intermittent spin cycle:1 10 ON.
Continuous spin cycle: 50 ON.
During spinning if unbalance condition occurs, safety
switch will activate.
Water is supplied to MED level.
SPIN
RINSE
WATER IS SUPPLIED
RINSE
Overflow rinse: Twice overflow.
DRAIN
After water level reaches reset point, draining
continues 1 40 .
Intermittent spin cycle: 1 10 ON.
Continuous spin cycle: 50 ON.
During spinning if unbalance condition occurs, safety
switch will activate.
SPIN
SPIN
The safety device activation and load automatically adjusting program:
During Spin-Dry cycle in Rinse process or Spin process, if the safety device works, the washer will
automatically stop Spin-Dry cycle and adjust the balance of wash load.
Drain
Spin
Safety device works.
Yes
Yes
Close the Washer Lid, the
washer will operate continuously.
Is the washer lid open ?
No
Has the Safety Device been
activated three times ?
Yes
No
Trouble in Spin-Dry cycle.
-8-
Adjust the clothes evenly:
Water is supplied to set water
level. Implementing water save
rinse.
8. Preset time program
Turn on the power switch (ON/OFF).
HOW TO USE THE PRESET BUTTON
The PRESET time can be changed by
pressing the SET button.
6 hours
Load the laundry into the washer.
Turn the faucet on.
..
12 hours
No setting
1 hours
.
5 hours
Press the ONE TOUCH SELECT to
select the washing course.
Press SELECT button four times
to enter the preset time program.
Press SET button to select preset
time.
Press START/ PAUSE button.
To select a wash course
The selected preset time indicator will blink on.
When pressing the SET button, the preset time
indicator is changed from 1-12 (hours).
While the preset time program is selected, all
indicators except the PRESET (hour) indicator will
be automatically turned off in about 1 minute.
Preset time program begins working.
During presetting washing program, if the SET button is pressed, the indicator will light on to show the
content of preset washing program.
During presetting washing program, only SET button is affected when pressed.
On the Control Plate, the preset time indicator will blink on from 1-12 hours.
In case, to cancel the preset time, turn power switch off.
It is impossible to use the PRESET function on DRY CARE course.
-9-
9. Indication and judgment of troubles
Trouble judgment :
During operating, when trouble occurs, microchip will judge the cause and stop the present operation. Water
level indicator blinks on and off and buzzer sounds.
Troubles
Judgment
Check
Abnormal condition
of spinning
The Safety Switch works 3 times
continuously during Spin cycle.
Spin Tub is in unbalance, the laundry leant to
one side.
Abnormal condition
of draining
During draining, the water level doesn t
go down below the reset point within 8
minutes.
The Drain Hose hasn t been put down from the
washing machine.
Drain Hose is dented.
The Drain Hose is clogged.
Abnormal condition
of water supply
During supplying water, water level
does not reach to LOW 1 level within 15
minutes.
The faucet isn t turned on.
Water pressure is very low.
Water source is cut off.
Water supply valve is clogged.
Abnormal condition
of water level
sensor
The frequency of water level sensor is
higher than 73.728 KHz or lower than
8.192 KHz.
Abnormal condition
of the load sensor
During rotating of pulsator, the pulse
which is counted by motor is low than 2.
Water level sensor is defective.
Connector is poorly connected.
Motor rotated badly.
Tension strength of V-Belt is out of
specification.
Abnormal information:
Buzzer sounds with 0.3 seconds ON - 0.3 seconds OFF cycles in 16 times.
Depending on the kind of troubles, the indicators will blink on as bellow:
The blinking of indicators
Kind of Trouble
Spinning
Drain
Water supply
Washing (Child safety mode)
Other troubles
Trouble release :
Trouble
Indication
Where to check
Close the Washer Lid.
Check whether the laundry is clumped on one side of the Wash/ Spin Tub or not.
Check whether the Washer is on the level surface or not.
Check whether the Child safety mode is set or not. Close the Washer Lid.
Turn the water supply faucet on.
Check whether the water supply has been cut off or not.
Check whether the metal filter of the Water Inlet is clogged or not.
Check whether the washer has been freezing or not.
Put down the Drain Hose from the hookhole.
Check whether there is anything wrong with the Drain Hose or not.
Check the Drain Hose for any obstructions.
Check whether the Drain Hose is clogged with lint or not.
Check whether the Drain Hose rises too high (more than 15 cm) off the ground or not.
Check whether the Drain Hose is too long (longer than 3m) or not.
Check whether the diameter of the Drain Hose is too small or not.
Press the START/ PAUSE button or turn the POWER SWITCH.
- 10 -
10. Inspection mode for service man
Method to enter service inspection mode:
(1) While holding the PROGRAM button down at pressed state, press the POWER SWITCH button.
(2) Hold the program button down at pressed state, press the START/ PAUSE button three times.
The operation of inspection mode:
(1) Press PROGRAM button to set the inspection mode.
(2) Press only START/ PAUSE button to start the inspection mode.
Setting
course
Inspection
NORMAL
The motor rotates
clockwise.
Does Pulsator rotate
clockwise ?
Check the operation of Motor, Bearing Ass y
and PCB.
HEAVY
DUTY
The motor rotates
counter clockwise.
Does Pulsator rotate
counter clockwise ?
Check the operation of Motor, Bearing Ass y
and PCB.
CUSTOM
The drain valve
operates.
Does drain valve open ?
Is water drained ?
Check the operation of Magnetic Coil and
Drain valve.
DRY CARE
The Magnetic
Valve operates.
Does Magnetic Valve open ?
Check the operation of Magnetic Valve and
PCB.
Confirmation
Is water supplied ?
Purpose
Method to enter child safety inspection mode :
(1) Turn power switch on.
(2) Press and hold the WATER LEVEL for 4 seconds or more until sounds beep and the indicator of
CHILD SAFETY will light on.
NOTE:
Press the WATER LEVEL button again for 4 seconds or more until sounds beep and indicator of CHILD
SAFETY will light off in order to delete CHILD SAFETY inspection mode.
- 11 -
11. Care of service :
Disconnect the power cord during servicing for your safety.
Removing Front Panel
(1) Take two fixing screws out.
(2) Pull Front Panel down and lift it up for taking out.
(3) Reverse the order of the steps above to put the unit back.
Replacing Control Plate and Printed Circuit Board
(1) Follow the steps (1) to (2) of the Replacing Front Panel .
(2) Pull stopping pin down for taking out.
(3) Slide the control plate approximately 7mm to the left.
(4)
Hold both edges of the Control Plate, lift and tilt it towards back.
(5) Take out 6 screws that are holding the PCB, and remove the 9P, 4P, 3P and 2P
connectors before removing the PCB.
(6) Reverse the order of the steps above to put the unit back.
Removing Back Plate
(1) Remove the Cap on drainage and then remove screws.
(2) Hold both ends of the Back Plate, lift and remove it.
(3) Once the Back Plate is removed, the water supply valve and safety switch can be replaced.
(4) When the parts are replaced, reverse the order of the steps above to put the unit back.
- 12 -
Replacement of Top Plate
(1)
(2)
(3)
(4)
(5)
(6)
(7)
Follow the steps (1) to (2) of Replacing Font Panel .
Follow the steps (2) to (4) of Replacing Control Plate .
Follow the steps (1) to (3) of Removing Back Plate .
Take out 4 screws that are holding Top Plate and Frame.
Tilt the Top Plate backward during lifting it up.
Once the Top Plate is removed, the Response Switch, Water Pump can be replaced.
Reverse the order of the steps above to put the unit back.
CAUTION:
1. Do not bend the lever of safety device when opening the Top Plate, otherwise operating
angle of device will be out of specification.
2. As wires for connecting control parts are placed underneath the Top Plate, after removing
the Top Plate and reconnecting wires, make sure that the wires are not pinched or stuck
between Frame and the Top Plate.
Removing Washer Lid
(1) Open the washer lid.
(2) Remove the washer lid during pushing the shaft center of hinge at left, using a plate blade
screwdriver.
(3) Move the top lid to the left side and lift it up.
(4) Remove the Hinge Spring from the Washer Lid.
(5) Follow the above steps reversely when you want to assemble them again.
Handle of the washer lid
The hooks of the washer lid will be broken if you remove the handle.
When the handle is damaged, the Washer Lid Assembly containing the handle must be
replaced.
Removing Magnetic Valve
(1)
(2)
(3)
(4)
Follow the steps (1) to (3) of Replacing Back Plate .
Move Soap Box Ass y.
Remove two screws that are holding Pour Inlet Ass y and Top Plate.
With a screwdriver (-), carefully remove the edges on both ends (left and right) of the Pour Inlet Ass y
and lift it up. Be careful not to scratch the Top Plate.
(5) Remove three screws holding Magnetic Valve and Pour Inlet Ass y.
(6) Pull Magnetic Valve from Pour Inlet Ass y.
(7) Follow the above steps reversely when you want to assemble them again.
Replacement of Air Trap Hose
(1) Remove Top Plate.
(2) Pull out Air Trap Hose after making sure of no water in Outer Tub. If water remains in Outer Tub, pull
Connection Wire of drain valve to drain by hand.
(3) Wipe the surface which the hose will connect to with thinner liquid.
(4) Apply vinyl chloride type adhesive to the surface of pipe and insert new hose into the pipe completely
Notice : Do not cover the end of pipe by making a film of glue during glue application.
(5) Fit Hose Band at the middle of the pipe.
Wipe with thinner liquid
Air Trap Hose
Pipe for connection ( Outer tub)
Hose Band
Apply vinyl chloride type adhesive
- 13 -
Replacement of Suspension Rod Ass y:
(1)
Remove the screws which are seemed on Top plate, follow the steps of Replacing top plate .
(2)
Lay the washer down left or right suitably on the floor (It is necessary to have a soft cloth or blanket to
protect the washer).
(3)
Remove the Top Plate.
(4)
From bottom of Outer Tub, push the Suspension Rod Ass y up until it raises from suspension base.
(5)
After removing the Stopping Pin, pull out the Suspension Rod Ass y from bottom of Frame.
(6)
Follow the steps above in the reverse order when you want to assemble them again with a new
Suspension Rod Ass y.
When you have to replace a suspension rod complete, please replace the all of four Suspension Rod
Assembly.
There are four types of Suspension Rod Complete:
Back
At the non- motor side:
1 Set (Service Code: 617-259-7188)
At the motor side:
1 Set (Service Code: 617-259-7195)
Right
Left
Motor
At the motor side:
(In the corner of front side and left side)
1 Set (Service Code: 617-259-7119)
Front
At the non- motor side:
(In the corner of front side and right side)
1 Set (Service Code: 617-259-7102)
Lead Wire connector for water supply Valve
(1)
Move the insulation tube.
(2)
To remove the connector from water supply
valve, pull it while pressing the Projection in the
middle with your nail to unlock.
Projection
Connector
Do not pull it by force without unlocking,
otherwise the Lead Wire may be torn off.
When reconnecting the Connector, make sure
that it is locked firmly by pulling it slightly after
connecting.
(3)
Lead Wire
Fix the Insulation Tube.
- 14 -
Insulation Tube
12. Flow chart of trouble shooting
TROUBLE
INSPECTION
a. Power Source
Any indicators and
beep do not work
when the power
switch is on and
the start button is
pressed
CAUSES
REMEDY
Yes
Is fuse blown ?
No
Deterioration of fuse
Replace
Motor is defective
Replace
Capacitor is defective
Replace
Poor connection of the 14
pin connectors.
Repair or replace
P.C.B Complete is
defective
Replace
b. Water supply
Water does not
flow when the
power switch is on
and the start
button is pressed
Does humming noise
come on from Magnetic
Valve.
Yes Something on the filter of
the Magnetic Valve.
Poor connection of the 14
pin connectors.
Magnetic Valve is
defective
Response Switch is
defective
P.C.B Complete is
defective.
Water is not
supplied.
Low
Check water pressure.
High
Flow sheet
Collar
Clean the filter
Repair or replace
Replace
Replace
Replace
*Remove the flow
sheet of the Magnetic
Valve.
Clean the filter on the
Magnetic Valve.
Filter
Water Valve
* Note: when removing the flow sheet, reinstate the filter in place correctly.
Water does not
stop
Does water stop
when the plug is
removed or power
Switch is OFF ?
No
Yes
Something in the Air Trap
Hose or air leaks from a
part related Response
switch system
Response Switch is
defective.
P.C.B Complete is
defective.
Something on the
diaphragm on the water
valve
Diaphragm is deformed
- 15 -
Clean or replace
Replace
Replace
Replace or
disassemble the valve
and clean the
diaphragm
Replace the valve
TROUBLE
INSPECTION
CAUSES
REMEDY
c. Wash/ Rinse
Washing cycle
does not start
even if water
keeps the selected
water level.
Does the Spin Tub
rotate normally when
the SELECT button is
set to SPIN ?
No
Yes
Does the Pulsator
rotate by hand ?
Yes
Does humming noise
come on from motor ?
No
No
Bearing Ass y is
defective.
Replace
Poor connection of the 14
pin connectors.
Thermostat on motor is
opened
P.C.B Complete is
defective.
Replace
Bearing Ass y is
defective
Unnecessary materials
lock pulsator operation.
Replace
Motor wires are
disconnected.
Repair or replace
Capacitor s wires are
disconnected.
Repair or replace
Capacitor is defective
Motor coil is shortened
Replace
Replace
Brake lining on Bearing
Ass y is worn out
Replace Bearing
Ass y
Brake Lever Ass y is
defective.
Replace Bearing
Ass y
Magnetic Coil is
damaged.
Replace
Brake lining is worn out
Replace Bearing
Ass y
Replace Bearing
Ass y
Repair or replace after
cooling down
Replace
Take out
Yes
The Spin Tub
rotates together
with the Pulsator
during washing or
rinsing cycle.
Is the Magnetic Coil
working normally ?
Yes
No
Does brake work
normally ?
No
Brake Lever Ass y is
defective.
- 16 -
TROUBLE
INSPECTION
d. Drain
CAUSES
REMEDY
Foreign matter in Valve
Valve Spring is deformed
Clean valve inside
Replace Valve Spring
Valve Bellows is
deformed
Replace Valve Bellow
or replace Valve
Spring
Magnetic Coil lead wire
is disconnected.
P.C.B Complete is
defective
Repair or replace
Valve Bellow is deformed
Replace
Connect Hose is deformed
Repair or replace
Repair
Yes
Water does not
drain out
Is the Magnetic coil
working normally ?
No
Drain takes time
too long
Drain Hose Ass y is
deformed
Extension hose is too
long or too high.
15cm max
1m max (extension)
Extension of the Drain Hose:
The maximum length and height to which the
Drain Hose can be extended are given below.
Extension hose height
15 cm max
--
Replace
Repair
Extension hose lenght
1m max
3m max
e. Spin Drying
Spin drying cycle
does not work
Does safety device
work ?
Yes Machine inclines
Adjust the adjustor of
leg
No
NOTE :
1. When Safety Switch is continuously
affected 3 times, the washer will adjust
the unbalance condition. If the washer
can not adjust the unbalance condition,
it will stop and indicator shows U3 by
flashing on and off.
The V-belt is slipping
Adjust the motor
position
V-belt is snapped
Motor Pulley mounting
screw is loose.
Replace
Motor is disconnected or
burnt
Repair or replace
Capacitor is defective or
disconnected
Repair or replace
Bearing Ass y is
defective
Magnetic Coil is defective
Replace
Tighten up
Brake Lever is defective
Replace
Replace
Thermostat on motor is
opened
Repair or replace
after cooling down
Poor connection of the 14
pin connectors
Repair or replace
P.C.B Complete is
defective
Replace
- 17 -
TROUBLE
INSPECTION
CAUSES
REMEDY
f. Buzzing and rattling
Buzzing/ rattling
during water
supply.
Is water pressure high
(more than 10kg.f/ cm2)
?
Low Screw of Magnetic Valve
is loose.
Something in Magnetic
Valve.
High Faucet open too widely.
Buzzing/ rattling
during washing or
rinsing.
Does some noise sound
during spin drying?
Replace.
Adjust faucet turning.
V-Belt is slipping.
Adjust.
Motor Pulley is loose.
Tighten up.
Some parts touch motor
Repair or replace.
Something underneath
pulsator.
Remove.
Pulsator is rubbed.
Adjust Bearing Ass y
Pulsator Shaft is burnt.
Replace Bearing
Ass y
Is sound in low-pitched
mono-tone ?
Bearing of Bearing Ass y
is defective.
Replace.
Does variable sound
happen by vibration ?
Machine is in unbalance.
Place machine evenly
on base.
Suspension Rod Ass y is
worn out.
Replace.
Does noise sound when
the washer begins to
work ?
V-Belt is slipping.
Adjust.
Is clattering on maximum
rotation ?
Motor Pulley is loose.
Tighten up.
Sound is flapping ?
Wire and/ or Air Trap
Hose is loose.
Tighten.
No
Buzzing/ rattling
during spin drying.
Yes
Tighten screws.
- 18 -
13. Troube shooting of Bearing Assembly (Bearing Case Complete)
For Fully Automatic Washing Machines.
1. Abnormal (Squeaky) sound is heard during washing:
Symptom: The squeaky sound occurs when the brake system operates. During washing, the Pulsator turns
CW (clockwise) and CCW (counterclockwise), producing water flow in the CW and CCW
direction. The water flow exerts force on the Spin Tub in the same directions though interlocked
with the Brake Wheel during washing. The Spin Tub turns a little if the friction with the brake
lining reduces, generating braking sound. This symptom will not arise due to use of long
duration but is entirely an initial fault.
Diagnosis: Turn off the power. Open the Washer Lid. Hold the Spin Tub and lightly turn it CW. If sound is
heard from the brake, it is defective.
Cause:
The cause can be limited to foreign substance (grease in particular) affixed to the surface of
brake lining and brake wheel, which is attributed to poor quality control in the Bearing Assembly
manufacturing process.
Handling: Replace the Bearing Case (complete) and wipe the Brake Wheel surface with alcohol.
2. Spin tub stops sound (squeak):
Symptom: Squeaky sound is heard immediately before the Spin Tub stops.
Cause:
This symptom often arises when friction factor between brake lining and brake wheel is too big.
Therefore, this occurs when brake time is short, the cause of which is attributed mainly to the
improperness of brake lining material, roughness of brake wheel surface and excessive
strength of brake spring, but attachment of foreign matter and high humidity can also be
responsible for the symptom.
Diagnosis: Allow water extraction program to complete automatically instead of forcibly, apply the brake,
and listen for squeaky sound when the Spin Tub stops.
Handling: Replace the Bearing Case (complete) and wipe the Brake Wheel surface with alcohol.
3. Brake does not work:
Symptom: Brake is applied when water extraction has completed, but the Spin Tub takes too long time to
come to a complete stop.
Cause:
Braking torque is too small, which is attributed to excessive abrasion of brake lining, attachment
of foreign substance (grease in particular) on the surface of brake wheel and brake lining, etc..
Diagnosis: Taking approx 10 sec. of braking time, which is normally about 5 sec, can be determined to be
defective.
Handling: Replace the Bearing Case (complete) and wipe the Brake Wheel surface with alcohol.
4. Abrupt braking (When the Spin Tub stops, the entire machine moves):
Symptom: Brake is applied when the water extraction has complete, but the Spin Tub takes a very short
time to come to a complete stop.
Cause:
Braking torque is too big, which is attributed to abnormal shape of brake lining. This symptom
occurs particularly when clearance between brake lining and brake wheel is too small at their
tips.
Diagnosis: Taking only 2 or 3 sec. of braking time, which is normally about 5 sec at no load, can be
determined to be defective.
Handling: Replace the Bearing Case (complete) and wipe the Brake Wheel surface with alcohol.
- 19 -
5. Spin tub does not rotate (Spin Tub is locked):
Symptom: Spin Tub does not rotate despite water extraction starting stage.
Cause:
When it is caused by electric signals, water level sensor, Magnetic Coil, motor receptacle
Housing Assembly, PCB Complete, Safety Switch, etc are likely to response. However, the
troubles are mainly caused by related mechanical parts in this case. If this problem occurs, the
clutch mechanism of Bearing Ass y will fail. Especially, one-way bearing, which composes part
of Bearing Case (complete), rusted by detergent penetrating is the main cause of the trouble.
Insufficient transfer of rotation due to inaccurate dimensions of clutch spring also causes the
trouble.
Diagnosis: Assuming that all electric parts are normal, check if the Spin Tub can be easily rotated by hand
when the Magnetic Coil is in the state of pulling.
Handling: Replace the Bearing Case (complete) and wipe the Brake Wheel surface clean with alcohol, or
replace the Clutch Spring.
6. Water leakage:
Symptom: Water leaks from somewhere around the Bearing Ass y. Parts of the Bearing are sometimes
seen rusted.
Cause:
Oil seal lip lying on the top of ring (complete) is insufficiently fitted in the Outer Tub Bottom.
Handling: Replace the Bearing Ass y.
7. Click sound is heard during washing:
Symptom: Click sound is heard from the vicinity of the Bearing Ass y. Similar sound can also be caused
by a small metal piece, such as a coin or hair pin penetrating into the back of the Pulsator,
damaging and making its rear ribs into flakes and resultantly generating sound. This will not be
discussed here because there is nothing to do with the Bearing Ass y.
Cause:
Infusion engagement of the Clutch Lever with the ratchet causes the lever to jump, making
noises. In the washing process, the Clutch Lever is normally engaged with the ratchet
completely, generating no sound.
Diagnosis: Normally the clearance between the circumference of the ratchet and clutch lever is
approximately 3 mm. In the event of this trouble, the clearance should be 5 to 6 mm.
Handling: Replace the Bearing Ass y
- 20 -
14. Exploded View
- 21 -
- 22 -
- 23 -
- 24 -
15. Part List
No.
Part Name
Service Code
Q'Ty
Specification
1
PCB Complete
617-260-0239
1
2
SCR TPG TRS 4x16
411-007-5606
6
3
Control Plate
617-263-5347
1
202N
4
Stopping Pin
617-226-9603
1
RED COLOUR
5
Membrane Plate
617-259-8970
1
PET
6.1
Washer Lid Ass'y
617-259-8161
1
6.1.1
Washer Lid A
SER-SPC-0010
1
634N SILVER
6.1.2
Washer Lid B
SER-SPC-0012
1
634N SILVER
6.1.3
Lid Lens A
617-263-5392
1
293B BLUE
6.1.4
Lid Lens B
617-263-5385
1
293B BLUE
6.1.5
Hinge Shaft
617-259-8246
1
6.2
Lid Cushion
617-160-4252
2
TPE
6.3
Lid Spring
617-175-0935
1
SUS-304 D1.0
6.4
Hinge Arm
617-221-7390
1
P.P TPC/ AR564
7
Hinge Shaft
617-250-0171
1
P.P POM
8
Hinge Spring
617-259-8253
1
SUS-304-WPA
9
Safety Lever
617-259-8987
1
POM
10
Safety Lever Spring
617-175-0508
1
11
Switch
617-175-0485
1
12
SCR TPG TRS 4x16
411-007-5606
1
13
Response Switch
617-235-7263
1
14
Lead Wire Ass'y
617-245-6621
1
15
Hose Band
617-148-4632
1
16
Magnetic Valve
617-242-2084
1
17
SCR TPG TRS 4x16
411-007-5606
3
18
SCR TPG TPS 4x16
411-007-5606
2
19
Pour Inlet Ass'y
617-245-4481
1
20
Air Trap Hose
617-259-8994
1
21
Hose Band
617-026-4921
2
22
Hose joint Ass y
617-259-9021
1
23
Pump Ass y
617-249-5514
1
ZH-208G-2
24
Cushion
617-263-5101
2
T2.0 EPDM
25
Cover
617-259-9052
1
P.P - AR564
27
Feed Valve Fixture
617-244-6134
1
P.P
28
SCR TPG TRS 4x12
411-074-5806
2
- 25 -
KS-12-0
KPS-59-C
JWV-203G
No.
Part Name
Service Code
Q'Ty
Specification
30
Top Plate
617-259-9700
1
31
SCR TPG TRS 4x12
411-074-5806
2
32
SCR TPG TRS 4x20
411-007-1004
2
FIX TOP PLATE
33
SCR TPG TRS 4x10
411-074-5004
4
FIX FRAME ATTACH
34
Tab Housing Ass y
617-245-6614
1
220-240V
35
Tab Housing Ass y
617-250-2557
1
220-240V, M3 IEC
35.1
Fuse Ass y
617-244-1061
1
36
Back Plate
617-259-9731
1
202N
38
Sub Drain Cap
617-259-9779
1
P.P
39
Soap Box Ass'y
617-245-9219
1
40
Frame Complete
617-259-6976
1
41
Frame Attach
617-243-8061
1
PP. TPC AR564 (RIGHT)
42
Frame Attach
617-263-6672
1
PP. (LEFT)
43
Front Panel
617-259-7089
1
T0.5 (PCM)
44
Spring Damper Base
617-180-4676
4
P.P
45
Stopping Pin
617-261-0092
4
SUS-304-WPB D2.0
46
SCR TPG TRS 4x14
411-074-6605
2
47
Frame Handle
617-262-7809
2
P.P NATURAL
48
Drain Hose Ass y
617-252-5853
1
INNER
49
Hose Band
617-026-4891
1
50
Drain Hose Ass y
617-155-7879
1
OUTER
51
Leg
617-259-7096
1
AR564-COOL GRAY 10C
52
Bottom Cover
617-259-8345
1
P.P
53
SCR TPG TRS 4x14
411-074-6605
7
54
Cushion
617-180-4423
3
55
SCR TPG TRS 6x20
411-149-5106
3
56
Adjustor Screw
617-180-4386
1
FRPP E-7000
57
Adjustor Cap
617-263-6955
1
COOL GRAY
58
Adjustor
617-183-6363
1
59
Drain Cap
617-262-7830
1
60
Lead Stay
617-021-1413
1
61
Cord Ass y
617-231-4624
1
M3
62
Cord Stay
617-021-1338
1
NYLON
63
SCR TPG TRS 4x12
411-074-5806
1
64
Capacitor Ass y
617-230-3550
1
65
Sound Proof Board
617-025-3635
3
- 26 -
202N
PP COOL GRAY
444V.AC 8.0MF
No.
Part Name
Service Code
Q'Ty
Specification
66
Special Screw
617-029-0050
2
67
Lead Wire Ass y
617-192-7962
1
70
Pulsator Screw
617-026-9575
1
SUS-304
71
Pulsator Screw Washer
617-026-9636
1
SUS
72
Pulsator
617-259-7669
1
P.P AR564
73
Pulsator Washer
617-183-6431
1
SUS-430 T1.5
74
Outer Tub Cover
617-259-7645
1
P.P
75
SCR TPG TRS 4x16
411-007-5606
3
76
Suspension Rod Ass'y
617-259-7102
1
FRONT-RIGHT
77
Outer Tub Drum
617-259-7584
1
P.P
78
Drain Pipe
617-180-4799
1
P.P
79
Overflow
617-262-2064
1
P.P
80
Suspension Rod Ass'y
617-259-7119
1
FRONT-LEFT
81
Suspension Rod Ass'y
617-259-7188
1
REAR-RIGHT
82
Suspension Rod Ass'y
617-259-7195
1
REAR-LEFT
83
Overflow Hose
617-262-2040
1
PE.
84
Hose Joint Ass y
617-259-7539
1
85
Special Screw
617-216-8159
3
86
Bearing Ass y
617-259-7812
1
87
Special Screw
617-029-0050
2
4x10
88
Special Screw
617-029-0234
4
SWCH-18A
89
Balance Weight
617-141-6695
1
90
Magnetic Coil
617-234-3990
1
KD-SW22LB 200-240V
91
Special Screw
617-028-9740
4
FIX MAGNETIC COIL
92
Valve Ass y
617-262-9049
1
92.1
Valve Case
617-262-2057
1
P.P
92.2
Valve Bellows
617-120-3950
1
EPT
92.3
Valve Shaft
617-259-7706
1
92.4
Valve Spring
617-107-6585
1
92.5
Valve Cap
617-026-6468
1
P.P
92.6
Connection Wire
617-262-4013
1
P.P
93
Special Screw
617-028-9733
2
FIX VALVE
94
SCR TPG TRS 4x16
411-007-5606
1
95
Hose Band
617-183-6202
1
96
Insulator Plate
617-180-5758
2
FR-PP E7000
97
Motor Complete
SER-CPC-0007
1
AM-V14JM
- 27 -
4x10
No.
Part Name
Service Code
Q'Ty
Specification
98
Insulator Plate
617-180-5734
2
99
Special Screw
617-029-0180
2
100
Motor Pulley
617-244-0248
1
101
Brake Wheel Screw Ass y
617-015-6523
1
102
V- Belt
617-114-6073
1
M-20
103
Motor Angle Holder
617-185-0260
1
SGCCO-Z08 T1.0
104
Special Screw
617-029-0241
4
SWCH-18A
105
Feed Hose Ass'y
617-253-1519
1
1.2M
105.1
Magic Joint Ass'y
617-186-1747
1
Spin Tub Complete
617-259-7355
1
106.1
SCR TPG TRS 4x10
411-074-5301
8
FIX CIRCULATE HOSE A&B
106.2
SCR TPG TRS 5x22
411-075-2507
6
FIX SPIN TUB TO BALANCE
WEIGHT
106.3
SCR TPG TRS 5x22
411-075-2507
12
FIX SPIN TUB BOSS
106.4
Spin Tub Ass'y
617-259-7362
1
106.4.1 Circulate Hose Ass'y A
617-259-7409
1
106.4.2 Circulate Hose Ass'y B
617-259-7478
2
106.4.3 Balance Weight Ass y
617-259-7423
1
SER-SPC-0016
1
106
106.4.4 Spin Tub Boss
FR-PP E7000
ADC-12
107
Lint Filter Ass y
617-234-9282
1
NW-32
108
Packing
617-223-7039
2
EPDM
109
SCR TPG TRS 4x12
411-074-5806
1
110
Notice Label
617-180-8599
1
111
Special Screw
617-029-0227
4
112
Rubber Damper
617-138-2235
4
SANYO Electric Co., Ltd.
Osaka, Japan
- 28 -