1
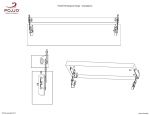
TRUE
TECHNICAL SERVICE MANUAL - ALL MODELS
www.truemfg.com
DOORS/DRAWERS/LIDS
55
NOTES
56
TRUE
TECHNICAL SERVICE MANUAL - ALL MODELS
www.truemfg.com
DOORS/DRAWERS/LIDS
Springs
97
TRUE
www.truemfg.com
TECHNICAL SERVICE MANUAL - ALL MODELS
TORSION SPRING REPLACEMENT GDM RADIUS FRONT SWING DOOR
INSTALLATION INSTRUCTIONS
Tools Required
• (2) - 1⁄8" drift Punch (forged)
Top
Door
Hinge
Bracket
• Needle-Nose Pliers
• Phillips Head Screwdriver
• Wrench (3⁄8")
Door
Hinge
Shaft
Nylon
Door
Block
Door
Stop
Pin
Hinge
Washer
Brass
Bushing
Door
Hinge
Spring
1b
Nylon
Door
Block
Brass
Bushing
Thrust
Bearing
1a
Hinge
Washer
NOTE: If the torsion spring is broken, there is no need for
steps 1-4.
STEP 1 - Turn the cooler off.
STEP 2 - Locate the top hinge assembly.
STEP 3 - If spring remains taut, relieve tension by placing a drift
punch or drill bit into the stop pin hole, two holes to the left (for right
hinged door) of the stop pin position.
With the punch firmly anchored in position, apply back pressure to the left and remove the stop pin with a pliers.
While firmly holding the drift punch with your left hand begin
rotating the door shaft to the right relieving spring tension. Insert
second drift punch into the hole to the left and repeat the process
until all spring tension is relieved.
NOTE: The opposite procedure would be followed for a left
hinge door.
98
Bottom
Door
Hinge
Bracket
STEP 4 - Remove all 4 anchor screws from louvered grill and remove
grill.
NOTE: If cabinet is equipped with integrated door light, be sure
to plug into ballast box.
NOTE: Freezer doors have heater wires which must be plugged
in before operation.
STEP 5 - In a squatted position rest the bottom of the open door
on your left knee (for right side door) as you face the outside of the
door. Create an upward pressure and remove the two 3/8" bolts
from the bottom hinge assembly. Remove the bottom hinge assembly.
(Illustration 2)
TRUE
www.truemfg.com
TECHNICAL SERVICE MANUAL - ALL MODELS
2
STEP 1 - Turn the cooler off.
®
STEP 2 - Locate the top hinge assembly.
STEP 3 - If spring remains taut, relieve tension by placing a drift punch or drill bit into the
stop pin hole, two holes to the left (for right hinged door) of the stop pin position.
With the punch firmly anchored in position, apply back pressure to the left and
remove the stop pin with a pliers.
While firmly holding the drift punch with your left hand begin rotating the door shaft
to the right relieving spring tension. Insert second drift punch into the hole to the left and
repeat the process until all spring tension is relieved.
NOTE: The opposite procedure would be followed for a left
hinge door.
STEP 4 - Remove all 4 anchor screws from louvered grill and remove grill.
NOTE: If cabinet is equipped with integrated door light, be sure
to plug into ballast box.
NOTE: Freezer doors have heater wires which must be plugged
in before operation.
STEP 5 - In a squatted position rest the bottom of the open door on your left knee
(for right side door) as you face the outside of the door. Create an upward pressure and
remove the two 3/8" bolts from the bottom hinge assembly. Remove the bottom hinge
assembly. (Illustration 2)
TO ADJUST DOOR HINGE
Loosen bolts from bottom hinge
assembly and lightly tap the hinge bracket
with a plastic or rubber hammer. When
door hangs true, tighten bolts.
STEP 6 - Remove the door and carefully place door on a flat surface with the door
handle on the bottom. The door should be in a rectangular position.
STEP 7 - Remove upper and lower brass bushing from from the top and bottom of door.
NOTE: It may be necessary to verify stop pin location and door block material for some
models. Or call 800-325-6152.
STEP 8 - Remove the broken torsion spring from the top of the door. To do this you
might need to bend a hook on the end of a piece of metal such as a coat hanger. Place this
hook in the top of the door grabbing the top of the torsion spring. Pull the torsion spring
out the top. Go to the bottom door block and insert a 3/16" drill bit into the 3/16" hole in
the block till it stops. Then drive it in about two inches to push the old rod out of the door
block. (See Illustration 1b)
NOTE: You may be only be able to pull out part of the broken torsion spring. If so,
cut the spring allowing remainder to fall back into the door.
STEP 9 - Before installing new spring be sure that the ends of the new torsion spring are
a “U” shape. If not, squeeze down on the end of the hook closing the gap.
STEP 10 - Insert the new spring from the top of the door ensuring that the end hooks
into the cross in the bottom door block.You will need to use the door shaft to ensure that
99
TRUE
TECHNICAL SERVICE MANUAL - ALL MODELS
www.truemfg.com
the spring is down in the cross of the door block. By turning and pushing down on the spring in either direction 90˚ the spring should fall into
place.
STEP 11 - Install new upper and lower bushings.
STEP 12 - Assemble top hinge. Place the hinge washer over the door hinge shaft, slide into brass bushing and fit into plastic door block. (Illustration 1a)
STEP 13 - Assemble bottom hinge. Place the hinge washer over the bottom hinge bracket, replace the thrust bearing over the washer, slide
this assembly into the brass bushing and fit into aluminum door bracket.
STEP 14 - While holding bottom hinge in place lift door and slide top door hinge together. Maintain vertical pressure by resting door bottom
on your knee while squatting, or have someone assist in order to re-attach lower hinge to cabinet. Fasten hinge with 3/8" bolts and washers.
STEP 15 - For right hand hinged doors adjust the spring by rotating the door hinge shaft to the left using two drift punches or drill bits hole
by hole to the desired tension (approximately one-half turn). Replace the stop pin in the door shaft. Note: the opposite procedure is
used for left hand hinged doors.
NOTE: If cabinet is equipped with integrated door light be sure to plug into ballast box.
NOTE: Freezer doors have heater wires which must be plugged in before operation.
STEP 16 - Replace louvered grill and secure with four screws.
100
TRUE
www.truemfg.com
TECHNICAL SERVICE MANUAL - ALL MODELS
TORSION SPRING REPLACEMENT OLD STYLE T-SERIES SWING DOOR
INSTALLATION INSTRUCTIONS
Top
Door
Hinge
Bracket
Tools Required
• (2) - 1⁄8" drift Punch (forged)
• Needle-Nose Pliers
Aluminum
Door
Block
• Phillips Head Screwdriver
Door
Hinge
Shaft
• • Wrench (3⁄8")
Door
Stop
Pin
Hinge
Washer
Brass
Bushing
Door
Hinge
Spring
1b
Aluminum
Door
Block
Brass
Bushing
Thrust
Bearing
Hinge
Washer
1a
NOTE: If the torsion spring is broken, there is no need for
steps 1-4.
STEP 1 - Turn the cooler off.
STEP 2 - Locate the top hinge assembly.
STEP 3 - If spring remains taut, relieve tension by placing a 1/8”
drift punch into the stop pin hole, two holes to the left (for right side
door) of the stop pin position.
STEP 4 - With punch firmly anchored in position, apply back pressure to the left and remove the stop pin with needle-nosed pliers.
NOTE: Operation is reversed for left side door.
While firmly holding the drift punch with your left hand begin rotating the hinge shaft to the right relieving spring tension. Insert second
drift punch into hole to the left and repeat process until all spring
tension is relieved.
Bottom
Door
Hinge
Bracket
In some instances it is necessary to relieve spring pressure one hole
position at a time until spring pressure is relieved.
STEP 5 - Remove all 4 anchor screws from louvered grill and remove grill.
NOTE: If cabinet is equipped with integrated door light, be sure
to plug into ballast box.
NOTE: Freezer doors have heater wires which must be plugged
in before operation.
STEP 6 - In a squatted position rest the bottom of the open door
on your left knee (for right side door) as you face the outside of the
door. Create an upward pressure and remove the two 3/8" bolts
from the bottom hinge assembly. Remove the bottom hinge assembly.
(Illustration 2)
101
TRUE
www.truemfg.com
TECHNICAL SERVICE MANUAL - ALL MODELS
STEP 7 - Remove the door and carefully place door on a flat surface with the door
handle on the bottom. The door should be in a rectangular position.
2
®
STEP 8 - Remove upper and lower brass bushing from from the top and bottom of door.
NOTE: It may be necessary to verify stop pin location and door block material for
some models. Or call 800-325-6152.
STEP 9 - Remove the broken torsion spring from the bottom of the door. To do this you
might need to bend a hook on the end of a piece of metal such as a coat hanger. Place this
hook in the bottom of the door grabbing the bottom of the torsion spring. Then pull the
torsion spring out the bottom.
NOTE: You may be only be able to pull out part of the broken torsion spring. If so,
cut the spring allowing remainder to fall back into the door.
STEP 10 - Before installing new spring be sure that the ends of the new torsion spring are
a “U” shape. If not, squeeze down on the end of the hook closing the gap.
STEP 11 - Insert the new spring from the bottom of the door ensuring that the end
hooks into the horizontal pin in the bottom door block. Inset the new brass bushing behind
it so it stays in position.
STEP 12 - Assemble top hinge. Place the hinge washer over the door hinge shaft, slide
into brass bushing and fit into aluminum door block. (Illustration 1a)
STEP 13 - Assemble bottom hinge. Place the hinge washer over the bottom hinge bracket, replace the thrust bearing over the washer, slide this assembly into the brass bushing and
fit into aluminum door bracket.
STEP 14 - While holding bottom hinge in place lift door and slide top door hinge together. Maintain vertical pressure by resting door bottom on your knee while squatting, or
have someone assist in order to re-attach lower hinge to cabinet. Fasten hinge with 3/8”
bolts and washers.
STEP 15 - Adjust the spring tension by turning counter-clockwise (right door) to the desired tension (approx. 1/2 turn). Again use a 1/8” drift punch to adjust and replace stop pin.
NOTE: If cabinet is equipped with integrated door light be sure to plug into ballast box.
NOTE: Freezer doors have heater wires which must be plugged in before operation.
STEP 16 - Replace louvered grill and secure with four screws.
102
TO ADJUST DOOR HINGE
Loosen bolts from bottom hinge
assembly and lightly tap the hinge bracket
with a plastic or rubber hammer. When
door hangs true, tighten bolts.
TRUE
www.truemfg.com
TECHNICAL SERVICE MANUAL - ALL MODELS
TORSION SPRING REPLACEMENT T-SERIES - SWING DOOR
INSTALLATION INSTRUCTIONS
Tools Required
Top
Door
Hinge
Bracket
• (2) - 1⁄8" drift Punch (forged)
• Needle-Nose Pliers
• Phillips Head Screwdriver
Door
Hinge
Shaft
• Wrench (3⁄8")
Nylon
Door
Block
Door
Stop
Pin
Hinge
Washer
Brass
Bushing
Door
Hinge
Spring
1b
Nylon
Door
Block
Brass
Bushing
Thrust
Bearing
Hinge
Washer
1a
NOTE: If the torsion spring is broken, there is no need for
steps 1-4.
STEP 1 - Turn the cooler off.
STEP 2 - Locate the top hinge assembly.
STEP 3 - If spring remains taut, relieve tension by placing a 1/8”
drift punch into the stop pin hole, two holes to the left (for right side
door) of the stop pin position.
STEP 4 - With the punch firmly anchored in position, apply back
pressure to the left and remove the stop pin with a pliers.
NOTE: Operation is reversed for left side door.
While firmly holding the drift punch with your left hand begin rotating the door shaft to the right relieving spring tension. Insert second
drift punch into hole to the left and repeat process until all spring
tension is relieved.
Bottom
Door
Hinge
Bracket
In some instances it is necessary to relieve spring pressure one hole
position at a time until spring pressure is relieved.
STEP 5 - Remove all 4 anchor screws from louvered grill and remove grill.
NOTE: If cabinet is equipped with integrated door light, be sure
to plug into ballast box.
NOTE: Freezer doors have heater wires which must be plugged
in before operation.
STEP 6 - In a squatted position rest the bottom of the open door on
your left knee (for right side door) as you face the outside of the door.
Create an upward pressure and remove the two 3/8" bolts from the
bottom hinge assembly. Remove the bottom hinge assembly. (Illustration
2)
103
TRUE
www.truemfg.com
TECHNICAL SERVICE MANUAL - ALL MODELS
STEP 7 - Remove the door and carefully place door on a flat surface with the door
handle on the bottom. The door should be in a rectangular position.
2
®
STEP 8 - Remove upper and lower brass bushing from from the top and bottom of door.
NOTE: It may be necessary to verify stop pin location and door block material for
some models. Or call 800-325-6152.
STEP 9 - Remove the broken torsion spring from the top of the door. To do this you
might need to bend a hook on the end of a piece of metal such as a coat hanger. Place this
hook in the top of the door grabbing the top of the torsion spring. Pull the torsion spring
out the top. Go to the bottom door block and insert a 3/16" drill bit into the 3/16" hole in
the block till it stops. Then drive it in about two inches to push the old rod out of the door
block. See Illustration 1b.
NOTE: You may be only be able to pull out part of the broken torsion spring. If so,
cut the spring allowing remainder to fall back into the door.
STEP 10 - Before installing new spring be sure that the ends of the new torsion spring are
a “U” shape. If not, squeeze down on the end of the hook closing the gap.
STEP 11 - Insert the new spring from the top of the door ensuring that the end hooks
into the cross in the bottom door block.You will need to use the door shaft to ensure that
the spring is down in the cross of the door block. By turning and pushing down on the
spring in either direction 90˚ the spring should fall into place.
STEP 12 - Install new upper and lower bushings.
STEP 13 - Assemble top hinge. Place the hinge washer over the door hinge shaft, slide
into brass bushing and fit into plastic door block. (Illustration 1a)
TO ADJUST DOOR HINGE
STEP 14 - Assemble bottom hinge. Place the hinge washer over the bottom hinge bracket, replace the thrust bearing over the washer, slide this assembly into the brass bushing and
fit into aluminum door bracket.
Loosen bolts from bottom hinge
assembly and lightly tap the hinge bracket
with a plastic or rubber hammer. When
door hangs true, tighten bolts.
STEP 15 - While holding bottom hinge in place lift door and slide top door hinge together. Maintain vertical pressure by resting door bottom on your knee while squatting, or
have someone assist in order to re-attach lower hinge to cabinet. Fasten hinge with 3/8”
bolts and washers.
STEP 16 - Adjust the spring tension by turning counter-clockwise (right door) to the desired tension (approx. 1/2 turn). Again use a 1/8” drift punch to adjust and replace stop pin.
NOTE: If cabinet is equipped with integrated door light be sure to plug into ballast box.
NOTE: Freezer doors have heater wires which must be plugged in before operation.
STEP 16 - Replace louvered grill and secure with four screws.
104
TRUE
www.truemfg.com
TECHNICAL SERVICE MANUAL - ALL MODELS
INSTALLING NEW DOOR AND REINSTALLING HINGE FOR
T-SERIES GLASS DOOR
INSTALLATION INSTRUCTIONS
STEP 1 - Remove old door See instructions.
Tools Required
STEP 2 - Remove the rainshield and place on top of cabinet. Phillips screws are located
on the top, sides and bottom of the rainshield. The number of screws depend on the size
of the rainshield. See Image 1.
• 7/32" Drill Bit
• 2-1/8" Drift Punches
• Cordless Drill
NOTE:
• Be careful not to damage thermometer capillary tube.
• On freezer models, be sure not to damage door switch wires.
• Phillips Screw Driver
• 3/8" Socket for Hinge Removal
STEP 3 - Remove top hinge bracket by removing both 3/8" bolts.
• Ratchet
Wires to door switch
Probe to thermometer
1
STEP 4 - Add a second plastic shim between the top hinge bracket and cabinet and
reinstall.
Shim #1
Bolt #1
Bolt #2
NOTE: A second shim must be added to each hinge bracket to keep the door gasket
from rolling. Two extra shims are shipped with the new door. See Image 2.
Shim #2
STEP 5 - When putting the pin assembly in door, make sure the end of the spring (slightly
sticking out of the door) goes in the small hole on the underside of the pin assembly. See
Image 3.
A. Insert the hinge shaft top into the pin assembly. See Image 4.
2
6
1. Spring
2. Tension Screw
3. Nylon Bushing
4. Spring Housing
5. Pin Assembly
3
4
6. Hinge Shaft Top
105
TRUE
www.truemfg.com
TECHNICAL SERVICE MANUAL - ALL MODELS
STEP 6
A. Slide new door onto top hinge bracket.
B. Holding door in place with knees or shipping bracket, install bottom hinge bracket
in door and mount to cabinet using a second shim. See Image 5.
5
6
7
STEP 7 - There is a screw on the right side of the rainshield that mounts to the top
hinge. The hole in the rainshield should be drilled out with a 7/32" drill bit.
This will help line the two holes up since the extra shim was added behind the hinge.
See Image 6 and 7.
STEP 8 - Re-install the rain shield.
Screw removed from
top hinge
Screw mounted from
top hinge
STEP 9 - Set tension on spring by rotating the shaft the opposite direction that the
door opens. See Image 8.
STEP 10 - To test proper hinge tension, open the door approximately 4". Let go and
make sure door closes on its own.
Shaft
8
106
TRUE
TECHNICAL SERVICE MANUAL - ALL MODELS
www.truemfg.com
TSSU UPPER DOOR HINGE
INSTALLATION INSTRUCTIONS
107
TRUE
TECHNICAL SERVICE MANUAL - ALL MODELS
108
www.truemfg.com