1
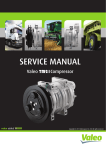
SERVICEMANUAL
Valeo TM43 Compressor
Copyright © 2014 Valeo Japan CO., LTD. | All rights reserved.
Flexible port design
Easier installation
Oil fill-up plug for better
inner oil return
5 double-headed pistons architecture
ensuring smooth and quiet operations
Compact & robust design enabling
easy mounting configurations
Lip type shaft seal providing
ultimate reliability & performance
Light & Compact, Ultimate Reliability, Highest Performance
Foreword
This service manual has been elaborated to help service personnel to provide efficient and correct service
and maintenance on the Valeo TM43 compressor (for
HFC-134a) for automotive air conditioning.
The contents of this manual, including illustrations,
drawings and specifications were the latest available
at the time of printing.
Valeo Japan reserves the right to make changes in
specifications and procedures at any time without
notice.
This manual includes the operation specifications,
procedures for disassembly, reassembly, and
inspection of the compressor.
VALEO JAPAN CO., LTD.
WARNINGS
The following warning signs are used in this service manual.
These are extremely important to ensure safe operation and to prevent body injuries and
property damage.
They must be fully understood before starting the air conditioner maintenance.
WARNING!!
Maintenance must be properly done to avoid serious injury risks.
CAUTION!!
Improper maintenance can result in injury or property damage.
MEANING OF MARKS
The following marks are used in this service manual to facilitate correct air conditioner
maintenance.
Advice
Procedures necessary to ensure the best air conditioner maintenance.
Note
Information to optimize the air conditioner maintenance.
-1-
Contents
1-Product description................................................................................... 3
2-Operation precautions.............................................................................. 16
3-Handling instructions............................................................................... 17
Maintenance precautions.......................................................................... 17
Work area................................................................................................. 17
Refrigerant handling................................................................................... 17
Compressor handling................................................................................ 18
Compressor removal.................................................................................. 18
Oil return operation.................................................................................. 19
Oil handling.............................................................................................. 19
Oil contamination..................................................................................... 20
Oil check................................................................................................... 20
Replacement of components..................................................................... 20
Running-in operation................................................................................ 21
Compressor runnning-in............................................................................... 22
Magnetic clutch running-in........................................................................... 22
Leak test.................................................................................................. 23
Refrigerant charging................................................................................... 23
Storing a repaired compressor ...................................................................... 23
4-Troubleshooting ...................................................................................... 24
Compressor troubleshooting ........................................................................ 24
Compressor troubleshooting tree .................................................................. 24
A/C cycle diagnosis by gauge pressure............................................................ 27
5-Tightening torques................................................................................... 29
6-Service procedures - Magnetic clutch..................................................... 30
7-Services procedures - Shaft seal assembly............................................. 36
8-Services procedures - Cylinder heads...................................................... 39
9-Service tools............................................................................................. 43
Magnetic clutch service tools....................................................................... 43
Compressor tools...................................................................................... 44
Test and inspection tools ............................................................................ 44
10-Service parts .......................................................................................... 45
-2-
1-Product description - Compressor
Compressor
TM43
MODEL
TECHNOLOGY
Heavy Duty Swash Plate
425cc / 26 in3 per rev.
DISPLACEMENT
NUMBER OF CYLINDERS
10 (5 double-headed pistons)
REVOLUTION RANGE
600-5000 rpm
DIRECTION OF ROTATION
Clockwise viewed from clutch
BORE
40 mm (1.57 in)
STROKE
33.8 mm (1.33 in)
SHAFT SEAL
Lip seal type
LUBRICATION SYSTEM
Lubrication by gear pump
REFRIGERANT
HFC-134a
OIL (QUANTITY)
PAG OIL (800 cc/0.21 gal) or POE option
Suction: 35 mm (1-3/8 in)
Discharge: 28 mm (1-1/8 in)
CONNECTIONS
Internal Hose Diameter
WEIGHT (w/o clutch)
13.5 kg / 29.7 lbs
DIMENSIONS (w/o clutch)
319-164-269 (mm)
Length - Width - Height
MOUNTING
12.6-6.5-10.6 (in)
Direct (side or base)
Saturatedcondensingconditions
Valeo TM43 Application limits
PSIA
PSIG
oF
MPaA
MPaG
oC
398
384
180
2.75
2.65
82
244
229
140
1.68
1.58
60
125
111
93
0.86
0.76
34
83
68
68
0.57
0.47
20
tc : Condensing temperature
te : Evaporating gas temperature
tc
te
-20
-10
10
20
oC
0.03
0.10
0.31
0.47
MPaG
0.13
0.20
0.41
0.57
MPaA
-4
14
50
68
o
5
14
45
68
PSIG
19
29
60
83
PSIA
Saturatedevaporatingconditions
-3-
F
1-Product description - Name Plate
Nameplate
COMP. TYPE
PART NO.
SERIAL NO.
OIL
LEAK TEST
To ensure that the compressor operates
smoothly, be careful to respect the indications
written on the name plate located on top of the
compressor body.
TM-43
ZXXXXXXX X
X X X X X X X XXX
ZXL 100PG 800 cm3
HIGH SIDE 2.9MPaG
LOW SIDE 1.5MPaG
REFRIG.
HFC-134a
M A D E I N J A PA N
THE DIRECTION OF ROTATION
CLOCKWISE AS VIEWED FROM CLUTCH SIDE
-4-
1-Product description - Magnetic clutch
Magneticclutch
VALEO TM43 is available either as a compressor and magnetic clutch assembly or as a compressor body that
customers can fit with compatible magnetic clutches. The magnetic clutch design Valeo has been promoting
for more than 20 years is now gradually adopted by major market actors.
Our compressors and magnetic clutches have successfully passed the thousand hours of long validation tests
in Valeo Compressors research center laboratory. Operational excellence was demonstrated during hot season
testing on field under challenging climates in the most stressful conditions.
Being able to rely on our robust magnetic clutch provides the best way to reduce fuel consumption without
using additional unloading devices that decrease significantly the efficiency and durability of the compressor.
The range of Valeo magnetic clutches ensures an unmatched reliability and the longest durability that perfectly
matches the Valeo TM43 compressor qualities.
Specifications TM43*
TYPE
Electromagnetic single-plate dry clutch
RATED VOLTAGE
12V DC
24V DC
POWER CONSUMPTION
41W max
39 W max
STATIC TORQUE
120 N·m {12.2 kgf·m, 88.5 lbf·ft}
DIRECTION OF ROTATION
Clockwise, viewed from clutch
WEIGHT
Approx 7 kg {15.4 lbs}
V-BELT TYPE
V-groove B or V-ribbed (PK)
Valeo TM43 magnetic clutch Compact
and robust design
Housing mounted magnetic clutch.
Improved robustness to vibration
Bearing and pulley positionned to
reduce efficiently the moment of tilt
Single level or multi-level pulleys
*The specifications may vary with the compressor.
Please also note that the maintenance procedures introduced in this service manual apply only to magnetic
clutches provided by Valeo.
-5-
1-Product description - Connectors
Connectors
1. Fully open the shut-off valve when operating the compressor
• Unscrew the cap.
• Loose the valve spindle seal by 1/4 turn.
• Turn the spindle in the counterclockwise direction until it stops.
The shut-off valve is now fully opened and the service port connector is closed.
• When finished, tighten the valve spindle seal carefully and screw the cap.
1
4
2
1 Valve spindle seal
2 Cap
3 Spindle
3
4 Service port connector
5 Safety devices port
5
2. Open the service port connector when using a gauge manifold
• Turn the spindle in the clockwise direction by 1/2 turn to 1 turn.
The shut-off valve and the service port connector are now opened.
4
1
2
1 Valve spindle seal
2 Cap
3
3 Spindle
4 Service port connector
5 Safety devices port
5
3. Fully close the shut-off valve when removing the compressor
• Turn the spindle in the clockwise direction until it stops.
4
1
2
1 Valve spindle seal
2 Cap
3
3 Spindle
4 Service port connector
5 Safety devices port
5
-6-
1-Product description - Connectors
Flexible Port Design
The design of TM43 has been developped to adapt
any kind of air conditioning system specifications
to optimize mounting position either inside engine
room.
ADVICE
Valeo Compressors recommends
following hose sizes:
INTERNAL DIAMETER
Suction: Ø 35 mm - 1-3/8 inch
Discharge: Ø 28 mm - 1-1/8 inch
-7-
the
1-Product description - Performance
The performance data below were measured under the following conditions:
• Compressor speed: 1450 rpm
• Subcooling temperature: 5°C
• Super heat temperature: 10°C
Valeo TM43 performance data (R134a)
Cooling capacity Q (kW) & Power consumption P (kW)
Conditions
Evaporating Temperature (°C)
-10
Condensing
Temperature
(°C)
Pd
(MPaG)
40
0.91
50
1.21
60
1.58
-5
0
5
10
12.5
Ps (MPaG)
0.10
0.15
0.19
0.24
0.32
0.35
Q (kW)
10.72
14.83
17.36
21.62
28.36
31.36
P (kW)
4.08
4.57
4.92
5.28
5.72
5.88
Q (kW)
9.23
12.47
15.12
18.52
23.96
26.00
P (kW)
4.41
5.03
5.46
5.91
6.51
6.68
Q (kW)
7.79
10.68
12.99
16.00
20.93
22.67
P (kW)
4.69
5.43
5.94
6.49
7.26
7.48
Valeo TM43 conversion factors
Cooling Capacity and power consumption data at different rotation speed can be approximated with
the conversion factors below.
Conversion factors
3.0
P
2.5
2.0
Q
1.5
1.0
0.5
0.0
0
1000
1450
2000
3000
Compressor speed (rpm)
-8-
4000
5000
1-Product description - Dimensions
ø150
112
69
138
ø146
ø156
ø160
133.3
Approx. 319
73.54
12-M12x1.75Dp.26
132
Sight glass
CB104 CA104
500
(From
Field Coil)
-9-
1-Product description - Dimensions
TM43 compressors without magnetic clutch
31.1
57.54
20.5
91
133.8
15˚
1.6
13
8-ø
27
.6
12-M12x1.75Dp.26
(66)
133
(66)
132
57.54
4-ø27
ø32
ø17
69
69
164
247.6
261.
91
20.5
-10-
56
56
28
28
20.5
ø156
138
ø45
ø42.35
ø55
138
4-M6x1.0,Dp.13
PCDø90
1-Product description - Exploded view
6
30
29
23
28
22
21
27
25
24
20
3
26
36
19
7
35
17
13
16
34
5
33
16
4
2
11
31
1
9
18
20
32
15
12
14
13
10
9
8
1. Center bolt
2. Armature assembly
3. Adjusting shim
4. Snap ring
5. Pulley assembly
6. Screw
7. Field coil
8. Bolt
9. Gasket
10.Front cylinder head
11.Shaft seal assembly
12.Snap ring
13.O-Ring
14.Gasket
15.Valve plate assembly
16.Suction valve
17.Pin
18.Bolt
19.Cylinder shaft assembly
20.O-Ring
21.Plate
22.Plate
23.Bolt
24.O-Ring
25.Oil filler plug
26.Strainer
27.Gasket
28.Connector
29.Gasket
30.Bolt
31.Sight glass
32.Snap ring
33.Valve plate assembly
34.Gasket
35.Gear pump
36.Rear cylinder head
-11-
1-Product description - Swash plate system
Valeo TM43 is a 10-cylinder swash plate type
compressor. With this type of compressor, the
cylinders and pistons are arranged axially along the
drive shaft.
The pistons operate within the cylinders and
are driven by a swash plate to perform suction,
compression and discharge.
Drive shaft
Radial bearing Thrust bearings
Swash plate system
The drive shaft, which is driven by the engine
through the magnetic clutch, is equipped with a
swash plate.
The drive shaft is supported by two radial bearings
and two thrust bearings.
The swash plate is rotated by the drive shaft, and
moves the pistons back and forth.
Swash plate
Piston
Radial bearing
Piston Drive System
Radial bearing
The pistons in the cylinders are mounted on the
swash plate through hemispherical shoes.
Each piston has a compression head at each end.
Swash plate rotation results in a reciprocating
piston movement parallel to the drive shaft.
The cylinders, which are arranged at 72° intervals
around the drive shaft, are each divided into 2
chambers, providing 5 front and 5 rear bores.
As each piston performs suction and compression
at either end, the compressor operates as a
10-cylinder compressor.
Thrust bearing
Suction
Suction
Compression
Compression
Piston
Shoe
-12-
1-Product description - Lubrication
The compressor is lubricated by a gear pump in the rear cylinder head which is connected to the compressor.
Oil flow
When the compressor starts operating, the gear pump draws oil from the reservoir and pumps it through
an oil passage in the shaft.
The oil then flows through ports in the shaft to lubricate the bearings and the shaft seal.
The area between the swash plate and the shoe disks is lubricated by the splashing action of the oil flowing
through the thrust bearings.
Oil also flows through ports in the pistons to lubricate the cylinders and the pistons.
Drive shaft
Shaft seal
Swash plate
Radial bearing
Gear pump
Oil passage
Radial bearing
Reservoir
Sight glass
Thrust bearing
-13-
Oil passage
1-Product description - General
Compressor
1. The direction of rotation is clockwise as viewed
from the clutch side.
2. The standard compressor oil charge is specified
for passenger vehicles and truck air conditioners,
and the oil quantity differs depending on the
type of compressor. Please refer to the label on
the compressor.
Operation condition table
Item
Condition
Surrounding
Under 120°C (248°F)
temperature
Minimum: 600 r/min
Speed
Maximum: 5500 r/min
Continuous: 5000 r/min
Maximum: 2.65 MPaG
Pressure
{28 kgf/cm², 384.3 psig}
3. The compressor must be operated under the
conditions shown in the operation conditions
table shown on the left.
CAUTION!
The A/C cycle components must be
designed so that the pressure in the cycle
does not exceed 2.65 MPaG {28 kgf/cm2,
384.3 psig}
4. Inclination limit at installation
Valeo recommends the compressor to be
installed on the vehicle within the inclination
range shown on the left.
Front head leaning is prohibited.
15˚ 15˚
5˚
Compressor mounting points
The compressor’s mounting points should be
tightened to the specified torque:
Specified torque: 45 ~ 50 N·m
{4.6 ~ 5.1 kgf·m, 33.2 ~ 36.9 lbf·ft}
Compressor bracket
1. Install the bracket securely on the chassis
frame or engine body. As the engine vibrations
may be severe, the bracket and mounting
bolts must be installed securely.
2. Vibration resistance
There must not be any resonance under 250
Hz.
-14-
1-Product description - General
Magneticclutch
1. Voltage
DC24V
The terminal voltage of the magnetic clutch
must exceed 21 V.
DC12V
The terminal voltage of the magnetic clutch
must exceed 10.5 V.
2. Ratio of magnetic clutch to drive pulley
• When the compressor is driven from the pulley
drive of the vehicle, the magnetic clutch to drive
pulley ratio should avoid the range 1: 0.92-1.08
to limit vibration and resonance.
• Compressor speed must not exceed the specified
speed.
1 mm
Magnetic clutch
Idle pulley
CAUTION!
Drive pulley
Pulley ratio is the ratio of the magnetic
clutchdiametertothedrivepulleydiameter.
3. Pulley alignment tolerance is less than 1mm
(0.04 in).
4. Pulley groove: V-groove or V-ribbed.
5. The belt tension must be adjusted to the tension
specified by the belt maker.
-15-
2-Operation precautions
1. During the off season of the air conditioner,
operate the compressor for a few minutes once
a week.
2. Do not drive through water. Water may damage
the magnetic clutch, thus preventing normal
operation.
3. Do not wet a compressor that has not been used
for a long period.
4. Always charge the A/C system with the specified
quantity of refrigerant.
5. Keep the compressor clear of water projection
while cleaning the vehicule.
-16-
3-Handling instructions
Maintenance precautions
Work area
As the components of air conditioners are particularly
sensitive to moisture, dirt and rust, always observe
the following :
• Work indoors whenever possible
• Select a flat ground work area
• Keep the work area clean
• Select a work area with adequate ventilation.
CAUTION!
Refrigerant itself is not harmful, but
excessive accumulation in a closed area can
cause oxygen deficiency.
• Keep open flame and inflammables away from
the vehicle in which the air conditioner is being
installed.
(Fire is particularly dangerous during the gas
leak inspection following installation)
WARNING!
Contact with flame and high temperatures
can generate toxic gases.
Safety glasses
Gloves
Refrigerant handling
WARNING!
Direct contact with refrigerant can cause
frostbite or blindness.
Always wear safety glasses and protective
gloves.
Do not work with refrigerant close to your
face.
1. Do not misidentify refrigerants
If an HFC-134a air conditioning system is mistakenly
charged with another refrigerant, serious problems
such as compressor seizing may occur. Therefore,
confirm before charging with refrigerant that the
type of air conditioning system is an HFC-134a
system.
-17-
3-Handling instruction
2. Do not release refrigerant into the air
Although HFC-134a is not subject to CFC regulations,
it can have effect on global warming and so should
not be released into the air. When removing
refrigerant from the air conditioning system, always
use a refrigerant recovery unit made specifically for
HFC-134a.
Do not release refrigerant into
the air
FILL
AUTO
Compressor handling
Do not strike or unnecessarily turn the compressor
upside down. If the compressor is knocked over or
turned upside down during handling or installation,
rotate the armature plate 5 or 6 times by to circulate
the oil.
Otherwise, oil in the cylinder duing compressor startup will cause valve damage and reduce durability.
Recovery unit
Compressor removal
When the compressor is operational
1. Perform the oil return operation (see p.19).
2. Recover the refrigerant from the system using a
refrigerant recovery unit.
3. Remove the compressor.
4. Drain the oil from the compressor and close all
open connections immediately.
5. Check the oil quantity and the degree of
contamination (see p.19 & 20).
When the compressor is inoperable
1. Recover the refrigerant from the system using
a refrigerant recovery unit if the shut-off valves
are to be removed with the compressor.
2. Remove the compressor.
3. Drain the oil from the compressor and close all
open connections immediately.
4. Check the oil quantity and the degree of
contamination (see p.19 & 20).
-18-
3-Handling instructions
Oil return operation
Compressor oil mixed with refrigerant is circulating
in the air conditioning system.
Perform the oil return operation to return this oil to
the compressor before removing components from
the system.
1. Open the doors and windows and operate the
blower motor at maximum speed.
2. Operate the vehicle engine at idling during at
least 20 minutes.
Note: The maximum amount of oil cannot be
recovered at higher speeds. This operation also
requires a warm ambient temperature.
Oil handling
Oil specification
Use only ZXL 100PG PAG (DH-PS) or POE oil.
Oil quantity inspection
There is no particular need for frequent inspection or
replacement, although it is recommended to check
operating refrigerent pressures and oil levels at the
start of the season.
Please replace the refrigerant and restore the system
oil and refrigerant charge to factory specifications if:
• the AC system is opened for repair or replacement
of any component (e.g.: evaporator, condenser
or receiver drier)
• any loss of charge - refrigerant or oil - is detected.
As long as it remains within the range of vision
through the sight glass, the oil quantity is sufficient
Oil level can be read through the sight glass of he
compressor (see on the left).
Handling precautions
Do not mix with other oils
1. The oil must be free from dust, metal filings, etc.
2. Do not mix oils.
3. The moisture content must not exceed 1,000
ppm. (PAG oil only)
4. The oil easily absorbs moisture when the
container is open. Therefore always seal the
container immediately after use. (PAG oil only)
Cap the container immediately
-19-
3-Handling instructions
•
•
•
•
Oil contamination
Opacity
Color change
Foreign substances
Metal filings
Unlike engine oil, no cleaning agent is added to
the compressor oil. Even if the compressor is run
for a long period (approximately 1 season), the oil
never becomes turbid as long as there is nothing
wrong with the compressor or its method of use.
Inspect the extracted oil for any of the following.
• Increased opacity of the oil.
• Color change to red.
• Presence of foreign matter, metal filings, etc.
WARNING!
When system (oil) contamination is
found during compressor replacement,
flush the A/C system with a fluid that
meets SAE J2670 and replace the drier (or
accumulator).
Oil check
The compressor oil must be checked as follows
when being charged into a used system.
1. Perform the oil return operation (see page
19).
2. Remove the compressor from the vehicle.
3. Remove the oil filler plug and drain the oil
through the oil filler plug and the high and
low pressure connectors.
4. Check the oil for contamination.
5. Fill the compressor with the specified amount
of oil through the oil filler plug (see page 21).
Oil filler plug
Charge specified quantity
of compressor oil
O-ring
-20-
3-Handling instructions
unit: cm3 & cc
Factory
oil
charge
800
Current
Compressor
is kept
Compressor is
replaced
Amount
recovered
Charging
amount
Amount
to remove
from new
compressor
500 or
more
Same as
recovered
800-(amount
recovered+20)
Under
500
500
300
CAUTION!
The specified oil quantity differs, depending
on the type of air conditioning system. A
label describing the specified quantity is
attached to the compressor.
Additionally, all of the oil cannot be removed
when draining the compressor, as some
remains as an oil film on the inside of the
compressor and the system components.
Therefore, refer to the table on the left
when recharging the compressor with oil.
Excess oil adversely affects the cooling
capacity and the compressor.
unit: cu in
Factory
oil
charge
48.8
Current
Compressor
is kept
Compressor is
replaced
Amount
recovered
Charging
amount
Amount
to remove
from new
compressor
30.5 or
more
Same as
recovered
48.8-(amount
recovered+1.2)
Under
30.5
30.5
18.3
6. Install the oil filler plug and tighten it to the
specified torque.
Specified torque: 15 ~ 18 N·m
{1.5 ~ 1.8 kgf·m, 11 ~ 13 lbf·ft}
CAUTION!
The oil filler plug O-ring must be replaced
with a new one.
Replacement of components
200cm3 (12.2cu in)
When replacing the system’s component parts,
supply the following amount of oil to the
compressor.
120cm3 (7.3cu in)
60cm3 (3.7cu in)
Component mounted
Amount of oil
Evaporator
200 cm3 (12.2 cu in)
Condenser
120 cm3 (7.3 cu in)
Receiver drier
60 cm3 (3.7 cu in)
Pipe or hose
60 cm3 (3.7 cu in)
After installing these component parts, check the
compressor oil. (See p.21).
-21-
3-Handling instructions
High pressure connector
Running-in operation
Low pressure
connector
Whenever moving parts have been replaced, it is
necessary to run-in both the compressor and the
magnetic clutch.
O-ring
Compressor running-in
Reassembled compressors must be run-in after the
leak test (see next page).
1. Check that the compressor contains the
specified amount of oil.
2. Install the compressor on the test bench.
3. Install the high and low pressure connectors
(Z0011222) to the ports and tighten the bolts
to the specified torque.
Specified torque: 25 ~ 32 N·m
{2.5 ~ 3.3 kgf·m, 18 ~ 24 lbf·ft}
4. Connect the two connector ports using a flexible hose.
5. Run the compressor at 1,000 rpm for at least
30 minutes.
6. Replace the oil.
7. Repeat the leak test.
Flexible hose
O-ring
CAUTION!
While the compressor is being run-in in step
5 above, check the outside temperature of
the front head. If the temperature exceeds
80°C (176°F), stop the running-in operation.
Resume the operation when the head has
cooled.
Magnetic clutch running-in
1. Install the clutch on the compressor.
2. Install the compressor on the test bench, and
operate the compressor by running the system.
3. Maintain the compressor speed at 500 rpm.
Operate the A/C switch through the ON/OFF
cycle at least 50 times (“ON” for 10 seconds
and “OFF”for 10 seconds).
ON
OFF
(50 times)
-22-
3-Handling instructions
Leak test
The compressor must be checked for refrigerant
leaks after it is repaired. The procedure is as
follows.
1. Fit plates to the suction and discharge
connections, and tighten it to the specified
torque.
Specified torque: 25 ~ 32 N·m
{2.5 ~ 3.3 kgf·m, 18 ~ 24 lbf·ft}
2. Fill the compressor with refrigerant through
the suction side, rising the refrigerant pressure
to at least 0.39 MPaG {5 kgf/cm2, 56.3 psig}.
3. Check the compressor for leaks using a leak
detector.
Gas leak detector
597001-1020
Refrigerant charging
In order to prevent a liquid charge and greatly
increase risks of compressor dammage, do not
shake or turn the refrigerant bottle upside down.
Storing a repaired compressor
ILE
G
FRA
FRA
GIL
Par
t
No s
.
E
UP
DE
MA
td,
oL
nC
ww
w.v
a
ing
ion r
t
i
d o
Con ress
Air omp
C
leo
com
pre
sso
EO
VAL
UP
IN
If it is necessary to store a repaired compressor
for some time before installation, evacuate the
compressor and fill it with dry nitrogen gas through
the suction fitting to raise the pressure to 49 ~ 150
kPa {0.5 ~ 1.5 kgf/cm2, 7.1 ~ 21 psi}.
N
JAPA
a
Jap
rs.c
om
-23-
4-Troubleshooting
Compressor troubleshooting
When a problem occurs during the compressor operation, it is often difficult to pinpoint exact the cause
of the malfunction.
As long as the compressor maintenance is done correctly, there should not be any problem throughout
the whole vehicle life, but should it happen, we hope this troubleshooting can help you solve the issue
efficiently.
Below are listed most of the issues you may encounter while the A/C is ON.
Please refer to the compressor troubleshooting tree to localize the malfunction symptom, then look at the
table (p.25-26) for the appropriate counter measure.
Most of the malfunction symptoms can be classified in the following categories:
1. Insufficient cooling capacity
2. Abnormal noise
3. Smoke
In case of insufficient cooling capacity, we recommend that you prepare a gauge manifold to measure the
pressure of both discharge and suction sides (for a detailed diagnosis by gauge pressure, see p.27-28).
Compressor troubleshooting tree
1. Insufficient cooling capacity
A. Compressor is not running
B. Compressor is running
C. Compressor runs intermittently
2. Abnormal noise
A. Abnormal noise from compressor
B. Abnormal noise from magnetic clutch
C. Belt slipping noise
3. Smoke
A. Magnetic clutch friction surface slipping
B. Magnetic clutch belt slipping
C. Smoke from magnetic clutch
D. Smoke from compressor
-24-
4-Troubleshooting
1. Insufficient cooling capacity
Issue
Compressor is
not running
(No cool blow
coming out)
Symptom
B
C
Compressor
runs
intermittently
(Cool blow
comes out only
from time to
time)
Measure
Magnetic clutch slips when
turning on the A/C switch
Compressor internal part
damage
Replace the compressor
Low pressure cut switch
operates (see p.27-28)
Refrigerant shortage
Fix the refrigerant leakage
then fill with refrigerant until
reaching the right amount
The magnetic clutch slips or
does not engage when the
compressor runs
Lead wire short circuit or
wiring connector not seated
properly
Replace the lead wire if it is
defective
Magnetic clutch damage
Repair or replace the
magnetic clutch
Magnetic clutch air gap too
wide
Adjust air gap or replace
magnetic clutch
Low magnetic clutch voltage
Check the voltage of battery
The magnetic clutch engages
but the armature does not
rotate
Belt slipping
Replace the compressor if it
is locked
Belt run off the pulley
Compressor internal part
damage or magnetic clutch
damage
Replace the compressor or
the magnetic clutch
Center bolt is loose / Center
bolt is missing
Bolt drop off/ Armature drop
off
Replace magnetic clutch
Compressor is running
normally
Poor compression
Replace the compressor
No difference of temperature
between discharge side and
suction side (see p.27-28)
Refrigerant shortage
Fix the refrigerant leakage
then fill with refrigerant until
reaching the right amount
The magnetic clutch slips or
does not engage when the
compressor is running
Magnetic clutch friction
surface slipping
Check the voltage of battery
or replace the magnetic
clutch
Loose connection of the
magnetic clutch electrical
circuit
Replace the magnetic
clutch after making sure it is
defective
Belt slipping
Magnetic clutch belt slipping
Belt tension readjustment
The magnetic clutch does
not engage
Defective thermostatic
switch
Replace the thermostatic
switch after making sure it is
defective
Both discharge and suction
pressures are high
Excess of refrigerant
Reduce the refrigerant
charge until reaching the
right amount
Condenser fan failure
Replace the condenser after
making sure it is defective
The magnetic clutch slips or
does not engage when the
compressor is running
Loose connection of the
magnetic clutch electrical
circuit
Replace the magnetic
clutch after making sure it is
defective
The magnetic clutch does
not engage
Defective thermostatic
switch
Replace the thermostatic
switch after making sure it is
defective
A
Compressor is
running
(No cool blow
coming out)
Possible cause
-25-
4-Troubleshooting
2. Abnormal noise
Issue
Abnormal
noise from the
compressor
Symptom
Abnormal vibration after
turning on the A/C switch
B
C
Belt slipping
noise
Measure
Compressor installation bolt
is loose
Increase tightening torque of
the loose bolts
Wide gap at the attaching
portion between the
compressor and the bracket
Improve the compressor
attaching portion
Abnormal noise from the
compressor body
Compressor body internal
component damage
Replace the compressor
The magnetic clutch has a
backlash and slips
Magnetic clutch damage
Replace the magnetic clutch
Strange noise when the
magnetic clutch engages
Air gap too wide
Adjust air gap or replace
magnetic clutch
Armature slips / does
not engage when the
compressor is running
Magnetic clutch friction,
slippery surface
Check the voltage of battery
or replace magnetic clutch
Armature does not rotate
when magnetic clutch
engages
Belt slipping
Replace the compressor if
locked. Readjust the belt
tension if the belt is loose
A
Abnormal
noise from the
magnetic clutch
Possible cause
3. Smoke
Issue
A
Magnetic
clutch friction
surface slipping
Magnetic
clutch belt
slipping
Symptom
The magnetic clutch slips /
does not engage when the
compressor is running
Smoke from
clutch
Smoke from
the compressor
D
Measure
Magnetic clutch air gap too
wide
Adjust air gap or replace
magnetic clutch
Low magnetic clutch voltage
Check the voltage of battery
Magnetic clutch friction,
greasy surface
Clean friction surface or
replace magnetic clutch
Belt alignment is not correct
Adjust the compressor
installation position
Magnetic clutch belt is
greasy
Clean or replace the belt
Magnetic clutch belt tension
is loose
Adjust belt tension
The magnetic clutch does
not engage
Coil open or shorted
Replace the magnetic clutch
Refrigerant / oil is blowing
out
Refrigerant leaking,
uncoupled piping or piping
burst
Fix the refrigerant leakage
then fill with refrigerant until
having the right amount
Refrigerant blowing from
the high pressure relief valve
due to excess of refrigerant
Reduce the refrigerant
charge until reaching the
right amount
The magnetic clutch slips /
does not engage when the
compressor is running
B
C the magnetic
Possible cause
-26-
4-Troubleshooting
A/C cycle diagnosis by gauge pressure
Following is a diagnosis procedure to connect gauge manifold to A/C cycle, measure suction and
discharge pressures and analyze the defects of the cycle.
Operation conditions of the A/C cycle for pressure mesuring:
1. Ambient temperature: 30 - 35 °C
2. Engine speed: 1,500 rpm
3. A/C switch: ON
4. Blower speed: high
5. Temperature control: full cold
Gauge pressure
indication
Pressure is normal
Cause
Confirmation method
Action to take
A/C cycle operates normally.
If there is any defect (poor cooling performance), there shall be another
cause
Discharge pressure: around 1.0 - 1.7 Mpa (10 - 17 kgf/cm²)
Suction pressure: around 0.13 - 0.20 Mpa (1.3 - 2.0 kgf/cm²)
Both discharge and
suction pressures are
low
Suction pressure
becomes vacuum
Refrigerant shortage
Connect gauge
manifold to cycle
Receiver dryer is
clogged
Temperature difference Replace parts
between inlet and
outlet pipes happens.
Dryer is covered with
frost
Expansion valve is
clogged
Expansion valve was
covered with frost
Clean or replace part
Enclosure leakage from
the Expansion valve’s
temperature sensing
tube.
(Expansion valve
operates to close the
valve opening)
Temperature sensing
device at outlet air is
defective
Outlet side of the
Expansion valve is not
cooling.
(Low side of gauge
indicates vacuum)
Replace part
Evaporator becomes
frozen up
Adjust or replace the
part
Refrigerant piping is
clogged or crashed
If any part between
the dryer and the
compressor is clogged
or crashed, the low
side pressure becomes
vacuum
Adjust or replace the
part
-27-
Recover refrigerant,
then refill with the
right amount of
refrigerant
4-Troubleshooting
Gauge pressure
indication
Both discharge and
suction pressures are
high
Cause
Confirmation method
Action to take
Excess of refrigerant
Connect gauge
manifold to cycle
Condenser cooling
malfunction
Recover refrigerant,
then refill with the
right amount of
refrigerant
Clean up, hand repair
of fin and replacement
Condenser becomes
muddy and fins are
clogged and collapsed.
Defect of cooling fan
rotation.
Malfunction of fan
motor for condenser.
Defective refrigerant
Adjustment or
flow control, the
replacement
thermal sensing tube
is not closely in contact
with the evaporator
pipe
Misaligned Expansion
valve or thermal
sensing tube of the
Expansion valve is not
fit on regularly.
(Excess opening of the
Expansion valve)
Air mixed in
refrigeration cycle
Discharge pressure
is high and suction
pressure is low
Discharge pressure
is low and suction
pressure is high
Refrigerant cycle is
clogged between
compressor and
condenser
Defect of the
compressor valve or
gasket
Just after compressor
stops, discharge
pressure will come
down immediately to
0.29 - 0.39 MPa (3 - 4
kgf/cm²)
Appreciable
temperature difference
at the clogged location
Evacuate air from cycle,
the charge with the
adequate amount of
refrigerant
Clean up inside the
cycle or replace the
part
Discharge and suction Replace the compressor
pressures balance
immediately after the
compressor stops.
(Defective compression
of compressor)
-28-
5-Tightening torques
6
2
4
5
3
1
3
Unit: N·m {kgf·m, lbf·ft}
Part
1. Bolt
2. Field coil screw
3. Through bolt
4. Bolt
5. Oil filler plug
6. Connector fixing bolt
Thread size
M10 x 1.25
M6 x 1.0
M10 x 1.5
M10 x 1.5
M10 x 1.5
M10 x 1.5
-29-
Tightening torque
25 - 30 (2.5 - 3.1, 18 - 22)
4.2 - 7.2 (0.4 - 0.7, 3.1 - 5.3)
25 - 32 ( 2.5 - 3.3, 18 - 24)
15 - 25 (1.5 - 2.5, 11 - 18)
15 - 18 (1.5 - 1.8, 11 - 13)
25 - 32 (2.5 - 3.3, 18 - 24)
6-Service procedures - Magnetic clutch
Magnetic clutch
Removal
1. Check your armature type (see on left):
• 3-hole type (1)
• 2-way stopper type (2)
3-hole type (1)
CAUTION!
2-way stopper type (2)
The Procedure applies to Valeo standard
magnetic clutches only.
It may differ with other compatible
magnetic clutches, please refer to the
clutch maker’s service procedures. Armature
holder
2. Remove the armature.
CAUTION!
The armature removal process differs
according to the armature type
• If it is a 3-hole type armature (1)
a. Remove the center bolt using an armature
holder to prevent armature assembly rotation.
b. Remove the armature assembly using an
armature puller assembly. Remove the shims
from the compressor driveshaft or armature
assembly.
Armature
puller
• If it is a 2-way stopper type armature (2)
a. Remove the center bolt using a spanner to
prevent armature assembly rotation.
Spanner
-30-
6-Service procedures - Magnetic clutch
b. Remove the armature assembly using an
armature puller. Remove the shims from the
compressor driveshaft or armature assembly.
Armature puller
3. Remove the snap ring (5803301900) using
external snap ring pliers.
External snap
ring pliers
Snap ring
4. Position the center pulley puller at the end of
the driveshaft.
5. Attach a suitable pulley puller to the pulley.
Hook the puller claws to the edge of the
pulley as shown.
6. Tighten the center pulley puller bolt to remove
the pulley.
Center pulley
puller
Pulley puller
7. Remove the six field coil/compressor screws.
Then remove the field coil.
WARNING!
Removing the pulley will systematically
damage the pulley bearing.
CAUTION!
Do not clip the puller claws into the pulley
groove to prevent pulley groove damage.
CAUTION!
Do not hold the field coil by the harness.
-31-
6- Service procedures - Magnetic clutch
Magnetic clutch
Inspection
Armature assembly
Pulley assembly
1. If the contact surface has been damaged by
excessive heat, the armature and pulley must
be replaced.
2. Check the appearance of the pulley assembly.
If the contact surface of the pulley is
excessively grooved due to slippage, both the
pulley and the armature must be replaced.
The contact surface of the pulley assembly
must be cleaned with a suitable solvent
before reinstallation.
Check the field coil for a loose connector or
cracked insulation.
Field coil
Installation
Screws
1. Install the field coil on the compressor (with
the harness on top) and tighten the mounting
screws to the specified torque.
Specified torque: 4.2 ~ 7.2 N·m
{0.4 ~0.7 kgf·m, 3.1 ~ 5.3 lbf·ft}
2. Carefully place the wire harness/strain relief.
Field coil
Pulley assembly
Press
• If you are using a press*
3. Install the pulley assembly using the pulley
installer and a hand press.
Pulley Installer
CAUTION!
Use only a press to install the pulley
assembly. Do not use a hammer. A hammer
will damage or deform the pulley.
4. Install the snap ring (beveled edge up) using
external snap ring pliers.
Snap ring
External snap
ring pliers
* if not using a press p.34
-32-
6- Service procedures - Magnetic clutch
3-hole
armature (1)
Armature
holder
Adjusting
shim
2-way stopper
armature (2)
5. Install the armature assembly on the driveshaft
together with the original shim(s). Press the
armature assembly down by hand.
6. Install the armature bolt and tighten it to the
specified torque using an armature holder
(for 3-hole armature) or a spanner (for 2-way
stopper armature) to prevent armature
assembly rotation.
Specified torque: 25 ~ 30 N·m
{2.5 ~ 3.1 kgf·m, 18 ~ 22 lbf·ft}
Spanner
Adjusting
shim
Gap adjustment
0.3~0.7 mm
7. Check that the clutch clearance is as specified.
If necessary adjust the clearance using shim(s).
Adjusting shims are available in the following
thickness:
Shim Part No
Z0010245
Z0010246
Thickness
gauge
Thickness
0.2 mm {0.008 in}
0.3 mm {0.012 in}
Specified clearance: 0.3 ~ 0.7 mm
(0.01 ~ 0.027 in)
8. Run-in the clutch as described on page 22.
-33-
6- Service procedures - Magnetic clutch
• If you are not using a press
3. Install the pulley using a pulley installer assembly
and a spanner.
CAUTION!
If the bolt of the pulley installer assembly
is not screwed into the driveshaft, it may
result in damage.
4. Once the pulley is fixed, loose the collar and
remove the pulley installer assembly.
5. Install the snap ring (beveled edge up) using
external snap ring pliers.
Snap ring
External snap
ring pliers
-34-
6- Service procedures - Magnetic clutch
3-hole armature
2-way stopper armature
6. Install the armature assembly on the driveshaft
together with the original shim(s).
Adjusting
shims
3-hole armature
2-way stopper armature
7. Install the armature assembly using an
armature installer assembly.
Armature
installer
assembly
3-hole armature
Armature
holder
2-way stopper armature
Spanner
Gap adjustment
0.3~0.7 mm
8. Install the armature bolt and tighten to the
specified torque using an armature holder
or a spanner to prevent armature assembly
rotation.
Specified torque: 25 - 30 N·m
{2.5 - 3.1 kgf·m, 18 - 22 lbf·ft}
9. Check that the clutch clearance is as specified.
If necessary adjust the clearance using shim(s).
Adjusting shims are available in the following
thicknesses:
Shim Part No.
Z0010245
Z0010246
Thickness
gauge
Thickness
0.2 mm {0.008 in}
0.3 mm {0.012 in}
Specified clearance: 0.3 - 0.7 mm
{0.012 - 0.028 in}
10. Run in the clutch as described on page 22.
-35-
7- Services procedures - Shaft seal assembly
Shaft seal assembly
Bolts
Removal
1. Remove the magnetic clutch assembly as
described on page 30.
2. Remove the four bolts securing the connectors,
and then remove the connectors and strainer
from the cylinder shaft assembly.
3. Remove the oil filler plug and then drain the
oil.
4. Remove the five bolts securing the heads.
5. Alternately tap the two projections on the
front head using the remover (597035-0500)
and a mallet to remove the front cylinder
head.
Tap lightly
Front cylinder head
Remover
6. Remove the snap ring using the internal snap
ring pliers.
Snap ring
Internal snap
ring pliers
Press uniformly from
above
7. Remove the shaft seal assembly using the
remover.
Shaft seal
Remover
Front cylinder head
-36-
7- Services procedures - Shaft seal assembly
Inspection
The shaft seal must not be reused.
Always use a new shaft seal when reassembling
the compressor. Ensure that the seal seat is free
from lint and dirt that could damage the shaft
seal lip.
Installation
Press using a press
1. Clean the portion of the front cylinder head
where the shaft seal is to be assembled.
2. Assemble the shaft seal on the remover.
3. Coat the shaft seal well with compressor oil
and install the shaft seal in the front cylinder
head with the shaft seal remover.
4. Install the snap ring using the internal snap
ring pliers.
Remover
Shaft seal
Front cylinder head
5. Position the guide on the shaft.
6. Coat the new O-ring with clean compressor oil
and install it in the front cylinder head.
7. Install the front cylinder head.
Front cylinder head
O-ring
Guide
CAUTION!
Align the roll pins and tap the head lightly and evenly with a plastic hammer.
8. Remove the guide.
9. Install the five bolts from the front cylinder
head side and tighten them to the specified
torque.
Specified torque: 25 ~ 32 N·m
{2.5 ~ 3.2 kgf·m, 18 ~ 24 lbf·ft}
Tighten each bolt gradually (in three or more
stages) to ensure the specified torque.
10.Turn the drive shaft 2 ~ 3 times by hand to
ensure that the shaft rotates smoothly.
-37-
7- Services procedures - Shaft seal assembly
11.Fill the compressor with the specified amount
of clean compressor oil through the oil filler.
12.Install the oil filler plug with a new O-ring,
and tighten it to the specified torque.
Specified torque: 15 ~ 18 N·m
{1.5 ~ 1.8 kgf·m, 11 ~ 13 lbf·ft}
Oil filler plug
O-ring
13.Install the strainer in the suction port.
When the connectors are installed
14.Fit plates/connectors to the suction and
discharge connections, and tighten them to
the specified torque.
Specified torque: 25 ~ 32 N·m
{2.5 ~ 3.3 kgf·m, 18 ~ 24 lbf·ft}
15.Install the magnetic clutch as described (p.
32).
16.Run-in the compressor as described (p.22).
17.Perform the leak test as described (p.23).
-38-
8- Services procedures - Cylinder heads
Cylinder heads (Front & Rear)
Bolts
Disassembly
1. Remove the magnetic clutch assembly as
described on page 30.
2. Remove the four bolts securing the connectors,
and then remove the connectors and strainer
from the cylinder shaft assembly.
3. Remove the oil filler plug and then drain the
oil.
4. Remove the five bolts securing the heads.
5. Alternately tap the two projections on the
front head using the remover and a mallet to
remove the front cylinder head.
Tap lightly
Front cylinder head
Remover
6. Remove the front valve plate assembly and
then the suction valve (in that order).
7. Remove and discard the O-ring from the front
cylinder head.
8. Remove all gasket material from the front
cylinder head and the front valve plate.
Suction valve
Gasket
Valve plate assembly
O-ring
-39-
8- Services procedures - Cylinder heads
9. To remove the rear cylinder head, alternately
tap the two projections on the front head
using the remover (597035-0500) and mallet.
Tap lightly
Remover
Rear cylinder head
Suction valve
10.Remove the O-ring from the rear cylinder
head, and then remove all the gasket material
from the rear cylinder.
Gasket
11.Remove the valve plate and suction valve
from cylinder shaft assembly, then remove all
the gasket material from the valve plate.
O-ring
Valve plate assembly
12.Remove the gear pump from the rear cylinder
head or the end of the driveshaft.
Gear pump
Rear cylinder head
Inspection
Check the front and rear valve plates for scratched,
bent or damaged parts.
Inspect both cylinder heads and both valve plates
for nicks or burrs on the sealing surfaces.
Clean both cylinder heads and both valve plates
or replace them if they are cracked or damaged.
Check that there are no clogged passages in the
valve plates.
Valve plate
Cylinder head
-40-
8- Services procedures - Cylinder heads
Escape groove
Reassembly
Rear cylinder head
1. Place the cylinder shaft assembly on the
bench with the rear side up.
2. Install the rear suction valve so that it matches
the roll pins.
CAUTION!
Ensure each valve matches each cylinder
valve escape groove.
3. Install the rear valve plate on the rear suction
valve.
CAUTION!
Do not mistake the front and rear valve
plates.
Gear pump
Rear cylinder head
Gear pump
4. Coat the new gasket with clean compressor oil
and install it on the rear valve plate.
5. Coat the new gear pump with clean compressor
oil and install it on the end of the drive shaft.
6. Coat the new O-ring with clean compressor oil
and install it on the rear cylinder head.
7. Install the rear cylinder head.
When positioning the head, ensure the gear
pump is inserted into the hole in the cylinder
head.
O-ring
Gasket
Valve plate
assembly
Suction valve
-41-
8- Services procedures - Cylinder heads
Front cylinder head
O-ring
Front cylinder head
1. Place the cylinder shaft assembly on the
bench with the front side up.
2. Install the front suction valve so that it matches
the spring pins.
CAUTION!
Gasket
Ensure each valve matches each cylinder’s valve escape groove.
Valve plate
assembly
Suction valve
Guide
Pins
3. Install the front valve plate on the front suction
valve.
4. Coat the new gasket with clean compressor oil
and install it on the front valve plate.
5. Position the guide (597067-6100) on the
shaft.
6. Coat the new O-ring with clean compressor oil
and install it on the front cylinder head.
7. Install the front cylinder head.
CAUTION!
Align the roll pins and tap the head lightly and evenly with a plastic hammer.
Oil filler plug
O-ring
8. Remove the guide (597067-6100).
9. Install the five bolts from the front cylinder
head side and tighten them to the specified
torque.
Specified torque: 25 ~ 32 N·m
{2.5 ~ 3.2 kgf·m, 18 ~ 24 lbf·ft}
Tighten each bolt gradually (in three or more
stages) to ensure the specified torque.
10.Turn the drive shaft 2 ~ 3 times by hand to
ensure that the shaft rotates smoothly.
11.Fill the compressor with the specified amount
of clean compressor oil through the oil filler.
12.Install the oil filler plug with a new O-ring,
and tighten it to the specified torque.
Specified torque: 15 ~ 18 N·m
{1.5 ~ 1.8 kgf·m, 11 ~ 13 lbf·ft}
13.Install the strainer in the suction port.
When the connectors are not installed
14.Fit the blanking plates/connectors to the
suction and discharge connections, and
tighten it to the specified torque.
Specified torque: 25 ~ 32 N·m
{2.5 ~ 3.3 kgf·m, 18 ~ 24 lbf·ft}
15.Install the magnetic clutch (see p. 32).
16.Run-in the compressor (see p.22).
17.Perform the leak test (see p.23 ).
-42-
9- Service tools
In addition to standard tools, numerous special tools are necessary to service the Valeo TM43 compressor.
The use of these special tools enables prompt and correct compressor service.
The special tools are classified into three groups: those for magnetic clutch disassembly and reassembly;
those for compressor disassembly and reassembly; and those for testing and running-in operation.
Magnetic clutch service tools
Part name
Shape
Reference
page
Center Pulley puller
31
Pulley Installer
32
Armature puller assembly
30
Armature holder
33
-43-
Application
To remove pulley
To install pulley
To remove the armature
To fix the armature
9- Service tools
Compressor tools
Part name
Reference
page
Shape
Application
Remover
39-40
To remove cylinder head
and cylinder block
Shaft Seal Remover
36-37
To remove shaft seal
Guide
37-42
To install shaft seal
Test and inspection tools
Part name
Reference
page
Shape
Valve assembly
-
Gas leak detector
23
-44-
Application
For charging refrigerant
For detecting gas leaks
10- Service parts
1.Compressor body service kits, sets and parts
Item* Part name
OVERHAUL KIT
(O-RING SET + GASKET SET + SHAFT SEAL)
Reference
Quantity
T907749
-
T907750
Z0011797
569300-4000
n=2
n=1
T907754
Z0011492
569310-6200
n=2
n=9
11
SHAFT SEAL (for service)
Shaft seal
Z0011811
n=1
14
32
15
OTHER COMPRESSOR PARTS
Valve plate assy (front)
Valve plate assy (rear)
Suction valve
Z0011810
Z0011809
Z0011798
n=1
n=1
n=1
12
23
O-RING SET
O-ring body (front & rear head)
O-ring drain
GASKET SET
13-33 Gasket front head & rear head
9
Gasket (bolt) 9 per set
*See Product description - Exploded view (p.11)
2. Connector assy (Z0011222) service parts
Item*
27
26
28
29
Part name
Connector (body)
Gasket
Gasket
Bolt
Reference
Z0011223
Z0011226
Z0011227
Z0011228
Quantity
n=1
n=1
n=1
n=2
*See Product description - Exploded view (p.11)
3. Oil
Item
-
Part name
ZXL 100PG (250 cc)
Reference
Quantity
569900-0600 250 cc
-45-
Remarks
Dis./Suc.
For conn.
For piping
For conn.
Notes
-46-
Notes
-47-
Notes
-48-
Notes
-49-
Notes
-50-
Notes
-51-
VALEO JAPAN - TM43
for HFC-134a use
SERVICE MANUAL
Version: WW43-14011.01EN
Published by: VALEO JAPAN CO, LTD.
Copyright © 2014, VALEO JAPAN CO, LTD.
For any inquiry regarding the present service manual,
contact us at [email protected]
-52-
Valeo TM43 Compressor
Valeo TM43 Benefits
High reliability
Integration flexibility
Great cooling capacity
Enhanced performance
Lower fuel consumption
Compact & robust design
Improved field serviceability
Reduced noise and vibrations
Staggering value through innovation
Asia
39 Sendai, Kumagaya-shi
Saitama-ken 360-0193 Japan
Phone: +81 (0) 48 539 3800
Fax: +81 (0) 48 539 3843
Email: [email protected]
China
Europe, Middle East & Africa Americas
No.2677 Shiji Avenue, Eco. & Tec. Dvt
Zone 130031 Changchun, Jilin PRC
Phone: +86 (0) 431 8499 2025
Fax: +86 (0) 431 8499 2004
Email: [email protected]
8, rue Louis Lormand ZA de l’Agiot
78321 La Verriere, France
Phone: +33 (0) 1 3013 5027
Fax: +33 (0) 1 3461 5898
Email: [email protected]
-53-
Copyright © 2014 Valeo Japan CO., LTD. | All Rights Reserved.
2520 Esters Blvd #100
Dallas, TX 75261 United States
Phone: +1 972 456 1077
Fax: +1 972 456 1090
Email: [email protected]