1
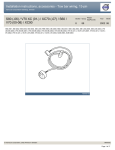
Installation instructions, accessories - Body kit
Volvo Car Corporation Göteborg, Sweden
S60
Section Group Weight(Kg/Pounds) Year
8
86
Month
2004 04
Replaces issue: 2004 02
© VolvoCar Corporation, 2004 Printed in Sweden
30664734
Page 1 of 14
Installation instructions, accessories - Body kit
Volvo Car Corporation Göteborg, Sweden
Required tools
A0000162
A0000163
A0000161
A0000165
A0000214
A0000177
M0000232
M8401177
M8401178
A0000332
© VolvoCar Corporation, 2004 Printed in Sweden
30664734
Page 2 of 14
Installation instructions, accessories - Body kit
Volvo Car Corporation Göteborg, Sweden
Any comments on this publication? Please contact your nearest dealer. Thank you!
Publication no: MA30664734, Issue: 2004-04
Comments:..........................................................................................................
............................................................................................................................
............................................................................................................................
............................................................................................................................
............................................................................................................................
.............................................................................................................................
From:...................................................................................................................
Address:.............................................................................................................
Telephone no:................................................................................................... .
Telefax:...............................................................................................................
© VolvoCar Corporation, 2004 Printed in Sweden
30664734
Page 3 of 14
Installation instructions, accessories - Body kit
Volvo Car Corporation Göteborg, Sweden
INTRODUCTION
Body kit
Note!
●
NOTE! Read through the entire text before carrying out
any work.
●
The front page gives the date of this edition and the edition it
replaces
●
The second page shows the tools needed for the installation and
the contents of the installation kit
●
The illustrations display the procedure in order of operation. The
order of operation is repeated in the text section
●
Cut out the text page in order to follow the illustrations and text at
the same time.
© VolvoCar Corporation, 2004 Printed in Sweden
During installation the underlay must be kept at a temperature of at least
+15°C (60°F). NOTE! For cars with a tow hitch, a cut-out for the tow
hitch (point 2) must be made before painting. NOTE! Spray paint
according to the Service Manual “Touch up spraying”, section 8 (80).
Note that, before spraying, the body kit must first be cleaned, then
sanded and then cleaned again. See the instructions in the Service
Manual.
30664734
Page 4 of 14
Installation instructions, accessories - Body kit
Volvo Car Corporation Göteborg, Sweden
1
●
Pry off the cover for the towing eyelet in the new spoiler. The cover will be
painted separately together with the spoiler.
M8401179
2A
Note!
Illustration A applies to cars with a fixed tow bar
Illustration B applies to cars with a detachable tow bar, EU
Illustration C applies to cars with a detachable tow bar, AUS
Illustration D applies to cars with a detachable tow bar, USA
M8401180
On cars equipped with tow bars, cutting for the tow bar must be carried out in the new
lower section of the bumper cover. See illustrations A, B and C.
2B
●
Apply tape to the lower outside section of the bumper cover, opposite the
markings on the inside. This is to protect the paint from the saw when cutting the
cut-out for the tow hitch wiring connector. (Applies to cars with a painted lower
section)
●
Cut the cut-out following the existing markings.
Note!
M8401181
Do not damage the lower painted surface section of the bumper cover. Cut so
that the raised edge on the inside remains. The raised edge marks the cut-out.
2C
●
Smooth off the sawn edges using a fine toothed file. Remove the tape.
M8401182
© VolvoCar Corporation, 2004 Printed in Sweden
30664734
Page 5 of 14
Installation instructions, accessories - Body kit
Volvo Car Corporation Göteborg, Sweden
2D
M8401183
3
●
Remove the clip at the lower side of the face on the lower section of the front
bumper cover. Press in the centre pin and remove the clip. There is a new clip in
the kit
●
Repeat the operation on the other side.
●
Remove the clips at the lower side of the face on the lower section of the front
bumper cover. Press in the centre pins and remove the clips. There are new
clips in the kit.
●
Turn the wheels to the right
●
Insert a screwdriver in the space by the joint between the upper and lower
sections of the bumper cover. Press the hook holding the sections to each other.
At the same time pull out the side so that the hook releases. Force is required to
release the hook
●
Repeat the operation on the other side.
M8401184
4
M8401185
5
M8401186
© VolvoCar Corporation, 2004 Printed in Sweden
30664734
Page 6 of 14
Installation instructions, accessories - Body kit
Volvo Car Corporation Göteborg, Sweden
6
●
Now pull off the entire lower section from the upper section. Place to one side. It
will not be reused.
●
Clean the joint where the new spoiler is to be positioned.
●
Take the new spoiler from the kit. Install the new spoiler in the same place where
the old lower section was positioned
●
Check that it aligns in the grooves (1) correctly
●
Press the spoiler into place properly. Ensure that all the hooks engage.
●
Bend the mounting bracket for the spoiler towards the mounting hole at the front
edge of the wheel arch
●
Install a black clip with a long centre pin. Press into place
●
Repeat the operation on the other side.
M8401187
7
M8401190
8
M8401192
9
M8401191
© VolvoCar Corporation, 2004 Printed in Sweden
30664734
Page 7 of 14
Installation instructions, accessories - Body kit
Volvo Car Corporation Göteborg, Sweden
10
●
Bend the centre mounting brackets on the spoiler towards the corresponding
mountings on the bumper cover
●
Install the grey clips with a short centre pin from the kit. Press into place.
●
Remove the screw in the lower edge of the side on the lower section of the rear
bumper cover
●
Repeat the operation on the other side.
●
Pry off the panel for the cut-out for the towing eyelet. Cut off the strap. The
cover will not be reused.
●
Pull off the bumper cover ends from the car body on both sides.
M8401195
11
M8401196
12
M8401197
13
M8401188
© VolvoCar Corporation, 2004 Printed in Sweden
30664734
Page 8 of 14
Installation instructions, accessories - Body kit
Volvo Car Corporation Göteborg, Sweden
14
●
Fold down the edge on the lower section of the bumper cover until the mounting
clips on one side can be accessed
●
Remove the clips. Press in and remove the centre pins. New clips can be found
in the kit
●
Repeat the operation on the other side.
●
Pull off the lower section of the bumper cover until the remaining hooks release
from the rear edge
●
Place the lower section to one side. It will not be reused.
●
Disconnect the strap for the towing eyelet cover from the car body.
●
Clean the joint where the new spoiler is to be positioned.
M8401189
15
M8401200
16
M8401207
17
M8401201
© VolvoCar Corporation, 2004 Printed in Sweden
30664734
Page 9 of 14
Installation instructions, accessories - Body kit
Volvo Car Corporation Göteborg, Sweden
18
●
Install the new spoiler where the old lower section was positioned
●
Only press the spoiler into place in the hooks at the rear edge, not into the sides
yet.
●
Fold down the edge on the lower section of the bumper cover and the brackets
in the bodywork for installing the spoiler, so that the clips can be pressed into
place
●
Take new clips from the kit. Press the spoiler mounting at the mounting brackets
in the car body into place
●
Repeat the operation on the other side.
●
Press the spoiler ends on the right and left-hand sides into the corresponding
mountings in the car body
●
Now check that all the hooks on the spoiler have engaged.
●
Fold the spoiler mounting bracket towards the spring clip. Tighten the spoiler
bracket to the mounting. Use a screw from the kit
●
Repeat the operation on the other side.
M8401202
19
M8401205
20
M8401206
21
M8401204
© VolvoCar Corporation, 2004 Printed in Sweden
30664734
Page 10 of 14
Installation instructions, accessories - Body kit
Volvo Car Corporation Göteborg, Sweden
22
●
Secure the new strap for the cover in the hole in the car body. Press the cover
into the spoiler.
●
Remove the rear wheels
●
Drill out the two rivets in the front edge of the rear wheel arch. Use a Ø 6.5 mm
(1/4 ") drill bit
●
Remove the remains of the rivets.
●
Drill out the two rivets in the rear edge of the rear wheel arch. Use a Ø 6.5 mm
(1/4 ") drill bit
●
Remove the remains of the rivets.
●
Knock out the centres of the seven clips securing the bottom edge of the door sill
panel. The eighth rear clip must be drilled out. Use a 5 mm (3/16”) diameter drill
bit. Drill out the centre pin
●
Remove the clip
●
Remove the lower section of the panel together with the clips from the
bodywork.
M8401198
23
M8401090
24
M8401089
25
M8401098
© VolvoCar Corporation, 2004 Printed in Sweden
30664734
Page 11 of 14
Installation instructions, accessories - Body kit
Volvo Car Corporation Göteborg, Sweden
26
●
Remove the top edge / rear edge of the panel. Use a plastic weatherstrip tool.
The panel is secured with a clip in the rear wing
●
Continue forwards. Pry out the panel along the door sills. The panel is secured
with eight clips
●
Then disconnect the panel from the front wing. The panel is secured with two
clips
●
Place the panel to one side.
●
Clean the tops of the door sills along the car. Wipe dry
●
Clean using isopropanol Volvo P/N 1161721. Wipe dry.
M8401228
27
M8401229
28A
●
●
Illustration A
Take a new panel and rubber strips from the kit. Press two new clips into place
on the panel. The rubber strips for the panels are specific to the left and righthand sides, as well as for front and rear. Check the old panels. Check where
each rubber strip is to be located
Press new rubber strips into place on the panel.
Illustration B
M8401039
Note!
28B
●
The rear clip on the new rear rubber strips must be heated and pressed into
place. Heat using a soldering iron.
R8401109
© VolvoCar Corporation, 2004 Printed in Sweden
30664734
Page 12 of 14
Installation instructions, accessories - Body kit
Volvo Car Corporation Göteborg, Sweden
29
●
Apply adhesive (Volvo P/N 1161767), at the start of the radius and inwards, to
all projections on the vehicle sill. The bead of adhesive must be approximately
4 mm (5/32”) wide.
●
Remove the backing tape from the mounting tape on the panel.
M8102019
30
M8401079
31
Note!
Two people are necessary to carry out installation of the new panel. Ensure that the
panel is lifted to a height in relation to the sill sufficient so that the panel does not smear
the bead of adhesive.
M8401048
© VolvoCar Corporation, 2004 Printed in Sweden
●
The front and rear edges of the wing liners must cover the ends of the side
panel. Align the panel with the car. Position the locating pin in the centre hole on
the top of the sill
●
Press the front and rear clips for the panel into place in the holes in the sills
●
Press the panel firmly into place against the sills along the surfaces where the
tape is located
●
Secure the bottom edge of the panel against the bodywork using eight new clips
from the kit
●
Remove any adhesive residue that has been pressed out.
30664734
Page 13 of 14
Installation instructions, accessories - Body kit
Volvo Car Corporation Göteborg, Sweden
32
●
Drill through the existing holes in the rear edge of the front wheel arch and
through the front end of the panel. Use a 5 mm (3/16”) diameter drill bit
●
Remove any swarf
●
Secure the panel at the rear edge of the front wheel arch. Use two blind rivets
(from the kit).
●
Drill through the existing holes in the front edge of the rear wheel arch and
through the rear end of the panel. Use a 5 mm (3/16”) diameter drill bit
●
Remove any swarf
●
Secure the panel at the front edge of the rear wheel arch. Use two blind rivets
(from the kit)
●
Repeat points 26-36 on the other side of the car
●
Reinstall the rear wheels. Tighten the wheel studs. Tighten to 140 Nm (103 lbf.
ft).
M8401049
33
M8401050
Note!
Leave the car indoors for 2 hours after carrying out the work. Do not wash the
car for 48 hours.
© VolvoCar Corporation, 2004 Printed in Sweden
30664734
Page 14 of 14