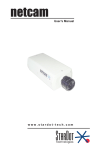
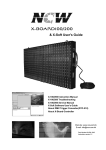
1
5300 Series Printer
Users Guide
Pertech Resources Inc.
November 2005
220321A-01
Disclaimer
Information in this document is subject to change without notice. Consult your Pertech® sales representative for information
that is applicable and current. Pertech reserves the right to improve products as new technology, components, software and
firmware become available.
No part of this document may be reproduced or transmitted in any form or by any means, electronic or mechanical, for any
purpose with out the express written permission of Pertech.
Copyright
Copyright © 2005 by Pertech Resources, Inc.
Riverton, Wyoming USA
All rights reserved
Printed in USA
Confidential, Unpublished
Property of Pertech Resources, Inc.
Trademarks
PERTECH® is a registered trademark of PERTECH RESOURCES, INC.
Other trademarks and registered trademarks are the property of their respective holders
Web site
http://www.pertechresources.com/
Federal Communications Commission (FCC) Radio
Frequency Interference Statement
Warning
Changes or modifications to this unit not expressly approved by the party responsible for compliance could void the user’s
authority to operate the equipment.
Note
This equipment has been tested and found to comply with the limits for a Class B digital device, pursuant to Part 15 of the
FCC rules. These limits are designed to provide reasonable protection against harmful interference when the equipment is
operated in a commercial environment. This equipment generates, uses, and can radiate radio frequency energy and , if
not installed and used in accordance with the instruction manual, may cause harmful interference to radio communications.
Operation of this equipment in a residential area is likely to cause harmful interference in which case the user will be
required to correct the interference at his own expense.
Information to the User
This equipment must be installed and used in strict accordance with the manufacturer’s instructions. However, there is no
guarantee that interference of radio communications will not occur in a particular commercial installation. If this equipment
does cause interference, which can be determined by turning the equipment off and on , the user is encouraged to contact
Pertech immediately.
Pertech is not responsible for any radio of television interference caused by unauthorized modification of this equipment, or
the substitution of attachment or connection cables and equipment other than those specified by Pertech. The correction of
interferences caused by such unauthorized modification, substitution or attachment will be the responsibility of the user.
Industry Canada
This Class B digital apparatus complies with Industry Canada Standard ICES-003.
Cet appareil numérique de la classe A est conforme à la norme NMB-003 d’Industrie Canada.
Pertech Resources Inc.
November 2005
220321A
II
Important Information to the User
In order to ensure compliance with the Product Safety, FCC and CE marking requirements. you must use the power supply,
power cord, and interface cable which were shipped with this product or which meet the following parameters:
Power Supply
Input power to this product must be provided by one of the following:
(1) A NRTL Certified power source with a Limited Power Source
(LPS) output for use in North America, input rated 100 - 240 Vac, 1.5 A, 50/60 Hz, Output rated 24Vdc, 2.5 A Maximum and
60W Maximum. or
(2) A power source with a Limited Power Source (LPS) output Certified by an agency recognized in the country of
installation, input rated 100 - 240 Vac, 1.5 A, 50/60 Hz, Output rated 24Vdc, 2.5 A Maximum and 60W Maximum. Use of this
product with a power supply other than the Pertech power supply will require you to test this power supply and the Pertech
printer for FCC and CE mark certification.
Interface Cable
A shielded (360 degree) interface cable must be used with this product. The shield must be connected to the frame or earth
ground reference at each end of the cable.
Use of a cable other than the described here will require that you test this cable with the Pertech printer and your system
for FCC and CE mark certification.
Power cord
For North America a NRTL Recognized detachable power cord must be used. For applications where the power supply
module may be located on the floor, a power cord with Type SJT marking must be used.
For applications outside of North America, Power cords which meet the country of installation’s certification and application
requirements must be used.
Use of a power cord other than described here may result in a violation of safety certifications which are in force in the
country of use.
Pertech Resources Inc.
November 2005
220321A
III
Contents
Preface ............................................................................................................... VI
About The Printer ................................................................................................1
Features and Options .................................................................................1
Choosing a Location ...................................................................................1
Unpacking the Printer .................................................................................1
Ordering Paper and Supplies .....................................................................2
Operating the Printer...........................................................................................3
Using the Controls ......................................................................................3
Paper Loading ............................................................................................3
Cartridge Installation & Replacement .........................................................4
Validation and Document Guides ......................................................................5
Validation Print Fields .................................................................................5
Document Guide Installation ......................................................................6
Cables and Connections.....................................................................................7
Comunications ............................................................................................7
RS232 Serial Interface ...............................................................................7
RS-232 Interface Connection ..........................................................7
USB 2.0 Interface .......................................................................................8
Cash Drawer...............................................................................................8
Power Supply .............................................................................................9
Drivers & Utilities ..............................................................................................10
XP/2000 Windows Driver..........................................................................10
Driver Installation ...........................................................................10
Print Driver Setup..........................................................................12
Printer Configuration ...........................................................13
Printing Preferences ...........................................................14
Printer Commands .............................................................14
Logo Download Utility ..............................................................................16
Pertech Resources Inc.
November 2005
220321A
IV
Configuration & Diagnostic Print Tests ..........................................................17
Configuration Utility Program....................................................................17
Printer Control Language...............................................................18
Font ...............................................................................................19
RS232 Interface ............................................................................19
USB Interface ...............................................................................19
Hardware .......................................................................................19
Memory ..........................................................................................20
Tallies .............................................................................................20
Configuration Report & Setup Mode.........................................................21
Printer Configuration Options ...................................................................23
Options for ACL Compatibility Mode .............................................23
Options for A470 Compatibility Mode ...........................................24
Options for Mode 1, 2, 3, 4 & 5 (DO214, ZC2979, ZC5979 ZC1939 &
ZC2059) ........................................................................................25
Compatibility Modes .....................................................................25
LED Mode Indicators ...............................................................................26
Trouble Shooting Printer Problems .................................................................27
LED Error Fault Mode Diagnostics ...........................................................27
Trouble Shooting General Issues .............................................................28
Service & Support.....................................................................................29
Maintaining The Printer.............................................................................29
Specifications ....................................................................................................30
Index ...................................................................................................................32
Warranty .............................................................................................................33
Pertech Resources Inc.
November 2005
220321A
V
Preface
This manual has been written to help you Install and Operate your Pertech® 5300 Series Printer. Feel free to contact
us if you need further assistance after reading this manual. Please see the Troubleshooting Printer Problems section of
this manual and determine the complete part number of your printer prior to calling. Pertech provides technical support
Monday through Friday from 8:00 AM to 5:00 PM MST at 307-856-4821.
Every effort has been made to insure the information in this manual is complete and accurate. Feel free to contact us
with any comments concerning this manual. Pertech assumes no responsibility for errors.
Where to Get Additional information
The following publications contain more information about the 5300 series printer. Contact your Pertech sales representative to obtain additional copies of this Manual or any of the publications listed below.
Title
Part Number
5300 Printer: Setup Guide
5300 Printer: Users Guide
5300 Printer: Service Guide
5300 Printer: Programming Manual A470
5300 Printer: Programming Manual ACL
5300 Printer: Programming Manual D0214
5300 Printer: Programming Manual ZC 5999 / 5979
5300 Printer: Programming Manual ZC 2979
5300 Printer: Programming Manual ZC 1939 / 2059
220322
220321
220323
220282
220320
220284
220285
220286
220325
Available Models:
5351 Ink Jet Receipt / Independent Validation
5354 Ink Jet Validation Only
5371 Impact Receipt / Independent Validation
5374 Impact Validation Only
Pertech Resources Inc.
November 2005
220321A
VI
About The Printer
Unpacking the Printer
Save all packing materials in case you need to repack the
printer.
To report a printer that was damaged during shipping, see
“Contact Information” on the last page of this Guide.
To repack the printer, consult the illustration and use the
original packing materials.
Choosing a Location
Place the printer on a level surface on or near
the host computer. Leave space to open the
cover, change the paper, Ink or ribbon Cartridge, and to insert a form.
The maximum distance from the printer to the
host and the power supply is: 20 feet (RS-232
serial interface).
Features and Options
Automatic paper loading.
Serial and USB Standard interfaces
One button configuration.
Validation / Receipt and Validation Only
Models.
Impact / Ink Jet conversion capability
Pertech Resources Inc.
November 2005
535X Packing Shown
220321A
1
Ordering Paper and Supplies
The following section lists the paper and supplies available for order. In addition to paper and ribbons,
parts, service and repair may be obtained by calling 1-800-800-6614.
Paper:
Call: 1-800-800-6614
Paper
Part Number
Ink Jet 5351
One Ply....................................................................................................... 103292057
Impact 5371
One Ply....................................................................................................... 103292062
Two Ply ....................................................................................................... 103292061
Cartridge’s:
Call: 1-800-800-6614
Description
Part Number
Ink Jet 535X
Black........................................................................................................... 108541001
Impact 537X
Black........................................................................................................... 100629011
Purple ......................................................................................................... 100629012
Cables:
Call: 1-800-800-6614
Description
Part Number
5300 Printer RS232 Serial Cable ................................................................. 106356010
5300 Printer Certified USB Cable ............................................................... 106356011
Documentation:
Call: 1-800-800-6614 - or downloadable at www.pertechresources.com
Title
Part Number
5300 Printer: Setup Guide ............................................................................ 220322
5300 Printer: Users Guide .......................................................................... 220321
5300 Printer: : Service Manual ..................................................................... 220223
Parts Information Manual (PIM)..................................................................... 220324
Pertech Resources Inc.
November 2005
220321A
2
Operating the Printer
Using the Controls
The 5300 printer includes the
following controls :
•Paper feed button used to
advance paper.
•Power switch used to turn the
printer on and off.
Paper Loading
Paper and other printer consumables may be purchased from Pertech by calling 1-800-800-6614.
Roll paper must be 3.0 inches wide +/- .03 inches (.762mm) with a maximum diameter of 3.5 inches (88.9mm).
Ink Jet 535X receipt printers can accommodate 1 paper ply. Impact 537X receipt printers can accommodate 1 or two
paper plys. The minimum inside core diameter is 5/8 inches (15.875mm).
Inserted forms allow for one original plus 2 additional copies, this includes the receipt roll paper if used. Minimum
form size is 5.5 inches by 2.75 inches (139.7 by 69.9mm) with thickness between .0015 to .0047 inches (.0381.1194mm) for 2 ply s, .0026-.0047 for 1ply(.066-.1194mm) . Total media thickness allowed is no more than .012
inches (.305mm) includes the receipt.
To load paper the power must be turned ON. Refer to the pictorial paper loading instructions in the Paper Roll
Cover. Follow the instructions on this page.
Failure to load paper correctly may result in a paper jam. To remove paper that has jammed:
1. Open the Front Cover.
2. Pull the paper backwards out of the mechanism. If the paper will not remove pull the paper
forwards out of the mechanism. If needed cycle power to the printer and wait 5 seconds.
Drop roll into paper bucket so that paper comes off the bottom of the paper roll. Insert the paper end into the paper
feed actuator assembly. The paper feed actuator will automatically feed the paper through the mechanism . Close
the paper cover lid, paper loading is complete.
Correct
Incorrect
Pertech Resources Inc.
November 2005
220321A
3
Cartridge Installation & Replacement
1. Press the Power Switch to turn on the printer.
2. Open the front cover. The printhead cradle will move to an accessible position.
3. If replacing print cartridge lift the print cartridge out and discard. Skip this step if no print cartridge is installed.
Note: Replacement ink jet print cartridge for your printer 108541001
Replacement impact print cartridge for your printer 100629011 Black
100629012 Purple.
535X Ink Jet Specific Directions
To reset the Ink Status - Close and Re-Open the Cover after Step 3
(See INK STATUS RESET in Configuration section of this manual for available options.)
4. Remove the protective vinyl tape from replacement print cartridge.
Do not touch the Ink nozzles.
Do not touch or remove the copper contacts.
5. Push the print cartridge firmly, angled down into the print
cartridge cradle, cradle latch will latch automatically.
6. Close the front cover.
Warning: Printer is shipped without the print cartridge
installed. When shipping or transporting printer remove the
ink cartridge to prevent damage to the printer. Ink cartridges
should be shipped in original packaging only.
537X Impact Specific Directions
4. Remove the cartridge from its protective plastic bag.
5. Angle the exposed ribbon end over the print head carriage
In front of the two ribbon guides.
6. Lightly push the ribbon case down until it is engaged into
the ribbon advance gear on the right side and the ribbon
cartridge is flush in the ribbon carrier.
NOTE: It may be necessary to turn
the ribbon advance knob clock
wise during Installation to engage
the ribbon advance gear.
Ribbon Advance Knob
Pertech Resources Inc.
November 2005
220321A
4
Validation and Document Guides
Validation Print Fields
Dot column #1 Dot Column #400
The 5300 series printer has 2.5 inch wide printfield.
The validation print field height is adjustable from .17 to 1.75
inches. This can be done via the configuration utility or the
one button setup. An inserted form can be manually aligned
or a optional document guide can be attached to provide a
fixed right side stop for the inserted form. The drawings below indicate the typical print positions for a 2 3/4” X 6” form.
The highlighted area is the printfield width and Maximum
height.
3 Inches
Print Zone
2 Inches for 6” Check
1 Inch
1.75 Document Stop
Print field is 2.5” Wide
Center Justify
3.25 Inches
Note: The one button set-up only has three selectable document stop settings. Using the Configuration Utility the document stop can be adjusted to any desired printfield height
within the parameters specified above.See Configuration and
Diagnostics section of this manual for available options.
3 Inches
Print Zone
2 Inches for 6” Check
1 Inch
1.75 Document Stop
Print field is 2.5” Wide
Left Justify
3 Inches
Bank of F
irst Deposit (BOFD) Endorsement A470, bit [print field is ;larger
To 2” Print Zone:
3 Inches
Left Justify
Right Justify
Doc ument Guide
Print Zone
2 Inches for 6” Check
1 Inch
1.75 Document Stop
2.5” Wide Print Field
Print field is 2.5” Wide
Right Justify
3 Inches
Print Zone
2 Inches for 6” Check
1 Inch
3.5 Inches
3 Inches
Print Zone
2 Inches for 6” Check
1 Inch
1.75 Document Stop
Right Edge of Form Aligned with Right
Edge of Receipt Retail Endorsement. To
center justify check in print zone, document guide is 2.625” from dot column #1
Print field is 2.5” Wide
Right Justify
2.75 Inches
Right Edge of Form Aligned with Right
Edge of Receipt BOFD Endorsement
Effective print area in Endorsement zone
is 1.75” wide.
1.75 Document Stop
Print field is 2.5” Wide
Right Justify
Note: The Print Field is 2.5” wide. Left Justification
will overlap into the 1” right zone. Right Justification will overlap into 3” left zone.
1 Inch
2.75 Inches
Pertech Resources Inc.
November 2005
220321A
5
Document Guide Installation
The Document Guide is a clip in durable plastic part that attaches to the printers Validation Roller to provide a
right side guide for an inserted form.
NOTE: Before installing the Document Guide make sure the area where the guide is to be installed is free of
any dust debris or contamination that could inhibit the movement of the Validation Roller.
The Document Guide is installed by
attaching it to the Validation Roller. The
guide is installed vertically with the bottom of the guide clipped into the Validation Roller in the rollers notch on the
right side. The tapered tab end of the
guide needs to be toward the top of the
printer. Align the bottom two extensions
of the Document guide so that they are
left of the MLV Roller Gear. Make sure
an inserted form will not catch on the
guide.
Tab
MLV Gear
When the Document Guide is attached the
Print is Left Justified to the 2” Print Zone on the
back of a 2 3/4” X 6” standard check.
Note: The Print Field is 2.5” wide. Left Justification can overlap into the 1” right zone.
3 Inches
Print Zone
2 Inches for 6” Check
1 Inch
The print field will be
1/4” left of a standard
2 3/4” X 6” form when
inserted vertically and
aligning with the document guide.
1.75 Document Stop
Print field is 2.5” Wide
3 Inches
1.75 Document Stop
Print field is 2.5” Wide
1 Inch
2.75 Inches
Pertech Resources Inc.
November 2005
220321A
6
Cables and Connections
Comunications
The 5300 comes with two communication interfaces, RS-232 Serial and USB. Additionally, the printer has a cash
drawer port and a three pin mini din power coupling. The RS-232 interface connector is a DB9M connector and
requires a Null Modem Serial cable for standard PC to printer connections. The USB Interface uses a standard USB
2.0 cable for standard PC to printer connections. A single tele-jack port provides a cash drawer interface capable of
running two cash drawers. An external Class 2 Power Supply provides 15 watt Min output to the printer. All connectors are located on the back of the printer in the order listed below.
Connecting the Cables
Caution: Be sure the power switch is turned off before connecting cables. The host computer should be
turned off before connecting any cables.
Power
USB
Serial
Cash Drawer
RS232 Serial Interface
1. Make sure the host computer and printer are turned off.
2. Attach the cable to the DB9 Male connector on the back of the Printer.
3 Attach the cable to the DB9 Male connector on the back of the PC.
4. Tighten the connector screws to secure the cable and ensure a solid connection.
RS-232 Interface Connection
Printer
DB-9M
Pin
1 N/C
2.RXD
3 TXD
4 DTR
5 SIG. GND.
6 DSR
(TTL FORM IN)
7 RTS
8 CTS
(TTL LOW PAPER)
9. N/C
Pertech Resources Inc.
←
→
→
←
←
→
→
←
→
DB-9M
Pin
1 N/C
3
2
6
5
4
Computer
Serial Cable DB9F - DB9F
Part Number 106356010
8
7
N/C
November 2005
220321A
7
USB 2.0 Interface
Pin 1
Pin 2
Pin 3
Pin 4
Pin 5
Pin 6
USB Cable Part
Number 106356011
EOT/VCC
DD+
GND
GND
GND
The USB cable may be attached or detached when the
system is on. When Using the USB interface the Windows® Operating System will automatically install the
USB port driver. Pertech has available printer drivers at
www.pertechresources.com.
Warning: When Hot Swapping USB cable make
sure that cable is installed into the correct connectors or damage to the printer could result.
Cash Drawer
1. Printer should be off when connecting the cash drawer.
2. Connect the cable to the cash drawer and the printer.
Pin #
1
2
3
4
5
6
Signal Name
Ground
Cash Drawer drive #1
Cash Drawer Sense
Cash Drawer +24V
Cash Drawer drive #2
COM
A470 Cash Drawer Commands
Cash Drawer “A”
Cash Drawer “B”
Signal Source
Printer
Cash Drawer
Printer
Printer
Cash Drawer
ASCII
ESC BEL
ESC BS
ACL Cash Drawer Commands
Immediate peripheral pulse
ASCII
DLE DC4
HEX
1B 07
1B 08
HEX
10 14
Description
Ground
Drive for Cash Drawer 1
Cash Drawer Switch
Drawer supply side.
Drive for Cash Drawer 2
Cash Sense Return (Gnd)
Decimal
27 7
27 8
123456
Default 75ms Pulse
Decimal
16 20
s m n
s: Peripheral Select
m: Peripheral On Time
n: Peripheral Off Time
Immediately generates a pulse of (m x 2 msec) followed by an off time of (n x 2 msec) on the peripheral output. If s
= 00, the first peripheral on pin 2 is activated and if s =01, the second peripheral on pin 1 is activated.
Off Time should be set so that it is greater than or equal to On Time.
Warning: use of incompatible cables can damage the printer and will void the warranty.
When purchasing a cash drawer for this product please make sure the vendor is aware of the product specifications.
When replacing an A470 model printer, the cash drawer cable must be changed.
Cash Drawer Cable
Printer
Cash Drawer Y Cable
Cash Drawer
Single Cash Drawer Configuration
Pertech Resources Inc.
November 2005
Cash Drawers
Printer
Dual Cash Drawer Configuration
(Requires Y Cash Drawer Cable Adapter, See your
cash drawer manufacture for the correct cable.)
220321A
8
Power Supply
To avoid damage to the printer connect the Power Supply last.
1. Make sure the printer power switch is off.
2. Plug the Power Supply Cable into the printer. The power supply cable connector has a
locking mechanism to ensure that the cable stays fastened to the printer. When removing
the cable release the locking mechanism by pulling the mechanism away from the printer.
3. Plug the Power Supply Cable into a grounded outlet.
4. Turn the power switch on. The Power LED on the front of the
Printer will illuminate to green.
�����
�����
��� ���
�����
����
Connector Cable Locking
Mechanism
Ink Jet 535X Power Supply
Impact 537X Power Supply
INPUT
Input Voltage:
Input Current:
Input Frequency
INPUT
Input Voltage:
Input Current:
Input Frequency
OUTPUT
Output Voltage:
Output Current:
Rated Output Power:
Load Regulation:
Line Regulation:
Ripple Voltage:
Inrush Current:
Efficiency:
PROTECTION
Over-voltage:
Short Circuit:
APPROVALS
Safety Marks:
EMI:
PHYSICAL
AC Plug:
DC Cord Length:
DC Plug:
Pertech Resources Inc.
90Vac To 255Vac
<.5Arms At 90Vac
47Hz To 63Hz
24VDC
.625A Minimum, No Minimum
Load Required
15 Watts Minimum
+/- 5%
+/- 1%
250mV Peak To Peak
30A @ 115Vac, 40A @ 230Vac
60% Minimum, 75% Typical
25.6Vdc TO 30Vdc
Auto-Recover Upon Removal
Of Short
UL, CSA or CUL, *CE, *TUV
FCC Part 15 Class B
(Both Radiated And Conducted)
On Wall Mount Adapter
1830mm (6 FT.)
3-pin Locking Mini Din
(See Pinout Above)
November 2005
OUTPUT
Output Voltage:
Output Current:
Rated Output Power:
Load Regulation:
Line Regulation:
Ripple Voltage:
Inrush Current:
Efficiency:
PROTECTION
Over-voltage:
Short Circuit:
APPROVALS
Safety Marks:
EMI:
PHYSICAL
Ac Plug:
Dc Cord Length:
Dc Plug:
220321A
90Vac To 255Vac
1.5A Max
47Hz To 63Hz
24VDC
2.5A Minimum, No Minimum
Load Required
60 Watts Minimum
+/- 5%
+/- 1%
250mV Peak To Peak
50A @ 115Vac, 100A @ 230Vac
75% Minimum
25.6Vdc To 30Vdc
Auto-Recover Upon Removal
Of Short
UL, CSA OR CUL, CE, TUV
FCC Part 15 Class B
(Both Radiated And Conducted)
IEC 320/C6
1830mm (6 FT.)
3-pin Locking Mini Din
9
Drivers & Utilities
XP/2000 Windows Driver
Pertech provides drivers for various operating systems. Common drivers can be downloaded off the Pertech web
site www.pertechresources.com. For drivers not listed on the web site check with your Pertech representative for
availability.
For the 5300 to utilize the Pertech drivers or the USB communication interface a driver must be installed. When connecting the printer to a XP or 2000 Windows® operating system use the Pertech driver available for download off
the Pertech web site. The printer must be set into the ACL command language to function with the driver. To set the
command language see the Diagnostic & Configuration section in this manual.
Driver Installation
1. Unzip the 5300 driver package to a temporary folder.
Make a note of where this folder is located for later.
2. If using USB, connect the USB cable between the
5300 printer and computer. Then turn on the 5300. This
causes Windows to assign the 5300 to a Virtual USB
Printer Port, which will need to be selected in the “Select
Printer Port” step described below.
3. Use the “Add Printer Wizard” to install this driver on
either Windows 2000 or Windows XP. Find “Printers
And Faxes” on the “Start” menu. (Some machines may
have this section under the sub-heading “Control Panel”). Click on “Add Printer” and click “Next”.
5. To “Select a Printer Port”, pull down the drop box.
If using USB, select the virtual USB port number for
the printer. If USB001 and USB002 are shown, select
USB002. You can always change this later. If using
RS-232 serial, select the appropriate COM port that the
printer is attached and note that later you may need to
adjust RS-232 settings. Click “Next”.
4. Select “Local Printer” and uncheck “Automatically
detect and install my Plug and Play printer”. Click “Next”.
Note that unchecking “Automatically detect...” is optional,
but speeds up the installation process.
Pertech Resources Inc.
November 2005
220321A
10
6. The “Install Printer Software” section will display a list
of printers that Windows currently supports and show a
button called “Have Disk”. Click “Have Disk” and browse
to the temporary folder where the driver was unzipped in
step 1. In this folder, Windows will find “5300.INF”. Click
“Open”, then click “OK”.
Click “OK” again.
8. You can optionally rename your printer and assign it
as default. Click “Next”.
9. Click whether or not you want the printer to be shared
with other PC’s on a network. Click “Next”.
7. Four different versions of the 5300 will be listed:
5371 (impact receipt and validation)
5374 (impact validation only)
5351 (inkjet receipt and validation)
5354 (inkjet validation only).
Click on the appropriate model and click “Next”.
Pertech Resources Inc.
November 2005
10. Click whether or not to print a test page and click
“Next”.
220321A
11
11. Click “Finish”. Windows will issue a warning that the
driver is not digitally signed by Microsoft®. To install the
driver, click “Continue.”
Print Driver Setup
COMx Port Set up
If using RS-232, it is likely that first time installers will
need to adjust the RS-232 parameters to match the
attached printer. After installing the driver, go to “Printers and Faxes” on the “Start” menu and right click on
the 53xx printer driver. Select “Properties”. Select the
“Ports” tab. Select “Configure Port”. Verify that the baud
rate, parity data and stop bits and flow control match.
VERY IMPORTANT: Make sure that the Windows COM
port is set for Flow Control = Hardware (or XON/XOFF if
the attached printer is configured to for XON/XOFF). If
Flow Control is set to “None”, garbage print may eventually result. To check the printers configuration settings
see the next section of this manual “ Configuration &
Diagnostic Print Tests”.
Pertech Resources Inc.
November 2005
220321A
12
Bi-directional Status
The printer driver will display printer status via an icon in
the Windows System Tray, which is located on the task
bar next to the clock. There are several different icons
that could be possibly displayed, but the one shown
represents the last printer status item that changed. To
display the complete status, right click on the icon and a
window will pop-up showing all status items.
The icon can be turned off in a number of ways. Clicking
on the 53xx Printer Property menu will shut the icon off
until the next print job is sent. It can also be optionally
disabled by unchecking “Enable bidirectional support”
in the “Ports” tab , or unchecking “Enable Status” in the
“Device Setting” tab of the 53xx Printer Properties dialog
box.
To see a complete list of icons, please click “Help” on the
“Device Setting” tab of the 53xx Printer Property page.
Limited status information is also displayed in the “Details” view of the “Printers and Faxes”dialog box under
the “Status” column.
Printer Configuration
The printer may be configured at any time by clicking on
the printer icon in the printer folder with the right mouse
button and selecting Properties. The Device Setting Tab
allows the user to set the following parameters.
Clamp Delay
This is set to 1 second as a default and refers to the delay between the printer sensing that a validation slip has
been inserted into the validation slot and the validation
clamp operating. It is recommended that this be no less
than 1 second.
Bill out length
This is set to 1.57 inches (40 mm) as a default but can
be changed as required. “Bill out” refers to the length of
paper that is appended to the end of a print job and is
normally used to move the paper up to the printer’s tear
bar. It is only operational if selected in the Document
Defaults dialog box.
About
Clicking this button gives version information about the
driver.
Enable Status
If this box is checked (this is the default condition) then
information about the current status of the printer is displayed in the bottom of the screen on the task bar.
Ink Level (Inkjet models only)
This bar is adjusted when sending a print job and gives a
estimated visual representation of the amount of ink left
in the cartridge.
Clean Nozzles (inkjet models only)
The 535x printers perform automatic maintenance for
best print quality when required, but if it is desired to
force the printer to self clean its nozzles, click this button.
Validation Height
This is set to maximum (1.75 inches) as a default but
can be set between .17 to 1.75 inches. This should be
set to match the printer configuration setting under the
heading “Document Stop”.
Pertech Resources Inc.
November 2005
220321A
13
Printing Preferences
If the printer icon in the printers folder is clicked with the
right mouse button and Printing Preferences selected
the various parameters to do with the document may be
modified. This dialog box is also usually available from
within an application within its printer setup. Note that
the current application’s Printing Preferences will override any set by other applications.
jobs. It is not available if “Continuous” mode is selected.
Bill Out Mode
This specifies if the Bill Out setting in the Printer Configuration should be used at the end of a document, the
end of a page or not at all. The default setting is the end
of a document. In most applications the bottom margin
setting is used unless it is set to zero, in which case the
bill out distance is used.
Horizontal Resolution
This can be set to 160 Dots Per Inch or 80 Dots Per
Inch. 160 DPI will yield better printer quality but use
more ink than 80 DPI. Graphics and True Type fonts will
also print slower at 160 DPI. The InkJet models resident
fonts (when used) will also change quality between 80
DPI. (Applications, such as Visual Basic, can use the
PrintQuality attribute to select. i.e. vbPRPQHigh and
vbPRPQMedium select 160 Dpi mode and vbPRPQLow
and vbPRPQDraft select 80 Dpi).
About
Clicking this button gives version information about the
driver.
Print Mode
This defaults to journal and refers to how the job should
be printed. There are three main choices:
Journal Mode. This is a standard mode of Windows operation and simply means that the job will be printed on
the journal roll with a fixed page length - set in the Paper
length box. (Applications can select “Journal” mode
when dmPaperSize = 257).
Printer Commands
This page allows raw printer commands to be sent to the
printer in addition to the Windows print job. Since the
5300 printer driver is designed for printers configured for
the ACL command language, please refer to the “5300
Printer Series ACL Programming Manual” for a list and
description of commands that are available.
Continuous Mode. This is a special mode of operation which permits the journal roll to be used but without
a fixed page length. In practice there is a maximum of
approximately 24 inches (600mm) after which the driver
will insert top and bottom margins before continuing. To
minimize this effect, top and bottom margins should be
set to zero in “Continuous” mode. Headers and Footers in this mode will also give unpredictable results and
should therefore be avoided. (Applications can select
“Continuous” mode when dmPaperSize = 258)
Validation Mode. Selection of this mode will cause the
print job to be printed on a Validation slip, which must
be manually inserted into the slot in the printer. (Applications can select “Validation” mode when dmPaperSize =
259).
Upside Down
If this box is checked then all jobs will be sent to the
printer last line first and upside down. This mode is usually employed when printing on certain validation
Pertech Resources Inc.
November 2005
220321A
14
Commands can be entered in ASCII text or Hexadecimal
format. To enter in hex, bracket the hex code with <>
symbols. If spaces are added between characters, the
printer driver will automatically convert them to <20>, or
20h, which is equivalent to ASCII space character, when
OK or Apply is clicked.
Note that some commands will affect page length and
may make the WYSIWYG (What You See Is What You
Get) system no longer an accurate representation of
the printed page.
Start of Document
This command will be sent at the start of each print job,
after the printer driver transmits its own print job setup
commands to the printer.
Start of Page
This command will be sent at the start of each page
break in a document.
End of Page
This command will be sent at the end of each page
break in a document.
End of Document
This command will be sent at the end of each print job.
Use of The Driver from within Applications
Margins:
Most word processor packages tend to automatically
set all margins to approximately 1 inch (25 mm). With
a printer whose field width is less than 3 inches, this will
obviously need to be changed. A good starting point is
to set all margins to zero. This will usually ensure that
the left and right margins are set to the minimum (You
may need to specify the Fix utility in Word to do this).
It is recommended that the top and bottom margins
are also set to zero. Note that there is an inherent top
margin associated with the 53xx series printers which
corresponds to the distance between the print head and
the tear bar in Journal and Continuous modes. Bottom
margins should use the Bill Out feature of the driver.
Resident Printer Fonts:
Any of the fonts available to applications can be used by
the printer (See below about the Control Font). It should
be noted however that resident printer fonts (signified
by a small printer icon in the font list) print much faster
and with slightly better resolution than True Type fonts
(signified by the small TT icon). The style of printer fonts
as compared with the enormous range of available True
Type fonts is tiny. The choice of when to use each type
will depend very largely on the application. Note that
Pertech Resources Inc.
November 2005
while it is possible to print TT fonts and generic printer
fonts on the same line, this should be avioded if possible. Printing TT and generic printer fonts on the same
line will slow down the print speed, as the print head
has to sweep twice, and it will increase the print job time.
Note that there are two point sizes for each font: 9 and
18. Most applications require that these be specifically
set to either 9 or 18. If not, then the application will select a true type font instead. These resident fonts are:
Wide 8 CPI
Normal 10 CPI
Normal 14.5 CPI
Normal 20 CPI
Wide 10 CPI
Normal 12.3 CPI
Normal 16 CPI
Bold, Italic and Underline versions are all available. Inverse printing causes these fonts to be printed all black.
Control Font:
The Control Font is the means by which the printer’s
extra features can be controlled. On a standard printer
there is no such thing as a Cash Drawer controller so
the Windows operating system was designed without
a means of such control. The way around this problem
is to use the Control Font that appears in the list as a
generic printer font. These are the only characters that
are used:
A - Fire cash drawer A
C - Clean Print Nozzles
2 - Select stored logo 2
4 - Select stored logo 4
6 - Select stored logo 6
8 - Select stored logo 8
B - Fire cash drawer B
1 - Select stored logo 1
3 - Select stored logo 3
5 - Select stored logo 5
7 - Select stored logo 7
9 - Select stored logo 9
Note that only the capital letters in this font do anything
and while the characters appear on the screen the
printer will not print them on the job, although they may
slightly affect the page length. These characters should
appear on a line by themselves, rather than embedded
into other text.
If there was no logo downloaded to the printer that corresponds to the digit, the printer will ignore the Control
font digit and nothing will be printed.
Note that the driver does not have the ability to store
logos, only print them.
Status:
The status information is not exported by the driver and
is only used to generate the status display on the task
bar. Note that the icon displayed on the task bar only
displays the last change in status from the printer.
To view the current complete status report, click on the
status icon and a small dialog box will appear.
220321A
15
Logo Download Utility
Pertech provides a Logo Download Utility to simplify the adding of logos or Bit Mapped images to your printed tickets
or receipts. The utility is available for download from the Pertech web site.
This utility allows BMP (Bitmap) graphic files to be downloaded into Pertech Resources printer memory for later
printing. BMP graphics can be stored in non-volatile
Flash or RAM.
The BMP Download Utility can be used on either the
5300 series printers, or the A470e printers.
The utility may be configured to download using one of
two communication types: RS232 or USB. RS232 may
be configured to use hardware or software handshaking, baud rates 1200, 2400, 4800, 9600, 19200, 38400,
57600 on a choice of COM ports 1-9.
Before using the utility to download BMP files, the user
should verify the host communication settings match the
connection to the printer. The communication settings
used to transmit information to the printer are displayed
on the bottom of the form. If the settings are incorrect,
you may click on the “Setup” menu, then select “Communications”. See the “Modify Host Communications”
section of this document for more information.
The printer must be configured so that the “Printer Control Language” is set to “ACL Language”. This can be
verified by printing a configuration ticket on the printer:
Turn off power to printer, press and hold the paper feed
button. While holding the feed button down, turn on the
printer power. Release the button after the printer has
finished centering the printhead.
Features
The “Remove” button will take a selected file off of the
list of BMP files to be downloaded.
A “Destination Memory” must be selected, either FLASH
or RAM. This selection will choose which type of memory where the BMP will be stored in the printer when the
“Send BMP(s)” button is clicked. It will also choose the
type of memory to be erased (“Erase Selected Memory”)
and the amount of total memory available (“Selected
Memory Available”).
Modify Host Communications
Setting the communications is done in the dialog box
shown above. One of 2 interfaces may be checked,
RS232 or USB.
RS232: For RS232 connections, the baud rate and
handshaking method must match how the current printer
is configured. If you are unsure how the printer is configured, print a self-test (hold the feed button and cycle
power). Make sure that a null modem cable is connected between the selected COM port and the printer.
USB: USB connections do not require any special parameter settings. (Windows 98 users may need to check
the “Troubleshooting” section of this document.)
Click on OK when the interface and parameters match
those of the connected printer.
The “Add” button will open up a browser window to
select a BMP file and add it to the list of BMP files to
download. The BMP files must be monochrome and no
larger than 368 pixels wide.
Pertech Resources Inc.
November 2005
220321A
16
Configuration & Diagnostic Print Tests
Configuration Utility Program
Pertech Provides a Configuration Utility for the 5300
series that is downloadable from the Pertech web site.
The Configuration Utility offers an alternative to the One
Button Configuration explained later in this section. This
utility requires a Windows XP or 2000 operating system
and is easily installed. To install the Utility run setup.exe
and follow instructions on the screen. For updated or
additional information consult the readme / help file
included with the software.
The Configuration Utility is organized in tabs and drop
down box’s and shows the available options for each
Printer Control Language (PCL) selected.
Host and printer communication settings can be configured within the application to steamline the setup for the
system and printer. Before using the utility to configure
a printer, the user should verify the host communication
settings match the connection to the printer. The communication settings used to transmit information to the
printer are displayed on the bottom of the form
The utility may be configured to download using RS232
or USB. RS232 may be configured to use hardware or
software handshaking, baud rates of 1200, 2400, 4800,
9600, 19200, 38400, 57600 on a choice of COM ports
1-9.
If the settings are incorrect, you may click on the “Settings” menu, then select “Host Communication Settings”,
or press CTRL-H on the keyboard.
The “Configure” button will open up a window displaying
allowed changes to the configuration of the 5300. See
“Printer Configuration Options” for more information on
the various options available. These items are what will
be sent when the “Send” button is clicked. If there is a
padlock icon in the bottom right of this window, then the
configuration items can not be changed.
The “Send” button is what actually transmits the information set up in “Configure” to the printer. Make sure the
host communications parameters match the connected
printer, and that the printer is connected. It may take
a few moments to transmit all the data. The 5300 may
need to reset itself several times during this process. Do
not disconnect the printer until the “Finished” dialog box
appears. If for some reason the utility can not configure
an item, you will be prompted with a choice to “Abort” the
entire configuration process, “Ignore” (or skip) only the
particular item that it can not configure, or to “Retry”.
The “Print” button is used to print a self-test so that the
configuration can be verified. Like the “Send” button, the
printer must be connected, powered on, with the parameters displayed on the bottom of the window matching
those of the currently connected printer. (Note that it is
possible to have changed the printer communications
settings if new settings were specified on a previous
“Send”). Note that the printer is not able to receive data
while the ticket is printing. Please wait until the ticket
is finished before clicking “Send” or “Print” or a transmit
error message will be displayed.
The “Exit” button will prompt the user if it would like to
save the settings for a later session. If yes, then there is
also an option to lock those settings, so that they can not
be changed again without a password.
Pertech Resources Inc.
November 2005
220321A
17
The user can choose to Lock Settings if desired. This
prevents accidental changes from occurring in both the
host communication settings and configuration items.
When exiting the utility via the “Exit” button, there is a
prompt to save the current settings to disk. If the user
clicks “Yes”, then there is a second prompt asking if
locking is desired. To lock, click “yes” again and enter a
password, which can be used to unlock the settings later
if desired. A padlock icon will be displayed at the bottom
right if the utility is currently locked. To unlock, go to the
“Settings” menu under “Lock Configuration Settings” or
pressing CTRL-N on the keyboard and enter the password used to lock the utility.
Modify Host Communication
RS232: For RS232 connections, the baud rate and
handshaking method must match how the current printer
is configured. If you are unsure how the printer is configured, print a self-test (hold the feed button and cycle
power). Make sure that a null modem cable is connected between the selected COM port and the printer.
USB: No special settings are required.
IEEE1284 is not available on the 5300.
Click on OK when the interface and parameters match
those of the connected printer.
Host communications will appear greyed out if the settings have been locked.
Note: Under “Printer Configuration Options”, you may
change the communications parameters so that they will
no longer match the host configuration. The printer communications parameters are sent last and they do not
take effect until the final printer reset when updating the
printer. However, if the printer needs re-configured after
the update process, the host communication parameters
will then need to be changed to match the printer’s new
settings.
For all configuration items, click on the list boxes for
each item to change an option. If an option is left blank,
which will be the case if the “Clear” button is pressed,
then that item will not be changed in the printer. Click
“OK” or “Apply” to accept the settings. Clicking “OK” will
close the window, and you will return to the main screen.
Neither “OK” or “Apply” save the items to disk, the program must be exited to save the configuration.
If you are unsure about any of the particular items in any
of the Tabs, consult the appropriate 5300 manual for the
compatibility mode you are using.
If an item is left blank, then that item will not be changed
on the connected printer.
Printer Control Language
There are seven printer control languages available in
the configuration menu. If you are unsure which control
language your application needs to communicate with the
printer, contact your Pertech representative or application
vendor for assistance.
A Hex Dump Diagnostic mode setting is available for
printing of Hex information helpful in determining control
code issues.
The Auto Line feed setting can be changed to allow Carriage Returns to be treated as Line Feeds. Additionally,
some control languages offer an ACK on CR for status
back to the host ( See your Compatibility Mode Programming manual for details on how to implement ).
The Soft Fault Recover (ACL mode only ) setting allows
for Automatic or Host Controlled recover when a Soft
Fault occurs. Examples of Soft Faults occurrences are
Cover Open, Paper Out etc. ........
Printer Configuration Options
Click the “Configure” button to open the configuration
window. Settings will appear greyed out if the settings
have been locked.
The 5300 has several different compatible languages
or “PCL’s” available. Because the compatibility mode
affects so many other configuration items, if the compatibility changes, all other items are reset. (Note that not
all items are available depending on which compatibility
mode is selected).
Pertech Resources Inc.
November 2005
220321A
18
Font
USB Interface
There are three font options available in all control languages except the A470 Mode they are Standard - Compressed - Expanded. The table below details each of the
font options pitch and column capabilities
Inkjet Font
Pitch
(Char/Inch)
Columns
(Char/Line)
Standard
16
40
Compressed
22.8
57
Expanded
13.2
33
The A470 control language has the following font capabilities: 33, 36, 40, 44, 50, 57, 66 Characters Per Line
RS232 Interface
Baud Rate - Data Bits -Stop Bit - Parity and Flow control
settings are selectable through the configuration menu.
Flow control is designated as Hardware = DTR, DSR, or
RTS, CTS depending on the printer control language being used. Software flow control is Xon/Xoff.
Change the USB option to “Serial Number” for the USB
driver to assign serial numbers for each printer that is
installed. The Model number default selection allows for
a 5300 printer to be removed and a new 5300 printer to
be installed without the Operating System detecting and
installing a new driver.
Hardware
The Mechanism Model identifies the printers current
model setting, this parameter can only be adjusted with
the use of command codes. This parameter is set at the
factory and should not require change.
The option for Validation Clamp default to be changed
to the Open position is only available in the A470 mode
control language.
The time allowed for the user to insert a form is selectable
up to 15 minutes.
The Paper Low Stop can be set to enable or disable,
enable will notify the user via the led indicator when the
paper is out.
There are two options for the INK STATUS RESET setting.
1. Automatic (Default Setting) - Allows for the user to
automatically reset the ink cartridge Dot Count Tally,
LOW INK LED and Command Status Notification for a
new cartridge. The cover must be opened and closed an
additional time after the old Ink Cartridge is removed and
before a new Cartridge is installed for the Status to clear.
2. Manual - LOW INK LED Status Notification will occur
when the Dot Count exceeds it preset limit for the cartridge. The Dot Count Tally must be reset via Configuration Menu to clear LOW INK LED Status.
Available Fixed Document stop settings are 1.75”, 1.63”
and 1.46” these are available in the one button configuration mode. The Configuration Utility allows the Document
Stop settings to be incrementally set between the .17”
and 1.75”. The validation print field width is 2.5”, up to 14
lines of print @ 1.75” setting with Validation Lines Per inch
set at 8 LPI.
Print Zone
2 Inches for 6” Check
3 Inches
1 Inch
1.75”
1.63”
1.46”
Print field is 2.5” Wide
Center Justify
3.25 Inches
Column Alignment is set at the factory and should not be
adjusted.
Pertech Resources Inc.
November 2005
220321A
19
Memory
Tallies
When the printer is set into the ACL Mode control language memory is user define able. The configuration
utility allows the user to adjust the memory allocated for
Logos, Fonts, Macros and User Data for RAM and Flash
memory.
Pertech Resources Inc.
November 2005
Tallies provide information and can be reset with the
use of the one button setup. Available tallied information
includes:
Printed Lines -Character printed before a carriage return.
Hours On - Power on time.
Flash Updates - Number of changes made to the Flash
memory for logos, or firmware updates.
Cover Opens - Number of time the cover has been
opened.
220321A
20
Configuration Report & Setup Mode
After the printer is set up, you can run two print diagnostic reports / tests and
enter the configuration menu. Below is an example of the configuration report.
1 Press and hold the Paper Feed Button and then
press the Power Switch to turn the printer on and
start the first test.
Validation printers will perform a Self Test if a form is
detected, when the power is turned on.
Release the Paper Feed Button after 4 seconds for
the printing to begin.
The 5300 completes a test of RAM , a checksum
test of program memory, homing and maintenance
of the print head, and then prints the configuration
settings.
2 To change the configuration settings, press the
Paper Feed Button when prompted, the Left LED
will begin flashing.
Serial Number:
Main Firmware
Revision:
CRC:
Boot Firmware
Revision:
CRC:
Font:
PRESSING THE PAPER FEED BUTTON WHILE THE
GREEN LIGHT IS FLASHING WILL REJECT THE
LAST PRINTED PARAMETER. IF THE BUTTON IS
NOT PRESSED WITHIN 5 SECONDS. THE PARAMETER WILL BE ACCEPTED AND THE NEXT SET-UP
OPTION WILL BE LISTED.
PRESS THE PAPER FEED BUTTON NOW TO
REJECT THE CURRENT CONFIGURATION AND
CONTINUE WITH THE PRINTER SET-UP.
Standard
Draft
USA
437 USA
6 Lines Per Inch
6 Lines Per Inch
Model Number
Hardware
Memory
=================================
SET-UP INSTRUCTIONS
Font:
Font Quality:
Intl Char set:
Code Page:
Receipt LPI:
Validation LPI:
USB (when used)
Descriptor:
Note: If Ink Status Reset is set to “Manual”, first
option to print will be “Press feed to Reset Ink Tally”.
Press paper feed to change configuration
ACL Language
Standard Print
CR = CR
Automatic
57.6K
8-bits
1-bit
None
Hardware
�����
Note: Validation-Only printers do not have this
feature.
* ** ***
****
RS232 Serial (when used)
Baud Rate:
Data Bits:
Stop Bits:
Parity:
Flow Control:
��� ���
����
* ** ***
****
Printer Control Language
PCL:
Diag Mode:
Auto LF:
Soft Fault Recover:
�����
�����
********
Tallies
Validation Clamp:
Form Insert Wait:
Paper Low Sensor
Ink Status Reset:
Document Stop:
Column Alignment
Half Speed:
Full Speed:
3
10
Installed RAM:
Installed ROM:
Total User Flash:
Flash Logos
Flash Fonts
Flash Macros:
Flash Raw Data:
Total User Ram:
Ram Logos:
Ram Fonts:
Ram Macros:
128K
512K
64K
32K
0K
0K
32K
24560
24560
0K
0K
Printed Lines:
Dot Count:
Validation Opens:
Feed Distance:
Hours On:
Flash Updates:
Cover Opens:
0
0
0
0
0
0
0
Diagnostic:
0
0
Closed
1 Min
Enabled
Automatic
1.75 Inches
0
====================================
Press paper feed to change configuration
Press paper feed to enter print test
A. Entering the configuration mode, the printer prints
the Set-Up Instructions and prompts the user to
press the feed button to reject the current settings.
C. After completing the Configuration Mode, the
printer prints the new configuration settings and
stores them in non-volatile memory.
3 Otherwise, wait 10 seconds
and you can choose to enter
an Extended Print Test. After
this test, or Ignoring this
option, will return the printer
to normal operation after 10
seconds.
Note: Exiting setup early by turning the printer off
will erase any changes made to the configuration.
You must complete the setup for changes to take
effect.
4. Extended Print Test:Checks the
printers vertical line alignment,
character fonts, and pitches.
B. If you don’t want to change an option, wait for five
seconds and the next option will print.
Pertech Resources Inc.
November 2005
220321A
21
1
Configuration Example:
=================================
Configure the RS232 Serial parameters for the printer using the
configuration menu.
Press paper feed to change configuration
SET-UP INSTRUCTIONS
PRESSING THE PAPER FEED BUTTON WHILE THE
GREEN LIGHT IS FLASHING WILL REJECT THE
LAST PRINTED PARAMETER. IF THE BUTTON IS
NOT PRESSED WITHIN 5 SECONDS. THE PARAMETER WILL BE ACCEPTED AND THE NEXT SET-UP
OPTION WILL BE LISTED.
2
PRESS THE PAPER FEED BUTTON NOW TO
REJECT THE CURRENT CONFIGURATION AND
CONTINUE WITH THE PRINTER SET-UP.
3
ACL Language
Draft
USA
437 USA
6 PLI
:6LPI
RS232 Serial (when used)
Baud Rate:
57.6K
Data Bits:
8 Bits
Stop Bits:
1
Parity:
None
Flow Control:
Hardware
4
5
Baud Rate Options:
9600
19.2K
38.4K
57.6K
57.6
Baud Rate:
9600
Stop Bit Options:
1-Bit
2-Bit
Stop Bits:
6
1
2
Baud Rate:
3
1 Bit
Parity Options:
None
Even
Odd
Parity:
None
4
Flow Control Options:
Hardware
Software
Flow Control: Hardware
5
Flow Control: Software
USB (when used)
Descriptor:
7
Model Number
Hardware
Mechanism Model:JRNL / VAL
Validation Clamp: Closed
Paper Low Stop: Disabled
Ink Status Reset: Automatic
Document Stop: 1.75 inches
Column Alignment
Half Speed: X
Full Speed: X
Tallies
Printed Lines:
Dot Count:
Validation Opens:
Feed Distance:
Hours On;
Flash Updates:
Cover Opens:
Diagnostic:
0
0
0
Configuration Report to follow
Pertech Resources Inc.
Change to:
Baud Rate
57.6
9600
Data Bits
8
8
Stop Bits
1
1
Parity
None
None
Flow Control Hardware
Printer Control Language
PCL:
ACL Language
Diag:
Standard Print
Auto LF:
CR=CR
Font:
Font:
Font Quality:
Intl Char Set:
Code Page:
Receipt LPI:
Validation LPI
Current Parameters
6
7
Software
Press and hold the Paper Feed Button and then press the
Power Switch to turn the printer on.
Release the Paper Feed Button after 4 seconds for the configuration report to begin printing.
At the end of the configuration report the printer will prompt “
Press Paper Feed to Change Configuration” .
Press the Paper Feed Button.
The Setup instructions will print and prompt to:
“PRESS THE PAPER FEED BUTTON NOW TO REJECT
THE CURRENT CONFIGURATION AND CONTINUE WITH
THE PRINTER SET-UP”
Press the Paper Feed Button.
The First Menu Item will appear “Printer Control Language”.
Wait 5 seconds and the next Menu Item will appear “Font”. Wait
5 seconds and the “RS232 Serial (When Used)” Menu will appear.
Press the Paper Feed Button
The “Baud Rate Options” will appear
Press the Paper Feed Button
The currently selected Baud Rate “57.6K” will appear
Press the feed button until the 9600 parameter appears then
wait 5 seconds for the next option.
The “Stop Bits” parameter will appear
Wait 5 seconds and the next Menu Item will appear “Parity
Options”. Wait 5 seconds and the next Menu Item will appear
“Flow Control Options”.
Press the Paper Feed Button
The currently selected Flow Control Option, “Hardware” will
appear
Press the Paper Feed Button until the “Software” parameter
appears then wait until the printer goes through the rest of the
menus and prints off the configuration Report.
Check the New Report with the old to make sure the setting are
now correct.
November 2005
220321A
22
Printer Configuration Options
Serial Number:
Main Firmware
Revision:
CRC:
Boot Firmware
Revision:
CRC:
********
* ** ***
****
* ** ***
****
Printer Control Language
PCL:
Diag Mode:
Auto LF:
Soft Fault Recover:
Font:
Options for ACL Compatibility Mode
ACL Language
Standard Print
CR = CR
Automatic
Font:
Font Quality:
Intl Char set:
Code Page:
Receipt LPI:
Validation LPI:
Standard
Draft
USA
437 USA
6 Lines Per Inch
6 Lines Per Inch
���� ��������
���� � �������
���� � ��������
����� ���
����� ���
��������
��� �������������
���� ����� �
����������� �����
� ���
�����
USB (when used)
Descriptor:
Model Number
������ ������
Tallies
���� � ��������
����������
57.6K
8-bits
1-bit
None
Hardware
Memory
���� � ��������
��������
RS232 Serial (when used)
Baud Rate:
Data Bits:
Stop Bits:
Parity:
Flow Control:
Hardware
���� � ��������
��� ����
�� � ��
���� ����������
�������
������
����
��������
��
���
�����
����� �
������� �
������
�����
������
Validation Clamp:
Form Insert Wait:
Paper Low Sensor
Ink Status Reset:
Document Stop:
Column Alignment
Half Speed:
Full Speed:
3
10
Installed RAM:
Installed ROM:
Total User Flash:
Flash Logos
Flash Fonts
Flash Macros:
Flash Raw Data:
Total User Ram:
Ram Logos:
Ram Fonts:
Ram Macros:
128K
512K
64K
32K
0K
0K
32K
24560
24560
0K
0K
Printed Lines:
Dot Count:
Validation Opens:
Feed Distance:
Hours On:
Flash Updates:
Cover Opens:
0
0
0
0
0
0
0
Diagnostic:
0
0
Closed
1 Min
Enabled
Automatic
1.75 Inches
������� ��
���� �� �����
��������
������
��������� ������
0
====================================
Press paper feed to change configuration
Pertech Resources Inc.
Press paper feed to enter print test
November 2005
220321A
23
Serial Number:
Main Firmware
Revision:
CRC:
Boot Firmware
Revision:
CRC:
********
* ** ***
****
* ** ***
****
Printer Control Language
PCL:
Diag Mode:
Auto LF:
Font:
Options for A470 Compatibility Mode
A470 Language
Standard Print
CR = CR
��� ��������
���� � �������
���� � ��������
���� � ��������
��� ����
�� � ��
���� � ��������
���� � ��������
Font:
Font Quality:
Char / Line:
Intl Char set:
Code Page:
Receipt LPI:
Validation LPI:
Standard
Draft
33CPL
USA
437 USA
6 Lines Per Inch
6 Lines Per Inch
��������
�����������������
����� ���
����� ���
��� �������������
RS232 Serial (when used)
Baud Rate:
Data Bits:
Stop Bits:
Parity:
Flow Control:
57.6K
8-bits
1-bit
None
Hardware
����������� �����
� ���
�����
USB (when used)
Descriptor:
Model Number
������ ������
Validation Clamp:
Paper Low Sensor
Ink Status Reset:
Document Stop:
Column Alignment
Half Speed:
Full Speed:
Closed
Enabled
Automatic
1.75 Inches
����
�������
������
��������� ������
Installed RAM:
Installed ROM:
Logo / Font Storage
128K
512K
64K
Printed Lines:
Dot Count:
Validation Opens:
Feed Distance:
Hours On:
Flash Updates:
Cover Opens:
0
0
0
0
0
0
84
Hardware
Memory
Tallies
Diagnostic:
0
0
���� ����� �
�������
������
����
��������
��
���
�����
����� �
������
3
10
0
====================================
Press paper feed to change configuration
Press paper feed to enter print test
Pertech Resources Inc.
November 2005
220321A
24
Serial Number:
Main Firmware
Revision:
CRC:
Boot Firmware
Revision:
CRC:
********
* ** ***
****
* ** ***
****
Printer Control Language
PCL:
Diag Mode:
Auto LF:
ACK on CR
Font:
DO214 Language
Standard Print
CR = CR
Disabled
Font:
Font Quality:
Intl Char set:
Code Page:
Receipt LPI:
Validation LPI:
Standard
Draft
USA
437 USA
6 Lines Per Inch
6 Lines Per Inch
57.6K
8-bits
1-bit
None
Hardware
USB (when used)
Descriptor:
Memory
Tallies
Model Number
Validation Clamp:
Form Insert Wait:
Paper Low Sensor
Ink Status Reset:
Document Stop:
Column Alignment
Half Speed:
Full Speed:
Closed
1 Min
Enabled
Automatic
1.75 Inches
Installed RAM:
Installed ROM:
Logo / Font Storage
128K
512K
64K
Printed Lines:
Dot Count:
Validation Opens:
Feed Distance:
Hours On:
Flash Updates:
Cover Opens:
0
0
0
0
0
0
0
Diagnostic:
0
0
��� ��������
���� ��������
���� � ��������
���� � ��������
��� ����
�� � ��
���� � ��������
�������
���� � ��������
����� ��������� �� ����� � � ��
����������
��������
��������
����� ���
����� ���
��� �������������
���� ����� �
RS232 Serial (when used)
Baud Rate:
Data Bits:
Stop Bits:
Parity:
Flow Control:
Hardware
Options for Mode 1, 2, 3, 4 & 5 (DO214,
ZC2979, ZC5979 ZC1939 & ZC2059)
Compatibility Modes
����������� �����
� ���
�����
�������
������
����
��������
��
���
�����
����� �
������� �
������
������ ������
�����
������
������� ��
�� �� ���
��������
������
��������� ������
3
10
0
====================================
Press paper feed to change configuration
Press paper feed to enter print test
Pertech Resources Inc.
November 2005
220321A
25
LED Mode Indicators
The 5300 series printers are equipped with two color led indicators that identify Paper, Error,
Ink Low, Form In, and Power On conditions.
Status
Left LED
Right LED
Power On
Off
Green
Insert form
Blink Green
Current Status
Form is in
Green
Current Status
Error
Off
Red
Ink Low
Current Status
Blink Amber
Ink Cartridge Out
Current Status
Amber
Paper Out
Blink Red
Current Status
Cover Open
Current status
Blink Green
��� ���
�����
����
�����
�����
��� ���
�����
����
�����
�����
Error
��� ���
�����
����
�����
�����
Ink Low
��� ���
�����
����
Ink Cartridge Out
Pertech Resources Inc.
�����
��� ���
Form is in
Cover Open
�����
����
�����
Insert form
Paper Out
�����
�����
Power On
�����
�����
��� ���
����
�����
�����
�����
��� ���
�����
����
�����
�����
��� ���
����
November 2005
�����
220321A
26
Trouble Shooting Printer Problems
LED Error Fault Mode Diagnostics
The printer will enter a Fault Mode and will not operate when certain failure conditions are encountered. Confirmation
of this condition can be accomplished by the host on the DTR (pin 8) or status with an RS-232 interface.
A Printer in fault mode will not feed paper when the paper advance button on the top cover is depressed nor will it
execute commands other than immediate commands that are executed even when the printer is in a fault condition. Immediate commands are high-level commands that are typically executed prior to low-level commands that
are stored in the input buffer. They are received and processed regardless of the printer’s fault state or communications interface busy status.
ACL Control Language Immediate Commands
(See 5300 Programing Manuals for details on these and other Compatibility Mode available commands)
Immediate status transmission
DLE EOT
10 04
16 4
n
Immediate recovery from fault
DLE ENQ
10 05
16 5
n
Immediate peripheral pulse
DLE DC4
10 14
16 20
s m n
Immediate printer reset
DLE @
10 40
16 64
The color of the Power LED on the front panel of the printer will change from Green to Red if a fault condition is encountered. Depressing the paper feed button on the printer cover will cause the printer to enter diagnostic mode. This
will cause the LED to flash a 3 bit code to define the specific reason the printer entered Fault Mode. The error code is
followed by a delay before being repeated. The diagnostic code will toggle the DTR line and flash the Red LED if the
RS-232 interface is selected. It will toggle the fault line and flash the green led if parallel interface is selected.
�����
�����
��� ���
�����
����
Diagnosed failure
Error Code
Dot
Dot
Dash
Mechanical Error (most likely compensator, wiper problem)*
Dot
Dash
Dot
Ram Error***
Dot
Dash
Dash
Program Error / Firmware Error***
Dash
Dot
Dot
Home Sensor Error **
* Clamp functionality, wiper engage and disengage
** Failed sensor, control board problem, mechanical problem or dirty sensor. The later has
proved to be the most common and can be resolved by cleaning paper dust and other debris
from the sensors and code wheel.
***Failures diagnosed with error codes indicating a problem with the firmware or control board.
The printer will remain in FAULT Mode until the power is cycled or the printer is reset with a imediate reset command.
Pertech Resources Inc.
November 2005
220321A
27
Trouble Shooting General Issues
A. Printer prints garbage when using RS-232 and/or printer occasionally prints garbage
even when not sending print job.
- Solution : Verify that the COM port is set up to match the attached printer. .
B. Printer is not printing and receive error message from Windows that it failed to print.
- Verify that the printer is connected and powered on.
- Cancel the document.
- Solution for USB users:
Windows may have assigned the 53xx printer to some other port than the one chosen during the install. Select a different “USB00x Virtual Printer Port”. To do this, go to 53xx Printer Properties and select the Ports tab. If the printer
is on and connected, but the 53xx icon displayed in the Printers and Faxes dialog box is grayed out, right click on the
53xx icon and check “Use Printer Off Line”. Try sending the print job again. You may have to repeat this process
if several “USB00x Virtual Printer Ports” are displayed under the Ports tab until you find the correct port. Always
remember to cancel the documents that fail to print.
- Solution for RS-232 users:
Verify that the NULL MODEM cable is connected to the port selected by the printer driver. Verify that the baud rate,
parity, data and stop bits match. If the printer is on and connected, but the 53xx icon displayed in the Printers and
Faxes dialog box is grayed out, right click on the 53xx icon and check “Use Printer Off Line”. Try sending the print
job again. Always remember to cancel the documents that fail to print.
C. When using a RS232 port and clicking on “Update Printer” or “Print”, Windows 2000
or XP displays a message that says the port is not available, but no other applications are
running.
Verify that a printer driver is not using the same COM port. Open “control panel, printers” or “printers and faxes” in
Windows and select the properties (right click on the printer icon) for each installed printer. Select the “ports” tab. If
the current checked port for any installed printer matches the COM port that is being used with the configuration utility, you will need to select another port for the printer driver. This only needs to be done while the configuration utility
is being used. After the printer is configured, set the printer driver port back to the correct COM port
D. Utility does not communicate with USB connected printer.
If using Windows 98 SR2, you may need to contact Pertech Resources for Microsoft’s USBPRINT.SYS driver. Windows ME, 2000 and XP already include this driver.
If you have a Printer Driver for Windows 2000/XP installed using a virtual USB printer port, you may have to temporarily re-assign the Printer Driver to a “File” port before using the configuration utility. Go to “Printers and Faxes”,
right click on the printer, select “Properties”, select the “Ports” tab, make a note of which USB port is checked, then
check the “File” port. After using the configuration utility, remember to switch the port back to the USB port that it
was assigned to.
E. The power switch is turned ON but the printer is dead. The Green Status light is Off.
Make sure the outlet has power and the power cord is plugged into the back of the printer. Check the power brick for a
green LED (Impact Printers 537X).
F. The printer will print a Configuration Report but will not respond to the system commands.
Check to see that the interface cable is connected to the back of the terminal/ PC, and to the back of the printer.
G. Printer prints too light to read easily.
Impact printers (537X) replace the ribbon cartridge. See Chapter 2 Operating the Printer.
Call 1-800-800-6614 to order new Ribbon Cartridges.
Pertech Resources Inc.
November 2005
220321A
28
Service & Support
Pertech provides Technical Support for this product by calling 307-856-4821 between the hours of 8AM to 5PM
Monday through Friday MST, or by submitting a Support Inquiry at the Pertech web site. www.pertechresources.com
under the service/support section.
The Model Number, Revision, Date, and Serial Number can be located on the Label attached on the bottom of the
printer. Please have this information available when you contact Pertech.
Maintaining The Printer
There is no customer maintenance required for the 5300 printers. However, printers gather paper dust and other
debris through normal use, continued accumulation can eventually lead to printer issues. A general preventive maintenance program can help reduce unnecessary failures and downtime. Pertech recommends that you occasionally
clean lint and paper dust out of the mechanism using low pressure canned air. It is recommended that this be done
on a regular basis, such as after every Ink Cartridge change. Clean the cabinet as needed to remove finger marks
and dust. Use any household cleaner designed for plastics, but test it first on a small, unseen area.
Caution: Do not spray or try to clean the print head or the inside of the printer with any kind of cleaner. This may
damage the print head or the electronics.
Pertech Resources Inc.
November 2005
220321A
29
Specifications
Dimensions
Height
Width
Length
Weight
R/V Models
Ext. Power Supply
Power Supply
Roll Paper
Width
Diameter
Plies
Thickness
Core ID
Form
Thickness
Total Media Thickness
Impact Ribbon
Purple
Black
InkJet Cartridge
Interface
Baud Rates
Input Buffer
Cash Drawer
Print Speed
Paper Feed
Printhead
Line Pitch
Character Sets
Code Pages
5 Fonts
Graphics
Print Line
Validation
Compatibility Modes
User Memory
Flash
Ram
Environmental
Noise
Operating
Storage
Expected Life
Printhead
PCB
Mechanism
Agency Listings
Drivers
Utilities
Pertech Resources Inc.
5.38” / (136.65 mm)
6.92” / (175.77 mm)
8.9” / (226.06 mm)
5.75 Lbs. / (2.61 kg)
1.12 Lbs. Max. / (.051 kg)
Impact: 60 Watt 24V Brick or Inkjet:15 Watt 24V Wall Mount
3.0” +/- .03” / (76mm +/- .762 mm)
3.5” Max./ (88.9 mm)
1 or 2 Ply
.0064” Combined Two Ply (.1626 mm)
5/8” Min. / (15.875 mm)
Original + 2, 5.5” by 2.75” Min.(139.7 X 69.9mm)
.0015 to .0047 Multi-Ply / (.0381-.1194 mm)
.012” Total (Includes Receipt) / (.305 mm)
4 Million Characters 100629012
3 Million Characters Part # 100629011
Part # 108541001 (Black Ink)
RS232C (DB9M)
USB 1.1, 2.0 Compatible
9600, 19200 & 57600
9K
One 6 Pin Female Tele-Connector
2 Drawer Capability /Single Sense
Ink Jet: 5.0 LPS (Lines Per Sec.)@ 40 CPL(Characters
Per Line),16 CPI (Caracters Per Inch) and 6LPI (Lines Per Inch)
Impact : 4.7 LPI @ 40 CP L, 16 CPI and 6LPI
5 Inches Per Second
HP Inkjet / 9 Wire Impact Dot Matrix
5, 6, 7, 8, LPI
USA
437 USA, 863 Canadian-French and 1252 Latin I
7 x 12 @ Max. 66 CPL
10x10 @ Max. 44 CPL
12 X 12 @ Max. 33 CPL
OCRA ( Ink Jet ONLY)
Times New Roman (ink Jet Only)
InkJet: 12 Nozzle / Impact: Full 9 wire
InkJet: 3”, 96X80 DPI Draft Mode, 96X160 DPI Standard Mode.
Impact: 72X80 & 72X160 DPI
Up to 14 Lines on Inserted Form at 8 LPI
Seven
64K Expandable to 512
16K Expandable to 400K
62 db impact, 49 db Inkjet
10˚ to 40˚ C, Humidity 10-90% Non-Condensing
-10˚ to 40˚ C, 10-90% Non-Condensing
Impact 300 Million Impacts Per Wire
61K hrs
8 Miilion Printed Lines 535K Validations
FCC Class B, C CSA US
Windows XP, 2000
Logo - Dowload - Configuration
November 2005
220321A
30
Pertech Resources Inc.
November 2005
220321A
31
Index
A
A470 Compatibility Mode .................. 24, V
Additional information ............................. VI
Agency Listings ......................................30
ASCII 8, .................................................15
Available Models: ................................... VI
B
Baud .........................................19, 22, 30
Bi-directional Status ............................... 13
Bill out length ..........................................13
C
Canned air ..............................................29
Cash Drawer ...................... 7, 8, 15, 30, IV
Cash Drawer Commands ......................... 8
Caution ...................................................29
Character Sets .......................................30
Clamp Delay ...........................................13
Code Pages............................................30
Compatibility Modes .................... 25, 30, V
Configuration & Diagnostic ..................... 17
Configuration Example ........................... 22
Configuration Options............ 17, 18, 23, V
Continuous Mode ................................... 14
Control Font............................................15
Copyright ..................................................II
D
Diagnostic code ......................................27
Disclaimer.................................................II
Document Guide ...................................... 6
Drivers ........................................ 10, 30, IV
E
Environmental ........................................30
Error Code ..............................................27
Error code...............................................27
Extended Print Test ................................ 21
G
General Issues .................................. 28, V
H
Hardware ............................... 12, 19, 22, V
Hexadecimal...........................................15
Horizontal Resolution ............................. 14
Host Communications ............................ 16
I
IEEE1284 ...............................................18
Information to the User ............................. II
Ink Level .................................................13
Ink nozzles ...............................................4
INK STATUS RESET.......................... 4, 19
Input Buffer .............................................30
J
Journal Mode..........................................14
K
L
LED Mode Indicators ......................... 26, V
Left LED ...........................................21, 26
M
Maintenance ...........................................29
Margins...................................................15
Mechanism .............................9, 19, 22, 30
Media .......................................................3
Memory.................................. 16, 20, 30, V
N
Note .......4, 5, 6, 10, 14, 15, 17, 18, 21, II
F
O
Fault Mode .............................................27
Fault Mode Diagnostics ..................... 27, V
Flash ...................................16, 20, 22, 30
Flow Control .....................................12, 22
Font .....................................................19
Form ...........................................5, 26, 30
P
Pertech Resources Inc.
November 2005
Paper Feed Button ........................... 21, 22
Paper Loading .......................................... 3
Parts Information Manual ......................... 2
Power LED .........................................9, 27
Power Supply ...................... 7, 9, 30, III, IV
220321A
32
Printer Control Language 16, 17, 18, 22, V
Print Cartridge ..........................................4
Print Head Carriage.................................. 4
Print Mode ..............................................14
Print Speed.............................................30
Print Tests.................................... 12, 17, V
Publications ............................................ VI
Tallies .......................................... 20, 22, V
Trademarks .............................................. II
Trouble Shooting ......................... 27, 28, V
U
USB 2.0 Interface ............................... 8, IV
Users Guide ........................................... VI
Utilities ........................................ 10, 30, IV
Q
R
Ram ...............................................27, 30
Ram test failure ......................................27
Resident Printer Fonts............................ 15
Revision..................................................29
Ribbon Advance Gear .............................. 4
Ribbon Advance Knob .............................. 4
Ribbon Carrier ..........................................4
Ribbon Guides..........................................4
Right LED ...............................................26
Roll Paper...............................................30
RS232 Serial Interface ....................... 7, IV
S
Serial Number ........................................29
Service .....................................................2
Service & Support .................................. 29
Service Guide ......................................... VI
Set-Up Instructions ................................. 21
Setup Guide ........................................... VI
Setup Mode ....................................... 21, V
Specifications .........................................30
Pertech Resources Inc.
T
November 2005
V
Validation Height..................................... 13
Validation Mode ...................................... 14
Virtual USB Printer Port.......................... 10
W
Warning ............................................4, 8, II
Web site....................................................II
Windows Driver ................................ 10, IV
WYSIWYG..............................................15
X
Y
Z
220321A
33
Warranty
Warranty
Pertech Resources warrants all of its transaction printers against defects in material and workmanship for a period
of 24 months from date of shipment by Pertech Resources or the rated maximum number of transactions for the
specific product – whichever comes first. Kiosk printers, mechanisms and distributed products carry warranties
specific to their application or manufacturers’ warranty. Contact [email protected] for details on
the specific product warranty.
Pertech Resources does not consider damage caused by replacement ribbons or replacement parts supplied by
parties other than Pertech Resources to be a defect in material or workmanship. This is a limited warranty, limited
exclusively to its terms, including the exclusive remedies set forth below. In addition, this warranty is void if the
product has been altered, misused, taken apart or otherwise abused. All other warranties, expressed or implied are
excluded, including but not limited to the implied warranties of merchantability and fitness for particular purpose.
Any warranty claims must be supported by proof of purchase, represented by reference to the customers’ purchase
order.
Buyer’s Remedies
Pertech Resources’ obligations and liabilities under the foregoing warranty are limited to repair or replacement of
the product without charge, provided it is shipped prepaid to Pertech Resources, 860 College View Drive, Riverton,
WY 82501-2298. A charge is made for repairs after the expiration of the warranty period. In addition, if a printer is
returned and replacement ribbons or other replacement parts not supplied by Pertech Resources have caused the
printer damage, a reasonable charge for repair will be assessed. Printers returned under warranty discovered to be
Pertech Resources Inc.
860 College View Drive
Riverton, WY 82501
www.pertechresources.com
Pertech Resources Inc.
November 2005
220321A
34