1
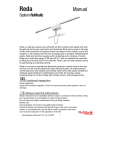
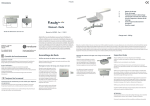
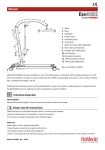
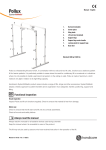
Dimensions English mm mm mm 1 15 9 7 mm 3 490 mm 2 D 10 13 4 mm Manual - Carina350EM/EE Manual nr: 00881En Ver. 6 101209 350 mm All measurements are in mm • Turning diameter is 1230 mm • The total weight of lift is 33 kg / 73 lbs for EM and 34 kg / 75 lbs for EE • The weight of the heaviest component is 17,5 kg / 38,58 lbs • D is movement in forward direction 5 11 12 Ready for life is a series of assistive devices that are designed to give users the best possible conditions for living an active life on a daily ba- 8 6 The product meets the requirements of the Medical Devices Directive 93/42/EEC. for homecare and institutional care settings. Ready for life offers the price. The transfer assistive products can be used either independently Internet: www.handicare.com E-mail: [email protected] Functional inspection Visual inspection Inspect lift functions regularly. Check to ensure that material is free from damage. Before use: Make certain the lift is properly assembled. Check sling bar connection and safety latch function. Check lifting function and base-width adjustment. Check to ensure that the quick-connecting locking pin for the actuator is correctly installed. Always read the manual Read instructions for all assistive devices used in connection with transfers: Keep the manual where it is accessible to users of the product. Do not leave the patient unattended during a lifting situation. Under no circumstances may the lift be used by persons who have not received instruction in the operation of the lift. or as a complement to products in the SystemRoMedic range. Assembly of Carina350EM/EE Mast with lift arm, lift motor, sling bar and control box. Undercarriage with base-width adjustment motor (EE) or base-width adjustment pedals (EM). Quick-connecting locking pin for mounting actuator. Hand control and cord. Locking handle for mounting mast on undercarriage. Manual and charger. The lift is collapsed when delivered. Set up the lift, according to the following instructions (no tools required): 1. Lock castor brakes. 2. Loosen the locking handle at the base of the mast (image 1). 3. Pull the mast forward, lift it up and place it in the base. 4. Tighten locking handle (image 1). 5. Loosen the tension strap that holds the lift arm and lift the lift arm up. 6. Remove the actuator from the mount on the mast and move it to the mount on the lift arm (image 2). 7. Check all mounting fixtures and locking handles (images 1 and 2). 8. Release the emergency stop (image 3) and perform a final inspection (see Final inspection). 1 The mobile lift Carina350EM/EE has been developed to, in combination with the right accessories, meet most lifting needs. It is intended for lifting users from a seated or supine position. Carina350EM/EE is collapsible and therefore easy to transport and store. Carina350EM has manual base-width adjustment and Carina350EE has electrical base-width adjustment. To collapse the lift, follow the instructions below. Check to ensure that all components are included: 2 Lift arm Mast Handle Control box Emergency stop Rear castors with brakes Sling bar with safety latches Front castors Emergency lowering (manual) Motor/actuator for lifting arm Locking handle Motor for base-width adjustment (EE) Pedal for base-width adjustment (EM) Tension strap Quick-connecting locking pin Max. load 165 kg/350 lbs sis. The products have been specially developed to meet the conditions right quality, the right function and the right performance at the right Veddestav. 15, Box 640 SE-175 27 Järfälla SWEDEN Tel: +46 (0)8-557 62 200 Fax:+46 (0)8-557 62 299 14 1. 2. 3. 4. 5. 6. 7. 8. 9. 10. 11. 12. 13. 14. 15. 1. Lock castor brakes. 2. Run the lift arm to the lowest position, and then press in the emergency stop. 3. Remove the actuator from the lift arm by freeing the quick-connecting locking pin and moving it to the mount on the mast (diagram 4). Make sure the pin is facing the right way up. 4. Lower the lift arm and secure it to the link on the sling bar with the tension strap. NOTE! Warning for risk of pinching (between boom and mast). 5. Loosen the locking handle at the base of the mast (diagram 1). You need not remove the locking handle. 6. Lift up on the mast and lower it towards the undercarriage. 7. Pull the mast back and tighten the locking handle (image 1). 4 Emergency stop Final inspection Inspect the lift for signs of wear and damage. Check all four castors and castor brakes. Check all connections and fixtures including screws and bolts. Check the packaging to ensure that there are no loose parts. Check emergency stop function by depressing the emergency stop, and then pressing either the up or down button. If nothing happens when the up or down buttons are pressed, the emergency stop is functioning properly. Grasp the hand control, press the up button and run the lift arm all the way up. Then, press the down button and run the lift all the way down. Test base-width adjustment function by pressing the button for basewidth adjustment (model EE). Widen the base to max. width and then press the other button to narrow it again. Test base-width adjustment function on model EM by pushing down on the respective pedals for widening and narrowing the base. Test lift function by lifting a person (not a user) using an approved sling. At the same time, check the emergency lowering function with someone in the lift, see section on Emergency lowering. If the equipment is satisfactory upon inspection, connect the charger to the lift and to a power outlet, and then check to ensure that the charging lamp on the control box lights up. NOTE! Connection for charger Before the lift is used for the first time, it must be charged for at least 4 hours. See section on Charging batteries. 3 Keep the manual where it is accessible to users of the product. How to use the product Important information • The lift must be assembled according to the assembly instructions provided by Handicare. • The lift may only be used on a level floor. • Lifting accessories must be properly trial fitted and tested in relation to the user’s needs and functional ability. • Under no circumstances may the safe working load be exceeded. See section on Technical information and the product label on the lift. • Never move the lift by pulling on the actuator! Do not push • The lift must not be exposed to running water. • Batteries control unit and actuators on the lift must not come in direct contact with water. • Carina350EM/EE must not be charged in a wet room or used in connection with showering and bathing. • To ensure optimal function, the lift must be inspected regularly. See section on other maintenance details. • Warranty applies only if repairs or alterations are made to the product by personnel who are authorized by Handicare. Safe working load: Charging batteries Base-width adjustment Trouble-shooting Lock the castors when charging the battery. Make sure the emergency stop button is not pressed. Manual base-width adjustment (model EM): If the lift is not working properly (up or down), check the following: Push down on the respective pedals at the back of the lift to widen and narrow the base. Charging procedure: 1. Connect the charger to the charger cable leading from the underside of the control box. 2. Connect the charger to a power outlet (100-240 V AC). 3. When the charger is connected, the control box lamp indicates as follows: - yellow lamp indicates charging in progress NOTE! Before the lift is used for the first time, it must be charged for at least 4 hours. Charge batteries regularly for maximum longevity. We recommend daily charging when the lift is in daily use. The emergency stop button must be pulled out during charging. Electrical base-width adjustment (model EE): LED indication of charging LED indication of hand control activation Button for electrical emergency lowering Hand control Raising/lowering the lift arm: Use the buttons on the hand control to adjust the base width of Carina350EE. The buttons are marked with symbols to indicate widening/ narrowing. Emergency stop Emergency stop: - All cables are properly and securely connected. Pull out the contact and plug it in again firmly. If the lift is still not working properly, contact Handicare. Turn the button in the direction of the arrows until the button pops out. If the lift makes unusual noises: Emergency lowering Markings on the buttons indicate function. For manual emergency, turn the round plastic knob on the actuator clockwise. Electrical emergency lowering: Accessories from SystemRoMedic Maintenance Technical information Sling bars The lift must undergo thorough inspection at least once per year. This must be done by authorized Handicare service personnel and in accordance with Handicare’s service manual. Repairs and maintenance may only be done by authorized personnel using original spare parts. Lifting speed: _ _________ 23 mm/s without load Batteries: ______________ Two 12V 2.9 Ah valve-regulated, sealed, lead acumulator (gel-type batteries) Charger: _______________ Max. 400mA Motor (mast): _ _________ DC 24 V, 5.5 A. IPX4. Operating time: 10% maxi- mum continuous in 2 minutes, max. 5 directional changes per minute. Push: 6,000N. Motor (base): ___________ DC 24 V, 5 A. IPX4. Operating time: 10% maximum continuous in 2 minutes, max. 5 directional chan ges per minute. Push: 3,000N. Sound level: ___________ With load: up: 54 dB(A) down: 54 dB(A). Material: _ _____________ Powdercoated Steel Emergency lowering: ____ Manual and electrical Wheels: _ ______________ Front 75 mm, rear 75 mm IP class: _ ______________ IPX4. Weight: _ ______________ 33 kg/34kg, 73 lbs/75 lbs Expected service life:_ ___ 10 years Pressure hand control: ___ Buttons on hand control: 4 N SWL: __________________ 165 kg/350 lbs Sidebars are used in combination with the standard twopoint sling bar delivered with Carina350EM/EE to provide more space in the sling for large users. They open up the sling and enable more reclined, comfortable position. SideBar Article no.: 70200013 Scale SystemRoMedic’s Scale660 and Scale880 are used together with stationary or mobile lifts for weighing of users. Article no.: 70100002 Article no.: 70200003 Maintenance free castors The SystemRoMedic encapsulated dual castors, 100 mm/” diam are maintenance free and very easy to roll, even on softer surfaces. With this castor upgrade, Carina350EM/EE becomes even more versatile and easier to use. The ride is smooth, transfers are practical and efficient and it looks good. 100 mm in diameter. Article no.: 70200014 Spent batteries are to be left at the nearest recycling station or returned for recycling to Handicare or a Handicare dealer. Cleaning Clean the lift with warm water or rubbing alcohol and ensure that the castor wheels are free of dirt and hair. Do not use cleaning agents containing phenol or chlorine, as this may damage the material. Storage If the lift is not to be used for some time or e.g., when transporting, we recommend that the emergency stop button be pressed in. Store the lift at a temperature exceeding freezing point and at normal relative humidity (about 60%). Service agreements Handicare offers the possibility of service agreements for maintenance and regular testing of your mobile lift. Contact your local Handicare representative. Dimensions 515 290 515 The device is intended for indoor use. Type B, according to the degree of protection against electric shock. Dimensions 370 mm All measurements are in mm All measurement is in mm 640,5 mm 1800 1260 1020-1120 557 860 572 1110 60 110 520 1250 mm TopSheet Article no.: 1510 or 1520 SafeHandlingSheet Article no.: 47522007 SafeHandlingSheet disposableArticle no.: 47592006 RoMedicClips (pair) Article no.: 70200007 For more information about SystemRoMedic , manual transfer assistive devices and lifting accessories, please visit www.handicare.com. SystemRoMedic offers a wide variety of functional and comfortable high quality lifting slings adapted to meet the different requirements of all kinds of lifting situations and users. The lifting slings are available in four different materials and in sizes ranging from XXS to XXL. All models are safe and very easy to use and have a safe working load of up to 300 kg/660 lbs. 1650 Positioning aids Carina350EM/EE are delivered complete and ready to use, but they can also be equipped with many clever and functional accessories from the SystemRoMedic lifting range. For security reasons: Always read the manual and remember that lifting accessories must be properly trial fitted and tested in relation to the user’s needs and functional ability. Slings Motion stops as soon as the buttons are released. SlingBar is SystemRoMedic’s aluminium sling bar. It’s available in three different widths and is therefore suitable in most lifting situations and for users of all sizes. SlingBar S Article no.: 70200001 SlingBar M Article no.: 70200002 SlingBar L Article no.: 70200003 - Try to locate the source of the sound, take the lift out of operation and contact Handicare. Accessories from SystemRoMedic Manual emergency lowering: Arrows indicate direction of travel. Motion stops as soon as the button is released. Widening/narrowing the base (model EE): If the lift can be raised but not lowered (or vice versa), or the base-width adjustment only works in one direction. Check the following: Press the red emergency stop button on the control box. Resetting: For electrical emergency, use the down button on the control box. Different products on the assembled lift system; ie. lift, sling bar, lifting sling, scale, and other accessories may have different safe working loads. It is always the lowest maximum allowable load indicated for the respective products on the system that applies for the entire system. Always check the markings on all products in the unit and contact Handicare with any questions. - The emergency stop device is not pressed in. - All cables are properly connected. - The battery is being charged. - That there is power in the battery. If the lift is still not working properly, contact Handicare.