1
Innovative Control Solutions For Your Needs
R850 SERIES
R850V STEP CONTROLLER
WITH INTEGRATED VERNIER STAGE
•
•
•
•
Pulsed or analog 0 to 10 Vdc vernier stage
4 or 8 step models
Up to 16 stage total with a slave unit
Test button
DESCRIPTION
OVERRIDE TEST BUTTON
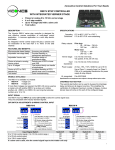
The Viconics R850V series step controller is designed for
cost effective, precise modulation of multi-stage control
application. A common application is a multi step electric
duct heater.
An integrated vernier control output will give a precise and
full modulation of the load from 0 to 100% of the total
capacity.
FEATURES AND BENEFITS
Microcomputer-based design
Adjustable inter-stage delay
Adjustable Vernier ratio
Choice of pulsed or analog
Vernier output
Up to 16 stages
Choice of LIFO or FIFO
sequencing
Test button
The override test button can be used to by-pass the
interstage delay and bring on all stage at one time. This
simplifies the verification of configured maximum number of
stage.
A status LED per step will come on for each of the configured
stage.
SPECIFICATIONS
Accuracy and reliability
Provides flexibility in
replacement applications
Simplifies design of
proportional stage
Permits use of SCR or lower
cost SSR
One product family can handle
all applications
Increased flexibility of FIFO
permits even use of contactors
Quick troubleshooting
Operating
Conditions:
Relay outputs:
Isolated relay 30 Vac @ 1.0 amps. max. per
output, up to a maximum of 4.0 amps. total
per R850 controller. See application note 02.
Vernier stage:
Vdc pulsed: 6 Vdc, 30 mA max.
0 to 10 Vdc 5 mA max.
Input
impedance:
Power supply:
MODELS AVAILABLE
0°C to 80°C ( 32°F to 176°F )
0 % to 95 % R.H. non-condensing
0 to 10 Vdc into 10 KΩ minimum
24 Vac -15%, +10% 50/60 Hz; 4 VA
Use a Class 1 ( properly fused ) or Class 2,
CSA or UL recognized transformer for power
supply & relay outputs.
The R850-V is available in 2 models
•
R850V-4
4 stage unit
•
R850V-8
8 stage unit
If more than 8 stage are required, the R850-V8 can be used
as a master unit with another R850V as a slave unit. Adding
another unit ( R850-V4 or R850-V8 ) can bring the total step
number up to 12 or 16.
Specifications and equipment are subject to change without prior notice.
INPUT SIGNAL
2
1
The R850V has four INPUT dip switch (S1 to S4) to select the control signal input:
They are compatible with industry standard signals.
4
ON
0 to 10 Vac
1 2
3
4
3
4
3
4
ON
4 to 20 mA
1 2
0 to 135 Ω
ON
1 2
1 2
3
4 5
ß CONTROL DIP SWITCH
6
C
O
N
T
R
O
L
3
I
N
P
U
T
1 2
(1-4) Input signal selection
ON
S
INPUT DIP SWITCH à
W
ON
S
W
DIP SWITCH ADJUSTMENTS & WIRING CONTROL INPUT
(3-6) Number of steps selection
(see next pages for details)
(2) Vernier stage selection
OFF = 0 to 10 Vdc (SCR)
ON = Vdc pulsed signal (SSR)
(1) Sequence of operation (LIFO or FIFO)
OFF = LIFO (Last IN, First OUT)
ON = FIFO (First IN, First OUT)
Input Signal Switch
Switch #1
0 to 10 Vdc control signal ( 2 to 10 Vdc control range )
Off
4 to 20 mA control signal
Off
On
0 to 135 Ω control signal
If a slave unit is used, wire the control signal input to the master unit only
Switch #2
Off
Off
On
Switch #3
Off
On
Off
Switch #4
On
Off
Off
2 To 10 Vdc Or 0 To 10 Vdc Stand Alone Thermostat
( Power To The Thermostat Is Supplied By The R850V )
1
1
0 To 135Ω
Ω Stand Alone Thermostat
ON
ON
4
2
3
4
I
N
P
U
T
3
I
N
P
U
T
1
2
3
2
1
2
3
1
1
0 Ohms = 0% capacity
135 Ohms = 100% capacity
2 Vdc = 0% capacity
10 Vdc = 100% capacity
Common
W
24 Vac
R
0 to 10 Vdc
output
B
1
4 To 20 mA From D.D.C.
Building Automation System
1
2 To 10 Vdc Or 0 To 10 Vdc From D.D.C.
Building Automation System
ON
ON
4
1
2
3
4
I
N
P
U
T
3
1
2
3
2
I
N
P
U
T
1
2
3
1
4 mA = 0% capacity
20 mA = 100% capacity
2 Vdc = 0% capacity
10 Vdc = 100% capacity
+
+
24 VAC POWER & RELAY OUTPUT WIRING
The wiring diagrams are for the R850V-8 models with 8 outputs. The wiring for the R850V-4 is the same except that the unit only
has 4 outputs.
Terminals
Screw terminal & connector #1
Screw terminal & connector #2
Screw terminal & connector #3
R850V-4
COM
V
S
C8
C7
C6
C4
C5
C3
C4
C2
C3
C
C1
C1
C2
24 Vac contactor coils
POWER
R850V-4
Number
of stage
1
2
3
4
150
001-0102
JUNE 99
REV.1
4
TEST
3
120
90
2
VR2
200
100
RATIO(%)
1
DELAY(s)
4
60
3
30
ON
2
I
N
P
U
T
1
C
O
N
T
R
O
L
ON
1
2
3
4 STAGE APPLICATION
3
•
2
•
It is not necessary to ground any leg of the transformer to earth with the controller card.
The controller uses internally a half wave rectifier bridge. On 0 to 10 Vdc control signal, the reference of the control signal is the
Common of the power supply of the SCR controller card.
Use a Class 1 ( properly fused ) or Class 2, CSA or UL recognized transformer.
1
•
•
Common
24 Vac
Control Signal input
R850V-4 Control Switch
Switch #3
Switch #4
Off
Off
On
Off
Off
On
On
On
2
•
8 STAGE APPLICATION
R850V-8
C8
COM
C8
V
C7
S
C6
C7
C3
C5
C6
C2
POWER
C4
C5
C3
C4
C2
C
C1
C1
24 Vac contactor coils
6
R850V-8 Control Switch
Switch #4
Switch #5
Off
Off
Off
Off
On
Off
On
Off
Off
On
Off
On
On
On
On
On
Switch #3
Off
On
Off
On
Off
On
Off
On
R850V-8 MASTER UNIT, R850V-4 SLAVE UNIT
001-0102
V
C8
COM
C7
S
C6
C12
C8
C5
C11
C7
C4
C10
C6
C3
R850V-4
1
2
3
4
150
001-0102
TEST
4
VR2
200
100
RATIO(%)
3
120
90
ON
2
JUNE 99
REV.1
2
JUNE 99
001-0102
120
1
1
DELAY(s)
150
ON
60
6
30
5
C
O
N
T
R
O
L
4
I
N
P
U
T
3
TEST
2
VR2
200
100
RATIO(%)
1
DELAY(s)
4
30
3
60
ON
2
I
N
P
U
T
1
2
3
1
C
O
N
T
R
O
L
ON
90
1
2
REV.1
3
3
R850V-8
C9
C5
C8
C2
C7
C1
C6
C
C5
POWER
C4
V
C3
COM
C2
Use vernier output of master
if vernier control is required
S
C1
C2
24 Vac contactor coils
C1
C
Switch #6
Off
Off
Off
Off
Off
Off
Off
Off
( See also slave application section at the end )
24 Vac contactor coils
POWER
TEST
5
VR2
200
100
RATIO(%)
4
150
90
3
60
2
C
O
N
T
R
O
L
1
C4
12 STAGE APPLICATION
4
1
2
3
•
3
C3
Number
of stage
1
2
3
4
5
6
7
8
ON
2
I
N
P
U
T
1
2
3
1
30
ON
DELAY(s)
120
1
2
REV.1
JUNE 99
3
R850V-8
R850V-8 Master Unit Control Switch
R850V-4 Slave Unit
Number
of stage
Switch #3
Switch #4
Switch #5
Switch #6
Switch #3
Switch #4
9
Off
Off
Off
On
Off
Off
10
On
Off
Off
On
On
Off
11
Off
On
Off
On
Off
On
12
On
On
Off
On
On
On
The intensity of the yellow status LED on the master unit is proportional to the slave output.
3
R850V-8 MASTER UNIT, R850V-4 SLAVE UNIT
( See also slave application section at the end )
C16
COM
C15
V
C14
S
C8
C13
C8
C7
C12
C7
C6
C11
C6
C5
C10
C5
C4
R850V-8
2
3
4
5
6
150
TEST
1
VR2
200
100
RATIO(%)
4
DELAY(s)
3
120
90
ON
2
60
1
001-0102
JUNE 99
REV.1
2
1
001-0102
ON
30
6
C
O
N
T
R
O
L
5
1
2
3
4
TEST
3
150
90
2
VR2
200
100
RATIO(%)
1
DELAY(s)
4
C
O
N
T
R
O
L
3
60
ON
2
I
N
P
U
T
1
2
3
1
30
ON
120
1
2
REV.1
JUNE 99
3
3
R850V-8
C9
C4
C3
POWER
Use vernier output of master
if vernier control is required
C2
C8
C1
C7
C
C6
POWER
C5
V
C4
COM
C3
S
C2
C
C1
C2
24 Vac contactor coils
C1
24 Vac contactor coils
C3
16 STAGE APPLICATION
I
N
P
U
T
•
R850V-8 Master Unit Control Switch
R850V-8 Slave Unit Control Switch
Number
of stage
Switch #3
Switch #4
Switch #5
Switch #6
Switch #3
Switch #4
Switch #5
Switch #6
9
Off
Off
Off
On
Off
Off
Off
Off
10
On
Off
Off
On
On
Off
Off
Off
11
Off
On
Off
On
Off
On
Off
Off
12
On
On
Off
On
On
On
Off
Off
13
Off
Off
On
On
Off
Off
On
Off
14
On
Off
On
On
On
Off
On
Off
15
Off
On
On
On
Off
On
On
Off
16
On
On
On
On
On
On
On
Off
The intensity of the yellow status LED on the master unit is proportional to the slave output.
R850V DIMENSIONS & INSTALLATION
7.075"
V
COM
S
C7
C6
C5
C4
C3
C2
C1
0.250"
C8
3.050"
3.450"
C
0.325"
0.425"
Vernier output green LED
Slave output yellow LED
3
4
5
6
150
120
JUNE 99
2.700"
3.675"
001-0102
TEST
2
VR2
200
100
RATIO(%)
1
DELAY(s)
4
30
3
60
ON
2
I
N
P
U
T
1
2
3
1
C
O
N
T
R
O
L
ON
90
1
2
REV.1
3
Power indicating
green LED
POWER
0.325"
0.225"
Install on the mounting plate on the electrical cabinet using five #6 pan head metal screw. Do not over torque the screws to prevent
damage to the board. Specifications and equipment are subject to change without prior notice.
All R850V series controls are for use only as operating controls. Whenever a control failure could lead to personal
injury and/or loss of property, it becomes the responsibility of the user to add safety devices and/or alarm system
to protect against such catastrophic failures.
4
LIFO / FIFO ADJUSTMENT
The R850V series features 2 different staging sequences:
•
LIFO
LAST IN FIRST OUT ( CONTROL SWITCH #1 OFF, FACTORY DEFAULT )
This is the regular mode, Stage #1 will always be the first to energize and the last stage to de-energize
•
FIFO
FIRST IN FIRST OUT ( CONTROL SWITCH #1 ON )
In this mode, the stages are rotated to ensure a more uniform wear of the contactors and elements. For example, on an increase in
demand, stage 1 will be energized following by stage 2, etc. On a decrease in demand, stage 1 will de-energized first followed by
stage 2, etc.
Please verify that if this mode is enabled, the manufactured product still complies with active codes and regulations.
VERNIER STAGE SELECTION AND WIRING
The Viconics R850V series step controller has an integrated vernier control output. This output will give a precise and full
modulation of the load from 0 to 100% of the total capacity of the unit. If a master slave application is used, always connect the
vernier output of the master unit.
ADJUSTMENTS
Functions of the units can be configured with six dip switch and 2 potentiometers.
75
60
90
45
Interstage delay potentiometer setting
A potentiometer is used to adjust the interstage delay from 30 seconds up 120 seconds.
105
120
30
60
This delay is active in 3 ways.
•
Minimum time delay between each step activation when the control signal rises
•
Minimum ON time when the step is activated
•
Minimum time delay between each step de-activation when the control signal drops
175
100
30
120
DELAY(s)
Vernier stage ratio
A potentiometer is used to adjust the vernier stage ratio from 100% to 200% capacity of the other on/off
stage capacity.
150
125
90
200
RATIO SETTING
( See also slave application section at the end )
First adjust the vernier stage ratio potentiometer. This will insure a smooth capacity rise of the total load.
150
Example 1:
VR2
200
100
The total unit has 100 kW divided in 10 equal stage of 10 kW.
RATIO(%)
If only 10 kW is used as the modulating stage, then the heater would have 9 on/off mechanical stage plus
one modulating stage. This modulating stage has the same value as all the other stage. Adjust the vernier stage ratio
potentiometer to 100%.
Example 2:
The total unit still has 100 kW divided in 10 equal stage of 10 kW.
If 20 kW are used as the modulating stage, then the heater would have 8 on/off mechanical stage plus one modulating stage.
The modulating stage has twice the value as all the other stage. Adjust the vernier stage ratio potentiometer to 200%.
•
TYPE OF VERNIER STAGE SETTING
The vernier stage output can be configured to operate either as a:
•
•
•
Vdc pulsed output to activate an R810 power module
0 to 10 Vdc analog output to activate an R820 SCR power controller.
VERNIER STAGE WIRING
Control Switch #2 On
Vdc pulsed to activate R810 power modules
COM
V
S
R810
Do not wire more than six R810 power module on the
vernier stage output
Respect the polarity between the R850 step controller
board an the R810 power modules
Connect
Connect
-
+
V to +
COM to -
The green status LED on the master unit will cycle at
the same rate as the time proportioning vernier output
For more information, please refer to the R810 service
manual
5
Control Switch #2 Off
0 to 10 Vdc analog output to activate R820 SCR power controller
Set the R820 SCR power controller to accept a 0 to 10 Vdc control signal input
Switch #1, #2 & #3 Off
Switch #4 On
The intensity of the green status LED on the master unit is proportional to vernier output
V
COM
S
C8
C7
C6
C5
C4
C3
C2
C1
R820
SCR Power Controller
4
5 6
150
JUNE 99
001-0102
TEST
3
VR2
200
100
RATIO(%)
2
DELAY(s)
1
60
3 4
30
ON
2
C
O
N
T
R
O
L
1
I
N
P
U
T
1
2
3
ON
90
120
1
2
REV.1
3
POWER
C
For more information, please refer to the R820 service manual
1 2 3
SLAVE APPLICATION SECTION
When using a unit for slave applications, it is important that the proper adjustments & setting be made to the unit for proper
operation of the system.
The yellow LED near the vernier output connector is proportional to the vernier output of the master unit ( 0 to 5 Vdc ).
On the slave unit:
Set vernier ratio potentiometer to 100%
Set interstage delay potentiometer to the same value as the master unit
Set all control signal INPUT dip switch to OFF
ON
2
3
4
I
N
P
U
T
1
1
2
3
•
•
•
TEST MODE BUTTON
The test mode button can be used to verify if the number of stage have been configured properly.
1.
2.
3.
4.
5.
Press and hold the button for 3 to 4 seconds.
If a slave unit is used, press & hold the 2 units button simultaneously
All the selected stage will come on, one after the other until all selected number of stages are all on.
There is a delay of approximately 5 second between each step activation.
When all selected stage are on, they will stay on for approximately 30 seconds before shutting down.
Powering up the R850V controller while holding down the test button will by-pass the interstage delay for 10 minutes. During that
period, the unit will respond to a changing signal input very rapidly. Also hold down slave test button on start-up if a slave unit is
used. After that 10 minute period, the unit will function normally with the interstage delays active
Viconics Electronics Inc. 9245, Langelier Blvd, St-Leonard, Quebec, Canada H1P 3K9
28-5007
www.viconics.com
M:\1_BINDER\6_R800 Series SCR SSR\Spec sheet english\R850\R850-Vse16.doc 4/30/01
6