1
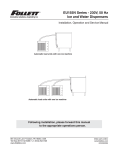
T400A/W, MCD400A/W, R400A/W,
MFD400A/W, D400A/W Icemakers
Order parts online
www.follettice.com
Installation, Operation and Service Manual
Following installation, please forward this manual
to the appropriate operations person.
801 Church Lane • Easton, PA 18040, USA
Toll free (800) 523-9361 • (610) 252-7301
Fax (610) 250-0696 • www.follettice.com
208600R16
Follett Corporation
Equipment Return Policy
Follett equipment may be returned for credit under the following conditions:
1.
The equipment is new and unused.
2. A return authorization number has been issued by customer service within 30 days after shipment.
3. Follett receives the equipment at the factory in Easton, PA within 30 days after issuance of the return authorization number.
4. The equipment must be returned in Follett packaging. If the packaging has been damaged or discarded, Follett will forward, at
the customer’s expense, new packaging.
Note:
Return freight charges are the responsibility of the customer. If equipment is returned and is damaged because of
improper packaging, Follett Corporation will not be held responsible.
Credit will be issued when:
The equipment has been inspected by Follett and deemed suitable to be returned to stock.
Note:
A 15% restocking charge will be deducted from the credit. If the cost to return the product to stock exceeds 15%, the
actual cost will be deducted.
2
Table of contents
Welcome to Follett Corporation
Specifications
Installation
Top mount icemakers (models T400A/W, MCD400A/W and MFD400A/W)
Satellite-fill™ icemakers (models MCD400A/W, R400A/W)
Ventilation
Ice transport tube
Start up
Operation
Cleaning
Weekly exterior care
Monthly condenser cleaning
Semi-annual evaporator cleaning
Service
Icemaker operation
Technical specifications
Refrigeration system diagram
Refrigeration pressure data
Compressor data
Gearmotor data
MCD400A/W wiring diagram
Electrical control system operation
Refrigeration system
Service procedures
Evaporator disassembly
Evaporator reassembly
Gearmotor replacement
Troubleshooting
Replacement parts
3
4
5
8
8
9
14
15
17
17
17
17
18
18
19
19
20
20
20
20
21
21
22
28
29
29
29
29
30
32
Welcome to Follett
Follett equipment enjoys a well-deserved reputation for excellent performance, long-term reliability and
outstanding after-the-sale support. To ensure that this equipment delivers that same degree of service, we ask
that you review the installation portion of this manual before beginning to install the unit. Our instructions are
designed to help you achieve a trouble-free installation. Should you have any questions or require technical
help at any time, please call our technical service group at (800) 523-9361 or (610) 252-7301.
Before you begin
After uncrating and removing all packing material, inspect the equipment for concealed shipping damage. If damage is
found, notify the shipper immediately and contact Follett Corporation so that we can help in the filing of a claim,
if necessary.
Check your paperwork to determine which model you have. Follett model numbers are designed to provide information
about the type and capacity of Follett equipment. Following is an explanation of the different model numbers in the
400 series.
MCD400ABT
Configuration
Application
Condenser type
Icemaker capacity and refrigerant
400 – 400 lbs (181kg)/day, R404A
A – air-cooled
W – water-cooled
S – Satellite-fill™
T – top-mount
V – Vision
B – Bin
H – Harmony
Voltage
D – 115V 60Hz
Icemaker series
Nugget icemaker
MCD – Satellite-fill installation, Vision™ ice and beverage dispensers and
top installation, Follett ice storage bins
R – Remote installation, Symphony™ ice and water dispensers
D – Replacement icemaker, Symphony ice and water dispensers
Flake icemaker
MFD – Top installation, Follett ice storage bins
!
Important cautions
Moving parts. Do not operate with front cover removed.
Hot parts. Do not operate with cover removed.
To reduce risk of shock disconnect power before servicing.
Most ice machine cleaners contain citric or phosphoric acid, which can cause skin irritation. Read caution
label on product and follow instructions carefully.
Ice is slippery. Maintain counters and floors around dispenser in a clean and ice-free condition.
Ice is food. Follow recommended cleaning instructions to maintain cleanliness of delivered ice.
4
Specifications
Electrical
Each icemaker and dispenser require a separate circuit with electrical disconnect within 10 ft (6m).
Equipment ground required.
Standard electrical – 115V, 60Hz, 1 phase.
Maximum dispenser fuse – 15 amps,
Maximum icemaker fuse – 20 amps each
Maximum icemaker amperage – 11 amps each
Cord and plug provided on icemaker and dispenser
Electrical connections
Model
Electrical connection
Circuits required
25FB400A/W, 50FB400A/W, 110FB400A/W
cord & plug provided
115/60/1, 20 amp max. fuse size
25CT400A/W, 50CT400A/W, 110CT400A/W
cord & plug provided
115/60/1, 20 amp max. fuse size
25CR400A/W, 50CR400A/W, 110CR400A/W
dispenser, icemaker
and bin signal:
cord & plug provided
115/60/1, (2) circuits required
dispenser: 15 amp max. fuse size
icemaker: 20 amp max. fuse size
VU155R400A/W, VU300R400A/W
VU155BR400A/W, VU300BR400A/W
VU155R400A/WX, VU155BR400A/WX
dispenser, icemaker
and bin signal:
cord & plug provided
115/60/1, (2) circuits required
dispenser: 15 amp max. fuse size
icemaker: 20 amp max. fuse size
VU155NR400A/W, UD300R400A/W
VU155R800A/W, VU300R800A/W,
VU155R800A/WX,
VU155BR800A/W, VU300BR800A/W,
VU155R800A/WX
dispenser, icemaker
and bin signal:
cord & plug provided
115/60/1, (3) circuits required
dispenser: 15 amp max. fuse size
(2) icemakers: 20 amps max. fuse
size each
CAUTION
• Check start relay before supplying power
• Start relay is gravity sensitive, and MUST be in “up” position
• Failure to comply may cause equipment to overheat, resulting in equipment failure, equipment damage or fire hazard
UP
UP
UP
top mount and
Satellite-fill position
freestanding
position
5
Plumbing
3/8" OD push-in water inlet
3/4" MPT drain
3/8" FPT condenser inlet (water-cooled condenser only – 1.25 gpm minimum available flow)
3/8" FPT condenser drain (water-cooled condenser only)
Notes: Slope to drain of 1/4" per foot (6mm per 30.4cm run) with a 1/2" min. is recommended.
Water shut-off recommended within 10 feet (3m), drain to be hard piped and insulated.
Separate drains for icemaker and condenser. To prevent back flow, do NOT connect drains.
Follett recommends installation of an activated carbon filter in icemaker inlet water line.
Ambient
Air temperature
Water temperature
Water pressure
100 F/38 C max.
90 F/32 C max.
70 P.S.I max. (482 kPA)
50 F/10 C min. (best performance below 80 F/27 C)
40˚F/4˚C min. (best performance below 70 F/21 C)
10 P.S.I. min. (89 kPA)
6
Dimensions and clearances
Entire front of icemaker must be clear of obstructions/connections to allow removal.
12" (305mm) clearance above icemaker for service.
6" (153mm) minimum clearance between exhaust side of icemaker and any adjacent equipment.
MCD400A & R400A – 18" (457mm) minimum, 10 ft (3m) maximum clearance between discharge and air
intake grilles.
Back view — air-cooled
top mount
Front view — air-cooled
top mount
13.00"
(331mm)
C
4.875"
(124mm)
2.375"
(61mm)
B
Front view — water-cooled
Satellite-fill
Back view — water-cooled
top mount
Front view — air-cooled
Satellite-fill
C
12.875"
(327mm)
F
8.375"
(213mm)
B
A
C
F
D
4.75"
(121mm)
2.25"
(57mm)
1.875" (48mm)
Side view — air-cooled and water-cooled
top mount and Satellite-fill
A
B
E
1.875" (48mm)
7.00" (178mm)
Icemaker plug
configuration
NEMA 5-20
22.75" (578mm)
20.75" (527mm)
17.00"
(432mm)
Satellite-fill air-cooled units only
A – 3/4" MPT drain
B – 3/8" OD push-in water inlet
C – Electrical cord
D – 3/8" FPT condenser inlet
E – 3/8" FPT condenser drain
F – Bin signal cord
7
A
6.875"
(175mm)
2"
(51mm)
Installation
Icemaker performance is very sensitive to the quality of installation. To ensure proper performance, ease of
service and warranty coverage, it is critical that you follow the requirements detailed in this manual. If you cannot
meet these requirements or have questions, call our technical service group immediately at (800) 523-9361 or
(610) 252-7301.
Top mount icemaker on bin installation procedure
(models MCD400A/WBT and MFD400A/WBT)
Install icemaker and rough-in utilities
1. Install ice storage bin in its final location.
2. Install one supplied grommet in large knockout in base of icemaker and second supplied grommet in ice
hole provided in top of ice storage bin.
3. Rough in plumbing and electrical per specs provided.
4. Flush all water lines before final hook up.
5. Position icemaker with utility connections facing rear of bin.
A. If new storage bin and icemaker – position icemaker with connections facing rear of bin.
B. If using existing bin – place supplied gasket 2.5" (64mm) from front of bin (Fig. 2). Position icemaker
with utility connections facing rear of bin.
6. Make final plumbing and electrical connections.
7. Working from inside bin storage area, push end of transport tube without fasteners up through grommets
into icemaker, leaving about 2" (51mm) hanging down in bin.
8. Route free end of tube to evaporator port.
9. Slip a hose clamp in free end of tube.
10. Push free end of tube on evaporator port and tighten clamp, making sure clamp is positioned on evaporator
side of flange (no flange on MFD400 series flake icemaker).
11. Position ice tube under float bracket retaining tab.
12. Carefully slip ice level control stat alongside transport tube through both grommets and down into bin.
13. Run ice level control stat down through one side of cap tube fasteners attached to ice transport tube, form a
180˚ bend at end of tube and run back up through fastener (Fig. 1).
14. Adjust loop length to provide desired ice level. Loop must below end of ice transport tube.
15. Carefully bend end of cap tube to prevent it from slipping out of clamp.
Fig. 2 – Replacing existing icemakers
Fig. 1
bin top
bin top
ice transport tube
ice level control
stat fastener
ice level control stat
top view shown
add gasket
2.5"
(64mm)
Apply supplied gasket to bin top
as shown. Position icemaker on
bin top.
existing gasket
front of icemaker
Before turning power on
1. Clean and sanitize ice storage bin in accordance with cleaning procedure in ice storage bin installation
information packed with ice storage bin.
2. Turn water to icemaker on.
3. Remove cover on float reservoir.
4. Push down on float to force water out overflow tube and into evaporator drain pan.
5. Check that water drains freely from evaporator drain pan.
6. Lift float and check that float valve shuts off incoming water when raised.
8
After turning power on
1. Turn power to icemaker on and confirm that gearmotor, compressor and fan motor start immediately.
2. Check that ice begins to enter bin within approximately 10 minutes.
3. With icemaker running, check that float reservoir water level is approximately 3/8" (10mm) below internal
overflow and adjust to this level (raised line on side of reservoir) if necessary.
4. After making ice for 10 minutes, put ice against ice level control stat cap tube and check that icemaker
shuts down.
5. Warm ice level control stat with your fingers and check that icemaker restarts in approximately 20 minutes.
(Bin must be calling for ice.)
Satellite-fill icemaker installation procedure
(models MCD400A/WHS and MCD400A/WVS)
Satellite-fill icemaker performance is very sensitive to the quality of installation. To ensure proper performance, ease
of service and warranty coverage. it is critical that you follow the requirements detailed in this manual. If you can not
meet these requirements or have questions, call our technical service group immediately at (800) 523-9361 or
(610) 252-7301.
Installing Satellite-fill icemaker and rough-in utilities without optional slide-out accessory
The requirements below are for icemaker installation without the Follett slide-out accessory. These procedures
ensure that the icemaker can be easily removed as one unit for cleaning and maintenance. For installation with the
slide-out accessory, refer to instructions to install icemaker and rough-in utilities with optional slide-out accessory.
General requirements
Front of icemaker free of obstructions, plumbing lines, electric conduits.
12" (305mm) minimum clearance above icemaker for access to icemaker components.
6" (153mm) minimum clearance between exhaust side of icemaker and adjacent equipment.
Do NOT weld icemaker to counter channels.
Large, removable panels in counter face to allow icemaker removal.
Machine stand accessory required for icemakers not supported on counter channels.
Connection requirements
Compression fittings for water and drain lines.
Separate drains for condenser and icemaker. Do NOT connect drains.
20 amp power supply with 6 feet.
bin signal from
dispenser
to icemaker
12"
305mm
clearance
separate power
to dispenser
front of
icemaker
clear
separate power
to icemaker
water shut off
compression fittings
for water and drain lines
Note: Diagram intended as guide only. All field wiring to be installed in accordance with NEC and
local electrical codes.
9
Field wiring diagrams for Satellite-fill icemaker installations
All field wiring must be installed in accordance with NEC and local electrical codes.
Field wiring diagram is intended only to aid electrician or technician in understanding how equipment works.
Should local codes require a hard-wired connection and/or shielded wiring, eliminate the cord and plug(s) and
follow the appropriate field wiring diagram.
MCD400A/W and R400A/W icemakers have separate power supply from dispenser.
Electric disconnects required within 10 ft (3m) for all hard-wired connections.
Recommended junction box preparation of
hard-wired Satellite-fill icemakers.
1. Cut plugs from supplied power cords.
2. Replace upper (power) strain relief with
a cord connector.
3. Mount two 2" x 4" junction boxes using
supplied holes in icemaker face.
4. Make power and bin signal connections.
25, 50 or 110 ice and water dispenser with ONE Satellite-fill icemakers
(dispenser models 25CR400A/W, 25HR400A/W, 50CR400A/W, 50HR400A/W, 110CR400A/W)
Electric
power
source
Electric
power
source
Lower icemaker
junction box
(bin signal)
Dispenser
junction box
GND
X
LEGEND
Upper icemaker
junction box
(power)
GRN
X
GND GRN
X
B
W
R
W
W
B
B
B
W
GRN
BL
Y
RD
WIRENUT FIELD
CONNECTIONS
EQUIPMENT
GROUND
BLACK
WHITE
GREEN
BLUE
YELLOW
RED
VU155/VU300 ice and beverage dispenser with either ONE or TWO Satellite-fill icemakers
Note: 24V bin signal; Verify black bin signal wire is on the 24V terminal
Icemaker #1
(optional)
Electric
power
source
Lower junction box
(24V bin signal)
DISPENSER
Electric
power
source
Left junction box
W
W
B
B
W
Right junction box
GRN
GND X
BL
B
Icemaker #2
(optional)
Y
GND
GRN
Upper junction box
(power)
Lower junction box
(24V bin signal)
RD
Electric
power
source
Upper junction box
(power)
W
W
B
B
GRN
GND X
10
Installing Satellite-fill icemaker and rough-in utilities with optional slide-out accessory
The slide-out accessory allows the icemaker to be pulled out on a track from below a counter without
disconnecting utilities. A leg supports the icemaker in the full-out position. If your order did not include a
slide-out accessory proceed to icemaker ventilation and exhaust.
Step 1 – Installing track accessory (Follow either A or B below for Satellite-fill icemaker)
Track must be positioned flush against inside of counter and slightly above counter access opening.
A. When icemaker stand is used (required if icemaker is not supported on counter channels)
1. Bolt vertical utility panel to slide-out track assembly with supplied 10/32 screws.
2. Secure slide-out track assembly to icemaker stand with 10/32 screws provided.
3. Position icemaker stand in desired location and adjust stand legs to proper height and level in
both directions.
4. Using holes in flanged legs as template, mark floor for 12 anchoring holes to be drilled.
5. Remove stand/track assembly and drill marked holes.
6. Reposition and anchor stand to floor with 12 fasteners appropriate to floor material (not supplied).
Stand MUST be anchored to avoid tipping and possible injury when icemaker is pulled out.
B. When icemaker is supported on counter channels
1.
2.
3.
4.
5.
Bolt vertical utility panel to slide-out track assembly with supplied 10/32 screws.
Position track assembly on counter channels (Fig. 3).
Using holes in track assembly as a template, mark and drill required holes in counter channels.
Remove track assembly on channels and drill marked holes.
Reposition track assembly on channels and secure using appropriate hardware (not supplied).
14"
(356mm)
verical utility panel
13"
(331mm)
14"
(356mm)
12.75
(324mm)
slide-out-track
11
Step 2 – Installing Satellite-fill icemaker on slide-out track
A. When icemaker is shipped with slide-out track accessory (follow either A or B)
1.
2.
3.
4.
Connect inlet water, drain, and power supply to back of vertical utility panel.
Place icemaker on slide-out track assembly.
Connect drain and water lines.
Connect electrical plugs from icemaker to utility panel.
B. When icemaker is installed in and shipped with counter
1.
2.
3.
4.
5.
6.
7.
8.
Remove two outer rear screws from icemaker and install supplied spacer and screw (Fig. 3).
Place icemaker on slide-out track assembly.
Connect drain and water lines.
Connect electrical plug from icemaker to utility panel.
Remove pin from adjustable leg.
Place hold-down strap over leg block and secure strap to slide-out assembly with supplied screws (Fig. 4).
Reinstall pin in leg block.
At job site remove hold-down strap and make utility connections at rear utility panel.
position track accessory so that 2" (51mm) duct
supplied with air-cooled satellite-fill icemaker mates
with back of counter opening.
counter front
grille supplied with aircooled satellite-fill icemakes
power cord
bin signal cord
(icemaker connection)
bin signal cord
(customer connection)
air in
(air-cooled units only)
Fig. 3
Fig. 4
hold-down strap
(for installation; remove
and discard)
Remove screw. Install
supplied screws and spacers.
supplied screws (for installation; remove and discard)
12
Front view
3/8" OD push-in condenser inlet
(water-cooled only)
5.25"
(134mm)
icemaker
power outlet
3/8" OD push-in condenser drain
(water-cooled only)
icemaker
twist-lock
bin signal cord
3/8" OD push-in icemaker water inlet
barbed push-on icemaker drain
25.875"
(658mm)
Side view
(All customer field
connections are made
to rear of vertical
utility panel)
3/8" OD push-in condenser inlet
(water-cooled only)
cord holder
3/8" OD push-in condenser drain
(water-cooled only)
vertical utility panel
3/8" OD push-in icemaker water inlet
icemaker power cord
16.75"
(415mm)
bin signal cord connector
(to connect to dispenser bin signal cord)
3/4" MPT icemaker drain
22.75"
(578mm)
Plan view
22.75"
(578mm)
Icemaker front
1.563"
(40mm)
16"
(407mm)
19.25"
(489mm)
25.875"
(658mm)
13
1.563"
(40mm)
Satellite-fill icemaker ventilation and exhaust requirements
Fabricator-supplied, custom air intake grilles must have 12" x 12" (305mm x 305mm) opening yielding 100 sq.
inches (645 sq. cm) of open air space within duct perimeter. Block off any open area outside of the air duct.
Intake air requirements — air-cooled icemakers (MCD400AHS, MCD400AVS & R400A only)
1. Check that 2" (51mm) duct is installed on condenser front.
2. Cut a 12" x 12" (305mm x 305mm) opening in counter face to align with duct.
3. Position icemaker to mate duct flush with back of counter opening.
4. Install supplied grille on outside of counter opening.
Exhaust air — all icemakers (MCD400A/W & R400A/W)
Provide 100 sq. in. (645 sq. cm) of counter opening for exhaust air at least 18" (457mm) from intake opening
but not more than 10 ft (3m) away.
MCD400AHS, MCD400AVS & R400A — Side View
Standard
louvered grille
(supplied)
Air intake
Exhaust air
Supplied 2" (51mm) duct MUST be installed
to front of icemaker and mated flush to inside
of counter face opening.
Front View
Standard 51mm
(2") duct
mates counter
opening
(behind grille) to
condenser front
Air in
through louver
Exhaust air
out side to
opening at least
457mm (18" )
from air intake
Air out through louver
Provide at least 645 sq. cm
(100 sq. inches) of counter
opening for exhaust air
14
Satellite-fill icemaker ice transport tube installation
Incorrect ice transport tube installation can result in wet ice and dispensing problems. Follow guidelines below
to ensure correct installation. Call factory for assistance if you are unable to meet these requirements.
General requirements
Maximum length of tube run – 20 ft (6m). Factory approval required for longer runs.
Run tube without dips.
One continuous length of tube; no splices.
Minimum radius of bends in tube – 6" (153mm) inside radius.
Maximum number of bends – 6.
Insulation on entire run of ice tube.
Procedure
1. If installing MCD series icemaker refer to additional connection specifications for Vision series ice and
beverage dispensers instructions below.
2. Select side, rear or top knockout in icemaker cabinet for tube entrance.
3. Install supplied grommet in knockout.
4. Remove icemaker top panel.
5. Install supplied insulation on entire length of tube.
6. Run insulated tube without dips between icemaker and dispenser and secure in place.
7. Cut insulation off tube where tube enters grommet.
8. Slide end of tube without insulation through grommet and run to evaporator port.
9. Cut tube to that length.
10. Install a section of insulation on tube from grommet to evaporator port.
11. Slip supplied hose clamp over free end of tube.
12. Pull insulation back from free end of tube.
13. Push tube on evaporator port.
14. Position clamp behind lip on evaporator port and tighten clamp.
Correct installation
Incorrect installation
• Dips in tube where water can collect
• Splice or tight bend that restricts ice flow
• Uninsulated tube that results in wet ice and
potential dispensing problems
• Length of run no more than 20 ft (6m)
• Tube run continuously from icemaker to
dispenser
• Insulation on entire run of tube
• No dips or tight bends
• Tube secured in place
• No splices
15
Additional ice transport tube connection specifications for Vision series ice and beverage dispensers
Check to make sure bin signal on icemaker control board is switched to 24 volt connection.
1. Push one end of ice transport tube(s) through hole(s) provided in side of dispenser.
2. Route tube into ice tube bracket inside dispenser and engage bracket tabs in holes located in end of ice
transport tube(s) (see drawings below).
3. Verify bin thermostat capillary tube is mounted correctly (see drawings below).
Ice tube retainer bracket
1" (26mm)
ice tube
retaining
bracket
Bin thermostat capillary tube mounting
Front View, VU155
Front View, VU300
ice tube
retaining
bracket
thermostat
ice tube
thermostat
tabs in ice tube
retainer bracket
engage holes in ice
tube and hold tube
in place
ice tube
retaining
bracket
16
ice tube
thermostat
Ice transport tube installation detail
install insulation on full run of tube
Dispenser
Evaporator
grommet
install clamp behind lip on
evaporator port
Satellite-fill icemaker start up procedure
The start-up procedure below is intended to ensure that icemaker is operating properly after installation has been
made. Check each item listed and call factory immediately for assistance if you experience problems with unit.
Before turning on power
1. Turn on water to icemaker.
2. Push down on float to force water through overflow chamber into evaporator drain pan and check for proper
drainage of drain pan.
3. Check that float valve shuts off incoming water when raised.
4. Check that hose clamp securely holds ice transport tube on evaporator port.
After turning on power
1. Turn on power to icemaker and confirm that gearmotor, fan motor and compressor start immediately.
2. Check that ice begins to enter dispenser bin area within approximately 10 minutes.
3. Check that float reservoir water level is approximately 3/8" (.95mm) below overflow during icemaker
operation and adjust to this level if necessary.
4. Put ice against bin level thermostat in dispenser bin and check that compressor and fan motor shut down
approximately 10 seconds after thermostat opens. Gearmotor should run for an additional 60 seconds.
5. Check that icemaker comes back on in approximately 20 minutes (bin signal must be present).
Operation
Cleaning and preventive maintenance (all models)
Preventive maintenance
Periodic cleaning of Follett’s icemaker system is required to ensure peak performance and delivery of clean,
sanitary ice. The recommended cleaning procedures that follow should be performed at least as frequently as
recommended and more often if environmental conditions dictate.
Cleaning of the condenser can usually be performed by facility personnel. Cleaning of the icemaker system,
in most cases, should be performed by your facility’s maintenance staff or a Follett authorized service agent.
Regardless of who performs the cleaning, it is the operator’s responsibility to see that this cleaning is performed
according to the schedule below. Service problems resulting from lack of preventive maintenance will not be
covered under the Follett warranty.
Weekly exterior care
The exterior may be cleaned with a stainless cleaner such as 3M Stainless Steel Cleaner & Polish or equivalent.
17
Monthly condenser cleaning (air-cooled icemaker only)
1. Use a vacuum cleaner or stiff brush to carefully clean condenser coils of air-cooled icemakers to ensure
optimal performance.
2. When reinstalling counter panels in front of remote icemakers, be sure that ventilation louvers line up with
condenser air duct.
Semi-annual evaporator cleaning (every 6 months)
Fig. 5
Solution A – Ice machine cleaner: Prepare one gallon (3.8L) of Follett
2
SafeCLEAN™ Ice Machine Cleaner (one 7 oz packet) or equivalent. Solution
1
temperature must be at least 120 F (49 C).
Warning: Most ice machine cleaners contain citric or phosphoric acid that
can cause skin irritation. Read caution label on product and follow instructions
carefully.
Solution B – Sanitizing solution: Prepare 2 gallons (9L)
3
Combine 1 oz (30ml) bleach with 2 gal (8L) hot water (at least 120 F (49 C))
or use 200ppm of Ecolab Mikro-chlor Cleaner or equivalent 5.25% sodium
hypochlorite solution.
Fig. 6
1. Remove icemaker panels required to gain access to water reservoir'
components (Fig. 5) and electrical control box.
2. Turn compressor switch on electrical box to OFF position.
3. Dispense all ice from dispenser.
4. Shut off water to icemaker.
1
5. Drain water from reservoir through float/evaporator drain line (Fig. 5.1).
Reinsert hose into hose clip (Fig. 5.3).
6. Fill reservoir and evaporator (Fig. 5.2) with Solution A.
7. Verify compressor switch is in the off position. Restart icemaker and allow
gearmotor to run for 15 minutes.
8. While waiting 15 minutes, follow steps 8a through 8c.
3
a) Remove ice compression nozzle (Fig. 6.1). Soak in Solution A.
4
Note: No compression nozzle on MFD400 series flake icemaker.
b) Descale drain pans (Fig. 6.2) by grasping firmly and gently bending
up and down. Vacuum residue out.
c) Inspect all drain lines. Clean as necessary with Solution A (Fig. 5).
9. Disconnect icemaker power.
10. Drain Solution A through float/evaporator drain line (Fig. 5.3). Rinse
evaporator by filling reservoir (Fig. 5.2) with potable water and draining
evaporator through float/evaporator drain line (Fig. 5.3) three times.
Reinsert hose into hose clip (Fig. 5.3) and insert plug into end of drain
line (Fig. 5.1).
11. Connect ice transport tubes (Fig. 6.3) directly to evaporator outlet ports
(without ice compression nozzle) (Fig 6.4).
12. Fill reservoir and evaporator (Fig. 5.2) with Solution B.
13. Rinse ice compression nozzle in clear water and submerge in cup of
Solution B while performing steps 14 through 16.
14. Turn on bin signal switch in electrical box to allow gearmotor to run.
15. Wait 10 minutes. Turn compressor switch on.
16. Keep reservoir (Fig. 5.2) full of Solution B while making ice for 20 minutes.
17. Turn compressor switch off.
18. Rinse ice compression nozzles (Fig. 6.1) with water and reinstall.
Note: No compression nozzles on MFD400 series flake icemaker.
19. Drain any remaining sanitizing solution from reservoir through float/evaporator drain line (Fig. 5.1).
20. Fill reservoir (Fig. 5.2) with 120 F (49 C) water. Empty water through float/evaporator drain line (Fig 5.3).
Repeat 3 times.
21. Turn on water to icemaker.
22. Turn compressor switch on.
23. Replace reservoir cover and any panels removed to clean icemaker.
24. Make ice for 30 minutes. Dispense and discard all ice.
25. Clean and sanitize dispenser as outlined in dispenser operation and service manual.
18
2
Service
Icemaker Operation (all models)
Follett’s icemaker consists of four distinct functional systems:
• Refrigeration system
• Water system
• Harvesting system
• Electrical control system
These four systems work together to accomplish the production and harvesting of ice. A problem in any one
of these systems will result in improper operation of the entire ice production cycle. When troubleshooting the
icemaker, it is important to analyze the entire system operation to determine which system is not functioning
properly, then pinpoint the component within that system that is malfunctioning. Determine what corrective action
must be taken before making any adjustments or replacing any components.
The icemaking process
The Follett icemaker uses a stainless steel jacketed evaporator and operates on a continuous freezing cycle. Water is
supplied to the evaporator from the water reservoir where the water level is controlled by a float valve. This valve also
shuts off the water supply when the icemaker is not running.
When the icemaker is running, a
layer of ice forms on the interior
surface of the evaporator. This ice
is continuously removed by a slowly
rotating (12 RPM) auger. The auger
carries the ice upward into the
cavity formed by the top bearing
housing and the compression
loop, where it is compressed to
remove excess water. When the
ice reaches the desired hardness
it rotates within the cavity and is
forced through a discharge port and
compression nozzle and into the ice
transport tube. The discharge tube
and compression nozzle are slightly
restricted to further compress
the ice and produce the desired
hardness. Note: MFD series flake
icemakers have no compression
nozzle. As the formation of ice
continues, ice in the transport tube
is pushed through the tube to the
storage compartment in the ice
dispenser or ice storage bin.
A solid state control board located
in the electrical box of the icemaker
controls the normal operation of the
icemaker and monitors gearmotor
torque. This control board will shut
down the icemaker should an
over-torque condition occur. It is
very important that you familiarize
yourself with the operational
sequences detailed in this manual
before attempting to service
the icemaker.
Harvest system diagram
evaporator
port
ice transport tube
compression nozzle
auger
water
inlet
19
Technical specifications (all models)
Refrigeration system diagram
high pressure
switch
high side
service port
condenser
low side
service port
filter dryer
compressor
evaporator
high
pressure
vapor
thermostatic
expansion
valve
high
pressure
liquid
low
pressure
liquid
low
pressure
vapor
Refrigeration pressure data
Water regulating valve is factory set at 225 PSIG head pressure.
Readings within 10% of above table values should be considered normal.
Air-cooled Icemaker
Refrigeration Pressure
Water-cooled Icemaker
Refrigeration Pressure
Discharge Pressure/Suction Pressure
Discharge Pressure/Suction Pressure
Ambient air temperat ur e ˚F /˚C
Condenser inlet water temperature ˚F/˚C
˚F /˚C
60/16
80/27
Icemaker inlet water temperature ˚F/˚C
Icemaker inlet water temperat ur e ˚F /˚C
Notes: 1)
2)
100/38
50/10 174/23 245/31 237/37
psi
70/21 174/23 244/30 326/38
psi
90/32 190/25 265/32 347/40
psi
˚F/˚C
50/10
70/21
90/32
50/10 236/28 235/29 250/34
psi
70/21 237/28 230/30 250/34
psi
90/32 236/28 235/30 250/34
psi
Compressor data
Compressor current draw
Air-cooled
Ambient air temp.
Water-cooled
Water temp. at float
Locked rotor amps
60 F/15.6 C
6.3A
70 F/21.1 C
6.5A
80 F/26.7 C
6.7A
90 F/32.2 C
6.9A
100 F/37.8 C
7.1A
50 F/10 C
6.6A
60 F/15.6 C
6.7A
70 F/21.1 C
6.7A
80 F/26.7 C
6.8A
90 F/32.2 C
6.9A
58.8
20
Water-cooled icemaker capacity/24 hrs.
Ambient Air Temperature ˚F/˚C
Ambient Air Temperature ˚F/˚C
F
C
50
10
60
16
70
21
80
27
90
32
60
16
510
232
482
219
454
206
424
193
394
179
70
21
454
206
435
198
417
190
385
175
354
161
80
27
397
180
389
177
380
173
347
158
313
142
90
32
335
152
329
150
323
147
297
135
270
123
Performance with new RG Group 1/2 ton coil
(Note: Data expressed in lbs/hr and kg/hr)
100
38
273
124
270
123
266
121
247
112
227
103
lbs.
kg.
lbs.
kg.
lbs.
kg.
lbs.
kg.
lbs.
kg.
Inlet Water Temperature ˚F/˚C
Inlet Water Temperature ˚F/˚C
Air-cooled icemaker capacity/24 hrs.
F
C
50
10
60
16
70
21
80
27
90
32
60
16
451
204
423
192
394
179
371
168
352
160
70
21
447
202
413
187
390
177
361
163
342
155
80
27
442
200
409
185
380
172
352
160
333
151
90
32
437
199
399
181
371
168
342
155
323
146
100
38
428
194
394
179
361
163
333
151
309
140
lbs.
kg.
lbs.
kg.
lbs.
kg.
lbs.
kg.
lbs.
kg.
Note: Nominal values – actual production may vary by ± 10%
Gearmotor data
Gearmotor current
2.25A (nominal)
Locked rotor amps
14 amps
Electrical control system operation
MCD400A/WBT, MCD400A/WHT and MFD400A/WBT wiring diagram
Follett icemakers used on top of an ice storage bin have a slightly different circuitry. A diagram for these icemakers
is shown below. The operational and diagnostic stages for these icemakers will be otherwise the same as the
following stages 1 - 10.
INPUT
POWER
W
B
WATER
SENSOR
G
GRD
X
PWR
GRD
M
BLACK
WHITE
DR
L1
L2
C
CONTROL
BOARD
L2
L2
L2
L2
BLACK
R
ORANGE
C
S
RED
M
1
S
L BLACK
BLACK
T.O.L.
COMPRESSOR
FAN
DRIVE
BLACK
BLACK
HIGH PRESSURE
SAFETY SWITCH
BLACK
24V
COMMON
LINE VAC
BLACK
60M
BIN SIGNAL
FROM DISPENSER
JUNCTION BOX
2ND
RED
COMPRESSOR
20M
WTR
B-T
B-E
RED
RED
COMPRESSOR
SWITCH
WHITE
2
BLUE
4
WHITE
BLACK
WHITE
START
YELLOW
3
RUN
T.O.L.
GEARMOTOR
21
RED
FAN
L1
WHITE
WHITE
BIN T-STAT
RESET
BLACK
Electrical control system operation
The D400A/W, MCD400A/WVS and R400A/W wiring diagrams which follow illustrate the circuitry of Follett
icemakers used with ice dispensers. Both normal operation of the icemaker (Stages 1 - 6) and non-normal
diagnostic sequences showing torque-out (Stages 7 - 10) for use in troubleshooting icemaker problems are
shown.
Follett icemakers used on top of an ice storage bin have a slightly different circuitry. The operational and
diagnostic stages for these icemakers will be otherwise the same as Stages 1 - 10 that follow.
Circuitry notes
When the icemaker is used with a dispenser it receives power from two sources – the main power supply and the
bin control signal power from the dispenser. Disconnect both power sources before performing service. When
performing electrical service, always use a meter to determine whether or not the components being serviced are
energized.
High pressure cutout opens at 425 PSI and closes at 287 PSI (auto reset).
Compressor switch should read open in on position.
Compressor start relay is position sensitive. See label on start relay for proper orientation.
Bin signal may be 120V, 60Hz; 230V, 50Hz; or 24V, 60Hz. If bin signal is 24V, 60Hz, black bin signal wire must be
moved from LINE VAC terminal to 24V terminal.
Flashing water LED at any time indicates that water signal to board had been lost for more than
one second.
Ten-second delay: There is a 10 second delay in reaction to loss of water (WTR) or bin (B-E) signals. If signals
are not lost for more than 10 seconds, no reaction will occur.
Normal operation – Stage 1
Power is supplied to L1 of the control board. The ice level control in the dispenser is closed and calling for ice,
supplying signal voltage to the control board. The control board will now go through the start-up sequence. Less
than 30 seconds will elapse as the water sensor located in the float reservoir checks for water in the reservoir.
The Bin Empty LED (B-E) will be on.
INPUT
POWER
WATER
SENSOR
GRD
G
X
PWR
RESET
GRD
B
BLACK
M
WHITE
L2
L2
R
ORANGE
S
M
1
S
L
HIGH PRESSURE
SAFETY SWITCH
WHITE
2
BLUE
GEARMOTOR
4
BLACK
WHITE
START
YELLOW
RUN
3
T.O.L.
22
WHITE
BLACK
BLACK
BLACK
60M
WTR
B-T
B-E
RED
BLACK
BLACK
RED
COMPRESSOR
FAN
DRIVE
BLACK
20M
2ND
24V
COMMON
LINE VAC
BLACK
T.O.L.
CONTROL
BOARD
RED
COMPRESSOR
C
C
L2
L2
FAN
BLACK
DR
L1
L1
L2
WHITE
W
RED
COMPRESSOR
SWITCH
WHITE
RED
BIN SIGNAL
FROM DISPENSER
BIN T-STAT
JUNCTION BOX
(MCD400A/WVS series –
blk wire is on 24V)
Normal operation – Stage 2
The water sensor verifies water in the float. The Water OK LED (WTR) comes on. At the same time, the
gearmotor, compressor, and condenser fan motor come on, lighting the Drive LED (DR) and compressor LED
(C). The compressor is started through a current style relay that is pulled in by the initial high current draw of the
compressor. The gearmotor start windings are also energized through a current relay. The B-E and WTR LED
remain on.
INPUT
POWER
WATER
SENSOR
GRD
G
X
PWR
RESET
GRD
B
BLACK
M
WHITE
L2
L2
R
ORANGE
S
M
1
S
L
4
2
WTR
B-T
B-E
RED
BLACK
WHITE
RED
BIN SIGNAL
FROM DISPENSER
BIN T-STAT
JUNCTION BOX
(MCD400A/WVS series –
blk wire is on 24V)
START
YELLOW
RUN
3
RED
COMPRESSOR
SWITCH
WHITE
BLUE
GEARMOTOR
WHITE
BLACK
BLACK
BLACK
HIGH PRESSURE
SAFETY SWITCH
WHITE
60M
BLACK
BLACK
RED
COMPRESSOR
FAN
DRIVE
BLACK
20M
2ND
24V
COMMON
LINE VAC
BLACK
T.O.L.
CONTROL
BOARD
RED
COMPRESSOR
C
C
L2
L2
FAN
BLACK
DR
L1
L1
L2
WHITE
W
T.O.L.
Normal operation – Stage 3
After the initial high current draw drops off, the gearmotor start relay contacts open dropping out the start winding.
As the compressor comes up to normal running speed, the compressor start relay contacts open, dropping out
the start winding of the compressor. The icemaker is now in a normal icemaking mode. The icemaker will produce
ice until the bin level control in the ice dispenser is satisfied. The B-E, DR, C and WTR LEDs are all on.
INPUT
POWER
WATER
SENSOR
GRD
G
X
PWR
RESET
GRD
B
BLACK
M
WHITE
L2
L2
R
ORANGE
S
M
1
S
L
HIGH PRESSURE
SAFETY SWITCH
4
WHITE
2
BLUE
GEARMOTOR
BLACK
WHITE
START
YELLOW
RUN
3
T.O.L.
23
WHITE
BLACK
BLACK
BLACK
60M
WTR
B-T
B-E
RED
BLACK
BLACK
RED
COMPRESSOR
FAN
DRIVE
BLACK
20M
2ND
24V
COMMON
LINE VAC
BLACK
T.O.L.
CONTROL
BOARD
RED
COMPRESSOR
C
C
L2
L2
FAN
BLACK
DR
L1
L1
L2
WHITE
W
RED
COMPRESSOR
SWITCH
WHITE
RED
BIN SIGNAL
FROM DISPENSER
BIN T-STAT
JUNCTION BOX
(MCD400A/WVS series –
blk wire is on 24V)
Normal operation – Stage 4
Once the ice level control opens, the B-E LED goes out. After a 10 second delay the LED (C), compressor, and
fan motor go off and the B-T LED comes on. (Should the ice level control not remain open for 10 seconds, the
icemaker will continue to run.) The gearmotor continues to run for 60 seconds. The purpose of this function is to
drive the remaining ice out of the evaporator and to boil off any refrigerant remaining in the evaporator.
INPUT
POWER
WATER
SENSOR
GRD
G
X
PWR
RESET
GRD
B
BLACK
M
WHITE
R
ORANGE
S
M
1
S
L
HIGH PRESSURE
SAFETY SWITCH
WHITE
2
BLACK
WHITE
B-T
B-E
RED
RUN
3
RED
COMPRESSOR
SWITCH
RED
BIN SIGNAL
FROM DISPENSER
BIN T-STAT
JUNCTION BOX
(MCD400A/WVS series –
blk wire is on 24V)
START
YELLOW
WTR
WHITE
BLUE
GEARMOTOR
4
WHITE
BLACK
BLACK
BLACK
60M
BLACK
BLACK
RED
COMPRESSOR
FAN
DRIVE
BLACK
20M
2ND
24V
COMMON
LINE VAC
BLACK
T.O.L.
L2
L2
RED
COMPRESSOR
C
C
CONTROL
BOARD
L2
L2
FAN
BLACK
DR
L1
L1
L2
WHITE
W
T.O.L.
Normal operation – Stage 5
The B-T LED will remain on for 20 minutes. The icemaker will not start while the B-T LED is on. To restart the
icemaker for troubleshooting purposes, depress the reset button to clear the control board.
INPUT
POWER
WATER
SENSOR
GRD
G
X
PWR
RESET
GRD
B
W
BLACK
M
WHITE
L2
L2
R
ORANGE
S
M
1
S
L
HIGH PRESSURE
SAFETY SWITCH
4
WHITE
2
BLUE
GEARMOTOR
BLACK
WHITE
START
YELLOW
RUN
3
T.O.L.
24
WHITE
BLACK
BLACK
BLACK
60M
WTR
B-T
B-E
RED
BLACK
BLACK
RED
COMPRESSOR
FAN
DRIVE
BLACK
20M
2ND
24V
COMMON
LINE VAC
BLACK
T.O.L.
CONTROL
BOARD
RED
COMPRESSOR
C
C
L2
L2
FAN
BLACK
DR
L1
L1
L2
WHITE
RED
COMPRESSOR
SWITCH
WHITE
RED
BIN SIGNAL
FROM DISPENSER
BIN T-STAT
JUNCTION BOX
(MCD400A/WVS series –
blk wire is on 24V)
Normal operation – Stage 6
When the dwell time of 20 minutes has expired, the B-T LED goes off. The icemaker will go through the normal
start-up sequence when the bin level control signals the control board for ice. The WTR LED will remain on as
long as the water sensor in the float reservoir senses water.
INPUT
POWER
WATER
SENSOR
GRD
G
X
PWR
RESET
GRD
B
W
BLACK
M
WHITE
L2
L2
R
ORANGE
S
M
1
S
L
HIGH PRESSURE
SAFETY SWITCH
2
4
WHITE
BLACK
WHITE
B-T
B-E
RED
RUN
3
RED
COMPRESSOR
SWITCH
RED
BIN SIGNAL
FROM DISPENSER
BIN T-STAT
JUNCTION BOX
(MCD400A/WVS series –
blk wire is on 24V)
START
YELLOW
WTR
WHITE
BLUE
GEARMOTOR
WHITE
BLACK
BLACK
BLACK
60M
BLACK
BLACK
RED
COMPRESSOR
FAN
DRIVE
BLACK
20M
2ND
24V
COMMON
LINE VAC
BLACK
T.O.L.
CONTROL
BOARD
RED
COMPRESSOR
C
C
L2
L2
FAN
BLACK
DR
L1
L1
L2
WHITE
T.O.L.
Diagnostic sequence – Stage 7
The 20 minute error LED (20M) is on indicating that the control board has sensed an over-torque condition (above
3 AMPS on the gearmotor) and shut the icemaker down. The 20M LED will remain on for 20 minutes after an
over-torque condition has occurred. The icemaker will remain off as long as the 20M LED is on. When the 20M
LED goes off, the control board will try to go through a normal start-up sequence. The WTR LED remains on as
long as the water sensor in the float reservoir senses water.
INPUT
POWER
WATER
SENSOR
GRD
G
X
PWR
RESET
GRD
B
BLACK
M
WHITE
L2
L2
R
ORANGE
S
M
1
S
L
HIGH PRESSURE
SAFETY SWITCH
4
WHITE
2
BLUE
GEARMOTOR
BLACK
WHITE
START
YELLOW
RUN
3
T.O.L.
25
WHITE
BLACK
BLACK
BLACK
60M
WTR
B-T
B-E
RED
BLACK
BLACK
RED
COMPRESSOR
FAN
DRIVE
BLACK
20M
2ND
24V
COMMON
LINE VAC
BLACK
T.O.L.
CONTROL
BOARD
RED
COMPRESSOR
C
C
L2
L2
FAN
BLACK
DR
L1
L1
L2
WHITE
W
RED
COMPRESSOR
SWITCH
WHITE
RED
BIN SIGNAL
FROM DISPENSER
BIN T-STAT
JUNCTION BOX
(MCD400A/WVS series –
blk wire is on 24V)
Diagnostic sequence – Stage 8
If the restart is successful the 20M LED goes off, the 60 minute timer LED (60M) comes on. The 60M LED will
remain on for 60 minutes from restart. A lighted 60M LED tells the technician that the icemaker has experienced
an over-torque condition. If the icemaker runs without problems for 60 minutes and no additional torque errors
occur, the 60M LED will go off and the icemaker will continue normal operation.
INPUT
POWER
WATER
SENSOR
GRD
G
X
PWR
RESET
GRD
B
BLACK
M
WHITE
R
ORANGE
S
M
1
S
L
HIGH PRESSURE
SAFETY SWITCH
WHITE
BLACK
WHITE
B-T
B-E
RED
RUN
3
RED
COMPRESSOR
SWITCH
RED
BIN SIGNAL
FROM DISPENSER
BIN T-STAT
JUNCTION BOX
(MCD400A/WVS series –
blk wire is on 24V)
START
YELLOW
WTR
WHITE
BLUE
GEARMOTOR
2
4
WHITE
BLACK
BLACK
BLACK
60M
BLACK
BLACK
RED
COMPRESSOR
FAN
DRIVE
BLACK
20M
2ND
24V
COMMON
LINE VAC
BLACK
T.O.L.
L2
L2
RED
COMPRESSOR
C
C
CONTROL
BOARD
L2
L2
FAN
BLACK
DR
L1
L1
L2
WHITE
W
T.O.L.
Diagnostic sequence – Stage 9
The second error (2ND) LED will come on if an over-torque condition occurs while the 60M LED is still lighted.
The 2ND LED will indicate to the technician that two consecutive over-torque situations have occurred. The
icemaker will shut down at this time and lock out. It will not restart unless the manual reset button is depressed.
INPUT
POWER
WATER
SENSOR
GRD
G
X
PWR
RESET
GRD
B
W
BLACK
M
WHITE
L2
L2
R
ORANGE
S
M
1
S
L
HIGH PRESSURE
SAFETY SWITCH
4
WHITE
2
BLUE
GEARMOTOR
BLACK
WHITE
START
YELLOW
RUN
3
T.O.L.
26
WHITE
BLACK
BLACK
BLACK
60M
WTR
B-T
B-E
RED
BLACK
BLACK
RED
COMPRESSOR
FAN
DRIVE
BLACK
20M
2ND
24V
COMMON
LINE VAC
BLACK
T.O.L.
CONTROL
BOARD
RED
COMPRESSOR
C
C
L2
L2
FAN
BLACK
DR
L1
L1
L2
WHITE
RED
COMPRESSOR
SWITCH
WHITE
RED
BIN SIGNAL
FROM DISPENSER
BIN T-STAT
JUNCTION BOX
(MCD400A/WVS series –
blk wire is on 24V)
Diagnostic sequence – Stage 10
If the water level in the float reservoir drops to an unacceptable level, the WTR LED will go out, shutting the
icemaker off. Also, the BT LED will come on, preventing the icemaker from restarting for twenty minutes. If water
is restored, the WTR LED will come back on and flash to alert the technician that water to icemaker has been
lost. The icemaker will then restart at the end of the 20 minute time delay. The flashing WTR LED can be cleared
by pressing the reset button.
INPUT
POWER
WATER
SENSOR
GRD
G
X
PWR
RESET
GRD
B
W
BLACK
M
WHITE
L2
L2
R
ORANGE
S
M
1
S
L
HIGH PRESSURE
SAFETY SWITCH
4
WHITE
2
BLUE
GEARMOTOR
BLACK
WHITE
START
YELLOW
RUN
3
T.O.L.
27
WHITE
BLACK
BLACK
BLACK
60M
WTR
B-T
B-E
RED
BLACK
BLACK
RED
COMPRESSOR
FAN
DRIVE
BLACK
20M
2ND
24V
COMMON
LINE VAC
BLACK
T.O.L.
CONTROL
BOARD
RED
COMPRESSOR
C
C
L2
L2
FAN
BLACK
DR
L1
L1
L2
WHITE
RED
COMPRESSOR
SWITCH
WHITE
RED
BIN SIGNAL
FROM DISPENSER
BIN T-STAT
JUNCTION BOX
(MCD400A/WVS series –
blk wire is on 24V)
Refrigeration system (all models)
All service on refrigeration systems must be performed in accordance with all federal, state and local laws. It is
the responsibility of the technician to ensure that these requirements are met. Recharging icemaker to other than
factory specifications will void the warranty.
R404A icemaker charge specifications
Model
Charge
Refrigerant type
T400A, MCD400A, MFD400A, R400A, D400A (air-cooled)
19oz (539g)
R404A
T400W, MCD400W, MFD400W, R400W , D400W (water-cooled)
9oz (255g) R404A
Refrigerant replacement requirements
1. Non-contaminated refrigerant removed from any Follett refrigeration system can be recycled and returned to
the same system after completing repairs. Recycled refrigerant must be stored in a clean, approved storage
container. If additional refrigerant is required, virgin or reclaimed refrigerant that meets ARI standard 700-88
must be used.
2. In the event of system contamination (for example, a compressor burn out, refrigerant leak, presence of noncondensibles or moisture), the system must be repaired, evacuated and recharged using virgin or reclaimed
refrigerant that meets ARI standard 700-88.
3. Follett Corporation does not approve of recovered refrigerants. Improper refrigeration servicing procedures
will void the factory warranty.
Evacuation
Evacuate the system to a level of 500 microns. When the 500 micron level is reached, close valves and both
manifold and shut down the vacuum pump. Allow the system to sit for approximately 20 minutes. During this period
the system pressure should not rise. If the system pressure rises and stabilizes there is moisture in the system
and further evacuation is needed. If the pressure continues to rise check the system for leaks.
Ambients
Air temperature1
Water temperature2
Minimum
50 F/10 C
40 F/4.4 C
Maximum
100 F/37.8 C
90 F/32.2 C
1Ambient air temperature is measured at the air-cooled condenser coil inlet.
2Ambient water temperature is measured in the icemaker float reservoir.
Ice capacity test
Icemaker production capacity can only be determined by weighing ice produced in a specific time period.
1.
2.
3.
4.
5.
6.
7.
8.
Replace all panels on icemaker.
Run icemaker for at least 15 minutes.
Weigh and record weight of container used to catch ice.
Catch ice for 15 or 20 minutes.
Weigh harvested ice and record total weight.
Subtract weight of container from total weight.
Convert fractions of pounds to decimal equivalents (ex. 6 lbs 8oz = 6.5 lbs).
Calculate production using following formula:
1440 min. x wt. of ice produced
=
Production capacity/24 hr. period
Total test time in minutes
9. Calculated amount per 24 hours should be checked against rated capacity for same ambient and water
temperatures in Ice Production Tables.
28
Service procedures
Fig. 7
Evaporator disassembly (Fig. 7)
1.
2.
3.
4.
5.
6.
7.
8.
9.
10.
11.
12.
13.
14.
15.
Disconnect power to icemaker.
Shut off water to icemaker.
Drain evaporator and float tank.
Disconnect plastic tubing from evaporator water inlet, drain pan
stub, compression nozzle tubing and reservoir overflow tubing from
secured clip.
Disconnect ice transport tube from compression nozzle.
Note: No compression nozzle on MFD400 series flake icemakers.
Loosen nut and remove upper vee band coupling from top of
evaporator.
Lift top bearing assembly straight up with a slight rotating motion and
remove.
Remove ice compression loop located at top of auger.
Lift auger straight up and out of evaporator.
Remove nut and lower vee band coupling from bottom of evaporator.
Lift evaporator to clear bottom bearing assembly.
Loosen hex head bolt in side of mounting base with 5/16 wrench and
lift lower bearing assembly.
Remove condensate shield.
Remove 4 Allen head machine screws holding mounting base to
gearbox.
If replacing evaporator, remove compression nozzle from evaporator
port.
Evaporator reassembly (Fig. 7)
1.
2.
3.
4.
5.
6.
7.
8.
9.
10.
11.
12.
13.
14.
Clean gearmotor boss, output shaft and shaft well.
Install drain pan and evaporator mounting base.
Fill gearmotor shaft well with food-grade grease (Fig. 8).
Install condensate shield and seat against gearmotor boss.
Install mounting base O ring in groove in evaporator mounting base.
Lower bottom bearing assembly into evaporator mounting base.
While maintaining a downward pressure on bottom bearing assembly,
tighten hex head bolt with a 5/16 wrench.
Position evaporator over lower bearing assembly and align grooves
with pins in bearing assembly.
Install vee band clamp and nut and tighten to 70 in/lb.
Place auger in center of evaporator and rotate to mate with drive pin.
Install ice compression loop, orienting loop as shown in Fig. 7.
Note: No compression nozzle on MFD400 series flake icemakers.
Install upper bearing and seal assembly, rotating bearing to slip pin.
into auger slot.
Install upper vee band clamp and nut and tighten to 70 in/lb.
If evaporator was replaced, reinstall compression nozzle.
Gearmotor replacement (Fig. 8)
1. Disassemble evaporator as described above.
2. Disconnect the wire connectors.
3. Remove 4 screws holding gearmotor mounting plate to base of
icemaker and lift gearbox and motor clear of icemaker (Fig. 8.1).
4. Remove machine screws holding mounting plate to motor (Fig. 8.2).
5. Install new motor in reverse order.
29
Fig. 8
apply
grease
here
1
2
Troubleshooting chart
Flashing water LED at any time indicates that water signal to board had been lost for more than one second.
Ten-second delay: There is a 10 second delay in reaction to loss of water (WTR) or bin (B-E) signals. If signals are not lost
for more than 10 seconds, no reaction will occur.
Problem
1. Icemaker will
not run.
System status:
compressor,
gearmotor, and fan
motor inoperative.
2. Compressor will
not run.
System status:
gearmotor and fan
motor run.
3. Unit cycles
intermittently.
Indicators/possible cause
Corrective action
1. No power to unit.
2. Open bin level control.
3. Water OK LED (WTR) not on.
4. 20M or 2ND LED is on indicating that first
or second torque error has occurred.
5. Gearmotor locked up (immediate torque
error indicated by LEDs when board is
reset).
6. Open coil on gearmotor start relay
causing an immediate torque error.
1. Check that unit is plugged in, circuit
breakers are on.
2. Adjust or replace ice level control.
3. Check reservoir for water, restore
water to unit.
4. See Problem #6.
5. Repair or replace gear motor.
6. Replace gearmotor start relay.
1. Condenser coil plugged causing open
overload or high pressure cut-out.
2. Defective starting capacitor.
3. Defective starting relay.
4. Open motor winding.
5. No power output from compressor output
terminal on control board.
1. Clean condenser coil and replace
overload if necessary.
2. Replace start capacitor.
3. Replace relay.
4. Check winding resistance and
replace compressor if necessary.
5. Check terminal connection and
replace control board if necessary.
1. Float reservoir running dry, sensing probe
signalling for system to shut down.
1. Check water supply to float and float
operation. PC board will have flashing
WTR LED.
1. Dirty condenser coil.
2. Restricted air flow to condenser coil.
3. Mineral coated evaporator.
4. High ambient water supply and/or air
temperature.
5. Improper exhaust air provisions.
6. Faulty expansion valve.
7. Low refrigerant charge.
8. Superheat incorrect.
9. Inefficient compressor.
1.
2.
3.
4.
System status:
compressor, gear
motor, and fan
motor cycle.
4. Low ice production.
Poor quality ice.
5.
6.
7.
8.
9.
5. Water leaks
from bottom of
evaporator.
1. O ring seal broken.
Clean condenser.
Remove obstruction.
Clean evaporator.
Precool water and/or install air duct
per Follett installation manual.
Provide proper exhaust air provisions
per Follett installation manual.
Replace expansion valve.
Check for leaks; repair, evacuate, and
weigh in correct charge.
Check that TEV sensing bulb is
securely clamped in place and not
damaged; check that insulated bulb
cover is in place. Replace TEV if
necessary.
Replace compressor.
1. Replace O ring.
30
Troubleshooting
Problem
6. Icemaker runs
for short period
of time and shuts
down on torque
error.
System status:
20M or 2nd LED
are lit.
7. Evaporator is iced
up on the outside.
No ice production.
Indicators/possible cause
1. Kink in ice transport tube.
2. Bin level control remains in closed
position.
3. Ice transport tube ruptured internally.
4. Worn evaporator bearings.
5. Faulty gearmotor start relay. Icemaker
torques out within 5 seconds of start-up.
6. Torque-out occurs when storage bin fills
to capacity.
1. Eliminate kink and check that tube
routing complies with Follett icemaker
installation manual.
2. Adjust or replace control.
3. Replace complete run of ice transport
tube.
4. Inspect bearings for roughness or
binding and replace if necessary.
5. Replace gearmotor start relay.
6. Ensure that ice contacts bin
thermostat before backing ice up in
transport tube. Reference dispenser
manual for proper thermostat and ice
tube mounting.
1. Gearmotor running but no output rotation.
2. Float reservoir empty.
3. Air bubble in water supply line. Water in
reservoir but not in evaporator.
1. Check for broken gearmotor output
shaft or damaged gearbox.
2. Check for defective water sensor
(water OK (WTR) LED remains on
even when float empty or probe
removed from water).
3. Purge air from line.
System status:
compressor,
gearmotor and fan
motor running.
8. Compressor cycles
intermittently.
System status:
gearmotor and fan
motor run.
Corrective action
1. Compressor start relay in wrong position.
1. Position relay with arrow or word “top”
2. High pressure cutout open due to high
facing up.
head pressure.
2a. Check supply and temperature of
3. Clogged or dirty condenser coil.
water to w/c condenser.
4. Improper ventilation.
2b. Check discharge pressure and adjust
5. Defective compressor.
water regulator value.
3. Clean condenser coil.
4. Provide inlet and exhaust air
provisions per Follett icemaker
installation manual.
5. Replace compressor.
1. Clogged or dirty condenser coil.
2. Compressor not pumping.
3. Low refrigerant charge.
1. Clean condenser coil.
2. Replace compressor.
3. Check for leaks; repair, evacuate, and
weigh in correct charge.
10. Compressor and
fan motor will not
run. Gearmotor
runs.
1. Compressor switch in OFF position.
2. No output on compressor and fan motor
terminals on control board.
3. Failed fan motor causes high pressure
cut-out to open.
1. Turn compressor switch on.
2. Replace control board.
3. Replace fan motor.
11. Intermittent noises
from evaporator.
1. Mineral build-up on evaporator surface.
1. Clean evaporator with liquid IM
cleaner.
9. Unit runs but not
making ice.
System status:
compressor,
gearmotor and fan
motor running.
31
Replacement parts
Order parts online
www.follettice.com
Evaporator
Part #
502735
502736
502110
502737
502725
500496
502738
501063
500744
501080
502733
502227
502730
502729
502220
502221
502727
502226
500680
501111
502739
502740
502742
502744
502743
502775
Description
Coupling, vee band, includes nut
Bearing assembly, top
Loop, ice compression, beveled
(all icemakers except MFD400 series –see flaker-specific components below)
Auger
(all icemakers except MFD400A/W – see flaker specific components below)
Evaporator (includes insulation jacket, 502740)
O ring, bearing housing
Bearing assembly, bottom (includes O rings and condensate shield)
O ring, mounting base
Shield, condensate
Screw, Allen 1/4 20 x 1/2 (set of 4)
Mounting base, evap. (includes 501063)
Bolt, mounting base
Gearbox & motor assembly
Mounting base, gearbox
Compression nozzle, with double drain (no nozzle in MFD400 series)
Compression nozzle, with single drain (no nozzle in MFD400 series)
Drain pan, evaporator
Clamp, compression nozzle and screw
Tubing, compression nozzle drain(s) (sold by foot)
Grease, Chevron SRI-2, 14oz
Bracket, drain hose
Insulation jacket, evaporator
Relay, start, gearmotor
Drip cover, gearmotor
Evaporator & gearmotor assembly
Oil, gearmotor (1 pint)
Reference #
1
2
3
4
5
6
7
8
9
10
11
12
13
Not shown
14
15
16
17
18
Not shown
19
20
21
22
Not shown
Not shown
Flaker-specific components
Part #
00124123
00124115
Description
Auger (with paddle)
Loop, compression, notched
Reference #
3
4
32
Order parts online
www.follettice.com
Evaporator
2
15
1
3
17
18
4
14
5
18
20
1
19
7
8
6
10
11
12
22
16
9
21
13
33
Order parts online
www.follettice.com
Air-cooled icemakers
7
9
6
8
1
11
16
10
13
14
4
2
15
12
17
3
5
34
Order parts online
www.follettice.com
Air-cooled icemakers
Part #
502724
501187
502116
501986
500504
00141440
502079
502078
502220
502221
502726
502727
502732
501966
502729
502730
501191
500474
500672
501188
502782
502731
502728
500376
502920
501820
502734
502924
502925
00109728
502830
502698
Description
Drier
Condenser coil, A/C
Water sensor
Reservoir mounting bracket
Float valve & reservoir
Drain kit, evaporator
Evaporator (see page 32 and 33 for complete breakdown)
Tubing, polypropylene, reservoir supply (sold by foot)
Fitting, plastic, float valve (includes sleeve & stem)
Compression nozzle, with double drain
Compression nozzle, with single drain
Valve, expansion, thermal
Drain pan, evaporator
High pressure cutout
Tubing, evaporator drain, 3/4" (19mm) ID x 1" (26mm) OD
(sold by the foot)
Mounting bracket, gearbox
Gearbox & motor assembly, 115V, 60Hz
Tubing, plastic, food grade, 1/2" (13mm) ID (sold by foot)
Fan blade
Motor, fan, 115V, 60Hz
Bracket, fan motor
Overload, compressor, 115V, 60Hz
Compressor, 115V, 60Hz
Base – L400A
Strainer, water, threaded connections
Strainer, push-in connections
Shroud, condenser coil
Water inlet & drain assembly, brass
Water inlet fitting, plastic
Water inlet elbow, plastic
Drain fitting, plastic
Jacket, insulation, TXV
Bracket, ice tube entry
35
Reference #
1
2
Not shown
3
4
5
6
Not shown
Not shown
Not shown
Not shown
7
8
9
Not shown
10
11
12
13
14
15
Not shown
16
17
Not shown
Not shown
Not shown
Not shown
Not shown
Not shown
Not shown
Not shown
Not shown
Order parts online
www.follettice.com
Water-cooled icemakers before serial number C57245
18
7
16
5
1
15
9
8
10
14
3
12
13
11
17
20
4
6
2
19
36
Water-cooled icemakers before serial number C57245
Part #
502724
500537
501810
502116
500504
501986
502079
502078
502220
502221
00141440
502954
502726
502727
501966
502730
502729
501191
500672
501188
500790
502782
502731
00111898
502741
500376
502920
502734
502924
502925
00109728
502348
502732
502830
00143941
502698
Description
Drier
Valve, water regulating (includes 501810)
Iso-washer (for water regulating valve)
Water sensor
Float valve & reservoir
Reservoir mounting bracket
Tubing, polypropylene, reservoir supply (sold by foot)
Fitting, plastic, float valve (includes sleeve & stem)
Compression nozzle, with double drain
Compression nozzle, with single drain
Evaporator (see page 32 and 33 for complete breakdown)
Drain kit, evaporator
Drain kit, evaporator, water-cooled freestanding units
Valve, expansion, thermal
Drain pan, evaporator
Tubing, evaporator drain, 3/4" (19mm) ID x 1" (26mm) OD (sold by foot)
Gearbox & motor assembly, 115V, 60Hz
Mounting bracket, gearbox
Tubing, plastic, food grade, 1/2" (13mm) ID (sold by foot)
Motor, fan, 115V, 60Hz
Bracket, fan motor
Fan blade
Overload compressor, 115V, 60Hz
Compressor, 115V, 60Hz
Coil, condenser
Base, L400W
Strainer, water, threaded connections
Strainer, push-in connections
Water inlet and drain assembly, brass
Water inlet fitting, plastic
Water inlet elbow, plastic
Drain fitting, plastic
Assembly, drain, single fitting
High pressure cutout
Jacket, insulation, TXV
Fitting, condenser drain
Bracket, ice tube entry
37
Order parts online
www.follettice.com
Reference #
1
2
Not shown
Not shown
3
4
Not shown
Not shown
Not shown
Not shown
5
6
6
7
8
Not shown
9
10
11
12
13
14
Not shown
15
16
17
Not shown
Not shown
Not shown
Not shown
Not shown
Not shown
Not shown
18
Not shown
19
20
Order parts online
www.follettice.com
Water-cooled icemakers after serial number C57244
15
7
13
5
16
12
1
16
9
8
10
3
11
14
4
6
2
17
38
Water-cooled icemakers after serial number C57244
Part #
502724
500537
501810
502116
500504
501986
502079
502078
502220
502221
00141440
502954
502726
502727
501966
502730
502729
501191
502782
502731
00117234
502741
500376
502920
502734
502924
502925
00109728
502348
502732
502830
204584
00143941
502698
Description
Drier
Valve, water regulating (includes 501810)
Iso-washer (for water regulating valve)
Water sensor
Float valve & reservoir
Reservoir mounting bracket
Tubing, polypropylene, reservoir supply (sold by foot)
Fitting, plastic, float valve (includes sleeve & stem)
Compression nozzle, with double drain
Compression nozzle, with single drain
Evaporator (see page 32 and 33 for complete breakdown)
Drain kit, evaporator
Drain kit, evaporator, water-cooled freestanding units
Valve, expansion, thermal
Drain pan, evaporator
Tubing, evaporator drain, 3/4" (19mm) ID x 1" (26mm) OD (sold by foot)
Gearbox & motor assembly, 115V, 60Hz
Mounting bracket, gearbox
Tubing, plastic, food grade, 1/2" (13mm) ID (sold by foot)
Overload compressor, 115V, 60Hz
Compressor, 115V, 60Hz
Coil, condenser
Base, L400W
Strainer, water, threaded connections
Strainer, push-in connections
Water inlet and drain assembly, brass
Water inlet fitting, plastic
Water inlet elbow, plastic
Drain fitting, plastic
Assembly, drain, single fitting
High pressure cutout
Jacket, insulation, TXV
Ty-rap (2 required)
Fitting, condenser drain
Bracket, ice tube entry
39
Order parts online
www.follettice.com
Reference #
1
2
Not shown
Not shown
3
4
Not shown
Not shown
Not shown
Not shown
5
6
6
7
8
Not shown
9
10
11
Not shown
12
13
14
Not shown
Not shown
Not shown
Not shown
Not shown
Not shown
Not shown
15
Not shown
16
17
Not shown
Order parts online
www.follettice.com
Electrical components
1
2
3
4
POWER
EARTH
L1
L1
RESET
I.D.
LABEL
L2
L2
L2
L2
L2
WATER
PROBE
DR
C
20M
60M
2ND
WTR
B-T
B-E
SOFTWARE
I.D.
COMP.
SWITCH
LINE
VAC
FAN
DRIVE
COMM.
24
VAC
COMP.
5
Part #
502780
501588
502331
502116
502392
500514
501959
Description
Capacitor, start, compressor, 115V, 60Hz
Relay start, compressor, 115V, 60Hz
Board, control circuit, 115V, 60Hz
Water sensor
Switch, on/off, compressor
Bin thermostat (MCD400A/WBT, MCD400A/WHT, MFD400A/WBT
and MFD400A/WHT only)
Board, stand off control (4 required)
40
Reference #
1
2
3
Not shown
4
Not shown
5
Order parts online
www.follettice.com
Water filter kits and cartridges
00130229
Follett QC4-FL4S water filter system (includes FL4S primary cartridge and head, coarse
pre-filter and head, pressure gauge, flushing valve; assembled and installed on mounting
bracket)
00130245
Follett FL4S primary replacement cartridge
00130211
Everpure coarse pre-filter cartridge
Ice machine cleaner
00132001
SafeCLEAN environmentally-friendly cleaner, carton of 24 x 7 oz packets
Miscellaneous
501860
501781
502775
501111
500377
501921
502783
502781
501425
501986
501759
501858
501786
501702
502051
502052
502333
502334
502235
502336
502794
502795
502796
502797
502798
502799
502800
502801
502802
502803
502874
502875
00918045
Condensate pump
Regulator, water pressure (25 psi)
Oil, gearmotor, 1 pint
Grease, Chevron, SRI-2, 14 oz tube
Clamp, ice tube
Grommet, ice tube
Duct – 2" (51mm)
Gasket, air duct
Grille
Bracket, float mounting
Cord and plug (female), dispenser bin signal (F1105A/W)
Cord and plug (female), dispenser power (all 25, 50, 110 series dispensers)
Cord and plug (female), dispenser bin signal (all 25 and 50 series top mount and
freestanding dispensers)
Control board adapter (R404A to R12)
Cord and twist-lock plug (male), icemaker bin signal
Cord and twist-lock plug (male), icemaker power
Plug, twist-lock, two lead, male
Plug, twist-lock, two lead, female
Plug, twist-lock, three lead, male
Plug, twist-lock, three lead, female
Panel, right hand, louvered, R400A, MCD400A/W
Cover, top, R400A/W, MCD400A/W
Panel, front utility, R400A, MCD400A
Panel, top front, R400A,MCD400A
Panel, left hand & rear, R400A/W, MCD400A/W
Panel, front, R400W, MCD400W
Filler, base, R400A/W, MCD400A/W
Condenser, L400W
Power cord, R400, MCD400
Bin signal cord, R400, MCD400
Grille, condenser, T400A and MCD400AHT
Filter, air, T400A and MCD400AHT
Assembly, front cover
41
Order parts online
www.follettice.com
Replacement icemaker ordering matrix
Dispenser models
Dispensers with top mounted icemakers
50CT400A & 50HT400A
50HT400W & 50HT400W
25CT 400A & 25HT400A
25CT400W & 25HT400W
110CT400A
110CT400W
Replacement
icemaker model
D400A
D400W
D400A
D400W
D400A
D400W
Dispensers with remote icemakers
25CR400A & 25HR400A
25CR400W & 25HR400W
50CR400A & 50HR400A
50CR400W & 50HR400W
110CR400A
110CR400W
All U150/VU155 series with air-cooled icemakers
All U150/VU155 series with water-cooled icemakers
All VU300 series with air-cooled icemakers
All VU300 series with water-cooled icemakers
Dispenser models
R400A
R400W
R400A
R400W
R400A
R400W
MCD400A
MCD400W
MCD400A
MCD400W
Replacement
icemaker model
Freestanding dispensers with icemakers in the base
25FB400A
25FB400W
50FB400A
50FB400W
110FB400A
110FB400W
D400A
D400W
D400A
D400W
D400A
D400W
Nugget icemaker on top of bin
MCD400ABT
MCD400WBT
MCD400ABT
MCD400WBT
Flake icemaker on top of bin
MFD400ABT
MFD400WBT
MFD400ABT
MFD400WBT
42
43
Harmony, SafeCLEAN, Satellite-fill, Symphony and Vision are trademarks of Follett Corporation.
801 Church Lane • Easton, PA 18040, USA
44
Toll free (800) 523-9361 • (610) 252-7301
Fax (610) 250-0696 • www.follettice.com
208600R16
03/09