1
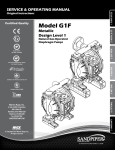
24.90 632.56 11.63 295.28 5.82 147.95 SERVICE & OPERATING MANUAL 4.87 123.70 DISCHARGE PORT Certified Quality Model G20 Metallic Design Level 1 2.25 57.15 5.00 127 10.00 254 25.04 2: INSTAL & OP PT SUCTION PORT Natural Gas-Operated Diaphragm Pumps 3: EXP VIEW 635.97 4: Gas END Quality System ISO9001 Certified .67 17.07 Environmental Management System 2.00 10.00 ISO14001 Certified 50.80 5: WET END 254 9 89 6: OPTIONAL 16.00 406.40 Warren Rupp, Inc. A Unit of IDEX Corporation 800 N. Main St., Mansfield, Ohio 44902 USA Telephone 419.524.8388 Fax 419.522.7867 www.sandpiperpump.com 7: WARRANTY 4.99 26.69 1: PUMP SPECS Original Instructions 2" RF 150# ANSI FLANGE © Copyright 2013 Warren Rupp, Inc. All rights reserved www.sandpiperpump.com Safety Information IMPORTANT WARNING Read the safety warnings and instructions in this manual before pump installation and start-up. Failure to comply with the recommendations stated in this manual could damage the pump and void factory warranty. When the pump is used for materials that tend to settle out or solidify, the pump should be flushed after each use to prevent damage. In freezing temperatures the pump should be completely drained between uses. When used for toxic or aggressive fluids, the pump should always be flushed clean prior to disassembly. Before maintenance or repair, shut off the compressed gas line, bleed the pressure, and disconnect the gas line from the pump. Be certain that approved eye protection and protective clothing are worn at all times. Failure to follow these recommendations may result in serious injury or death. Gasborne particles and loud noise hazards. Wear eye and ear protection. CAUTION Before pump operation, inspect all fasteners for loosening caused by gasket creep. Retighten loose fasteners to prevent leakage. Follow recommended torques stated in this manual. Nonmetallic pumps and plastic components are not UV stabilized. Ultraviolet radiation can damage these parts and negatively affect material properties. Do not expose to UV light for extended periods of time. In the event of diaphragm rupture, pumped material may enter the gas end of the pump, and be discharged into the atmosphere. If pumping a product that is hazardous or toxic, the gas exhaust must be piped to an appropriate area for safe containment. Take action to prevent static sparking. Fire or explosion can result, especially when handling flammable liquids. The pump, piping, valves, containers and other miscellaneous equipment must be properly grounded. This pump is pressurized internally with gas pressure during operation. Make certain that all fasteners are in good condition and are reinstalled properly during reassembly. Grounding the Pump To be fully groundable, the pumps must be ATEX Compliant. Refer to the nomenclature page for ordering information. Optional 8 foot long (244 centimeters) Ground Strap is available for easy ground connection. To reduce the risk of static electrical sparking, this pump must be grounded. Check the local electrical code for detailed grounding instruction and the type of equipment required. Refer to nomenclature page for ordering information. WARNING Take action to prevent static sparking. Fire or explosion can result, especially when handling flammable liquids. The pump, piping, valves, containers or other miscellaneous equipment must be grounded. www . sandpiperpump . com g20mdl1sm-rev0213 SECTION 4: Gas End......................................11 • Aluminum Gas Valve Assembly • Stainless Steel Gas Valve Assembly • Pilot Valve Assembly • Intermediate Assembly SECTION 5: Wet end......................................13 • Diaphragm Drawings • Diaphragm Servicing 2: INSTAL & OP 3: EXP VIEW 7: WARRANTY SECTION 7: Warranty & Certificates.....15 • Warranty • CE Declaration of Conformity - Machinery • ATEX Declaration of Conformity • ATEX Summary of Markings 4: AIR END SECTION 3: Exploded View............................8 • Composite Repair Parts Drawing • Composite Repair Parts List • Material Codes 5: WET END SECTION 2: Installation & Operation.......5 • Principle of Pump Operation • Recommended Installation Guide • Troubleshooting Guide 6: OPTIONAL SECTION 1: Pump Specifications.................1 • Explanation of Nomenclature • Performance • Materials • Dimensional Drawings 1: PUMP SPECS Table of Contents www . sandpiperpump . com g20mdl1sm-rev0213 1: PUMP SPECS Explanation of Pump Nomenclature Your Model G #: __ ____ __________________ ____ (fill in from pump nameplate) PumpPumpCheckDesignWettedDiaphragm/ Check Valve Non-WettedPortingPump Brand Size Valve Level Material Check Valve Seat Material Options Style Model #: GXXXXXXXXXXXXX Pump Brand G Gas Operated Pump Size 202" Check Valve Type BBall Design Level 1 MufflerPump Options Options Design Level Wetted Material S Stainless Steel AAluminum Diaphragm/Check Valve Materials BNitrile/Nitrile T PTFE -Nitrile/PTFE 5Nitrile/PTFE Check Valve Seat BNitrile TPTFE AAluminum S Stainless Steel Non-Wetted Material Options A B D X 0 V S T 7 8 9 Painted Aluminum Unpainted Aluminum with Stainless Steel Gas Valve Unpainted Aluminum with Stainless Steel Gas Valve with FKM O-rings Unpainted Aluminum Unpainted Aluminum/FKM Elastomers Unpainted Aluminum/FKM Elastomers Stainless Steel/ S02/304 SS Hardware Stainless Steel/ 316 Stainless Hardware Painted Stainless Steel Stainless Steel/FKM Elastomers Painted Stainless Steel/FKM Elastomers Porting Options N B R W NPT Threads BSP (Tapered) Threads 150# Raised Face 2" ANSI Flange w/ Threaded Pipe Connections 150# Welded Raised Face 2" ANSI Flanged Manifolds Pump Style SStandard Muffler Options X No Muffler Permitted * Your Serial #: (fill in from pump nameplate)______________________________________ ATEX Detail II 1G c T5 (1) G c T5 T5 IIII t2GD (2) G c T5 IIII 3/2 2GD T5 II 1D c T100°C † I M1 c I M2 c Models equipped with Wetted Option S Non-Wetted Options S, T, 7, 8, or 9, Pump Option X. Note: See ATEX Explanation of EC-Type Certificate II 2G c T5 II 2D c T100°C † Models equipped with Wetted Options A or S, All Non-Wetted Options, Pump Option X. Note: See ATEX Explanation of Type Examination Certificate 1 • Model G20 Metallic www . sandpiperpump . com g20mdl1sm-rev0213 Performance G20 Metallic MODEL G20 Metallic Performance Curve 20 (34) Solids-Handling • Up to .25 in. (6mm) 4 Heads Up To • 100 psi or 231 ft. of water (7 bar or 70 meters) 3 Maximum Operating Pressure • 100 psi (7 bar) Displacement/Stroke • .42 Gallon / 1.59 liter 1 60 Ba SI (4 Ba Bar) I (2.7 20 100 (170) 2 Bar 20 PS ) I (1.3 10 80 (136) r) .08 40 PS 30 60 (102) r) .44 60 P 40 0 .8 SI (5 70 0 40 (68) I (6 80 P 50 2 SHIPPING WEIGHT • Aluminum 69 lbs. (31kg) • Stainless Steel 114 lbs. (52kg) 80 PS NPSHR 5 HEAD Gas Distribution Valve • No-lube, no-stall design 90 0 6 Bar ) Gas In 20 0 let Pre 40 100 ssure 60 80 100 U.S. Gallons per minute 200 300 Liters per minute 400 120 140 500 METERS 6 100 FEET 7 100 Capacity • 0 to 150 gallons per minute (0 to 567 liters per minute) 1: PUMP SPECS Performance based on the following: elastomer fitted pump, flooded suction, water at ambient conditions. The use of other materials and varying hydraulic conditions may result in deviations in excess of 5%. PSI BAR Suction/Discharge Port Size • 2" 30 25 20 15 10 5 9.1 7.6 6 4.5 3 1.5 160 600 CAPACITY Materials Material Profile: CAUTION! Operating temperature limitations are as follows: Operating Temperatures: Max. Min. FKM: (Fluorocarbon) Shows good resistance to a wide range of oils and solvents; especially all aliphatic, aromatic and halogenated hydrocarbons, acids, animal and vegetable oils. Hot water or hot aqueous solutions (over 70°F(21°C)) will attack FKM. 350°F 177°C -40°F -40°C Nitrile: General purpose, oil-resistant. Shows good solvent, oil, water and hydraulic fluid resistance. Should not be used with highly polar solvents like acetone and MEK, ozone, chlorinated hydrocarbons and nitro hydrocarbons. 190°F 88°C -10°F -23°C Virgin PTFE: (PFA/TFE) Chemically inert, virtually impervious. Very few chemicals are known to chemically react with PTFE; molten alkali metals, turbulent liquid or gaseous fluorine and a few fluoro-chemicals such as chlorine trifluoride or oxygen difluoride which readily liberate free fluorine at elevated temperatures. 220°F 104°C -35°F -37°C Maximum and Minimum Temperatures are the limits for which these materials can be operated. Temperatures coupled with pressure affect the longevity of diaphragm pump components. Maximum life should not be expected at the extreme limits of the temperature ranges. Metals: Stainless Steel: Equal to or exceeding ASTM specification A743 CF-8M for corrosion resistant iron chromium, iron chromium nickel and nickel based alloy castings for general applications. Commonly referred to as 316 Stainless Steel in the pump industry. For specific applications, always consult the Chemical Resistance Chart. Ambient temperature range: -20°C to +40°C Process temperature range: -20°C to +80°C for models rated as category 1 equipment -20°C to +100°C for models rated as category 2 equipment In addition, the ambient temperature range and the process temperature range do not exceed the operating temperature range of the applied non-metallic parts as listed in the manuals of the pumps. www . sandpiperpump . com g20mdl1sm-rev0213 Model G20 Metallic • 2 1: PUMP SPECS Dimensional Drawings G20 Metallic Dimensions in inches (mm dimensions in brackets). Dimensional Tolerance:±1/8" (± 3mm) The dimensions on this drawing are for reference only. A certified drawing can be requested if physical dimensions are needed. 11.63 295.28 16.88 428.67 2.24 56.84 2" NPT DISCHARGE PORT 1" AIR EXHAUST PORT 26.47 672.31 24.90 632.56 24.90 632.56 13.85 351.77 2.19 55.63 2.00 50.80 6.12 155.55 12.25 311.15 10.00 254 3/4" NPT AIR INLET R.25 6.35 2" NPT SUCTION PORT 2.25 57.15 5.00 127 10.00 254 9.00 228.60 10.06 255.59 BOTTOM VIEW 3 • Model G20 Metallic www . sandpiperpump . com g20mdl1sm-rev0213 G20 Metallic - ANSI Flange Dimensions in inches (mm dimensions in brackets). Dimensional Tolerance:±1/8" (± 3mm) The dimensions on this drawing are for reference only. A certified drawing can be requested if physical dimensions are needed. 11.63 11.63 11.63 295.28 295.28 295.28 16.93 16.93 16.93 430.08 430.08 430.08 4.87 4.87 4.87 123.70 123.70 123.70 29.82 29.82 29.82 757.50 757.50 757.50 24.88 24.88 24.88 632.03 632.03 632.03 27.88 27.88 27.88 708.23 708.23 708.23 1"1"NPT NPTEXHAUST EXHAUSTPORT PORT 1" NPT EXHAUST PORT 26.38 26.38 26.38 670.13 670.13 670.13 5.82 5.82 5.82 147.95 147.95 147.95 1: PUMP SPECS Dimensional Drawings 2"2"RF RF150# 150#ANSI ANSIFLANGE FLANGE DISCHARGE DISCHARGE PORT PORT 2" RF 150# ANSI FLANGE DISCHARGE PORT 25.04 25.04 25.04 635.97 635.97 635.97 2"2"RF RF150# 150#ANSI ANSIFLANGE, FLANGE, SUCTION SUCTION PORTFLANGE, 2" RF 150#PORT ANSI SUCTION PORT 2.00 2.00 2.00 50.80 50.80 50.80 2.19 2.19 2.19 55.56 55.56 55.56 2.00 2.00 2.00 50.80 50.80 50.80 4X 4X .75 .75 HOLES HOLES 4X 19.05 .75 HOLES 19.05 19.05 13.06 13.06 13.06 331.72 331.72 331.72 10.06 10.06 10.06 255.52 255.52 255.52 13.00 13.00 13.00 330.20 330.20 9.00 16.00 16.00 330.20 9.00 9.00 16.00 228.60 228.60 406.40 406.40 228.60 406.40 3.00 3.00 3.00 76.20 76.20 76.20 MOUNTINGHOLES HOLES .50 .50 MOUNTING .50 MOUNTING HOLES 12.70 12.70 12.70 R.25 R.25 R.25 6.35 6.35 6.35 4.00 4.00 4.00 101.60 101.60 101.60 4.99 4.99 4.99 126.69 126.69 126.69 7.99 7.99 7.99 202.89 202.89 202.89 10.00 10.00 10.00 254 254 254 .67 .67 .67 17.07 17.07 17.07 2.00 2.00 2.00 50.80 50.80 50.80 16.00 16.00 16.00 406.40 406.40 406.40 4.50 4.50 4.50 114.28 114.28 114.28 8.00 8.00 8.00 203.18 203.18 203.18 AIR AIRINLET INLET 3/4" 3/4"INLET NPT NPT AIR 3/4" NPT BOTTOM BOTTOMVIEW VIEW BOTTOM VIEW www . sandpiperpump . com g20mdl1sm-rev0213 Model G20 Metallic • 4 Principle of Pump Operation 2: INSTAL & OP Gas-Operated Double Diaphragm pumps are powered by compressed gas, nitrogen or natural gas. The main directional (gas) control valve ① distributes compressed gas to an gas chamber, exerting uniform pressure over the inner surface of the diaphragm ②. At the same time, the exhausting gas ③ from behind the opposite diaphragm is directed through the gas valve assembly(s) to an exhaust port ④. Gas Line As inner chamber pressure (P1) exceeds liquid chamber pressure (P2), the rod ⑤ connected diaphragms shift together creating discharge on one side and suction on the opposite side. The discharged and primed liquid’s directions are controlled by the check valves (ball or flap)⑥ orientation. Discharged Fluid Discharge Stroke Suction Stroke The pump primes as a result of the suction stroke. The suction stroke lowers the chamber pressure (P3) increasing the chamber volume. This results in a pressure differential necessary for atmospheric pressure (P4) to push the fluid through the suction piping and across the suction side check valve and into the outer fluid chamber ⑦. PUMP INSTALLATION AREA SAFE AIR EXHAUST Suction (side) stroking also initiates the reciprocating DISPOSAL (shifting, stroking or cycling) action of the pump.AREA The suction diaphragm’s movement is mechanically pulled through its 1" DIAMETER AIR EXHAUST PIPING stroke. The diaphragm’s inner plate makes contact with an MUFFLER actuator plunger aligned to shift the pilot signaling valve. Once actuated, the pilot valve sends a pressure signal to the opposite end of the main directional gas valve, redirecting the compressed gas to the opposite inner chamber. Primed Fluid Submerged Illustration MUFFLER 1" DIAMETER AIR EXHAUST PIPING LIQUID LEVEL SUCTION LINE Pump can be submerged if the pump materials of construction are compatible with the liquid being pumped. The gas exhaust must be piped above the liquid level. When the MUFFLER pumped product source is at a higher level than the pump (flooded suction condition), pipe the exhaust higher than the product source to prevent siphoning spills. 1" DIAMETER AIR EXHAUST PIPING LIQUID LEVEL 5 • Model G20 Metallic SUCTION LINE www . sandpiperpump . com g20mdl1sm-rev0213 Recommended Installation Guide Available Accessories: 1. Surge Suppressor 2. Filter/Regulator 3. Gas Dryer Unregulated Air Supply to Surge Suppressor 1 Surge Suppressor Pressure Gauge Note: Surge Suppressor and Piping must be supported after the flexible connection 2: INSTAL & OP Shut-Off Valve Pipe Connection (Style Optional) Flexible Connector Discharge Check Valve Shut-Off Valve Drain Port Muffler (Optional Piped Exhaust) 2 Flexible Connector Air Inlet 3 Vacuum Gauge Flexible Connector Filter Regulator P/N: 020.V107.000 Air Dryer Suction Note: Pipe weight should not be supported by pump connections. CAUTION Shut-Off Valve Drain Port Pipe Connection (Style Optional) The gas exhaust should be p iped to an area for safe d isposition of the product b eing pumped, in the event of a diaphragm failure. Installation And Start-Up Locate the pump as close to the product being pumped as possible. Keep the suction line length and number of fittings to a minimum. Do not reduce the suction line diameter. Gas Supply Connect the pump gas inlet to an gas supply with sufficient capacity and pressure to achieve desired performance. A pressure regulating valve should be installed to insure gas supply pressure does not exceed recommended limits. Gas Valve Lubrication The gas distribution system is designed to operate WITHOUT lubrication. This is the standard mode of operation. If lubrication is desired, install an gas line lubricator set to deliver one drop of SAE 10 non-detergent oil for every 20 SCFM (9.4 liters/sec.) of gas the pump consumes. Consult the Performance Curve to determine gas consumption. Gas Line Moisture Water in the compressed gas supply may cause icing or freezing of the exhaust gas, causing the pump to cycle erratically or stop operating. Water in the gas supply can be reduced by using a point-of-use gas dryer. Gas Inlet And Priming To start the pump, slightly open the gas shut-off valve. After the pump primes, the gas valve can be opened to increase gas flow as desired. If opening the valve increases cycling rate, but does not increase the rate of flow, cavitation has occurred. The valve should be closed slightly to obtain the most efficient gas flow to pump flow ratio. www . sandpiperpump . com g20mdl1sm-rev0213 Model G20 Metallic • 6 Troubleshooting Guide Symptom: Pump Cycles Once 2: INSTAL & OP Pump Will Not Operate / Cycle Pump Cycles and Will Not Prime or No Flow Pump Cycles Running Sluggish / Stalling, Flow Unsatisfactory Product Leaking Through Exhaust Premature Diaphragm Failure Unbalanced Cycling Potential Cause(s): Deadhead (system pressure meets or exceeds gas supply pressure). Gas valve or intermediate gaskets installed incorrectly. Bent or missing actuator plunger. Pump is over lubricated. Lack of gas (line size, PSI, CFM). Check gas distribution system. Discharge line is blocked or clogged manifolds. Deadhead (system pressure meets or exceeds gas supply pressure). Blocked gas exhaust muffler. Pumped fluid in gas exhaust muffler. Pump chamber is blocked. Cavitation on suction side. Check valve obstructed. Valve ball(s) not seating properly or sticking. Recommendation(s): Increase the inlet gas pressure to the pump. Pump is designed for 1:1 pressure ratio at zero flow. (Does not apply to high pressure 2:1 units). Install gaskets with holes properly aligned. Remove pilot valve and inspect actuator plungers. Set lubricator on lowest possible setting or remove. Units are designed for lube free operation. Check the gas line size and length, compressor capacity (HP vs. cfm required). Disassemble and inspect main gas distribution valve, pilot valve and pilot valve actuators. Check for inadvertently closed discharge line valves. Clean discharge manifolds/piping. Increase the inlet gas pressure to the pump. Pump is designed for 1:1 pressure ratio at zero flow. (Does not apply to high pressure 2:1 units). Remove muffler screen, clean or de-ice, and re-install. Disassemble pump chambers. Inspect for diaphragm rupture or loose diaphragm plate assembly. Disassemble and inspect wetted chambers. Remove or flush any obstructions. Check suction condition (move pump closer to product). Disassemble the wet end of the pump and manually dislodge obstruction in the check valve pocket. Clean out around valve ball cage and valve seat area. Replace valve ball or valve seat if damaged. Use heavier valve ball material. Valve ball(s) missing (pushed into chamber or Worn valve ball or valve seat. Worn fingers in valve ball cage (replace part). Check Chemical manifold). Resistance Guide for compatibility. Valve ball(s) / seat(s) damaged or attacked by product. Check Chemical Resistance Guide for compatibility. Check valve and/or seat is worn or needs adjusting. Inspect check valves and seats for wear and proper setting. Replace if necessary. Suction line is blocked. Remove or flush obstruction. Check and clear all suction screens or strainers. Excessive suction lift. For lifts exceeding 20’ of liquid, filling the chambers with liquid will prime the pump in most cases. Suction side gas leakage or gas in product. Visually inspect all suction-side gaskets and pipe connections. Pumped fluid in gas exhaust muffler. Disassemble pump chambers. Inspect for diaphragm rupture or loose diaphragm plate assembly. Over lubrication. Set lubricator on lowest possible setting or remove. Units are designed for lube free operation. Icing. Remove muffler screen, de-ice, and re-install. Install a point of use gas drier. Clogged manifolds. Clean manifolds to allow proper gas flow. Deadhead (system pressure meets or exceeds gas Increase the inlet gas pressure to the pump. Pump is designed for 1:1 pressure ratio at zero flow. supply pressure). (Does not apply to high pressure 2:1 units). Cavitation on suction side. Check suction (move pump closer to product). Lack of gas (line size, PSI, CFM). Check the gas line size, length, compressor capacity. Excessive suction lift. For lifts exceeding 20’ of liquid, filling the chambers with liquid will prime the pump in most cases. Gas supply pressure or volume exceeds system hd. Decrease inlet gas (press. and vol.) to the pump. Pump is cavitating the fluid by fast cycling. Undersized suction line. Meet or exceed pump connections. Restrictive or undersized gas line. Install a larger gas line and connection. Suction side gas leakage or gas in product. Visually inspect all suction-side gaskets and pipe connections. Suction line is blocked. Remove or flush obstruction. Check and clear all suction screens or strainers. Pumped fluid in gas exhaust muffler. Disassemble pump chambers. Inspect for diaphragm rupture or loose diaphragm plate assembly. Check valve obstructed. Disassemble the wet end of the pump and manually dislodge obstruction in the check valve pocket. Check valve and/or seat is worn or needs adjusting. Inspect check valves and seats for wear and proper setting. Replace if necessary. Entrained gas or vapor lock in chamber(s). Purge chambers through tapped chamber vent plugs. Purging the chambers of gas can be dangerous. Diaphragm failure, or diaphragm plates loose. Replace diaphragms, check for damage and ensure diaphragm plates are tight. Diaphragm stretched around center hole or bolt holes. Check for excessive inlet pressure or gas pressure. Consult Chemical Resistance Chart for compatibility with products, cleaners, temperature limitations and lubrication. Cavitation. Enlarge pipe diameter on suction side of pump. Excessive flooded suction pressure. Move pump closer to product. Raise pump/place pump on top of tank to reduce inlet pressure. Install Back pressure device (Tech bulletin 41r). Add accumulation tank or pulsation dampener. Misapplication (chemical/physical incompatibility). Consult Chemical Resistance Chart for compatibility with products, cleaners, temperature limitations and lubrication. Incorrect diaphragm plates or plates on backwards, Check Operating Manual to check for correct part and installation. Ensure outer plates have not been installed incorrectly or worn. worn to a sharp edge. Excessive suction lift. For lifts exceeding 20’ of liquid, filling the chambers with liquid will prime the pump in most cases. Undersized suction line. Meet or exceed pump connections. Pumped fluid in gas exhaust muffler. Disassemble pump chambers. Inspect for diaphragm rupture or loose diaphragm plate assembly. Suction side gas leakage or gas in product. Visually inspect all suction-side gaskets and pipe connections. Check valve obstructed. Disassemble the wet end of the pump and manually dislodge obstruction in the check valve pocket. Check valve and/or seat is worn or needs adjusting. Inspect check valves and seats for wear and proper setting. Replace if necessary. Entrained gas or vapor lock in chamber(s). Purge chambers through tapped chamber vent plugs. For additional troubleshooting tips contact After Sales Support at [email protected] or 419-524-8388 7 • Model G20 Metallic www . sandpiperpump . com g20mdl1sm-rev0213 Composite Repair Parts Drawing Torque: 90 in/lbs ATTACH EYELET TO ONE OF THE FOUR CAPSCREWS ITEM #12 Torque: 360 in/lbs 3: EXP VIEW Torque: 90 in/lbs Torque: 360 in/lbs Plate to Rod Torque: 480 in/lbs Plate to Plate Service & Repair Kits 476.227.000 Gas End Kit Seals, O-Rings, Gaskets, Retaining Rings, Gas Valve Assembly and Pilot Valve Assembly 476.227.363 Gas End Kit FKM Seals, O-Rings, Gaskets, Retaining Rings, Gas Valve 476.206.360 Assembly and Pilot Valve Assembly Wetted End Kit Nitrile Diaphragms, Nitrile Check Balls and Nitrile Check Valve Seats 476.206.649 Wetted End Kit Nitrile Diaphragms, PTFE Overlay Diaphragms, PTFE Check Balls and PTFE Check Valve Seats 476.206.672 Wetted End Kit Nitrile Diaphragms, PTFE Check Balls, PTFE Seats www . sandpiperpump . com g20mdl1sm-rev0213 Model G20 Metallic • 8 3: EXP VIEW Composite Repair Parts List ItemPart NumberDescription Qty. 1 031-183-000 Aluminum Gas Valve Assembly 1 031-183-363 Aluminum Gas Valve Assembly with FKM O-rings 1 031-179-000 Stainless Steel Gas Valve Assembly (use with Option B) 1 031-179-363 Stainless Steel Gas Valve Assembly with FKM O-rings (used with Option D) 1 2 050-017-360 Ball, Check 4 050-018-600 Ball, Check 4 3 070-006-170 Bushing 2 4 095-110-000 Pilot Valve Assembly 1 095-110-363 Pilot Valve Assembly with FKM O-rings 1 095-110-110 Pilot Valve Assembly (Stainless Steel Midsection) 1 095-110-363SS Pilot Valve Assembly with FKM O-rings (Stainless Steel Midsection) 1 5 114-024-157 Intermediate Bracket 1 114-024-110 Intermediate Bracket (Stainless Steel Midsection) 1 6 132-035-360 Bumper, Diaphragm 2 132-035-363 Bumper, Diaphragm 2 7 135-034-506 Bushing, Plunger 2 8 165-116-157 Cap, Gas Inlet Assembly 1 165-116-110 Cap, Gas Inlet Assembly (Stainless Steel Midsection) 1 9 170-060-330 Capscrew, Hex Hd 7/16-14 X 2.00 16 170-060-115 Capscrew, Hex Hd 7/16-14 X 2.00 16 170-060-110 Capscrew, Hex Hd 7/16-14 X 2.00 16 (Stainless Steel Midsection) 10 170-052-330 Capscrew, Hex Hd 3/8-16 X 2.25 16 170-052-115 Capscrew, Hex Hd 3/8-16 X 2.25 16 170-052-110 Capscrew, Hex Hd 3/8-16 X 2.25 16 (Stainless Steel Midsection) 11 170-069-330 Capscrew, Hex Hd 5/16-18 X 1.75 4 170-069-115 Capscrew, Hex Hd 5/16-18 X 1.75 4 170-069-110 Capscrew, Hex Hd 5/16-18 X 1.75 4 (Stainless Steel Midsection) 12 170-006-330 Capscrew, Hex Hd 3/8-16 X 1.00 4 170-006-115 Capscrew, Hex Hd 3/8-16 X 1.00 4 170-006-110 Capscrew, Hex Hd 3/8-16 X 1.00 4 (Stainless Steel Midsection) 13 171-059-330 Capscrew, Soc Hd 7/16-14 X 1.25 8 171-011-115 Capscrew, Soc Hd 1/2-13 X 1.00 8 171-011-110 Capscrew, Soc Hd 1/2-13 X 1.00 8 (Stainless Steel Midsection) 14 196-167-156 Chamber, Outer 2 196-167-110 Chamber, Outer 2 15 196-168-156 Chamber, Inner 2 196-168-110 Chamber, Inner (Stainless Steel Midsection) 2 16 286-007-360 Diaphragm 2 17 286-020-604 Diaphragm, Overlay 2 18 360-093-360 Gasket, Natural Gas Valve 1 19 360-103-360 Gasket, Pilot Valve 1 20 360-104-379 Gasket, Natural Gas Inlet 1 21 360-105-360 Gasket, Inner Chamber 2 22 518-145-156 Manifold, Suction 1 518-145-156E Manifold, Suction 2" BSP 1 518-145-156W Welded Raised Face 150# 2" ANSI Flanged Manifold 1 518-145-110 Manifold, Suction 1 518-145-110E Manifold, Suction 2" BSP 1 518-145-110W Welded Raised Face 150# 2" ANSI Flanged Manifold 1 ItemPart NumberDescription Qty. 23 518-146-156 Manifold, Discharge 1 518-146-156E Manifold, Discharge 2" BSP 1 518-146-156W Welded Raised Face 150# 2" ANSI Flanged Manifold 1 518-146-110 Manifold, Discharge 1 518-146-110E Manifold, Discharge 2" BSP 1 518-146-110W Welded Raised Face 150# 2" ANSI Flanged Manifold 1 24 545-005-330 Nut, Hex 3/8-16 16 545-005-115 Nut, Hex 3/8-16 16 545-005-110 Nut, Hex 3/8-16 (Stainless Steel Midsection) 16 25 545-007-330 Nut, Hex 7/16-14 16 545-007-115 Nut, Hex 7/16-14 16 545-007-110 Nut, Hex 7/16-14 (Stainless Steel Midsection) 16 26 560-001-360 O-Ring 2 560-001-363 O-Ring 2 28 612-192-157 Plate, Inner Diaphragm 2 612-192-334 Plate, Inner Diaphragm (Stainless Steel Midsection) 2 29 612-194-156 Plate, Outer Diaphragm Assembly 2 612-194-110 Plate, Outer Diaphragm Assembly 2 30 612-195-157 Plate, Inner Diaphragm (PTFE overlays only) 2 612-195-334 Plate, Inner Diaphragm (Stainless Steel Midsection)2 31 612-039-157 Plate, Outer Diaphragm (PTFE overlays only) 2 612-097-110 Plate, Diaphragm (PTFE overlays only) 2 32 620-020-115 Plunger, Actuator 2 33 675-042-115 Ring, Retaining 2 34 685-058-110 Rod, Diaphragm 1 35 720-004-360 Seal, Diaphragm Rod 2 720-004-363 Seal, Diaphragm Rod 2 36 722-040-360 Seat, Check Ball 4 722-040-600 Seat, Check Ball 4 722-040-110 Seat, Ckeck Ball (requires seals, see item 39) 4 722-040-150 Seat, Ckeck Ball (requires seals, see item 39) 4 37 900-005-330 Washer, Lock 16 900-005-115 Washer, Lock 16 900-005-110 Washer, Lock (Stainless Steel Midsection) 16 38 920-025-000 Ground Strap 1 39 560-106-360 O-Ring (use with metal seats) 8 720-060-608 Seal (use with metal seats) 8 40 901-038-330 Flat Washer 4 901-038-110 Flat Washer 4 901-038-115 Flat Washer 4 Parts not shown used with Raised Face ANSI Flange Options R and W: 170.035.330 Hex Cap Screw 326.052.080 Mounting Foot 545.007.330 Hex Nut 900.006.330 Lock Washer 901.022.330 Flat Washer 4 2 4 4 8 Parts not shown used with Raised Face ANSI Flange Option R ONLY: 334.115.110 2" ANSI 150# Raised Face Flange and Threaded Pipe Connection 538.024.110 2" NPT Pipe Nipple x 2 1/2" Long 2 2 LEGEND: = Items contained within Gas End Kits = Items contianed within Wet End Kits Note: Kits contain components specific to the material codes. ATEX Compliant 9 • Model G20 Metallic www . sandpiperpump . com g20mdl1sm-rev0213 000����Assembly, sub-assembly; and some purchased items 010����Cast Iron 015����Ductile Iron 020����Ferritic Malleable Iron 080����Carbon Steel, AISI B-1112 110�����Alloy Type 316 Stainless Steel 111�����Alloy Type 316 Stainless Steel (Electro Polished) 112�����Alloy C 113�����Alloy Type 316 Stainless Steel (Hand Polished) 114�����303 Stainless Steel 115�����302/304 Stainless Steel 117�����440-C Stainless Steel (Martensitic) 120����416 Stainless Steel (Wrought Martensitic) 148����Hardcoat Anodized Aluminum 150����6061-T6 Aluminum 152����2024-T4 Aluminum (2023-T351) 155����356-T6 Aluminum 156����356-T6 Aluminum 157����Die Cast Aluminum Alloy #380 158����Aluminum Alloy SR-319 162����Brass, Yellow, Screw Machine Stock 165����Cast Bronze, 85-5-5-5 166����Bronze, SAE 660 170����Bronze, Bearing Type, Oil Impregnated 180����Copper Alloy 305����Carbon Steel, Black Epoxy Coated 306����Carbon Steel, Black PTFE Coated 307����Aluminum, Black Epoxy Coated 308����Stainless Steel, Black PTFE Coated 309����Aluminum, Black PTFE Coated 313����Aluminum, White Epoxy Coated 330����Zinc Plated Steel 332����Aluminum, Electroless Nickel Plated 333����Carbon Steel, Electroless Nickel Plated 335����Galvanized Steel 337����Silver Plated Steel 351����Food Grade Santoprene® 353����Geolast; Color: Black 354����Injection Molded #203-40 Santoprene® Duro 40D +/-5; Color: RED 356����Hytrel® 357����Injection Molded Polyurethane 358����Urethane Rubber (Some Applications) (Compression Mold) 359����Urethane Rubber 360����Nitrile Rubber Color coded: RED 363����FKM (Fluorocarbon) Color coded: YELLOW The Last 3 Digits of Part Number 364����EPDM Rubber Color coded: BLUE 365����Neoprene Rubber Color coded: GREEN 366����Food Grade Nitrile 368����Food Grade EPDM 371����Philthane (Tuftane) 374����Carboxylated Nitrile 375����Fluorinated Nitrile 378����High Density Polypropylene 379����Conductive Nitrile 408����Cork and Neoprene 425����Compressed Fibre 426����Blue Gard 440����Vegetable Fibre 500����Delrin® 500 502����Conductive Acetal, ESD-800 503����Conductive Acetal, Glass-Filled 506����Delrin® 150 520����Injection Molded PVDF Natural color 540����Nylon 542����Nylon 544����Nylon Injection Molded 550����Polyethylene 551����Glass Filled Polypropylene 552����Unfilled Polypropylene 555����Polyvinyl Chloride 556����Black Vinyl 558����Conductive HDPE 570����Rulon II® 580����Ryton® 600����PTFE (virgin material) Tetrafluorocarbon (TFE) 603����Blue Gylon® 604����PTFE 606����PTFE 607����Envelon 608����Conductive PTFE 610����PTFE Encapsulated Silicon 611�����PTFE Encapsulated FKM 632����Neoprene/Hytrel® 633����FKM/PTFE 634����EPDM/PTFE 635����Neoprene/PTFE 637����PTFE, FKM/PTFE 638����PTFE, Hytrel®/PTFE 639����Nitrile/TFE 643����Santoprene®/EPDM 644����Santoprene®/PTFE 656�����Santoprene® Diaphragm and Check Balls/EPDM Seats 661����EPDM/Santoprene® 666����FDA Nitrile Diaphragm, PTFE Overlay, Balls, and Seals 668����PTFE, FDA Santoprene®/PTFE www . sandpiperpump . com g20mdl1sm-rev0213 • Delrin and Hytrel are registered tradenames of E.I. DuPont. • Nylatron is a registered tradename of Polymer Corp. • Gylon is a registered tradename of Garlock, Inc. • Santoprene is a registered tradename of Exxon Mobil Corp. • Rulon II is a registered tradename of Dixion Industries Corp. • Ryton is a registered tradename of Phillips Chemical Co. • Valox is a registered tradename of General Electric Co. 3: EXP VIEW Material Codes - R E C YC L I N G Many components of SANDPIPER® AODD pumps are made of recyclable materials. We encourage pump users to recycle worn out parts and pumps whenever possible, after any hazardous pumped fluids are thoroughly flushed. Model G20 Metallic • 10 Gas Distribution Valve Assembly Valve Assembly for Aluminum Mid Sections 1-F 1-E Natural Gas Assembly Parts List 1-D 1-D 1-C 1-B 1-B 1-E 1-A 1-C 1-D ItemPart NumberDescription 1 031-183-000 Gas Valve Assembly 1-A 095-109-157 Valve Body 1-B 031-139-000 Sleeve and Spool Set 1-C 132-029-357 Bumper 1-D 560-020-360 O-Ring 1-E 165-127-157 Cap, End 1-F 170-032-330 Capscrew Qty 1 1 1 2 10 2 8 ItemPart NumberDescription 1 031-183-363 Gas Valve Assembly (FKM) 1-D 560-020-363 O-Ring (FKM) (includes all other items used on 031-183-000) Qty 1 10 1-F 1-F 1-D Valve Assembly for Stainless Steel Mid Sections Natural Gas Assembly Parts List 4: AIR END 1-D 1-C 1-B 1-B 1-A 1-C 1-D 1-F 1-E 1-E ItemPart NumberDescription 1 031-179-000 Gas Valve Assembly 1-A 095-109-110 Valve Body 1-B 031-139-000 Sleeve and Spool Set 1-C 132-029-357 Bumper 1-D 560-020-360 O-Ring 1-E 165-127-110 Cap, End 1-F 170-032-115 Capscrew 170-032-110 3/16" Stainless Steel Option Qty 1 1 1 2 10 2 8 8 ItemPart NumberDescription 1 031-179-363 Gas Valve Assembly (FKM) 1-D 560-020-363 O-Ring (FKM) (includes all other items used on 031-179-000) Qty 1 10 Gas Distribution Valve Servicing Step 1: Remove cap screws (1-F). Step 2: Remove end cap (1-E) and bumper (1-C). Step 3: Remove spool part of (1-B) (caution: do not scratch). Step 4: Press sleeve (1-B) from body (1-A). Step 5: Inspect O-Ring (1-D) and replace if necessary. IMPORTANT Step 6: Lightly lubricate O-Rings (1-D). Read these instructions completely, before installation and start-up. It is the responsibility of the purchaser to retain this manual for reference. Failure to comply with the recommendations stated in this manual will damage the pump, and void factory warranty. Step 7: Press sleeve (1-B) into body (1-A). Step 8: Reassemble in reverse order, starting with step 3. Note: Sleeve and spool (1-B) set is match ground to a specified clearance sleeve and spools (1-B) cannot be interchanged. ATEX Compliant 11 • Model G20 Metallic www . sandpiperpump . com g20mdl1sm-rev0213 Pilot Valve Assembly Parts List Pilot Valve Servicing With Pilot Valve removed from pump. Step 1: Remove snap ring (4-F). Step 2: Remove sleeve (4-B), inspect O-Rings (4-C), replace if required. Step 3: Remove spool (4-D) from sleeve (4-B), inspect O-Rings (4-E), replace if required. Step 4: Lightly lubricate O-Rings (4-C) and (4-E). Reassemble in reverse order. www . sandpiperpump . com g20mdl1sm-rev0213 ItemPart NumberDescription 4 095-110-000 Pilot Valve Assembly 4-A 095-095-157 Valve Body 4-B 755-052-000 Sleeve (With O-Rings) 4-C 560-033-360 O-Ring (Sleeve) 4-D 775-055-000 Spool (With O-Rings) 4-E 560-023-360 O-Ring (Spool) 4-F 675-037-080 Retaining Ring Qty 1 1 1 6 1 3 1 ItemPart NumberDescription 4 095-110-000 Pilot Valve Assembly 4-A 095-095-157 Valve Body 4-B 755-052-363 Sleeve (With FKM O-Rings) (FKM) 4-C 560-033-363 O-Ring (Sleeve) (FKM) 4-D 775-055-363 Spool (With FKM O-Rings) (FKM) 4-E 560-023-363 O-Ring (Spool) (FKM) (includes all other items used on 095-110-000) Qty 1 1 1 6 1 3 For Pumps with stainless steel center section ItemPart NumberDescription 4 095-110-110 Pilot Valve Assembly 4-A 095-095-110 Valve Body (includes all other items used on 095-110-000) Qty 1 1 For pumps with stainless steel center section ItemPart NumberDescription 4 095-110-363SS Pilot Valve Assembly 4-B 755-052-363 Sleeve (With FKM O-Rings) (FKM) 4-C 560-033-363 O-Ring (Sleeve) (FKM) 4-D 775-055-363 Spool (With FKM O-Rings) (FKM) 4-E 560-023-363 O-Ring (Spool) (FKM) (includes all other items used on 095-110-110) Qty 1 1 6 1 3 4: AIR END Pilot Valve Assembly Model G20 Metallic • 12 Intermediate Assembly 26 7 33 32 4: AIR END 5 Intermediate Assembly Drawing Step 1: Remove plunger, actuator (32) from center of 35 intermediate pilot valve cavity. Step 2: Remove Ring, Retaining (33), discard. Step 3: Remove bushing, plunger (7), inspect for wear and replace if necessary with genuine parts. Step 4: Remove O-Ring (26), inspect for wear and Step 5: Lightly lubricate O-Ring (26) and insert into replace if necessary with genuine parts. intermediate. Step 7: Remove Seal, Diaphragm Rod (35). ItemPart NumberDescription 5 114.024.157 Bracket, Intermediate 114.024.110 Bracket, Intermediate 7 135.034.506 Bushing, Plunger 26 560.001.360 O-Ring 560.001.363 O-Ring (FKM) 32 620.020.115 Plunger, Actuator 33 675.042.115 Ring, Retaining* 35 720.004.360 Seal, Diaphragm Rod 720.004.363 Seal, Diaphragm Rod (FKM) Qty 1 1 2 2 2 2 2 2 2 *Note: It is recommended that when plunger components are serviced, new retaining rings be installed. Step 6: Reassemble in reverse order. Step 8: Clean seal area, lightly lubricate and install new Seal, Intermediate Repair Parts List Diaphragm Rod (35). IMPORTANT When the pumped product source is at a higher level than the pump (flooded suction condition), pipe the exhaust higher than the product source to prevent siphoning spills. In the event of a diaphragm failure a complete rebuild of the center section is recommended. 13 • Model G20 Metallic www . sandpiperpump . com g20mdl1sm-rev0213 Diaphragm Service Drawing, with Overlay 5: WET END Diaphragm Service Drawing, Non-Overlay www . sandpiperpump . com g20mdl1sm-rev0213 Model G20 Metallic • 14 Diaphragm Servicing Step 1: With manifolds and outer chambers removed, remove diaphragm assemblies from diaphragm rod. DO NOT use a pipe wrench or similar tool to remove assembly from rod. Flaws in the rod surface may damage bearings and seal. Soft jaws in a vise are recommended to prevent diaphragm rod damage. Step 1.A: NOTE: Not all inner diaphragm plates are threaded. Some models utilize a through hole in the inner diaphragm plate. If required to separate diaphragm assembly, place assembly in a vise, gripping on the exterior cast diameter of the inner plate. Turn the outer plate clockwise to separate the assembly. Always inspect diaphragms for wear cracks or chemical attack. Inspect inner and outer plates for deformities, rust scale and wear. Inspect intermediate bearings for elongation and wear. Inspect diaphragm rod for wear or marks. Clean or repair if appropriate. Replace as required. Step 2: Reassembly: There are two different types of diaphragm plate assemblies utilized throughout the Sandpiper product line: Outer plate with a threaded stud, diaphragm, and a threaded inner plate. 5: WET END Outer plate with a threaded stud, diaphragm, and an inner plate with through hole. Secure threaded inner plate in a vise. Ensure that the plates are being installed with the outer radius against the diaphragm. Step 3: Lightly lubricate, with a compatible material, the inner faces of both outer and inner diaphragm plates when using on non Overlay diaphragms (For EPDM water is recommended). No lubrication is required. Step 4: Push the threaded outer diaphragm plate through the center hole of the diaphragm. Note: Most diaphragms are installed with the natural bulge out towards the fluid side. S05, S07, and S10 non–metallic units are installed with the natural bulge in towards the gas side. Step 5: Thread or place, outer plate stud into the inner plate. For threaded inner plates, use a torque wrench to tighten the assembly together. Torque values are called out on the exploded view. Repeat procedure for second side assembly. Allow a minimum of 15 minutes to elapse after torquing, then re-torque the assembly to compensate for stress relaxation in the clamped assembly. Step 6: Thread one assembly onto the diaphragm rod with sealing washer (when used) and bumper. Step 7: Install diaphragm rod assembly into pump and secure by installing the outer chamber in place and tightening the capscrews. Step 8: On opposite side of pump, thread the remaining assembly onto the diaphragm rod. Using a torque wrench, tighten the assembly to the diaphragm rod. Align diaphragm through bolt holes, always going forward past the recommended torque. Torque values are called out on the exploded view. NEVER reverse to align holes, if alignment cannot be achieved without damage to diaphragm, loosen complete assemblies, rotate diaphragm and reassemble as described above. IMPORTANT Read these instructions completely, before installation and start-up. It is the responsibility of the purchaser to retain this manual for reference. Failure to comply with the recommendations stated in this manual will damage the pump, and void factory warranty. 15 • Model G20 Metallic www . sandpiperpump . com g20mdl1sm-rev0213 Written Warranty 5 - YEAR Limited Product Warranty Quality System ISO9001 Certified • Environmental Management Systems ISO14001 Certified Warren Rupp, Inc. (“Warren Rupp”) warrants to the original end-use purchaser that no product sold by Warren Rupp that bears a Warren Rupp brand shall fail under normal use and service due to a defect in material or workmanship within five years from the date of shipment from Warren Rupp’s factory. Warren Rupp brands include SANDPIPER®, MARATHON®, PortaPump®, SludgeMaster™ and Tranquilizer®. ~ See complete warranty at www. sandpiperpump.com/About/guaranteesandwarranties.html ~ Declaration of Conformity Signature of authorized person October 20, 2005 Date of issue David Roseberry Printed name of authorized person Engineering Manager Title Revision Level: F August 23, 2012 Date of revision 7: WARRANTY Manufacturer: Warren Rupp, Inc.®, 800 N. Main Street, P.O. Box 1568, Mansfield, Ohio, 44901-1568 USA Certifies that Air-Operated Double Diaphragm Pump Series: HDB, HDF, M Non-Metallic, S Non-Metallic, M Metallic, S Metallic, T Series, G Series, U Series, EH and SH High Pressure, RS Series, W Series, SMA and SPA Submersibles, and Tranquilizer Surge Suppressors comply with the European Community Directive 2006/42/EC on Machinery, according to Annex VIII. This product has used Harmonized Standard EN809:1998+A1:2009, Pumps and Pump Units for Liquids - Common Safety Requirements, to verify conformance. EC Declaration of Conformity In accordance with ATEX Directive 94/9/EC, Equipment intended for use in potentially explosive environments. Manufacturer: Warren Rupp, Inc.®, A Unit of IDEX Corportion 800 North Main Street, P.O. Box 1568, Mansfield, OH 44901-1568 USA EN 60079-25: 2004 For pumps equipped with Pulse Output ATEX Option KEMA Quality B.V. (0344) Applicable Standard: EN13463-1: 2001, EN13463-5: 2003 AODD Pumps and Surge Suppressors For Type Examination Designations AODD (Air-Operated Double Diaphragm) Pumps EC Type Examination Certificate No. Pumps: KEMA 09ATEX0071 X KEMA Quality B.V. Utrechtseweg 310 6812 AR Arnhem, The Netherlands DATE/APPROVAL/TITLE: 27 MAY 2010 EC Declaration of Conformity David Roseberry, Engineering Manager David Roseberry, Engineering Manager DATE/APPROVAL/TITLE: 27 MAY 2010 ATEX Summary of Markings Type Marking Listed In Non-Conductive Fluids AODD (Air-Operated Double Diaphragm) Pumps EC Type Examination Certificate No. Pumps: KEMA 09ATEX0071 X KEMA Quality B.V. Utrechtseweg 310 6812 AR Arnhem, The Netherlands Pump types, S1F, S15, S20, and S30 provided with the pulse output option KEMA 09ATEX0071 X KEMA 09ATEX0071 X II 2 G Ex ia c IIC T5 CE 0344 II 3/2 G Ex ia c IIC T5 KEMA 09ATEX0071 X II 2 D Ex c iaD 20 IP67 T100oC KEMA 09ATEX0071 X No Yes Yes Pump types, S1F, S15, S20, and S30 provided with the integral solenoid option II 2 G EEx m c II T5 II 3/2 G EEx m c II T5 II 2 D c IP65 T100oC KEMA 09ATEX0071 X KEMA 09ATEX0071 X CE 0344 KEMA 09ATEX0071 X KEMA 09ATEX0071 X No Yes Yes Pump types, HDB1½, HDB40, HDB2, HDB50, HDB3, HDF1, HDF25, HDF2, HDF3M, PB¼, S05, S1F, S15, S20, S30, SB1, SB25, ST1½, ST40, G15, G20, and G30, without the above listed options, no aluminum parts II 1 G c T5 II 3/1 G c T5 II 1 D c T100oC I M1 c I M2 c KEMA 09ATEX0071 X KEMA 09ATEX0071 X KEMA 09ATEX0072 X KEMA 09ATEX0071 X CE 0344 KEMA 09ATEX0071 X KEMA 09ATEX0071 X KEMA 09ATEX0072 X No Yes Yes No Yes Pump types, DMF2, DMF3, HDB1½, HDB40, HDB2, HDB50, HDB3, HDF1, HDF25, HDF2, HDF3M, PB¼, S05, S1F, S15, S20, S30, SB1, SB25, SE½, ST1, ST25, ST1½, ST40, U1F, G05, G1F, G15, G20, and G30 II 2 G c T5 II 3/2 G c T5 II 2 D c T100oC KEMA 09ATEX0072 X KEMA 09ATEX0072 X CE KEMA 09ATEX0072 X KEMA 09ATEX0072 X No Yes Yes Surge Suppressors all types II 2 G T5 II 3/2 G T5 II 2 D T100oC AODD Pumps and Surge Suppressors For Type Examination Designations, see page 2 (back) EN 60079-25: 2004 For pumps equipped with Pulse Output ATEX Option KEMA Quality B.V. (0344) Applicable Standard: EN13463-1: 2001, EN13463-5: 2003 Manufacturer: Warren Rupp, Inc.®, A Unit of IDEX Corportion 800 North Main Street, P.O. Box 1568, Mansfield, OH 44901-1568 USA In accordance with ATEX Directive 94/9/EC, Equipment intended for use in potentially explosive environments. EC Declaration of Conformity EC Type Certificate No. Pumps: KEMA 09ATEX0071 X Type Certificate No. Pumps: KEMA 09ATEX0072 X Type Certificate No. Suppressors: KEMA 09ATEX0073 KEMA 09ATEX0073 CE KEMA 09ATEX0073 KEMA 09ATEX0073 KEMA 09ATEX0073 No Yes Yes