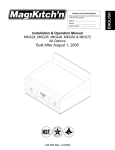
1
Licensed to: iChapters User
Licensed to: iChapters User
This is an electronic version of the print textbook. Due to electronic rights
restrictions, some third party content may be suppressed. Editorial
review has deemed that any suppressed content does not materially
affect the overall learning experience. The publisher reserves the
right to remove content from this title at any time if subsequent
rights restrictions require it. For valuable information on pricing, previous
editions, changes to current editions, and alternate formats, please visit
www.cengage.com/highered to search by ISBN#, author, title, or keyword
for materials in your areas of interest.
Copyright 2011 Cengage Learning. All Rights Reserved. May not be copied, scanned, or duplicated, in whole or in part. Due to electronic rights, some third party content may be suppressed from the eBook and/or eChapter(s).
Editorial review has deemed that any suppressed content does not materially affect the overall learning experience. Cengage Learning reserves the right to remove additional content at any time if subsequent rights restrictions require it.
SM-FM_i-xviii
11/8/05
Licensed to: iChapters User
6:34 AM
Page iv
Today’s Technician: Advanced Engine Perfo rmance Shop Manual
Mark Schnubel
Vice President, Technology and
Trades SBU:
Dave Garza
Editorial Director:
Sandy Clark
Senior Acquisitions Editor:
David Boelio
Channel Manager:
William Lawrensen
Production Editor:
Barbara Diaz
Marketing Coordinator:
Mark Pierro
Art/Design Specialist:
Cheri Plasse
Production Director:
Mary Ellen Black
Technology Project Manager:
Kevin Smith
Editorial Assistant:
Andrea Domkowski
Developmental Editor:
Matthew Thouin
COPYRIGHT © 2006 Thomson Delmar
Learning. Thomson, the Star Logo, and
Delmar Learning are trademarks used
herein under license.
Printed in the United States of America
1 2 3 4 5 XX 07 06 05
For more information contact
Thomson Delmar Learning
Executive Woods
5 Maxwell Drive, PO Box 8007,
Clifton Park, NY 12065-8007
Or find us on the World Wide Web at
www.delmarlearning.com
ALL RIGHTS RESERVED. No part of
this work covered by the copyright
hereon may be reproduced in any form
or by any means—graphic, electronic, or
mechanical, including photocopying,
recording, taping, Web distribution,
or information storage and retrieval
systems—without the written permission
of the publisher.
For permission to use material from the
text or product, contact us by
Tel.
(800) 730-2214
Fax
(800) 730-2215
www.thomsonrights.com
Library of Congress Catalogingin-Publication Data:
Schnubel, Mark.
Shop manual for advanced
engine performance / Mark Schnubel.
p. cm. — (Today’s technician)
ISBN 1-4018-7787-7 (CM&SM) — ISBN
1-4018-7788-5 (IML)
1. Automobiles—Motors—Maintenance and repair. 2. Automobiles—Performance. I. Title: Advanced engine
performance. II. Title. III. Series.
TL210.S37 2006
629.25'0288—dc22
2005054908
NOTICE TO THE READER
Publisher does not warrant or guarantee any of the products described herein or perform any independent analysis in connection
with any of the product information contained herein. Publisher does not assume, and expressly disclaims, any obligation to
obtain and include information other than that provided to it by the manufacturer.
The reader is expressly warned to consider and adopt all safety precautions that might be indicated by the activities herein and
to avoid all potential hazards. By following the instructions contained herein, the reader willingly assumes all risks in connection
with such instructions.
The publisher makes no representation or warranties of any kind, including but not limited to, the warranties of fitness for particular purpose or merchantability, nor are any such representations implied with respect to the material set forth herein, and the
publisher takes no responsibility with respect to such material. The publisher shall not be liable for any special, consequential, or
exemplary damages resulting, in whole or part, from the readers’ use of, or reliance upon, this material.
Copyright 2011 Cengage Learning. All Rights Reserved. May not be copied, scanned, or duplicated, in whole or in part. Due to electronic rights, some third party content may be suppressed from the eBook and/or eChapter(s).
Editorial review has deemed that any suppressed content does not materially affect the overall learning experience. Cengage Learning reserves the right to remove additional content at any time if subsequent rights restrictions require it.
SM_ch_01_001-040.qxd
Licensed to: iChapters User
11/7/05
10:01 AM
Page 1
C H A P T E R
Safety and Shop Practices
1
Upon completion and review of this chapter, you should be able to:
❏ Recognize shop hazards and take the
necessary steps to avoid personal injury or
property damage.
❏ Observe all shop rules when working in
❏ Explain the purposes of the Occupational
Safety and Health Act (OSHA).
while working in the automotive shop.
❏ Identify the necessary steps for personal
safety in the automotive shop.
❏ Describe the reasons for prohibiting drug
and alcohol use in the shop.
❏ Explain the steps required to provide
electrical safety in the shop.
❏ Define the steps required to provide safe
handling and storage of gasoline.
❏ Describe the necessary housekeeping
safety steps.
❏ Explain the essential general shop safety
practices.
❏ Define the steps required to provide fire
safety in the shop.
❏ Describe a typical fire extinguisher
operating procedure.
❏ Explain four different types of fires and the
type of fire extinguisher required for each
type of fire.
❏ Describe three other pieces of shop safety
equipment other than fire extinguishers.
the shop.
❏ Observe all personal safety precautions
❏ Demonstrate proper lifting procedures and
precautions.
❏ Demonstrate proper vehicle lift operating
and safety procedures.
❏ Observe all safety precautions when
hydraulic tools are used in the automotive
shop.
❏ Follow the recommended procedure while
operating hydraulic tools such as presses,
floor jacks, and vehicle lifts to perform automotive service tasks.
❏ Follow safety precautions regarding the use
of power tools.
❏ Demonstrate proper safety precautions during the use of compressed air equipment.
❏ Follow safety precautions while using cleaning equipment in the automotive shop.
❏ Operate vehicles in the shop according to
shop driving rules.
❏ Observe all shop housekeeping rules.
❏ Follow the necessary procedures to maintain satisfactory shop air quality.
❏ Follow proper safety precautions while
handling hazardous waste materials.
❏ Fulfill employee obligations when working
❏ Dispose of hazardous waste materials in
accordance with state and federal
regulations.
❏ Accept job responsibilities for each job
❏ Describe three requirements for shop layout and explain why these requirements
are important.
in the shop.
completed in the shop.
❏ Describe the ASE technician testing and
certification process, including the eight
areas of certification.
1
Copyright 2011 Cengage Learning. All Rights Reserved. May not be copied, scanned, or duplicated, in whole or in part. Due to electronic rights, some third party content may be suppressed from the eBook and/or eChapter(s).
Editorial review has deemed that any suppressed content does not materially affect the overall learning experience. Cengage Learning reserves the right to remove additional content at any time if subsequent rights restrictions require it.
SM_ch_01_001-040.qxd
Licensed to: iChapters User
11/7/05
10:01 AM
Page 2
Occupational Safety and Health Act
The Occupational
Safety and Health Act
(OSHA) regulates
working conditions in
the United States.
The Occupational Safety and Health Act (OSHA) was passed by the United States government in
1970. The purposes of this legislation are:
1. To assist and encourage the citizens of the United States in their efforts to assure safe
and healthful working conditions by providing research, information, education, and
training in the field of occupational safety and health.
2. To assure safe and healthful working conditions for working men and women by
authorizing enforcement of the standards developed under the Act.
Since approximately 25 percent of workers are exposed to health and safety hazards on the
job, the OSHA is necessary to monitor, control, and educate workers regarding health and safety
in the workplace. Employers and employees should be familiar with workplace hazardous materials information systems (WHIMS).
Shop Hazards
Shop hazards must be
recognized and
avoided to prevent
personal injury.
Personal injury, vehicle
damage, and property
damage must be
avoided by following
safety rules regarding
personal protection,
substance abuse,
electrical safety,
gasoline safety,
housekeeping safety,
fire safety, and general
shop safety.
Service technicians and students encounter many hazards in an automotive shop. When these
hazards are known, basic shop safety rules and procedures must be followed to avoid personal
injury. Some of the hazards in an automotive shop are:
1. Flammable liquids such as gasoline and paint must be handled and stored properly.
2. Flammable materials such as oily rags must be stored properly to avoid a fire hazard.
3. Batteries contain a corrosive sulfuric acid solution and produce explosive hydrogen
gas while charging.
4. Loose sewer and drain covers may cause foot or toe injuries.
5. Caustic liquids, such as those in hot cleaning tanks, are harmful to skin and eyes.
6. High-pressure air in the shop compressed air system can be very dangerous if it penetrates the skin and enters the bloodstream.
7. Frayed cords on electric equipment and lights may result in severe electrical shock.
8. Hazardous waste material such as batteries and the caustic cleaning solution from a
hot or cold cleaning tank must be handled properly to avoid harmful effects.
9. Carbon monoxide (CO) from vehicle exhaust is poisonous.
10. Loose clothing or long hair may become entangled in rotating parts on equipment or
vehicles, resulting in serious injury.
11. Dust and vapors generated during some repair jobs are harmful. Asbestos dust generated during brake lining service and clutch service is a contributor to lung cancer.
12. High noise levels from shop equipment such as an air chisel may be harmful to the
ears.
13. Oil, grease, water, or parts cleaning solutions on shop floors may cause someone to
slip and fall, resulting in serious injury.
Safety in the Automotive Shop
Each person in an automotive shop must follow certain basic shop safety rules to remove the
danger from shop hazards. When all personnel in the automotive shop follow these basic shop
safety rules, personal injury, vehicle damage, and property damage may be prevented.
2
Copyright 2011 Cengage Learning. All Rights Reserved. May not be copied, scanned, or duplicated, in whole or in part. Due to electronic rights, some third party content may be suppressed from the eBook and/or eChapter(s).
Editorial review has deemed that any suppressed content does not materially affect the overall learning experience. Cengage Learning reserves the right to remove additional content at any time if subsequent rights restrictions require it.
SM_ch_01_001-040.qxd
Licensed to: iChapters User
11/7/05
10:01 AM
Page 3
Hearing
protection
Respirator
Safety
goggles
Welding
shield
Gloves
Welding
gloves
Working
clothes
Safety
shoes
Figure 1-1 Shop safety equipment, including safety goggles, respirator, welding shield, proper
work clothes, ear protection, welding gloves, work gloves, and safety shoes.
Personal Protection
1. Always wear safety glasses or a face shield in the shop (Figure 1-1).
2. Wear ear plugs or covers if high noise levels are encountered.
3. Always wear boots or shoes that provide adequate foot protection. Heavy-duty work
boots or shoes with steel toe caps are best for working in the automotive shop.
Footwear must protect against heavy falling objects, flying sparks, and corrosive liquids. Soles on footwear must protect against punctures by sharp objects. Runners and
street shoes are not recommended in the shop.
4. Do not wear watches, jewelry, or rings when working on a vehicle. Severe burns
occur when jewelry makes contact between an electrical terminal and ground. Jewelry
may catch on an object, resulting in painful injury.
5. Do not wear loose clothing, and keep long hair tied behind your head. Loose clothing
and long hair are easily entangled in rotating parts.
6. Wear a respirator to protect your lungs when working in dusty conditions.
Smoking, Alcohol, and Drugs in the Shop
Do not smoke when working in the shop. If the shop has designated smoking areas, smoke only
in these areas. Do not smoke in customers’ cars. A nonsmoker may not appreciate cigarette odor
in his or her car. A spark from a cigarette or lighter may ignite flammable materials in the work
place. The use of drugs or alcohol must be avoided while working in the shop. Even a small
amount of drugs or alcohol affects reaction time. In an emergency situation, slow reaction time
may cause personal injury. If a heavy object falls off the work bench and your reaction time is
slowed by drugs or alcohol, you may not get your foot out of the way in time, resulting in a foot
injury. When a fire starts in the workplace and you are a few seconds slower putting a fire extinguisher into operation because of alcohol or drug use, it could make the difference between
extinguishing a fire and having expensive fire damage.
The improper or
excessive use of
alcoholic beverages
and/or drugs may be
referred to as
substance abuse.
3
Copyright 2011 Cengage Learning. All Rights Reserved. May not be copied, scanned, or duplicated, in whole or in part. Due to electronic rights, some third party content may be suppressed from the eBook and/or eChapter(s).
Editorial review has deemed that any suppressed content does not materially affect the overall learning experience. Cengage Learning reserves the right to remove additional content at any time if subsequent rights restrictions require it.
SM_ch_01_001-040.qxd
Licensed to: iChapters User
11/7/05
10:01 AM
Page 4
Electrical Safety
1. Frayed cords on electrical equipment must be replaced or repaired immediately.
2. All electrical cords from lights and electrical equipment must have a ground connec-
tion. The ground connector is the round terminal in a three-prong electrical plug. Do
not use a two-prong adapter to plug in a three-prong electrical cord. Three-prong
electrical outlets should be mandatory in all shops.
3. Do not leave electrical equipment running and unattended.
Gasoline Safety
Gasoline is a very explosive liquid! One exploding gallon of gasoline has a force equal to fourteen sticks of dynamite. It is the expanding vapors from gasoline that are extremely dangerous.
These vapors are present even in cold temperatures. Vapors formed in gasoline tanks on cars are
controlled, but vapors from a gasoline storage can may escape from the can, resulting in a hazardous situation. Therefore, gasoline storage containers must be placed in a well-ventilated
space.
Approved gasoline storage cans have a flash-arresting screen at the outlet (Figure 1-2).
These screens prevent external ignition sources from igniting the gasoline within the can while
the gasoline is being poured. Follow these safety precautions regarding gasoline containers:
1. Always used approved gasoline containers that are painted red for proper
identification.
2. Do not fill gasoline containers completely full. Always leave the level of gasoline at
least 1 inch from the top of the container. This action allows expansion of the gasoline
at higher temperatures. If gasoline containers are completely full, the gasoline will
expand when the temperature increases. This expansion forces gasoline from the can
and creates a dangerous spill.
3. If gasoline containers must be stored, place them in a well-ventilated area such as a
storage shed. Do not store gasoline containers in your home or in the trunk of a
vehicle.
Screen
Figure 1-2 An approved gasoline container.
4
Copyright 2011 Cengage Learning. All Rights Reserved. May not be copied, scanned, or duplicated, in whole or in part. Due to electronic rights, some third party content may be suppressed from the eBook and/or eChapter(s).
Editorial review has deemed that any suppressed content does not materially affect the overall learning experience. Cengage Learning reserves the right to remove additional content at any time if subsequent rights restrictions require it.
SM_ch_01_001-040.qxd
Licensed to: iChapters User
11/7/05
10:01 AM
Page 5
4. When a gasoline container must be transported, be sure it is secured against upsets.
5. Do not store a partially filled gasoline container for long periods of time because it
may give off vapors and produce a potential danger.
6. Never leave gasoline containers open except while filling or pouring gasoline from the
container.
7. Do not prime an engine with gasoline while cranking the engine.
8. Never use gasoline as a cleaning agent.
Housekeeping Safety
1. Keep shop floors clean! Always clean shop floors immediately after a spill.
2. Store paint and other flammable liquids in a closed steel cabinet (Figure 1-3).
3. Oily rags must be stored in approved, covered garbage containers (Figure 1-4). A slow
generation of heat occurs from oxidation of oil on these rags. Heat may continue to
be generated until the ignition temperature is reached. The oil and the rags then begin
to burn, causing a fire. This action is called spontaneous combustion. However, if the
oily rags are in an airtight, approved container, the fire cannot receive enough oxygen
to cause burning.
4. Keep the shop neat and clean. Always pick up tools and parts, and do not leave
creepers lying on the floor.
5. Keep the workbenches clean. Do not leave heavy objects, such as used parts, on the
bench after you are finished with them.
Figure 1-3 Paints and combustible material
containers must be kept in an approved safety
cabinet.
Figure 1-4 Oily rags must be stored in approved
airtight containers.
5
Copyright 2011 Cengage Learning. All Rights Reserved. May not be copied, scanned, or duplicated, in whole or in part. Due to electronic rights, some third party content may be suppressed from the eBook and/or eChapter(s).
Editorial review has deemed that any suppressed content does not materially affect the overall learning experience. Cengage Learning reserves the right to remove additional content at any time if subsequent rights restrictions require it.
SM_ch_01_001-040.qxd
Licensed to: iChapters User
11/7/05
10:01 AM
Page 6
General Shop Safety
1. All sewer covers must fit properly and be kept securely in place.
2. Always wear a face shield, protective gloves, and protective clothing when necessary.
3.
4.
5.
6.
7.
8.
9.
10.
11.
12.
13.
14.
15.
16.
17.
18.
19.
20.
21.
22.
23.
24.
Gloves should be worn when working with solvents and caustic solutions, handling
hot metal, or grinding metal. Various types of protective gloves are available. Shop
coats and coveralls are the most common types of protective clothing.
Never direct high-pressure air from an air gun against human flesh. If this action is
allowed, air may penetrate the skin and enter the bloodstream, causing serious health
problems or death. Always keep air hoses in good condition. If an end blows off an
air hose, the hose may whip around and cause personal injury. Use only OSHAapproved air gun nozzles.
Handle all hazardous waste materials according to state and federal regulations.
(These regulations are explained later in this chapter.)
Always place a shop exhaust hose on the tailpipe of a vehicle if the engine is running
in the shop, and be sure the shop exhaust fan is turned on.
Keep hands, long hair, and tools away from rotating parts such as fan blades and belts
on running engines. Remember that an electric-drive fan may start turning at any time.
When servicing brakes or clutches from manual transmissions, always clean asbestos
dust from these components with an approved asbestos dust vacuum cleaner.
Always use the correct tool for the job. For example, never strike a hardened steel
component, such as a piston pin, with a steel hammer. This type of component may
shatter, and fragments can penetrate eyes or skin.
Follow the car manufacturer’s recommended service procedures.
Be sure that the shop has adequate ventilation.
Make sure the work area has adequate lighting.
Use trouble lights with steel or plastic cages around the bulb. If an unprotected bulb
breaks, it may ignite flammable materials in the area.
When servicing a vehicle, always apply the parking brake and place the transmission
in park with an automatic transmission or neutral with a manual transmission if the
engine is running. When the engine is stopped, place the transmission in park with an
automatic transmission or reverse with a manual transmission.
Avoid working on a vehicle parked on an incline.
Never work under a vehicle unless the vehicle chassis is supported securely on jack
stands.
When one end of a vehicle is raised, place wheel chocks on both sides of the wheels
remaining on the floor.
Be sure that you know the location of shop first-aid kits, eyewash fountains, and fire
extinguishers.
Collect oil, fuel, brake fluid, and other liquids in the proper safety containers.
Use only approved cleaning fluids and equipment. Do not use gasoline to clean parts.
Obey all state and federal safety, fire, and hazardous material regulations.
Always operate equipment according to the equipment manufacturer’s recommended
procedure.
Do not operate equipment unless you are familiar with the correct operating procedure.
Do not leave running equipment unattended.
Be sure the safety shields are in place on rotating equipment.
6
Copyright 2011 Cengage Learning. All Rights Reserved. May not be copied, scanned, or duplicated, in whole or in part. Due to electronic rights, some third party content may be suppressed from the eBook and/or eChapter(s).
Editorial review has deemed that any suppressed content does not materially affect the overall learning experience. Cengage Learning reserves the right to remove additional content at any time if subsequent rights restrictions require it.
SM_ch_01_001-040.qxd
Licensed to: iChapters User
11/7/05
10:01 AM
Page 7
25. All shop equipment must have regularly scheduled maintenance and adjustment.
26. Some shops have safety lines around equipment; always work within these lines when
27.
28.
29.
30.
31.
operating equipment.
Be sure that shop heating equipment is well ventilated.
Do not run in the shop or engage in horseplay.
Post emergency phone numbers near the phone. These numbers should include a
doctor, ambulance, fire department, hospital, and police.
Do not place hydraulic jack handles where someone can trip over them.
Keep aisles clear of debris.
Fire Safety
1. Familiarize yourself with the location and operation of all shop fire extinguishers.
2. If a fire extinguisher is used, report it to management so the extinguisher can be
recharged.
3. Do not use any type of open flame heater to heat the work area.
4. Do not turn the ignition switch on or crank the engine with a gasoline line discon-
nected.
5. Store all combustible materials such as gasoline, paint, and oily rags in approved
safety containers.
6. Clean up gasoline, oil, or grease spills immediately.
7. Always wear clean shop clothes. Do not wear oil-soaked clothes.
8. Do not allow sparks and flames near batteries.
9. Welding tanks must be securely fastened in an upright position.
10. Do not block doors, stairways, or exits.
11. Do not smoke when working on vehicles.
12. Do not smoke or create sparks near flammable materials or liquids.
13. Store combustible shop supplies, such as paint, in a closed steel cabinet.
14. Store gasoline in approved safety containers.
15. If a gasoline tank is removed from a vehicle, do not drag the tank on the shop floor.
16. Know the approved fire escape route from your classroom or shop to the outside of
the building.
17. If a fire occurs, do not open doors or windows. This action creates extra draft that
makes the fire worse.
18. Do not put water on a gasoline fire because the water will make the fire worse.
19. Call the fire department as soon as a fire begins, and then attempt to extinguish the
fire.
20. If possible, stand 6 to 10 feet from the fire and aim the fire extinguisher nozzle at the
base of the fire with a sweeping action.
21. If a fire produces a great deal of smoke in the room, remain close to the floor to
obtain oxygen and avoid breathing smoke.
22. If the fire is too hot or the smoke makes breathing difficult, leave the building.
23. Do not reenter a burning building.
7
Copyright 2011 Cengage Learning. All Rights Reserved. May not be copied, scanned, or duplicated, in whole or in part. Due to electronic rights, some third party content may be suppressed from the eBook and/or eChapter(s).
Editorial review has deemed that any suppressed content does not materially affect the overall learning experience. Cengage Learning reserves the right to remove additional content at any time if subsequent rights restrictions require it.
SM_ch_01_001-040.qxd
Licensed to: iChapters User
11/7/05
10:01 AM
Page 8
Transfer
pump
Bond wire
Ground to
water pipe
Hose
Spring clamp
Spring clamp
Screw clamp
Paint or
solvent drum
Safety
can
Bond wire
Safety
can
Figure 1-5 Safe procedures for flammable liquid transfer.
24. Keep solvent containers covered except when pouring from one container to another.
When flammable liquids are transferred from bulk storage, the bulk container should
be grounded to a permanent shop fixture such as a metal pipe. During this transfer
process, the bulk container should be grounded to the portable container (Figure 1-5).
These ground wires prevent the buildup of a static electric charge, which could result
in a spark and disastrous explosion. Always discard or clean empty solvent containers
because fumes in these containers are a fire hazard.
25. Familiarize yourself with different types of fires and fire extinguishers, and know the
type of extinguisher to use on each fire.
Shop Safety Equipment
Fire Extinguishers
Shop safety
equipment must be
easily accessible and
in good working
condition.
Fire extinguishers are one of the most important pieces of safety equipment. All shop personnel
must know the location of the fire extinguishers in the shop. If you have to waste time looking for
an extinguisher after a fire starts, the fire could become out of control before you put the extinguisher into operation. Fire extinguishers should be located where they are easily accessible at all
times. Everyone working in the shop must know how to operate the fire extinguishers. There are
several different types of fire extinguishers, but their operation usually involves these steps:
1. Get as close as possible to the fire without jeopardizing your safety.
2. Grasp the extinguisher firmly and aim the extinguisher at the fire.
3. Pull a pin from the extinguisher handle.
4. Squeeze the handle to dispense the contents of the extinguisher.
5. Direct the fire extinguisher nozzle at the base of the fire and dispense the contents of
the extinguisher with a sweeping action back and forth across the fire. Most extinguishers discharge their contents in 8 to 25 seconds.
8
Copyright 2011 Cengage Learning. All Rights Reserved. May not be copied, scanned, or duplicated, in whole or in part. Due to electronic rights, some third party content may be suppressed from the eBook and/or eChapter(s).
Editorial review has deemed that any suppressed content does not materially affect the overall learning experience. Cengage Learning reserves the right to remove additional content at any time if subsequent rights restrictions require it.
SM_ch_01_001-040.qxd
Licensed to: iChapters User
11/7/05
10:01 AM
Page 9
6. Always be sure the fire is extinguished.
7. Always keep an escape route open behind you so a quick exit is possible if the fire
becomes out of control.
A decal on each fire extinguisher identifies the type of chemical in the extinguisher and
provides operating information (Figure 1-6). Shop personnel should be familiar with the following types of fires and fire extinguishers:
1. Class A fires are those involving ordinary combustible materials such as paper, wood,
clothing, and textiles. Multipurpose dry chemical extinguishers are used on these fires.
2. Class B fires involve the burning of flammable liquids such as gasoline, oil, paint, solvents, and greases. These fires may be extinguished with multipurpose dry chemical
extinguishers. Fire extinguishers containing halogen, or halon, may be used to extinguish class B fires. The chemicals in this type of extinguisher attach to the hydrogen,
hydroxide, and oxygen molecules to stop the combustion process almost instantly.
However, the resultant gases from the use of halogen-type extinguishers are very toxic
and harmful to the operator of the extinguisher.
3. Class C fires involve the burning of electrical equipment such as wires, motors, and
switches. These fires may be extinguished with multipurpose dry chemical
extinguishers.
4. Class D fires involve the combustion of metal chips, turnings, and shavings. Dry
chemical extinguishers are the only type of extinguisher recommended for these fires.
Figure 1-6 Types and sizes of fire extinguishers.
9
Copyright 2011 Cengage Learning. All Rights Reserved. May not be copied, scanned, or duplicated, in whole or in part. Due to electronic rights, some third party content may be suppressed from the eBook and/or eChapter(s).
Editorial review has deemed that any suppressed content does not materially affect the overall learning experience. Cengage Learning reserves the right to remove additional content at any time if subsequent rights restrictions require it.
SM_ch_01_001-040.qxd
Licensed to: iChapters User
11/7/05
10:01 AM
Page 10
TABLE 1-1 FIRE EXTINGUISHER SELECTION
(Courtesy of General Fire Extinguisher Corporation)
Additional information regarding types of extinguishers for various types of fires is provided
in Table 1-1.
Eyewash Fountains
Eye injuries may occur in various ways in an automotive shop. Some of the common eye accidents are:
1. Thermal burns from excessive heat
2. Irradiation burns from excessive light such as from an arc welder
3. Chemical burns from strong liquids such as battery electrolyte
4. Foreign material in the eye
5. Penetration of the eye by a sharp object
6. A blow from a blunt object
Wearing safety glasses and observing shop safety rules will prevent most eye accidents. If a
chemical gets in your eyes, it must be washed out immediately to prevent a chemical burn. An
eyewash fountain is the most effective way to wash the eyes, and every shop should be
equipped with some eyewash facility (Figure 1-7). Be sure you know the location of the eyewash
fountain in the shop.
10
Copyright 2011 Cengage Learning. All Rights Reserved. May not be copied, scanned, or duplicated, in whole or in part. Due to electronic rights, some third party content may be suppressed from the eBook and/or eChapter(s).
Editorial review has deemed that any suppressed content does not materially affect the overall learning experience. Cengage Learning reserves the right to remove additional content at any time if subsequent rights restrictions require it.
SM_ch_01_001-040.qxd
Licensed to: iChapters User
11/7/05
10:01 AM
Page 11
Figure 1-7 Eyewash fountain.
Safety Glasses and Face Shields
The mandatory use of eye protection with safety glasses or a face shield is one of the most
important safety rules in a shop. Many shop insurance policies require the use of eye protection
in the shop. Some automotive technicians have been blinded in one or both eyes because they
did not bother to wear safety glasses. All safety glasses must be equipped with safety glass, and
they should provide some type of side protection (Figure 1-8). When selecting a pair of safety
glasses, they should feel comfortable on your face. If they are uncomfortable, you may tend to
take them off, leaving the eyes unprotected. A face shield should be worn when handling hazardous chemicals or when using an electric grinder or buffer (Figure 1-9).
Side
protectors
Figure 1-8 Safety glasses with side protection must be
worn in the automotive shop.
Figure 1-9 Face shield.
11
Copyright 2011 Cengage Learning. All Rights Reserved. May not be copied, scanned, or duplicated, in whole or in part. Due to electronic rights, some third party content may be suppressed from the eBook and/or eChapter(s).
Editorial review has deemed that any suppressed content does not materially affect the overall learning experience. Cengage Learning reserves the right to remove additional content at any time if subsequent rights restrictions require it.
SM_ch_01_001-040.qxd
Licensed to: iChapters User
11/7/05
10:01 AM
Page 12
Figure 1-10 First-aid kit.
First-Aid Kits
First-aid kits should be clearly identified and conveniently located (Figure 1-10). These kits contain
such items as bandages and ointment required for minor cuts. All shop personnel must be familiar
with the location of first-aid kits. At least one of the shop personnel should have basic first-aid
training, and this person should be in charge of administering first aid and keeping first-aid kits
filled.
Hazardous Waste Disposal
▲
WARNING: To avoid personal injury when handling hazardous waste material,
always wear proper protective clothing and equipment detailed in the right-to-know
laws. This includes respirator equipment (Figure 1-11). All recommended procedures must
be followed accurately.
Figure 1-11 Wear recommended safety clothing and equipment when hazardous materials are
handled.
12
Copyright 2011 Cengage Learning. All Rights Reserved. May not be copied, scanned, or duplicated, in whole or in part. Due to electronic rights, some third party content may be suppressed from the eBook and/or eChapter(s).
Editorial review has deemed that any suppressed content does not materially affect the overall learning experience. Cengage Learning reserves the right to remove additional content at any time if subsequent rights restrictions require it.
SM_ch_01_001-040.qxd
Licensed to: iChapters User
11/7/05
10:01 AM
Page 13
Hazardous waste materials in automotive shops are chemicals or components that the shop no
longer needs. These materials pose a danger to the environment and people if they are disposed
of in ordinary garbage cans or sewers. However, it should be noted that no material is considered
hazardous waste until the shop has finished using it and is ready to dispose of it. The Environmental Protection Agency (EPA) publishes a list of hazardous materials, which is included in the
Code of Federal Regulations. Waste is considered hazardous if it is included on the EPA list of
hazardous materials or if it has one or more of the following characteristics:
1. Reactive. Any material that reacts violently with water or other chemicals is considered
hazardous. If a material releases cyanide gas when exposed to low pH acid solutions,
hydrogen sulphide gas, or similar gases, it is hazardous.
2. Corrosive. If a material burns the skin or dissolves metals and other materials, it is
considered hazardous.
3. Toxic. Materials are hazardous if they leach one or more of eight heavy metals in con-
centrations greater than 100 times primary drinking water standard.
4. Ignitable. A liquid is hazardous if it has a flash point below 140°F (60°C), and a solid
is hazardous if it ignites spontaneously.
▲
WARNING: Hazardous waste disposal laws include serious penalties for anyone
responsible for breaking these laws.
Federal and state laws control the disposal of hazardous waste materials. Every shop
employee must be familiar with these laws. Hazardous waste disposal laws include the Resource
Conservation and Recovery Act (RCRA). This law basically states that hazardous material users
are responsible for hazardous materials from the time they become a waste until the proper
waste disposal is completed. Many automotive shops hire an independent hazardous waste
hauler to dispose of hazardous waste material (Figure 1-12). The shop owner or manager should
have a written contract with the hazardous waste hauler. Rather than have hazardous waste material hauled to an approved hazardous waste disposal site, a shop may choose to recycle the
material in the shop. Therefore, the user must store hazardous waste material properly and safely
and be responsible for the transportation of this material until it arrives at an approved hazardous
waste disposal site and is processed according to the law.
The Resource
Conservation and
Recovery Act (RCRA)
states that hazardous
material users are
responsible for
hazardous materials
from the time they
become a waste
until the proper
waste disposal is
completed.
Figure 1-12 Hazardous waste hauler.
13
Copyright 2011 Cengage Learning. All Rights Reserved. May not be copied, scanned, or duplicated, in whole or in part. Due to electronic rights, some third party content may be suppressed from the eBook and/or eChapter(s).
Editorial review has deemed that any suppressed content does not materially affect the overall learning experience. Cengage Learning reserves the right to remove additional content at any time if subsequent rights restrictions require it.
SM_ch_01_001-040.qxd
Licensed to: iChapters User
11/7/05
10:01 AM
Page 14
The RCRA controls the following types of automotive waste:
1. Paint and body repair products waste
2. Solvents for parts and equipment cleaning
3. Batteries and battery acid
4. Mild acids used for metal cleaning and preparation
5. Waste oil and engine coolants or antifreeze
6. Air-conditioning refrigerants
7. Engine oil filters
Material safety data
sheets (MSDS)
provide extensive
information about
hazardous materials.
Never, under any circumstances, use the following methods to dispose of hazardous waste
material:
1. Pour hazardous wastes on weeds to kill them
2. Pour hazardous wastes on gravel streets to prevent dust
3. Throw hazardous wastes in a dumpster
4. Dispose of hazardous wastes anywhere but an approved disposal site
5. Pour hazardous wastes down sewers, toilets, sinks, or floor drains
The right-to-know laws state that employees have a right to know when the materials they
use at work are hazardous. The right-to-know laws started with the Hazard Communication Standard published by OSHA in 1983. This document was originally intended for chemical companies
and manufacturers that required employees to handle hazardous materials in their work situation.
At the present time, most states have established their own right-to-know laws. Meanwhile, the
federal courts have decided to apply these laws to all companies, including automotive service
shops. Under the right-to-know laws, employers have three responsibilities regarding the handling of hazardous materials by their employees.
First, all employees must be trained about the types of hazardous materials they will
encounter in the workplace. The employees must be informed about their rights under legislation
regarding the handling of hazardous materials. All hazardous materials must be properly labeled,
and information about each hazardous material must be posted on material safety data sheets
(MSDS), which are available from the manufacturer (Figure 1-13). In Canada, MSDS sheets are
called workplace hazardous materials information systems (WHMIS).
Employers have a responsibility to place MSDS sheets where they are easily accessible to all
employees. The MSDS sheets provide extensive information about the hazardous material such
as:
1. Chemical name
2. Physical characteristics
3. Protective equipment required for handling
4. Explosion and fire hazards
5. Other incompatible materials
6. Health hazards such as signs and symptoms of exposure, medical conditions aggravated by exposure, and emergency and first-aid procedures
7. Safe handling precautions
8. Spill and leak procedures
Secondly, the employer has a responsibility to make sure that all hazardous materials are
properly labeled. The label information must include health, fire, and reactivity hazards posed by
the material and the protective equipment necessary to handle the material. The manufacturer
14
Copyright 2011 Cengage Learning. All Rights Reserved. May not be copied, scanned, or duplicated, in whole or in part. Due to electronic rights, some third party content may be suppressed from the eBook and/or eChapter(s).
Editorial review has deemed that any suppressed content does not materially affect the overall learning experience. Cengage Learning reserves the right to remove additional content at any time if subsequent rights restrictions require it.
SM_ch_01_001-040.qxd
Licensed to: iChapters User
11/7/05
10:01 AM
Page 15
HEXANE
=======================================================
MSDS Safety Information
=======================================================
Ingredients
=======================================================
Name: HEXANE (N_HEXANE)
% Wt: >97
OSHA PEL: 500 PPM
ACGIH TLV: 50 PPM
EPA Rpt Qty: 1 LB
DOT Rpt Qty: 1 LB
=======================================================
Health Hazards Data
=======================================================
LD50 LC50 Mixture: LD50:(ORAL,RAT) 28.7 KG/MG
Route Of Entry Inds _ Inhalation: YES
Skin: YES
Ingestion: YES
Carcinogenicity Inds _ NTP: NO
IARC: NO
OSHA: NO
Effects of Exposure: ACUTE:INHALATION AND INGESTION ARE HARMFUL AND MAY BE FATAL.
INHALATION AND INGESTION MAY CAUSE HEADACHE, NAUSEA, VOMITING, DIZZINESS, IRRITATION
OF RESPIRATORY TRACT, GASTROINTESTINAL IRRITATION AND UNCONSCIOUSNESS. CONTACT
W/SKIN AND EYES MAY CAUSE IRRITATION. PROLONGED SKIN MAY RESULT IN DERMATITIS (EFTS
OF OVEREXP)
Signs And Symptions Of Overexposure: HLTH HAZ:CHRONIC:MAY INCLUDE CENTRAL
NERVOUS SYSTEM DEPRESSION.
Medical Cond Aggravated By Exposure: NONE IDENTIFIED.
First Aid: CALL A PHYSICIAN. INGEST:DO NOT INDUCE VOMITING. INHAL:REMOVE TO FRESH AIR. IF
NOT BREATHING, GIVE ARTIFICIAL RESPIRATION. IF BREATHING IS DIFFICULT, GIVE OXYGEN.
EYES:IMMED FLUSH W/PLENTY OF WATER FOR AT LEAST 15 MINS. SKIN:IMMED FLUSH W/P LENTY
OF WATER FOR AT LEAST 15 MINS WHILE REMOVING CONTAMD CLTHG & SHOES. WASH CLOTHING
BEFORE REUSE.
=======================================================
Handling and Disposal
=======================================================
Spill Release Procedures: WEAR NIOSH/MSHA SCBA & FULL PROT CLTHG. SHUT OFF
IGNIT SOURCES:NO FLAMES, SMKNG/FLAMES IN AREA. STOP LEAK IF YOU CAN DO SO W/OUT
HARM. USE WATER SPRAY TO REDUCE VAPS. TAKE UP W/SAND OR OTHER NON_COMBUST MATL &
PLACE INTO CNTNR FOR LATER (SU PDAT)
Neutralizing Agent: NONE SPECIFIED BY MANUFACTURER.
Waste Disposal Methods: DISPOSE IN ACCORDANCE WITH ALL APPLICABLE FEDERAL, STATE AND
LOCAL ENVIRONMENTAL REGULATIONS. EPA HAZARDOUS WASTE NUMBER:D001 (IGNITABLE
WASTE).
Handling And Storage Precautions: BOND AND GROUND CONTAINERS WHEN TRANSFERRING LIQUID.
KEEP CONTAINER TIGHTLY CLOSED.
Other Precautions: USE GENERAL OR LOCAL EXHAUST VENTILATION TO MEET
TLVREQUIREMENTS. STORAGE COLOR CODE RED (FLAMMABLE).
=======================================================
Fire and Explosion Hazard Information
=======================================================
Flash Point Method: CC
Flash Point Text: _9F,_23C
Lower Limits: 1.2%
Upper Limits: 77.7%
Extinguishing Media: USE ALCOHOL FOAM, DRY CHEMICAL OR CARBON DIOXIDE. (WATER MAY BE
INEFFECTIVE).
Fire Fighting Procedures: USE NIOSH/MSHA APPROVED SCBA & FULL PROTECTIVE
EQUIPMENT (FP N).
Unusual Fire/Explosion Hazard: VAP MAY FORM ALONG SURFS TO DIST IGNIT SOURCES & FLASH
BACK. CONT W/STRONG OXIDIZERS MAY CAUSE FIRE. TOX GASES PRDCED MAY INCL:CARBON
MONOXIDE, CARBON DIOXIDE.
=======================================================
Figure 1-13 Material safety data sheets (MSDS) inform employees about hazardous materials.
must supply all warning and precautionary information about hazardous materials, and this information must be read and understood by the employee before handling the material.
Thirdly, employers are responsible for maintaining permanent files regarding hazardous
materials. These files must include information on hazardous materials in the shop, proof of
employee training programs, and information about accidents such as spills or leaks of hazardous
materials. Employers’ files must also include proof that employees’ requests for hazardous material information such as MSDS sheets have been met. A general right-to-know compliance procedure manual must be maintained by employers.
15
Copyright 2011 Cengage Learning. All Rights Reserved. May not be copied, scanned, or duplicated, in whole or in part. Due to electronic rights, some third party content may be suppressed from the eBook and/or eChapter(s).
Editorial review has deemed that any suppressed content does not materially affect the overall learning experience. Cengage Learning reserves the right to remove additional content at any time if subsequent rights restrictions require it.
SM_ch_01_001-040.qxd
Licensed to: iChapters User
11/7/05
10:01 AM
Page 16
Personal Safety
Personal safety is the responsibility of each technician in the shop. Always follow these safety
practices:
1. Always use the correct tool for the job. If the wrong tool is used, it may slip and cause
hand injury.
2. Follow the car manufacturer’s recommended service procedures.
3. Always wear eye protection such as safety glasses or a face shield (Figure 1-14).
4. Wear protective gloves when cleaning parts in hot or cold tanks and when handling
hot parts such as exhaust manifolds.
5. Do not smoke when working on a vehicle. A spark from a cigarette or lighter may
ignite flammable materials in the work area.
6. When working on a running engine, keep hands and tools away from rotating parts.
Remember that electric-drive fans may start turning at any time.
7. Do not wear loose clothing, and keep long hair tied behind your head. Loose clothing
or long hair is easily entangled in rotating parts.
8. Wear safety shoes or boots.
9. Do not wear watches, jewelry, or rings when working on a vehicle. Severe burns
occur when jewelry makes contact between an electric terminal and ground.
10. Always place a shop exhaust hose on the vehicle tailpipe if the engine is running, and
be sure the exhaust fan is running. Carbon monoxide in the vehicle exhaust is harmful
or fatal to the human body.
11. Be sure that the shop has adequate ventilation.
12. Make sure the work area has adequate lighting.
13. Use trouble lights with steel or plastic cages around the bulb. If an unprotected bulb
breaks, it may ignite flammable materials in the area.
14. When servicing a vehicle, always apply the parking brake and place the transmission
in park with an automatic transmission or neutral with a manual transmission.
15. Avoid working on a vehicle parked on an incline.
16. Never work under a vehicle unless the vehicle chassis is supported securely on safety
stands.
Figure 1-14 Safety glasses.
16
Copyright 2011 Cengage Learning. All Rights Reserved. May not be copied, scanned, or duplicated, in whole or in part. Due to electronic rights, some third party content may be suppressed from the eBook and/or eChapter(s).
Editorial review has deemed that any suppressed content does not materially affect the overall learning experience. Cengage Learning reserves the right to remove additional content at any time if subsequent rights restrictions require it.
SM_ch_01_001-040.qxd
Licensed to: iChapters User
11/7/05
10:01 AM
Page 17
17. When one end of a vehicle is raised, place wheel chocks on both sides of the wheels
18.
19.
20.
21.
22.
23.
24.
25.
26.
27.
28.
29.
30.
remaining on the floor.
Be sure that you know the location of shop first-aid kits and eyewash fountains.
Familiarize yourself with the location of all shop fire extinguishers.
Do not use any type of open flame heater to heat the work area.
Collect oil, fuel, brake fluid, and other liquids in the proper safety containers.
Use only approved cleaning fluids and equipment. Do not use gasoline to clean parts.
Obey all state and federal safety, fire, and hazardous material regulations.
Always operate equipment according to the equipment manufacturer’s recommended
procedure.
Do not operate equipment unless you are familiar with the correct operating procedure.
Do not leave running equipment unattended.
Do not use electrical equipment, including trouble lights, with frayed cords.
Be sure the safety shields are in place on rotating equipment.
Before operating electric equipment, be sure the power cord has a ground connection.
When working in an area where extreme noise levels are encountered, wear ear plugs
or covers.
Lifting and Carrying
Many automotive service jobs require heavy lifting. You should know your maximum weight lifting
ability. Do not attempt to lift more than this weight. If a heavy part exceeds your weight lifting ability, have a co-worker help with the lifting job. Follow these steps when lifting or carrying an object:
1. If the object is to be carried, be sure your path is free from loose parts or tools.
2. Position your feet close to the object and position your back reasonably straight for
proper balance.
3. Your back and elbows should be kept as straight as possible. Continue to bend your
knees until your hands reach the best lifting location on the object to be lifted.
4. Be certain the container is in good condition. If a container falls apart during the lifting
operation, parts may drop out of the container and result in foot injury or part damage.
5. Maintain a firm grip on the object, and do not attempt to change your grip while lifting
is in progress.
6. Straighten your legs to lift the object, and keep the object close to your body. Use leg
muscles rather than back muscles.
7. If you have to change the direction of travel, turn your whole body instead of twisting
it.
8. Do not bend forward to place an object on a workbench or table. Position the object on
the front surface of the workbench and slide it back. Do not pinch your fingers under
the object while setting it on the front of the bench.
9. If the object must be placed on the floor or a low surface, bend your legs to lower the
object. Do not bend your back forward because this movement strains back muscles.
10. When a heavy object must be placed on the floor, locate suitable blocks under the
object to prevent jamming your fingers under the object.
17
Copyright 2011 Cengage Learning. All Rights Reserved. May not be copied, scanned, or duplicated, in whole or in part. Due to electronic rights, some third party content may be suppressed from the eBook and/or eChapter(s).
Editorial review has deemed that any suppressed content does not materially affect the overall learning experience. Cengage Learning reserves the right to remove additional content at any time if subsequent rights restrictions require it.
SM_ch_01_001-040.qxd
Licensed to: iChapters User
11/7/05
10:01 AM
Page 18
Hand Tool Safety
Many shop accidents are caused by improper use and care of hand tools. These hand tool safety
steps must be followed:
1. Maintain tools in good condition and keep them clean. Worn tools may slip and cause
hand injury. If a hammer is used with a loose head, the head may fly off and cause
personal injury or vehicle damage. Your hand may slip off a greasy tool, and this
action may cause some part of your body to hit the vehicle. For example, your head
may hit the vehicle hood.
2. Using the wrong tool for the job may cause damage to the tool, fastener, or your hand
if the tool slips. If you use a screwdriver for a chisel or pry bar, the blade may shatter,
causing serious personal injury.
3. Use sharp pointed tools with caution. Always check your pockets before sitting on the
vehicle seat. A screwdriver, punch, or chisel in the back pocket may put an expensive
tear in the upholstery. Do not lean over fenders with sharp tools in your pockets.
4. Tool tips that are intended to be sharp should be kept in a sharp condition. Sharp
tools, such as chisels, will do the job faster with less effort.
Power Tool Safety
Power tools use electricity, shop air, or hydraulic pressure as a power source. Careless operation of
power tools may cause personal injury and vehicle damage. Follow these steps for safe power tool
operation:
1. Do not operate power tools with frayed power cords.
2. Be sure the power tool cord has a proper ground connection.
3. Do not stand on a wet floor while operating an electric power tool.
4. Always unplug an electric power tool before servicing the tool.
5. Do not leave a power tool running and unattended.
6. When using a power tool on small parts, do not hold the part in your hand. The part
must be secured in a bench vise or with locking pliers.
7. Do not use a power tool on a job where the maximum capacity of the tool is exceeded.
8. Be sure that all power tools are in good condition, and always operate these tools
according to the tool manufacturer’s recommended procedure.
9. Make sure all protective shields and guards are in position.
10. Maintain proper body balance while using a power tool.
11. Always wear safety glasses or a face shield.
12. Wear ear protection.
13. Follow the equipment manufacturer’s recommended maintenance schedule for all shop
equipment.
14. Never operate a power tool unless you are familiar with the tool manufacturer’s recommended operating procedure. Serious accidents occur from improper operating procedures.
15. Always make sure that the wheels are in good condition and are securely attached on
the electric grinder.
16. Keep fingers and clothing away from grinding and buffing wheels. When grinding or
buffing a small part, it should be held with a pair of locking pliers.
17. Always make sure the sanding or buffing disc is securely attached to the sander pad.
18
Copyright 2011 Cengage Learning. All Rights Reserved. May not be copied, scanned, or duplicated, in whole or in part. Due to electronic rights, some third party content may be suppressed from the eBook and/or eChapter(s).
Editorial review has deemed that any suppressed content does not materially affect the overall learning experience. Cengage Learning reserves the right to remove additional content at any time if subsequent rights restrictions require it.
SM_ch_01_001-040.qxd
Licensed to: iChapters User
11/7/05
10:01 AM
Page 19
18. Special heavy-duty sockets must be used on impact wrenches. If ordinary sockets are
used on an impact wrench, they may break and cause serious personal injury.
19. Never operate an air chisel unless the tool is securely connected to the chisel with the
proper retaining device.
20. Never direct a blast of air from an air gun against any part of your body. If air penetrates
the skin and enters the bloodstream, it may cause very serious health problems and
even death.
Compressed Air Equipment Safety
The shop air supply contains high-pressure air in the shop compressor and air lines. Serious
injury or property damage may result from careless operation of compressed air equipment. Follow these steps to improve safety when using compressed air equipment:
1. Wear safety glasses or a face shield for all shop tasks, including those tasks involving
the use of compressed air equipment.
2. Wear ear protection when using compressed air equipment.
3. Always maintain air hoses and fittings in good condition. If an end suddenly blows off
an air hose, the hose will whip around, and this may cause personal injury.
4. Do not direct compressed air against the skin. This air may penetrate the skin, particularly through small cuts or scratches. If air penetrates the skin and enters the bloodstream, it can be fatal or cause serious health complications. Use only air gun nozzles
approved by OSHA.
5. Do not use an air gun to blow off clothing or hair.
6. Do not clean the workbench or floor with compressed air. This action may blow very
small parts against your skin or into your eye. Small parts blown by compressed air
may cause vehicle damage. For example, if the car in the next stall has the air cleaner
removed, a small part may go into the carburetor or throttle body. When the engine is
started, this part will likely be pulled into the cylinder by engine vacuum, and the part
will penetrate through the top of a piston.
7. Never spin bearings with compressed air because the bearing will rotate at extremely
high speed. Under this condition, the bearing may be damaged or disintegrate, causing personal injury.
8. All pneumatic tools must be operated according to the tool manufacturer’s recommended operating procedure.
9. Follow the equipment manufacturer’s recommended maintenance schedule for all
compressed air equipment.
Hydraulic Pressing and Lifting Equipment
Hydraulic Press
▲
WARNING: When operating a hydraulic press, always be sure that the components
being pressed are properly supported on the press bed with steel supports. Improperly
supported components may suddenly move or fall, resulting in personal injury.
▲
WARNING: When using a hydraulic press, never operate the pump handle until the
pressure gauge exceeds the maximum pressure rating of the press. If this pressure is
exceeded, some part of the press may suddenly break and cause severe personal injury.
When two components have a tight precision fit between them, a hydraulic press is used to separate these components or press them together. The hydraulic press rests on the shop floor, and an
19
Copyright 2011 Cengage Learning. All Rights Reserved. May not be copied, scanned, or duplicated, in whole or in part. Due to electronic rights, some third party content may be suppressed from the eBook and/or eChapter(s).
Editorial review has deemed that any suppressed content does not materially affect the overall learning experience. Cengage Learning reserves the right to remove additional content at any time if subsequent rights restrictions require it.
SM_ch_01_001-040.qxd
Licensed to: iChapters User
11/7/05
10:01 AM
Page 20
Figure 1-15 Hydraulic press.
adjustable steel beam bed is retained to the lower press frame with heavy steel pins. A hydraulic
cylinder and ram is mounted on the top part of the press with the ram facing downward toward the
press bed (Figure 1-15). The component being pressed is placed on the press bed with appropriate
steel supports. A hand-operated hydraulic pump is mounted on the side of the press. When the
handle is pumped, hydraulic fluid is forced into the cylinder, and the ram is extended against the
component on the press bed to complete the pressing operation. A pressure gauge on the press
indicates the pressure applied from the hand pump to the cylinder. The press frame is designed for
a certain maximum pressure, and this pressure must not be exceeded during hand pump operation.
Floor Jack
■
CAUTION: The maximum lifting capacity of the floor jack is usually written on a
jack decal. Never lift a vehicle that exceeds the jack lifting capacity. This action may
cause the jack to break or collapse, resulting in vehicle damage or personal injury.
A floor jack is a portable unit mounted on wheels. The lifting pad on the jack is placed under the
chassis of the vehicle, and the jack handle is operated with a pumping action (Figure 1-16). This
jack handle operation forces fluid into a hydraulic cylinder in the jack, and this cylinder extends
to force the jack lift pad upward and lift the vehicle. Always be sure that the lift pad is positioned
securely under one of the car manufacturer’s recommended lift points. To release the hydraulic
pressure and lower the vehicle, the handle or release lever must be turned slowly. Do not leave
the jack handle where someone can trip over it.
20
Copyright 2011 Cengage Learning. All Rights Reserved. May not be copied, scanned, or duplicated, in whole or in part. Due to electronic rights, some third party content may be suppressed from the eBook and/or eChapter(s).
Editorial review has deemed that any suppressed content does not materially affect the overall learning experience. Cengage Learning reserves the right to remove additional content at any time if subsequent rights restrictions require it.
SM_ch_01_001-040.qxd
11/7/05
Licensed to: iChapters User
10:01 AM
Page 21
Figure 1-16 Hydraulic floor jack.
Lift
▲
WARNING: Always be sure that the lift arms are securely positioned under the car
manufacturer’s recommended lift points before raising a vehicle. These lift points are
shown in the service manual. Using improper lift points may cause the vehicle to slip off the
lift, resulting in vehicle damage or personal injury.
■
CAUTION: The maximum capacity of the vehicle lift is placed on an identification
plate. Never lift a vehicle that is heavier than the maximum capacity of the lift.
A lift is used to raise a vehicle so the technician can work under the vehicle. The lift arms must be
placed under the car manufacturer’s recommended lift points prior to raising a vehicle. Twin posts
are used on some lifts, whereas other lifts have a single post (Figure 1-17). Some lifts have an electric motor that drives a hydraulic pump to create fluid pressure and force the lift upward. Other
lifts use air pressure from the shop air supply to force the lift upward. If shop air pressure is used
for this purpose, the air pressure is applied to fluid in the lift cylinder. A control lever or switch is
placed near the lift. The control lever supplies shop air pressure to the lift cylinder, and the switch
turns on the lift pump motor. Always be sure that the safety lock is engaged after the lift is raised.
When the safety lock is released, a release lever is operated slowly to lower the vehicle.
A lift may be
referred to as a
hoist.
An engine lift may
be called a crane or
a cherry picker.
Figure 1-17 Lifts are used to raise a vehicle.
21
Copyright 2011 Cengage Learning. All Rights Reserved. May not be copied, scanned, or duplicated, in whole or in part. Due to electronic rights, some third party content may be suppressed from the eBook and/or eChapter(s).
Editorial review has deemed that any suppressed content does not materially affect the overall learning experience. Cengage Learning reserves the right to remove additional content at any time if subsequent rights restrictions require it.
SM_ch_01_001-040.qxd
Licensed to: iChapters User
11/7/05
10:01 AM
Page 22
Lift Safety
▲
WARNING: Do not raise a vehicle on a lift if the vehicle weight exceeds the maximum capacity of the lift. This action may result in lift damage or sudden lowering of
the lift, which may result in personal injury.
▲
WARNING: When a vehicle is raised on a lift, the vehicle must be raised high
enough to allow engagement of the lift locking mechanism. If the locking mechanism
is not engaged, the lift may drop suddenly, resulting in personal injury.
Special precautions and procedures must be followed when a vehicle is raised on a lift. Follow
these steps for lift safety:
1. Always be sure the lift is completely lowered before driving a vehicle on or off the lift.
2. Do not hit or run over lift arms and adapters when driving a vehicle on or off the lift.
Have a co-worker guide you when driving a vehicle onto the lift. Do not stand in
front of a lift with the car coming towards you.
3. Be sure the lift pads on the lift are contacting the car manufacturer’s recommended lift
points shown in the service manual. If the proper lift points are not used, components
under the vehicle such as brake lines or body parts may be damaged. Failure to use
the recommended lift points may cause the vehicle to slip off the lift, resulting in
severe vehicle damage and personal injury.
4. Before a vehicle is raised or lowered, close the doors, hood, and trunk lid.
5. When a vehicle is lifted a short distance off the floor, stop the lift and check the contact between the hoist lift pads and the vehicle to be sure the lift pads are still on the
recommended lift points.
6. When a vehicle is raised on a lift, be sure the safety mechanism is in place to prevent
the lift from accidentally dropping.
7. Before lowering a vehicle on a lift, always make sure there are no objects, tools, or
people under the vehicle.
8. Do not rock a vehicle on a lift during a service job.
9. When a vehicle is raised on a lift, removal of some heavy components may cause
vehicle imbalance on the lift. Since front-wheel-drive cars have the engine and
transaxle located at the front of the vehicle, these cars have most of their weight on
the front end. Removing a heavy rear-end component on these cars may cause the
back end of the car to rise off the lift. If this action is allowed to happen, the vehicle
could fall off the lift!
10. Do not raise a vehicle on a lift with people in the vehicle.
11. When raising pickup trucks and vans on a lift, remember these vehicles are higher
than a passenger car. Be sure there is adequate clearance between the top of the vehicle and the shop ceiling or components under the ceiling.
12. Do not raise a four-wheel-drive vehicle with a frame contact lift because this may damage axle joints.
13. Do not operate a front-wheel-drive vehicle that is raised on a frame contact lift. This
action may damage the front drive axles.
Engine Lift
▲
WARNING: An engine lift has a maximum lifting capacity that is usually indicated
on a decal. Never lift anything heavier than the maximum capacity of the lift. This
action may result in lift damage or personal injury.
An engine lift is used to remove and replace automotive engines. A long, pivoted arm is mounted
on the top of the engine lift (Figure 1-18). When the lift handle is pumped, hydraulic fluid is
forced into a cylinder under the lift arm. This action extends the cylinder ram and forces the arm
22
Copyright 2011 Cengage Learning. All Rights Reserved. May not be copied, scanned, or duplicated, in whole or in part. Due to electronic rights, some third party content may be suppressed from the eBook and/or eChapter(s).
Editorial review has deemed that any suppressed content does not materially affect the overall learning experience. Cengage Learning reserves the right to remove additional content at any time if subsequent rights restrictions require it.
SM_ch_01_001-040.qxd
11/7/05
Licensed to: iChapters User
10:01 AM
Page 23
Figure 1-18 Engine lift.
upward to lift the engine. A lifting chain is attached to the lift arm, and this chain is bolted
securely to the engine. Always be sure that these retaining bolts are strong enough to support the
engine weight.
Hydraulic Jack and Jack Stand Safety
■
▲
CAUTION: Always make sure the jack stand weight capacity rating exceeds the
vehicle weight that is lowered onto the stands.
WARNING: Never lift a vehicle with a floor jack if the weight of the vehicle exceeds
the rated capacity of the jack. This action may cause the jack to drop suddenly, resulting in personal injury or vehicle damage.
Accidents involving the use of floor jacks and jack stands may be avoided if these safety precautions are followed:
1. Never work under a vehicle unless jack stands are placed securely under the vehicle
chassis and the vehicle is resting on these stands (Figure 1-19).
Figure 1-19 Jack stands.
23
Copyright 2011 Cengage Learning. All Rights Reserved. May not be copied, scanned, or duplicated, in whole or in part. Due to electronic rights, some third party content may be suppressed from the eBook and/or eChapter(s).
Editorial review has deemed that any suppressed content does not materially affect the overall learning experience. Cengage Learning reserves the right to remove additional content at any time if subsequent rights restrictions require it.
SM_ch_01_001-040.qxd
Licensed to: iChapters User
11/7/05
10:01 AM
Page 24
2. Before lifting a vehicle with a floor jack, be sure that the jack lift pad is positioned
securely under a recommended lift point on the vehicle. Lifting the front end of a vehicle with the jack placed under a radiator support may cause severe damage to the
radiator and support.
3. Position the jack stands under a strong chassis member such as the frame or axle
housing. The jack stands must contact the vehicle manufacturer’s recommended lift
points.
4. Since the floor jack is on wheels, the vehicle and jack tend to move as the vehicle is
lowered from a floor jack onto jack stands. Always be sure the jack stands remain
under the chassis member during this operation, and be sure the jack stands do not
tip. All of the jack stand legs must remain in contact with the shop floor.
5. When the vehicle is lowered from the floor jack onto jack stands, remove the floor
jack from under the vehicle. Never leave a jack handle sticking out from under a vehicle. Someone may trip over the handle and injure themselves.
Cleaning Equipment Safety
and Environmental Considerations
▲
WARNING: Some parts cleaners contain caustic solutions. To avoid personal injury,
always wear protective gloves and a face shield when using this equipment.
All technicians are required to clean parts during their normal work routines. Face shields and
protective gloves must be worn while operating cleaning equipment. In most states, environmental regulations require that the runoff from steam cleaning must be contained in the steam
cleaning system. This runoff cannot be dumped into the sewer system. Since it is expensive to
contain this runoff in the steam cleaner system, the popularity of steam cleaning has decreased.
The solution in hot and cold cleaning tanks may be caustic, and contact between this solution
and skin or eyes must be avoided. Parts cleaning often creates a slippery floor, and care must be
taken when walking in the parts cleaning area. The floor in this area should be cleaned frequently. When the caustic cleaning solution in hot or cold cleaning tanks is replaced, environmental regulations require that the old solution be handled as hazardous waste. Use caution
when placing aluminum or aluminum alloy parts in a cleaning solution. Some cleaning solutions
will damage these components. Always follow the cleaning equipment manufacturer’s recommendations.
Parts Washers with Electromechanical Agitation
Some parts washers provide electromechanical agitation of the parts to provide improved cleaning action (Figure 1-20). These parts washers may be heated with gas or electricity, and various
water-based hot tank cleaning solutions are available depending on the type of metals being
cleaned. For example, Kleer-Flo Greasoff number 1 powdered detergent is available for cleaning
iron and steel. Nonheated electromechanical parts washers are also available. These washers use
cold cleaning solutions such as Kleer-Flo Degreasol formulas.
Many cleaning solutions, such as Kleer-Flo Degreasol 99R, contain no ingredients listed as
hazardous by the Environmental Protection Agency’s RCRA Act. This cleaning solution is a blend
of sulphur-free hydrocarbons, wetting agents, and detergents. Degreasol 99R does not contain
aromatic or chlorinated solvents, and it conforms to California’s Rule 66 for clean air. Always use
the cleaning solution recommended by the equipment manufacturer.
24
Copyright 2011 Cengage Learning. All Rights Reserved. May not be copied, scanned, or duplicated, in whole or in part. Due to electronic rights, some third party content may be suppressed from the eBook and/or eChapter(s).
Editorial review has deemed that any suppressed content does not materially affect the overall learning experience. Cengage Learning reserves the right to remove additional content at any time if subsequent rights restrictions require it.
SM_ch_01_001-040.qxd
Licensed to: iChapters User
11/7/05
10:01 AM
Page 25
POWER
MA
STER
Figure 1-20 Parts washer with electromechanical agitator.
Cold Parts Washer with Agitated Immersion Tank
Some parts washers have an agitated immersion chamber under the shelves, which provides
thorough parts cleaning. Folding workshelves provide a large upper cleaning area with a constant flow of solution from the dispensing hose (Figure 1-21). This cold parts washer operates on
Degreasol 99R cleaning solution.
Figure 1-21 Cold parts washer with agitated immersion tank.
25
Copyright 2011 Cengage Learning. All Rights Reserved. May not be copied, scanned, or duplicated, in whole or in part. Due to electronic rights, some third party content may be suppressed from the eBook and/or eChapter(s).
Editorial review has deemed that any suppressed content does not materially affect the overall learning experience. Cengage Learning reserves the right to remove additional content at any time if subsequent rights restrictions require it.
SM_ch_01_001-040.qxd
Licensed to: iChapters User
11/7/05
10:01 AM
Page 26
Figure 1-22 Aqueous parts cleaning tank.
Aqueous Parts Cleaning Tank
The aqueous parts cleaning tank uses a water-based environmentally friendly cleaning solution,
such as Greasoff 2, rather than traditional solvents. The immersion tank is heated and agitated for
effective parts cleaning (Figure 1-22). A sparger bar pumps a constant flow of cleaning solution
across the surface to push floating oils away, and an integral skimmer removes these oils. This
action prevents floating surface oils from redepositing on cleaned parts.
Safety Training Exercises
After the equipment operation and safety practices are explained by your instructor, complete
these safety training exercises to demonstrate your understanding of equipment operation and
safety procedures:
1. Find the lift points on a specific vehicle in the vehicle manufacturer’s service manual.
Under the supervision of your instructor, position this vehicle properly on a lift, then
use the proper lift operating procedures to raise and lower the vehicle on the lift.
2. Find the lift points on a specific vehicle in the vehicle manufacturer’s service manual.
Under the supervision of your instructor, raise the front and rear suspension of this
vehicle with a floor jack and lower the vehicle onto jack stands. Raise the vehicle with
a floor jack, and remove the jack stands, and lower the vehicle.
3. Find the lift points on a specific vehicle in the vehicle manufacturer’s service manual.
Under the supervision of your instructor, position this vehicle properly on a lift and
raise the vehicle. Follow proper service and safety procedures to remove and replace
all four wheels. Remove two wheels with an electric impact wrench and the other two
wheels with an air impact wrench.
4. Draw a layout diagram of your automotive shop or shops, indicating the major service
areas and service equipment, and clearly identify the location of all safety equipment.
26
Copyright 2011 Cengage Learning. All Rights Reserved. May not be copied, scanned, or duplicated, in whole or in part. Due to electronic rights, some third party content may be suppressed from the eBook and/or eChapter(s).
Editorial review has deemed that any suppressed content does not materially affect the overall learning experience. Cengage Learning reserves the right to remove additional content at any time if subsequent rights restrictions require it.
SM_ch_01_001-040.qxd
Licensed to: iChapters User
11/7/05
10:01 AM
Page 27
●
CUSTOMER CARE: Some automotive service centers have a policy of performing
some minor service as an indication of their appreciation to the customer. This service
may include cleaning all the windows and/or vacuuming the floors before the car is returned
to the customer.
Although this service involves more labor costs for the shop, it may actually improve
profits over a period of time. When customers find their windows cleaned and/or the floors
vacuumed, it impresses them with the quality of work you do and the fact that you care
about their vehicle. They will likely return for service and tell their friends about the quality
of service your shop performs.
Guidelines for Use of Tools, Safety Practices,
and the Use of Test Equipment
1. Two systems of measurement in common use are the United States customary (USC)
2.
3.
4.
5.
6.
7.
8.
9.
10.
11.
12.
13.
14.
15.
16.
17.
18.
19.
20.
21.
22.
and international system (SI).
The SI system may be called the metric system.
In the metric system, the units can be divided or multiplied by 10.
Personal safety is the responsibility of everyone in the shop.
When lifting heavy objects, always bend your knees rather than your back.
Many shop accidents are caused by the improper use of hand tools.
Never operate any type of equipment unless you are familiar with the proper operating procedure.
Never exceed the rated capacity of a hydraulic press, hydraulic jack, vehicle lift, or
jack stands.
When raising a vehicle with a lift or floor jack, always be sure the lifting equipment is
contacting the vehicle on the manufacturer’s recommended lift points.
After a vehicle is raised on a lift, be sure the lift locking mechanism is in place.
Never operate electric equipment with a frayed cord or without a ground wire.
Never direct a blast of compressed air against human flesh.
Always wear eye protection and protective gloves when cleaning parts in any type of
cleaning solution.
Electronic fuel injection (EFI) systems must be depressurized before connecting a fuel
gauge or disconnecting fuel system components.
On a port fuel injection (PFI) system, the pressure gauge is connected to the Schrader
valve on the fuel rail.
On throttle body injection (TBI) or carburetor systems, the fuel pressure gauge must
be connected in series at the fuel inlet line.
The injector balance tester is a timing device that opens each injector for a specific
length of time.
During an injector balance test, the fuel system pressure drop is recorded when each
injector is opened for a specific length of time.
Injectors are cleaned with a solution of unleaded gasoline and injector cleaner in a
pressurized container connected to the Schrader valve on the fuel rail.
During the injector cleaning procedure, the return fuel line must be blocked, and the
electric fuel pump must be disabled.
Conventional 12-volt or self-powered test lights should not be used to test computer
circuits. High-impedance test lights should be used for this purpose.
Test lights of any type must not be used to diagnose air bag circuits. Only the vehicle
manufacturer’s recommended tools should be used on these systems.
27
Copyright 2011 Cengage Learning. All Rights Reserved. May not be copied, scanned, or duplicated, in whole or in part. Due to electronic rights, some third party content may be suppressed from the eBook and/or eChapter(s).
Editorial review has deemed that any suppressed content does not materially affect the overall learning experience. Cengage Learning reserves the right to remove additional content at any time if subsequent rights restrictions require it.
SM_ch_01_001-040.qxd
Licensed to: iChapters User
11/7/05
10:01 AM
Page 28
23. Volt-ampere testers are commonly used to perform battery load tests, starter current
draw tests, alternator output tests, and alternator normal system voltage tests.
24. Multimeters read AC volts, DC volts, milliamperes, amperes, and ohms on various
scales.
25. Digital multimeters have higher impedance than analog multimeters.
26. Only high-impedance digital multimeters should be used to test computer system
27.
28.
29.
30.
31.
32.
33.
34.
35.
36.
37.
38.
39.
40.
41.
components such as oxygen (O2) sensors.
Tach-dwellmeters read engine rpm and ignition dwell.
A piece of reflective tape attached to a rotating component, such as the crankshaft
pulley, provides a signal for a photoelectric tachometer.
The probe on a magnetic probe-type digital tachometer is installed in the magnetic
timing receptacle above the crankshaft pulley.
The control knob on an advance-type timing light may be used to check spark
advance.
When a magnetic probe-type digital timing meter is used, the offset on the tester must
be adjusted for the engine being tested.
Many ignition module testers check the ignition module and primary ignition circuit
voltage and current under various engine operating conditions.
An oscilloscope contains a cathode ray tube (CRT), which provides a voltage trace of
the ignition system voltage much like a very fast reacting voltmeter.
Scan testers retrieve fault codes from the computer memory and perform many other
diagnostic functions.
The scan tester must be programmed for the vehicle make, model year, and type of
engine.
Since most scan testers have the capability to test various computer systems on the
vehicle, the tester must be programmed for the computer system being tested.
The scan tester must be connected to the appropriate diagnostic connector on the
vehicle.
A two-gas emissions analyzer reads carbon monoxide (CO) and hydrocarbon (HC)
emission levels.
A four-gas emissions analyzer reads the same emission levels as a two-gas analyzer,
plus oxygen (O2) and carbon dioxide (CO2). The latter two emissions are not affected
by the catalytic converter.
Emissions analyzers require a 15-minute warm-up and calibration period when they
are turned on.
An engine analyzer contains a combination of many different automotive testers.
Shop Layout
There are many different types of shops in the automotive service industry, including new car
dealers, independent repair shops, specialty shops, service stations, and fleet shops.
▲
WARNING: Always know the location of all safety equipment in the shop and be
familiar with the operation of this equipment.
The shop layout in any shop is important to maintaining shop efficiency and safety. Shop
layout includes bays for various types of repairs, space for equipment storage, and office locations. Safety equipment such as fire extinguishers, first-aid kits, and eyewash fountains must be in
easily accessible locations. The location of each piece of safety equipment must be clearly
marked. Areas such as the parts department and the parts cleaning area must be located so they
are easily accessible from all areas of the shop. The service manager’s office should also be centrally located. All shop personnel should familiarize themselves with the shop layout, especially
28
Copyright 2011 Cengage Learning. All Rights Reserved. May not be copied, scanned, or duplicated, in whole or in part. Due to electronic rights, some third party content may be suppressed from the eBook and/or eChapter(s).
Editorial review has deemed that any suppressed content does not materially affect the overall learning experience. Cengage Learning reserves the right to remove additional content at any time if subsequent rights restrictions require it.
SM_ch_01_001-040.qxd
Licensed to: iChapters User
11/7/05
10:01 AM
Workbench tools, instruments
Bay #1
Quick
service
area
Shop
door
Page 29
Bay #2
lift
Bay #3
lift
Bay #4
lift
Bay #5
lift
Machining
area
Parts
cleaning
Fire extinguishers
Eyewash
fountain
First-aid kit
First-aid kit
Service
manager
Customer
waiting
area
Parts
dept.
Bay #6
lift
Wheel
alignment
and
tires
Electrical
area
Bench
Figure 1-23 Typical shop layout.
the location of safety equipment. If you know the exact fire extinguisher locations, you may get
an extinguisher into operation a few seconds faster. These few seconds could make the difference between a fire that is quickly extinguished and one that gets out of control, causing extensive damage and personal injury! Most shops have specific bays for certain types of work, such as
electrical repair, wheel alignment and tires, and machining (Figure 1-23).
The tools and equipment required for a certain type of work are stored in that specific
bay. For example, the equipment for electrical and electronic service work is stored in the bay
allotted to that type of repair. When certain bays are allotted to specific types of repair work,
unnecessary equipment movement is eliminated. Each technician has his or her own tools on
a portable roll cabinet which is moved to the vehicle being repaired. Special tools are provided
by the shop, and these tools may be located on tool boards attached to the wall. Other shops
may have a tool room where special tools are located. Adequate workbench space must be
provided in those bays where bench work is required.
Shop Rules
■
CAUTION: Shop rules, vehicle operation in the shop, and shop housekeeping are
serious business. Each year a significant number of technicians are injured and vehicles
damaged by disregarding shop rules, careless vehicle operation, and sloppy housekeeping.
The application of some basic shop rules helps to prevent serious, expensive accidents. Failure
to comply with shop rules may cause personal injury or expensive damage to vehicles and
shop facilities. It is the responsibility of the employer and all shop employees to make sure that
shop rules are understood and followed until these rules become automatic habits. The following basic shop rules should be followed:
1. Always wear safety glasses and other protective equipment that is required by a service
procedure. For example, a special parts washer must be used to avoid breathing
asbestos dust into the lungs. Asbestos dust is a known cause of lung cancer. This dust is
encountered in manual transmission clutch facings and brake linings.
2. Tie long hair securely behind the head, and do not wear loose or torn clothing.
29
Copyright 2011 Cengage Learning. All Rights Reserved. May not be copied, scanned, or duplicated, in whole or in part. Due to electronic rights, some third party content may be suppressed from the eBook and/or eChapter(s).
Editorial review has deemed that any suppressed content does not materially affect the overall learning experience. Cengage Learning reserves the right to remove additional content at any time if subsequent rights restrictions require it.
SM_ch_01_001-040.qxd
Licensed to: iChapters User
11/7/05
10:01 AM
Page 30
3. Do not wear rings, watches, or loose hanging jewelry. If jewelry such as a ring, metal
Carbon monoxide is
a poisonous gas and,
when breathed into
the lungs, it may
cause headaches,
nausea, ringing in
the ears, tiredness,
and heart flutter. In
strong
concentrations, it
causes death.
4.
5.
6.
7.
8.
9.
10.
11.
12.
13.
14.
15.
16.
17.
18.
19.
20.
21.
watch band, or chain makes contact between an electrical terminal and ground, the jewelry becomes extremely hot, resulting in severe burns.
Set the parking brake when working on a vehicle. If the vehicle has an automatic transmission, place the gear selector in park unless a service procedure requires another
selector position. When the vehicle is equipped with a manual transmission, position the
gear selector in neutral with the engine running or reverse with the engine stopped.
Always connect a shop exhaust hose to the vehicle tailpipe and be sure the shop
exhaust fan is running. If it is absolutely necessary to operate a vehicle without a shop
exhaust pipe connected to the tailpipe, open the large shop door to provide adequate
ventilation. Carbon monoxide in the vehicle exhaust may cause severe headaches and
other medical problems. High concentrations of carbon monoxide may result in death!
Keep hands, clothing, and wrenches away from rotating parts such as cooling fans.
Remember that electric-drive fans may start turning at any time, even with the ignition
off.
Always leave the ignition switch off unless a service procedure requires another switch
position.
Do not smoke in the shop. If the shop has designated smoking areas, smoke only in
these areas.
Store oily rags and other discarded combustibles in regulation, covered metal garbage
containers.
Always use a wrench or socket that fits properly on the bolt. Do not substitute metric
for English wrenches or vice versa.
Keep tools in good condition. For example, do not use a punch or chisel with a mushroomed end. When struck with a hammer, a piece of the mushroomed metal could
break off, resulting in severe eye or other injury.
Do not leave power tools running and unattended.
Serious burns may be prevented by avoiding contact with hot metal components such
as exhaust manifolds, other exhaust system components, radiators, and some airconditioning hoses.
When lubricant such as engine oil is drained, always use caution because the oil could
be hot enough to cause burns.
Before getting under a vehicle, be sure the vehicle is placed securely on safety stands.
Operate all shop equipment, including lifts, according to the equipment manufacturer’s
recommended procedure. Do not operate equipment unless you are familiar with the
correct operating procedure.
Do not run or engage in horseplay in the shop.
Obey all state and federal fire, safety, and environmental regulations.
Do not stand in front of or behind vehicles.
Always place fender covers and a seat cover on a customer’s vehicle before working on
the car.
Inform the shop foreman of any safety dangers and suggestions for safety improvement.
30
Copyright 2011 Cengage Learning. All Rights Reserved. May not be copied, scanned, or duplicated, in whole or in part. Due to electronic rights, some third party content may be suppressed from the eBook and/or eChapter(s).
Editorial review has deemed that any suppressed content does not materially affect the overall learning experience. Cengage Learning reserves the right to remove additional content at any time if subsequent rights restrictions require it.
SM_ch_01_001-040.qxd
Licensed to: iChapters User
11/7/05
10:01 AM
Page 31
Vehicle Operation
When driving a customer’s vehicle, certain precautions must be observed to prevent accidents
and maintain good customer relations.
1. Before driving a vehicle, always make sure the brakes are operating and fasten the
safety belt.
2. Check to be sure there are no people or objects under the car before you start the
engine.
3. If the vehicle is parked on a lift, be sure the lift is fully down and the lift arms or components are not contacting the vehicle chassis.
4. Check to see if there are any objects directly in front of or behind the vehicle before
driving away.
5. Always drive slowly in the shop and watch carefully for personnel and other moving
vehicles.
6. Make sure the shop door is up high enough so there is plenty of clearance between
the top of the vehicle and the door.
7. Watch the shop door to be certain that it is not coming down as you attempt to drive
under the door.
8. If a road test is necessary, obey all traffic laws, and never drive in a reckless manner.
9. Do not squeal tires when accelerating or turning corners.
If customers observe that service personnel take good care of their cars by driving carefully
and installing fender and seat covers, the service department image is greatly enhanced in their
eyes. These procedures impress upon customers that shop personnel respect their cars. Conversely, if grease spots are found on the upholstery or fenders after service work is completed,
customers will probably think the shop is very careless, not only in car care, but also in service
work quality.
Housekeeping
●
CUSTOMER CARE: When customers see that you are concerned about their
vehicles and that you operate a shop with excellent housekeeping habits, they will be
impressed and will likely keep returning for service.
Careful housekeeping habits prevent accidents and increase worker efficiency. Good housekeeping also helps to impress upon customers that quality work is a priority in this shop. Follow these housekeeping rules:
1. Keep aisles and walkways clear of tools, equipment, and other items.
2. Be sure all sewer covers are securely in place.
3. Keep floor surfaces free of oil, grease, water, and loose material.
4. Place proper garbage containers in convenient locations and empty them regularly.
5. Make sure that access to fire extinguishers is unobstructed at all times, and check fire
extinguishers for proper charge at regular intervals.
Excellent housekeeping involves
general shop
cleanliness, proper
shop safety
equipment in good
working condition,
and the proper
maintenance of all
shop equipment and
tools.
31
Copyright 2011 Cengage Learning. All Rights Reserved. May not be copied, scanned, or duplicated, in whole or in part. Due to electronic rights, some third party content may be suppressed from the eBook and/or eChapter(s).
Editorial review has deemed that any suppressed content does not materially affect the overall learning experience. Cengage Learning reserves the right to remove additional content at any time if subsequent rights restrictions require it.
SM_ch_01_001-040.qxd
Licensed to: iChapters User
11/7/05
10:01 AM
Page 32
SERVICE TIP: When you are finished with a tool, never set it on the customer’s
car. After using a tool, the best place for it is in your tool box or on the workbench.
Many tools have been lost by leaving them on customers’ vehicles.
6. Keep tools clean and in good condition.
7. When not in use, store tools in their proper location.
8. Place oily rags and other combustibles in properly covered garbage containers.
9. Make sure that rotating components on equipment and machinery have guards and
that all shop equipment has regular service and adjustment schedules.
10. Maintain benches and seats in a clean condition.
11. Keep parts and materials in their proper location.
12. When not in use, store creepers in a specific location.
13. Make sure that the shop is well lighted, and keep all lights in working order.
14. Replace frayed electrical cords on lights or equipment.
15. Regularly clean walls and windows.
16. Keep stairs clean, well lighted, and free of loose material.
If these housekeeping rules are followed, the shop will be a safer place to work, and customers will be impressed with the appearance of the premises.
Air Quality
▲
WARNING: Never run the engine in a vehicle inside the shop without an exhaust
hose connected to the tailpipe.
Vehicle exhaust contains small amounts of carbon monoxide, which is a poisonous gas. Strong
concentrations of carbon monoxide may be fatal for human beings. All shop personnel are
responsible for air quality in the shop.
Shop management is responsible for an adequate exhaust system to remove exhaust fumes
from the maximum number of vehicles that may be running in the shop at the same time.
Technicians should never run a vehicle in the shop unless a shop exhaust hose is
installed on the tailpipe of the vehicle. The exhaust fan must be switched on to remove
exhaust fumes.
If shop heaters or furnaces have restricted chimneys, they release carbon monoxide emissions into the shop air. Therefore, chimneys should be checked periodically for restriction and
proper ventilation.
Monitors are available to measure the level of carbon monoxide in the shop. Some of these
monitors read the amount of carbon monoxide present in the shop air, and other monitors provide an audible alarm if the concentration of carbon monoxide exceeds the danger level.
Diesel exhaust contains some carbon monoxide, but particulates are also present in the
exhaust from these engines. Particulates are basically small carbon particles, which can be
harmful to the lungs.
The sulfuric acid solution in car batteries is a very corrosive, poisonous liquid. If a battery is
charged with a fast charger at a high rate for a period of time, the battery becomes hot and the sulfuric acid solution begins to boil. Under this condition, the battery may emit a strong sulfuric
acid smell, and these fumes may be harmful to the lungs. If this condition occurs in the shop,
the battery charger should be turned off, or the charger rate should be reduced considerably.
32
Copyright 2011 Cengage Learning. All Rights Reserved. May not be copied, scanned, or duplicated, in whole or in part. Due to electronic rights, some third party content may be suppressed from the eBook and/or eChapter(s).
Editorial review has deemed that any suppressed content does not materially affect the overall learning experience. Cengage Learning reserves the right to remove additional content at any time if subsequent rights restrictions require it.
SM_ch_01_001-040.qxd
11/7/05
Licensed to: iChapters User
10:01 AM
Page 33
▲
WARNING: When an automotive battery is charged, hydrogen gas and oxygen
gas escape from the battery. If these gases are combined, they form water, but hydrogen gas by itself is very explosive. While a battery is charged, sparks, flames, and other
sources of ignition must not be allowed near the battery.
▲
WARNING: Breathing asbestos dust must be avoided because this dust is a known
contributor to lung cancer.
Some automotive clutch facings and brake linings contain asbestos. Never use an air hose
to blow dirt from these components because this action disperses asbestos dust into the shop
where it may be inhaled by technicians and other people in the shop. Parts washers approved
by OSHA must be used to clean the dust from these components (Figure 1-24). Brake washer
concentrate is mixed with water in these parts washers (Figure 1-25). A catch basin with a
removable liner is placed under the parts to be washed, and the washer sprays the cleaning
solution on the parts. After the washing operation is completed, the liner containing the cleaning solution and asbestos dust is removed, sealed, and labeled for proper handling and disposal according to waste disposal laws.
Even though technicians take every precaution to maintain air quality in the shop, some
undesirable gases may still get in the air. For example, exhaust manifolds may get oil on them
during an engine overhaul. When the engine is started and these manifolds become hot, the oil
burns off the manifolds and pollutes the shop air with oil smoke. Adequate shop ventilation
must be provided to take care of this type of air contamination.
BRAKE
WASHER
Figure 1-24 Brake assembly washer for asbestos dust.
Figure 1-25 Brake washer concentrate.
33
Copyright 2011 Cengage Learning. All Rights Reserved. May not be copied, scanned, or duplicated, in whole or in part. Due to electronic rights, some third party content may be suppressed from the eBook and/or eChapter(s).
Editorial review has deemed that any suppressed content does not materially affect the overall learning experience. Cengage Learning reserves the right to remove additional content at any time if subsequent rights restrictions require it.
SM_ch_01_001-040.qxd
Licensed to: iChapters User
11/7/05
10:01 AM
Page 34
Employer and Employee Obligations
When you begin employment, you enter into a business agreement with your employer. A
business agreement involves an exchange of goods or services that have value. Although the
automotive technician may not have a written agreement with his or her employer, the technician exchanges time, skills, and effort for money paid by the employer. Both the employee and
the employer have obligations. The automotive technician’s obligations include the following:
1. Productivity. As an automotive technician, you have a responsibility to your employer
to make the best possible use of time on the job. Each job should be done in a reasonable length of time. Employees are paid for their skills, effort, and time.
2. Quality. Each repair job should be a quality job! Work should never be done in a
careless manner. Nothing improves customer relations like quality workmanship.
3. Teamwork. The shop staff is a team and everyone, including technicians and management personnel, is a team member. You should cooperate with and care about other
team members. Each member of the team should strive for harmonious relations with
fellow workers. Cooperative teamwork helps to improve shop efficiency, productivity,
and customer relations. Customers may be turned off by bickering between shop
personnel.
4. Honesty. Employers and customers expect and deserve honesty from automotive technicians. Honesty creates a feeling of trust between technicians, employers, and customers.
5. Loyalty. As an employee, you are obliged to act in the best interests of your employer,
both on and off the job.
6. Attitude. Employees should maintain a positive attitude at all times. As in other professions, automotive technicians have days when it may be difficult to maintain a positive
attitude. For example, there will be days when the technical problems on a certain
vehicle are difficult to solve. However, developing a negative attitude certainly will not
help the situation! A positive attitude has a positive effect on the job situation as well
as on the customer and employer.
7. Responsibility. You are responsible for your conduct on the job and your work-related
obligations. These obligations include always maintaining good workmanship and
customer relations. Attention to details such as always placing fender and seat covers
on customer vehicles prior to driving or working on the vehicle greatly improve customer relations.
8. Following directions. All of us like to do things our way. Such action may not be in
the best interests of the shop, and as an employee you have an obligation to follow
the supervisor’s directions.
9. Punctuality and regular attendance. Employees have an obligation to be on time for
work and to be regular in attendance on the job. It is very difficult for a business to
operate successfully if it cannot count on its employees to be on the job at the
appointed time.
10. Regulations. Automotive technicians should be familiar with all state and federal regulations such as the OSHA and hazardous waste disposal laws pertaining to their job
situation. In Canada, employees should be familiar with workplace hazardous materials information systems (WHMIS).
Employer-to-employee obligations include:
1. Wages. The employer has a responsibility to inform the employee regarding the exact
amount of financial remuneration they will receive and when they will be paid.
34
Copyright 2011 Cengage Learning. All Rights Reserved. May not be copied, scanned, or duplicated, in whole or in part. Due to electronic rights, some third party content may be suppressed from the eBook and/or eChapter(s).
Editorial review has deemed that any suppressed content does not materially affect the overall learning experience. Cengage Learning reserves the right to remove additional content at any time if subsequent rights restrictions require it.
SM_ch_01_001-040.qxd
Licensed to: iChapters User
11/7/05
10:01 AM
Page 35
2. Fringe benefits. A detailed description of all fringe benefits should be provided by the
3.
4.
5.
6.
employer. These benefits may include holiday pay, sickness and accident insurance,
and pension plans.
Working conditions. A clean, safe workplace must be provided by the employer. The
shop must have adequate safety equipment and first-aid supplies. Employers must be
certain that all shop personnel maintain the shop area and equipment to provide adequate safety and a healthy workplace atmosphere.
Employee instruction. Employers must provide employees with clear job descriptions
and be sure that each worker is aware of his or her obligations.
Employee supervision. Employers should inform their workers regarding the responsibilities of their immediate supervisors and other management personnel.
Employee training. Employers must make sure that each employee is familiar with the
safe operation of all the equipment that they are required to use in their job situation.
Since automotive technology is changing rapidly, employers should provide regular
update training for their technicians. Under the right-to-know laws, employers are
required to inform all employees about hazardous materials in the shop. Employees
should be familiar with WHMIS, which detail the labeling and handling of hazardous
waste and the health problems if exposed to hazardous waste.
Job Responsibilities
An automotive technician has specific responsibilities regarding each job performed on a customer’s vehicle. These job responsibilities include:
1. Do every job to the best of your ability. There is no place in the automotive service
industry for careless workmanship! Automotive technicians and students must realize
they have a very responsible job. During many repair jobs, you, as a student or technician working on a customer’s vehicle, actually have the customer’s life and the safety
of the vehicle in your hands. For example, if you are doing a brake job and leave the
wheel nuts loose on one wheel, that wheel may fall off the vehicle at high speed. This
could result in serious personal injury for the customer and others, plus extensive
vehicle damage. If this type of disaster occurs, the individual who worked on the
vehicle and the shop may be involved in a very expensive legal action. As a student
or technician working on customer vehicles, you are responsible for the safety of
every vehicle that you work on! Even when careless work does not create a safety
hazard, it leads to dissatisfied customers who often take their business to another
shop, and nobody benefits when that happens.
2. Treat customers fairly and honestly on every repair job. Do not install parts that are
unnecessary to complete the repair job.
3. Use published specifications; do not guess at adjustments.
4. Follow the service procedures in the service manual provided by the vehicle manufacturer or an independent manual publisher.
5. When the repair job is completed, always be sure the customer’s complaint has been
corrected.
6. Do not be too concerned with work speed when you begin working as an automotive
technician. Speed comes with experience.
35
Copyright 2011 Cengage Learning. All Rights Reserved. May not be copied, scanned, or duplicated, in whole or in part. Due to electronic rights, some third party content may be suppressed from the eBook and/or eChapter(s).
Editorial review has deemed that any suppressed content does not materially affect the overall learning experience. Cengage Learning reserves the right to remove additional content at any time if subsequent rights restrictions require it.
SM_ch_01_001-040.qxd
Licensed to: iChapters User
11/7/05
10:01 AM
Page 36
National Institute for Automotive Service
Excellence (ASE) Certification
Automotive Service Excellence (ASE) has provided voluntary testing and certification of automotive technicians on a national basis for many years. The image of the automotive service industry
has been enhanced by the ASE certification program. More than 265,000 ASE-certified automotive
technicians now work in a wide variety of automotive service shops. ASE provides certification in
these eight areas of automotive repair:
1. Engine repair
2. Automatic transmissions/transaxles
3. Manual drivetrain and axles
4. Suspension and steering
5. Brakes
6. Electrical systems
7. Heating and air conditioning
8. Engine performance
A technician may take the ASE test and become certified in any or all of the eight areas.
When a technician passes an ASE test in one of the eight areas, an Automotive Technician’s
shoulder patch is issued by ASE. If a technician passes all eight tests, he or she receives a Master Technician’s shoulder patch (Figure 1-26). Retesting at 5-year intervals is required to remain
certified.
The certification test in each of the eight areas contains forty to eighty multiple-choice
questions. The test questions are written by a panel of automotive service experts from various
areas of automotive service, such as automotive instructors, service managers, automotive manufacturer’s representatives, test equipment representatives, and certified technicians. The test
questions are pretested and checked for quality by a national sample of technicians. Most questions have the Technician A and Technician B format similar to the questions at the end of
each chapter in this book. ASE regulations demand that each technician must have 2 years of
working experience in the automotive service industry prior to taking a certification test or
tests. However, relevant formal training may be substituted for one of the years of working
experience. Contact ASE for details regarding this substitution.
Shops that employ ASE-certified technicians display an official ASE blue seal of excellence. This blue seal increases the customer’s awareness of the shop’s commitment to quality
service and the competency of certified technicians.
Figure 1-26 ASE certification shoulder patches worn by automotive technicians and master
technicians.
36
Copyright 2011 Cengage Learning. All Rights Reserved. May not be copied, scanned, or duplicated, in whole or in part. Due to electronic rights, some third party content may be suppressed from the eBook and/or eChapter(s).
Editorial review has deemed that any suppressed content does not materially affect the overall learning experience. Cengage Learning reserves the right to remove additional content at any time if subsequent rights restrictions require it.
SM_ch_01_001-040.qxd
Licensed to: iChapters User
11/7/05
10:01 AM
Page 37
The ASE test Advanced Engine Performance Specialist L1 can only be taken by those
technicians who are currently certified in Engine Performance (A8). The test is designed to
identify those technicians who are knowledgeable in the areas of driveability and emissionsrelated diagnostics on automobiles, light trucks, and SUVs. The test is designed to test the technician’s knowledge of PCM-controlled engine and emission control systems as well as the
technician’s ability to diagnose and repair the causes of emission failures.
ASE Advanced Engine Performance Specialist Test L1
Content Area
General Powertrain Diagnosis
Computerized Powertrain Diagnosis
(Including OBD II)
Ignition System Diagnosis
Fuel Systems and Air Induction Systems
Diagnosis
Emission Control System Diagnosis
I/M Failure Diagnosis
Total
Questions in Test
5
13
Percentage of Test
10%
26%
7
7
14%
14%
10
8
50
20%
16%
100%
Shop Projects to Enhance the Theories
in Chapter 1 of the Classroom Manual
1. Strike the tread of an inflated tire with a rubber hammer. What reaction did you find?
Why did this reaction occur?
2. Place some cold water in a graduated heat-resistant container supported on a metal
stand, and record the exact quantity of water. Heat the water with a propane torch
until it boils and record the exact quantity of water. What happened to the water
when it was heated?
3. Obtain an empty metal 1-gallon container with a tight-fitting top. Place about 1 pint of
water in the container and heat the container until the water is boiling. Then install
the top securely and allow the container to cool. Cooling time may be reduced by
placing ice on the container. What happened to the container? Why did this happen?
4. Obtain a vacuum hand pump and a vacuum advance from a distributor. Gradually
operate the pump and observe the vacuum diaphragm. How much vacuum is
required to begin moving the vacuum diaphragm? How much vacuum is required to
move this diaphragm to the fully advanced position? What two forces move the
diaphragm?
Guidelines for Following Proper Shop
Practices
1. Technicians must be familiar with shop layout, especially the location of safety equip-
ment. This knowledge provides a safer, more efficient shop.
2. Shop rules must be observed by everyone in the shop to provide adequate shop
safety, personal health protection, and vehicle protection.
37
Copyright 2011 Cengage Learning. All Rights Reserved. May not be copied, scanned, or duplicated, in whole or in part. Due to electronic rights, some third party content may be suppressed from the eBook and/or eChapter(s).
Editorial review has deemed that any suppressed content does not materially affect the overall learning experience. Cengage Learning reserves the right to remove additional content at any time if subsequent rights restrictions require it.
SM_ch_01_001-040.qxd
Licensed to: iChapters User
11/7/05
10:01 AM
Page 38
3. The application of driving rules in the shop increases safety, protects customer vehi4.
5.
6.
7.
8.
cles and shop property, and improves the shop image in the eyes of the customer.
When good housekeeping habits are developed, shop safety is improved, worker efficiency is increased, and customers are impressed.
If some basic rules are followed to maintain shop air quality, the personal health of
shop employees is improved.
When employers and employees accept and fulfill their obligations, personal relationships and general attitudes are greatly improved, shop productivity is increased, and
customer relations are improved.
If a technician accepts certain job responsibilities, job quality improves, and customer
satisfaction increases.
ASE technician certification improves the quality of automotive repair and improves
the image of the profession.
C A S E
S T U D Y
1
A technician raised a vehicle on a lift to perform an oil and filter change including a
chassis lubrication on a Grand Marquis. This lift was a twin post-type with separate front
and rear lift posts. On this type of lift, the rear wheels must be positioned in depressions
in the floor to position the rear axle above the rear lift arm. Then the front lift post and
arms must be moved forward or rearward to position the front lift arm under the front
suspension. The front lift arms must also be moved inward or outward so they are lifting
on the vehicle manufacturer’s specified lift points.
The technician carefully positioned the front lift post and arms properly, but forgot to
check the position of the rear tires in the floor depressions. The car was raised on the lift,
and the technician proceeded with the service work. Suddenly there was a loud thump
and the rear of the car bounced up and down! The rear lift arms were positioned against
the floor of the trunk rather than on the rear axle, and the lift arms punched through the
floor of the trunk, narrowly missing the fuel tank. The technician was extremely fortunate
the car did not fall off the lift, resulting in severe damage. If the rear lift arms had
punctured the fuel tank, a disastrous fire could have occurred! Luckily, these events did
not happen.
The technician learned a very important lesson about lift operation. Always follow all the
recommended procedures in the lift operator’s manual! The trunk floor was repaired at no
cost to the customer, and fortunately the shop and the vehicle escaped without major
damage.
C A S E
S T U D Y
2
A technician was removing and replacing the alternator on a General Motors car. After
installing the replacement alternator and connecting the alternator battery wire, the
technician proceeded to install the alternator belt. The rubber boot was still removed from
the alternator battery terminal. While installing this belt, the technician’s wristwatch
expansion bracelet made electrical contact from the alternator battery terminal to ground
on the alternator housing. Even though the alternator battery wire is protected with a fuse
link, which melted, a high current flowed through the wristwatch bracelet. This heated the
bracelet to a very high temperature and severely burned the technician’s arm.
38
Copyright 2011 Cengage Learning. All Rights Reserved. May not be copied, scanned, or duplicated, in whole or in part. Due to electronic rights, some third party content may be suppressed from the eBook and/or eChapter(s).
Editorial review has deemed that any suppressed content does not materially affect the overall learning experience. Cengage Learning reserves the right to remove additional content at any time if subsequent rights restrictions require it.
SM_ch_01_001-040.qxd
Licensed to: iChapters User
11/7/05
10:01 AM
Page 39
This technician forgot two safety rules:
1. Never wear jewelry, such as watches and rings, while working in an automotive shop.
2. Before performing electrical work on a vehicle, disconnect the negative battery cable.
If the vehicle is equipped with an air bag, wait 1 minute after this cable is disconnected.
C A S E
S T U D Y
3
A technician was removing and replacing the starting motor with the solenoid mounted
on top of the motor. The technician began removing the battery cable from the solenoid,
and the ring on one of his fingers made contact between the end of the wrench and the
engine block. The current flow through the ring was so high that the positive battery
terminal melted out of the battery. The technician’s finger was so badly burned that a
surgeon had to cut the ring from his finger and repair the finger.
This technician forgot to disconnect the negative battery cable before working on the
vehicle!
C A S E
S T U D Y
4
A technician had just replaced the engine in a Ford product, and she was performing final
adjustments such as timing and air-fuel mixture. In this shop, the cars were parked in the
work bays at an angle on both sides of the shop. With the engine running at fast idle, the
automatic transmission suddenly slipped into reverse. The car went backwards across the
shop and collided with a car in one of the electrical repair bays. Both vehicles were
damaged to a considerable extent. Fortunately, no personnel were injured.
This technician forgot to apply the parking brake while working on the vehicle!
Terms to Know
Asbestos dust vacuum cleaner
ASE technician certification
Shop layout
ASE blue seal of excellence
ASE-Style Review Questions
1. While discussing shop hazards:
Technician A says high-pressure air from an air gun
may penetrate the skin.
Technician B says air in the bloodstream may be fatal.
Who is correct?
A. A only
C. Both A and B
B. B only
D. Neither A nor B
2. While discussing shop rules:
Technician A says breathing carbon monoxide may
cause arthritis.
Technician B says breathing carbon monoxide may
cause headaches.
Who is correct?
A. A only
C. Both A and B
B. B only
D. Neither A nor B
39
Copyright 2011 Cengage Learning. All Rights Reserved. May not be copied, scanned, or duplicated, in whole or in part. Due to electronic rights, some third party content may be suppressed from the eBook and/or eChapter(s).
Editorial review has deemed that any suppressed content does not materially affect the overall learning experience. Cengage Learning reserves the right to remove additional content at any time if subsequent rights restrictions require it.
SM_ch_01_001-040.qxd
11/7/05
10:01 AM
Page 40
3. While discussing shop rules:
Technician A says breathing asbestos dust may cause
heart defects.
Technician B says oily rags should be stored in
uncovered garbage containers.
Who is correct?
A. A only
C. Both A and B
B. B only
D. Neither A nor B
4. While discussing hazardous waste disposal:
Technician A says the right-to-know laws require
employers to train employees regarding hazardous
waste materials.
Technician B says the right-to-know laws do not
require employers to keep permanent records
regarding hazardous waste materials.
Who is correct?
A. A only
C. Both A and B
B. B only
D. Neither A nor B
5. While discussing material safety data sheets (MSDS):
Technician A says these sheets explain employers’ and
employees’ responsibilities regarding hazardous
material handling and disposal.
Technician B says these sheets contain specific
information about hazardous materials.
Who is correct?
A. A only
C. Both A and B
B. B only
D. Neither A nor B
6. While discussing air quality:
Technician A says a battery gives off hydrogen gas
during the charging process.
Technician B says a battery gives off oxygen gas
during the charging process.
Who is correct?
A. A only
C. Both A and B
B. B only
D. Neither A nor B
8. While discussing employer and employee
responsibilities:
Technician A says employers are required to inform
their employees about hazardous materials in the
shop.
Technician B says that employers have no obligation
to inform their employees about hazardous materials
in the shop.
Who is correct?
A. A only
C. Both A and B
B. B only
D. Neither A nor B
9. While discussing hazardous materials:
Technician A says a solid that ignites spontaneously is
considered a hazardous material.
Technician B says a liquid with a flash point below
140°F (60°C) is considered a hazardous material.
Who is correct?
A. A only
C. Both A and B
B. B only
D. Neither A nor B
10. While discussing hazardous waste disposal:
Technician A says hazardous waste materials may be
hauled to an approved hazardous waste disposal site
or recycled in the shop.
Technician B says all hazardous waste materials must
be hauled to an approved hazardous waste disposal
site.
Who is correct?
A. A only
C. Both A and B
B. B only
D. Neither A nor B
7. While discussing air quality:
Technician A says diesel exhaust contains particulates.
Technician B says particulate emissions contain oxides
of nitrogen.
Who is correct?
A. A only
C. Both A and B
B. B only
D. Neither A nor B
40
Copyright 2011 Cengage Learning. All Rights Reserved. May not be copied, scanned, or duplicated, in whole or in part. Due to electronic rights, some third party content may be suppressed from the eBook and/or eChapter(s).
Editorial review has deemed that any suppressed content does not materially affect the overall learning experience. Cengage Learning reserves the right to remove additional content at any time if subsequent rights restrictions require it.