1
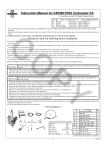
Instruction Manual for Standard Kit for Special Clutch for Die-Cast Cover
CO
(Only for manual transmission)
Item No.:02−01−5007
(Only for TAKEGAWA-made 4-, 5- and 6- speed crossed transmission)
Fitting models and frame Nos:
Monkey & Gorilla :Z50J-1600008∼
:Z50J-2000001∼
:AB27-1000001 ∼
Monkey (FI)
:AB27-1900001 ∼
・Thank you for purchasing one of our TAKEGAWA-made products. Please strictly follow the following instructions in installing and using the kit.
・Before installing the kit, please be sure to check the kit contents. Should you have any questions about the kit, please contact your local motorcycle dealer.
◎ Please note that, in some cases, the illustrations and photos may vary from the actual hardware.
Features
○ As the clutch is installed on the secondary side (on the transmission main shaft), the friction loss on the crankshaft can be reduced and the crankshaft
durability and throttle response can be improved.
○ We have designed the number of clutch friction disks to be five in order to correspond to the high-powered engine with a large engine displacement.
○ Six pieces of dampers are fixed to the primary driven gear, which works to reduce the shock felt at the time of letting in the clutch.
PY
Read all instructions first before starting the installation.
◎ We do not take any responsibility for any accident or damage whatsoever arising from the use of the kit not in conformity with the instructions in the manual.
◎ We shall be held free from any kind of warranty whatsoever of products other than this product if the glitch takes place on the other products than this
one after the installation and use of this product.
◎ You are kindly requested not to contact us about the combination of our products with other manufacturers'.
◎Please note that this kit is designed for exclusive use in the above-mentioned compatible models and frame numbers only and that it cannot be mounted
on other models.
◎ Installation of this kit requires removal and installation of an engine, disassembly of a crankcase, special tools and some processing. This instruction manual, as well as a HONDA’s service manual, is prepared for those who have acquired basic skill and knowledge. Therefore, those who are technically
unskilled or inexperienced may not be able to install the kit correctly or may be unable to install at all, leading to parts breakage.
◎ This kit isn’t usable on a stock transmission motorcyle. An extra-cost TAKEGAWA-made transmission kit is indispensable.
◎ This kit doesn’t come with a clutch cover. A TAKEGAWA-made extra-cost die-cast clutch cover kit is necessary.
◎ The installation of this Kit makes it impossible to install a stock muffler. Therefore, use other muffler than the said muffler.
◎ Please be informed that, mainly because of improvement in performance, design changes, and cost increase, the product specifications and prices are
subject to change without prior notice.
◎ This manual should be retained for future reference.
The following show the envisioned possibility of injuries to human bodies and property damage as a result of disregarding the
CAUTION following cautions.
・Before starting the installation, make sure the engine and muffler are cool. (Otherwise, you will burn yourself.)
・Always use a torque wrench to screw bolts and nuts tight and securely to the specified torque.
(Otherwise, these parts may get damaged or fall off, resulting in accidents.)
・As some products and frames have sharp edges or protruding portions, please work with your hands protected.
(Otherwise, you will suffer injuries.)
・Before riding, always check every section for slack in parts like screws. If you find slack ones, screw them securely up to the specified torque. (Otherwise, improper tightening may cause parts to come off.)
The following show the envisioned possibility of human death or serious injuries to human bodies as a result of disregarding the
WARNING following cautions.
・Always start the engine in a well-ventilated place, and do not turn on the engine in an airtight place.
(Otherwise, you will suffer from carbon monoxide poisoning.)
・When you notice something abnormal with your motorcycle while riding, immediately stop riding and park your motorcyle in a safe place to check what has gone wrong. (Otherwise, the abnormality could lead to accidents.)
・Before doing work, place the motorcycle on level ground to stablize the position of your motorcycle for safety's sake.
(Otherwise, your motorcycle could overturn and injure you while you are working.)
・Check or carry out maintenance of your motorcycle correctly according to the procedures in the instruction manual or service manual.
(Improper checking or maintenance could lead to accidents.) ・If you find damaged parts when checking and performing maintenance of your motorcycle, do not use these parts any longer, and replace them with new ones. (The continued use of these damaged parts could lead to accidents.)
・As gasoline is highly flammable, never place it close to fire. Make sure that nothing flammable is near the gasoline. Since vaporized accumulation of
gasoline is at the high risk of explosion, work in a well-ventilated place.
-1-
Mar./03/’
09
Kit Contents
CO
18
19
20
5
21
1
2
3
4
8
9
22
23
29
6
11
7
6
24
25
26
27
28
28
PY
12
14
10
15
16
17
13
Die-cast cover kit
No.
1
2
3
4
5
6
7
8
9
10
11
12
13
14
15
Part Name
Thrust bearing seat
Thrust bearing, 17 mm
Thrust washer, 17x30x1
Washer, 17x23x0.5
Clutch outer COMP., 67T
Radial ball bearing, 6803
Distance collar
Clutch spacer, 17x21.5x3
Clutch pressure plate
Clutch friction disk
Clutch plate
Clutch center
External circlip, 17 mm
Clutch springs
Clutch lifter plate
Qty
1
1
1
1
1
2
1
1
1
5
4
1
1
4
1
Repair Part Item No.
22301-181-T00
00-02-0061
00-02-0060
00-02-0097
00-02-0030
00-00-0024
28242-181-T00
23512-GEF-T00
22350-KRL-T00
00-02-0026
00-02-0029
22120-181-T00
00-02-0005
22401-181-T00
22361-GEF-T00
in packs of
1
1
1
1
1
1
1
1
1
1
1
1
5
1
1
No.
16
17
18
19
20
21
22
23
24
25
26
27
28
29
Part Name
Radial ball bearing, 6001
Flange bolt, 6x22
Primary drive gear, 18T
Lock washer, 14 mm
Conical spring washer, 14 mm
Lock nut COMP., 14 mm
Oil seal, 6x13x5
C-ring, 13 mm
Clutch release arm
Flang bolt, 6x18
Clutch release arm spring
Plain washer, 10 mm
Dowel pin, 8x12
Clutch cable, COMP.
Qty
1
4
1
1
1
1
1
1
1
1
1
1
2
1
Repair Part Item No.
00-00-0021
00-02-0098
23121-181-T01
90431-001-T00
00-02-0036
90200-181-T00
00-02-0037
00-02-0099
22812-181-T00
00-00-0023
22815-165-T00
00-00-0151
00-00-0153
22870-181-T20
in packs of
1
4
1
1
1
1
1
5
1
5
1
10
2
1
※ Please order repair parts with the Repair Part Item No. Without the repair part item No., we may not be able to provide the correct parts.
Some parts are only available as a set. Please order them with the set number.
-2-
Mar./03/’
09
Installation Procedures
This Installation Procedures relate to the work at a stage after 5- or 6-speed transmission has been installed and the
engine has already been demounted from the frame. For the work before this stage, please refer to a service
manual, instruction manual, or engine-tuning master book.
CO
2. Into a transmission main shaft, put a thrust bearing seat, thrust
bearing, thrust washer, and washer in this order, and attach a clutch
outer COMP to the transmission main shaft.
※Set the thrust bearing seat in the location so its protrusion gets stuck
on the crankcase, preventing it from rotating
※ Apply engine oil to the thrust washer and clutch outer ball bearing.
Disassembly:
(Please do the following work referring to a service manual.)
1.Pull out a right crankcase-cover bolt to remove a right
crankcase cover.
Detach a case-cover gasket and two dowel pins.
PY
2.Remove a clutch outer cover, clutch assembly, primary drive gear, clutch center guide and primary driven gear.
3.
Using a gear holder, tighten the lock nut to the specified torque with the crankshaft being seated in detect, and fold back the hook on the
lock washer.
Torque: 39 N・m (4.0 kgf・m)
※ After tightening the lock nut to the specified torque, turn the lock nut
in the direction of tightening if the hook on the lock washer does not fit
in the lock nut groove. Keep other hooks in close contact with the lock
nut.
Assembly:
Installation of primary drive gear
1.First make sure that a stock collar is in the crankshaft. Then attach
a primary drive gear, lock washer, and conical spring washer, which
please fasten with a lock nut for the moment.
※ Be careful about the direction in which to attach the conical spring washer.
-3-
Mar./03/’
09
3.Fit the supplied external circlip to the groove in the main shaft with the
circlip’s round corner on the downside.
※ Don’t expand the circlip more than necessary.
※In case you find it hard to fit the circlip into the mainshaft groove, then
Clutch assembly:
1.To clutch center, attach alternately one each of five friction disks and
four clutch plates, and then a clutch pressure plate.
※ Apply engine oil to both sides of the clutch friction disk.
※ Check that the bumpy surfaces of the clutch center and clutch
friction disk are meshing well with each other.
CO
2.Attach the clutch spacer to the transmission main shaft.
do the work lifting up the main shaft.
PY
4.Place four clutch springs into the pressure-plate boss, and fix the Fitting the protrusion on the clutch friction disk into the groove in the clutch outer, and also fitting, at the same time, the spline on the clutch
center into the spline on the main shaft, attach the clutch assembly.
clutch lifter plate with a flange bolt. And tighten it to the specified torque diagonally in a few steps.
Torque: 12 N・m (1.2 kgf・m)
Assembly of right crankcase cover and clutch cable
※ Please assemble these parts referring to the instruction manual for the
die-cast clutch cover kit.
※ Please assemble the engine referring to the instruction manual for the
relative engine.
3-5-16 Nishikiorihigashi Tondabayashi
Osaka Japan
TEL : 81-721-25-1357
FAX : 81-721-24-5059
URL : http://www.takegawa.co.jp
-4-
Mar./03/’
09
CO
Notice on installing Special clutch or Dry Clutch
A collar attached to a crankshaft should be used an genuine one.
Please noted that never attach the collar included in Takegawa Heavy-Duty 3 disc clutch kit as it is different size.
It will be a cause to damage if it installed. In the worst case it will cause to destroy the engine.
As the diagram below indicates, height and shape are different. Please confirm.
Genuine collar
Collar included in Takegawa
Heavy-Duty 3 disc clutch kit
step
PY
flat
10mm
8mm
Should be used an genuine one.
Do not use.
※There are two types of Heavy-Duty 3 disc clutch kit.
One uses the included collar and the other one uses
the genuine collar.
Jan./28/’
13
Jan./28/’
13
the genuine collar.
One uses the included collar and the other one uses
※There are two types of Heavy-Duty 3 disc clutch kit.
Do not use.
Should be used an genuine one.
8mm
flat
Genuine collar
10mm
Collar included in Takegawa
Heavy-Duty 3 disc clutch kit
step
A collar attached to a crankshaft should be used an genuine one.
Please noted that never attach the collar included in Takegawa Heavy-Duty 3 disc clutch kit as it is different size.
It will be a cause to damage if it installed. In the worst case it will cause to destroy the engine.
As the diagram below indicates, height and shape are different. Please confirm.
Notice on installing Special clutch or Dry Clutch