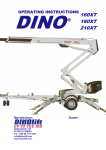
1
DINO ® 260XTD
OPERATING INSTRUCTIONS
Manufacturer:
Raikkolantie 145
FI-32210 LOIMAA
T. +358 2 762 5900
F. +358 2 762 7160
[email protected]
www.dinolift.com
Dealer:
®
DINO 260XTD
2
DINO 260XTD
ORIGINAL OPERATING INSTRUCTIONS
Valid from serial number
3
26316
DINO 260XTD
TABLE OF CONTENTS
1
EU DECLARATION OF CONFORMITY ......................................................................................6
2
REACH DIAGRAM...........................................................................................................................7
3
DIMENSION DRAWING..................................................................................................................8
4
TECHNICAL SPECIFICATION .....................................................................................................9
EXAMPLE OF THE MACHINE’S NAMEPLATE ......................................................................................9
GENERAL DESCRIPTION OF THE MACHINE......................................................................................10
DESCRIPTION OF THE MACHINE’S INTENDED USE ..........................................................................10
4.1
4.2
4.3
5
GENERAL SAFETY REGULATIONS .........................................................................................11
5.1
!! INSTRUCTIONS FOR SAFE OPERATION! .......................................................................................13
6
INSPECTIONS .................................................................................................................................14
7
WORKSITE INSPECTION ............................................................................................................15
8
OPERATION OF SAFETY DEVICES ..........................................................................................16
9
OPERATING CONTROLS.............................................................................................................18
9.1
9.2
OPERATING CONTROLS ON THE CHASSIS CONTROL PANEL .......................................18
OPERATING CONTROLS ON THE PLATFORM ....................................................................19
10
MEASURES TO BE TAKEN IN CASE OF EMERGENCY/AT RISK OF LOSING THE
STABILITY .............................................................................................................................................22
11
START-UP .....................................................................................................................................23
11.1
11.2
11.3
11.4
11.5
11.6
11.7
11.8
11.9
11.10
11.11
GROUND STABILITY ...................................................................................................................23
STARTING THE ENGINE ...............................................................................................................25
OPERATING THE SUPPORT OUTRIGGERS FROM THE CHASSIS PANEL ............................................26
OPERATING THE SUPPORT OUTRIGGERS FROM THE PLATFORM PANEL ........................................27
USING THE CHASSIS CONTROL PANEL.........................................................................................28
USING THE CONTROL PANEL ON THE PLATFORM ........................................................................29
DRIVING DEVICE ........................................................................................................................29
BOOM MOVEMENTS FROM THE PLATFORM PANEL ......................................................................31
BOOM MOVEMENTS FROM THE CHASSIS CONTROL PANEL ..........................................................31
TEST THE OPERATION OF THE OUTREACH LIMIT SWITCH RK4....................................................32
DRIVING INSTRUCTIONS .............................................................................................................33
12
EMERGENCY DESCENT SYSTEM .........................................................................................35
13
SPECIAL INSTRUCTIONS FOR WINTER USE ....................................................................37
14
MEASURES TO BE TAKEN AT THE END OF THE WORKING DAY..............................37
15
PREPARING THE LIFT FOR TRANSPORT ..........................................................................38
16
CONNECTION TO THE TOWING VEHICLE .......................................................................39
17
INSTRUCTIONS FOR SERVICE AND MAINTENANCE .....................................................40
17.1
17.2
GENERAL SERVICE INSTRUCTIONS.................................................................................40
SERVICE AND INSPECTION INSTRUCTIONS ..................................................................41
4
DINO 260XTD
17.3
WHEEL BRAKES AND BEARINGS......................................................................................42
17.4
LUBRICATION PLAN ............................................................................................................45
17.5
LONG-TERM STORAGE........................................................................................................46
17.6
LOAD HOLDING AND LOAD REGULATION VALVES....................................................47
17.7
LEVELLING SYSTEM OF THE PLATFORM .......................................................................49
17.8
REGULAR SERVICING .........................................................................................................50
17.8.1
TESTING THE OUTREACH LIMIT SWITCH...................................................................55
17.8.2
SETTING OF THE OUTREACH LIMIT SWITCH AND THE OVERLOAD LIMIT
SWITCH 57
18
INSPECTION INSTRUCTIONS.................................................................................................61
18.1
18.2
18.3
18.4
18.5
18.6
18.7
FIRST INSPECTION ...............................................................................................................61
SAMPLE OF INSPECTION PROTOCOL FOR THE ACCESS PLATFORM........................62
DAILY INSPECTION (START-UP INSPECTION) ...............................................................64
MONTHLY INSPECTION (MAINTENANCE INSPECTION) .............................................65
ANNUAL INSPECTION (REGULAR INSPECTION) ...........................................................66
EXTRAORDINARY INSPECTION........................................................................................69
TEST LOADING INSTRUCTIONS FOR REGULAR INSPECTION....................................70
19
FAULT FINDING .........................................................................................................................71
20
OPERATION OF ELECTRIC COMPONENTS.......................................................................77
20.1
20.2
20.3
20.4
20.5
20.6
20.7
20.8
20.9
20.10
20.11
MAIN CENTRE (PK), RELAYS .............................................................................................77
MAIN CENTRE (LCB), SWITCHES ...............................................................................................78
MAIN CENTRE (LCB), OTHER ITEMS ..........................................................................................79
CONTROL CENTRE (UCB), RELAYS ............................................................................................80
CONTROL CENTRE (UCB), SWITCHES ........................................................................................80
CONTROL CENTRE (UCB), OTHER ITEMS ...................................................................................81
CONTROL CENTRE ON CHASSIS (CCB), SWITCHES (EMERGENCY DESCENT OPERATIONS)...........81
CONTROL CENTRE ON CHASSIS (CCB), OTHER ITEMS ................................................................81
CHASSIS, OTHER ITEMS ..............................................................................................................82
LIMIT SWITCHES ........................................................................................................................82
TURNING DEVICE (RU), OTHER ITEMS........................................................................................83
21
ELECTRIC DIAGRAM 26316 >.................................................................................................84
22
HYDRAULIC COMPONENTS.................................................................................................102
23
HYDRAULIC DIAGRAM .........................................................................................................103
5
DINO 260XTD
1 EU Declaration of Conformity
EU Declaration of Conformity
Dinolift Oy
Raikkolantie 145
FI-32210 Loimaa,
which has authorised the Chief Engineer Mr. Seppo Kopu to draw up the Technical
Construction File
declares that
DINO 260 XTD Access Platform no YGC D260XT X X XXXXX
complies with the provisions of the Machine Directive 2006/42/EC and its
amendments as well as the national decree, through which they have been brought
into effect as well as the regulations of the Low Voltage Directive 2000/14/EC and
the EMC Directive 2004/108/EC.
Notified body nr. 0537,
VTT
P.O.Box 1300
FI-33101 Tampere
FINLAND
has granted the certificate no. VTT 177 / 524 / 09
In designing the machine, the following harmonized standards have been applied:
EN 280/A1+A2; DIN EN 60204-1/A1
Loimaa
(place)
04.10.2011
(date)
----------------------------------------(signature)
Seppo Kopu
Chief Engineer
(name in block letters, position)
6
DINO 260XTD
2 REACH DIAGRAM
7
DINO 260XTD
3 DIMENSION DRAWING
8
DINO 260XTD
4 TECHNICAL SPECIFICATION
Max. working height
Max. platform height
Max. outreach
Boom rotation
Platform rotation
Turn area
Support width
Transport width
Transport length
Transport height
Weight (without power unit)
Max. allowed load on platform
Max. number of persons + additional load
Max. allowed sideways load (caused by persons)
Max. lateral inclination (chassis)
Max. wind speed during operation
Min. ambient temperature when working
Max. support force on the outriggers
Työkorin koko
Gradeability
Power supply:
- mains current:
- Sound pressure level
- internal combustion engine
- Sound pressure level
Socket outlets on the platform
4.1
26.0 m
24.0 m
11.7 m
continuous
90°
refer to reach diagram
4.40 m
2.05 m
8.11 m
2.43 m
3,495 kg
215 kg
2 persons + 55 kg
400 N
±0,3°
12.5 m/s
-20 °C
22,800 N
0.7 x 1.3 m
25 %
230V / 50Hz / 16A
Under 70 dB
9.6 kW (13 hp)/ 3600 r/min
Under 82 dB
230V / 50Hz / 10A
Example of the machine’s nameplate
9
DINO 260XTD
4.2 General description of the machine
The denominations of the machine’s essential parts and concepts, which are used later in these
instructions, are described on this page.
4.3
Description of the machine’s intended use
The Access Platform is exclusively intended for transferring people and tools and acting as a work
platform to the limit of its load-bearing capacity and reach (refer to the table of Technical
Specifications and Reach Diagram).
The intended use also covers:
Following all the instructions in the Operating Instructions
Performance of the inspections and maintenance operations
10
DINO 260XTD
5 GENERAL SAFETY REGULATIONS
Make yourself familiar with these operation instructions before using the lift!
Keep these operating instructions in the place reserved for them.
Make sure that all users of the lift are familiar with these instructions.
Advice the new users and strictly follow all instructions given by the manufacturer.
Make sure you clearly understand all instructions relating to the operational safety of the lift.
Always use chocks under the wheels when disconnecting the lift from the car.
Only specially trained personnel with authorisation in writing from the employer who are well
familiarised with the device and at least 18-years old are allowed to operate the lift
-
-
-
-
-
-
The max. allowed load on the platform is two (2) persons and at maximum fifty five (55) kg of
additional load, however, the total load must not exceed two hundred fifteen (215) kg.
The platform may only be operated when the chassis is well supported and the wheels are off the
ground.
The load-bearing capacity and the gradient of the base must be taken into account when
supporting the chassis.
Additional support plates of adequate size must be used under the outriggers when working on
soft ground. Only use such additional support plates on which the metallic outriggers will not
slide.
The lift may only be moved in the transport position. No persons or load are allowed on the
platform during the transportation.
The weather conditions, such as wind, visibility and rain, must always be taken into account so
that these factors will not adversely affect the safe performance of the lifting operations.
The use of the lift is prohibited if
- the temperature drops under - 20 °C or
- the wind speed exceeds 12.5 m/s
PROTECT YOUR HEARING WHILE USING THE POWER UNIT 82 dB
USE THE SAFETY HARNESS!
Connecting points
for the safety
harness.
1 person/lug
11
DINO 260XTD
Do not use ladders, steps or other similar equipment on the platform.
Never throw any objects from the platform.
The lift must not be used for transferring goods or persons between different floors or working levels.
Never disable the operation of any safety device.
Always make sure before lowering the platform that the area on the underside is clear of any
obstructions.
Avoid damaging the platform by lowering it on the ground or bringing it in contact with any structures.
When working in busy areas the operating range of the lift must be clearly marked either by using
warning lights or fencing.
Also observe the regulations of the Road Traffic Act.
Beware of the live aerial power lines in the area - observe the minimum safety distances:
Voltage
100 – 400 V hanging spiral
cable
100 – 400 V open-wire cable
6 – 45 kV
110 kV
220 kV
400 kV
Min. distance below Min. distance at the
(m)
side (m)
0,5
0,5
2
2
3
4
5
2
3
5
5
5
Keep the lift clean of any dirt which may impair the safe operation and impede the inspection of the
structures
The device must be serviced and inspected regularly.
Only skilled persons who are familiar with the service and reparation instructions are allowed to carry
out the service and reparation work.
It is strictly prohibited to use a lift which is out of order.
The operator must be given instructions and consent from the manufacturer for all
such specific work methods or conditions, which the manufacturer has not explicitly
defined
The device must neither be altered without the manufacturer’s consent nor be used
under conditions which do not meet the requirements set by the manufacturer.
12
DINO 260XTD
5.1 !! Instructions for safe operation!
-
Use a safety harness while on the platform.
-
Use hearing protectors when operating the power unit (optional) from the chassis panel.
Sound pressure level 82 dB.
-
Never load the platform while in the upper position.
-
The lift must not be used when the temperature is below -20°C and the wind speed exceeds
12.5 m/s.
-
Beware of live power lines within the work area.
-
The lift MUST NOT be used as a crane.
-
Always ensure the load-bearing capacity of the standing surface.
-
Ensure the unobstructed range of movement before operating the outriggers.
-
While in the support position, ensure that the wheels are off the ground.
-
Always verify the horizontal position of the machine.
-
Ensure that the outriggers cannot slide while on a gradient.
-
Always ensure that the work area is clear of outsiders. Danger of getting squeezed between
rotating and fixed structures.
-
Stepping on or off the platform in motion is prohibited.
-
The maximum-allowed gradient during transfers is 5°. During transfer in rough terrain, try to
stay above the machine.
-
While operating the boom from the control panel on the turning device, beware of getting
pressed against the outriggers or other structures that do not turn with the boom.
-
When the boom is in its lowest positions, make sure it cannot clash during rotation with
structures that do not turn with the boom.
-
Before operating, always ensure that the safety devices and the emergency descent system are
in working order.
-
Do not take tools/material of large surface area onto the platform. The increase in wind load
may jeopardize the stability of the device.
-
Always keep the lift free from dirt, snow and ice.
-
Ensure that the lift is inspected and serviced, before use.
-
Never use a defective lift.
13
-
6
DINO 260XTD
Never use a lift alone. Make sure, there is always someone on the ground, who can call for help
in case of an emergency.
INSPECTIONS
A thorough inspection of the lift must be carried out at least once every twelve (12) months.
The inspection shall be carried out by a technically trained person who is familiar with the operation and
structure of the lift.
Draw up a protocol of the inspections and keep it always with the unit stored in the space reserved for it.
Carry out he inspections on regular basis throughout the service life of the lift.
The inspection must be carried out within twelve (12) months from the first or the previous inspection.
If the lift is used under extreme conditions, intervals between the inspections shall be reduced.
The overall operating condition of the lift as well as the condition of the safety-related control devices
shall be established in the regular inspections. Particular attention shall be paid to changes which affect
the operational safety.
In connection with the regular inspection, it shall be established to what extent the lessons and practical
experience gained from the previous inspection can be implemented for even better safety.
NOTE! Primarily the national legislation must be followed!
Regular inspections and service measures are described more thoroughly in the chapter "Service- and
maintenance".
14
DINO 260XTD
7 WORKSITE INSPECTION
1.
-
General information
Is the lift suited for the intended job?
Is the performance of the lift sufficient for the job? (reach, loadability etc.)
Is the position of the lift safe?
Is the lighting on the worksite sufficient?
2. Documents
- Are the Operation and Service Instructions for this lift present? (Manufacturer´s instructions)
- Are inspections and servicing carried out in accordance with the instructions and have the
defects affecting the safety been checked as repaired?
(Inspection protocols)
3.
-
Structure (Visual inspection and operational test)
General condition of the lift
Operation and protection of the controls
Emergency stop, signal horn and limit switches
Electrical appliances and wiring
Oil leaks
Load markings and signs
4. Operator
- Is the operator old enough?
- Has the operator received the required training?
5. Special issues on the work site
- Are there any additional regulations relevant to the worksite or the work?
15
DINO 260XTD
8
OPERATION OF SAFETY DEVICES
RK3
16
DINO 260XTD
1. Lifting the boom (Fig. A)
The safety limit switch RK3 prevents the operation of the outriggers and the driving device when the
boom does not rest on the transport support.
The switch is located on the tow-bar at the transport support.
2. Support outriggers (Fig. B)
All the lift’s support outriggers must be in the support position before the boom is lifted. Make sure that
the wheels are off the ground.
The safety limit switches RK11, RK12, RK13 ja RK14 are located on the support outriggers.
3. Outreach range and overload protection switch (Figs. A and C)
The safety limit switches prevent overloading of the lift. At a predetermined position the outreach limit
switch RK4 stops extension of the telescope and lowering of the boom.
The overload limit switch RK5 backs up if the RK4 for some reason does not work.
The red light flashes and the buzzer buzzes as the RK4 stops the movement. When the red light is on,
the lift can be operated in the direction where it stays inside the allowed outreach area.
The overload limit switch RK5 backs up the operation of the RK4 and, at the same time, switches the
buzzer and the light signal on the platform to operate at a higher frequency.
4. As the emergency stop button is depressed all movements stop and the power unit is turned off.
The emergency stop pushbutton must be pulled up before starting the power unit.
Check operation of the safety devices.
17
DINO 260XTD
9 OPERATING CONTROLS
9.1
OPERATING CONTROLS ON THE CHASSIS CONTROL PANEL
S20
F11
VM1
Q1
S18
S9
S6
H8
S17
S31
S11
S19
S16
F11
H8
Q1
S1
S6
S8
S9
S11
S16
S17
S18
S19
S20
VM1
S8
S1
Fuse for the socket outlet on the platform
Signal light for the outreach control safety limit switch
Selector switch for the operating location
Emergency stop button
Start and stop switches for the combustion engine
Switch for selecting the movement speed of the boom
Choke button for the combustion engine
Start button for the emergency descent motor
Turning the boom to the right and to the left
Lifting and lowering the boom
Retracting and extending the telescope
Lifting and lowering the articulated arms
Levelling the platform to the front and to the rear
Voltage meter for the mains current
18
DINO 260XTD
9.2
OPERATING CONTROLS ON THE PLATFORM
Close the cover of the chassis control panel before operating the platform controls.
F10
S10
H2
S4
S5
S32
S14
S37
S13
DSP
S33
S34
H1
S36
DSP
H1
H2
F10
S5
S4
S10
S12
S13
S14
S33
S34
S35
S36
S37
S35
Display
Signal light for the outrigger limit switches
Alarm signal light
Automatic fuse for turning the platform
Start and stop switches for the combustion engine
Emergency stop button
Pushbutton for the sound signal
Operating switch for the emergency descent system
Turning the platform to the left and to the right
Control switch for the combustion engine choke
Lifting and lowering the support outrigger 1
Lifting and lowering the support outrigger 2
Lifting and lowering the support outrigger 3
Lifting and lowering the support outrigger 4
Levelling the platform to the front and to the rear
19
S12
DINO 260XTD
17. Control lever JSR (right)
Boom up
Driving to the front
Turning the
boom to the
right
Turning the boom to
the left
Curving to the left, to
the front and rear
Switching on pressing
of the rollers (Pressing
is switched off from the
chassis)
Curving to the
right, to the
front and rear
Driving to the rear
20
Boom down
DINO 260XTD
19. Control lever JSL (left)
Retracting the telescope
1. Automatic levelling
2. Outriggers up
(optional)
Lowering the
articulated arms
Raising the
articulated arms
Extending the telescope
21
DINO 260XTD
10 MEASURES TO BE TAKEN IN CASE OF EMERGENCY/AT RISK OF
LOSING THE STABILITY
Reduced stability can be caused by a fault in the lift, the wind or other lateral force, collapse of the
standing base or negligence in providing sufficient support. In most cases one sign of reduced stability
is the inclination of the lift.
WHEN AT RISK OF LOSING THE STABILITY
1. If there is time, try to find out the reason for the reduced stability and the direction of its effect.
Warn other people on the work site using the alarm signal.
2. If possible, reduce the load from the platform in a safe manner.
3. Reduce the outreach to the side by retracting the telescopic boom using the emergency descent
system. Avoid abrupt movements.
4. Turn the boom away from the danger zone, i.e. to a position where the stability of the lift is normal.
5. Lower the boom.
If the stability has been lost as a result of a fault in the lift, repair such a fault immediately.
Do not use the lift until the fault has been repaired and the condition of the lift has been verified.
IN CASE OF OVERLOADING
1. If there is time, try to find out the reason for the reduced stability and the direction of its effect.
Warn other people on the work site using the alarm signal.
2. If possible, reduce the load from the platform in a safe manner.
3. Reduce the outreach to the side by retracting the telescopic boom using the emergency descent
system.
4. The green light becomes illuminated when the overload situation is reset. After this the machine
may be operated normally.
IN CASE THE POWER SUPPLY IS INTERRUPTED (power unit/combustion engine)
1. Lower the boom using the emergency descent system (see point “Emergency descent system”).
2. Establish the reason why the energy supply was interrupted.
IN CASE OF MALFUNCTION, WHEN EVEN THE EMERGENCY DESCENT SYSTEM IS NOT
OPERATIONAL
1. If the emergency descent system does not operate, try to warn other personnel present on the site so
that they can call for help so that the power supply required for normal operation can be resumed or
make the emergency descent system operational by, for example, changing the battery so that the person
on the platform can be lowered safely.
22
DINO 260XTD
Always check the condition of the emergency descent system battery before putting the lift into
operation (see point "Using the chassis control panel").
11 START-UP
11.1 Ground stability
-
make sure that the ground is even and hard enough to support the lift in a steady level position
Soil material
Density
Gravel
High density
Medium density
Loose
High density
Medium density
Loose
High density
Medium density
Loose
High density (very hard to work)
Medium density (hard to work)
Loose (easily worked)
Sand
Fine sand
Sand/ mud
Max. ground
pressure
P kg/cm²
6
4
2
5
3
1,5
4
2
1
1,00
0,50
0,25
-
if the ground is soft, use sufficiently large and sturdy additional plates under the support outriggers
-
observe the effect of ice, possible rain and inclination of the surface on the support (the support
outriggers must not slip on the surface)
the operation is prohibited if the lift is not properly supported and in a level position
-
2. Drive or push the lift to the inspected lifting site
apply the parking brake
disconnect the lift from the towing vehicle
23
DINO 260XTD
S20
VM1
F11
Q1
S18
S9
S6
H8
S17
S31
S11
S19
S8
S1
S16
H2
S10
F10
S4
S5
S14
S37
S32
S13
DSP
S33
S34
H1
S36
S35
24
S12
DINO 260XTD
11.2 Starting the engine
At first, make sure that the main battery switch is switched on.
- The main switch is located on top of the chassis control panel.
Select the operating location using the switch Q1.
Check the condition of the battery to ensure operation of the emergency descent system. The emergency
descent unit must rotate at a fair speed as the emergency descent button is depressed.
A. POWERED BY AC-SUPPLY
- connect the mains cable to the power supply
- for maximum out of the electric motor the voltage must 230 VAC (-10%/ +6%), the frequency must
be 50 Hz (the length of the connecting cable has some effect)
- fuse 16 A
Starting the electric motor:
1. Operating the support outriggers from the chassis panel: turn the switch S47 to position 1 and select
any of the movement directions using the switches S41-S44 or S48 (see picture on the next page).
2. Operating the boom from the chassis panel: select the movement speed for the boom using the
switch S8 and, at the same time, select any direction of movement using the switches S16-S20.
3. Operating from the platform: as the foot pedal ís switched on and any direction of movement is
selected
The engine will stop 5 seconds after the movement stops
B. POWERED BY COMBUSTION ENGINE (POWER PACK)
- check that there is enough fuel in the tank.
- open the fuel cock and, as required, switch on the choke for the start using the separate pushbutton
(either the pushbutton S9 on the chassis panel or the switch S5 on the platform) and start the engine
using either the lever switch S6 on the chassis panel or the lever switch S5 on the platform
- adjust the engine speed (combustion engine) using the throttle lever
-
If the battery is flat, start the unit by pulling the starter string and keeping the button in front of the
unit depressed. The key switch Q1 must be in the "operation from the chassis panel" position.
Pull the starter grip lightly until you feel resistance, then pull briskly. Keep the button depressed for
about 1 minute in order to recharge the battery.
Do not allow the starter grip to snap back against the engine.
- adjust the engine speed to halfway.
Let the combustion engine run for a sufficient period of time between operations because the battery
only recharges while the engine is running.
- The engine stops when the switch S5 or S6 is turned to the Stop position.
- Close the fuel cock when stopping the combustion engine.
Note! The fuel cock must be closed when the lift is towed.
For additional information concerning the operation of the combustion engine generator, please refer to
separate operating and service manual.
C. OPERATION WITH DIESEL ENGINE
- do not connect the mains cable (230 VAC)
Please refer to separate user manual for the diesel engine delivered with the lift for instructions
concerning the start-up of the engine, when the battery is empty.
Leave the combustion engine running between operations because the battery only recharges while the
engine is running.
To avoid damaging the electronics of the diesel engine; do not disconnect the mains current while the
diesel engine is running!
25
DINO 260XTD
11.3 Operating the support outriggers from the chassis panel
The support outriggers may only be
operated, while the boom is resting on the
support.
The support outriggers are operated using
dedicated lever switches for each outrigger.
1. Turn the selector switch S47 to position
1 and keep it there as long as you
operate the selected movement.
2. Turn the lever switch, dedicated to this
outrigger, in the desired direction of
movement (as desired, all outriggers can
be operated simultaneously).
3. Lower the support outriggers in the
front.
4. Lower the rear support outriggers (Do
not damage the tow-bar jockey
wheel!)
Level the chassis using the outriggers in accordance with the level gauge.
5. The green signal light next to the operating lever for the outrigger will illuminate as soon as
sufficient force is exerted on the
outrigger.
Note! Illumination of the green signal
light does not necessarily mean that the
lift is on a level.
MAKE SURE THAT THE WHEELS
ARE CLEARLY OFF THE GROUND
-
make sure all outriggers are firmly supported on the ground
26
DINO 260XTD
11.4 Operating the support outriggers from the platform panel
The support outriggers may only be operated, while the boom is resting on the support.
The support outriggers are operated using dedicated lever switches for each outrigger.
1. Press the foot pedal.
2. Turn the lever switch, dedicated to this outrigger, in the desired direction of movement (as
desired, all outriggers can be operated simultaneously).
3. Lower the support outriggers in the front.
4. Lower the rear support outriggers (Do not damage the tow-bar jockey wheel!)
5. Level the lift using the outriggers.
a. the level position can be established by the columns on the display (DSP)
b. the numeric values X and Y indicate the tilt in degrees
c. check from the display that the inclination in directions X and Y is less than 0,3º
6. The green signal light H1 amid
the operating levers for the
outriggers will illuminate as soon
as sufficient force is exerted on
all outriggers.
Note! Illumination of the green signal
light does not necessarily mean that
the lift is on a level.
MAKE SURE THAT THE WHEELS
ARE CLEARLY OFF THE
GROUND
-
make sure all outriggers are firmly supported on the ground
Automatic levelling (optional)
1. Press the foot pedal.
2. Depress the left-hand side of the rocker switch on the left joystick in order to balance the lift to a
level.
3. Continue the levelling until the movement stops.
4. Establish on the display that the inclination in directions X and Y is less than 0,3º.
Always check the level position of the lift.
Readjust manually, as necessary.
Lifting the outriggers to the transport position using the automatic levelling
5. Press the foot pedal.
27
DINO 260XTD
6. Depress the right-hand side of the rocker switch on the left joystick in order to lift the outriggers to
transport position.
11.5 Using the chassis control panel
Select the chassis panel using the selector switch (Q1) for the operating location
-
start the combustion engine or the electric motor in accordance with the instructions
select the speed using the switch S8 (keep the switch activated throughout the operation)
the switch has three positions
- Position 0 - none of the movements operate
-
- position - boom movements operate at low speed
-
- position - boom movements operate at high speed
-
the boom movements, controlled using the switches S16-S20, operate at selected speed
-
test the operation of the emergency descent
system as follows:
1. lift the boom about 1-2 metres, extend the
telescope 1-2 metres and depress the emergency
stop button - the motor and the movement should
now stop
2. start the emergency descent power unit
(pushbutton S11), retract the telescope (lever
switch S18 or pushbutton S31) and lower the
boom (lever switch S17)
3. pull up the emergency stop button
The boom movements are noticeably slower when
the emergency descent system is used.
Note! If you have levelled the chassis of the lift ON A
GRADIENT turn around the boom carefully to
make sure that the turning device does not bang
against the support outriggers.
-
lift the platform from the tow-bar and turn it to the side to enable its lowering
extend the telescope as much as necessary to ensure safe entrance on the platform
28
DINO 260XTD
DO NOT DAMAGE THE TOW-BAR JOCKEY WHEEL!
11.6 Using the control panel
on the platform
-
-
once the foot pedal is depressed,
the electric motor starts
automatically as any of the
movements is activated
for operation powered by
combustion engine, start the
engine using the selector switch
S5
Adjust the engine speed to ¾ of
the maximum. The engine speed
affects the movement speed of
the lift
11.7 Driving device
The hydraulic driving device is intended for moving the lift
within the work area.
If the terrain is rough, use the remote control panel or a
towing vehicle.
Make sure the platform is in the transport position and the
outriggers are in the upper position.
Make sure that the mains cable is long enough to cover the
whole travel distance (power supply from mains).
Use the additional jockey wheel during transportation. The
wheel is located on the left-hand side behind the machine.
Operating the lift from the platform panel
- activate the foot pedal and press the driving device against
the wheel depressing the left face of the rocker switch on
the right-hand joystick (JSR)
The switching on can also be performed from the chassis
control panel by turning the lever switch S47 to position 1
and selecting the direction of movement for the rollers
using the switch S48. The disconnection can only be
performed from the chassis control panel using the switch
S48.
-
release the parking brake
29
-
DINO 260XTD
activate the foot pedal and drive the unit using the right-hand joystick (JSR) (see the operating
diagram in point “Using the control panel on the platform”)
do not drive the jockey wheel into obstacles or potholes
- after the driving apply the parking brake
- do not disconnect the driving device from the tyre until having
engaged the handbrake from the chassis control panel
Driving using the remote control panel
the control panel is located on top of the chassis control panel, behind the machine
press the rollers against the tyres as instructed (see point “Driving device”)
the remote control panel has arrow keys for driving to the front and rear, turning to the right and left
as well a pushbutton for emergency stop
REMEMBER THE HANDBRAKE!
-
WARNINGS.
1. Do not drive downhill with the driving device if the inclination of the surface is more than 5 per
cent, i.e., more than 1/20 (corresponding to a descent of 0.5 m over a distance of 10 m). If the
surface gradient is greater than this, you may lose control of the device.
maks. 5 %
2. When driving on a slope, the tow-bar must always point towards the descent.
Never drive with the driving device with the tow-bar pointing towards the ascent.
3. Always place chocks under the wheels before disconnecting the device from the towing vehicle.
4. Always apply the handbrake before disconnecting the device from the towing vehicle.
Only use the handbrake as a parking brake or for emergency stopping.
5. Never leave the lift on a slope being supported only by the self-braking action of the driving device.
6. When transferring the lift using the driving device:
- take care not to allow the wheel to roll over your foot
- look out for sudden sideways movements of the tow-bar
- be careful not to cause danger to other people and the environment
7. Do not move the device on a slope using only hand-power. You may lose control over it and cause
an injury.
8. Never park a vehicle combination on a slope.
30
DINO 260XTD
11.8 Boom movements from the platform panel
- select "driving from the platform" using the switch Q1 on the chassis control panel
- activate the foot pedal
-
as required, start the combustion engine in accordance with the instructions
the electric motor starts upon activating any of the movements and stops as soon as the activation
ends
the boom movements are controlled by means of joysticks (see point " Using the control panel on
the
platform").
JSL
JSR
Test the operation of the emergency descent system as follows:
- The boom movements are noticeably slower when the emergency descent system is used.
1. lift the boom about 1-2 metres, extend the telescope 1-2 metres and depress the emergency stop
button - the motor and the movement should now stop
2. start the emergency descent unit using the pushbutton S12, then the telescope starts retracting
automatically - as the telescope is fully in, the boom and the articulated arms start lowering
3. pull up the emergency stop button
11.9 Boom movements from the chassis control panel
- see point “Using the chassis control panel”
Note! If you have levelled the chassis of the lift ON A GRADIENT turn around the boom carefully
to make sure that the turning device does not bang against the support outriggers.
31
DINO 260XTD
11.10 Test the operation of the outreach limit switch RK4
-
platform load about 80 kg
drive the boom to a horizontal position
extend the telescope
As the movement stops, the red light H2 shall flash, the buzzer on the platform shall buzz and the text
"maximum outreach" shall be displayed on the screen
- compare the outreach with the reach diagram in the manual
(distance to the outer face of the platform = reach - 0,5 m
Note! If you disconnect the voltage from the lift at the limit of the operating range, you must use
the pushbuttons S31 or S32 in order to retract the telescope to inside the normal operating range.
Measures after the normal operating range has been exceeded.
- the limit switch RK5 for operating range control cuts off all the control movements
- the buzzer on the platform is buzzing
- the red signal light H2 is flashing
- the text "maximum operating range exceeded" is shown on the display
Return inside the normal operating range
- retract the telescope using the blue buttons S31 or S32
- the signal light will go out, the buzzer will stop buzzing and the text on the display will disappear as
soon as the normal operating range is reached
- after this the lift may be operated normally
The "telescope in" buttons S31 and S32 are operational if the electric motor, the combustion engine or
the emergency descent motor is running. These operations must be activated from the actual operating
location using either the foot pedal or the selector switch S8 for the movement speed.
Once the emergency descent button S12 on the platform is depressed, the telescope automatically
retracts first and the boom and the articulated arms lower last.
WARNING
Do not add further load (e.g. another person) onto the platform at maximum outreach.
Example: A person, who is working alone on the platform, extends the telescope, or an empty platform
is driven from the chassis control panel to the maximum reach keeping it close to the ground. If the
outreach limit signal light now illuminates, the telescope must be retracted before loading the platform
further.
IF THE SAFETY DEVICES OR THE EMERGENCY DESCENT SYSTEM ARE NOT
WORKING, HAVE THEM REPAIRED BEFORE OPERATING THE LIFT!
32
DINO 260XTD
11.11 Driving instructions
1. Refer to the item "Daily inspections" in the task list for servicing.
2. With the boom slightly lifted and the telescope extended, make sure that the platform does not
lower of itself while the operating controls are not being used.
3. When working under cold weather conditions, let the engine run for a while without load to
increase the hydraulic oil temperature. Start the operations by driving the movements carefully
without load back and forth from the chassis control panel.
4. Move the platform to the work object
The platform movements can be operated with continually adjustable speed from the platform control
panel (not from the chassis control panel). The movements can be operated simultaneously. If several
control levers are operated simultaneously, the speed of individual movements decreases.
DO NOT TAKE ADDITIONAL LOAD IN THE UPPER POSITION!
NOTE!
Lowering the platform to transport position: Always before lowering the boom onto the transport
support, retract the telescope completely and turn the platform perpendicular to the boom.
5. Observe when lifting the platform
-
the operating range of the platform depends on the load (see Technical Data) and is monitored by
the safety limit switches RK4 and RK5, which are located under the protecting cover
The limit switches must not be adjusted or modified. The inspection and adjustment may only be
carried out by an authorized serviceman.
33
DINO 260XTD
6. Working a long time in the same position
- it is not necessary to let the engine run if the weather is warm and the platform is kept for a
longer period of time in the same position
- It is recommended to also leave the combustion engine running between the operations, to
ensure the battery remains well charged
- check the stability and condition of the base regularly during the operation, taking into
account the weather and ground conditions
7. When moving the platform, remember the following
-
be careful of the high voltage power lines
-
do not exceed the max. allowed lateral force
(400N)
-
do not touch open electric wires
-
do not throw objects from the platform
-
do not damage the lift
-
do not take additional load in the upper position
-
do not damage other devices
-
do not load the platform vertically more than
what is allowed
8. When leaving the lift
-
drive the lift to a safe position, preferably to the transport position
switch off the power unit
prevent unauthorised use of the lift by removing the keys from the control panel
9. Adjustment of the platform position
The levelling of the platform is operational while the lift is in the support position (supported by the
outriggers).
BE PREPARED FOR SUDDEN PLATFORM MOVEMENTS!
The levelling of the platform from the chassis control panel:
- turn the selector switch Q1 to position "chassis control panel"
- select the movement speed using the switch S8
- select the desired correction movement direction using the switch S20
The levelling of the platform from the platform control panel:
- activate the pedal switch
- select the desired correction movement direction using the switch S37
34
DINO 260XTD
12 EMERGENCY DESCENT SYSTEM
As a precaution against malfunction, the lift is equipped with a battery-operated emergency descent
system.
1. Setup of the system
- battery 12V 44Ah
- battery charger
- hydraulic unit 12 VDC
2. Servicing the battery
- the system incorporates an automatic battery recharger with short circuit and overheat
protection
- if necessary, top up distilled water above the battery elements
3. The hydraulic unit comprises:
- pressure relief valve, set value 16 MPa (160 bar)
- check valve
- direct current motor 800W
Start the emergency descent system from the platform using the pushbutton S12 or from the chassis
using the pushbutton S11 and the selector switch for this movement.
The emergency descent system can only be operated when the pushbutton is depressed.
Starting of the emergency descent system stops the 230 VAC motor.
NOTE!
Emergency descent from the chassis control panel
-
Start the emergency descent motor using the pushbutton S11 (keep it depressed throughout the
operation).
Retract the telescope completely (the limit switch RK8 will close).
Lower the boom and, as necessary, also the articulated arms.
Turn the boom to above the transport support and lower the boom onto it.
At first, retract the telescope using the emergency descent system, then lower the boom.
Emergency descent from the platform control panel
-
-
Start the emergency descent motor using the pushbutton S12 (keep it depressed throughout the
operation).
The telescope automatically moves inwards; allow it to retract completely (the limit switch RK8
will close).
As the telescope has retracted completely, the limit switch RK8 will switch the operation to
lowering of the boom and the articulated arms. Lower the boom system sufficiently in order to
enable safe exit from the platform
As necessary, drive the boom onto the transport support using the emergency descent operation from
the chassis control panel.
If the emergency descent system does not operate try to warn other personnel present on the site so that
they can make the lift engine or the emergency descent unit operational by, for example, changing the
battery.
35
DINO 260XTD
Always check the condition of the emergency descent system before putting the lift into operation (see
point "Using the chassis control panel").
Emergency descent operations from the chassis control panel
You can use the emergency descent system for lifting the outriggers to the transport position and for
disconnecting the drive rollers from the tyres.
Emergency descent of the outriggers
-
The boom must rest on the transport support.
Start the emergency descent motor from the pushbutton S40.
The pushbuttons S41-S44 can only be used for lifting the outriggers.
Lift the outriggers one by one in order to lower the unit smoothly.
Disconnecting the drive rollers from the tyres
-
If the lift is not hooked up to a towing vehicle, remember to apply the handbrake before
disconnecting the drive rollers.
The boom must rest on the transport support.
Start the emergency descent motor from the pushbutton S40.
Use the pushbutton S48 for disconnecting the drive rollers from the tyres.
The rollers will come loose from the tyres slightly at different times. Therefore, keep the motion
activated long enough to ensure that the rollers have drawn away to a sufficient distance from the
tyres before the lift is moved.
36
DINO 260XTD
13 SPECIAL INSTRUCTIONS FOR WINTER USE
-
the lowest allowed operating temperature of the lift is -20 °C.
-
if the temperature is below zero, let the power unit run for a few minutes before starting the
movements
-
start with a few movements to warm-up oil in the cylinders and to ensure proper operation of the
valves
-
check that the limit switches and the emergency descent devices are operational and clean (from dirt,
snow, ice, etc.)
-
protect the control panel and the platform from snow and ice whenever they are not in use
ALWAYS KEEP THE LIFT FREE FROM DIRT, SNOW ETC.
14 MEASURES TO BE TAKEN AT THE END OF THE WORKING DAY
1. Retract the telescope boom completely.
2. Check that the platform is perpendicular to the boom.
3. Lower the boom/platform onto the support on the tow-bar.
- the limit switch on the transport support prevents operation of the support outriggers if the
platform is not down
4. Close the covers on the operating controls.
5. Turn the selector switch Q1 to the position OFF and the mains switch to the position 0.
6. If you want to charge the battery , keep the mains cable connected and turn the mains switch to
position 0; otherwise disconnect the lift from the mains supply.
37
DINO 260XTD
15 PREPARING THE LIFT FOR TRANSPORT
1. Apply the parking brake.
2. Retract the telescope boom completely.
3. Check that the platform is perpendicular to the boom.
4. Lower the boom/platform onto the transport support on the tow-bar.
5. The limit switch on the transport support prevents operation of the outriggers if the boom is not
properly supported.
6. Lift the support outriggers
a. at first the rear support outriggers (do not damage the rear lights)
b. then the front support outriggers (do not damage the jockey wheel)
7. Make sure that the driving device is disconnected.
8. Turn the selector switch Q1 to OFF position and disconnect the lift from the power supply.
9. Turn the main switch to position 0.
10. Make sure that the covers are locked.
38
DINO 260XTD
16 CONNECTION TO THE TOWING VEHICLE
1. Lift up and push forward the ball-coupling handle (in the driving direction). Now the ball-coupling
is released.
2. Press the ball-coupling onto the towball using only a little force. The hooking up and locking will
take place automatically once the handle is lowered.
NOTE! ALWAYS MAKE SURE AFTER THE CONNECTION THAT THE BALL-COUPLING
IS PROPERLY LOCKED!
Clean and lubricate the ball-coupling regularly.
3. Connect the emergency stop wires and light plug to the vehicle. Check the cable for chafing and
proper operation of the wires.
4. Check the operation of the lights.
5. Carefully release the parking brake and make sure that its locking is in order and that its handle
stays in the lower position.
6. Lift up the jockey wheel to the transport position.
No load is allowed on the platform during towing of the lift.
If you are parking or disconnecting the lift from the towing vehicle on a slope, apply the parking brake
as firmly as possible. After having applied the parking brake, push the lift backward to make the reverse
automatics release the brake shoes. The spring cylinder pulls the parking brake tighter. This ensures the
brakes of the vehicle are again properly on.
Adjust the brakes according to the service instructions.
Place chocks under the wheels as an additional precaution.
If you leave the lift standing for a longer period of time, for example over the winter, we recommend
propping it up to release any load from the wheels.
NOTE!
- Check:
- transport position of the outriggers
- locking of the ball-coupling
- operation of the lights
- parking brake
- condition and pressure of the tyres (700 kPa, jockey wheel 250 kPa and additional jockey
wheel 300 kPa)
- safety wires
- locking of the brakes after transportation
- attachment of the jockey wheel
- that the driving device is disconnected from the wheel
39
DINO 260XTD
17 INSTRUCTIONS FOR SERVICE AND MAINTENANCE
17.1 GENERAL SERVICE INSTRUCTIONS
-
carry out the servicing and inspection of the lift in accordance with the instructions
-
when it comes to more demanding repair works turn to a specialist or contact the distributor or the
manufacturer of the lift
-
do not modify the lift without written consent from the manufacturer
-
any such faults which may affect the operational safety of the unit must be repaired before the lift is
next used
-
do not let oil spill on the ground
-
keep the lift clean, especially the platform
-
clean up the lift before service and inspection
-
use genuine spare parts
-
support the platform, boom system, articulated arms and support outriggers in a position in which
the load does not rest on the structure under repair or cause any other danger (e.g. transport position
or use of supporting structures)
-
the device may be lifted with two slings, each with a load-carrying capacity of at least 3,500 kg or
slinging at the four lugs (see picture)
Be careful not to damage the device during the lifting!
240 mm
40
DINO 260XTD
17.2 SERVICE AND INSPECTION INSTRUCTIONS
1. The first service after 20 hours of operation
- change the pressure and return filter elements
- adjust the brakes according to the instructions (see point "Wheel brakes and bearings")
- check the the wheel bolts for tightness after about 100 km of driving (325 Nm)
2. Daily service
- check the oil level in the hydraulics, top up if necessary
- check the hydraulic connections
- check the unit visually
- check the operation of the emergency descent and emergency stop functions
- check the operation of the safety devices
3. Weekly service
- check the tyre pressure (700 kPa, jockey wheel 250 kPa and additional jockey wheel 300
kPa)
- lubricate the joint pins (see point “Lubrication plan”)
- check the sliding surfaces of the telescope and apply silicon if necessary
- check the clearance between the slide pads and surfaces and adjust the pads if necessary
- put a load of about 80 kg onto the platform and drive the boom to level position
Continue by extending the telescope until the red signal light lights up and the movement
stops. Mittaa isku ohjeen mukaisesti. If the stroke exceeds the allowed value, contact the
service person. See point "Testing the outreach limit switch").
4. Service every six months
- change the hydraulic oil and both filters
- check the condition of the brakes
- check the the wheel bolts for tightness (325 Nm)
- grease the gear ring of the turning device bearing
5. Periodic service every 12 months ín accordance with the instructions for regular servicing
below in this manual
IF THE LIFT IS OPERATED UNDER DEMANDING CONDITIONS (IN EXCEPTIONALLY
HUMID OR DUSTY ENVIRONMENT, CORROSIVE CLIMATE, ETC.), THE INTERVALS
BETWEEN THE OIL CHANGES AND THE OTHER INSPECTIONS SHALL BE
SHORTENED TO MEET THE PREVAILING CONDITIONS IN ORDER TO MAINTAIN THE
OPERATIONAL SAFETY AND RELIABILITY OF THE LIFT.
THE PERFORMANCE OF THE PERIODIC SERVICING AND THE INSPECTIONS IS
ABSOLUTELY MANDATORY, BECAUSE THEIR NEGLIGENCE MAY IMPAIR THE
OPERATIONAL SAFETY OF THE LIFT.
THE GUARANTEE WILL NOT REMAIN VALID, IF THE SERVICING AND THE PERIODIC
INSPECTIONS ARE NOT PERFORMED.
41
DINO 260XTD
17.3 WHEEL BRAKES AND BEARINGS
Adjustment of the brakes
Jack up the lift until the wheels rise off the ground and support it in this position.
Make sure that the wheels can rotate freely.
The brake rods must be slack (with
the handbrake released).
Check the attachment of the brake
rods.
Turn the adjustment wheel behind the hole shown by the arrow until the wheel can no longer be turned
by hand.
Turn the adjustment wheel counter-clockwise until the wheel can be turned freely.
ADJUSTMENT
42
DINO 260XTD
Adjust the braking force with the nuts
keeping the brake balancer perpendicular
to the tow-bar so that both wheels will
brake.
ADJUSTMENT NUTS
PERPENDICULAR
Tightening the brake system too much causes overheating of the brakes during transportation and
increases the required towing force.
We recommend performing a braking test after the adjustment. Check the flawless operation by braking
2-3 times in the course of the test run.
43
DINO 260XTD
Adjustment of the bearing clearance
The wheel bearings are lubricated for life and do not require any service.
(The bearings do not require any lubrication and they cannot be adjusted)
Service intervals
500 km
(running in)
5,000 km
adjustment of the brakes, lubrication of the moving parts of the overrun
13,000 - 15,000 km
or every six months:
a) check the brake linings for wear
b) check the operation of the overrun brake
c) lubricate the sliding parts of the overrun brake
The service-life of the double row angular contact compact bearings is long and they are maintenancefree. Therefore, the bearings very rarely break under normal operating conditions. If a bearing failure,
due to exceptional operating conditions, occurs, replace the entire brake drum assembly with the
pressed-in bearings and locking nut.
NOTE!
Assign a specialized workshop for the work.
Turn the wheels at least once every 3 months to keep the lubricating film intact.
44
DINO 260XTD
17.4 LUBRICATION PLAN
45
DINO 260XTD
EVERY 50 HOURS
1.
2.
3.
4.
5.
6.
7.
Bearings of the safety device
Bearings of the outrigger cylinders
Bearings of the outriggers
Bearings of the outrigger foot plates
Bearings of the boom and the articulated arms
Bearings of the platform
Bearings of the levelling cylinders (except the bearing on the rod side of the upper levelling
cylinder)
8. Bearings of the lifting cylinder
9. Sliding surfaces/rolls of the telescope
10. Jockey wheel slide and threads
TWICE A YEAR
11. Bearing of the telescope cylinder
12. Driving device
13. Overrun brake - overrun
14. Turning device bearings and gear ring
15. Bearing on the rod side of the upper levelling cylinder
Lubricant Esso Beacon EP2 or equivalent.
The overload protection device joint (point 1) must absolutely be lubricated regularly and always
immediately after the lift has been washed.
Moving parts of the mechanism of the outrigger limit switch system must be lubricated every 50 hours.
If necessary, apply a thin grease film on moving parts of the ball coupling.
Always lubricate the lift and apply a protective grease film immediately after the washing.
Lubricate the visible parts of the Flyer-chains for the boom twice a year. Use Master chain
lubricant 1-4014 or equivalent.
17.5 LONG-TERM STORAGE
Clean the machine carefully, lubricate it and apply protective grease to it before putting it into storage
for a longer period of time. Repeat the cleaning and lubrication procedures while resuming the
operation.
The periodic inspections must be executed following the steps described in the instructions.
46
DINO 260XTD
17.6 LOAD HOLDING AND LOAD REGULATION VALVES
1
47
DINO 260XTD
Check of operation
1. To check the tightness of the outrigger cylinder load holding valves measure the height position of
the chassis from the floor separately at each outrigger. After a few minutes, measure the height
again.
2. To check the tightness of the load regulation valves on the boom cylinder and the cylinders of the
articulated arms drive the boom to a position in which its movement can be reliably measured.
Observe the possible movement of the boom in a few minute's time.
3. To check the tightness of the load regulation valve on the telescope cylinder extend the telescope
and stop the movement at any position, measure the stroke and observe in a few minutes time that
the stroke does not change. (Note! Drive the boom to an almost vertical position)
4. To check the tightness of the load regulation valve on the platform levelling system, put a load of
100 - 200 kg on the platform and measure the distance from the rear edge of the platform to the
floor. Observe for a few minutes that its height position does not change.
Service instructions
1. Disconnect and clean the valve
2. Check the O-rings and replace, if necessary
3. Put the valves carefully in place
4. Replace the valve, if necessary
5. Do not change the settings of the valves
Support the platform, boom system, articulated arm and outriggers in a position, where the load does not
rest on the structure under repair. Make sure to relieve the residual pressure from the cylinders.
48
DINO 260XTD
17.7 LEVELLING SYSTEM OF THE PLATFORM
-
A so-called Slave Cylinder System is applied for levelling of the platform:
- the slave cylinder under the platform is controlled by a master cylinder
- the platform keeps its level position only if the valves in the system are tight
- the levelling system comprises the following parts:
11. Double load regulation valve
16. Load regulation valve
19. Slave cylinder
20. Master cylinder
-
If the platform, viewed by the operator, tilts forwards, the reason
can be:
1) a leak in the slave cylinder double load regulation valve (on the
piston rod side) in the direction of the electric directional valve
(which is not tight)
2) an internal leakage in the cylinder
-
If the platform, viewed by the operator, tilts
backwards, the reason can be:
1) a leak in the load regulation valve (15) on the
piston (bottom) side of the slave cylinder in the
direction of the electric directional valve, which is
not tight
2) an internal leakage in the cylinder
Air in the levelling system causes inaccuracy during
levelling of the platform.
If the valves are not tight, refer to the service instructions in the chapter
"load holding and load regulation valves"
Settings of the load regulation valves:
- the opening pressure of the double load
regulation valves (11) is 21.5 MPa (215
bar)
- the opening pressure of the load regulation
valve (15) under the platform is 21.5 MPa
(215 bar)
Do not change the preset values.
49
DINO 260XTD
17.8 REGULAR SERVICING
The lift shall be serviced regularly at intervals of 11 - 12 month.
Under demanding conditions where moist, corrosive substances or corrosive climate may speed up the
deterioration of the structure and induce malfunctions, the inspection must be performed more often and
the influence of corrosion and malfunctions must be reduced by using appropriate protective means.
Only technical specialists who are familiar with the structure and the operation of the lift are allowed to
maintain the lift.
We recommend turning to the service staff of the dealer.
SCHEDULE FOR REGULAR SERVICING
1. Clean the lift thoroughly before the service
The hydraulic and electric appliances must not be dismantled if they are not clean. Any contaminants in
the system may cause malfunctions later on. Wash the lift externally.
NOTE! Be careful not to direct the high pressure water jet straight to the electric appliances, such as the
control panels on the chassis and on the platform, relays, solenoid valves and limit switches.
-
use pressure air to dry the electric devices, hydraulic connectors etc.before opening them
apply appropriate moisture repellent to the electric appliances after the drying
always protect the piston rods with e.g. CRC3-36 anti-corrosive agent after washing with a solvent
REMEMBER CLEANLINESS!
2. Change the hydraulic oil and replace the filter
(protect your skin against the hydraulic oil)
-
drain the oil tank through the draining plug opening, with all cylinders in retracted position
clean and rinse the oil tank with suitable agent
-
replace the pressure and return filters
-
install the drain plug
refill the tank with fresh oil, the volume required for change is about 30 litres (factory filling Mobil
EAL 32)
The viscosity class of the hydraulic oil must be ISO VG32 or ISO VG15 and the oil must meet the
requirements according to DIN 51524- HLP. Material Safety Sheet EXXON MOBIL n:o 58101760.
50
DINO 260XTD
never mix different oil sorts
if required, top up hydraulic oil to the level with the upper edge of the level eye while the lift is in
the transport position.
NOTE! Do not spill oil into the environment.
-
3. Check the hydraulic hoses and pipes
Replace any externally damaged hoses or clashed pipes. Check the connections.
4. Inspect joints of the support outrigger
-
lower the outriggers slightly
swing the outriggers back and forth in the horizontal plane and check the joints for play
- check the operation and condition of the limit switch mechanisms on the outriggers
- replace any worn out parts
- lubricate the joints (refer to the lubrication plan)
Lower the outriggers to support position.
5. Inspect the cylinders, and lubricate the joint bearings (refer to the lubrication plan).
-
drive the lift cylinder to its upper position from the chassis control panel and inspect the condition of
the piston rod and tightness of the connections
drive the lift cylinder to its lower position from the chassis control panel and inspect the connections
for tightness
retract and extend the telescope cylinder from the chassis control panel and inspect the condition and
tightness of the cylinder
lubricate the joints of the lifting, telescope and levelling cylinders
extend the articulated arm cylinders from the lower control panel and inspect their condition and
tightness
inspect the outrigger cylinders and lubricate their joints
51
DINO 260XTD
6. Inspection of the boom and the chassis
-
extend the telescope and inspect the platform, its attachment, the articulated arms and the boom
-
inspect the boom joints and play of the sliding pads, readjust if necessary. Lubricate the sliding
surfaces
-
check the condition, locking and adjustment of the Flyer-chains
-
secure the attachment to the boom of the unloaded flyer-chain by pulling the chain by hand with the
boom fully extended
-
inspect the turning device and its
attachment and lubricate the bearing
(4 nipples)
NOTE! Excess grease pressure may
press out the turning bearing seal.
-
check the turning bearing play
Max. allowed axial play is about 1
mm.
-
check the attachment bolts for the
turning device for tightness:
280 Nm (M16)
150 Nm (M12)
If you have to turn open or tighten the
attachment bolts, do not forget to use
bonding adhesive (tighten crosswise)
-
check the chassis and the welded seams on it; especially around the turning device and attachment
points of the outriggers
-
inspect the outriggers
-
check the tow-bar, in particular its attachment to the chassis
-
lubricate the bearings of the boom and outrigger joints
52
DINO 260XTD
7. Check the overrun
-
attachment of the overrun
-
clearance
-
condition of the towball-coupling
-
condition of the locking device
-
check that the overrun brake mechanism moves freely:
- stop the lift, as instructed (see point "Preparing the lift for transport")
- push in the towball-coupling with its push rod
- the push rod and the tow-ball-coupling must return to their initial outer position of
themselves following the action of the gas cushion of the hydraulic absorber
8. Inspection of the axle and suspension
-
check the attachment of the axles
-
check condition of the rubber absorbers and torsion arms
9. Inspection of the safety devices
-
check the attachment and the external condition of the limit switches
-
from the tow-bar RK3 (transport position of the platform 1 pc.)
-
safety devices RK4 and RK5 (2 pcs.)
-
support outriggers RK11- RK14 (4 pcs)
-
boom (6 pcs)
- Limit switches for chains RK7 and RK15
- Sensor for retracted telescope RK8
- Sensors for boom length RK16 and RK17
- Sensor for lifting angle of boom RK18
53
DINO 260XTD
10. operation of the safety devices when controlled from the platform
-
lift the boom from the transport support
-
the outriggers must not operate in any position of the selector switch
-
lift the boom and test the following:
1. operation of the emergency stop button
2. operation of the emergency descent system
-
lower the boom onto the transport support and lift the outriggers
- the boom must not operate
-
lower the outriggers (level the lift)
-
put a load of about 80 kg onto the platform
-
lift the boom and extend the telescope
The movement stops as soon as the red outreach limit signal light lights up (at max. outreach).
-
thus the lowering of the boom and retraction of the telescope must stop
other movements of the boom may operate
54
DINO 260XTD
17.8.1 TESTING THE OUTREACH LIMIT SWITCH
Put a carefully weighed load (80 kg) on the platform. Place it at a
distance of 100 mm from the rear edge of the platform.
-
-
-
drive to boom to a horizontal plane from the chassis control
panel
lift and lower the rear edge of the platform
using the position control
drive the platform with the position control to a horizontal
position so that that the last stage of the
adjustment procedure is lifting of the rear edge
extend the telescope until it stops (do not correct
the position of the platform)
measure the length of the telescopic boom's one protruding part (see picture); the measure must
be 2050 ± 50 mm
check that the red signal light H2 on the platform is lit
1. Lowering the rear edge of the platform
2. Lifting the rear edge of the platform
Note! If you disconnect the voltage from the lift at the limit of the operating range, you must use
the pushbuttons S31 or S32 in order to retract the telescope to inside the normal operating range.
55
DINO 260XTD
TESTING THE OVERLOAD LIMIT SWITCHES
-
the second safety limit switch (RK5) backs up if the outreach limit switch (RK4) fails
-
disable the RK4 by connecting the terminals 9 and 30 inside the chassis control panel with a jumper
lead
Also connect the terminal 58 and the terminal SR3:X2 on the safety relay using a jumper lead.
-
retract and extend the boom and
measure the length of the
telescope extension´s protruding
part
The measure must be 2350 mm ±50
mm.
-
if the protruding part is too long,
adjust the limit switches and
secure their position with a seal
NOTE! Remember to
resume the operation
of the RK4 by removing the jumper leads.
56
DINO 260XTD
17.8.2 SETTING OF THE OUTREACH LIMIT SWITCH AND THE OVERLOAD LIMIT
SWITCH
Always check the operation of both limit switches in connection with the service.
-
put a load of 80 kg onto the platform
-
drive the boom to a horizontal position
57
DINO 260XTD
Adjustment method I:
-
make sure that the RK5 with certainty will trip before the RK4 by adjusting the RK4
-
extend the boom and measure the length of one protruding part of the telescope
extension (stroke)
-
the measure shall be 2,350 mm ±50 mm.
-
tighten the lock nut of the adjustment screw and check once more the settings
-
set RK4 to trip earlier than RK5
-
extend the boom and measure the stroke
-
the measure shall be 2050 mm ±50 mm.
-
tighten the locking of the adjustment screw and check once more the settings
-
apply a safety wire to the adjustment screws in such a manner that it will not be
possible to unscrew the screws away from the limit switches
-
apply a seal on the wire
-
the gap between the adjustment screw
and the tip of the limit switch RK4
shall be 1 - 3 mm
-
put the cover in place
The 2nd alternative for securing the RK5 when the securing wire is in place is described
in this manual (see point “Testing the outreach limit switch”).
58
DINO 260XTD
11. Measuring the pressure
Connect the pressure gauge to the measuring point (indicated by the arrow).
-
the max. pressure with warm (40 - 60 °C) oil is 20 -20,5 MPa (200 -205 bar)
-
the turning pressure is 8 MPa (80 bar)
-
if you have to readjust the pressure, secure the new setting with a seal.
12. Check the operating controls on the platform
-
check the overall condition of the electric appliances inside the box and spray with moisture
repellent, if necessary
-
check the cables and the tightness of the cable clamps
-
test the sound signal (S10), emergency stop (S4), emergency descent (S12) and retraction of the
telescope (S32)
-
test all movements
-
test the operation of the oureach limit switch RK4 and the overload limit switch RK5 before
lifting the boom
59
DINO 260XTD
13. Warning stickers and adhesive tapes
-
make sure all warning stickers and adhesive tapes are legible, replace if necessary
14. Inspect the brakes and the driving device
-
remove the wheels
-
clean the brake system and check the settings
-
check the free movement of the brake shoes the operation of their return springs
-
replace any worn out linings
-
check the condition of the driving device and lubricate the joints
-
put the wheels in place and tighten the wheel bolts (325 Nm)
Remember to re-check the tightness after about 100 km drive.
-
check the tyre pressure:
-
check the free movement of the overrun brake and the parking brake
-
check the safety wires
700 kPa (7.0 bar) on the rear axle
250 kPa (2.5 bar) on the jockey wheel
300 kPa (3,0 bar) on the additional jockey wheel
15. Check the condition of the lights and the reflectors
16. Repeat the anti-corrosion treatment using e.g. Tectyl 210R anti-corrosion agent
17. Test-run with a load of 80 kg following the loading instructions
Check the structures after the test-run.
18. Draw up a test protocol, save your own copy and give the other copy to the customer
60
DINO 260XTD
18 INSPECTION INSTRUCTIONS
All lifting equipment and lifting gear used at a construction site must always be inspected before use.
The lifts and related lifting gear used on a work site shall be subjected to a regular maintenance
inspection; if possible once a week.
Keep a journal of any notable shortcomings and defects observed and advise the foreman of them.
18.1 FIRST INSPECTION
The initial inspection and test loading of the Dino access platforms is performed by the
manufacturer. A protocol which accompanies the lift is drawn up of the inspection.
61
DINO 260XTD
18.2 SAMPLE OF INSPECTION PROTOCOL FOR THE ACCESS PLATFORM
62
DINO 260XTD
63
DINO 260XTD
18.3 DAILY INSPECTION (START-UP INSPECTION)
To be always performed at a new work site and in the beginning of every working day. The
inspection is performed by the user. In the inspection attention shall be paid to the following
issues:
-
establish the load-bearing capacity of the ground at the lifting site (see the normative table
"Maximum permissible ground pressure for different soil materials" in point “Ground stability”)
-
verify the standing stability of the lift
-
control the due operation of the position indicator
-
test the operation of the emergency stop system both from the platform and the chassis control
panels.
-
test the operation of the emergency descent system both from the platform and the chassis
control panels
-
test the alarm signal
-
check the warning and signal lights
-
check the operation and cleanliness of the lights and reflectors
-
check the condition of the operating controls and test all work movements
-
check the condition of the access routes, the platform gate and the handrails
-
check the operation of the outreach limit switch RK4 (see point “Testing the outreach limit
switch”)
-
check the operation of the limit switches, which block the boom movements (see point “Regular
servicing”).
-
check the operation limit switch, which prevents the operation of the outriggers (see point
“Regular servicing”)
-
check the hydraulic system for tightness
-
test the brakes
-
check the unit visually
-
observe the location of nearby power lines (see point "General safety regulations")
64
DINO 260XTD
18.4 MONTHLY INSPECTION (MAINTENANCE INSPECTION)
The inspection shall be performed by a person who is well familiar with the lift.
Task list for inspection:
-
perform the measures of the daily inspection
-
check the attachment points of the boom and the platform
-
check the operation and condition of the platform levelling system
-
perform visual inspection of the load-bearing structures
- chassis
- turning device
- telescope (fully extended)
- support outriggers and their joints
- welded seams for cracks, corrosion or breaches
- are the possible repair weldings duly executed
-
check that the platform does not "drift" (refer to the service instructions)
-
check that the outriggers do not "drift" (refer to the service instructions).
-
hydraulic oil level
-
check the electro-hydraulic rotating adaptor for leaks and seizures
-
check the tyres and the tyre pressure
-
check the wheel bolts and rims
-
check the turning gear play
-
check the operation of the driving device
-
check the condition and attachment of the electric wires
-
check the condition and attachment of the battery
-
check the condition of the overrun
-
make sure that all signs, warnings and pictorials for operating controls and control equipment are
in place, in good condition and clean.
-
check that the lift is clean all over
65
DINO 260XTD
18.5 ANNUAL INSPECTION (REGULAR INSPECTION)
The inspection shall be performed by a skilled technician or an expert inspection body with
documented evidence of competence (see point “Inspections”). In the inspection special attention
has to be paid to the condition of the steel structures, the safety devices and the operating system.
Clean the lift before the inspection
The inspection incorporates the following measures and checks:
-
perform the measures of the daily and monthly inspection
-
inspect thoroughly the hydraulic system
-
power unit
-
-
connect the pressure gauge to the measuring point in the hydraulic system
make the oil flow through the relief valve by driving one of the movements
against the end stop
observe the pressure reading in the gauge; when the oil is warm the
pressure should be 20 - 20,5 MPa (200 -205 bar)
-
load-holding check-valves on the outriggers
lift the device off the ground with the outriggers and measure the distance
to the chassis at each outrigger
step on the platform and extend the telescope keeping the boom level
Turn the boom round a few times, stop at the initial position and check that
the distance between the ground and the outriggers has not changed.
lift the outriggers from the ground and leave them in this position for about
10 minutes
Observe that the outriggers do not lower of themselves.
-
load-holding check-valve on the lift cylinder
lift the boom from the chassis control panel to an angle of about 45° and
extend the telescope
Observe about 10 minutes that the boom does not lower of itself.
-
load regulation valve of the telescope cylinder
lift the boom from the chassis control panel and extend the telescope
slightly; leave it in this position for about 5 minutes
make sure that the telescope does not retract of itself
-
load regulation valve of the levelling system
put a load of about 80 kg on the platform
lift and lower the boom 4 - 5 times
make sure that the position of the platform does not change
-
electric directional valves
operate all boom and turning movements and check that they all work
properly and that the movements stop as soon as the levers are released
66
DINO 260XTD
-
directional valves on the chassis
check that the valves of the support outriggers and the driving device work
properly and no movements are executed when the spools are in the neutral
position
-
electro-hydraulic rotary adaptor
check the adaptor for tightness
check that the lever arm neither seizes nor is loose
-
cylinders
-
-
-
-
-
-
-
lower the outriggers to support position and check the condition of piston
rods and wiper rings
Check the cylinders for external oil leaks.
lift the boom to its upper position and check the condition of the piston rod
and the wiper ring of the lift cylinder
lift up the articulated arms and check the condition of the piston rods and
wiper rings of the cylinders
check the condition of the piston rod and wiper ring of the master cylinder
in the slave cylinder system.
lower the boom and check the condition of the piston rod and wiper ring of
the slave cylinder under the platform
hoses
-
check the hoses for leaks and chafing
-
check that there are no dents, leaks, trace of corrosion or chafing at the
clamps
Check that the pipes are properly fastened.
pipes
-
connections
check the hose and pipe connections for leaks
-
inspect thoroughly the electric system
check that the control panel boxes are dry, clean and tight.
check the condition of the cable connections and their protection against
moisture
check the condition and attachment of the limit switches
check the limit switch lead-throughs for tightness
check the connections of the electric valves
check the connections of the solenoid valves
perform visual inspection of all electric wiring
check the condition of the mains cable plug
check the condition of the electric motor.
-
check the attachment points of the hydraulic cylinders
check the condition of the bearings and pins of the outrigger cylinders and
the locking of the pins
check the condition of the lifting cylinder bearings and pins and the locking
of the pins
check the condition of the articulated arm cylinder bearings and pins and
the locking of the pins
check the condition of the telescope cylinder bearings and pins and the
locking of the pins
67
-
DINO 260XTD
Check the condition of the gas springs
check the condition of the master and slave cylinder bearings and pins and
the locking of the pins
-
check the condition of the boom joint
check the bearing and the pin of the boom joint and the locking of the pin
check the condition and attachment of the articulated arm joint pins and
bearings
-
check the support outriggers and their footplates
check the mechanical structure of the outriggers and the welded seams
The structures must not show signs of deformations or cracks No fractures
or cracks allowed in the welded seams.
check the footplates for deformations, cracks or breaches
Also check that the footplate can turn freely on its joint.
-
inspect the boom.
extend the telescope and check that there are no permanent deformations,
dents or traces of substantial wear in the boom
also check the welded seams for wear, cracks or breaches
check the boom attachment for cracks or breaches
check the condition of the platform brackets
check the locking of the platform pin
check the condition and attachment of the flyer-chain, the locking of the
pins and the tightness of the spring
check the condition of the cable chain, its clamp brackets as well as the
tightness of the screw connections
check the play and attachment of the gliding surfaces on the boom.
-
inspect the platform
general condition
check that the platform does not show signs of deformations, substantial
wear or buckles
check that the handrails, the steps, the gate and the attachment of the gate
are in order
check that the gate is not tied to the upper pipe
check the condition of the platform floor plate
check the platform carrier for notable buckles or deformations
-
check all protective covers
check the condition of the support outrigger cylinder guards
check the condition of the slave cylinder guard
check the condition of the boom end cover, turning device covers, chassis
control panel cover, safety device cover and platform control panel cover
-
perform visual inspection of all screw connections
-
inspect the turning device
general condition
check the play and attachment of the angular gear
check the condition of the gear ring
check the play of the turning gear
check the tightening torque of the turning bearing´s attachment screws
(M16 280 Nm, M12 150 Nm)
check the attachment of the turning motor
68
DINO 260XTD
-
check the condition of the chassis
general condition
check the attachment of the tow-bar to the chassis
check the condition of the overrun and its attachment to the chassis.
check the axle and its attachment to the chassis
check the attachment and condition of the brake wires and rods
check the rims, the tightness of the wheel bolts, the tyres and the tyre
pressure
check the condition and play of the wheel bearings
check the condition of the driving device, attachment of the parts and
condition of the covers for electric components
check the condition of the transport support of the boom
-
perform a test run, test all operating controls, control the outreach with a load of 80 kg on the
platform in accordance with the instructions (see point “Testing the outreach limit switch”)
-
also check the operation of the limit switches during the test run (refer to the service
instructions)
the overload limit switches on the safety devices
the limit switches on the outriggers, which prevent the operation of the boom movements
the limit switches on the tow-bar, which prevent the use of the outriggers
-
after the test-loading make sure that the test loading has not caused any defects, such as fractures
or permanent deformations of dangerous nature, on the steel structures or other loaded parts
-
draw up a protocol of the regular inspection with following articles:
1. inspection form
2. data of repair welds
a) date of repair
b) repaired by whom
c) what was repaired
-
as the machine is ready for operation after the annual inspection, mark the inspection date on the
inspection plate affixed to the lift
18.6 EXTRAORDINARY INSPECTION
(INSPECTION AFTER AN EXCEPTIONAL SITUATION)
The inspection is required if the lift has been damaged in a manner which may affect its loadbearing capacity or safe operation.
-
thus the lift shall be inspected according to the instructions for the start-up inspection
perform a test-loading with an overload of 25 % and a stability test of the lift
a protocol shall be drawn up for the inspection
69
DINO 260XTD
18.7 TEST LOADING INSTRUCTIONS FOR REGULAR INSPECTION
1. Place the lift on an even surface with good carrying capacity. Drive the outriggers to their
lowest position (the minimum support width).
2. Turn the boom to the side from the tow-bar and lower it on the ground.
3. Put a weighed load of 215 kg on the platform (I).
4. Lift the boom to as high as it goes and extend the telescope to its full length (maximum lifting
height).
5. Lower the boom until the safety device stops the movement.
6. Turn the boom round over 360°.
7. Retract the telescope and lower the boom to a horizontal position.
8. Extend the telescope until the safety limit switch RK4 stops the movement. Establish the
standing stability in this situation by turning the lift round over 360°.
9. Carry out the same procedure with a platform load of 80 kg (II).
10. Compare the outreach with the reach diagram. If necessary, readjust according to instructions in
point "Adjustment of the outreach and overload limit switches".
After the above mentioned test loadings (case I and case II) and the subsequent inspection have been
completed without finding any defects in the structure or stability of the lift, the lift may be used inside
the permitted operating range presented in the reach/platform load diagram of this manual.
The max. allowed platform load is 215 kg
-
in conjunction with the first, i.e. start-up inspection, the lift shall be subjected to a test loading
with an overload of 25% and after that the supporting structures shall be thoroughly inspected
-
in conjunction with every annual inspection the lift shall be subjected to a test run with
maximum permissible load and after that the supporting structures shall be thoroughly inspected
-
the first inspection shall be recorded in the start-up inspection protocol and the test-run shall be
recorded in the protocols for the annual and regular inspection
70
DINO 260XTD
19 FAULT FINDING
FAULT
1. No voltage supply to the control centre
No voltage supply to the timer card.
The timer card cannot be activated.
No voltage feed through the timer card.
REMEDY
The main battery fuse F1 has blown, replace the
fuse. Mains switch turned off, turn on the switch.
Check the fuse F6.
Check, that the key-switch is in position 1.
Check the fuse F2 on the timer card.
2. None of the platform movements is operational though the electric motor is running and the
selector switch is in position 1
Green signal light for outriggers is not lit.
Check operation of the safety limit switches
RK11, RK12, RK13 and RK14.
The green signal light for the outrigger limit
switches is lit, but the boom movements do not
operate.
The outreach range of the boom exceeded.
3. Outriggers do not move
Boom does not rest on the transport support.
Limit switch on the boom support is not closed.
4. Platform turn is not operational
Automatic fuse F10 has tripped.
5. The electric motor does not start
The key-switch is in wrong position.
Emergency stop button is stuck.
Fuse F3 blown.
Check the operation of the safety relay SR2 for
the outrigger circuit.
Retract the telescope, using pushbuttons S31 or
S32, until the platform returns to its normal
operating range.
Drive the boom onto the transport support.
Drive the boom onto the transport support and
check the operation of the limit switch RK3.
Reset the automatic fuse with the reset button.
Turn the key-switch to position of desired
operating loaction.
Pull up the button and re-start the engine by
actuating any of the control movements.
Replace the fuse (10A).
No mains supply (230VAC) to the voltage meter. Check the fault current switch, extension cords,
possible distribution boards and fuses.
The fault current safety switch has tripped.
Reset the fault current switch.
Either of the telescope chain limit switches RK7 Check the operation of the RK 7 and the RK15
or RK15 has cut off the contactor circuit.
and readjust them acoording to the instructions
(see point ”Regular servicing”).
The safety relay SR4 is not automatically reset
With reference to electric diagrams, check the
operation of the safety relay.
Check, whether the fault is in the electric system or in the hydraulic system.
71
DINO 260XTD
FAULT
REMEDY
6. Disturbance of platform movements - only one of the movements is operational
Irregular and indefinite malfunctions.
Make sure that the hydraulic oil and the filter
have been changed.
Thoroughly clean the solenoid valve spools and
housings (requires utmost cleanliness - not all
contaminants can be spotted with the naked eye).
Also temporary contact failures in the joysticks
may cause malfunctions.
Spray with moisture repellent.
Lifting or lowering of the boom and extension of Overloading of boom has ocurred; retract the
the telescope are not operational, red light on the telescope and retry (automatic reset).
platform is lit and the buzzer in the chassis
control panel is audible.
7. Boom drifts slowly downwards
The load regulation valve leaks.
Remove and clean the valve.
Check the condition of the o-rings.
Install the valve carefully - the correct
tightening torque is 60 Nm.
If necessary, replace the valve.
8. Power pack does not start
The mains cable is plugged.
Battery is flat.
Main battery fuse has blown.
Disconnect the plug from the mains.
Recharge the battery.
Replace the fuse.
9. Power pack cranks but does not start
Fuel tank is empty.
Fill the fuel tank.
Choke is off.
Press choke button (cold engine).
Throttle lever in idling position.
Increase the engine revolutions.
72
DINO 260XTD
FAULT
REMEDY
10. Boom cannot be lifted
Refer to item 4.
The solenoid valve is in the neutral or in the
lowering position.
The lift turns as the lifting movement is
activated.
Remedy as instructed above in conjunction with
the seizure of the electric valve spool.
Solenoid valve is stuck in turning position.
Wash carefully the spool and the block.
11. Telescope movement does not operate
Refer to item 6.
Check that the solenoid valve of the telescope is
not stuck in the centre or in the lowering
position.
12. Telescope retracts slowly
The load regulation valve leaks.
For remedy, refer to item 7.
13. Platform drifts backward
Double load regulation valve on the bottom side
is leaking.
For remedy, refer to item 7.
Load regulation valve under the platform is
leaking.
For remedy, refer to item 7.
73
DINO 260XTD
FAULT
REMEDY
14. Platform drifts forward
Double load regulation valve on the rod side is
leaking.
Measures as above.
15. Support outriggers do not operate
Boom does not rest on the transport support.
Electric valve for movement of boom/outriggers
does not operate (jams in the centre position).
Drive the boom onto the support.
For remedy, refer to item 6.
16. Outrigger does not stay in the support position (see illustration)
The load regulation valve on the bottom side is
For remedy, refer to item 7 (load regulation
leaking.
valve). Tightening torque 55 Nm.
15
14
17. Outrigger does not stay in the transport position (see illustration)
Load regulation valve on the rod side is leaking. Measures as above.
18. Driving device does not operate
Boom does not rest on the transport support.
Electric valve for movement of boom/outriggers
does not operate (jams in the centre position).
Drive the boom onto the support.
For remedy, refer to item 6.
74
DINO 260XTD
FAULT
19. Too low braking force
Too much play in the brake system.
Brake linings not yet run-in.
REMEDY
Adjust the brake system (see point "Wheel
brakes and bearings").
Pull the parking brake lever slightly and drive 2 3 kilometres.
Brake-shoes "glazed", dirty or oil on the friction
surfaces.
Replace the brake-shoe sets.
Clean the friction surfaces of the brake drum.
Overrun brake jams.
Lubricate.
Brake rod jammed or bent.
Repair.
Brake wires rusty or broken.
Replace wires.
20. Braking uneven and jerky
Too much play in the brake system.
Shock absorber of the overrun device faulty.
Reverse automatics - brake-shoe jams in the
carrier.
Adjust the brake system (see point "Wheel
brakes and bearings").
Replace the shock absorber.
Replace the brake-shoe in the carrier.
21. The brakes drag (only one of the wheels brakes)
Brake units wrongly adjusted.
Readjust the brake units according to
instructions.
Also refer to point 19 for possible cause.
22. Lift brakes as the engine speed is decreased
Shock absorber of the overrun device faulty.
Replace the shock absorber.
23. Reversing forced or impossible
Brakes have been adjusted too tight.
24. Wheel brakes overheat
Brake system wrongly adjusted.
Wheel brakes dirty.
Adjust the brake system (see point "Wheel
brakes and bearings").
Adjust the brake system (see point "Wheel
brakes and bearings").
Clean the wheel brakes.
Overrun brake - force transmission lever jams.
Dismantle, clean and lubricate the transmission
rod.
Parking brake not completely released.
Release the parking brake completely.
75
DINO 260XTD
FAULT
REMEDY
25. Ball-coupling is not locked
Inner parts of the ball-coupling dirty.
Clean and lubricate.
Tow-ball of the towing vehicle too large.
Measure the tow-ball. According to DIN74058
the diameter of the ball must be max. 50 mm and
min. 49,5 mm.
If the measure is different or the ball is nor
perfectly spherical, it must be replaced.
Always, when you change brake-shoes, replace all shoes on the axle.
Always when assembling the brakes make sure to install the springs, the brake-shoes and the expander
in the right way.
When adjusting the brakes, turn the wheels forward (in driving direction)!
Naturally the possible reasons for malfunctions are many, but the following are the most
common:
-
low supply voltage (long and thin supply cable)
-
the battery is flat (low voltage)
-
contaminants in the hydraulic system
-
loose electric connection or a contact failure caused by moisture
KEEP THE LIFT CLEAN AND PROTECT IT AGAINST MOISTURE
76
DINO 260XTD
20 OPERATION OF ELECTRIC COMPONENTS
20.1 MAIN CENTRE (PK), RELAYS
K1: Control contactor for the motor (M1)
K2: Auxiliary contactor for the emergency stop switch
Switches on/off the mains supply (230VAC).
K3: Sensor relay for AC feed. Enables operation of the electric motor, while the relay is active.
K4: Switch-off relay for the combustion engine, connects the ignition spool of the combustion engine to
earth.
K5: Switch-off relay for the combustion engine, connects the ignition spool of the combustion engine to
earth.
K6: Relay for selecting motor, directs the "running command" to the desired motor.
K7: Switches the valve control over from turning of the boom to the selector valve for the outriggers.
K8: Emergency descent relay, switches on the lowering of the articulated arms once the limit switch
RK8 closes (as the telescope is completely retracted).
K9: Operating relay for the motors, the relay is active while the motor is running (electric motor or
combustion engine).
K10: Emergency descent relay, switches over the control of the lifting/lowering movement of the boom
and the retraction/extension of the telescope to the disposal of the emergency descent system.
K11: Emergency descent relay, switches over the control of the lifting/lowering movement of the
articulated arms and the turning of the boom to the disposal of the emergency descent system.
K12: Emergency descent relay, switches over the control of the boom/chassis selector valve to the
disposal of the emergency descent system.
K13: Extinction relay for the timer card, while "control from the chassis panel" is selected.
RL1: Change-over relay on the timer card, switches the voltage supply over from either the power
supply unit or from the battery, depending on whether the power supply unit is feeding power to
the system or not.
RL2: Mains relay on the timer card, controls and switches on and off the mains current of the control
system.
SR2: Safety relay monitoring operation of the outriggers.
The safety relay resets as soon as all outrigger safety limit switches (RK11, RK12, RK13 and
RK14) have closed. After that it is possible to operate the boom.
SR3: Safety relay for monitoring the outreach to the side. Safety limit switches RK5 and RK4
controlling operation of the safety relay.
77
DINO 260XTD
Overloading of the boom:
SR3 trips. The safety relay is automatically reset upon return to the normal outreach range.
As the RK4 or the RK5 has failed:
The safety relay SR3 trips as soon as the operating range for the RK5 has been exceeded.
Upon return to the operating area of the RK4, the safety relay is not reset automatically
and it has to be checked.
SR4: Safety relay for emergency stop, stops the motors and disconnects the control voltage from the
boom/chassis selector valve. The relay will trip, if the emergency stop button S1 or S4 or the
chain limit switch RK7 or RK15 cuts off the control circuit for the relay.
SR5: Safety relay for outriggers, prevents operation of the outriggers if the limit switch RK3 for the
boom is not closed. The relay cuts off the control voltage from the selector valve (1A) for the
chassis and from the selector valve (9B) for the outriggers.
20.2 Main centre (LCB), switches
S1: Locking emergency stop switch. Stops all other functions except the emergency descent and the
sound signal, which remain operational. Controls the safety relay SR4.
S6: Start and stop switch for the combustion engine. Operates only, if the mains current is not
connected.
S8: Selector switch for the boom movement speed.
0- position boom movements impeded
1- position slow boom movements
2- position full-speed boom movements
S11: Start switch for emergency descent, yellow pushbutton.
S16: Turning the boom to the left and right, lever switch (also emergency descent).
S17: Lifting and lowering the boom, lever switch (also emergency descent).
S18: Retracting and extending the telescope, lever switch (also emergency descent).
S19: Lifting and lowering the articulated arms, lever switch (also emergency descent).
S20: Levelling the platform to the front and to the rear, lever switch
S31: Blue control button for "telescope in" valve.
Is used once the outreach limit RK5 has been exceeded.
Also requires that the speed selector switch S8 be turned.
78
DINO 260XTD
20.3 Main centre (LCB), other items
E1: Thermo-relay for the engine M1.
F1: Main battery switch (125A).
F2: Control circuit main switch (10A).
F3: Emergency stop circuit, power supply to safety relays, activation of the combustion engine recharge
and turning of platform (10A).
F4: Power supply to main centre bus module (10A).
F6: Power supply to activation circuit for mains current (1.6A).
F10: Control fuse for turning of platform, 5A automatic.
F7: Power supply to emergency descent circuit (10A).
F11: Automatic protection switch for the socket outlet on the platform (10A, c-curve).
H8: Red led signal light. Is lit once the normal outreach range is exceeded (when the safety relay SR3
trips).
MC50-010: Bus module, control unit for valves and inlet unit for sensors.
Q1: Selector switch for the operating location
0 = power switched off
1 = power switched on, "control from chassis panel" and "control centre for outriggers" selected
2 = power switched on, "control from platform panel" selected
T1: Power source, feeds supply voltage into the control system for the lift while the mains current is
connected.
TC: Timer card, switches the mains current on and off. Switches the power supply to the control system
automatically once the mains current from the network is connected.
VM1: Voltage meter, shows the network voltage (0-250VAC).
79
DINO 260XTD
20.4 Control centre (UCB), relays
K14: Turning the platform to the left. The linear motor is controlled by means of a relay, the inductive
limit switch RK9 limits the maximum turning angle by disconnecting the control voltage from
the relay.
K15: Turning the platform to the right. The linear motor is controlled by means of a relay, the inductive
limit switch RK10 limits the maximum turning angle by disconnecting the control voltage from
the relay.
20.5 Control centre (UCB), switches
JSL: Joystick, left
movements:
JSR: Joystick, right
movements:
telescope out - in
lifting-lowering the articulated arms
rocker switch for automatic levelling and lifting the outriggers
Boom up-down
turning to the right-left
transferring the chassis to the front-rear and turning
pressing the rollers against the tyres using the left-hand rocker switch
S5: Start and stop switch for the combustion engine. Operates only, if the mains current is not
connected.
S4: Locking emergency stop switch. Stops all other functions except the emergency descent and the
sound signal, which remain operational. Controls the safety relay SR4.
S7: Foot pedal, to be activated always before any control movements are executed on the platform.
S12: Start switch for emergency descent, yellow pushbutton.
S13: Turning the platform to the left and to the right, controls the relays K14 and K15.
S32: Blue control button for "telescope in" valve.
Is used once the outreach limit RK5 has been exceeded.
Requires that also the foot pedal S7 is depressed.
S33: Lifting and lowering the support outrigger 1, lever switch.
S34: Lifting and lowering the support outrigger 2, lever switch.
S35: Lifting and lowering the support outrigger 3, lever switch.
S36: Lifting and lowering the support outrigger 4, lever switch.
S37: Levelling the platform manually to the front and to the rear, lever switch
80
DINO 260XTD
20.6 Control centre (UCB), other items
DSP Display, shows the alarm messages, the inclination sensor view and assists while the parameters
are being adjusted (see separate instructions).
F10: Power supply to the turning motor for the platform (5A, automatic).
H1: The red LED flashes once the maximum outreach has been reached, once it has been exceeded and
in connection with the alarm messages shown on the display.
M3: Turning motor for the platform, 12V.
MC24-010: Bus module, inlet unit for the control levers on the platform.
PR: Socket outlets on the platform, 230VAC 10A, automatic fuse located in the main centre cover.
ÄM2: Buzzer, indicates that either of the safety limit switches RK4 or RK5 has tripped.
20.7 Control centre on chassis (CCB), switches (emergency descent operations)
S40: Emergency descent button for the outriggers, starts the emergency descent motor provided that the
mains current is on.
S41: Emergency descent button for the outriggers, lifting the outrigger 1.
S42: Emergency descent button for the outriggers, lifting the outrigger 2.
S43: Emergency descent button for the outriggers, lifting the outrigger 3.
S44: Emergency descent button for the outriggers, lifting the outrigger 4.
S48: Emergency button for the drive rollers, disconnection of drive rollers from tyres.
20.8 Control centre on chassis (CCB), other items
H3: LED signal light.
Signal light for outrigger, is illuminated if the support outrigger 1 is sufficiently supported on the
ground.
H4: LED signal light.
Signal light for outrigger, is illuminated if the support outrigger 2 is sufficiently supported on the
ground.
H5: LED signal light.
Signal light for outrigger, is illuminated if the support outrigger 3 is sufficiently supported on the
ground.
H6: LED signal light.
Signal light for outrigger, is illuminated if the support outrigger 4 is sufficiently supported on the
ground.
81
DINO 260XTD
MC50-10CCB: Bus module, control unit for the outriggers and the driving device as well as inlet unit
for the outrigger limit switches.
20.9 Chassis, other items
VVK: Fault current switch, disconnect the alternating current in the event of fault current.
EMC FILTER: Interference filter, filters out interferences in the supply from the AC power network.
20.10
Limit switches
RK3: Prevents the operation of the outriggers and the driving device if the boom does not rest on the
transport support.
controls the safety relay SR5.
RK4: Limit switch for adjusted outreach range, cuts off lowering of the boom and extension of the
telescope.
RK5: Backup limit switch for the safety limit switch RK4.
Controls the sound signal ÄM2 and the safety relay SR3. By means of the safety relay SR3
impedes all boom movements.
RK7: Safety limit switch for the telescope chain for the boom.
Controls the emergency stop safety relay SR4. Launches an emergency stop procedure as soon
as the limit switch SR4 has opened.
RK8: Limit switch for sensing that the telescope is completely retracted. Affects the emergency descent
circuit, allows the boom and the articulated arms to lower while the telescope is fully retracted.
RK9: Inductive limit switch.
Limits the stroke of the "turning the platform to the left" movement.
RK10: Inductive limit switch.
Limits the stroke of the "turning the platform to the right" movement.
RK11 - RK14 : Limit switches for the outriggers.
Impede the deployment of the boom unless the outriggers are firmly supported on the ground (that
the limit switch should close, requires that a minimum force of 300N be exerted on the outrigger)
RK15: Safety limit switch for the telescope chain for the boom.
Controls the emergency stop safety relay SR4. Launches an emergency stop procedure as soon
as the limit switch SR4 has opened.
RK16: Inductive sensor.
Slows down the lifting and lowering movements of the boom and the turning movement if the
boom length is appr. 16 m.
RK17: Inductive sensor.
Slows down the lifting and lowering movements of the boom and the turning movement if the
boom length is appr. 20 m.
RK18: Limit switch for boom angle.
82
DINO 260XTD
Slows down the lifting movement of the boom while approaching the maximum length of the
lifting cylinder.
20.11
Turning device (RU), other items
B1: Battery 12VDC 44Ah.
Iida: Switch-off unit for the combustion engine, connects the ignition spool to earth.
LS: Inclination sensor, monitors the level position of the lift. When operation of the sensor is
normal, a green signal light flashes on it, a red signal light illuminates, if the inclination
exceeds ±10º.
K4: Blocking relay for dual starting of the combustion engine, the relay disconnects current supply to
the start solenoid.
K42h: Start relay for the combustion engine.
M1: Electric motor 230VAC 16A.
M2: Emergency descent motor 12 VDC, Maximum uninterrupted operating time is 10 minutes.
P1 and P2: Centre-position sensors for the spool of the boom/chassis selector valve. Prevent operation
of the reset circuit for the safety relay SR3 in case the spool is not in the centre.
S37: Pushbutton, enabling string start of the power unit. Is used, if the battery is empty.
SPV: Mains switch, disconnects the positive pole of the battery from the system.
SR1: Solenoid for the emergency descent unit.
T2: Battery re-charger, charges the battery if the mains supply is connected.
ÄM1: Sound signal.
83
DINO 260XTD
21 ELECTRIC DIAGRAM 26316 >
84
DINO 260XTD
85
DINO 260XTD
86
DINO 260XTD
87
DINO 260XTD
88
DINO 260XTD
89
DINO 260XTD
90
DINO 260XTD
91
DINO 260XTD
92
DINO 260XTD
93
DINO 260XTD
94
DINO 260XTD
95
DINO 260XTD
96
DINO 260XTD
97
DINO 260XTD
98
DINO 260XTD
99
DINO 260XTD
100
DINO 260XTD
101
DINO 260XTD
22 HYDRAULIC COMPONENTS
26209 ja 26229>
Ref.
Part nr.
1 47.828
2 47.2061
3
47.892
4
47.2317
5
6
7
8
9
10
11
12
13
14
15
16
17
18
19
20
21
22
23
24
25
26
27
28
29
30
47.3003
47.195
47.2963
47.190
47.080
47.2766
47.2969
47.2722
47.2997
47.2766
47.2722
3CB1768
3CB1743
3CB1732
DL10.005
DL10.007
47.2273
4CB1944
47.2825
47.2947
47.2828
47.2824
47.2981
50.102
3CB1754
47.2946
31
47.2338
32
33
34
35
47.2771
47.2810
47.196
2CB3100
Item
Pcs.
Electric motor
1
Hydraulic pump
1
Combustion engine
1
(aggregate)
Power unit (reserve power
1
pack)
Check valve
1
Pressure filter
1
Solenoid valve
1
Breather plug
1
Oil level eye
1
Load regulation valve
1
Load regulation valve
1
Load regulation valve
1
Load regulation valve
1
Load regulation valve
2
Load regulation valve
1
Cylinder (telescope)
1
Cylinder (lift)
1
Cylinder (articulated arms) 2
Cylinder (slave)
1
Cylinder (master)
1
Hydraulic motor (turn)
1
Rotary adaptor
1
Solenoid valve
5
Lock valve
2
Flow dividing valve
1
Solenoid valve
3
Valve housing + valves
4
Cylinder (driving device)
2
Cylinder (outriggers)
4
Load regulation valve
2
Hydraulic motor (driving
2
device)
Flow control valve
4
Flow control valve
4
Return filter
1
Oil tank
1
102
DINO 260XTD
23 HYDRAULIC DIAGRAM
26120 ja 26122>
103
DINO 260XTD
Notes
104