1
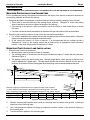
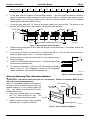
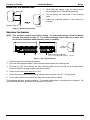
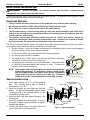
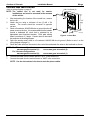
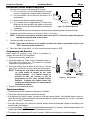
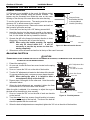
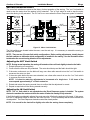
Carefree of Colorado Installation Manual Mirage INSTALLING THE RF REMOTE RECEIVER 1. Determine the location of the optional RF receiver: 4 3/16” 1.1 Do not mount the unit near heat producing elements such as LP appliances or engine exhaust components. 1.2 For best reception, do not mount the unit near or on a metal surface. 1” 1.3 Mount the unit with the antenna pointing up. #6 x 1/2 1.4 The included cable is approximately 60 inches long. Screw (2) 3 7/8” RTA034 Mount the unit close enough to the splitter or control box so that the cord can be connected without stressing the Figure 10. RR24 RF Receiver. connections. 1.5 Allow room below the box to access the connector jack, programming button and indicator light. Program Mode Press to Learn Transmitter TO EYE PORT on RP24 RR24 UP 2. Position the control box and secure using two (2) #6 x 1/2” screws. NOTE: If the box is mounted on a surface that is less that 1/2” thick, the screws will protrude through the opposite side of the surface. 3. Connect the cable to the receiver. NOTE: If the Lock-Out Sensor is not installed, the Receiver cable is connected directly to the "EYE" connector of the control box. 4. Route the cable to the splitter; or, to the control box and connect to “EYE”. Press to Learn Transmitter Program Mode When adding or replacing a key FOB it is necessary to program the receiver for the transmitter 1. Power to the control box must be on. 2. Press and release the “Press to Learn Transmitter” button on the bottom of the receiver box. The receiver is in program mode when the red light comes on. 3. Press and release the stop button on the remote. The red Stop light will go out after the receiver learns the remote signal. NOTE: Pressing the stop button will cause the blue up arrow button to default as the close (retract) function. If a function button is pressed to train the receiver, it will be programmed as the close (retract) button. Example: Pressing the bottom button will program the bottom button for retract and the top button as extend. 4. Repeat for each additional remote. TO EYE PORT on RP24 Programming the Receiver Indicator Light UP Program Button DR020 Figure 11. RF Receiver. Operational Notes: Transmitter and receiver operate on a frequency of 433 MHz. The receiver exits the program mode after ten seconds. If the light does not come on above, the memory is full and must be cleared. If the light still does not come on, check the continuity of the cord between the boxes and repair or replace as required. Pin 1 of the 1st connector goes to pin 1 of the 2nd connector etc. If the light does not go out in above, the receiver already knows the transmitter's signal or the battery in the remote needs to be replaced. To clear the memory: PRESS AND HOLD the transmitter learn button for 5 seconds. While holding the button, the indicator light should be OFF for the full 5 seconds then come on. The system may be programmed for up to 5 remotes. Additional remotes may be ordered separately. 8 052979-003r5