1
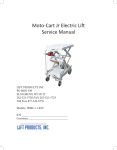
Moto-Cart Jr
Service Manual
LIFT PRODUCTS INC
PO BOX 349
ELM GROVE WI 53122
262-521-5720 FAX 262-521-5725
Toll Free 877-543-8776
Models: JRMC-11-LT
S/N ________________________________
Customer____________________________
REGISTRATION INFORMATION
(To validate your warranty and receive updated service bulletins, please complete this form)
Date_______________
Model No.________________
How did you first hear of Lift Products?
____Magazine Ad (Specify which magazine)_____________________________________
____Recommended by a dealer (Name of Dealer)_________________________________
____Received information in the mail
____Internet
____Other (Please specify)___________________________________________________
What factors caused you to choose Lift Products?____________________________________
____________________________________________________________________________
____________________________________________________________________________
Describe how and where products are being used?____________________________________
____________________________________________________________________________
____________________________________________________________________________
Name of person completing this form______________________________________________
Title________________________________________________________________________
Company____________________________________________________________________
Street Address________________________________________________________________
City, State, Zip________________________________________________________________
Phone________________________ Fax No.________________________________________
Purchased From:
Name of Dealer_______________________________________________________________
Street Address________________________________________________________________
City, State, Zip________________________________________________________________
Phone No._____________________Fax No.________________________________________
Please fax this form to 262-521-5725.
TABLE OF CONTENTS
Introduction.....................................................................................................................................2
Safety First.......................................................................................................................................3
Operating the Moto-Cart Jr LT.........................................................................................................4
Platform Cart
Controls...............................................................................................................................4
On-Off Switch.......................................................................................................................4
Emergency Stop Switch........................................................................................................4
Forward & Reverse...............................................................................................................4
Braking Systems...................................................................................................................4
Panic Stopping.....................................................................................................................5
Hand Control Picture............................................................................................................5
Motion Alarm.......................................................................................................................6
Battery Discharge Indicator..................................................................................................6
Driving the Cart...................................................................................................................6
Lift Table Operation.............................................................................................................7
Charging...............................................................................................................................7
Batteries..........................................................................................................................................8
Battery Life..........................................................................................................................9
Battery Load Testing.............................................................................................................9
Circuit Breaker......................................................................................................................9
Maintenance..................................................................................................................................10
Maintenance Schedule......................................................................................................10
Maintenance Procedures...................................................................................................11
Pushing Manually...............................................................................................................11
Trouble Shooting Checklist............................................................................................................12
Warranty........................................................................................................................................13
1
INTRODUCTION
Welcome to the Moto-Cart Jr-LT a member of Lift Products family of quality material handling
products. We know you’ll be depending on the cart, so have taken great care to make it
completely reliable. This Owner’s Manual is designed to help you get the most out of your
Moto-Cart Jr-LT cart and includes very important safety and care information. Please read it
thoroughly and keep it handy for reference. Thank you for choosing the Moto-Cart Jr-LT.
Information in this manual is based upon specifications in effect at the time of publication. Lift
Products reserves the right to make changes at any time without notice. Lift Products, products
are covered by Lift Products, patents, patents pendingm and other rights reserved.
Be sure to complete the Owners’s information box. This will be your record of important
information which will help you if your Moto-Cart Jr-LT ever requires service. When seeking
repair parts while your Moto-Cart Jr-LT is under warranty, a copy of your bill of sale may be
requested to verify warranty status.
FAILURE TO READ THIS OWNER’S MANUAL WILL VOID THE WARRANTY
If there is anything is this manual that you do not understand or that you are unsure of, DO
NOT OPERATE your Moto-Cart Jr-LT. Call our Customer Service Dept. at 877-543-8776.
2
SAFETY FIRST
To prevent accidents which can cause injury to you, damage the Moto-Cart Jr-LT or damage
your Moto-Cart Jr-LT or damage your cargo, observe the following rules:
1. Read and understand this Owner’s/Operator’s Manual before operating the
Moto-Cart Jr-11.
2. Read and understand all safety instructions provided with the cart or piece of equipment
which is installed on the Moto-Cart Jr-LT.
3. Only trained personnel should be allowed to use the Moto-Cart Jr-LT. All persons using
the Moto-Cart Jr-LT must read this owner’s/operator’s manual.
4. The Moto-Cart Jr-LT has a maximum load capacity of 1,000 pounds on a level surface. Do
not exceed the rated 1,000 pound capacity.
5. Do not travel up or down inclines greater that 8°.
6. Do not travel sideways on inclines.
7. Do not stop the Moto-Cart Jr-LT on an incline. Always park, load and unload on a flat,
level surface.
8. Do not go up or down curbs. Only operate the Moto-Cart Jr-LT on smooth hard surfaces.
9. Do not carry passengers on the Moto-Cart Jr-LT.
10.Always turn the key switch off before loading or unloading the cart.
11.Always load the cart evenly, distributing the load to prevent tipping.
12.Always take corners slowly and with caution to prevent the load from shifting.
13.Do not use the Moto-Cart Jr-LT to push or pull objects or other carts.
14.Always unplug the batteries before making any adjustments or repairs to the Moto-Cart
Jr-LT.
15.Do not operate the Moto-Cart Jr-LT in wet environments.
16.Do not expose the Moto-Cart Jr-LT to high temperatures. The Moto-Cart Jr-LT is battery
operated. Batteries may explode to high temperatures.
17.Do not operate the Moto-Cart Jr-LT with a flat tire, broken wheel or broken bent cart
caster.
18.Use extreme caution when operating the Moto-Cart Jr-LT near doorways, in hallways and
near stair wells. Reduce speeds in these areas.
19.Do not manually release the electromechanical brake on or near an incline. If you must
release this brake, release the brake only when on a level surface and with the cart
completely unloaded.
20.Do not travel with the lift in a raised position. Always lower the lift before moving the
cart.
21.Always make sure load is stable before lifting. Unstable loads may shift causing injury.
3
OPERATING THE Moto-Cart Jr-LT
We would like you to be satisfied using your Moto-Cart Jr-LT. When you use the Moto-Cart Jr-LT
for the first time, you must know how to properly operate and care for it to avoid unsafe
situations. Please read this manual thoroughly and become familiar with all of the safety
information provided.
Be aware of your surroundings, drive slowly and cautiously. Avoid collisions and/or changing
directions quickly which could cause damage to the Moto-Cart Jr-LT, or shift the load, damaging
the goods or injuring you or any surrounding people.
Anticipate and avoid unsafe situations. Be courteous of others and let your presence be known.
Perform first time operation in an open area on a flat surface-free of obstacles. Have someone
familiar with the operation of the Moto-Cart Jr-LT available to assist you.
CONTROLS
Read and understand all instructions and control functions before attempting to operate the
Moto-Cart Jr-LT.
ON-OFF KEY SWITCH
The on-off key switch is located on the right side of the hand control panel mounted on the
Moto-Cart Jr-LT handle bar.
Drive Position:
To turn the power on, fully insert the key into the key switch, and then turn the key clockwise. When the power is on, the battery discharge indicator, located on the top of the hand control panel will illuminate.
EMERGENCY STOP SWITCH
The emergency stop switch is located on the face of the hand control panel. Pushing on the red
switch will stop the operation of the cart. To reset the operation of the cart, turn the key switch
off and then back on.
FORWARD & REVERSE
Forward and Reverse is controlled by the finger control lever located on either side of the hand
control panel. A slight push on the top side control lever accelerates the cart away from you. A
slight push on the lower side control lever accelerates the cart towards you. To STOP, release the
control lever. Let the cart come to a complete stop before changing directions.
BRAKING SYSTEMS
The Moto-Cart Jr-LT has two types of braking systems. It has dynamic regenerative braking while
moving and electromechanical braking for parking.
4
Dynamic Regenerative Braking
Dynamic regenerative braking automatically brings the Moto-Cart Jr-LT to a smooth stop when
you release the control lever. However, it does not lock the wheels in place.
Electromechanical Braking
After the dynamic braking as brought the Moto-Cart Jr-LT to a stop, or near stop, the
electro-mechanical brake will lock the wheels in place. The electromechanical brake is a parking
brake and can be applied quickly by pressing down the emergency stop switch located on the
top center right of the control panel. The drive wheels must be contacting the floor surface for
the brake to hold.
PANIC STOPPING
To stop the Moto-Cart Jr-LT in an emergency, release the control levers and press in on the
Emergency Stop Switch located on the face of the hand control panel. To reset the operation of
the cart, turn the key switch off and then back on.
5
MOTION ALARM
The Motion Alarm switch is located on the top side of the Moto-Cart Jr-LT’s control handle and
is marked with a horn symbol. Push on the button to sound the motion alarm when the control
levers are operated.
BATTERY DISCHARGE INDICATOR (BDI)
The BDI indicates four ranges of battery condition.
1. Bar #1 indicates the batteries are fully (or nearly) charged.
2. Middle bars 2-9 indicate the batteries are being drawn down. Fully charge the batteries
at the earliest convenience.
3. Bar #10, on left side indicates the batteries need charging. Fully charge as soon as
possible.
4. Flashing Red bars #9 & #10-Charge the batteries at once! Move the Moto-Cart Jr-LT to
the closest 115 Volt 60 HZ AC outlet to charge.
The BDI may fluctuate between the different ranges depending on the driving conditions at the
time. Quick acceleration or moving between floor surfaces (e.g., concrete to carpet) may cause
the BDI to drop momentarily to the next level.
DRIVING THE CART
The Moto-Cart Jr.LT is equipped with electronically proportional speed control. Driving speed is
proportionally to the force of your fingers on the control lever. The harder you push, the faster it
will go.
1. Turn the key switch clockwise to the Drive Position.
2. To go forward (away from you), gently push on the top side control lever. The cart will
start to move and accelerate away from you to the desired speed proportional to the
pressure on the control lever.
3. To stop, release the control lever. The cart will gently slow down with the aid of dynamic
regenerative braking.
4. To go in reverse (toward you), gently push the lower side control lever. The cart will
accelerate toward you to the desire speed proportional to your finger pressure on the
control lever.
5. To stop, release the control lever. The cart will gently slow down with the aid of dynamic
regenerative braking.
6
LIFT TABLE OPERATION
The lift table is controlled by the foot pump located below the handle and the release lever to
the right and below the Moto-Cart Jr-LT’s control handle.
Lower the pump lever and push down with your foot on the lever to raise the platform. Repeat
as necessary to get the desired height.
To lower the platform, grasp the release lever and gently push down on the lever until the
desired height is reached.
CAUTION: Keep hands and feet away from the table and all moving parts while the table is in
motion to prevent injury. DO NOT place anything under the table while it is in a lifted position.
CHARGING
The Moto-Cart Jr-LT is equipped with two absorbed glass mat or gel-cell batteries which require
charging on a regular basis.
To Charge the Moto-Cart Jr-LT:
1. Position the cart close to a 115 Volt 60 Hz AX power outlet.
2. Turn the power key switch off and remove the key.
3. Remove the charger from storage compartment in the back of the cart.
7
4. Locate the cart’s main charging port on the deck below hand controls.
5. Plug the charging cord end of the charging port and the power cord from the
charger port and the power cord from the charger into a 115 Volt AC power supply
outlet. Make sure the plug is fully engaged into the supply outlet. If needed, connect
only an industrial grade grounded extension cord to the charging cord and then into the
115 Volt AC power supply outlet.
6. Allow the unit to charge overnight, six to eight hours, for a full charge.
7. Unplug the cord (and extension cord) from the power supply outlet before unplugging
the charger from the cart. The unit will not operate while in the charging mode.
BATTERIES
FOR BEST RESULTS: USE ABSORBED GLASS MAT OR GEL-CELL BATTERIES WITH YOUR
Moto-Cart Jr-LT.
1. The batteries supplied with the Moto-Cart Jr-LT are maintenance free, sealed, absorbed
glass mat or gel-cell batteries. DO NOT remove the battery caps. DO NOT attempt to add
water. This will ruin your batteries and void your warranty. Liquid-electrolyte batteries
are not recommended for use with your Moto-Cart Jr-LT.
2. If a crusty or powdery white substance appears on or around the battery terminals,
clean them using a solution of baking soda and water with a toothbrush. DO NOT
allow this solution to enter the battery vents. If you do not clean the batteries when
this substance appears, or if it is left for prolonged periods, it will reduce the quality of
battery connection and affect performance.
8
3. When replacing the batteries, clean the terminals and battery posts using a wire brush.
When re-attaching the terminals, be sure all connections are tight. The black wire must
be attached to the negative (-) terminal. The red wire must be attached to the circuit
breaker and to the positive (+) post of the opposite battery. Failure to connect with
proper polarity will damage the control module.
BATTERY LIFE
Battery life depends upon use and proper care. Of you use the Moto-Cart Jr-LT frequently, your
batteries will need replacement sooner than if you only use your Moto-Cart Jr-LT occasionally.
Other factors which can reduce battery life, include: irregular or inefficient charging, leaving the
batteries in a discharge state for a prolonged period of time, extreme temperatures and cargo
weight.
If the distance you travel on a charge becomes noticeably shorter, and ramps once easily
climbed become difficult to go up, you may need to replace the batteries. Heating or swelling of
the batteries (sometimes accompanied by an acrid odor) is another sign that the batteries may
require replacement. If you notice any of these conditions, have your batteries load tested.
BATTERY LOAD TESTING
A “load test” is a sure test of battery condition, and can be performed by your local Authorized
Service Center.
CIRCUIT BREAKER
A manually reset circuit breaker is located on one battery attached to the positive (+)
terminal. The circuit breaker protects the wiring and batteries against damage in the event of
short circuit.
If a breaker opens, try to determine the cause or reason why it opened. Reset the breaker by
pushing in on the tab. If it opens again in a short time-there is a short circuit which must be
found and corrected. DO NOT TAPE THE TAB DOWN.
DO NOT DEFEAT THE BREAKER! DO NOT REMOVE OR BYPASS THE CIRCUIT BREAKER! If any
additional wiring is added to the Moto-Cart Jr-LT, it must not bypass the breaker
9
MAINTENANCE
MAINTENANCE SCHEDULE
Your Moto-Cart Jr-LT will give you years of safe and dependable service in return for regular
maintenance and early attention to any developing problems. We recommend the following
maintenance program.
If you use your Moto-Cart Jr-LT often, you will find it to your advantage to perform this
maintenance more frequently.
CAUTION: Turn the cart off before performing any maintenance.
CAUTION: Raise lift to highest position and move safety bars in position before placing hands
under lift mechanism.
Every Day or As Needed:
1. Maintain the batteries’ charge.
2. Clean debris from the wheels and drive unit assembly.
3. Check tire pressure. Pressure should be between 40-50 psi.
Once Each Month:
1. Check for loose connectors and any signs of unusual wear.
2. Grease caster wheel & swivel assemblies. Follow the instructions given with your cart.
Once Every Three Months:
1. Check the exposed wires for wear, fraying or cracking.
2. Check the connectors for wear or cracking.
3. Examine the tires or wheel assemblies for wear or damage.
Once Each Year
Check the motor brushes for wear.
NOTE: This maintenance is best performed by your local Authorized Service Center.
10
MAINTENANCE PROCEDURES
Cleaning your Moto-Cart Jr-LT:
Turn the power OFF before cleaning your cart. DO NOT hose off your Moto-Cart Jr-LT. Excessive
water may damage electronic components. Wipe the hand controls with a damp cloth and dry
immediately.
Do not use harsh or abrasive cleaners on the Moto-Cart Jr-LT or its tires. These types of cleaners
will damage the finish of your Moto-Cart Jr-LT, and may cause premature tire wear. Clean your
tires with a rag or a soft bristle brush dipped in warm water.
Lubrication
Grease the wheel bearings by using the grease zerks on the wheels only. Spray silicone
lubricants (or WD-10) may be used on any other moving parts. Apply this lubricant whenever
there is “stickiness” in the moving parts.
Pushing Manually:
The cart’s drive system can be disabled to allow you to push the cart manually. To disable the
drive system:
1. On a level surface only, lift up on the brake release lever to disable the
Electro-Mechanical Parking Brake.
2. Turn the Key Switch to the OFF position to disable the Dynamic Braking.
3. Push cart at walking speed only, as the Dynamic Braking will automatically turn on if the
cart’s speed is above 3 mph. DO NOT TOW CART!
WARNING: DO NOT RELEASE THE BRAKE ON OR NEAR A RAMPED SURFACE. THE UNIT WILL
NOT STOP ON ITS OWN WHEN THE BRAKING SYSTEM IS DISABLED. SEVERE INJURY OR DEATH
MAY RESULT IF THE CART IS LEFT TO ROLL UNATTENDED.
11
TROUBLE SHOOTING CHECKLIST
Your cart’s drive system has been designed and built to be dependable and trouble free, but
we know that there can be unexpected problems with any technical product. The following
checklist will give you a “First Aid” approach to dealing with most problems.
SYMPTOM
Unit Dead, BDI Dark-
Unit Dead, BDI Illuminated-
Unit Runs Slow
Battery Weak or Won’t
Take a Charge
Intermittent
Running
Hard To Turn
Lift Won’t Raise
Lift Won’t Lower
POSSIBLE CAUSE
SOLUTION
Key switch turned to off position.
Turn key switch to Drive (right) position.
Circuit breaker open.
Check and re-set the circuit breaker.
Batteries dead.
Charge batteries. Load test batteries.
Power connection interrupted.
Check power cable going to battery. Check
other connections.
Brake switched to off position.
Check brake lever-Place in Down (on)
position.
Emergency stop switch engaged.
Turn the Key Switch off and on.
Obstruction in pathway of wheels.
Check for obstruction.
Unit in “Sleep” mode.
Turn unit off for 3 seconds to reset mode.
Unit in “Charge” mode.
Unplug unit.
Throttle engaged during start up.
Release throttle and wait 3 seconds or turn
unit off and then back on.
Heavy load on cart.
Normal condition. Reduce load to increase
speed.
Surface uneven or changed (concrete
or tile to carpet)
Normal condition.
Weak or low batteries.
Fully charge batteries.
Worn batteries.
Fully charge batteries. Load test batteries.
Motor worn out
Contact Authorized Service Center.
Battery charge low.
Fully charge and load test batteries. Replace
if bad.
Charger power interrupted. Look at
charger indicator lights for indication
that power us going to the charger.
Check wall outlet for continuous power.
Make sure light switch is not turning off
charger. Make sure power cord is inserted
into charger.
Charger burned out.
Replace charger.
Loose connection in wiring.
Check all exposed wire connection.
Worn motor brushes.
Have Authorized Service Center check
brushes. Replace if worn.
Load unbalanced or offset.
Redistribute load evenly on deck.
Casters require lubrication.
Lubricate casters.
Worn caster bearings.
Replace caster.
Release lever in down position.
Pull up on release lever.
Low hydraulic fluid.
Check hydraulic fluid level.
Release lever not pushed down.
Push down on release lever.
12
MOTO-CART JR POWER DRIVEN CART WARRANTY
Lift Products, Inc. warrants this product against defects in manufacturing, materials, or workmanship for a period
of twelve (12) months from the date of consumer purchase, covering parts only. Defective parts will be repaired or
replaced with new or reconditioned parts at the company’s option. A dated sales receipt is required for warranty
parts. Exclusion and exceptions as listed below. This entire warranty is limited to the original consumer only and is
not transferable.
Lift Products Drive System:
• The Moto-Cart System (consisting of the motor and trans axle only) carries a twelve (12) month pro-rated
warranty from the date of consumer purchase.
Batteries and Charging System:
• Lift Products supplied batteries carry a six (6) month warranty from the date of original shipment.
• Battery charger is not covered by this warranty if factory supplied and installed batteries are not used.
Item and Services Not Covered by This Warranty
• Labor, service calls, transportation to or from the service center or dealer, or other charges imposed by the
dealer or service center to make the repairs on the product.
• Defects caused by unauthorized work performed on the product.
• Part failure resulting from failure to maintain the product as specified in the owner’s manual.
• Product or part failure caused by unauthorized modification of the product. Unauthorized modification of
this product voids this entire warranty.
• Any part, accessory, or modification-authorized or not, placed on the product which is not manufactured,
supplied, or installed by Lift Products Inc.
• Tires, tubes, wheels, caster, drive chains, drive belts, motor brushes, bulbs, fused, and other normal wear
items are not covered by this warranty.
• Shipping damage is not covered by this warranty. Please contact freight carrier for information on how to
file a freight claim.
• Any warranty or claim made by the dealer or agent contrary to, or in addition to, this warranty.
To Exercise this limited warranty, the consumer must proceed as follows:
• Return the product to the dealer for warranty work. Lift Products will repair or replace the defective
part(s) at the company’s option) if the defect is a result of manufacturing, materials, or workmanship
during warranty period.
• If the dealer is unable to perform the warranty repair or is unable to provide warranty service, the dealer
may return the product, freight prepaid, to the factory. The dealer will be billed normal factory labor
charges.
Warranty Limitations and Exclusions
To the maximum extent permitted by applicable law, this limited warranty excludes any claim for incidental or consequential damages and is in lieu of any implied or other warranties. Lift Products, Inc. reserves the right to make
changes to this warranty at any time without notice.
Consumer Name_________________________
Purchased From_________________________
Model Number__________________________
Date of Purchase_________________________
Serial Number___________________________
13