1
TECHNICAL MANUAL
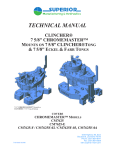
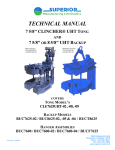
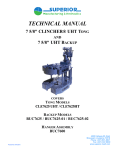
CLINCHER
7 5/8" CHROMEMASTER
MOUNTS ON 7 5/8" CLINCHER TONG
& 7 5/8" ECKEL & FARR TONGS
7 5/8" CHROMEMASTER Mounted on
CLINCHER 7 5/8" Tong & Backup
COVERS
CHROMEMASTER MODELS
CM7625
CM7625-E
CM7625-F / CM7625F-02 / CM7625F-03
Published 052006
4225 Highway 90, East
Broussard, Louisiana 70518
Phone: (337) 837-8847
Fax: (337) 837-8839
www.superior-manf.com
TECHNICAL MANUAL
CLINCHER
7 5/8" CHROMEMASTER
MOUNTS ON 7 5/8" CLINCHER TONG
& 7 5/8" ECKEL & FARR TONGS
COVERS
CHROMEMASTER MODELS
CM7625
CM7625-E
CM7625-F / CM7625F-02 / CM7625F-03
Published 05/2006
4225 Highway 90, East
Broussard, Louisiana 70518
Phone: (337) 837-8847
Fax: (337) 837-8839
www.superior-manf.com
8 Copyright, 2006, SUPERIOR Manufacturing & Hydraulics, Inc. All rights reserved. This document is the
property of SUPERIOR Manufacturing & Hydraulics, Inc. It is supplied as reference information to users of
our products. This document is considered confidential and is not to be disclosed, copied or reproduced,
transmitted, transcribed in any form or stored in any type of system without the express written consent of
SUPERIOR Manufacturing & Hydraulics, Inc.
CLINCHER, CHROMEMASTER, LOCKJAW, HYTOPS, Drillmaster, Grit Face, Grit Faced Die or Insert &
Low-Friction are trademarks of SUPERIOR Manufacturing & Hydraulics, Inc.
The products described in this manual are covered by U.S. and foreign Patents and/or pending Patent
Applications.
This manual is not a controlled document and is subject to revision
without notice. To receive updates and insure you have access to
the latest information concerning the 7 5/8" CLINCHER CHROMEMASTER, we request you complete this form and return the lower
half to SUPERIOR Manufacturing and Hydraulics by mail or
facsimile. Access to our manuals can also be acquired through our
web site www.superior-manf.com. Select the tab ‘CLINCHER
Products’, select the equipment from the list to get Specs page,
select the tab ‘Download Manual’.
Name:
Company:
Address:
Address:
City:
Postal Code:
Telephone:
State:
Country:
Fax:
CM Model No.:
Tong Model No.:
Backup Model No.:
Assembly Date:
Serial No.:
Serial No.:
Serial No.:
7 5/8"CLINCHER CHROMEMASTER
Technical Manual Registration Form
Name:
Company:
Return To:
SUPERIOR Mfg. & Hyd.
4225 Hwy. 90 East
Broussard, LA 70518
USA
Address:
Address:
City:
Postal Code:
Telephone:
Country:
Fax:
CM Model No.:
Tong Model No.:
Serial No.:
Serial No.:
Backup Model No.:
Assembly Date:
Serial No.:
Telephone: 337-837-8847
Facsimile: 337-837-8839
Web Site: www.superior-manf.com
TABLE OF CONTENTS
Hazard Warnings
1
Description, Features & Specifications
2
Die Information
3
Operational Instructions
4
Maintenance Instructions & Trouble Shooting
5
Spare Parts Recommendations
6
CHROMEMASTER Illustrations
7
Valve Technical Data
8
7 5/8"CLINCHER CHROMEMASTER
REVISION TABLE
Section
Page
Date
SUPERIOR Manufacturing & Hydraulics, Inc.
7 5/8" CLINCHER CHROMEMASTER
Revision: 05/06
Description
Page 0 - 1
7 5/8" CLINCHER CHROMEMASTER
HAZARD WARNING
Nomenclature used in this manual:
WARNING concerns an operating procedure or practice that,
if not strictly observed, can result in injury to
personnel or loss of life
Caution
concerns an operating procedure or practice that,
if not strictly observed, can result in damage to
or destruction of equipment
Note
concerns an operating procedure or practice that
needs highlighting
CLINCHER Tongs, CHROMEMASTERS and Backups are
manufactured to provide a means of making up or breaking out
high torque tubular connections. They utilize high pressure
hydraulic fluid power which can cause the tong to move
suddenly and with great force if the tong is not properly rigged
up and operated. CLINCHER Tongs, CHROME-MASTERS
and Backups contain rotating and reciprocating parts which
can severely or fatally injure personnel who are operating,
repairing, or near this equipment during its operation.
WARNING: Tongs, CHROMEMASTERS and Backups
are not to be operated by untrained personnel or personnel
with diminished physical or mental capacity. No work of
any type, including changing of dies, is to be carried out
while the tong and backup are connected to any hydraulic
power unit.
CLINCHER Tongs, CHROMEMASTERS and Backups are
heavy tools. They should be suspended from a secure, high
strength 7/8" IWRC minimum diameter wire cable with a 31
ton minimum breaking strength. The wire rope should be hung
as close to the center of the wellbore as possible, without
interfering with drilling equipment operation, to allow the tong
to be readily swung into the working position. Vertical
position control should be achieved by means of a CLINCHER
hydraulically operated lift cylinder/spring hanger.
WARNING: Users must insure the entire suspension
system including cables, rig mounting points, lift cylinders,
tong lifting brackets/bridles, winches, pulleys, counter
weights, etc., are capable of handling the static weight of
the tong and backup plus any loads which could be
transferred to it during the makeup or breakout process
PLUS any shock loads which may be seen during
operation. This system must readily allow downward
movement equal to a minimum of the thread makeup
distance to avoid overloading the suspension system and/or
damage to equipment.
A 1" IWRC minimum diameter wire cable with a 51.7 ton
minimum breaking strength or better, should be attached at a
SUPERIOR Manufacturing & Hydraulics, Inc.
7 5/8" CLINCHER CHROMEMASTER
Revision: 05/06
Page 1 - 1
90 degree angle to the tong and at the same level to insure
proper readout of torque indicator. A SNUBBING LINE
should always be attached even when an integral backup is in
use to provide additional safety in the event of a backup
slippage. WARNING: Users must provide a means of
safely controlling the tong and backup movements in all
directions when it is in use. Failure to account for its size,
weight, movement and the amount of torque developed
could result in personnel injury or death.
CLINCHER Tongs, CHROMEMASTERS and Backups utilize
high pressure hydraulic fluids. Portions of the tong,
CHROMEMASTER and backup, control valves, hydraulic
lines and cylinders may contain high pressure fluid even when
the power unit is de-energized and the fluid supply hoses are
disconnected. During normal operation the temperature of the
hydraulic fluids as well as hoses, piping, valves, etc., can rise
to a level which can cause burns. WARNING: Personal
protective gear including safety glasses, face shields,
protective gloves and protective clothing must be worn to
guard against the hazards of high pressure fluids. Tight
fitting clothing is required to prevent entanglement in
rotating components. These tools should be serviced by
thoroughly trained and qualified hydraulic technicians
using procedures to safely insure hydraulic pressure is bled
from these circuits.
The CLINCHER Tong is equipped with a door interlock
system which prevents tong rotation whenever the door is
open. This system is to be tested before each mobilization and
at every shift change. Should this system be determined to be
inoperative, the tong is to be removed from service and tagged
as in-operative until repairs are made. CAUTION: Operating
the tong with the door in the open position could result in
severe damage to the equipment and will void all manufacturer
warranties. WARNING: Operating the tong with the door
open by means of a defective or bypassed door interlock
system exposes the operator and nearby personnel to
potentially fatal hazards.
No attempt should be made to operate the CLINCHER Tong,
CHROMEMASTER and Backup for any purpose other than
which it is intended. This system is capable of generating very
large clamping forces and torsional loads which, if improperly
applied or controlled, could result in damage to the tubular, to
the tong and backup, or could possibly result in injury or death
of personnel. Do not attempt to operate the unit without
correct dies and the proper size tubular being in the tong,
CHROMEMASTER and backup. See Section 3 for more
information concerning the selection and use of dies.
CAUTION: Operating this equipment without the correct
size, type, and orientation of dies can result in damage to
the equipment or tubulars being handled.
CROSS
GENERAL INFORMATION
HYDRAULIC PRODUCT
SAFETY
HYDRAULIC PRODUCT SAFETY
WARNING: Valve lever (spool) may "stick" (not center) under
certain conditions allowing the hydraulic equipment to continue to
operate and could cause serious injury, death or equipment failure.
VALVE SAFETY: Read and follow instructions carefully. Failure to observe instructions
and guidelines may cause serious injury, death or equipment failure. A sticking valve
(spool bind) may be caused by one or more of the following factors:
DIRTY OIL: Oil must be filtered to a minimum of 25 microns. Filters should be changed regularly spin-on types after 50 hours of initial use and then after every two hundred fifty hours of use. Use of
a condition indicator is recommended. Consult your tractor or implement owner=s manual for filtration and changing recommendations for internal systems.
OIL REQUIREMENTS: Premium quality anti-wear type oil with a viscosity between 100 and 200
SSU at operating temperatures. Certain synthetic oils may cause spool seals to swell and the valve
to stick. If in doubt, call CROSS Engineering.
IMPROPER HOOK UP OR MOUNTING: Always use the proper size fittings. Hook up "in" & "out"
as noted on the valve body. Do not overtorque pipe fittings. Mounting surfaces should be flat and
care should be used when tightening mounting bolts. Over-tightened bolts can cause spool bind
and casting breakage. When hooking a valve in series, always use a power beyond sleeve. Consult your tractor or implement manual to make sure you have the proper quick disconnect line
connected to the inlet of the remote valve.
MISAPPLICATION: Always use the proper valve for the job. CONVERTA, CD, CS or CA valves
should never be used for metered heavy load lifting - loaders or similar applications. Use an open
center valve for open center applications and a closed center valve for closed applications. If in
doubt, check with your tractor dealer. Contact CROSS if the valve allows the hydraulic equipment to
creep excessively.
MAINTENANCE: Make sure all bolts are tightened and torqued to the recommended specification.
Bent or broken parts should not be used. Replace immediately. Always use exact replacements.
Always protect valve spool from paint overspray.
Faulty quick disconnects can cause high back pressures and sticking spools. Check quick disconnects periodically to make sure they are functioning properly. If valve spool does not center or
appears to stick, do not use!
PUMPS & MOTORS SAFETY:
A relief or bypass in your hydraulic system is necessary to prevent pump from breakage due to
overpressurization. Use correct fittings and proper oil as noted in the technical service manual
packed with each unit. Change oil as recommended by your implement or tractor manufacturer.
CYLINDER SAFETY:
Check clevis clearances before, during and after extending the cylinder and before using the cylinder
under pressure to avoid possible injury, or bent or broken rods caused by binding. Never operatea
cylinder above recommended pressures. Never use a cylinder as a safety device when trans-porting
equipment.
PINHOLE LEAKS:
If you observe a pinhole leak, discontinue use of the component. If oil has penetrated your skin or
contacted your eye, seek medical attention immediately!
Page 1 - 2
DESCRIPTION and
FEATURES
SPECIFICATIONS
The CLINCHERᓽ 7 5/8" CM7625 CHROMEMASTERᓽ can
be added to 7 5/8" CLE7625-02 CLINCHER Tong. The
CLINCHER 7 5/8" CM7625-E CHROMEMASTER can be
added to 7 5/8" Eckel Tong. The CLINCHER 7 5/8"
CM7625-F CHROMEMASTER can be added to 7 5/8" Farr
Tong with the old style ring gear. The CLINCHER 7 5/8"
CM7625F-02 and CM7625F-03 CHROMEMASTER can be
added to 7 5/8" Farr Tong with the new style ring gear. The
addition of these CHROMEMASTER’S allows the use of
smooth, non-marking, non-penetrating dies to run CRA
(corrosion resistant stainless steel alloy) or fiberglass tubing
strings. These smooth dies are manufactured from aluminum
to prevent marking and to avoid contaminating CRA tubing
strings with materials which could initiate corrosion problems.
Grit Faced Dies may also be used with CRA tubulars to
provide high torque performance while protecting these
tubulars from damage and contamination.
The
CHROMEMASTER will also accept fine tooth dies for
applications where conventional steel tubulars are being run.
The torque capability of CLINCHER CHROMEMASTER,
when dressed with fine tooth dies, matches the rating of its
companion tong. Ratings for the CLINCHER Tong is
tabulated below:
These CHROMEMASTER’S have three wrap around dies
which provide up to 340 degrees of pipe coverage. These dies
are hydraulically activated by means of a system which
transfers hydraulic power from the stationary section of the
tong to the rotating section of the CHROMEMASTER. This
completely eliminates the need to connect and disconnect
hoses every time a joint is made up or broken out.
In extreme high torque applications it may be necessary to
install silicon carbide paper between aluminum dies and the
tubing in the CHROMEMASTER as well as in the
CLINCHER Backup. One piece is required for each
aluminum jaw. Sheets should be folded along one edge to
allow it to be hooked over edge of dies. The sheets of silicon
carbide paper should be visually inspected after each joint and
replaced when torn or worn.
This transfer of hydraulic energy is accomplished by means of
a push cylinder which is fixed to the stationary portion of the
tong and operated by the CHROMEMASTER directional
control valve. The push cylinder’s rod acts against a pump
plunger located on the rotating section of the CHROMEMASTER. Every time the rod is extended the pump is stroked
to generate pressure within the CHROMEMASTER’S
hydraulic circuit. The piston areas in the push cylinder and the
pump are sized to cause pressures to be intensified within the
CHROMEMASTER to 4,500 psi when the hydraulic power
unit pressure is limited to 3,000 psi.
SUPERIOR Manufacturing & Hydraulics, Inc.
7 5/8" CLINCHER CHROMEMASTER
Revision: 05/06
Page 2 - 1
TONG
CLE7625-02
MAXIMUM
TUBING SIZE
(INCHES)
MAXIMUM
TORQUE RATING
(FT./LBS.)
7 5/8
30,000
The torque capacity of the smooth CHROMEMASTER die is
a function of the radial load applied to the die and the
coefficient of friction of the contact interface between the die
and the tubing. Extremely small differences in this contact
interface caused by pipe varnish, mill scale, eccentricity or
pressure of a lubricant such as thread dope, oil or water can
cause a large variance in the torque capacity of a non-marking
die.
BACKUP APPLICATION
The CLINCHER Backup’s front jaws are hydraulic cylinders.
During a jaw closing cycle, the front jaws advance and clamp
the pipe against the fixed rear jaw. Once locked on the pipe,
pressure is locked in the backup cylinder by a load holding
valve. When opening, the front jaws retract to allow the pipe
to be removed.
CLE7625
CLINCHER 7 5/8" TONG
TOP VIEW
21 1/2" MAX. O.D.
8 13/16"
16 1/4" MAX. HEIGHT
CLE7625
CLINCHER
7 5/8" TONG
FRONT VIEW
7 5/8" CHROMEMASTER
DIMENSIONS
Page 2 - 2
1 3/16"
4225 HWY. 90 EAST
BROUSSARD, LA 70518
(318) 837-8847
THIS DOCUMENT IS THE PROPERTY OF SUPERIOR MANUFACTURING &
HYDRAULICS AND IS CONSIDERED CONFIDENTIAL. THIS INFORMATION
MAY NOT BE USED, DISCLOSED, COPIED, OR REPRODUCED IN ANY
FORM, WITHOUT THE EXPRESS WRITTEN CONSENT OF SUPERIOR
MANUFACTURING & HYDRAULICS.
REV. #
LOG #
05/04/06
DATE
REF: P:\Manuals\Equip Manuals\Dwgs\
CM7625\Dimensions.wpg
CLINCHER WRAP AROUND DIES
Clincher Wrap Around Dies are available in three types:
Fine Toothed Steel Dies: for low to ultra high torque
applications on carbon steel
tubulars including tubing, casing,
and drill pipe
Smooth Faced Aluminum Dies:for low to moderate torque
applications on fiberglass and
corrosion resistant alloy (stainless
steel) tubulars
Grit Faced Dies:
for low to high torque applications
on fiberglass and corrosion
resistant alloy (stainless steel)
tubulars where the use of steel dies
is prohibited as well as on carbon
steel tubulars where reduced
marking is desired
CLINCHER Dies are designed to match the OD of the tubing,
casing, coupling, or accessory being made up or broken out.
Each die is stamped on the top or side to identify its size.
Using Fine Toothed Steel Dies which are slightly larger than
the tubular is acceptable provided the difference in diameters
is less than 3/32" (0.093"). Aluminum and Grit Faced Dies
should be matched with the specific tubular diameters
required. Note: The use of improperly sized dies can result in
reduced torque capacity, increased pipe marking, and reduced
die life.
CAUTION: Do not attempt to grip tubular diameters which
are larger than the dies being used. Failure to observe this
precaution can result in damage to the tubular or tong jaws.
In emergencies where correct die sizes are unavailable, some
operators have successfully used two different sizes of dies to
accommodate unusual, nonstandard diameters.
CLINCHER Wrap Around Dies are manufactured in specific
diameters to match standard tubing and casing diameters, API
coupling diameters, selected work string connection diameters
and certain commonly used premium connection coupling
diameters. CLINCHER Wrap Around Dies should not be used
on tubulars which are larger than the nominal die size. Steel
Toothed Dies can be used on tubulars which are no smaller
than 3/32" (0.093") less than the nominal die size. Aluminum
and Grit Faced Dies should be matched with the specific
tubular diameters required.
Note: Fine Toothed Steel Dies are normally stocked in our
Broussard, Louisiana facility. A partial listing of commonly
manufactured sizes is shown below. Aluminum and Grit Faced
Dies are normally made to order although a limited range of
sizes and small quantities may be available from stock.
Contact SUPERIOR Manufacturing & Hydraulics for
information concerning availability of stock and special die
sizes.
DIE Nomenclature for CM7625 CHROMEMASTER
and BUCT7625 Backup
BUC7625-xxxx Fine Toothed Steel dies for jaws
(3 reqd per CHROMEMASTER)
(3 reqd per backup)
BUCA7625-xxxx Aluminum dies for jaws
(3 reqd per CHROMEMASTER)
(3 reqd per backup)
BB7625-xxxx
Grit Faced dies for jaws
(3 reqd per CHROMEMASTER)
(3 reqd per backup)
ORDERING EXAMPLE: fine toothed steel dies are needed
to run 2 7/8" OD tubing
Qty. three (3) BUC7625-2875 dies for CM
Qty. three (3) BUC7625-2875 dies for backup
(replace xxxx with size required in inches)
SUPERIOR Manufacturing & Hydraulics, Inc.
7 5/8" CLINCHER CHROMEMASTER
Revision: 05/06
Page 3 - 1
BUC7625-xxxx:
2.375 2.600
3.125 3.230
3.625 3.668
3.910 3.941
4.375 4.460
4.767 4.862
4.961 5.000
5.250 5.290
5.563 5.570
5.826 5.866
6.051 6.075
6.325 6.350
6.750 6.875
7.375 7.380
7.656 7.681
Fine Toothed steel dies for CM & Backup
2.700 2.707 2.875 3.000 3.062
3.240 3.250 3.375 3.400 3.500
3.750 3.862 3.875 3.886 3.900
4.000 4.025 4.053 4.125 4.250
4.500 4.505 4.530 4.625 4.750
4.875 4.892 4.900 4.921 4.935
5.005 5.125 5.137 5.150 5.215
5.313 5.439 5.470 5.500 5.530
5.587 5.620 5.695 5.750 5.780
5.875 5.931 6.000 6.035 6.050
6.100 6.125 6.150 6.250 6.260
6.375 6.400 6.500 6.625 6.650
7.000 7.020 7.191 7.250 7.350
7.390 7.400 7.413 7.500 7.625
7.732 7.750 7.790
CLINCHER WRAP AROUND DIES
BUCA7625-xxxx: Aluminum dies for CM & Backup
1.900 2.250 2.375 2.400 2.679 2.707 2.735
2.776 2.875 2.910 3.062 3.125 3.130 3.230
2.240 3.300 3.327 3.375 3.400 3.500 3.523
3.590 3.875 3.900 3.950 4.000 4.050 4.053
4.069 4.138 4.200 4.250 4.313 4.375 4.460
4.500 4.600 4.620 4.862 4.968 5.000 5.012
5.150 5.181 5.250 5.350 5.500 5.550 5.563
5.577 5.590 5.650 5.653 5.700 5.750 5.870
5.890 5.960 6.000 6.025 6.050 6.051 6.071
6.075 6.100 6.125 6.135 6.150 6.153 6.156
6.170 6.200 6.250 6.400 6.500 6.625 6.750
6.940 7.000 7.250 7.390 7.430 7.440 7.579
7.625 7.656 7.675 7.681 7.700 7.750
SUPERIOR Manufacturing & Hydraulics, Inc.
7 5/8" CLINCHER CHROMEMASTER
Revision: 05/06
Page 3 - 2
BB7625-xxxx: Grit Faced dies for CM & Backup
2.375 2.875 3.250 3.500 3.878 3.900
4.053 4.250 4.500 4.750 4.901 4.950
5.200 5.500 5.563 5.577 5.736 5.890
6.045 6.050 6.051 6.075 6.079 6.100
6.180 6.240 6.248 6.500 6.625 6.750
7.020 7.191 7.290 7.390 7.413 7.625
7.681 7.700 7.720 7.731 7.772 7.790
4.000
5.000
6.000
6.150
7.000
7.644
7.852
Contact SUPERIOR Manufacturing & Hydraulics for
information concerning availability of stock and special die
sizes.
TECH UPDATE
A brief explanation of oil field dies, the evolution of the CLINCHER™ Tong Die,
and advances in hydraulic power tong technology.
SUPERIOR’s CLINCHER line of
power tongs, backups, and accessories
supplies the oil industry with equipment used when installing oil field
tubing, casing, and drill pipe. These
products are hydraulically powered
wrenches which grip the exterior
surface of the pipe and transmit torque
to tighten or loosen the pipe’s
threaded connection.
Traditionally, tongs employing a
series of hardened steel dies with
sharp teeth were used to grip oil field
tubulars. Early steel die designs were
made from strips of flat bar stock.
These early dies ranged from approximately 3/4" to 1 1/2" in width and were
approximately 4" long. They are known
as strip dies because of their long
narrow geometry. These dies were installed in a holder, known as a jaw, in
sets of 2 or 4 and arranged in a v-block
configuration. The jaws holding the
strip dies are installed in opposed pairs
in a power tong. As the tong is operated, a cam system generates radial
loads which force the jaws to close on
the pipe and cause the teeth of the die
to penetrate the pipe’s surface.
(ref. Figure 1)
In high torque applications the pipe is
loaded on the leading edges of the
jaws while the trailing edges are
unloaded. Under these conditions, the
strip die can severely mark the pipe
because the strip die provides essentially only line contact. The limited
contact area associated with strip dies
can also lead to permanent pipe deformation under high torque conditions.
In an effort to reduce the depth of the
marks left by strip dies and increase
the contact area, strip dies were
modified to provide a contoured surface which matched the radius of the
pipe.
In 1985 Superior introduced the
CLINCHER Splined Tong Jaw and
Wrap-Around Fine Toothed Steel Die
system (ref. Figure 2). This wrap
around die replaced the two traditional
tong jaws and strip dies resulting in an
increase in contact area to approximately 230 degrees or 64% of the
circumference.
CLINCHER Wrap-Around Dies are
fixed to the jaws by means of a
patented spline arrangement which
insures proper alignment and uniform
distribution of radial loads (ref.
Figure 3). This causes the torsional
loads to be distributed across the
entire die unlike the concentrated
loading observed in strip dies. The
increased contact area combined with
the fine tooth pattern significantly
reduces the marking of tubulars under
high torque conditions when compared to the traditional die system.
Simultaneously, the increased contact
area reduces the stress in the tubular
and the possibility of permanent
deformation. In 1987, we introduced
the CLINCHER Hydraulic Backup
which also uses our Wrap-Around
Die. When these dies are installed in
CLINCHER Backups, CHROMEMASTERm and LOCKJAWm Tongs
having 3 jaws, this contact area is
increased to as much as 340 degrees or
94% of the tubular’s circumference.
Figure 2
Wrap-Around Die System
Tangential
Reaction
Clearance
Figure 1
Radial
Reaction
Figure 3
Patented Spline & Die
Published 01/2005
Page 3 - 3
4225 Highway 90, East
Broussard, Louisiana 70518
Phone: (337) 837-8847
Fax: (337) 837-8839
www.superior-manf.com
In the last decade, the use of carbon
steel tubulars has declined and the use
of exotic stainless steel tubulars has
increased. This change is in response
to declining reserves of sweet, noncorrosive hydrocarbon reserves and
the increase in production from hot,
corrosive oil and gas reservoirs. Some
of these corrosion resistant alloys (CRA)
materials can have their corrosion
resistance severely degraded if their
surface is damaged and/or contaminated with small particles of iron or
steel (ref. IADC/SPE Paper 36386).
The marks left behind by traditional
slips and elevators used to handle the
tubulars or by the tong dies used to
tighten the tubulars can also reduce
the mechanical strength and lead to
premature fatigue failures. Since these
exotic CRA tubulars cannot be used
with any type of toothed steel die it
became necessary to develop a nonmarking die.
encircle the pipe to reduce deformation and stress levels in the tubular.
For more information on the CHROMEMASTER as well as the CLINCHER
Hydraulic Power Tong which drives
it and our CLINCHER Hydraulic
Backup, contact Superior Manufacturing
and Hydraulics.
CLINCHER Non-Marking WrapAround Dies are manufactured from a
special aluminum alloy and are
machined with a smooth face which
matches the radius of the tubular.
They grip the pipe and transmit torque
without penetrating the pipe by using
the frictional force developed between
the die and the pipe. Standard tongs
used by the oil industry do not develop
enough radial load to allow nonmarking dies to function. CLINCHER
developed its CHROMEMASTER to
allow non-marking dies to be used
with standard tubing and casing tongs.
The CHROMEMASTER works by
increasing the amount of radial load
applied to the pipe. Three wrap-around
non-marking aluminum dies virtually
CLINCHER GRIT FACEDm Dies
were developed to further enhance die
torque capabilities for CRA tubulars
and eliminate the need to install a new
sheet of silicon carbide screen cloth
for every connection. The CLINCHER
GRIT FACED Dies are available for
our CHROMEMASTER, CLINCHER
Backups, CLINCHER LOW-FRICTIONm
Tong Jaws, CLINCHER LOCKJAW
Tongs and CLINCHER Bucking Units.
GRIT FACED Dies typically provide
at least twice the torque which can be
achieved using aluminum dies with
silicon carbide screen cloth. CLINCHER
GRIT FACED Dies do not leave the
tooth marks normally seen with
conventional steel dies. Like the
aluminum dies, GRIT FACED dies do
For a given radial load, torque values
for Non-Marking Dies can vary
significantly from tube to tube because
they are totally dependent upon the
coefficient of friction. The presence
of a small amount of varnish, moisture
such as dew, or some other type of
lubricant can reduce this value substantially. If this occurs, the torque
values can be increased by the addition of CLINCHER silicon carbide
screen cloth. The particles on this
cloth are sized to span the film of
lubricant between the pipe and the die
to increase the coefficient of friction.
not allow steel, iron, or carbon to
contact the pipe body. The absence of
teeth greatly reduces stress risers and
crevices which have been observed to
cause premature failures in CRA
tubing strings.
First proven in critical North Sea
applications, the CLINCHER GRIT
FACEDm Die is rapidly becoming the
standard die used with CRA strings
around the world. When properly
used GRIT FACED Dies will not
leave any significant marks on the
pipe. During recent lab tests the maximum depth of marks left after very
high torque applications was 0.004
inches. It is our belief these results are
considerably better than competitive
systems as they are shallower, are in a
random pattern which reduces stress
risers in the tubulars, and they do not
contaminate the CRA tubing with
steel, iron, or carbon. GRIT FACED
dies provide another major benefit.
Running of the tubulars is faster, safer,
and less tiring for operators because
they do not have to replace six sheets
of carbide paper every joint. Instead,
we recommend one die be removed
every 10 joints and replaced with a die
which has been brushed to remove any
accumulated dirt or paint.
The introduction of the GRIT FACED
Die brings the number of tong dies
available to three as shown in Figure 4.
The aluminum is a non-marking die
used on CRA tubulars at low to
moderate torques, GRIT FACED Dies
for CRA tubulars at low to high
torques, and the fine tooth steel die is
used in low to ultra high torque
applications on carbon steel tubulars.
Figure 4
CLINCHER Die Technology (Ver 8.0 01/11/05)
e-mail: [email protected]
Page 4 of 4
Page 3 - 4
Superior Manufacturing & Hydraulics
is committed to continually improving
our products and expanding our
product lines. In early 1997 we introduced the CLINCHER LOCKJAW
Tong. Like our other tongs, the
LOCKJAW tong utilizes our WrapAround Die system (ref Figure 2).
This is where the similarity with all
other tongs ends. The LOCKJAW
features a three jaw system which
provides more than 300 degrees of die
coverage to further reduce pipe marking under high torques. It also features
our patented constant cam angle and a
load control system which generates
the radial loads required to use our NonMarking Aluminum and GRIT FACED
Dies without a CHROMEMASTER.
In October 1997, CLINCHER
introduced its latest tong innovation to
the industry. The CLINCHER LOWFRICTION Jaw System now allows
Non-Marking Aluminum and GRIT
FACED Dies to be used in conventional CLINCHER Tongs which are not
equipped with CHROMEMASTERS.
These innovations now allow a single
tong and backup assembly to be used
for running normal steel tubulars, drill
pipe, or CRA tubulars. Eliminating
the need for separate tong systems
reduces capital and spare parts requirements for service companies using
the conventional tongs. These mechanical systems will be easier to
maintain and less prone to failure than
old fashioned hydraulic systems to
further reduce operating costs. The
simple mechanical system reduces
operator training and experience requirements when compared to other
systems used with CRA tubulars. The
CLINCHER LOCKJAW Tong and the
CLINCHER Tong dressed with LOWFRICTION Jaws are significantly
lighter in weight than competitive
systems which will reduce operator
fatigue and improve safety. GRIT
FACED Dies enhance job safety by
reducing operator fatigue and eliminating the need to reach inside a tong
and backup to replace the silicon carbide screen cloth at every connection.
GRIT FACED dies can also reduce
overall operating cost by reducing the
time required to run casing and tubing
strings.
CLINCHER GRIT FACED Die technology was recognized at the 1998
Offshore Technology Conference in
Houston, Texas, where Superior
Manufacturing & Hydraulics was presented with a Special Meritorious
Award for Engineering Innovation by
editors of Petroleum Engineer
International.
GRIT FACED Inserts for Slips, Elevators and Safety Clamps
As part of our ongoing program
providing tubular handling innovations to the oil field, SUPERIOR
Manufacturing & Hydraulics is
pleased to announce we are now providing inserts for slips, elevators, and
safety clamps which feature our GRIT
FACE Technology (ref. Figure 5).
This technology, field proven in tong
applications, now provides the industry with handling tool inserts designed
to protect CRA tubing and casing
strings from the hazards associated
with the use of conventional steel
toothed inserts. A combination of
exotic materials used in these new
inserts protect CRA tubulars from
contamination associated with conventional steel inserts.
GRIT FACED inserts are offered to fit
almost all types of tubular handling
tools. We provide our inserts for
manual and power slips/elevators used
to handle tubing, casing, drill pipe and
drill collars. Safety clamp inserts are
available for handling drill collars and
downhole tools. Inserts are also available for manual tongs used with
tubing, casing, and drill pipe.
Figure 5
CLINCHER Die Technology (Ver 8.0 01/11/05)
e-mail: [email protected]
Page 5 of 4
Page 3 - 5
Two different styles of GRIT FACED
inserts are available. One has a cylindrical surface which has been coated
with our grit material. This style insert,
known as a “smooth” insert because it
doesn’t have any teeth, is used to
handle most CRA tubular goods. The
“smooth” insert will accommodate
tubulars who’s OD is coated with
moderate amounts of foreign materials
such as pipe mill coatings. Our insert
style has “teeth” which are coated with
our grit material to protect the tubulars
from iron contamination. The mud
grooves and recesses between the
teeth provide room to accommodate
large amounts of foreign materials
which are often found on the exterior
of tubulars when removed from wells.
To insure maximum effectiveness
during use, both types of inserts must
be periodically inspected and cleaned
of foreign materials using a wire brush.
Our in-house laboratory testing, and
tests performed by an independent
third party have demonstrated the
marks left on tubulars by both of our
insert styles are almost negligible.
While our GRIT FACE insert system
is not totally non-marking, the depth
of the imprint left on the tubular after
the application of very heavy loads is
significantly less than the depth of slip
marks left by conventional inserts.
Smooth style GRIT FACED inserts do
not leave aligned “slip marks” which
are known to reduce mechanical strength
Typ. Pit Depth
0.0025 – 0.003"
and lead to premature corrosion or
fatigue failures in tubular goods.
Figure 6 compares the marks left by
“smooth” GRIT FACED inserts with
standard toothed inserts. Close examination will show it is almost
impossible to distinguish the impressions left by the GRIT FACED
insert from the normal pipe mill
surface imperfections. It is our belief
these results are considerably better
than competitive systems as they are
shallower, are in a random pattern
which reduces stress risers in the
tubulars, and they do not contaminate
the CRA tubing with steel, iron, or
carbon. As an additional benefit, our
GRIT FACE insert system does not
require specially adapted handling
tools so it can be used with almost all
handling tools in use today.
Typ. Pit Depth
0.005 – 0.006"
Figure 6
US and foreign Patents Pending. CLINCHER, CHROMEMASTER, LOCKJAW, LOW-FRICTION and
GRIT FACE are marks of SUPERIOR Manufacturing & Hydraulics.
CLINCHER Die Technology (Ver 8.0 01/11/05)
e-mail: [email protected]
Page 6 of 4
Page 3 - 6
CLINCHER Low-Friction Tong Jaw Technology(1)(4)
Most traditional power tong designs
rely on two opposed jaws to grip the
pipe. These jaws utilize hardened dies
with sharp teeth to penetrate the
surface of the pipe being made up or
broken out. The dies are fixed to the
jaws by means of a spline arrangement(2)
which insures proper alignment and
uniform distribution of radial loads.
The jaws and dies are moved into
contact with the tubular by cam
surfaces machined in the ID of the
ring gear. Tong jaws use a hardened
steel pin and roller system to act as the
interface between the ring gear=s cam
surface and the body of the tong jaw.
The initial jaw assembly movement
from the retracted position to the
initial contact position is caused by the
tong brake retarding movement of the
cage plate relative to the ring gear.
The braking force acting on a
relatively low (typically between 2 1/2
to 10 degrees) cam angle generates the
radial load which causes the tong dies
to overcome internal jaw system
friction and to initially penetrate the
surface of the pipe. If the initial die
penetration is adequate, additional
torque and die penetration can be
developed as torque within the joint
increases. If die penetration is inadequate, the die teeth will begin to shear
away the surface of the pipe as the
dies slip around the OD of the tubular.
on oversized pipe or crush undersized
pipe. Therefore, CLINCHER Low
Friction Jaws may not be used in any
other manufacturer=s tongs.
CLINCHER Non-Marking Aluminum
Dies are machined with a smooth face.
The torque they develop is a function
of the radial load applied to the die by
the cam and the coefficient of friction
between pipe and die. Standard tongs
available to the oil industry today do
not develop enough radial load to
overcome internal jaw system friction
and leave enough radial load to allow
non-marking
dies
to
function
effectively. Since initial radial load is
developed as a function of braking
force in combination with relatively
low cam angle, one might consider
reducing the cam angle to increase the
radial load. Unfortunately, such modifications can cause the tong to develop
so much radial load that the jaws crush
tubulars at low to moderate torques.
Very shallow angles can also cause
the tong to lock on the pipe or induce
failures of jaw pins, rollers or ring
gears. Increasing braking force is not
practical as it reduces tong efficiency,
causes overheating and premature
wear.
While cam angles vary between tongs
intended for different applications;
i.e., small tubulars versus large
tubulars, or low torque applications
versus high torque applications, it is
important to note the cam angle must
be constant over the tong=s entire
effective gripping ranges.
The
CLINCHER Constant Cam Angle
System(3) guarantees the radial loads
are adequate regardless of whether the
tubular is undersized, is on size, or is
oversized. Competitive tong systems
utilize cam systems which can provide
the correct angle for only a single
tubular. Since the angle can only be
correct for one size, the jaws may slip
P:\Manuals\Equip Manuals\_Tech Docs\Low Friction Jaw Tech rev3.doc
March 10, 2006
The CLINCHER Low-Friction Jaw
Assembly(1)(4) attacks the problem of
inadequate radial force by reducing
the friction between the jaw pin and
roller using a special friction reducing
bushing. This simple concept allows
the radial forces generated by the cam
system in standard CLINCHER tongs
to be transferred more efficiently.
Greater radial loads enable NonMarking Aluminum Dies to get the
Ainitial frictional bite@ required to take
torques up to values required to make
up and break out high torque tubular
connections.
Low-Friction Jaws
allow standard CLINCHER power
tongs to be readily converted into
tongs capable of handling CRA
tubulars using non-marking dies.
No special tools, other than the
jaws, are required.
No special
operator training is required. Since
standard tongs are used, tongs are
lighter and easier to handle, jobs
run faster with less operator fatigue
to reduce costs and increase safety.
(1)
US Patent Number 5,819,605;
US Patent Number 4,649,777;
(3)
US Patent Number 4,986,146;
(4)
1998 Winner of Petroleum Engineering
International=s Special Meritorious Award
for Engineering
(2)
LOW FRICTION
JAW PIN
GARLOCK BUSHING
(PRESSED INTO ROLLER)
TOP
JAW CLIP
LOW FRICTION
JAW ROLLER
LOW FRICTION JAW
BOTTOM
JAW CLIP
4225 Highway 90, East
Broussard, Louisiana 70518
Phone: (337) 837-8847
Fax: (337) 837-8839
www.superior-manf.com
Page 3 - 7
CLINCHER Grit Faced Die and Insert Coating
The CLINCHER Grit Faced die and insert coating system combines the use of extremely hard
grit particles, high strength corrosion resistant brazing materials and application processes which
insure optimum dimensional control.
Tungsten Carbide grit particles are graded by size and shape to provide uniform granules with
desired geometry. Different particle sizes are selected based upon application. Coatings on
smooth faced dies use larger particles than the coatings applied to dies which have machined
teeth. Coating thicknesses for small particles are approximately 0.010". Thicknesses for large
particle coatings is approximately 0.025" thick.
Use of grade C-4 tungsten carbide refractory material controls the chemistry of the grit particles
to prevent iron contamination. The Tungsten Carbide particles are metallurgically bonded to the
die substrate using a high strength Nickel/Chrome brazing compound containing 83% nickel,
6.8% Chromium, 4.2% Silicon and 3% Boron. The remaining 3% balance of materials consists
of a variety of trace elements including a small percentage of iron. It is important to note these
materials are alloyed together at extremely high temperatures so there is no free iron available to
contaminate CRA tubulars.
The Tungsten Carbide grit particles and brazing material are applied in controlled quantities
using proprietary dispersion processes which align the particles and insure uniform distribution
of materials in a single layer. The quantities of materials used insure the particles are securely
fixed to the substrate but left with enough exposed surface to precisely grip oilfield tubulars.
Brazing of the components takes place at 1800 degrees Fahrenheit in a controlled atmosphere
furnace where temperatures and times are precisely controlled. Mechanical properties of the die
or insert substrate are controlled using a combination of pre and post-brazing heat treatment
processes.
Covered under US Patent No’s 6,378,399 & 6,755,097
Other US and foreign patents pending
P:\Manuals\Equip Manuals\_Tech Docs\Dies\Grit Face Process rev4.doc
April 5, 2006
Page 3 - 8
4225 Highway 90, East
Broussard, Louisiana 70518
Phone: (337) 837-8847
Fax: (337) 837-8839
www.superior-manf.com
OPERATIONAL INSTRUCTIONS
SUSPENSION
Hydraulic Lines
A) Tong should be hung by a 7/8" IWRC minimum O.D.
wire cable with a 31 ton minimum breaking strength. It
should be hung as close to the center of the drill rotary
without interfering with operation of drill string and lifting
equipment. It is recommended the operator make use of
the Clincher Lift Cylinder. The Clincher Lift Cylinder
incorporates a hydraulic cylinder and manual lift spring.
The hydraulic cylinder portion is used to assist in the
raising and lowering of the tong and backup while the
spring allows for movement during make-up and breakout.
A) Be sure all power to unit is off and power unit itself is
shut down.
WARNING: The suspension system must allow the
tong to easily move down a distance equivalent to the
thread make-up length. If significant resistance is
encountered the suspension system may be subject to
load which could cause its failure, damage equipment,
or expose personnel to severe or fatal hazards.
B) Assure that tong is suspended in level manner. Both tong
and the backup must be level at the point they contact the
tubular. Using adjustment screws and slots in rigid hanger
assembly, adjust tong so that it hangs level on horizontal
axis and is parallel to tubular on vertical axis.
C) Make certain that floor space is adequate to maneuver
tong on and off pipe. The space must be clear of
obstructions to allow safe and unrestricted operation.
D) Attach 1" IWRC minimum wire cable with a 51.7 ton
minimum breaking strength or better, as a tong back up
line at 90 degree angle to tong and at same level to insure
proper readout of torque indicator. You should always
have snubbing line attached. Use of a integral hydraulic
backup is safer than manual backup, but operators should
maintain additional safety of snubbing line to prevent
injury in case of hydraulic failure or the failure of operator
to have backup properly applied to tubular. This
equipment generates extreme torque and should be used
with caution.
C) Install hydraulic supply hose and hydraulic return hose
between tong and hydraulic power unit. Be advised that
the standard installation on Clincher tong calls for 1"
Hydraulic Supply hose and 1-1/4" Hydraulic Return hose.
The differing hoses eliminates the possibility attaching
the wrong hose to the wrong outlet while at the same time
reducing back pressure in your hydraulic system.
Tong Operation
A. Insure proper dies are installed. Connect hydraulic hoses,
verify reservoir is full of hydraulic fluid and insure suction
valve is open.
B. Open bypass valve to hydraulic system, then check to
make sure all hose connections are secure and hydraulic
system is free of leaks.
C. Be certain door is completely closed before operation to
insure safe operation. The Clincher Tong is equipped
with a door switch, which prevents operation of the tong
when door is even partially open.
D. Use power unit to start up procedure as outlined in your
owners manual supplied by the manufacturer.
E. In the event hoses are not tightened securely, possible
failures to hydraulic system can occur.
1) If pressure supply hoses are restricted or flow is
blocked, pressure will increase in the hydraulic power
unit, resulting in increased RPM in the power unit.
2) If return line hoses are restricted or flow is blocked,
pressure will increase in the hydraulic power unit and
the hydraulic system to the tong itself, resulting in the
tong motor increasing to maximum pressure and
possible motor seal failure.
F.
Jaw and Die Installation
A) Be sure all power to unit is off and power unit itself is
shut down.
B) Determine O.D. of tubular to be made-up or broken-out.
Use proper dies to bite O.D. of tubular and insert as
follows: Remove sliding head jaws (2) from cage plate
pockets. Insert one jaw with proper dies into pocket
assuring the jaw roller pin faces upward. Repeat
procedure for other side.
SUPERIOR Manufacturing & Hydraulics, Inc.
7 5/8" CLINCHER CHROMEMASTER
Revision: 05/06
B) Always inspect hoses prior to installation for abrasions,
kinks, and other visible damage.
Page 4 - 1
After completion of A through E restart the power unit
and allow engine to idle for approximately 10 minutes.
Slowly close bypass valve to allow circulation of
hydraulic oil through tong and hoses. Place shifting lever
into low and rotate several times. Repeat in reverse. If
correct jaw-die combination is installed, the unit is now
ready to run pipe.
G. Adjust height of tong to proper height, using the control
valve located all the way to the right of rear valve bank
assembly.
OPERATIONAL INSTRUCTIONS
H. Stand in the normal operators position, insert the locking
pin into the rear cage plate hole (on operators side). This
pin allows ring gear to rotate clockwise (make-up) and
engage the cam to close jaws on pipe.
K. After correct amount of torque specific to that connection
has been applied, release tong jaws by pulling back on
motor control lever until jaws release and throat in cage
plate is aligned with door opening. Open door.
I.
L. Release backup by pulling back on right control lever on
rear valve bank assembly until backup jaws are
completely retracted.
J.
Swing tong and backup onto tubing, making sure to align
tubing on rear jaw of backup. Close backup jaws by
pushing middle control lever forward. The design of the
Clincher Integral Backup centers pipe in the backup and
tong. Close tong door.
Rotate ring gear clockwise by pushing motor control lever
on the front valve bank assembly forward until jaws lock
on pipe and continue to rotate until desired amount or
torque is applied.
M. High and low gear is adjusted by use of shifting handle
PN 45142, located to the left side of the shifting housing.
With the lever in the upwards position the tong is in high
gear. With the shifting lever in the downward position,
the tong is in low gear.
TYPICAL SNUB LINE INSTALLATION
NOTE: SNUB LINE IS PERPENDICULAR
TO AXIS OF TONG
TYPICAL TONG INSTALLATION
NOTE: TONG IS PERPENDICULAR
TO TUBING
CAUTION: DO NOT operate cylinders on CLINCHER
Backup or Chromemaster without installing proper sized dies
or without installing tubing in unit.
1.
Refer to Tong Operating Instructions to insure
Hydraulic Power Unit is properly rigged up for level
operation. Insure load cell and torque gauge are
properly filled with fluid. Check hydraulic connections
to tong and backup assembly. Set Power Unit’s
pressure relief valve to 2,500 psi for normal
applications. Note: This setting can be increased to a
maximum of 3,000 psi for applications requiring high
makeup or breakout torques.
SUPERIOR Manufacturing & Hydraulics, Inc.
7 5/8" CLINCHER CHROMEMASTER
Revision: 05/06
Page 4 - 2
2.
IMPORTANT NOTE: Insure Chromemaster push
cylinder rod is fully retracted. The push cylinder is
located on bottom sides of CLE7625-02 or equivalent 7 5/8"
Tong. Refer to Step 11 for retraction instructions.
Failure to retract rod before rotating will result in severe
equipment damage.
Rotate Chromemaster to align arrows on Tong and
Chromemaster head by manipulating tong directional
control valve. IMPORTANT NOTE: These items must
be aligned to insure proper operation and to avoid
severe equipment damage when the Chromemaster push
cylinder is extended.
OPERATIONAL INSTRUCTIONS
3.
Pull up Chromemaster latch handle to unlock Chromemaster swing jaws. Spread both jaws to their maximum
open position. Open tong door to its fully open position.
4.
Insure both backup cylinders (a.k.a. front jaws) are fully
retracted by manipulating backup directional control
valve.
5.
Adjust height of tong and backup assembly to straddle
tubing coupling by manipulating lift cylinder directional
control valve.
6.
Swing tong and backup assembly with Chromemaster
onto pipe.
7.
Close Chromemaster Swing Jaws and insure Chromemaster latch handle drops down into its fully engaged
position.
Close tong door. Note: The tong door incorporates an
interlock system, which prevents the hydraulic system
from developing significant pressure if the tong door is
in the open position. CAUTION: Severe personnel
hazards and equipment damage will result if the
interlock system is deactivated and the tong is operated.
8.
Close both valves located on the Chromemaster head.
9.
Close the Backup jaws by manipulating backup
directional control valve. Monitor backup pressure
gauge to insure pressure is at a minimum of 2,500 psi.
Note: Applications requiring extremely high torque for
makeup/breakout, may require higher pressures. Do not
exceed 3,000 psi maximum operating pressure.
In extreme high torque applications it may be necessary
to install silicon carbide paper between aluminum dies
and tubing in the Clincher backup. One piece is
required for each aluminum jaw. Sheets should be
folded along one edge to allow it to be hooked over
edge of dies. The sheets of silicon carbide paper should
be visually inspected after each joint and replaced when
torn or worn.
10.
11.
Insure proper alignment of Chromemaster and Tong.
IMPORTANT NOTE: Severe equipment damage will
result if the Chromemaster push cylinder is actuated
when incorrectly aligned.
Insure both valves on the Chromemaster head are in the
closed and block position.
For applications using the CLE7625 or equivalent 7
5/8" Tong, activate Chromemaster to grip pipe by
manipulating Chromemaster directional control valve.
Operating this valve causes the Chromemaster push
cylinder rod (located on the bottom side of the tong) to
SUPERIOR Manufacturing & Hydraulics, Inc.
7 5/8" CLINCHER CHROMEMASTER
Revision: 05/06
Page 4 - 3
operate the Chromemaster pump (located opposite the
push cylinder), which pressurizes the Chromemaster
hydraulic system. Pushing the handle away from the
operator will extend the push cylinder rod, pulling the
handle toward the operator will retract the push cylinder
rod. Repeat these operations as many times as required
to reach the desired operating pressure range of 4,200 to
4,500 psi. Note: A pressure reducing valve which is
located near the push cylinder may require adjustment to
insure proper operating pressures are achieved.
IMPORTANT NOTE: Insure last action taken fully
retracts push cylinder rod. Failure to retract rod will
result in severe equipment damage.
In extreme high torque applications it may be necessary
to install silicon carbide paper between aluminum dies
and tubing in the Chromemaster. One piece is required
for each aluminum jaw. Sheets should be folded along
one edge to allow it to be hooked over edge of dies.
The sheets of silicon carbide paper should be visually
inspected after each joint and replaced when torn or
worn.
12.
Select tong gear required and rotate tong to
makeup/breakout tubular joint as required by
manipulating tong directional control valve. Refer to
Tong Operating Manual for additional information.
13.
Release tong directional control valve after reaching
desired makeup torque or breaking out joint.
14.
Disengage Chromemaster jaw by opening either one of
the two valves located on the Chromemaster Head.
These two valves operate in a parallel circuit and are
provided for the convenience of the operator. Insure the
spring loaded jaw returns to its retracted position.
15.
Rotate Chromemaster to align arrows on Tong and
Chromemaster head by manipulating tong directional
control valve.
16.
Release pressure and retract the Backup cylinders (a.k.a.
front jaws) to their fully open position by manipulating
backup directional control valve.
17.
Open Chromemaster swing jaws by pulling up
Chromemaster latch handle to unlock Chromemaster
swing jaws. Spread both jaws to their maximum open
position. Open tong door to its fully open position.
18.
Swing tong away from pipe to prepare for next joint.
MAINTENANCE INSTRUCTIONS
Clincher recommends that owners of Clincher Hydraulic
Power Tongs, Backups, Chromemasters and accessories adapt
a regularly scheduled maintenance program. Implementation
of this type of program offers several benefits. First you
increase the life of your equipment, secondly, you may find a
problem before it escalates to a costly repair or down time on
the job, and most importantly, prevent injury to operating
personnel.
A major inspection (described at the end of this section)
should be carried out if equipment is suspected to have been
damaged during transit or is to be mobilized to a remote
location where maintenance operations are difficult to carry
out.
Routine Maintenance
Cleaning - Upon return from each and every job:
A) Pre-wash unit to remove majority of dirt and grease build
up as to allow removal of dies, and inspection of overall
condition of unit.
B) Remove and inspect dies from tong and backup. Note any
missing or damaged die retainers, and or die retainer
bolts.
C) Remove side jaws from tong Chromemaster and inspect
side jaw for missing or broken parts, damaged splines,
broken ears (locking hooks on front portion of side jaws.)
D) Clean and inspect side jaws and jaw pins for damage or
excessive wear (cracks, breakage, and uneven wear
patterns). Reassemble jaw sections replacing any
damaged parts. Lubricate pins and reinstall in tong.
E) Inspect position of the handle and its securing set screw
on the Chromemaster Bleeder Valve CM4556. (See Illustration of Maintenance Instructions.) If evidence of
packing leakage is observed, the packing nut should be
tightened using the procedures shown on the illustration.
If valve continues to leak after adjustment, it should be
replaced.
F) Clean and inspect backup operating cylinder. Insure
spline area is free from damage and any rust or dirt is
removed. Replace any missing or damaged die retainer
clips and die retainer bolts.
G) Inspect all hoses for wear, replace as necessary.
H) Inspect hanger assembly to assure all parts are returned
and in operating condition. (i.e. H-Plates, spring, leg
springs, leg spring caps and pins.)
I)
Replace jaw and pins in tong Chromemaster.
SUPERIOR Manufacturing & Hydraulics, Inc.
7 5/8" CLINCHER CHROMEMASTER
Revision: 05/06
Page 5 - 1
J)
Lubricate tong=s cam followers (upper and lower),
dumbell roller shafts (upper and lower zerts), door shaft,
idler gear shafts, pinion gear, and secondary gear
assemblies (Pinion gear and secondary gear assemblies
are sometimes installed with sealed bearings. There is no
provisions to grease these bearings. However, if replaced
by non-sealed bearings, the 1/8" N.P.T. flush plugs should
be replaced with zerts PN 1001 and both gear assemblies
should be added to the regular lubrication schedule.), low
gear housing, and shift housing, and re-pack tong body
cavity. Lubricate zerts in backup plates and pins.
K) Install dies of a size needed for testing purposes, and
attach hydraulic power unit to tong. Before energizing
power unit make certain no one is working on tong or
backup and all tools and parts are removed from the tong
and backup.
L) Insert test mandrel of the exact same size as the dies
which are installed in the tong and backup. Caution:
Testing the function of the backup without the proper size
dies installed and/or without the proper sized mandrel in
place, you risk serious damage to the backup cylinder.
M) After power unit has reached operating R.P.M. and
temperature, operate the backup control valve and close
backup around test mandrel using sufficient flow and
pressure to clamp mandrel and maintain pressure to
backup. (Recommended operating pressure of 2,500 psi)
Backup pressure gauge should match system operating
pressure. After release of control valve you may
experience a slight drop in backup pressure (up to 300
psi) this is normal. If backup pressure drops more than
300 psi within 2 minutes, you may be experiencing a
hydraulic leak.
N) While maintaining pressure on backup visually inspect
hoses, stainless steel lines, fittings, etc., for seepage of
hydraulic fluid. Repair or replace parts causing leaks. If
you see no visible external leaks and your backup is still
losing pressure, there may be an internal leak in the
operating cylinder or load holding valve allowing fluid to
bypass the piston. It is recommended that the backup be
returned to the manufacturer for repair.
O) If at this time your backup is functioning correctly, open
and close unit several time to insure consistent operation.
P) With the proper dies installed in the tong and backup, and
test mandrel locked in the backup, place reversing pin into
the make-up position, set tong into low gear and operate
tong through several cycles of locking, biting and torquing
to required torque. Change reversing pin to break-out
position and repeat. Repeat same procedure in high gear.
Note: Torque developed in high gear is considerably less
than torque developed in low gear.
MAINTENANCE INSTRUCTIONS
Q) Test door interlock system by opening door slightly with
tong rotating. (Remove test mandrel for this procedure.)
The tongs rotation should stop. If tong rotation fails to
stop, close door, cease rotation, deactivate power unit, and
inspect door interlock switch for damage. Insure that
adjustment collar is oriented to allow wheel of door
switch to fit into recess on collar.
Warning: If door switch system is not functioning
properly tong must not be used.
R) Re-inspect tong and backup hydraulic system for leaks.
MAINTENANCE INSTRUCTIONS
CHROMEMASTER BLEEDER VALVE CM4556
WARNING
Failure or improper selection or improper use of the products and / or
systems described herein or related items can cause death, personal
injury and property dam age.
S) If at this time the unit is functioning as intended, replace
all covers and grease splines in tong and backup (side
jaws and back jaws), tape or grease spools on control
valves (to prevent paint from adhering to polished spool
surface), prime and paint unit for storage.
Maximum Allowable W orking Pressure & Tem perature
Valve Body Material
Seat Material
Kel-F
Stainless Steel
6000 psi @ 70EF
Packing Adjustment
(For B-Series Ball Valves with Teflon Stem Packing)
Packing adjustments may be occasionally necessary depending on the
many and varied uses for the valve. It is recommended an adjustm ent
be made shortly after initial installation and just prior to flow startup.
Always consult Superior if questions arise.
Tang on handle
must overlap
tang on body
1. Rem ove the handle by turning the set screw counter-clockwise with
a 3/32" size hex-socket wrench.
2. Tighten the packing nut 1/8 to 1/4 turn or to 70 in-lbs. using a 7/16"
size hex wrench.
3. Re-install the handle and secure by turning the set screw clockwise
and torque to 15 in-lbs.
Valve Connector Make-Up Instructions
FIGURE 1 – General Two-Way Ball Valve Cross-Sectional
Assembly with Standard Teflon Packing
CAUTION: Whenever installing or removing a ball valve from a
system, always place a back-up wrench on the ball valves end
connector. NOT the valve body.
Tube Fitting Connectors
1. Insert the tube into the filter port until the tube bottoms out in the
filter body. Care should be exercised to insure the tube is properly
aligned with the filter body and port.
4225 HWY. 90 EAST
BROUSSARD, LA 70518
(318) 837-8847
THIS DOCUMENT IS THE PROPERTY OF SUPERIOR MANUFACTURING &
HYDRAULICS AND IS CONSIDERED CONFIDENTIAL. THIS INFORMATION
MAY NOT BE USED, DISCLOSED, COPIED, OR REPRODUCED IN ANY
FORM, WITHOUT THE EXPRESS WRITTEN CONSENT OF SUPERIOR
MANUFACTURING & HYDRAULICS.
1
REV. #
LOG #
04/27/06
DATE
REF: P:\Manuals\Equip Manuals\Dwgs\
ILL1089 rev1.wpg
SUPERIOR Manufacturing & Hydraulics, Inc.
7 5/8" CLINCHER CHROMEMASTER
Revision: 05/06
Page 5 - 2
2. Normal m ake-up for port size 4 thru 16 (1/4 thru 1 inch) is 1-1/4 turn
from finger tight.
Please follow the above directions for counting the num ber of turns for
proper fitting make-up. Do not m ake-up the tube fittings by torque or
"feel". Variables such as tubing and fitting tolerances, tube wall
thickness, and lubricity of nut lubricants can result in an improperly
assem bled tube fitting connection.
MAINTENANCE INSTRUCTIONS
Recommended Lubrication Schedule Performed After
Completion Of Each Job
Hydraulic Tong
A)
B)
C)
D)
E)
F)
G)
H)
I)
J)
Cam followers: upper and lower (all)
Dumbell roller shafts: upper and lower (all)
Door shaft: upper and lower
Outboard Idler shafts (2)
Low gear housing
Shift housing
Re-pack tong cavity
Pinion and secondary gear shafts (if sealed bearings have
been replaced by non-sealed bearings)
Jaw rollers and pins: Remove jaw pins and rollers, clean
and lubricate with gear grease
Inspect hydraulic fluid for foreign material and contaminants. Filter or replace. Your must filter or replace entire
system including power unit tank and lines along with
tong to insure all contaminants are removed.
Annual Major Maintenance
Routine preventative maintenance will significantly extend the
operating life of your equipment, reduce operating cost and
avoid downtime. CLINCHER recommends a program of
frequent routine inspection, and if equipment is suspected to
have been damaged during transit or is to be mobilized to a
remote location where maintenance operations are difficult to
carry out, perform the following:
1.
Visually inspect components on power tong or backup
which could possibly have been damaged either during
operation or transit. i.e. Damage to hanger assembly,
hydraulic backup, mounting legs, or hydraulic valve
assembly.
2.
Check test date. Ensure that a load test and inspection
was carried out within the last 9 months.
3.
Check ring gear. Check for any signs of damage or wear.
4.
Remove motor and valve assembly from the tong body.
5.
Check motor seal. Apply hydraulic power, run motor and
visually check motor seal for any signs of leakage.
Check drive gear, high and low pinion gears. Check for
excessive sign of wear on motor gear.
7.
8.
Check condition of control valve spools. Activate valves
and check for any sign of wear, pitting, or scoring of the
chrome surface of spools. If spool is damaged in any
way, the complete section must be changed out. Spools
are not interchangeable.
Check gear selector and shaft. Visually inspect the
shifting shaft for alignment and straightness.
SUPERIOR Manufacturing & Hydraulics, Inc.
7 5/8" CLINCHER CHROMEMASTER
Revision: 05/06
Check Hi/Low Gear assembly. Visually inspect high and
low clutch and gears for any sign of chipped, broken, or
worn teeth.
10. Check dumbell rollers, shafts and bushings. Check for
excess movement on either bearings, bushings, shafts or
dumbells.
11. Check idler gears and center pinion shaft gears and
bearings. Check that there are no signs of worn, chipped,
or broken teeth on idler and center pinion shaft gears.
12. Check door bearings. Visually check excess movement
on bearings at door assembly. If excess movement is
found door must be removed making careful note of
bearing washers positions for reassembly.
13. Check door switch system. Visually check that door
switch valve has sufficient strength to hold door in closed
position. If this is not the case, then repairs are required.
14. Check door safety device. Functionally check tong door
safety switch. Engage low gear, open tong door and push
rotor control lever forward as if to rotate rotor. If safety
device is operational then the rotor will not rotate.
15. Check lifting hanger test date. Check lifting hanger for
damage. Ensure that a load test and inspection was
carried out within the last 9 months.
Inspection and repair
6.
9.
Page 5 - 3
16. Check condition of all hydraulic hoses and fittings.
Visually inspect all hydraulic hoses fitted to the tong and
in the backup for any signs of leaks, cuts, or wear.
17. Remove Chromemaster doors, paint strip, MPI (magnetic
particle inspection). Pull pins out of the Chromemaster
doors after releasing grub screws. Paint strip doors
overnight by placing in paint strip solution. Doors should
then be cleaned and checked before submitting them for
MPI testing. All cracks should be noted on the service
sheet. Replace doors using grease on pins and ensure
securing devices are fitted to the hinge pins.
18. Check Chromemaster cam bolts. Ensure that the bolts
which secure the cam lugs on the Chromemaster are tight.
These can be reached from inside the bore of the tool.
19. Check Clincher die retaining lugs on Chromemaster and
tong. Check condition of bottom lugs on Clincher Backup.
These are welded in place and buffed flush, and should
show no signs of damage or cracking. The Chromemaster
door bottom lugs should be checked during MPI of these
items. Ensure all top lugs are present with bolts. Ensure
they are not bent and that the threads are clean, free, and
greased.
20. Check Chromemaster bottom plate bolts. Check that the
bottom plate bolts on the Chrome-master are tight and that
there is no sign of movement of the bottom plate relative
to the top plate. These bolts hold the Chromemaster
together.
MAINTENANCE INSTRUCTIONS
21. Check Chromemaster oil level. Remove the filling/level
plug from the side of the reservoir and fill with hydraulic
oil level with the plug.
29. Check for hydraulic leaks. Once the hydraulic oil has
reached a temperature of approximately 40°C, operate the
backup retract or the lift cylinder while visually checking
all components for oil leaks. i.e. Spool valve assemblies,
hoses, connections and rams in backup.
22. Remove bolts securing Clincher side plates and remove
plates. Steam clean tong and backup ensuring all foreign
material is removed. Take care not to remove lubrication
from tong and backup cylinders.
30. Check case drain oil flow rate. Stall power tong motor at
2000 psi with a flow meter in the case drain line. Measure
the volume of oil flowing from the case drain. The flow
must not exceed 18 liters per minute.
23. Remove retaining bolts at the back of Clincher hydraulic
rams (4 total) and check. They should be free from
damage, cracks and bends. Replace with grease and
ensure they are secure and sufficient threads engage into
the nuts.
31. Lubricate tong, backup and chromemaster according to
maintenance schedule preceding this section.
32. Paint, remembering to mask off surfaces not intending to
paint with grease or masking tape.
24. Function test tong ensuring turns counter works. Operate
the tong and record the maximum torques in both high and
low gears. Ensure turns counter (if installed) registers
correct number of turns per revolution.
33. Complete dated inspection report giving details of all
duties performed along with complete list of items
replaced.
25. Check front and rear legs for clearance. Fit torque gauge
to backup. Connect tong to hydraulic power supply.
Position suitable pup-joint in tong and backup. With
maximum torque applied in both directions, visually
check that there is sufficient clearance between the front
and rear legs of the tong and the backup to prevent a false
torque reading. Check that the tong and backup are
correctly aligned with full torque applied and check that
the break out bar fitted is the proper length and does not
give false torque readings. The number of the tong should
be stamped on the break out bar.
DUᓼ BEARING DRY WEAR PROCESS
26. Check Chromemaster ram pressure set to 2,500 psi.
Pressurize Chromemaster head WITH jaws and pipe to
grip. Ensure pressure limiting valve is set to restrict the
maximum pressure available to 2,500 psi.
27. Check Backup pressure control valve. Adjust valve fully
anti-clockwise, then while fully depressing the backup
spool handle, adjust the pressure control valve clockwise
to increase pressure up to 2,000 psi on the backup gauge.
Readjust pressure back down to 1,200 psi. Remove the
pressure and then reapply, ensuring only 1,300 psi is
applied and that the pressure is held.
28. Check lift cylinder valve. Connect lift cylinder to power
tong. If the load valve is operating properly, the tong
should rise smoothly and there should be no sudden
movements. When lift cylinder is half its stroke, the tong
should be left suspended for 2 minutes. The lift cylinder
should not be seen to extend during this period.
SUPERIOR Manufacturing & Hydraulics, Inc.
7 5/8" CLINCHER CHROMEMASTER
Revision: 05/06
1.
2.
3.
1. Running-in completed. Low wear rate starts when up to 10%
of the bronze is exposed.
2. Typical surface appearance when DUᓼ bearing approaches
its half life with 40% to 50% of the bronze exposed.
3. Bronze is beginning to smear near the end of DU=s useful life
as a dry bearing.
Over 75% of the bronze is visible at the surface.
Page 5 - 4
For additional information about DU bearings, please contact
Garlock Bearings Inc,
700 Mid Atlantic Parkway, Thorofare, New Jersey 08086.
(609) 848-3200 FAX: (609) 848-5115
TROUBLESHOOTING
HYDRAULIC SYSTEM
Hydraulic Pump Making Excessive Noise:
Problem
Solution
A)
Restricted or clogged intake line
Clean line, check for contamination.
B)
Contaminated fluid
Flush system, change fluid.
C)
Restricted vent
Clean or replace air vent.
D)
Air in fluid
Check for leaks and be certain fluid suction in tank is well below
hydraulic fluid in reservoir.
E)
Damaged or worn parts
Repair or replace damaged parts, check fluid for contamination.
F)
Excessive RPM
Check PTO, gears, and recommended speed to assure proper
pump is installed for operation.
G)
Increased friction
Make sure pump has been assembled using correct torque valves.
H)
Damaged or worn relief valve.
Replace relief valve.
I)
Damaged or worn check valve.
Replace check valve.
J)
Restricted discharge
Check to make sure relief valve is set to proper pressure.
K)
Valve system restricted
Inspect and repair or replace defective parts, check system for
contamination.
Excessive Wear to Hydraulic Components:
Problem
Solution
A)
Fluid contamination
Flush fluid system, replace with new fluid.
B)
Components misaligned
Inspect and realign.
C)
High operating pressures
Gauge and set to proper pressure.
D)
Exhausted fluid (depletion of additives)
Flush fluid system, replace with new fluid.
E)
Air in fluid
Check for leaks, and be certain fluid suction in tank is well below
hydraulic fluid in reservoir.
F)
Shortened bearing life
Check alignment, insure proper lubrication to non-sealed
bearings.
Slow Tong Speed:
Problem
Solution
A)
Restricted supply line
Clear supply line and check intake on reservoir.
B)
Low fluid level
Add fluid to proper volume.
C)
Air leak
Locate and repair leak.
D)
Pump speed insufficient
Assure proper pump speed for application.
E)
Damaged or worn equipment
Isolate pump and check pressure to determine whether motor or
pump is defective. Repair or replace defective part.
F)
Pump not primed
Check fluid viscosity and restrictions of intake line. Replace
fluid if inadequate for operating temperature.
G)
Low or no flow from supply line
Check to assure couplings are securely fastened.
H)
Hydraulic bypass valve malfunction
Inspect. Adjust unloading pressure.
necessary.
SUPERIOR Manufacturing & Hydraulics, Inc.
7 5/8" CLINCHER CHROMEMASTER
Revision: 05/06
Page 5 - 5
Replace or repair as
TROUBLESHOOTING
HYDRAULIC TONG SYSTEM
Insufficient Torque:
Problem
Solution
A)
Door switch malfunctioning
Check to make sure door is completely closed. Inspect door
switch and dump valve. Replace or repair door switch and/or
dump valve.
B)
Relief valve malfunctioning
Relief set too low, broken valve spring, contamination or
defective seals.
C)
Damaged or worn pump parts
Inspect, repair, or replace.
D)
Slow pump speed
Assure proper pump speed for application.
E)
Improper system fluid
Check fluid viscosity and replace fluid if inadequate for
operating temperature.
F)
Directional control valve set improperly
Check relief and directional control valve. Neutral should return
slightly to reservoir.
G)
Damage tong motor
Inspect, repair, or replace.
H)
Restriction of supply line, excessive back pressure
Check to assure couplings are securely fastened.
I)
Defective gauge or load cell
Inspect, repair, or replace. Assure unit has been calibrated to
proper arm length. NOTE: When using Clincher integral
backup system, it is the length of backup arm, NOT the tong arm
length.
Difficulty Shifting Gears:
Problem
Solution
A)
Broken key in shifting yoke
Inspect and replace key stock in shifting yoke.
B)
Worn or damaged shifting yoke pins
Inspect and replace broken or worn pins.
C)
Insufficient lubrication
Pump grease into both zerts located on shift housing.
D)
Detent ball bearing spring set too tight
Inspect and relieve pressure by adjusting set screw/spring
plunger on shifting gear PN 55084-02.
Failure to Grip Tubulars:
Problem
Solution
A)
Jaws move out from neutral, but fail to penetrate
pipe. Tong not perpendicular.
Inspect die size and replace with correct dies for pipe. Wrong
size dies for tubulars. Assure suspension of tong is perpendicular to tubulars. Adjust hanger as necessary.
B)
Jaws fail to move out of neutral. Brake band not
tight enough, faulty cam followers, rust debris or
damage to jaws.
Inspect for excessive wear on brake band. Inspect and replace
defective cam followers. Remove rust and debris from jaws, and
jaw pockets. Inspect jaw rollers and pins for wear, flats, and
lubrication. Repair, replace, and lubricate as needed.
C)
Tong will not release from tubular. Brake band
not tight enough, defective cam followers in cage
plate, insufficient lubrication to jaw pin and roller.
Inspect for excessive wear on brake band. Inspect and replace
defective cam followers. Remove rust and debris from jaws, and
jaw pockets. Inspect jaw rollers and pins for wear, flats, and
lubrication. Repair, replace, and lubricate as needed.
D)
Tong motor runs but ring gear does not rotate.
Broken gears or defective shift in hydraulic tongs
system.
Inspect and replace defective gears. Inspect and repair or replace
defective shifting parts.
SUPERIOR Manufacturing & Hydraulics, Inc.
7 5/8" CLINCHER CHROMEMASTER
Revision: 05/06
Page 5 - 6
TROUBLESHOOTING
HYDRAULIC TONG SYSTEM
Failure to Grip Tubulars:
Problem
Solution
E)
Tong binds under light load. Worn or damaged
cam followers, dumbell roller bearing, or idler
bearing.
Inspect and replace defective parts.
F)
Ring gear rotates while control lever is in neutral.
Replace control valve.
G)
Shift will not stay in set position. Lost spring
plunger.
Replace spring plunger.
H)
Hydraulic fluid leaking from motor. Damaged or
worn motor shaft seal.
Replace motor shaft seal.
I)
Chromemaster not holding pressure. Bleeder
Valve set screw which retains the handle loosens,
allowing the handle to move until no overlap
exists between the tang on the handle and the tang
on the valve body. Without contact between the
tangs, the operator can not properly position the
ball valve in the closed position.
Improperly maintained bleeder valve. Follow Maintenance
Instructions for Chromemaster Bleeder Valve CM4556.
J)
Chromemaster clamping cylinder fails to retract.
Remove and clean exterior of cylinder and recess where cylinder
operates to remove any rust or dirt. Lubricate with clean grease.
If everything looks good when you examine the cylinder and
recess, you should disassemble the cylinder and check for
internal damage and/or seal swelling. Seal swelling is the most
likely cause of the problem. If the cylinder continues to fail to
retract, replace the springs with new ones. If the cylinder
continues to fail to retract, check for restrictions in the hydraulic
return lines. Check that the operation of the releasing valve is
correct. If the handle is loose, the valve may not fully open
which would restrict the flow.
HYDRAULIC BACKUP SYSTEM
Failure to hold tubulars:
Problem
Solution
A)
Incorrect die for size tubular
Check pipe OD and match die size to pipe OD.
B)
Dies have material compacted in tooth area; worn
teeth.
Clean dies with wire brush and inspect. Replace with new dies if
necessary.
C)
Power unit pressure set incorrectly
Inspect relief valve on power unit to make sure enough system
pressure is being delivered to backup.
D)
Counter balance valve not holding pressure
Remove side plates on backup. Bench test and replace the
defective counter balance valve.
E)
Internal leakage in backup cylinder
Disconnect lines and bench test cylinder. Repair or replace as
necessary.
F)
Jaws will not retract. Counter balance valve is
stuck.
Replace counter balance valve.
G)
External leakage of cylinder
Repair or replace cylinder.
H)
Control valve set to neutral, but jaws extend.
Inspect control valve for damage and/or incorrect spool. Repair
or replace as necessary.
SUPERIOR Manufacturing & Hydraulics, Inc.
7 5/8" CLINCHER CHROMEMASTER
Revision: 05/06
Page 5 - 7
SECTION 6
SPARE PARTS RECOMMENDATIONS
Part Number
Quantity
Description
12501437
1
Seal for Rineer Motor
1001
8
1/8 NPT Zerts
SLV1000-04
1
N. C. Door Valve Assembly
45072
1
Shifting Yoke
CM7656
6
CM Door Jaw Clips & Cylinder Clips
1040-A
20
Clip Bolts 3/8"-16 x 3/4" SHCS
25001375
1
Seal for Pump CM7626
ASAP2312
1
Seal Kit for CM7621 Clamp Cylinder
CM4551
1
Check Valve (Cartridge CKCA-XAN)
CLE1209-B
1
Latch Pin Handle
1028
1
3/8"-16 x 1/4" Set Screw
CM7603-A
1
Latch Pin
CM7649
1
Latch Catch
CM7601-A
1
Shank
CM7602-A
1
Door Spring
CM7651
1
Plunger
CM7653
1
Compression Spring
CM4020
1
Filter SS-6TF2-LE
1651
1
Pressure Gauge BAC-5M-25
CM4554
2
Check Valve
CM7656-01
3
Backup Die Clip
DVG35-HMRV
1
Relief Cartridge
SUPERIOR Manufacturing & Hydraulics, Inc.
7 5/8" CLINCHER CHROMEMASTER
Revision: 05/06
Page 6 - 1
SECTION 7
CHROMEMASTER ILLUSTRATIONS
7 5/8" CHROMEMASTER ASSEMBLY (Assembly No. CM7625) ............................................................................... 7 - 3
7 5/8" CHROMEMASTER ASSEMBLY FOR ECKEL TONG (Assembly No. CM7625-E) ......................................... 7 - 4
7 5/8" CHROMEMASTER ASSEMBLY FOR FARR TONG (Assembly No.’s CM7625-F & CM7625F-03) .............. 7 - 5
7 5/8" CHROMEMASTER ASSEMBLY FOR FARR TONG (Assembly No. CM7625F-02)........................................ 7 - 6
CYLINDER ASSEMBLY (Assembly No. CM7621) ....................................................................................................... 7 - 7
PUMP CYLINDER ASSEMBLY (Assembly No. CM7626) ........................................................................................... 7 - 8
LATCH ASSEMBLY (Assembly No. CM7652).............................................................................................................. 7 - 9
DOOR SET ASSEMBLY (Assembly No. CM7657)........................................................................................................ 7 - 10
CHROMEMASTER INSTALLATION (Sht. 2).............................................................................................................. 7 - 11
CHROMEMASTER INSTALLATION (Sht. 1).............................................................................................................. 7 - 12
FITTINGS & VALVES ILLUSTRATION 7 5/8" CHROMEMASTER (2nd Generation) ............................................. 7 - 13
FITTINGS & VALVES ILLUSTRATION 7 5/8" CHROMEMASTER (1st Generation) .............................................. 7 - 14
SUPERIOR Manufacturing & Hydraulics, Inc.
7 5/8" CLINCHER CHROMEMASTER
Revision: 05/06
Page 7 - 1
SUPERIOR Manufacturing & Hydraulics, Inc.
7 5/8" CLINCHER CHROMEMASTER
Revision: 05/06
Page 7 - 2
Item # Qty. Part Number
Part Description
1
1 CM4582
STRIKE PIN
2
1 CM7645
CM COVER WELDMENT
3
2 CM7618
DOOR PIN
4
1
CM7621
CYLINDER ASSEMBLY
5
6
1
1
CM7626
CM7633
PUMP CYLINDER ASSEMBLY
CYLINDER
7
1
CM7635
PUSH CYLINDER MOUNT
8
1
CM7652
LATCH ASSEMBLY
9
1
CM7657
DOOR SET ASSEMBLY
10
11
12
1
1
2
CM7660-S
CM7661-S
CM7696
CM TOP BODY WELDMENT
TANK WELDMENT
PIVOT PIN RETAINER
13
2
1181
7/8"-9 x 2 1/4" SHCS
14
15
2
2
1182
1103
7/8" HI COLLAR LOCKWASHER
1/2" LOCKWASHER
16
2
1100
1/2"-13 EYE BOLT
17
18
2
1
1001
CM7622
1/8" NPT ZERT
1/4" NPT FILLER BREATHER
12
19
20
1
4
1493
245
3/4" x 1/4" REDUCER BUSHING
1/2"-13 x 3/4" SHCS
3
21
1
1651
GAUGE 0-5000 (NOT SHOWN)
22
4
1027
3/8" LOCKWASHER
23
4
1046
3/8"-16 x 3/4" HHCS
2
15
16
17
10
8
4
22
23
7
1
18
19
21
9
11
6
20
13 14
(USE BLUE LOCTITE)
5
( 1.88 )
7 5/8" CHROMEMASTER
ASSEMBLY
ASSEMBLY NO. CM7625
Page 7 - 3
APPROX. WEIGHT (LBS.) = 600
4225 HWY. 90 EAST
BROUSSARD, LA 70518
(318) 837-8847
THIS DOCUMENT IS THE PROPERTY OF SUPERIOR MANUFACTURING &
HYDRAULICS AND IS CONSIDERED CONFIDENTIAL. THIS INFORMATION
MAY NOT BE USED, DISCLOSED, COPIED, OR REPRODUCED IN ANY
FORM, WITHOUT THE EXPRESS WRITTEN CONSENT OF SUPERIOR
MANUFACTURING & HYDRAULICS.
1
REV. #
LOG #
05/08/06
DATE
REF: P:\Manuals\Equip Manuals\Dwgs\
CM7625\Assembly rev1.wpg
Item #
1
2
3
4
5
6
7.1
7.2
8
9
10
11
12
13
14
15
16
17
18
19
20
21
22
23
24
25
Qty.
1
1
2
1
1
1
1
4
1
1
1
1
2
2
2
2
2
2
1
1
4
1
4
4
2
1
Part Number
CM4582
CM7638
CM7618
CM7621
CM7626
CM7633
CME7635
CME7619
CM7652
CM7657
CME7617
CME7621
CM7696
1181
1182
1103
1100
1001
CM7622
1493
245
1651
1027
1046
CM4522-S2
CME7620
Part Description
STRIKE PIN
COVER
DOOR PIN
CYLINDER ASSEMBLY
PUMP CYLINDER ASSEMBLY
CYLINDER
PUSH CYLINDER MOUNT
PUSH CYLINDER MOUNT LEG
LATCH ASSEMBLY
DOOR SET ASSEMBLY
CM TOP BODY WELDMENT
TANK WELDMENT
PIVOT PIN RETAINER
7/8"-9 x 2 1/4" SHCS
7/8" HI COLLAR LOCKWASHER
1/2" LOCKWASHER
1/2"-13 EYE BOLT
1/8" NPT ZERT
1/4" NPT FILLER BREATHER
3/4" x 1/4" REDUCER BUSHING
1/2"-13 x 3/4" SHCS
GAUGE 0-5000 (NOT SHOWN)
3/8" LOCKWASHER
3/8"-16 x 3/4" HHCS
VALVE PROTECTOR
RING GEAR LUG (NOT SHOWN)
12
2
15
16
3
17
24
10
8
4
22
23
7.1
7.2
1
18
19
21
9
11
6
20
(USE BLUE LOCTITE)
13 14
5
( 1.88 )
7 5/8" CHROMEMASTER
ASSEMBLY
FOR ECKEL TONG
ASSEMBLY NO. CM7625-E
APPROX. WEIGHT (LBS.) = 600
4225 HWY. 90 EAST
BROUSSARD, LA 70518
(318) 837-8847
THIS DOCUMENT IS THE PROPERTY OF SUPERIOR MANUFACTURING &
HYDRAULICS AND IS CONSIDERED CONFIDENTIAL. THIS INFORMATION
MAY NOT BE USED, DISCLOSED, COPIED, OR REPRODUCED IN ANY
FORM, WITHOUT THE EXPRESS WRITTEN CONSENT OF SUPERIOR
MANUFACTURING & HYDRAULICS.
Page 7 - 4
REV. #
LOG #
05/08/06
DATE
REF: P:\Manuals\Equip Manuals\Dwgs\
CM7625\CM7625-E Assy.wpg
Item # Qty. Qty.
1
1 1
2
1 1
3
2 2
4
1 1
5
1 1
6
1 1
7.1
1 1
7.2
4 4
8
1 1
9
1 1
10
1 0
10
0 1
11
1 0
11
0 1
12
2 2
13
2 2
14
2 2
15
2 2
16
2 2
17
2 2
18
1 1
19
1 1
20
4 4
21
1 1
22
4 4
23
4 4
Part Number
CM4582
CM7645
CM7618
CM7621
CM7626
CM7633
CMF7635
CMF7619
CM7652
CM7657
CMF7617
CMF7617-01
CMF7621
CMF7621-01
CM7696
1181
1182
1103
1100
1001
CM7622
1493
245
1651
1027
1046
Part Description
STRIKE PIN
CM COVER WELDMENT
DOOR PIN
CYLINDER ASSEMBLY
PUMP CYLINDER ASSEMBLY
CYLINDER
PUSH CYLINDER MOUNT
PUSH CYLINDER MOUNT LEG
LATCH ASSEMBLY
DOOR SET ASSEMBLY
CM TOP BODY WELDMENT
CM TOP BODY WELDMENT
TANK WELDMENT
TANK WELDMENT
PIVOT PIN RETAINER
7/8"-9 x 2 1/4" SHCS
7/8" HI COLLAR LOCKWASHER
1/2" LOCKWASHER
1/2"-13 EYE BOLT
1/8" NPT ZERT
1/4" NPT FILLER BREATHER
3/4" x 1/4" REDUCER BUSHING
1/2"-13 x 3/4" SHCS
GAUGE 0-5000 (NOT SHOWN)
3/8" LOCKWASHER
3/8"-16 x 3/4" HHCS
2
15
12
16
3
17
10
4
22
23
8
7.1
7.2
1
18
19
21
9
11
6
20
13 14
(USE BLUE LOCTITE)
5
( 1.88 )
7 5/8" CHROMEMASTER
ASSEMBLY
FOR FARR TONG
ASSEMBLY NO. CM7625-F
ASSEMBLY NO. CM7625F-03
APPROX. WEIGHT (LBS.) = 600
4225 HWY. 90 EAST
BROUSSARD, LA 70518
(318) 837-8847
THIS DOCUMENT IS THE PROPERTY OF SUPERIOR MANUFACTURING &
HYDRAULICS AND IS CONSIDERED CONFIDENTIAL. THIS INFORMATION
MAY NOT BE USED, DISCLOSED, COPIED, OR REPRODUCED IN ANY
FORM, WITHOUT THE EXPRESS WRITTEN CONSENT OF SUPERIOR
MANUFACTURING & HYDRAULICS.
Page 7 - 5
REV. #
LOG #
05/08/06
DATE
REF: P:\Manuals\Equip Manuals\Dwgs\
CM7625\CM7625-F Assy.wpg
Item #
1
2
3
4
5
6
7
8
9
10
11
12
13
14
15
16
17
18
19
20
21
22
23
Qty.
1
1
2
1
---1
1
1
1
2
2
2
2
2
2
----4
4
Part Number
CM4582
CM5538
CM7618
CM7621
------------CM7652
CM7657
CMF7617-01
CMF7621-S1
CM7696
1181
1182
1103
1100
1001
----------------1027
1046
Part Description
STRIKE PIN
COVER
DOOR PIN
CYLINDER ASSEMBLY
------------LATCH ASSEMBLY
DOOR SET ASSEMBLY
CM TOP BODY WELDMENT
BOTTOM PLATE
PIVOT PIN RETAINER
7/8"-9 x 2 1/4" SHCS
7/8" HI COLLAR LOCKWASHER
1/2" LOCKWASHER
1/2"-13 EYE BOLT
1/8" NPT ZERT
----------------3/8" LOCKWASHER
3/8"-16 x 3/4" HHCS
12
2
15
16
3
17
10
8
4
22
23
1
9
11
13 14
7 5/8" CHROMEMASTER
ASSEMBLY
FOR FARR TONG
ASSEMBLY NO. CM7625F-02
4225 HWY. 90 EAST
BROUSSARD, LA 70518
(318) 837-8847
THIS DOCUMENT IS THE PROPERTY OF SUPERIOR MANUFACTURING &
HYDRAULICS AND IS CONSIDERED CONFIDENTIAL. THIS INFORMATION
MAY NOT BE USED, DISCLOSED, COPIED, OR REPRODUCED IN ANY
FORM, WITHOUT THE EXPRESS WRITTEN CONSENT OF SUPERIOR
MANUFACTURING & HYDRAULICS.
Page 7 - 6
REV. #
LOG #
05/08/06
DATE
REF: P:\Manuals\Equip Manuals\Dwgs\
CM7625\CM7625-F-02 Assy.wpg
( .500 )
Item #
1
WEAR BAND
P/N: W42500750
POLYPACK SEAL
4 1/4" x 5" x 3/8"
P/N: 37504250
Qty.
Part Number
1 CM7606
Part Description
CYLINDER HOUSING
2
2
CM7656
DIE CLIP
3
1
CM7615
GLAND
4
--
1 CM7613
-- -----
PISTON ROD
-----
6
4
1005-A
3/16" x 1/2" ROLL PIN
7
4
1040-A
3/8"-16 x 3/4" SHCS
8
9
4
1
1153
ASAP2312
5/8"-11 x 1" SHCS
SEAL KIT
10
11
4
2
CM7608
240
EXTENSION SPRING
3/8"-16 x 2 1/2" SHCS
6
NYLON WEAR BAND
P/N: W5000500
8
SEAL KIT ASAP2312 DETAIL
7
2
1
3
4
11
2
7
4225 HWY. 90 EAST
BROUSSARD, LA 70518
(318) 837-8847
CYLINDER ASSEMBLY
THIS DOCUMENT IS THE PROPERTY OF SUPERIOR MANUFACTURING &
HYDRAULICS AND IS CONSIDERED CONFIDENTIAL. THIS INFORMATION
MAY NOT BE USED, DISCLOSED, COPIED, OR REPRODUCED IN ANY
FORM, WITHOUT THE EXPRESS WRITTEN CONSENT OF SUPERIOR
MANUFACTURING & HYDRAULICS.
ASSEMBLY NO. CM7621
Page 7 - 7
REV. #
LOG #
03/28/06
DATE
REF: P:\Manuals\Equip Manuals\Dwgs\
CM7625\CM7621 Cyl.wpg
Item # Qty.
1
1
2
3
Part Number
Part Description
1936
SNAP RING
1
25001375
POLYPACK SEAL
1
CM7627
PUMP HOUSING WELDMENT
4
1
CM7628
INTENSIFIER GLAND
5
1
CM7630
PUMP PLUNGER
6
1
CM7632
SPRING
7
4
175
1/2"-13 x 2 3/4" HHCS
8
4
1103
1/2" LOCKWASHER
3
1
6
5
4
2
3
3
SECTION VIEW
7
5
8
3
PUMP CYLINDER ASSEMBLY
ASSEMBLY NO. CM7626
Page 7 - 8
4225 HWY. 90 EAST
BROUSSARD, LA 70518
(318) 837-8847
THIS DOCUMENT IS THE PROPERTY OF SUPERIOR MANUFACTURING &
HYDRAULICS AND IS CONSIDERED CONFIDENTIAL. THIS INFORMATION
MAY NOT BE USED, DISCLOSED, COPIED, OR REPRODUCED IN ANY
FORM, WITHOUT THE EXPRESS WRITTEN CONSENT OF SUPERIOR
MANUFACTURING & HYDRAULICS.
REV. #
LOG #
03/28/06
DATE
REF: P:\Manuals\Equip Manuals\Dwgs\
CM7625\CM7626 Pump Cyl.wpg
Item # Qty. Part Number
1
1 CM7601-A
2
1 CM7602-A
8
1
Part Description
SHANK
DOOR SPRING
3
1
CM7603-A
DOOR LATCH PIN
4
5
1
1
CM7649
CM7650
CATCH
LATCH HOUSING
6
7
8
1
1
1
CM7651
CM7653
CLE1209-B
PLUNGER
COMPRESSION SPRING
LATCH PIN HANDLE
9
10
11
12
4
2
2
2
1008-B1
1008-B2
1008-B3
1008-C
1/4" HI COLLAR LOCKWASHER
1/4" FLAT WASHER
1/4"-20 x 1/2" HHCS
1/4"-20 x 1/2" SHCS
13
1
1028
3/8"-16 x 1/4" SET SCREW
8
11
13
7
6
10
9
1
6
7
11 10 9
13
4
5
4
5
12 9
12
9
2
2
3
3
SECTION VIEW
LATCH ASSEMBLY
ASSEMBLY NO. CM7652
4225 HWY. 90 EAST
BROUSSARD, LA 70518
(318) 837-8847
THIS DOCUMENT IS THE PROPERTY OF SUPERIOR MANUFACTURING &
HYDRAULICS AND IS CONSIDERED CONFIDENTIAL. THIS INFORMATION
MAY NOT BE USED, DISCLOSED, COPIED, OR REPRODUCED IN ANY
FORM, WITHOUT THE EXPRESS WRITTEN CONSENT OF SUPERIOR
MANUFACTURING & HYDRAULICS.
Page 7 - 9
REV. #
LOG #
04/03/06
DATE
REF: P:\Manuals\Equip Manuals\Dwgs\
CM7625\CM7652 Latch.wpg
Item # Qty. Part Number
Part Description
1
2
1
1
CM7658
CM7659
LEFT DOOR WELDMENT
RIGHT DOOR WELDMENT
3
4
CM7656
DIE CLIP
4
8
1040-A
3/8"-16 x 3/4" SHCS
4
3
4
3
1
3
4
2
3
4
DOOR SET ASSEMBLY
ASSEMBLY NO. CM7657
Page 7 - 10
4225 HWY. 90 EAST
BROUSSARD, LA 70518
(318) 837-8847
THIS DOCUMENT IS THE PROPERTY OF SUPERIOR MANUFACTURING &
HYDRAULICS AND IS CONSIDERED CONFIDENTIAL. THIS INFORMATION
MAY NOT BE USED, DISCLOSED, COPIED, OR REPRODUCED IN ANY
FORM, WITHOUT THE EXPRESS WRITTEN CONSENT OF SUPERIOR
MANUFACTURING & HYDRAULICS.
REV. #
LOG #
03/29/06
DATE
REF: P:\Manuals\Equip Manuals\Dwgs\
CM7625\CM7657 Doors.wpg
4225 HWY. 90 EAST
BROUSSARD, LA 70518
(318) 837-8847
7 5/8" CHROMEMASTER
INSTALLATION
THIS DOCUMENT IS THE PROPERTY OF SUPERIOR MANUFACTURING &
HYDRAULICS AND IS CONSIDERED CONFIDENTIAL. THIS INFORMATION
MAY NOT BE USED, DISCLOSED, COPIED, OR REPRODUCED IN ANY
FORM, WITHOUT THE EXPRESS WRITTEN CONSENT OF SUPERIOR
MANUFACTURING & HYDRAULICS.
Page 7 - 11
REV. #
LOG #
03/29/06
DATE
REF: P:\Manuals\Equip Manuals\Dwgs\
CM7625\Installation sht2.wpg
1.875 [ 47.63 ]
POSITION WHEN CYLINDER
IS FULLY RETRACTED
ILLUSTRATION OF CLINCHER CM7625 INSTALLATION
INTO CLINCHER CLE7625-02
DIMENSIONS ARE IN INCHES [MM].
4225 HWY. 90 EAST
BROUSSARD, LA 70518
(318) 837-8847
7 5/8" CHROMEMASTER INSTALLATION
THIS DOCUMENT IS THE PROPERTY OF SUPERIOR MANUFACTURING &
HYDRAULICS AND IS CONSIDERED CONFIDENTIAL. THIS INFORMATION
MAY NOT BE USED, DISCLOSED, COPIED, OR REPRODUCED IN ANY
FORM, WITHOUT THE EXPRESS WRITTEN CONSENT OF SUPERIOR
MANUFACTURING & HYDRAULICS.
REV. #
LOG #
03/29/06
DATE
REF: P:\Manuals\Equip Manuals\Dwgs\
CM7625\Installation sht1.wpg
NOT SHOWN:
24, 25
15
TANK
MID PLATE
15
13
15
ITEM QTY. PART NUMBER
1
2
3
4
5
6
7
8
9
10
11
12
13
14
15
16
17
18
19
20
21
22
23
24
25
26
21
15
7 22
SUCTION
17
RETURN
16
18
3/8 TUBING
SEE ASSEMBLY 1
ASSEMBLY 1
3/8 TUBING TYP.
3/8 TUBING
15
3
CHROMEMASTER CIRCUIT
INTENSIFIER
PUMP
5
CHROMEMASTER
CYLINDER
19
8
19
13
14
19
2
3
2
1
2
1
6
3
1
1
1
1
2
1
5
1
2
2
4
-1
1
1
1
1
1
1575
1491
1449
CM7633
1486
1457
1450
1595
CM7648
CM4550
CM4551
1651
1599
1563
1570-A
1567
1425-A
CM4556
1578
----1580
CM4554
1429
CM4020
CM4021
CM7654
PART DESCRIPTION
1/4" MNPT x M-TUBE 90E
1/2" x 3/8" REDUCER BUSHING
1/4" STREET EL
CYLINDER
3/8" x 1/4" REDUCER BUSHING
3/8" HEX NIPPLE
3/8" STREET EL
3/8" RUN TEE
3/8" HEX NIPPLE W/ 3/32 ORIFICE
CHECK VALVE
PILOT OPR. CHECK VALVE W/CARTRIDGE
GAUGE 0-5000 PSI
3/8" TEE
1/4" MNPT x 3/8" TUBE BRANCH TEE
3/8" MNPT x 3/8" TUBE ADAPTER
3/8" FNPT x 3/8" M-TUBE ADAPTER
3/8" x 10 1/4" NIPPLE SCH.80 BI
3/8" SS BALL VALVE
3/8" MNPT x 3/8" M-TUBE 90E
----3/8" FNPT x 3/8" FNPT 90E
3/8" CHECK VALVE
3/8" MALE QUICK DISCONNECT
FILTER - SS-6TF2-LE
STRAINER - SS-8F-K4-230
PSI REDUCING VALVE 3/8" NPT PORTS
4
ASSEMBLY 2
3/8 TUBING
12
2
PRESSURE
MID PLATE
7
10
1
8
1
5
9
17
2
3
8
7
11
6
26
23
19
2
7
18
1/4 TUBING
7
7
SEE ASSEMBLY 2
CHROME BACKUP
LIFT
CYLINDER MASTER RETURN
OUTLET RETURN
TONG
RETURN
INLET
OUTLET
CHROME
MASTER
OUTLET
7 5/8" CHROMEMASTER
FITTINGS & VALVES
ND
2
GENERATION
BACKUP
OUTLET
TONG
OUTLET
4225 HWY. 90 EAST
BROUSSARD, LA 70518
(318) 837-8847
THIS DOCUMENT IS THE PROPERTY OF SUPERIOR MANUFACTURING &
HYDRAULICS AND IS CONSIDERED CONFIDENTIAL. THIS INFORMATION
MAY NOT BE USED, DISCLOSED, COPIED, OR REPRODUCED IN ANY
FORM, WITHOUT THE EXPRESS WRITTEN CONSENT OF SUPERIOR
MANUFACTURING & HYDRAULICS.
REV. #
LOG #
05/09/06
DATE
REF: P:\Manuals\Equip Manuals\Dwgs\
CM7625\Fittings 2nd.wpg
ITEM QTY. PART NUMBER
21
15
TANK
MID PLATE
15
13
15
1
2
3
4
5
6
7
8
9
10
11
12
13
14
15
16
17
18
19
20
21
22
23
15
7 22
SUCTION
17
RETURN
16
18
3/8 TUBING
SEE ASSEMBLY 1
ASSEMBLY 1
3/8 TUBING TYP.
3/8 TUBING
15
3
CHROMEMASTER CIRCUIT
INTENSIFIER
PUMP
5
CHROMEMASTER
CYLINDER
19
8
19
13
14
19
2
2
2
1
2
1
5
3
1
1
1
1
2
1
5
1
1
2
4
1
1
1
1
1575
1491
1449
CM7633
1486
1457
1450
1595
CM7648
CM4550
CM4551
1651
1599
1563
1570-A
1567
CM7655
CM4556
1578
1400
1580
CM4554
1429
PART DESCRIPTION
1/4" MNPT x M-TUBE 90E
1/2" x 3/8" REDUCER BUSHING
1/4" STREET EL
CYLINDER
3/8" x 1/4" REDUCER BUSHING
3/8" HEX NIPPLE
3/8" STREET EL
3/8" RUN TEE
3/8" HEX NIPPLE W/ 3/32 ORIFICE
CHECK VALVE
PILOT OPR. CHECK VALVE W/CARTRIDGE
GAUGE 0-5000 PSI
3/8" TEE
1/4" MNPT x 3/8" TUBE BRANCH TEE
3/8" MNPT x 3/8" TUBE ADAPTER
3/8" FNPT x 3/8" M-TUBE ADAPTER
3/8" x 9 1/2" H.P. NIPPLE
3/8" SS BALL VALVE
3/8" MNPT x 3/8" M-TUBE 90E
3/8" x 9 1/2" NIPPLE
3/8" FNPT x 3/8" FNPT 90E
3/8" CHECK VALVE
3/8" MALE QUICK DISCONNECT
4
2
7
2
3
8
1
8
1
5
ASSEMBLY 2
9
3/8 TUBING
12
PRESSURE
MID PLATE
7
11
6
7
23
7
1/4 TUBING
17
10
19
18
SEE ASSEMBLY 2
CHROME BACKUP
LIFT
CYLINDER MASTER RETURN
OUTLET RETURN
TONG
RETURN
CHROME
MASTER
OUTLET
TONG
OUTLET
INLET
7 5/8" CHROMEMASTER
FITTINGS & VALVES
1ST GENERATION
OUTLET
BACKUP
OUTLET
4225 HWY. 90 EAST
BROUSSARD, LA 70518
(318) 837-8847
THIS DOCUMENT IS THE PROPERTY OF SUPERIOR MANUFACTURING &
HYDRAULICS AND IS CONSIDERED CONFIDENTIAL. THIS INFORMATION
MAY NOT BE USED, DISCLOSED, COPIED, OR REPRODUCED IN ANY
FORM, WITHOUT THE EXPRESS WRITTEN CONSENT OF SUPERIOR
MANUFACTURING & HYDRAULICS.
REV. #
LOG #
05/09/06
DATE
REF: P:\Manuals\Equip Manuals\Dwgs\
CM7625\Fittings 2nd.wpg
SECTION 8
VALVE TECHNICAL DATA
To request copy of Valve Technical
Data, please contact:
Superior Manufacturing & Hydraulics
4225 Hwy. 90 East
Broussard, LA 70518
Phone: 337-837-8847
Fax: 337-837-8839
www.superior-manf.com
SUPERIOR Manufacturing & Hydraulics, Inc.
7 5/8" CLINCHER CHROMEMASTER
Revision: 05/06
Page 8 - 1