1
Toyota Front Axle Rebuild
http://www.4crawler.com/4x4/CheapTricks/AxleRebuild.shtml#TearDown
The important point is that there are many techniques to try, if one doesn't work, try another...
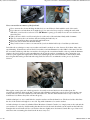
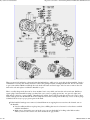
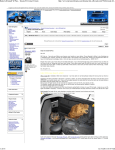
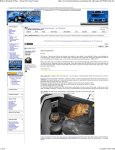
Remove all 6 cone washers.
Remove the lock ring from the end of the axle shaft.
Pull the hub body off .
Beat the tabs of the lock washer back that are holding the outer spindle nut in place.
Remove the outer spindle nut.
Remove the lock washer.
Remove the inner spindle nut.
Grab the brake rotor firmly and just pull the whole assembly off the spindle and trying not to dump the
outer bearing out on the ground when it comes off the spindle.
Remove the outer bearing from the hub and the washer that presses against the outer bearing.
A seal puller helps to remove the seal that holds the inner bearing in.
Another option is to turn the hub upside down and tap the bearing/seal out the back side. Be careful doing
this if you're planning on re-using that bearing as you can damage it easily.
Now that you've the hub completely disassembled. It's time to get the races out of the hub body for the bearings
you want to replace. I use a brass bar. It's sort of tricky getting those races out since there isn't a very large
surface of the race to hit on. Just hit a little on this side, a little on that, side, going back and forth and it'll come
out, but definitely use a brass *something*, not steel!
Remove the spindle and remove it and the seals and gaskets behind it.
Take careful note of the order of the parts for subsequent reassembly.
Now the Birfield joint can be removed, if needed:
Line up the flats of the Birfield joint with the knuckle bearings and pull it out along with the inner
axle.
Remove the cotter pins and loosen the nuts on the tie rod ends, just until the nut is at the top of the stud.
Now, use your favorite tie rod pulling technique, BFH, pickle fork, or mine is a propane torch, heat the
stud until the opposite side just starts to smoke, put down the torch, grab the hammer and a light tap
should pop the tie rod loose.
Remove whatever other steering linkage, like drag links, etc. from the steering arms.
Next, remove the nuts holding the upper steering arm and lower bearing caps and...
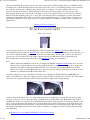
Cone washer encounters of the second kind:
Bigger washers, similar technique as the ones on the hubs, 4 on top, 4 below.
Use a hammer to loosen the steering arm from the knuckle bearing (hit up where the tie rod was
connected). Once loose a flat chisel can help lift it evenly.
Use a long brass punch to pop the lower bearing cap off from above.
If the trunion or knuckle bearings are being replaced, use a long punch to pop them out the the seats
in the steering knuckle.
There are two small semi-circular notches in the seat where the tip of a punch can reach the inner lip
of the race.
If you'll be replacing the bearing, use a steel punch on the race and tap it out with a hammer,
alternating side to side.
Remove the inner oil seal, you'll be replacing it anyway (you did buy a pair, right?)
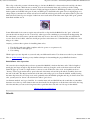
So, what do you do with that big, greasy Birfield/axle assembly. You really need to clean it well and the best
way to do that is to separate the axle and Birfield. A large metal tube, long enough for the inner axle to slide into
and small enough to contact the Birfield housing works great. Put a rag at the bottom of the tube (to prevent
damaging the splines when it pops loose), drop the inner axle into the tube and slam the whole Birfield assembly
onto the tube until the inner wire clip breaks and lets the inner axle drop out.
Then, clean that sucker out really well. I used a parts washer and left the solvent pump circulate solvent inside
the housing for an hour of so, to dissolve every trace of crud in there. Then dry it off and use a blast of brake
cleaner to get the solvent residue off. Refill the joint with CV Joint grease, its specially formulated for CV
joints, of which the Birfield is a variety.
3 of 10
2007/07/20 08:32 AM