1
Recall Campaign
November 2001
FL383A-D
(NHTSA 00V-246.001)
WARNING
Do not heat the arm to remove the tie rod assembly. Doing so may damage the parts. Loss of steering
control may result, possibly causing personal injury or property damage.
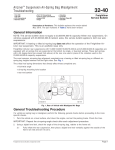
4. If necessary, tap on the tie rod end to loosen it from the tie rod arm. See Fig. 1.
REMOVING THE TIE ROD END FROM THE CROSS TUBE
1. Loosen the bolts and the nuts on the cross-tube clamps. See Fig. 2.
2. Mark the installed position of each tie rod end and count and record the number of threads that appear outside
of the cross tube. See Fig. 3.
WARNING
Do not remove clamps that are welded to the cross tube. Removing welded clamps may damage the cross
tube. Loss of steering control may result, possibly causing personal injury or property damage. If welds
are broken, replace the cross tube.
3. Remove the threaded tie rod ends from the cross tube. See Fig. 4.
4. Inspect the cross tube for damage and replace if necessary.
INSTALLING THE TIE ROD ENDS IN THE CROSS TUBE
CAUTION
Do not bend, weld, or heat front axle components. Doing so will damage the parts.
NOTE: The cross tube has right-hand threads on the right side of the vehicle and left-hand threads on the left
side of the vehicle.
1. Use the thread count as a guide and install the tie rod ends in the threaded cross tube ends to the approximate depth marked during the tie rod assembly removal. Both tie rod ends must be installed in the cross tube
deeper than the end of the cross tube slot. See Fig. 5.
A
1
2
09/11/2000
f461795
A. Tap on tie rod end to loosen and remove.
1. Tie Rod Arm
2. Tie Rod End
Fig. 1, Tie Rod End and Tie Rod Arm
Page 6
09/07/2000
Fig. 2, Loosen the Bolts and Nuts on the
Cross-Tube Clamp
f461796