1
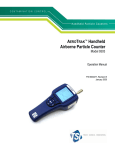
Optical Particle Counters Model 8220 AEROTRAK Handheld Optical Particle Counter TM Operation and Service Manual 1980543, Revision B January 2007 Model 8220 AEROTRAK Handheld Optical Particle Counter TM Operation and Service Manual 1980543, Revision B January 2007 SHIP TO/MAIL TO: TSI Incorporated 500 Cardigan Road Shoreview, MN 55126-3996 USA U.S. Technical Support: (800) 874-2811/(651) 490-2811 Fax: (651) 490-3824 E-mail address: [email protected] Website: http://www.tsi.com INTERNATIONAL Technical Support: (001 651) 490-2811 Fax: (001 651) 490-3824 Copyright © TSI Incorporated / 2006–2007/ All rights reserved. Address TSI Incorporated / 500 Cardigan Road / Shoreview, MN 55126 / USA Fax No. (651) 490-3824 LIMITATION OF WARRANTY AND LIABILITY (effective July 2000) Seller warrants the goods sold hereunder, under normal use and service as described in the operator's manual, shall be free from defects in workmanship and material for thirty-six (36) months, or the length of time specified in the operator's manual, from the date of shipment to the customer. This warranty period is inclusive of any statutory warranty. This limited warranty is subject to the following exclusions: a. Hot-wire or hot-film sensors used with research anemometers, and certain other components when indicated in specifications, are warranted for 90 days from the date of shipment. b. Parts repaired or replaced as a result of repair services are warranted to be free from defects in workmanship and material, under normal use, for 90 days from the date of shipment. c. Seller does not provide any warranty on finished goods manufactured by others or on any fuses, batteries or other consumable materials. Only the original manufacturer's warranty applies. d. Unless specifically authorized in a separate writing by Seller, Seller makes no warranty with respect to, and shall have no liability in connection with, goods which are incorporated into other products or equipment, or which are modified by any person other than Seller. The foregoing is IN LIEU OF all other warranties and is subject to the LIMITATIONS stated herein. NO OTHER EXPRESS OR IMPLIED WARRANTY OF FITNESS FOR PARTICULAR PURPOSE OR MERCHANTABILITY IS MADE. TO THE EXTENT PERMITTED BY LAW, THE EXCLUSIVE REMEDY OF THE USER OR BUYER, AND THE LIMIT OF SELLER'S LIABILITY FOR ANY AND ALL LOSSES, INJURIES, OR DAMAGES CONCERNING THE GOODS (INCLUDING CLAIMS BASED ON CONTRACT, NEGLIGENCE, TORT, STRICT LIABILITY OR OTHERWISE) SHALL BE THE RETURN OF GOODS TO SELLER AND THE REFUND OF THE PURCHASE PRICE, OR, AT THE OPTION OF SELLER, THE REPAIR OR REPLACEMENT OF THE GOODS. IN NO EVENT SHALL SELLER BE LIABLE FOR ANY SPECIAL, CONSEQUENTIAL OR INCIDENTAL DAMAGES. SELLER SHALL NOT BE RESPONSIBLE FOR INSTALLATION, DISMANTLING OR REINSTALLATION COSTS OR CHARGES. No Action, regardless of form, may be brought against Seller more than 12 months after a cause of action has accrued. The goods returned under warranty to Seller's factory shall be at Buyer's risk of loss, and will be returned, if at all, at Seller's risk of loss. Buyer and all users are deemed to have accepted this LIMITATION OF WARRANTY AND LIABILITY, which contains the complete and exclusive limited warranty of Seller. This LIMITATION OF WARRANTY AND LIABILITY may not be amended, modified or its terms waived, except by writing signed by an Officer of Seller. Service Policy Knowing that inoperative or defective instruments are as detrimental to TSI as they are to our customers, our service policy is designed to give prompt attention to any problems. If any malfunction is discovered, please contact your nearest sales office or representative, or call TSI at (800) 874-2811 (USA) or (001 651) 490-2811 (International). ii CONTENTS SAFETY INFORMATION .........................................................................V Laser Safety .............................................................................................v Labels......................................................................................................vi Description of Caution/Warning Symbols ..............................................vi Caution and Warning Symbols ............................................................. vii CHAPTER 1 UNPACKING AND PARTS IDENTIFICATION.............1 Unpacking the AEROTRAK Handheld Optical Particle Counter...............1 Optional Accessories ...............................................................................3 CHAPTER 2 SET UP ..................................................................................5 Supplying Power to the AEROTRAK™ Optical Particle Counter .............5 Daily Zero Check.....................................................................................6 Using the Isokinetic Probe .......................................................................7 Optional Thermal Printer .........................................................................8 Optional Temperature/Relative Humidity Probe .....................................9 Integral Instrument Stand.......................................................................10 Stylus .....................................................................................................10 USB Computer Communication ............................................................11 CHAPTER 3 OPERATION ......................................................................13 Screen Layout and Functionality ...........................................................14 CHAPTER 4 COMMUNICATION .........................................................29 Setting Parameters using TRAKPRO Software ........................................29 Downloading Data Using TRAKPRO Software.......................................31 Bulk Data Storage Capability ................................................................35 Accessing the Data in the File Viewer Window ....................................35 Data Folders ...........................................................................................35 Viewing Folder Contents .......................................................................36 CHAPTER 5 MAINTENANCE................................................................37 Maintenance Schedule ...........................................................................37 Daily Zero Check...................................................................................37 Cleaning the Instrument Enclosure ........................................................37 CHAPTER 6 TROUBLESHOOTING .....................................................39 APPENDIX A SPECIFICATIONS .........................................................43 Temperature/RH Probe Specifications...................................................44 Application Notes can be found at TSI’s web site: http://www.tsi.com iii Safety Information IMPORTANT There are no user serviceable parts inside the instrument. Refer all repair and maintenance to a qualified factory-authorized technician. All maintenance and repair information in this manual is included for use by a qualified factoryauthorized technician. Laser Safety • The Model 8220 Handheld Optical Particle Counter is a Class I laserbased instrument • During normal operation, you will not be exposed to laser radiation • Precaution should be taken to avoid exposure to hazardous radiation in the form of intense, focused, visible light • Exposure to this light may cause blindness Take these precautions: • DO NOT remove any parts from the OPC unless you are specifically told to do so in this manual • DO NOT remove the housing or covers. There are no serviceable components inside the housing WARNING The use of controls, adjustments, or procedures other than those specified in this manual may result in exposure to hazardous optical radiation. v Labels Advisory labels and identification labels are attached to the outside of the OPC housing and to the optics housing on the inside of the instrument. 1. Serial Number Label (back panel) 2. Laser Radiation Label (internal) DANGER! VISIBLE LASER RADIATION WHEN OPEN. AVOID DIRECT EXPOSURE TO BEAM WARNING: NO USER SERVICABLE PARTS INSIDE. REFER SERVICING TO QUALIFIED PERSONNEL 3. European symbol for non-disposable item. Item must be recycled. Description of Caution/Warning Symbols Appropriate caution/warning statements are used throughout the manual and on the instrument that require you to take cautionary measures when working with the instrument. Caution Caution Failure to follow the procedures prescribed in this manual might result in irreparable equipment damage. Important information about the operation and maintenance of this instrument is included in this manual. Warning WARNING Warning means that unsafe use of the instrument could result in serious injury to you or cause damage to the instrument. Follow the procedures prescribed. vi Model 8220 AEROTRAK Handheld Optical Particle Counters Caution and Warning Symbols The following symbols may accompany cautions and warnings to indicate the nature and consequences of hazards: Warns that uninsulated voltages within the instrument may have sufficient magnitude to cause electrical shock. Warns that the instrument contains a laser and that important information about its safe operation and maintenance is included in the manual. Warns that the instrument is susceptible to electro-static discharge (ESD) and ESD protection should be followed to avoid damage. Indicates the connector is connected to earth ground and cabinet ground. Safety vii Chapter 1 Unpacking and Parts Identification Unpacking the AEROTRAK Handheld Optical Particle Counter Carefully unpack the AEROTRAK Optical Particle Counter from the shipping container. 6 1 2 7 3 4 5 8 Model 8220 AEROTRAK Optical Particle Counter Qty. 1 1 1 1 2 1 1 1 Item Description AEROTRAK Optical Particle Counter AC power adapter and power cord Rechargeable lithium ion battery Isokinetic probe, Model 8220 Stylus Carrying case Computer cable, USB HEPA zero filter Part/Model 8220 2613239 1208058 1300084 N/A 1310060 1303740 1300089 Ref. 1 2 3 4 5 6 7 8 1 2 1 3 Service Manual, Certificate, and TRAKPRO Software Qty. 1 1 1 2 Item Description Operation and Service Manual Calibration Certificate TRAKPRO Software Part/Model 1980543 N/A 1090014 Ref. 1 2 3 Chapter 1 Optional Accessories 1 3 2 Accessories Item Description External battery charger with AC adapter and power cord Temperature/humidity probe Thermal printer with AC adapter and instrument interface cable Printer paper (5 rolls, not shown) Unpacking and Parts Identification Part/Model 2610113 Ref. 1 1300102 8930 2 3 80211 3 Chapter 2 Set Up Supplying Power to the AEROTRAK™ Optical Particle Counter Installing the Battery The Model 8220 AEROTRAK Optical Particle Counter (OPC) may be powered in two ways: • Rechargeable lithium-ion battery • AC power cord Installing the Battery To install the battery: 1. Remove the battery cover on the back of the instrument by lightly depressing the textured tab on the cover located on the lower left while looking at the back of the unit 2. Place the battery into the slot and slide it toward the top of the unit, pressing until it locks into place 3. Slide the battery cover closed until a click is heard. 5 WARNING The battery supplied by TSI (PN 1208058) has built in protection against explosion and fire hazard. Do not use a substitute. WARNING Do not use non-rechargeable batteries in this instrument. Fire, explosions, or other hazards may result. Using AC Power • When using the AC power, the battery (if installed) charges while the instrument is on, but not while actively sampling • The AEROTRAK Optical Particle Counter has an internal, non-user accessible battery to maintain settings and save logged data • Removing/changing the lithium-ion battery or disconnecting AC power does not cause the loss of data • TSI will install a new internal battery as part of routine service, as necessary Daily Zero Check A zero check should be performed at least once a day and before conducting any important testing or certification. Attaching Zero Filter Assembly 6 Chapter 2 1. Turn on the instrument and wait until the main menu is displayed 2. Remove the Isokinetic probe if attached 3. Attach the supplied zero filter to the inlet nozzle located on the top of the instrument 4. Allow the instrument to purge for 2 minutes 5. After the purge cycle, continue to sample. In accordance with JIS standards, there should be no more than 1 particle counted at any size in 5 minutes 6. Remove the zero filter; the instrument is now ready for operation Notes: 1 If the instrument does not go to zero, refer to Chapter 6, Troubleshooting, for additional information. 2. The daily zero check cannot be performed when the isokinetic probe is attached to the instrument. Using the Isokinetic Probe The Isokinetic probe smoothly accelerates air into the inlet of the instrument. The inlet diameter of the conical shaped probe is matched to a 90 ft/min flow rate, which is typical for many HEPA filters. Sampling with Isokinetic Probe Assembly • The Isokinetic probe may be pushed directly onto the inlet nozzle Set Up 7 Optional Thermal Printer • A hard copy of a sample set or statistics can be printed from the instrument using an optional thermal printer • The AEROTRAK OPC is equipped with an automatic print feature to print automatically after each test is completed that can be enabled under the “Settings” menu • Printer paper has a colored strip printed on the last few feet of each roll to indicate time to change the paper roll Optional Thermal Printer 8 Chapter 2 Optional Temperature/Relative Humidity Probe To install the optional temperature/relative humidity probe: • Align the small red dot at the base of the probe to the front of the OPC • Press the probe into the socket until it clicks • Temperature and relative humidity automatically display • The probe can be removed by pulling straight up Temperature/Relative Humidity Probe Set Up 9 Integral Instrument Stand • The Model 8220 handheld optical particle counter is equipped with an integral instrument support stand which pivots out and can be snapped back into place when not in use Stylus • The Model 8220 is equipped with a plastic stylus for use with the touch screen interface • The stylus locks into place in the case near the top of the unit when not in use 10 Chapter 2 USB Computer Communication • The unit is equipped with a USB compatible cable for uploading and downloading information to a PC • The cable plugs into the right side of the instrument Set Up 11 Chapter 3 Operation • Press and hold the ON/OFF switch (located in the center of the front of the instrument) for a couple seconds to turn on the AEROTRAK OPC • A brief start-up sequence which takes about 15 seconds, begins • A splash screen displays a TSI logo • When the main menu appears, the instrument is ready for operation Main Menu The AEROTRAK Optical Particle Counter is controlled using a touch screen display. Use a plastic stylus or finger tip. DO NOT use sharp objects that may damage the screen overlay. Main Menu 13 Screen Layout and Functionality The following explains the functions of the various touch screen commands. Start/Stop • Start—(green background) begin a sample test • Stop—(red background) end a sample test Notes: 14 1. Data will not be saved if a test is interrupted 2. The blue triangular button above the ON/OFF button may also be used to start and stop a test sample Chapter 3 Settings • Colors—screen colors are user selectable for background, buttons and text • Set Date—date should be entered as MM/DD/YYYY using a popup keypad (not shown) and selecting the MM/DD/YYYY or DD/MM/YYYY format • Set Time—pop-up keypad (not shown) for setting the time format to AM/PM or 24 hour • Touch calibration—set screen touch locations • Language—select language on the display Operation 15 • Information—unit serial number, model number, firmware version, and the last calibration date • Brightness—user adjustable from 0 to 100 • Main—return to the Main Menu Statistics Statistics Set-up Screen • Room—select a room from a drop down menu • Location—select a location • Show Statistics—display summary information 16 Chapter 3 • Main—return to the Main Menu Show Statistics Information at the top of the screen shows data selected on the statistics setup screen including room, location selected, date and time. • Count mode—toggle between summary (Σ) or differential (Δ) count • Counts—toggle between actual count, count/ft3 or count/m3 • Sample—toggle between individual sample or an average of samples • Previous—go to the previously saved test • Next—go to the next saved test • First—go to the first saved test • Last—go to the last test saved • Print—print the information displayed on the optional thermal printer • Back—return to the statistics set-up screen Operation 17 Print • Print—print the information displayed using the optional thermal printer Measurement 18 Chapter 3 Measurement • Sample Time—set length of time to be sampled in hours, minutes, seconds • Start Delay—set time before test sample begins from 10 seconds to 24 hours • Sample Delay—set time between multiple tests from 10 seconds to 24 hours • Number of Samples—set number of tests to be repeated with the same parameters up to 999 tests • Temperature—select between °F or °C • Set—save a given parameter selected • Main—return to the Main Menu Operation 19 Counts • 20 Counts is a toggle key to show units between: Actual number count for a given time or volume sample or Counts/ft3 (projected if volume sampled is less than 1 cubic foot) or Counts/m3 (projected if volume sampled is less than 1 cubic meter) Chapter 3 Count Mode • Count Mode—a toggle key to select between: Total or summary count mode (Σ) appears as “>0.3 µm” and all particles 0.3 µm and greater are counted and displayed in that channel or bin Differential count mode (Δ) appears as “0.3–0.5 µm” and only particles between 0.3 and 0.5 µm are counted and displayed Operation 21 Conditions • Time—user selectable format in “Settings” • Date—user selectable format in “Settings” • Flow rate—Shows the actual flow rate of the sample during a test; the average flow rate of the sample is saved • Temperature/humidity—displayed when the optional probe is attached Location Identification 22 Chapter 3 Location Identification to Save Data • Add Room—name a room using a pop-up keypad (not shown), eightcharacter limit • Add Location—name a specific location within a room using the popup keypad, eight-character limit IMPORTANT: To save a data set, a room and location must be selected either from memory or created • Delete Room—remove the room name from memory • Delete Location—remove the location name from memory • Delete Room Data—remove the data set from a selected room name from memory • Delete Location Data—remove the data set from a selected location name from memory • Enabled—sets the room and location information shown as the location where sample data is logged and saved • Disabled—turns the room and location information off, no data will be saved Operation 23 Program Setting Test Criteria • The initial Program screen allows the selection of previously saved test criteria using a drop-down menu • Test criteria can be created on the screen using other keys such as: Number of samples Sample volume Start and sample delays Count format Bins on/off, size selected, alarm on/off and alarm set points • This information can now be named and saved using a pop-up keyboard screen (not shown) 24 Chapter 3 Select Program • Select Program—a drop-down menu appears and a previously saved test program can be selected • OK—enables the selected test program using saved criteria • Cancel—disables the program • Save—allows criteria selected from the main menu to be saved for future reference. A pop-up keyboard (not shown) allows naming the test program Details Operation 25 • This screen shows criteria selected for a given test or program Battery Battery indicator—shows remaining charge expressed in a bar graph Bin or Channel Characteristics 26 Chapter 3 Example—Bin 2 • Bin ON/OFF—determine which bins are displayed; data for all six bins is collected and saved • Alarm ON/OFF—user selectable for one or more bin sizes • Alarm limits—can be set on the numeric pop-up screen (not shown) • Adjusting bin sizes—use the up/down arrows to change bin size ranges in 0.01 micron increments Size selected determines the lower limit of a given channel or bin Sizes selected may not overlap or cross into another channel or bin size Cannot go below 0.3 microns or above 10 microns Whatever value is selected for Bin 6, Bin 6 will then count particles at that size and larger. It is recommended that channel sizes be selected from smallest to largest. • Example—Changing bin lower limits to 0.4, 0.6, 2.0, 3.5, 6.0 and 9.0 would result in: Operation Differential Counts Summary Counts 0.4–0.6 >0.4 0.6–2.0 >0.6 2.0–3.5 >2.0 3.5–6.0 >3.5 6.0–9.0 >6.0 >9.0 >9.0 27 • Set—retain settings selected • Restore Defaults—return to factory settings of 0.3, 0.5, 1.0, 3.0, 5.0 and 10 microns in optical diameter 28 Chapter 3 Chapter 4 Communication Setting Parameters using TRAKPRO Software Room and Location Setup Room and Location Setup • Settings for rooms and locations can be created or edited, then saved to the computer or uploaded to the instrument • There is an eight-character limit for room and location names 29 Measurement Programs Measurement Programs • Program for sampling criteria can be created or edited and then saved or uploaded to the OPC • There is an eight-character limit for program names • Number of test samples with identical criteria to be run consecutively from 1 to 999 • Start delay and time between samples can be set from 10 seconds to 24 hours • Bin size may be adjusted between 0.3 and 10.0 microns in 0.01 increments. Bin size selected determines the lower limit of a given channel or bin and affects the adjacent bin. Bin sizes may not overlap or cross into another channel or bin size. The value selected for Bin 6 or the largest bin will count particles at that size and larger. 30 Chapter 4 Saving Programs • A program can be saved internally to the AEROTRAK OPC or to a file on a computer via the USB connection for future reference Opening Program • A program can be opened from those saved in the AEROTRAK OPC or from a saved file on a computer via the USB connection and loaded into the program settings editor Downloading Data Using TRAKPRO Software Use TRAKPRO to transfer data from an instrument to a computer via the USB connection for further analysis and report generation. Copy/Move Data • Choose either Copy Data or Move Data under the Preferences tab • To begin data transfer, select Receive from the File menu or press the receive button on the menu bar. If TRAKPRO finds an attached AEROTRAK OPC instrument, a dialog appears prompting you to select the folder to save the data Communication 31 • To cancel the data transfer, select Cancel • To accept data transfer, select OK • The data folder is named “Data – Date and Time”, the date and time will be the time at which the data transfer occurred expressed in Coordinated Universal Time (UTC), not local time • After transfer, the data set opens Opening Saved Data 1. Select Open from the File menu or Press • 32 on the menu bar or An open data browser appears and the desired data set can be selected Chapter 4 Data Selection • Use the data tree to select the samples to include in the display or calculation • Selected sets or individual samples have a green next to them • Files that are not selected have a red • Within a set, if some samples are selected and others not, a blue appears next to them Data Display • When samples have been selected, information appears in the Data Display window. Select the Data Display tab • To choose between a summed or differential histogram, right-click on the data display and select Graph Type NOTE: Due to the lower flow rate, the Model 8220 handheld OPC is not recommended for ISO 14644 certification testing • When the differential graph type is selected, each bin size value represents the lower size boundary for that bin and the width of the bin is determined by the lower boundary of the next larger bin. For example, the 0.3 μm bin contains particles from 0.3 μm up to 0.5 μm; the 0.5 μm bin contains data for particles from 05 μm up to 1.0 μm, etc. Communication 33 • When the summed graph type is selected, each bin size value represents the lower boundary and all larger particles • The Data Table shows a summary for the selected data. The table has six rows: size, average, minimum, maximum, standard deviation, and samples • The units for the average, minimum, maximum, and standard deviation can be expressed as #/cm3, #/m3, #/ft3 the total count for a given sample volume • To change the units, right-click on the Data Display and select the desired units from the Conc. Units submenu. • The final section of the Data Display contains measurement details, a summary of the test conditions including date and volume statistics. Temperature and humidity statistics are also shown if the optional temperature/humidity probe is used • To change the volume units, right-click on the Data Display, select Volume Units, and then choose the desired units • To change the temperature units, right-click on the Data Display, select Temp. Units 34 Chapter 4 Bulk Data Storage Capability • When connected via the USB cable to a computer, the AEROTRAK appears as an external drive to the computer and data can be removed from the instrument using drag and drop from the Windows Explorer file management program. This feature does not require TRAKPRO to be installed or used and works with Windows XP/2000 computers Accessing the Data in the File Viewer Window • Two folders will appear in the File Explorer window, the data folder holds all data saved to the instrument and the program folder holds settings or test criteria Data Folders • The data folder has subfolders that correspond to the “rooms” that were entered into the instrument Communication 35 Viewing Folder Contents • Each room folder has specific sample location files • Double-click on a folder to view its contents • The data is stored in CSV format and can be read by Microsoft Excel® 36 Chapter 4 Chapter 5 Maintenance Note There are no user-serviceable parts inside this instrument. Opening the instrument case may void the warranty. TSI recommends that you return the AEROTRAK Optical Particle Counter to the factory for any required maintenance or service not described in this manual. Maintenance Schedule TSI recommends annual factory cleaning and calibration for the AEROTRAK OPC Recommended Field Maintenance Schedule Item Frequency Daily zero check Daily (or before each use) Factory cleaning and calibration Annually Wipe down instrument enclosure As needed or per testing protocol prescribed Daily Zero Check • The daily zero check ensures that the instrument is properly assembled and free from leaks, residual particles and electronic noise. Please see Chapter 2, “Set Up” for detailed instructions on performing the zero check. Cleaning the Instrument Enclosure • To clean the enclosure, dampen a lint-free cloth and gently wipe the surface until surface contamination is removed 37 Chapter 6 Troubleshooting Symptom Possible Cause Corrective Action Counts are too low Instrument is being operated outside temperature or relative humidity specifications Operate instrument within specifications Internal parts have been damaged because instrument was stored at a temperature greater than 122 °F (50 °C) Return to factory for service Instrument has contamination on the optics due to condensation or excessive loading Return to factory for service Laser or pump control is damaged Return to factory for service Unit is due for calibration Return to factory for service On/off switch is not being pressed properly Press and hold on/off switch for one second Battery is dead Recharge battery or connect to AC power AC cord is not plugged into unit Connect AC cord Instrument does not turn on 39 Symptom Possible Cause Corrective Action Instrument does not meet zero count specification (<1 particle/5 mins) HEPA filter is not connected properly and room air is leaking into the HEPA filter assembly Check that the HEPA filter has been tightly connected to the inlet. Check that rubber Orings (black) in the aluminum connector are in place and have not become dislodged Residual particles from previous samples are shedding off internal parts and into the optics Purge instrument by running the instrument for 10–15 minutes before attempting zero count test An internal component has been damaged due to operation outside of temperature specifications or one ore more excessive bumps or jolts, and electronic noise is inducing false counts Return to factory for service A leak has developed in the aerosol flow path Return to factory for service Internal optics have become dirty Return to factory for service Battery does not charge The unit must be turned on but not in sampling mode for the battery to charge Turn on unit. LOW BATTERY ERROR Low battery Recharge battery or connect AC cord PHOTODETECTOR ERROR Direct light is entering the aerosol inlet Remove instrument from direct light Laser has become misaligned due to excessive bumps or jolts Return to factory for service Internal optics have become dirty Return to factory for service 40 Chapter 6 Symptom Possible Cause Corrective Action SYSTEM ERROR Information is not being read properly by microprocessor Restart instrument. If problem persists, contact TSI technical support TEMPERATURE HUMIDITY PROBE ERROR Temperature/RH probe was not recognized Detach and reconnect probe. If problem persists, contact TSI technical support FLOW ERROR Instrument was unable to control flow rate (if any tubing is connected to OPC) Restart measurement Pressure drop across inlet may be too large Lessen pressure drop across inlet by using larger diameter tubing, less tubing, and/or adding a bleed valve Inlet not at ambient pressure Do not subject the unit to other than ambient pressure conditions LASER POWER WARNING Laser power has fallen outside of specification Return to factory for service Instrument will not store data file. OPC storage capacity (128 MB) has been reached Remove files from OPC memory Troubleshooting 41 Appendix A Specifications All specifications meet or exceed JIS B 9921 and are subject to change without notice. Particle Size Range........... 0.3 to 10.0 µm Number of Bins ................. 6 Default Bin Cutpoints Default Thresholds............ Cutpoint Accuracy............. Variable Bin Cutpoints Thresholds........................ Cutpoint Accuracy............. 0.3, 0.5, 1.0, 3.0, 5.0, and 10.0 μm 50% ±10% user defined, between 0.3 and 10.0 @ 0.01 µm increments 50% ± 20% Maximum Concentration.. 8220 ………………………. 3 2,000,000 #/ft (5% coincidence loss) Counting Efficiency .......... 50% ±10% @ 0.3 μm 100% ±10% @ 0.45 µm and greater Zero Count ........................ <1 count in 5 minutes Laser .................................. 660 nm 50 mW laser diode Pump Flow Rate................ 0.1 cfm (2.83 lpm) ±5% Pressure Correction ......... Performed by internal pressure transducer Sample Output .................. HEPA filtered for zero emissions Operating Environment Temperature ..................... Relative Humidity.............. 41 to 95 °F (5 to 35 °C) 10 to 90 % RH, noncondensing Storage Environment Temperature ..................... Relative Humidity.............. 32 to 122 °F (0 to 50 °C) 0 to 90% RH, noncondensing Display............................... 3.7” (9.4 cm) color LCD with touch screen, 320 x 240 Memory.............................. 128 MB (over 100,000 sample sets) Communication................. USB Software ............................ TRAKPRO™ Data Analysis Software 43 Computer Requirements.. Battery Battery type ...................... Battery life ........................ ® PC with Microsoft Windows 2000 or XP; Windows-compatible printer; 5 MB hard disk space; and available USB serial port (for downloading) Rechargeable Lithium Ion Battery Pack, 6600 mA-hrs 8 hrs, typical use @ 70°F (21°C) Power ................................ 100 to 240 VAC, 50 to 60 Hz Fuse ................................... 250V, 1 AMP, TYPE "T", 5 mm x 20 mm Dimensions (Instrument)... 10 in. x 4.5 in. x 3 in. (25.4 cm x 11.4 cm x 7.6 cm) Instrument Weight with battery ....................... 2.2 lbs (1.0 kg) CE Rating Immunity........................... Emissions ......................... Laser Safety ..................... EN 61000 EN 61326 EN 60825 Calibration......................... NIST traceable (included) Factory Service Interval ... Annual service recommended Warranty............................ Three years on workmanship and material Temperature/RH Probe Specifications (Optional Accessory) Temperature Range............................... Accuracy........................... 32 to 95ºF (0 to 35ºC) ±2ºF (±1ºC) Relative Humidity Range............................... Accuracy........................... 10 to 90% RH ±5% RH 44 Appendix A TSI Incorporated Headquarters—Tel: +1 651 490 2811 Toll Free: 1 800 874 2811 E-mail: [email protected] UK Tel: +44 1494 459200 E-mail: [email protected] France Tel: +33 491 95 21 90 E-mail: [email protected] Germany Tel: +49 241 523030 E-mail: [email protected] Sweden Tel: +46 8 595 13230 E-mail: [email protected] India Tel: +91 80 41132470 E-mail: [email protected] China Tel: +86 10 8260 1595 E-mail: [email protected] P/N 1980543, Revision B Copyright © 2007 TSI Incorporated Printed in U.S.A.