1
Installation Instructions
6747 Whitestone Rd • Gwynn Oak, MD 21207 • (410) 298-4343 • FAX: (410) 298-3579
www.atiracing.com
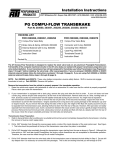
PG COMPU-FLOW TRANSBRAKE
Part #s 203050, 203051, 203250, 203300, 203350, 203070
PACKING LIST
FOR #203050, #203051, #203250
FOR #203300, #203350, #203070
Compu-Flow Valve Body
Compu-Flow Valve Body
Brake Valve & Spring #203440, #203460
External Solenoid with O-ring #203480
Transbrake Decals (2)
Instruction Sheet
Connector and O-ring #940330
Connecting Wire #940341
Case Plug #207340
Transbrake Decals (2)
Instruction Sheet
Packed By
The ATI Compu-Flow Transbrake is designed to replace the stock valve body on any aluminum Powerglide Transmission.
Full benefits of the computer-machined circuits in the ATI valve body are realized with proper transmission preparation and
valve body installation. If your transmission has not been prepared for transbrake use, follow Transmission Case Preparation
steps 1 through 7 before installing the valve body. After case preparation, if you are using part #203300, 203350 or 203070
(internal solenoid brake), follow the instructions numbered 1 through 16 (page 2). If you are using Part #203250 or #203050
(external solenoid brake), follow steps A through N (page 3).
NOTE: Part #203050 and #203070: These valve bodies incorporate a reverse safety feature. Shift to reverse and engage
transbrake to back up. Part #203350: Reverse shift pattern.
Remove the transmission from the vehicle to properly prepare it for transbrake operation.
1. Raise the vehicle and support with jackstands or raise on an automotive lift. make sure that the vehicle is properly supported!
Place a drain pan under the transmission.
2.
If your transmission is equipped with a drain plug, remove the plug and allow the fluid to drain. If your unit does not have
a drain plug, remove all pan bolts except the 2 at the front of the transmission. Remove bolts one at a time, working back
to front. Exercise caution as transmission fluid will splatter erratically during oil pan removal. You might need to reposition
the transmission crossmember in order to remove the rear oil pan bolts. If this becomes necessary, support the rear of the
transmission to prevent the transmission / engine assembly from oving down and causing damage to the distributor cap and/or
engine mounts. As you remove the bolts along the sides of the oil pan, the weight of the fluid will usually cause the oil pan to
separate from the transmission case, allowing the fluid to drain from the rear of the pan. However, if the pan does not readily
separate from the transmission case, insert a screwdriver between the oil pan and the case and pry gently to begin the draining
process. Remove the two front oil pan bolts slowly about one turn at atime) and fluid will drain at a steady rate from the rear of
the oil pan. Drain the oil pan completely and keep it to hold bolts and small parts.
Transmission Case Preparation
1. Refer to General Motors Service Manual or a suitable technical manual and completely disassemble the transmission, including
the removal of reverse clutch apply piston.
2.
Drill a .062" diameter hole through the reverse apply piston, inside of the inside diameter of the outer piston seal. See Figure
1. This hole should be positioned at the top of the transmission case when the piston is reinstalled.
3.
Drill a 5/16" diameter hole completely through the transmission case, starting from the rear as shown in Figure 2. Although this
hole exists on 1967 and later model Powerglides, the factory orifice dimensions are not acceptable for transbrake operation.
Therefore, the case must be drilled through for all model Powerglides.
4.
Drill a 5/16" diameter hole from the valve body side of the transmission case to intersect the hole drilled in Step 3. Do not drill
any deeper than it is necessary to connect the two passages. This is also an existing hole that you will enlarge to 5/16".
Transmission Case Preparation (continued)
5.
Clean the transmission case and remove all metal chips.
6.
Install rear support as removed. 1962-1966 Powerglides use a support and plate. 1967 and later model Powerglides use a
support and gasket. Rear pump gears and governor assembly should be discarded.
7.
After the reverse clutch piston and clutches are installed, check for proper operation and leaks by applying air pressure at Port
A. Recommended reverse clutch pack clearance is .070" - .100". Reassemble the transmission.
INSTALL WITH HOLE AT
12 O'CLOCK IN CASE
DETAIL A
SEAL GROOVE
.062"
NOTE! DO NOT INTERSECT WITH SEAL GROOVE
GROOVE
Figure 1. Piston Reverse (Drilled for Brake)
TO 12 VOLT FUSED SOURCE: USE A 10 AMP FUSE FOR INTERNAL BRAKE
USE A 25 AMP FUSE FOR EXTERNAL BRAKE
BRAKE
BUTTON
TO TRANSMISSION
MANY RACERS PREFER MOUNTING
THE TRANSBRAKE SWITCH IN THE
STEERING WHEEL UNDER THE
DRIVER'S THUMB POSITION
REINSTALL ORIGINAL SUPPORT AND PLATE ('62 - '66) OR SUPPORT & GASKET ('67 & LATER)
'62-'66 REV HOLE
MUST BE PLUGGED
IF LATE (NO GEARS)
SUPPORT IS USED ON
EARLY CASE
DRILL THROUGH
5/16" ALL CASES
2
DRILL 5/16" TO
INTERCEPT 5/16"
IN BACK OF CASE.
PORT "A"
ROUTE WIRE THROUGH HERE FOR
INTERNAL SOLENOID
Figure 2. Powerglide Case, Rear View
FOR EXTERNAL SOLENOID TRANSBRAKE (#203050 AND #203250)
A. Drain oil and remove the oil pan.
B. Remove the vacuum line from the modulator and discard it. Plug vacuum source at engine.
C. Using a 1" wrench, remove the vacuum modulator. Also remove the modulator gasket, plunger, dampening spring and
valve. Discard the modulator and associated parts.
D. Note the position of the detent guide plate, detent lever, detent spring and servo oil tube. Also note that there are
seven valve body attaching bolts. There is also one other bolt that is used to secure the detent guide plate to
the transmission case.
E. Remove the detent guide plate and note how the selector lever pin engages the groove in the manual valve.
F.
Remove the detent spring. Also remove six remaining valve body attaching bolts, holding the valve body as you remove
the last bolt. If the valve body does not detach readily, insert a screwdriver between the servo tube and the case and
gently pry to remove the valve body.
DO NOT ALLOW MANUAL VALVE TO FALL AS YOU LOWER THE VALVE BODY!
G. Inspect the transmission case mating surface carefully and use a scraper or single edge razor blade to remove any
pieces of the valve body gasket from the case. Also, clean your stock manual valve, dip it in clean transmission fluid
and install in your ATI Valve Body.
H. Remove two filter retaining screws, filter, and filter gasket from your stock valve body and install onto your ATI
valve body. If your filter screen is torn or clogged with debris you should replace it with a new filter. Tighten
the filter retaining screws securely.
I.
Install the servo oil tube into the ATI Valve Body and install valve body while carefully guiding tube into its bossintransmission case. Install and hand tighten six valve body attaching bolts, leaving one empty hole for detent guide plate bolt.
J.
Make sure that the manual valve is aligned properly with the selector lever pin. Move selector linkage toward outboard
side of transmission to allow room for repositioning the manual valve if necessary. The detent guide plate will hold the
selector pin in place during operation. Install the detent guide plate only after making sure that the manual valve is
engaged with the selector lever pin. Torque all eight bolts to 10 foot lbs. or 125 in. lbs. Install the detent spring.
K. Install the transbrake button and route wiring. Disconnect the vehicle battery before wiring to prevent electrical system
damage. See wiring diagram (Figure 2). Install the ATI brake valve with the spring through case modulator hole into the
valve body. Place the spring inside the pocket of the valve. Install the valve with spring end first.
L.
Install the external solenoid with o-ring at modulator hole in the transmission case. Connect the switch wire to either
solenoid wire and connect the other solenoid wire to a chassis ground. Test for proper operation after reconnecting
the battery.
M. Install the oil pan with gasket and torque oil pan bolts to 12 ft. lbs. or 150 in.lbs.
N. Prior to starting the engine, pour fluid into the transmission until reaching the "FULL" mark on the dipstick. (Usually 3 or
4 quarts). ATI recommends a quality brand of Type F fluid. Place the transmission in "PARK" and start the engine.
Since some of the fluid will now be pumped into the torque converter, you should recheck the fluid level and add fluid as
necessary to obtain a "FULL" reading before taking the transmission out of "PARK". With the brakes applied, select each
gear range to fill all of the valve body circuits and then make a final fluid check. DO NOT OVERFILL!
Note! For #203050 is a Safety Reverse Transbrake. It will engage in low gear only, but reverse will
engage in Low Gear or Neutral. Possible engagement of reverse can occur if the car is in Neutral and
the button is accidentally pushed. ATI recommends leaving the car in High Gear rather than Neutral
after going through the traps.
SEE PAGE 4 FOR INTERNAL SOLENOID TRANSBRAKE INSTRUCTIONS
3
FOR INTERNAL SOLENOID TRANSBRAKE (#203300, 203350 AND #203070)
1.
Drain oil and remove the oil pan.
2.
Remove the vacuum line from the modulator and discard it. Plug vacuum source at the engine.
3.
Using a 1" wrench, remove the vacuum modulator. Also remove the modulator gasket, plunger, dampening spring and
valve. Discard the modulator and associated parts.
4.
Note the position of the detent guide plate, detent lever, detent spring and servo oil tube. Also note that there are
seven valve body attaching bolts. There is also one other bolt that is used to secure the detent guide plate to
the transmission case.
5.
Remove the detent guide plate and note how the selector lever pin engages the groove in the manual valve.
6.
Remove the detent spring. Also remove the six remaining valve body attaching bolts, holding the valve body as you remove
the last bolt. If the valve body does not detach readily, insert a screwdriver between the servo tube and the case and
pry gently to remove the valve body.
DO NOT ALLOW MANUAL VALVE TO FALL AS YOU LOWER THE VALVE BODY!
7.
Inspect the transmission case mating surface carefully and use a scraper or single edge razor blade to remove any
pieces of the valve body gasket from the case. Also, clean your stock manual valve, dip it in clean transmission fluid
and install it in your ATI Valve Body.
8.
Remove the speedometer sleeve and gear from the extension housing. Remove transmission extension housing from
the case and install the supplied wire connector with o-ring into the speedometer hole.
9.
Route the brake solenoid connector wire through the rear support and transmission case, and connect at the wire prong
inside the extension housing.
10. Hold slack out of the solenoid connector wire as you reinstall the extension housing with the seal ring. Install housing
bolts and torque to 25 ft. lbs.
11. Remove two filter retaining screws, filter, and filter gasket from your stock valve body and install onto your ATI valve body.
If your filter screen is torn or clogged with debris you should replace it with a new filter. Tighten the filter retaining screws
securely.
I2. Install the servo oil tube into the ATI Valve Body and install the valve body while carefully guiding the tube into its boss in
transmission case. Tilt the ATI valve body slightly and fit the gold cap into the modulator hole recess in the case as you
align the valve body. Install and hand tighten six valve body attaching bolts, leaving one empty hole for the detent guide
plate bolt. Connect the solenoid wire to the wire from the extension housing connector.
13. Make sure that the manual valve is aligned properly with the selector lever pin. Move selector linkage toward outboard
side of transmission to allow room for repositioning the manual valve if necessary. The detent guide plate will hold the
selector pin in place during operation. Install the detent guide plate only after making sure that the manual valve is engaged
with the selector lever pin. Torque all eight bolts to 10 foot lbs. or 125 in. lbs. Install detent spring.
14. Install supplied gold plug with gasket in the modulator hole in the case. Tighten securely with a 1" wrench.
15. Install the oil pan with gasket and torque oil pan bolts to 12 ft. lbs. or 150 in.lbs.
16. Prior to starting the engine, pour fluid into the transmission until reaching the "FULL" mark on the dipstick. (Usually 3
or 4 quarts). ATI recommends a quality brand of Type F fluid. Place the transmission in "PARK" and start the
engine. Since some of the fluid will now be pumped into the torque converter, you should recheck the fluid level
and add fluid as necessary to obtain a "FULL" reading before taking the transmission out of "PARK". With the brakes
applied, select each gear range to fill all valve body circuits and then make a final fluid check. DO NOT OVERFILL!
4
INST. # 203000-I 6/2012
Technical Addendum
6747 Whitestone Rd • Gwynn Oak, MD 21207 • (410) 298-4343 • FAX: (410) 298-3579
www.atiracing.com
ADJUSTABLE PRESSURE REGULATOR
U.S. PATENT #7,780,564
For use with Compu-Flow Valve Bodies #203050, 203200, 203220 & 203250
Your new ATI Valve Body features an exclusive Adjustable Pressure Regulator. The baseline
pressure of this unit is 145 - 160 psi. The regulator has been factory pre-set at 165 psi. This is the
highest pressure ATI recommends for an OEM GM Powerglide case. Pressures exceeding 165 psi in
a GM case have been known to break the case at the reverse piston bore. If you have a GM case, no
adjustment is required. ATI further recommends that when using a GM cased transmission in cool
weather (sub 60° F), that the unit be thoroughly warmed up before engaging Reverse or Brake to
prevent case breakage.
ADJUSTMENT PROCEDURE FOR
AFTERMARKET CASES ONLY
The pressure can be increased by
loosening the lock nut with a 9/16”
box wrench and turning the adjuster
screw in (clockwise) with a 3/16”
Allen Key. The rate of change is 16
psi per turn. Tighten the lock nut
after adjusting.
NOTE! For Billet Aluminum
Valve Body (#203051), the rate
of change is 20 psi per turn!
ATI Pressure Recommendations
PRESSURE PSI
165
175
185
200
225
230 - 250+
HORSEPOWER
< 500
500-750
750-900
900-1500
1500-2500+
Not Recommended
Note!
1. Heavier cars generally require more pressure as horsepower amounts increase.
2. Generally, higher pressures may cause premature wear to occur on internal components and cause
parasitic horsepower losses.
TESTING WITH A PRESSURE GAUGE
Use the test port at the Servo Cover. A reading may be obtained with the transmission in first or with the brake applied (if equipped).
Bring the RPMs up until the pressure stops climbing and reads steady. This is the regulated pressure.
The ATI Powerglide Adjustable Pressure Regulator is patented.
Patent infringements will not be tolerated and are subject to legal action.
INST. # 203183-I
6/2012