1
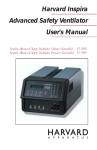
MAXO2Vent
Operators Manual
CAUTION
Federal Law Restricts this device to be
used by or on the order of a physician.
KEY SERVICE CONTACT NUMBERS
Phone: 800.748.5355
Fax: 801.270.5590
www.maxtecinc.com
maxtec
TABLE OF CONTENTS
PAGE
General Description
Definition of Statements
General Warnings
2
2
3
Specifications
3
Functional and Operational Procedures
3
Assembly of Components
Inlet gas hose
Patient tubing connections
4
4
5
Front Panel Control Knobs
Pressure Relief Valve
On/Off
IMV Flow
Respiratory Rate per Minute
Inspiratory Time
Tidal Volume
5
5
5
5
5
5
5
Clinical Techniques
Controlled Ventilation
Intermittent Mandatory Ventilation
Pressure Controlled Ventilation
Pressure Control-Inverse Ratio Ventilation
Positive End Expiratory Pressure
Continuous Positive Airway Pressure
6
6
6
6
6
7
7
General Accessory Systems
Humidifiers
Air/Oxygen Blenders
Cylinder Gas
Pressure Reducing Regulators
8
8
8
8
8
Functional Testing
8
Recommended Maintenance Procedures
Inlet Filter
Calibration of Locking Control Knobs
Locking-Knob Re-Assembly Instructions
Tidal Volume Control Knob
Calibration of Inspiratory/Expiratory Time Control Knobs
9
9
9
10
11
11
Cleaning and Disinfection
Gas Sterilization
11
11
Application Circuit Diagram
12
Gas Flow Diagram
13
Problem Solving
14
Max02Vent Exploded View of Parts
15
Max02Vent Part Numbers
16
Warranty
17
Limitations of Liabilities
17
Returned Goods Policy
17
GENERAL DESCRIPTION
The Maxtec Ventilator is pneumatically powered, single-circuit,
volume-constant, time-cycled and inspiratory flow variable.
The Maxtec Ventilator utilizes a high-pressure drive with regulated, high
internal resistance to control pressure and is considered a non-constant
pressure generator. Simultaneously, the Maxtec Ventilator produces a flow
pattern that is constant in spite of changes in lung mechanics
(inspiratory square-wave).
Originally designed, tested and utilized for military field work, the
Maxtec Ventilator is able to be used in virtually any demanding
environment such as In-Hospital Transport, Air-Mobile Operations,
Special Treatment Areas, Operating and Recovery Rooms, Animal
Laboratories and Veterinary Medicine.
The Maxtec Ventilator is designed with internal simplicity for operations
and maintenance. Quick connect features allow the operator to provide
for all necessary clinical situations: controlled ventilation, continuousflow intermittent mandatory ventilation, constant positive airway
pressure, as well as being adjustable to inspiratory/expiratory ratios that
are infinitely variable. A wide-range pressure relief valve allows for both
the prevention of barotrauma and time-cycled,
pressure-relieved ventilation.
In standard use, the Maxtec Ventilator may be used in conjunction with
a variety of face masks, cricothyroid tubes, endotracheal and
tracheostomy tubes.
Humidifiers and air/oxygen blenders of various types may be used, as
the operator desires.
FACTORY QUALITY ASSURANCE TESTING
Every Maxtec Ventilator is tested several times during the manufacturing
process. Final testing and calibration procedures utilize the Bio-Tek Lung
Analyzer, model VT-2. A copy of the final test is sent with each ventilator
as it is shipped from the Factory.
DEFINITION OF STATEMENTS
The following terminology and definitions are important for the operator
to understand before proceeding with the manual or operation of the
device:
WARNINGS: mean there is a possibility of injury to the operator or others.
CAUTIONS: mean there is a possibility of damage to the equipment.
NOTES: mean particular points of interest for professional operation of
the equipment
2
GENERAL WARNINGS
1. Patients requiring life-support equipment should be under
the constant surveillance of competent medical practitioners.
There is always the possibility of machine and alarm failure
and some malfunctions require immediate corrective, action.
2. The Maxtec Ventilator should always have the Pressure
Relief Valve adjusted in order that barotrauma cannot occur.
3. The Maxtec, Inc. Patient Tubing Circuit and Exhalation
Valve Assembly (P/N Oceanic-15.0) is the
only tubing/valve system authorized for use with the Maxtec
Series ventilators. Other systems may not work properly.
SPECIFICATIONS
Dimensions
Weight
Case Material
All other Materials
Gas Inlet Pressure Range
Breaths Per Minute Range
Inspiratory Time Range
Inspiratory Flow Range
Tidal Volume Range
Pressure Relief Range
IMV/CPAP Continuous Flow Range
PEEP/CPAP Range
Internal Compliance
Air/Oxygen Blenders
Exhalation Valves
MRI Capable
8 x 5.5 x 5.5 inches
5.0 LBS
aluminum
aluminum, brass
and plastic
30 to 150 PSI
0 to 60 BPM
0.2 to 3.0 seconds
0 to 100 LPM
0 - 2.0 L’s
0 to 120 CMH20
0 to 60 LPM
+1 to +50 CMH20
0 CMH20
any capable of producing
from 30 to 60 PSI
Oceanic-P/N 15.0 reusable
to 4.7 Tesla
FUNCTIONAL AND OPERATIONAL PROCEDURES
The following procedures should be performed between the
time the Maxtec Ventilator is assembled and before it
is placed into clinical service to ensure proper assembly.
3
Assembly of Components
Attach the Patient Tubing Circuit and desired accessories to the
ventilator, as shown in the photograph below.
B
C
A
A. Exhalation tubing attach point
B. Pressure gauge tubing attach point
C. IMV/CPAP tubing attach point
A. Inlet Gas Pressure Hose
Attach a high pressure hose to the Gas Inlet connector, which is
located at the right-rear position of the box container. Screw on the
hose connector securely, with the opposite end of the hose attached
to the gas source. Ensure that the gas source is ready to be used when
the on/off switch is turned on.
B. Breath Per Minute and Expiratory Control Knob
Turn the pointer of the inner knob to the 10 BPM position as indicated
on the label (or higher/lower position as desired). Confirmation of the
actual time may be made with a suitable watch or monitoring system.
C. Inspiratory Time Control Knob
Turn the pointer of the inner knob to the 1.0-second position on the
label (or higher/lower position as desired). Confirmation of the actual
inspiratory time may be made with a suitable watch or monitor.
4
D. Tidal Volume Control Knob
Turn the pointer to the 1.0 L position on the label. Confirmation of the
Tidal Volume may be made with a
hand-held spirometer or other volume montior.
NOTE: Tidal Volume markings are accurate when the inspiratory time is
set at 1.0 seconds.
E. Pressure Relief Valve
The pressure relief valve may now be adjusted to relieve any undesired,
excess pressure that may be generated due to the other control
settings. Observe the working pressure (assuming that the tubing
circuit is attached to a test lung) and turn the pressure relief Control
Knob until the desired maximum pressure is reached. It may be
necessary to completely occlude the outlet port of the tubing circuit in
order to generate the pressure level that the operator desires to use as
the maximum value.
NOTE: It is recommended that as the ventilator is placed in use with an
actual patient, the maximum relief pressure be re-adjusted to
approximately +5cmH20 above the actual working pressure.
NOTE: Re-confirm the delivered Tidal Volume whenever a pressure relief
value has been changed. If the relief pressure is set too low, the
desired Tidal Volume may not be achieved.
F. On/Off Switch
The on/off switch may be turned from either the “on” or “off” position
by turning the control knob 90 degrees in either direction. The pointer
on the knob will indicate that the knob is positioned to allow gas flow
to begin to the internal, working components of the machine.
G. Intermittent Mandatory Ventilation (IMV)
Gas flow may be employed by turning the IMV control knob anticlockwise and observing the gas reservoir bag. As the bag is inflated
and with the patient inhaling spontaneously ftom the bag between
mechanical breaths (or without any mechanical breaths as during CPAP)
the Operator should adjust the gas flow to the reservoir bag in order
that the bag is not deflated during the patients inspiratory efforts.
IMV gas flow may also be utilized during the administration of PEEP in
order to keep the PEEP level at a precise value.
CAUTION: High IMV gas flows may cause the ventilator to diminish in
total gas flow functions for Controlled Ventilation procedures and the
Control Knobs may have to be re-adjusted to compensate during the
IMV procedure.
5
NOTE: Source gas consumption using the IMV system (for IMV or CPAP)
is increased over gas utilization during controlled Ventilation. Measure
the continuous flow with a hand held spirometer and add this value to
any controlled minute volume for accurate calculation of total gas
consumption.
NOTE: The On/Off Switch must be in the “ON” position for the IMV
continuous gas flow bleed valve to operate.
CLINICAL TECHNIQUES
The following techniques may be utilized with the proper setting of
the Maxtec Ventilator controls:
Controlled Ventilation (CV)
For the apneic patient, CV is accomplished by using the Maxtec
Ventilator with the Patient Tubing Circuit only. Adjustment of the
Breath Per Minute, Inspiratory Times as well as the Tidal Volume
Controls and Pressure Relief Valve will provide the minute volume
and other parameters as the Operator deems necessary. PEEP valves
and other accessories can be employed as needed.
Intermittent Mandatory Ventilation (IMV)
For use with the patient that may desire to spontaneously breathe
between CV breaths, the IMV kit should be attached to the outlet port
of the ventilator. Using the continuous flow method, adjust the IMV gas
flow to the reservoir bag using the IMV control knob on the front panel.
Adjust the Breaths Per Minute, Inspiratory Time, Tidal Volume and
Pressure Relief Valve settings to those desired by using a suitable
timepiece, a hand-held spirometer or other monitoring system.
Pressure Controlled Ventilation
When the Operator desires to provide an inspiratory pressure plateau to
occur during the inspiratory phase and to control the inspiratory time
simultaneously, this system can provide the needed support. Establish
either CV or IMV parameters; observe the working pressure on the
pressure gauge, then set the Pressure Relief Valve setting to a pressure
slightly less than the original working pressure. Tidal Volume delivery
can be manipulated by adjusting the Tidal Volume Control until the
desired Volume is approximated.
NOTE: It is possible to not be able to deliver a high level of Tidal
Volume, depending on the settings of all of the controls.
Pressure Control-Inverse Ratio Ventilation (PC-E:I)
Inverse ratio ventilation can be established by using the Breaths Per
Minute and Inspiratory Time Controls and observing the pressure gauge
and using a watch and hand-held spirometer, until the desired
parameters are met. Then adjust the Pressure Relief Valve setting to the
6
value below the working pressure observed on the Monitor to that
pressure limit desired. Manipulation of the other controls will allow
the Operator to adjust the ventilator to the level of support
desired.
NOTE: The IMV system may also be employed with this maneuver
in order to provide the greatest amount of instantaneous gas
volume during the initial phases of the Inspiratory Time.
Positive End Expiratory Pressure (PEEP)
PEEP may be employed at any time the Operator desires by
attaching a PEEP valve to the outlet port of the Patient Tubing
Circuit and adjusting the end-expiratory pressure to that value
desired by observing the pressure gauge.
NOTE: As PEEP pressure is increased, the inspiratory Pressure will
also increase, therefore, it may be necessary to re-adjust the
Pressure Relief Valve setting to compensate for this increased
pressure.
“A” is the PEEP Valve. “B” is the Exhalation Valve.
A
B
Continuous Positive Airway Pressure (CPAP)
CPAP is provided by attaching the same accessories as in PEEP and
IMV, then:
1. Turn the On/Off Switch to the “on” position.
2. Turn the Breaths Per Minute Control Knob to the longest
time position (fully clock-wise).
3. Turn the Inspiratory Time and Tidal Volume to the lowest
position (fully anti-clock-wise).
7
4. Adjust the IMV Flow Control to a position wherein the IMV
reservoir bag is fully inflated.
5. Adjust the PEEP valve until the desired CPAP value is achieved.
6. Adjust the Pressure Relief Valve to a setting slightly above
the CPAP level to prevent inadvertent barotraurna.
NOTE: It may be necessary to “fine-tune” the adjustments of various
controls until the desired parameters are achieved.
NOTE: The regular Patient Tubing Circuit and other accessories may be
used as desired.
GENERAL ACCESSORY SYSTEMS
Humidifiers
Heated Molecular Humidifiers of any type may be used with the Maxtec
Ventilators. Follow the manufacturers recommendations for tubing
attachment and use.
“Artificial Nose” humidifiers of any type may also be used by placing
the device at the distal end of the Patient Tubing Circuit, between
the exhalation valve assembly and the patient interface. Follow
manufacturers instructions for use.
Air/Oxygen Blenders
All air/oxygen blenders may be used with the Maxtec Ventilators. Follow
the manufacturers instructions for use.
CAUTION: Some blenders are limited in their gas pressure/volume
output, which could affect the performance of the Maxtec Ventilator.
Refer to the manufacturers specifications for more information.
Cylinder Gas
Cylinder gas sources from size “E” through “H” may be used with the
Maxtec Ventilator, by attaching a suitable pressure-reducing regulator
to the cylinder and sending the gas through a high pressure hose to
the ventilator gas inlet port. The cylinder should be changed when the
pressure is 1/4 fullor less.
Pressure Reducing Regulators
Pressure reducing regulators of various descriptions may be utilized.
Pressure adjustable, dual-stage regulators give the Operator the ability
to know the actual outlet pressure during operations.
WARNINGS:
1. Regulators with flowgauges or flowmeters cannot be utilized unless
there is a 50 PSI gas outlet available that is not otherwise used. Using
a regular flowmeter outlet port will cause the ventilator to not function
properly or at all.
3. Regulators should be maintained according to the manufacturers
8
recommendations; do not use a regulator that has not been
maintained properly as gas outlet pressures
may not be adequate to power a ventilator properly.
FUNCTIONAL TESTING
Attach the Patient Tubing Circuit, along with any accessories desired,
to a mechanical test lung. Adjust the Control Knobs to the settings
desired, then turn the On/Off Switch to the “ON” position and
observe the results on the test lung, Turn on the Monitor and observe
the results, comparing them to those of the mechanical test lung.
Minor variations may occur depending on the equipment used. Several
Control Knob positions should be used to compare full range of
ventilator output.
NOTE: If a rubber test lung is used, keep in mind that the compliance
and resistance factors in this type of product are not constant, which
may result in a variance in delivered parameters.
RECOMMENDED MAINTENANCE AND PROCEDURES
Inlet Filter
The Inlet Filter should be inspected (and replaced if necessary) at
least annually. Refer to the Service Manual for this device for
complete inspection/replacement instructions.
Control Knob Calibration Procedures
In order to calibrate the Breaths Per Minute, Inspiratory Time and
Tidal Volume controls to coincide with Bio Tek Test Lung Displays,
the following procedure should be used:
1. Attach the Maxtec Ventilator to the test lung with the patient
tubing circuit and any accessories desired.
2. Remove the Breaths Per Minute, Inspiratory Time and Tidal Volume
Control Knobs, by using a 1/ 16” Allen wrench to loosen the two
Allen screws located on the sides of each knob.
3. Attach a high-pressure hose from a gas source to the gas
inlet adapter.
9
4. Turn the On/Off Switch Control Knob to the “ON” position and
allow the ventilator to cycle several times.
5. Activate the test lung and scroll up to the appropriate
display window.
6. Adjust the Inspiratory Time Control Knob Shaft until a reading of
“1.0 seconds” is displayed.
7. Simultaneously, adjust the Tidal Volume Control Knob Shaft
until a reading of “1.0 Liters” is displayed.
8. Adjust the Breaths Per Minute Control Knob Shaft until a reading
of 10 BPM is displayed.
While the machine is operating at these settings, carefully re-install
the Control Knobs, ensuring that those knobs with pointer-indicators
are pointing to the proper reference positions.
CAUTION: The BPM and Inspiratory Time Control Knobs are semi-locking
and a position stop system is molded into the plastic of both parts
of the knob assembly. Care should be taken to re-install these knobs
according to the instructions and diagram, following:
CAUTION: While calibration procedures are taking place, ensure that the
IMV/CPAP Flow Control is in the OFF position.
Locking-Knob Re-Assembly Instructions:
1. Ensure that the brass holding nut is secure and cannot
move with finger tension.
2. Place the spring over the brass nut.
3. Place the base knob over the spring and brass nut.
10
NOTE: The base knob has a single “rib” that should be placed at the
3 o’ clock position when placing the base knob over the brass nut.
If this position is not available when installing the base knob over the
brass nut, use a wrench to rotate the brass nut, clock-wise, to a
position that will allow the base knob to seat properly and position
the “rib” at the proper position.
4. Place the Top Knob into the Base Knob opening, with the indicator
pointing to the proper indicator on the label (Breaths Per Minute at
10 BPM and Inspiratory Time at 1.0 seconds).
5. Tighten the Top Knob into place with the Allen wrench.
The test lung display should now read the same as the indicated values
on the ventilator label.
Tidal Volume Control Knob
This Control knob may now be re-installed by placing the knob over
the shaft, reading the test lung display which should still indicate
“0.8 L”, and ensuring that the indicator is pointing to 1.0 L on the
label display. Tighten the two Allen screws into place.
The Calibration Procedure is now complete. The unit may now be
placed back into service.
CLEANING AND DISINFECTION
Cleaning
The ventilator may have the entire exterior cleaned with a
mild solution of soap and water and thoroughtly dried off.
Disinfection
The ventilator may have the entire exterior disinfected using
standard cold disinfection materials, rinsed with a wet cloth and
thoroughly dried off.
The patient tubing circuit and exhalation valve may be totally
immersed in a cold disinfection solution or pasteurized, thoroughly
rinsed and dried.
Sterilization
The ventilator may be gas sterilized with ethylene oxide and
11
purged with pure oxygen for 24-hours.
The patient tubing curcuit and exhalation valve may be gas
sterilized with ethylene oxide according to the institutions
guidelines for plastic materials.
WARNING: if the exhalation valve is disassembled, care must
be taken to ensure that the spring is re-installed before any
clinical use.
APPLICATION CIRCUIT DIAGRAM
Automatic Cycler
Turning the On/Off Switch to the “on” position V-1 sends a
signal through V-2 and to the flow control of V-3 where it is
delayed before piloting the 3-way (normally open) valve V-3.
The output of V-3 goes to the flow control of V-2 where it
is delayed before piloting the 3-way (normally closed) valve
V-2. When V-2 shifts, it shuts off the original signal from
V-1 and exhausts the pressure that has piloted V-3, allowing
the spring to sift the valve. This action exhausts the pressure
that has piloted V-2, allowing the spring to shift the valve.
This allows the signal from V-1 to start the cycle over again.
The adjustment on V-3 controls the “on” duration, and the
adjustment on V-2 controls the “off” duration at C-, patient
tubing circuit outlet port.
12
GAS FLOW DIAGRAMS
Inspiratory Phase
Source gas is introduced through a filter in the gas inlet
assembly, then gas flows to the pneumatic valve supply inlet.
The gas flows to the flow control then to the “tee” assembly,
which directs gas simultaneously to the exhalation valve,
pressure relief valve and to the patient As gas pressure/
volume is transmitted from the patient, it is transmitted to
the pressure gauge and displayed.
Expiratory Phase
Source gas follows the identical path of the inspiratory phase
to the pneumatic valves and is then held until the inspiratory
phase begins the cycle.
13
PROBLEM SOLVING
Problem
Solution
Failure for Ventilator to cycle
Check on/off switch for
proper position
Check gas source
available
Check Expiratory Time
Control Position
Check inlet filter for
foreign debris
Tidal Volume too low
Check Pressure Relief
Valve Setting
Check patient’s artificial
airway
Check for leaks in the
system
Adjust Control Knob to
full open position and
re-calibrate if necessary
Check inlet pressure at
30 to 50 PSI
Check external pressure
reducing regulators, if
using
Check inlet filter for debris
14
Max02Vent Exploded View
15
Max02Vent
PART NUMBERS FOR EXPLODED VIEW DIAGRAM
Oceanic
Part No.
Repeat of
Part No.
Description
No. of Parts
1.0
1.1
1.2
1.3
1.4
1.5
1.6
1.7
on/off switch
inlet gas filter
1/4 union
inlet hose connector
90 deg x 1/4npt, female
1/8 x 1/8 hose barb
washer
“d” washer
001
001
001
001
001
001
001
001
2.0
2.1
2.2
2.3
2.4
insp flow valve
imv flow valve
15/32 brass holding nut
bracket, valve mounting
10/32 x 1/8 hose barb
001
001
004
001
004
2.5
2.6
knob, control, rubber
manifold, in/out barbs
002
001
3.0
3.1
3.2
3.3
3.4
3.5
pressure relief valve
prv holding bracket
screws, 8/32 x 1
straight pipe, threaded
pipe cap
10/32 x 1/8 hose barb
001
001
002
001
001
001
acrylic base plate
10/32 brass plugs
insp/exp timing valves
standoffs, aluminum
screws, 8/32 x 1
10/32 x 1/8 hose barb
locking knob assembly
001
002
002
002
002
003
002
2.4
pressure gauge
press gauge bracket
540 x 1/4brass screw
10/32 brass nut
10/32 x 1/8 hose barb
001
001
002
002
001
6.0
6.1
6.2
6.3
1.4
2.4
flow accelerator A
flow accelerator B
1/8 x 1/8 hose barb
10/32 x 1/8 hose barb
001
001
002
001
7.0
7.1
2.4
10/32 4-way body
10/32 x 1/8 hose barb
001
004
8.0
1/8 3-way tee piece
002
9.0
urethane tubing, ft.
010
4.0
4.1
4.2
4.3
4.4
4.5
4.6
5.0
5.1
5.2
5.3
5.4
2.4
3.2
2.4
16
WARRANTY
The products of Maxtec, Inc. (OMPI herein) are warranted to be free from
defects in materials and workmanship and to meet the published
specifications for a period of five (5) years from date of delivery to the
original customer.
The liability of OMPI under this warranty is limited to replacing, repairing
or issuing credit, at the discretion of OMPI, for the parts that become
defective or fail to meet published specifications during the warrant
period; OMPI will not be liable under this warranty unless (a) OMPI is
promptly notified in writing by Buyer upon discovery of defects or failure
to meet specifications; (b) the defective unit or part is returned to OMPI,
with transportation charges prepaid by Buyer; (c) the defective unit or
part is received by OMPI for adjustment no later than four weeks following
the last day of the warranty period; and (d) OMPI examination of such
unit or part shall disclose, to its satisfaction, that such defects or failures
have not been caused by misuse, neglect, improper installation,
unauthorized repair or alteration, or accident.
Any authorization by OMPI for repair or alteration by the buyer must be in
writing to prevent voiding warranty. In no event shall OMPI be liable to
buyer for loss of profits, loss of use, consequential damage or damages of
any kind based upon a claim for breach of warranty, other than the
purchase price of any defective product covered hereunder.
OMPI warranties hereinabove set forth shall not be enlarged, diminished
or affected by, and no obligation or liability shall arise or grow out of,
the rendering of technical advice or service by OMPI or its agents in
connection with Buyers order of the products furnished hereunder.
LIMITATIONS OF LIABILITIES
This warranty does not cover normal maintenance such as cleaning,
adjustment or lubrication and updating of equipment or parts. This
warranty shall be void and shall not apply if the equipment is used
with accessories or parts not manufactured by OMPI or authorized
for use in writing by OMPI, or if the equipment is not maintained
in accordance with a prescribed schedule of maintenance.
The warranty stated above shall extend for a period of five years
from date of delivery, effective November 15, 2000.
The foregoing is in lieu of any other warranty, expressed or implied,
including, without limitation, warranty of merchantabibility, except
as to title, and can be amended only in writing by a duly authorized
representative of OMPI.
Returned Goods Policy
All returns must be authorized by OMPI prior to shipping. Returned goods
are subject to a 20% restocking fee. Contact OMPI Customer Service with
your request for an authorization number.
17
maxtec
6526 South Cottonwood Street
Salt Lake City, Utah 84107
800.748.5355 • Fax: 801.270.5590
www.maxtec.inc
Rev. 07.14.03