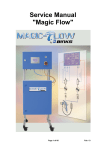
Download Magic Flow English - Finishing Brands EUROPE
Transcript
Magic Flow Rev. 3.0 – Software release 02.2011
Operating instructions
"Magic Flow"
Page 1 of 74
Feb. 2011
Magic Flow Rev. 3.0 – Software release 02.2011
Table of contents
1 Identification data
1.1 Preface
1.2 Identification of the apparatus
1.3 Warranty
Page 5
Page 5
Page 5
2 General
2.1 Notes for the user
2.2 General safety standards
2.3 Reaction hazard
2.4 Fire and explosion hazard
2.5 Toxic solvents
2.6 Injection hazard
2.7 Hazard posed by escaping liquids
2.8 Emergency shutdown
2.9 Residual pressure
Page 7
Page 7
Page 8
Page 8
Page 8
Page 8
Page 9
Page 9
Page 9
3 Description of the system
3.1 Functional characteristics
3.2 Mixing
3.3 Fluid delivery
Page 10
Page 10
Page 10
4 Installation
4.1 Transportation
4.2 Storage
4.3 Installation
4.4 Electrical connections
4.5 Motherboard with processor card
4.6 Pneumatic connections
4.7 Solenoid valve terminal
4.8 Fluid hose connections
Page 11
Page 11
Page 11
Page 11
Page 12
Page 13
Page 13
Page 14
5 Operating the system
5.1 General
5.1.1 Turning on the apparatus
5.1.2 Numerical input
5.2 Main menu
5.2.1 Select recipe
5.2.2 Start spraying procedure
5.2.3 Start flushing procedure
5.2.4 Enter settings
5.3 Painting / mixing
5.4 Flushing
5.5 Settings
5.5.1 Recipes
5.5.2 Management of flushing
5.5.3 Valves
5.5.4 System settings
5.5.5 Calibrate / adjust K- factors
5.5.5.1 Manual adjustment of K-factors
5.5.5.2 Determine K-factors
5.5.6 Container monitoring
Page 15
Page 15
Page 15
Page 16
Page 16
Page 16
Page 17
Page 17
Page 18
Page 21
Page 23
Page 24
Page 26
Page 28
Page 30
Page 33
Page 33
Page 33
Page 36
Page 2 of 74
Feb. 2011
Magic Flow Rev. 3.0 – Software release 02.2011
5.5.7 Printer configuration
5.5.8 Reports
5.5.9 V.O.C. values
5.5.10 Alarm memory
5.5.11 Security codes
5.5.12 Administrator settings
5.5.13 Optional software
5.5.13.1 Control of flushing pockets
Page 37
Page 38
Page 39
Page 40
Page 41
Page 42
Page 44
Page 44
5.5.13.2 Control of agitators
Page 45
6 Maintenance
6.1 Cleaning and maintenance of the fluid handling section
6.1.1 Cleaning of hoses and tubes
6.1.2 Maintenance of valves
6.1.3 Maintenance of metering cells
6.2 Cleaning of control module
Page 47
Page 47
Page 47
Page 47
Page 48
7 Alarm messages and troubleshooting
Page 49
8 Spare parts and options
Page 52
Page 52
Page 54
Page 55
8.1 Spare parts and options in general
8.2 Control components
8.3 Components of a typical low-pressure
fluid handling section
8.4 Assemblies with spare parts lists
8.4.1 Fluid valve 2K-4002 (high pressure)
8.2.3 Fluid valve CCV-403-SS-E (low pressure)
8.4.3 Volumeter
8.4.4 Air flow control
8.2.6 Accessories, fluid valve
8.4.6 Touch panel
Page 56
Page 56
Page 58
Page 60
Page 62
Page 63
Page 67
Page 68
9 Decommissioning the apparatus
10 Annex
10.1 Flow chart
10.2 Connecting fluid handling section and electrical cabinet
10.3 Technical characteristics
Page 69
Page 70
Page 71
Personal notes
Page 72
Page 3 of 74
Feb. 2011
Magic Flow Rev. 3.0 – Software release 02.2011
EC Declaration of Conformity
in accordance with EC Directives
− Machinery 93/68/EEC, Annex II B,
− Electromagnetic Compatibility 89/336/EEC amended by 92/31/EEC
− Low Voltage 73/23/EEC
The installation/machine
Function:
system
Trade name:
Type designation:
Electronic 2- or 3-component mixing and metering
Magic Flow
2K-2000
has been developed, designed and manufactured in accordance with the above
Directives.
The following harmonised standards were applied:
DIN 60204-1
ZH 1/406
ZH 1/200
EN 50082-2-1993
EN 50082-2-1995
Manufacturer: ITW Oberflächentechnik GmbH & Co. KG
Justus-von-Liebig-Str. 31
63218 Dietzenbach
Germany
André de Neergaard
(Managing Director)
Page 4 of 74
Feb. 2011
Magic Flow Rev. 3.0 – Software release 02.2011
1 Identification data
1 Introduction
1.1 Preface
Dear Customer,
Congratulations on the purchase of your new electronic multi-component apparatus.
Please be assured that design and fabrication of the apparatus have been carried out
according to the state of the art and with the aim of maximum user convenience and
the highest safety level, based on the selection of the best materials.
We wish to point out here that a thorough knowledge of how the system works along
with careful study of this manual and proper operation of the apparatus only by
suitably trained personnel from the start will result in more efficient operation, longer
trouble-free service and faster, easier troubleshooting. For your safety please also
refer to the service manuals for peripheral equipment, i.e. pumps, guns, and
electrostatic equipment.
If you have any questions regarding the equipment, please contact our distributors or
us. We will be pleased to help you.
1.2 Identification of the apparatus
If you have any questions regarding the product, please note the exact type
identification of the apparatus with the serial number. You will find it on the type plate
of the apparatus. This will help to identify the apparatus with regard to version and
equipment so that we can offer you the appropriate assistance.
1.3 Warranty
All ITW equipment and spare parts are manufactured from the best materials and
using the most modern production processes. Should you still have cause for
complaint, send the defective part or the defective assembly directly to ITW or to our
distributor. Please understand that we cannot accept any un-franked delivery. If your
warranty claim is legitimate, we will refund shipping costs to you.
We will check, replace, or repair defective parts that fall within the warranty. The
repair will be carried out at our company. If you wish the repair to be carried out at
your site, please note that you will be charged for any travel costs that may be
incurred.
The warranty is rendered invalid if any malfunctions or defects occurring were caused
by improper use or operation of the apparatus, or due to the accessing of assemblies
for which access was not authorised.
Page 5 of 74
Feb. 2011
Magic Flow Rev. 3.0 – Software release 02.2011
The warranty does not cover wearing parts that have been subjected to normal wear.
These include e.g. gaskets, packings and nozzles.
The warranty period will be twelve months in one-shift operation, and six months in
two-shift and three-shift operation, starting from the date of initial operation, but at the
latest 30 days after delivery. Any other agreements must be drawn up in writing.
Page 6 of 74
Feb. 2011
Magic Flow Rev. 3.0 – Software release 02.2011
2 General
2.1 Notes for the user
The safety precautions and safety standards in this section have been compiled for
your safety and in your interest. For safe operation it is necessary that the user reads
and understands all of the technical and safety literature and acts in accordance with
it. The user must be familiar with the function of the apparatus and must be aware of
the hazards and risks that may occur with pressurised pumps, hoses, and equipment.
2.2 General safety standards
-
DO NOT move, operate, maintain or service the apparatus before you have
read and understood this service manual. If in doubt or if problems arise,
contact your superior or one of our distribution partners.
-
NEVER leave tools or other mechanical components in or on the apparatus if
it is in operation or if it is about to be started up.
-
NEVER exceed the maximum pressure of the apparatus. The maximum
pressure of the apparatus is dictated by the component with the lowest
maximum pressure. You will find the maximum pressure of the apparatus on
the type plate.
-
When replacing components ALWAYS ensure that the new parts comply with
the technical data regarding fluid and maximum pressure.
-
ALWAYS ensure that the spray area is properly ventilated according to legal
requirements.
-
The equipment must ONLY be operated by authorised and adequately trained
personnel who have read and understood local codes, relevant legal
requirements and this service manual. The personnel must wear suitable
personal protection devices and clothing and use appropriate tools during
operation and maintenance.
-
Before carrying out any maintenance work AWAYS ensure the pressure is
relieved from all air and fluid hoses. Shut off the compressed air supply to the
apparatus and relieve all pumps connected to the apparatus.
-
Before carrying out any work in the electrical cabinet, ALWAYS ensure the
current supply is disconnected. It is not sufficient that the main switch is in the
OFF position. You must cut off the power supply to the cabinet completely.
-
When working with high-pressure spray equipment, ensure that the guns are
NEVER operated without protection against accidental contact. ALWAYS
activate the safety-locking lever when not using the gun, in order to prevent
unintentional opening of the guns.
-
When finishing maintenance and repair works replace properly ALL safety
covers that have been removed from moving parts.
-
Only use original spare parts and accessories. Failure to adhere to this
renders any warranty claims invalid.
-
After a longer period of shutdown, check ALL relevant components for leakage
and proper function.
Page 7 of 74
Feb. 2011
Magic Flow Rev. 3.0 – Software release 02.2011
2.3 Reaction hazard
All fluid-conducting parts of the apparatus are made of stainless steel in order to
avoid possible chemical reactions. However, in individual cases a chemical reaction
might occur if aggressive or chemically active media are being used, which might
lead in the worst case to disintegration or even to an explosion. If you want to use
such media, contact the fluid manufacturer prior to operation in order to check the
compatibility of the fluid with different kinds of stainless steel.
2.4 Fire and explosion hazard caused by sparks
High flow rates of non-conductive materials can lead to electrostatic charging. This
phenomenon frequently appears with airless systems, because the flow rate is very
high and the fluid will be sheared and ruptured at a small gap. In order to avoid
charging and associated spark discharge, all components must be electrically
connected to each other and earthed. Use suitable clamps and clean the contact
parts of spray mist, if necessary. Connect the clamps via suitable cable to an
adequate earth potential (permanently installed tubes etc.). If electrostatic charging
still occurs, check for proper earthing.
2.5 Toxic solvent vapours etc.
Toxic and harmful vapours may be released by the spraying and misting of paints
and other materials. Follow all the manufacturer’s safety instructions. Keep to the
relevant lower toxic limit values and maintain adequate ventilation.
2.6 Injection hazard
-
Never let any part of the body come in contact with the tip of the spray gun
-
Never aim high-pressure spray guns at any part of the body or at other
persons under any circumstances
-
If the pressure is high enough, the spray jet from high-pressure spray guns
can penetrate the skin. Such an injection of liquid can have serious health
consequences. If such an incident occurs, in spite of all safety precautions,
seek medical care immediately and inform the doctor of the nature and
composition of the fluid that has penetrated (see safety data sheets).
2.7 Hazard caused by escaping liquids
Never modify the connections of the apparatus without prior consultation.
Regularly check the condition of hoses and connections. Take care that hoses are
not crushed and bent below the permitted radius.
Never subject hoses and connections to high mechanical loads in excess of those for
which they are rated. Replace damaged hoses immediately!
Check that all connections are tight prior to operation.
Page 8 of 74
Feb. 2011
Magic Flow Rev. 3.0 – Software release 02.2011
Never try to stop or deflect leaking fluid with your hands or other parts of the body.
2.8 Emergency shutdown
In case of an accident or a hazardous situation, turn the main switch to the OFF
position. This will render all components on the panel currentless and will close all
valves.
2.9 Residual pressure
Even after interruption of the air supply to the pumps, the lines fed by the pumps are
still not depressurised, as pressure can usually only be relieved in one direction. In
order to depressurise the complete installation, open the spray gun and the relevant
valves via the control device (if no relief device is installed at the pumps).
Page 9 of 74
Feb. 2011
Magic Flow Rev. 3.0 – Software release 02.2011
3 Description of the system
3.1 Functional characteristics
The system is designed to meter two or three volume flows, in which the main
volume flow (generally the main component) will be opened and all other components
(e.g. the hardener) will be regulated on basis of the metered first volume flow
according to the mixture ratio of the chosen recipe. All parameters and tolerance
values that are necessary for the calculations will be filed in the system settings. In
order to guarantee maximum safety, the function of the metering sensors will be
monitored on the one hand, and on the other hand the apparatus will be shut down
and an alarm triggered if the required mixture ratio has not been achieved (e.g.
insufficient material).
Due to the high precision of the mixing and the controlled and economic handling of
solvents and paint materials, the electronic mixing and metering equipment is clearly
superior to mechanical metering equipment in many respects.
3.2 Mixing
The apparatus regulates and injects the B component (optionally also C) into the
running volume flow of side A. To obtain a good mixing result, it is necessary to
connect a static mixer to the outlet of the apparatus. Care must be taken that the
static mixer complies with the maximum pressure of the complete installation. The
length of the mixer, the number of mix steps, and the diameter are determined by the
paint material used, the mixture ratio and the maximum volume flow. It may be
necessary to insert a downstream hose mixer (e.g. at very high flow rates).
3.3 Fluid delivery
The fluid can be delivered either by piston pumps, double and mono-diaphragm
pumps, or by pressure tanks. Care must be taken that all components are operating
in a similar pressure range. So combined operation with e.g. pressure tanks and
high-ratio piston pumps is not recommended.
It must be ensured that the components of side B (possibly
also of side C) have a pressure that is approximately 10%
higher than side A, in order to be metered and fed in.
For proper operation of the apparatus, the following are the minimum requirements:
-
a paint supply for side A
a hardener supply for side B
a supply of flushing agent (two are possible depending on the paint system)
If necessary, a supply of thinners (for 3C installations)
Page 10 of 74
Feb. 2011
Magic Flow Rev. 3.0 – Software release 02.2011
4 Installation
4.1 Transportation
Depending on the design, the apparatus consists of one or two modules, which can
be transported separately from each other. Transportation will be on pallets. Two
people are needed to handle them.
4.2 Storage
If the apparatus is to be stored, the control section must be protected against heat
and humidity. In order to avoid condensation, the apparatus must not be exposed to
substantial temperature changes, otherwise the apparatus must be exposed to the
new ambient temperature with flaps open for several hours prior to operation.
The fluid handling section is extensively resistant to external influences. For a longer
period of storage, however, it should be filled with preservative oil in order to take
care of the packings and to guarantee smooth operation.
With regard to the supply pumps, proceed according to the relevant service manuals
for the pumps.
4.3 Installation
Industrial installations from ITW are normally commissioned by the company's own
service technicians or our agents’ service technicians. This is to avoid faults at the
very beginning caused by defective installation or operation.
If installation is not to be carried out by an ITW service technician, please check the
completeness and the correct function of all components within the scope of delivery.
When installing always take into account the operability of the installation, the
ambient conditions (e.g. EEx explosion proofing), and the safety of operators.
ATTENTION: the control cabinet cannot be located in the EEx area. If operation in
the EEx area is necessary, a remote control panel is available as an option.
4.4 Electrical connections
The apparatus will be supplied via a central electrical input at the control cabinet. Pay
attention to proper earthing of the necessary shock-proof plug. In the basic version,
the fluid cabinet (fluid handling section) and the electrical cabinet will be delivered
separately. The connection of the two parts should be carried out according to the
description in section 10.2 (Connecting fluid handling section and electrical cabinet).
Page 11 of 74
Feb. 2011
Magic Flow Rev. 3.0 – Software release 02.2011
4.5 Motherboard with processor card
Key for symbols
V1-V8
Outputs for control of
valves 1-8
S1-S8
Status outputs, assigned
as follows:
S1:
Mix OK
S2
System ready
S3
Flush
S4
Fill
S5
Drain valve
S6
System filled
S7
Alarm
S8
Pot life almost expired
*1
*2
*3
Page 12 of 74
Constant connection
+ 24 V
Switching side to GND of
status functions
Switching side to GND of
valve functions
Feb. 2011
Magic Flow Rev. 3.0 – Software release 02.2011
4.6 Pneumatic connections
The apparatus (in standard version) will be supplied via a central air connection. The
pressure may not exceed 8 bar, but must be at least 6 bar! Please provide clean
industrial air and ensure proper filtration and condensate separation. Use oil-free
compressed air.
4.7 Solenoid valve terminal
The solenoid valve terminal comprises 8 x 3-way, 2-position valves, which can be
used for different purposes, but mainly to control the paint (?), hardener and paint (?)
valves. With the maximum complement of 32 valves, 4 solenoid valve terminals are
required. The outputs are assigned as described on the following page.
Fig.: Solenoid valve terminal – view from below
The lead colour coding for
the solenoid valve terminal is follows:
4 x black= + 24 V
1 = Brown
2 = Red
3 = Orange
4 = Yellow
5 = Green
6 = Blue
7 = Purple
8 = Grey
Number
Valve
Number
Block
Output at
valve terminal
1
2
3
4
5
6
7
8
9
10
11
12
13
14
15
16
17
18
19
20
21
22
23
24
25
26
27
28
29
30
31
32
1
1
1
1
1
1
1
1
2
2
2
2
2
2
2
2
3
3
3
3
3
3
3
3
4
4
4
4
4
4
4
4
1
2
3
4
5
6
7
8
1
2
3
4
5
6
7
8
1
2
3
4
5
6
7
8
1
2
3
4
5
6
7
8
Page 13 of 74
Feb. 2011
Magic Flow Rev. 3.0 – Software release 02.2011
4.8 Fluid connections
Depending on the number of components, the fluid handling section must be
supplied with at least one main colour, one hardener and one flushing agent. The
outlet of the static mixer must be connected to the gun/guns by a suitable fluid hose
(please refer to length and nominal pressure).
The hoses must be equipped with suitable hose connections according to the
apparatus. The threads must be in a perfect condition and must seal under pressure.
Page 14 of 74
Feb. 2011
Magic Flow Rev. 3.0 – Software release 02.2011
5 Operating the system
5.1 General
5.1.1 Turning on the Apparatus
Turn on the apparatus by turning the main switch to the "ON" position. Only turn the
apparatus on if the control cabinet is closed (high voltage). Opening of the control
cabinet when the apparatus is ON must only be carried out by qualified personnel
and service technicians.
Generally it is not necessary to turn off the apparatus. If the apparatus is in main
menu mode and has been cleaned, the screen will independently turn off after an
adjustable period of time (see system settings, value "Standby").
Do not turn the apparatus off in the filled state, as control of the pot life will then no
longer be possible, resulting in a risk of material hardening in the apparatus.
5.1.2 Numerical input
To set the different parameters, it is necessary to be able to enter numbers.
Generally this is done using the input field shown below:
The value to be set is shown at the top left. The value is deleted by pressing the
"DEL" key (one decimal place per key depression). The value is entered into the
system by pressing the numerical fields and by pressing the "ENT field.
The name of the value (here "recipe", i.e. recipe number), is described below the
value.
Page 15 of 74
Feb. 2011
Magic Flow Rev. 3.0 – Software release 02.2011
5.2 Main menu
5.2.1 Select recipe
By pressing the recipe number (here "1") you are asked to enter a new recipe
number. Possible inputs are all recipe numbers from 1 to 50.
The name of the recipe is displayed below the recipe number. On the icon "Flushing",
the number of the stored flushing program (1-10) for this recipe will be displayed.
If you have chosen a recipe number that has been filed in recipe administration as
inactive, the display with the recipe parameters will flash. You cannot start this recipe.
5.2.2 Start spraying procedure Pressing the spray icon activates the mixing procedure, provided that an active
recipe was chosen beforehand.
5.2.3 Start flushing procedure Pressing the flushing icon activates the flushing procedure. The flushing procedure
may be repeated as often as you wish (for example, if several spray guns are
connected, which are to be cleaned one after the other). If the icon flashes, the
Page 16 of 74
Feb. 2011
Magic Flow Rev. 3.0 – Software release 02.2011
apparatus has not yet been cleaned after the last mixing procedure and the
remaining pot life will continue to be counted down.
The pot life will only be reset to the start value after a flushing procedure has been
CARRIED OUT IN FULL!
The flushing program activated by the last mixing procedure will always be selected
by default. It is not important, therefore, which flushing program number is displayed
on the icon, but which recipe was started and stopped last.
5.2.4 Enter settings This icon will take you to the system settings. Here you can change recipes,
operating parameters and safety settings for example. Depending on the setting the
various sections may only be accessed using passwords.
Page 17 of 74
Feb. 2011
Magic Flow Rev. 3.0 – Software release 02.2011
5.3 Painting / mixing
During the mixing procedure, four different displays can be selected. By using the
arrow keys on the bottom of the screen, you can change between the displays.
1
2
3
4
5
6
7
[1] The set values of the mixture ratio and the selected valves are displayed in the
top line (in all displays).
[2] Below this you can read the current actual values. The measured value for each
component is displayed in millilitres and in percent.
[3] You can read the total consumption at this position. This is important, for example,
for the filling quantity of the system or for resetting the pot life.
[4] Remaining pot life. The basic pot life is stored in the recipe. If not enough fluid is
extracted, the pot life will run towards 00:00:00 and will subsequently set off an alarm.
If the alarm is not acknowledged in time (within 5 minutes), an automatic flushing
procedure will be started. IMPORTANT: In order to reset the pot life automatically,
double the amount of the paint filling quantity has to be extracted from the system in
order to ensure complete fluid replacement. Example: If the filling quantity is
determined to be 200 ml and this is stored in the system (system settings), the pot life
will always be reset to the initial value after the removal of 400 ml.
[5] Using the arrow key will take you to the previous display.
[6] Pressing the "Stop" key ends the mixing procedure.
[7] Using the arrow key will take you to the next display.
Page 18 of 74
Feb. 2011
Magic Flow Rev. 3.0 – Software release 02.2011
1
2
[1] "strokes now" = the total number of strokes of the fluid valves in this recipe since
the start of the mixing procedure. The main component stays at "0" because the
valve is only opened at the start and closed at the end. The number of strokes per
volume provides information about the quality of the dosing. Many small hardener
injections result in a better mixing result than a few large injections.
[2] "strokes total" = total number of valve strokes since installation. This can be
helpful when servicing the valve. Based on experience gained during operation of the
system, you can draw conclusions regarding the actual condition of the wearing parts
on the valve.
1
2
3
[1] Gun monitoring: the number on the display indicates the time in seconds during
which the gun has been open, but no impulses were received from the metering cell.
As soon as the volume sensor measures a fluid flow, the value drops back to "0". If
the value increases up to the stored value for monitoring the gun, the system will set
off an alarm. The gun is monitored via a sensor in the atomizer air. For automatic
guns, the monitoring is carried out via a potential-free contact, which is closed by the
higher-level PLC.
[2] Volume flow: the bar displays the output frequency of the volume sensor. This is
proportional to the measured volume flow.
[3] Valve status: when the valve is activated, "ON" will be displayed on the screen,
otherwise "OFF". The main component is permanently open.
Page 19 of 74
Feb. 2011
Magic Flow Rev. 3.0 – Software release 02.2011
By means of this display, hardware errors can be detected easily. If, for example, the
valve is "ON" but the value of the gun monitoring is increasing steadily, then the
reason will be that no fluid is flowing, the metering cell is blocked or the flow sensor
for the atomizer air is set incorrectly.
1
2
3
[1] Tank size: the value displays the capacity, in litres, for this container.
[2] Minimum level: the programmed value indicates by which tank level the alarm will
be activated.
[3] Level indicator: the value displays the current fluid quantity in the tank.
"No level control": the tank has not been activated for tank monitoring.
Up to 8 tanks can be monitored with their own alarm output via the optional "standard
level" output module. By this means, for example, eight alarm lights can be activated
individually in order to see immediately which tank has to be refilled.
Page 20 of 74
Feb. 2011
Magic Flow Rev. 3.0 – Software release 02.2011
5.4 Flushing
3
4
5
6
1
2
7
8
9
10
[1] Current flushing step: a flushing procedure may consist of up to 20 different steps.
All flushing steps for which values are stored are run in numerical order.
[2] Skip a flushing step: if the current flushing step is to be skipped, press the key
and skip to the next flushing step for which values are stored.
[3] Valve number: the flushing valve that is currently open is displayed.
[4] Flushing value: stored set value of the flushing program, optionally in "ml" or in
"sec" (see [4]).
[5] Dimension: displays whether the current flushing step will be carried out in
millilitres or in seconds. In principle, cleaning of the apparatus in millilitres is a more
reliable process. However, quantity recording is not sensible for steps which cause
e.g. air / solvent flushing. So the dimension can be determined for each flushing step
separately (see flushing programming).
[6] Dump valve: for each step in the flushing program it is possible to set whether the
signal "Dump valve" is to be activated. The signal can then be used to activate e.g. a
gun cleaning box, or whether the cleaning is to be carried out via an external dump
valve (drain valve).
[7] Loop start: if a loop was programmed in the flushing program, which carries out
certain steps cyclically for a certain number of repeats, then the first flushing step of
this loop can be displayed here.
Page 21 of 74
Feb. 2011
Magic Flow Rev. 3.0 – Software release 02.2011
[8] Last step of the loop described under [7].
[9] Number of loop run-throughs (see [6]).
- This key interrupts the flushing procedure and closes all valves.
[10]
ATTENTION: if the flushing procedure is interrupted, the apparatus is regarded as
still being filled. The pot life continues to run accordingly!
For the refilling and flushing of several guns, an output module is available. You can
connect up to 4 dump valves or gun extractor units. If the system recognises this
module during switch-on, the operator will be prompted on start-up of the spraying
process to enter the spray guns that should be activated. If the system is flushed at a
later stage, the flushing procedure entered is run in full once for every previously
filled gun. During each run, another extractor unit is activated in order to ensure that
every gun is flushed properly.
Page 22 of 74
Feb. 2011
Magic Flow Rev. 3.0 – Software release 02.2011
5.5 Settings
All installation parameters can be set in the tool menu. All settings can
influence the mixing result and should therefore only be carried out by trained
personnel or by service technicians! The option also exists of protecting all
sub-menus by passwords and of informing only selected persons of these (see
"Security codes").
Page 23 of 74
Feb. 2011
Magic Flow Rev. 3.0 – Software release 02.2011
5.5.1 Recipes
Press the recipe key to access recipe administration (if necessary enter security
code):
Press the key at the top left-hand side for the recipe number to select the recipe to
be edited.
In the centre of the screen, you can choose any name for the recipe with up to 15
characters. This name will be displayed in the main menu under the recipe number.
This will make it easier for you to assign the recipes to the associated colours.
In the table, top right, a fluid valve can be allocated to each metering channel (A / B /
C) for the selected recipe and the fluid ratios for the recipe can be determined.
Please note that the volumetric mixture ratio will be entered. It is of no importance
whether, for example, for "A" 4 portions and for "B" 1 portion are entered, or whether
the mixture ratio will be entered e.g. as 100: 25. During the mixing procedure the
main component will automatically be determined by the greatest share of the total
mixture and permanently opened, while the other components will be added by
metering.
Only enter values under "C" if the apparatus is also equipped as a 3C installation.
Ensure that the valve numbers entered are actually connected to the relevant
metering cells.
Page 24 of 74
Feb. 2011
Magic Flow Rev. 3.0 – Software release 02.2011
Adjust the pot life of the relevant mixture under t(min) (in minutes).
If an automatic pressure adjustment kit (optional) is connected to the apparatus, you
can determine the fluid pressure under p(bar), which will be adjusted after filling.
Under Flush, enter the flushing program that should be assigned to this recipe. You
can select one of the ten flushing programs that you set up earlier.
Under Active you can determine whether it is an active recipe that can be started
immediately. You can release recipes to the operator or block them in this way.
Inactive recipes will flash when they are selected in the main menu and cannot be
used.
The icon with the crossed out disk rejects all modifications and downloads all 50
recipes again from the system memory.
The icon with the disk stores all modifications and takes you back to the tool menu.
ATTENTION: both when aborting and saving, the control unit requires a few seconds
either to write the data of 50 recipes to the EEprom or to read them from the EEprom.
For this reason, do not try UNDER ANY CIRCUMSTANCES to speed up this process
by pressing especially hard on the display!
Page 25 of 74
Feb. 2011
Magic Flow Rev. 3.0 – Software release 02.2011
5.5.2 Management of flushing
Press the flushing program key to access management of the flushing process (if
necessary enter security code):
First you are asked to enter the number of the flushing program that you wish to edit.
You can enter the numbers 1 to 10.
3
4
5
6
2a
1
2b
7
8
9
10
[1] Current flushing step that is being processed: a flushing procedure may consist of
up to 20 different steps. Only those flushing steps for which values are stored are run
in numerical order.
[2a] / [2b] Flushing step forward, flushing step back: changes to previous or next
flushing step that is to be processed.
[3] Valve number: number of the flushing valve which is to be opened in this step.
[4] Flushing value: set-point value of this step, which must be processed so that the
apparatus skips to the next step, optionally in "ml" or in "sec" (see [4]).
[5] Dimension: displays whether the current flushing step will be carried out in
millilitres or in seconds. In principle, cleaning of the apparatus in millilitres is a more
reliable process. However, quantity recording is not sensible for steps which cause
air / solvent flushing for example. So the dimension can be determined separately for
each flushing step.
Page 26 of 74
Feb. 2011
Magic Flow Rev. 3.0 – Software release 02.2011
[6] Dump valve: for each step in the flushing program it is possible to set whether the
signal "Dump valve" is to be activated. The signal can then be used to activate e.g. a
gun cleaning box, or whether the cleaning is to be carried out via an external dump
valve (drain valve).
[7] Loop start: in the flushing program a loop can be programmed, which carries out
certain steps cyclically for a certain number of repeat options. Here the first step of
this loop will be displayed.
[8] Last step of the loop described under [7].
[9] Number of loop run-throughs (see [6]).
[10]
- Key to store all modifications.
Page 27 of 74
Feb. 2011
Magic Flow Rev. 3.0 – Software release 02.2011
5.5.3 Valves
Press the valve key to enter the manual control panel for the associated valves,
signal outputs (optional), and pressure regulator (optional):
Keys 1- 8 (alternatively 1-16 or 1-32, depending on system configuration) control the
relevant valves. For security reasons only one fluid valve can be opened at a time. If
you want to close all valves again, press the key "Valves OFF".
Keys "S1" - "S8" control the special signals:
S1: Mixing OK
S2: Ready
S3: Flushing
S4: Filling
S5: Dump valve
S6: Filled
S7: Alarm
S8: Alarm prior to expiry of pot life
Press the key “Signals OFF” to turn off all outputs.
Keys "F1" - "F4" control gun extractor units 1 to 4
Keys "D1" - "D4" control colour distributor valves 1 to 4
You can test the optionally available pressure adjustment kit using the analogue
regulator. With "-" you reduce the value by 0.1 bar, with "+" you increase the value by
Page 28 of 74
Feb. 2011
Magic Flow Rev. 3.0 – Software release 02.2011
0.1 bar. With "Analogue OFF" you reset the value to 0.0 bar. The kit performs
adjustments from 0.0 to 7.0 bar.
Page 29 of 74
Feb. 2011
Magic Flow Rev. 3.0 – Software release 02.2011
5.5.4 System settings
Important security-related settings for the operation of the apparatus can be entered
in the system settings. The correct setting of these parameters is of great importance
for the resulting finish and trouble-free operation of the apparatus.
Filling quantity: on the one hand, the filling quantity is important
for the external signal "Filling" to which e.g. a signal light can be connected, which
indicates to the operator that the filling procedure is not yet complete. On the other
hand, the filling quantity is needed to monitor the pot life. After the removal of twice
the filling quantity, the pot life will be reset to the start value. Removal of twice the
filling quantity is necessary to prevent mixing of already reacting and fresh fluid in the
apparatus and in the hoses.
Increment size: the increment size is necessary for monitoring the
accurate mixing of the fluid. The stored value indicates the maximum interval
between two hardener metering injections in millilitres. Important: this value has no
effect on the quality of mixing! It only serves a monitoring function. The apparatus
itself tries to meter the hardener in the smallest possible injections. The cycle
Page 30 of 74
Feb. 2011
Magic Flow Rev. 3.0 – Software release 02.2011
frequency of the valve depends on hardener overpressure, the needle stroke of the
metering valve, flow rate, viscosity and many other factors.
Generally the increment size should be adjusted in such a way that mixing of the fluid
in the mixer can just take place. An increment size of 100 ml for a static mixer with a
filling volume of 20 ml may have the result that the fluid will not be mixed accurately,
but that the apparatus continues to operate without any error signal.
Metering cell monitoring: the value stored here indicates for how
long the spray gun may be opened without the metering cell having to move.
Monitoring of the gun opening in manual installations is generally carried out by the
air flow control integrated into the atomizing air. For automatic installations this signal
can also be given directly by an external control facility.
When the painter opens the gun, the fluid flow should start shortly afterwards and
activate the gear wheels of the metering sensors. As long as a movement is
recognised and impulses are thus sent by the metering cells to the mixing apparatus
controller, monitoring of the metering cells is reset. However, if a metering cell is
blocked because of contamination, for example, so that it can no longer detect a
volume flow, the apparatus will emit an alarm signal after the time set here.
The time should be in the range of 5-10 seconds in order to ensure that no unmixed
fluid can escape from the gun. The time chosen should not be too short (less than 3
seconds), however, since the painter occasionally uses the gun to blow dust from the
object to be coated.
Time: press the [SET CLOCK] key in order to set the internal clock
of the apparatus. The clock has a power reserve of approximately 10-14 days. The
clock is necessary to print logs and for storing alarm messages.
To change values press the keys [+] / [-]. To store the modifications press the [OK]
key.
Display brightness: enter the value for the relative display
brightness in percent (0- 100%). Please note: if the value is too low you might not be
able to read the displays and will then not be able to increase the value!
Standby time: the standby time in seconds indicates the time
period after which the display turns off to extend the service life of the lighting
cathode. The apparatus only switches to standby mode if it is flushed and if it is in
main menu mode (all valves closed).
Page 31 of 74
Feb. 2011
Magic Flow Rev. 3.0 – Software release 02.2011
If the apparatus is in standby mode, it is sufficient to touch the screen to return to the
main menu.
Units of measurement: pressing the appropriate
button sets the system either to metric units (ml / l / bar) or to imperial units (oz / gl /
psi). Recalculation is automatic.
Language settings:
Up to eight different language packages can be installed on the system. The
composition and positioning of the languages can vary. Important: a language must
always be installed. If no language package is specified, please contact us.
After selecting the desired language, please be patient - the language first has to be
loaded.
Page 32 of 74
Feb. 2011
Magic Flow Rev. 3.0 – Software release 02.2011
5.5.5 Calibrate / adjust K- factors
5.5.5.1 Manual adjustment of K-factors
For quick start-up of the apparatus and for checking the functions generally, it is
normally sufficient to enter the K-factors of the volumeter determined by the design
into the system. These are normally entered on delivery of the apparatus.
To take account of the different physical characteristics of the media to be metered, a
dedicated K-factor can be entered for each valve and thus for each associated
medium. A high-viscosity, solvent-based paint will produce a different K-factor from a
cleaning thinner or a water-based paint at the same volumeter.
Press the individual number fields (1 – 32) to read the stored value. If you wish to
change this value (e.g. after changing to another volumeter), you can do so by
.
pressing the number input icon
5.5.5.2 Determining K-factors
To increase the accuracy of the mixing apparatus, it is recommended that all media
be calibrated. To do this, proceed as follows:
Press the icon with the mixing cup (
)
Page 33 of 74
Feb. 2011
Magic Flow Rev. 3.0 – Software release 02.2011
Select the volumeter that is to be calibrated:
3. Select the valve that is to be used for calibrating:
Page 34 of 74
Feb. 2011
Magic Flow Rev. 3.0 – Software release 02.2011
4. Carry out metering:
-
-
-
-
The bar on the left side indicates the flow rate. If the bar does not expand
upwards when removing fluid, you have either selected a valve which is not
allocated to the selected volumeter, or the metering cell is mechanically
blocked.
The number top right indicates the number of pulses. First open the spray gun
and remove fluid. The pulse counter must now display an increasing value.
Using the "START / RESET" key you can reset the pulse counter to zero. After
filling the system with fluid, press the key, wait for a few seconds and then
start the actual metering.
Remove an easily readable quantity of fluid into a metering cup. Then close
the spray gun and wait for a few seconds until the pulse counter has come to a
stop.
Finally, press the "OK" key. You will then be asked to enter the volume of the
fluid removed.
The resulting K-factor will be displayed and will then be entered into the
system.
Page 35 of 74
Feb. 2011
Magic Flow Rev. 3.0 – Software release 02.2011
5.5.6 Container monitoring
Integrated container monitoring serves to check the container levels without any
additional sensor systems. If a container is to be monitored, its level must be stored
in this menu prior to use.
Starting from the consumed quantity of fluid metered, the system can emit an alarm
signal if a defined minimum level is reached in order to avoid no-load operation of the
pumps, with resultant defective mixtures and operating failures.
The container that is to be set or monitored is selected using the buttons [1] – [32].
The container size present when delivered is set using the button [MAX LEVEL].
[ACTUAL CONTENT] displays the current container level. Press the button to refill
the container numerically or to enter any new level.
[MIN LEVEL] displays the minimum level. An alarm signal will be triggered if the level
falls below this value. Press the button to adjust the level.
[ACTIVE] and [NOT ACTIVE] indicate whether monitoring is to be activated. If the
button is in [ACTIVE] mode, an alarm signal is emitted. If the button is in [NOT
ACTIVE] mode, the container level will be calculated, but the minimum level will be
ignored.
Page 36 of 74
Feb. 2011
Magic Flow Rev. 3.0 – Software release 02.2011
5.5.7 Printer configuration
[UNIT ID] displays the name of the mixing apparatus which appears on the print-outs.
It is therefore possible to distinguish between the print-outs of different apparatus.
The name can have up to 10 characters.
[PRINTING AFTER …ml] displays the intervals at which process information is to be
printed. In the above case, a print-out would be started after the removal of one litre
of fluid in each case.
[PRINTING AFTER …sec] displays the time intervals at which a print-out is to be
printed during the mixing procedure.
It is possible to activate both print-out variants, but also only one or neither of them. If
no print-outs are to be produced, set both values to "0".
Set the following parameters at the printer interface that is provided as standard
(serial):
Baud: 9600 (8 bit / no parity / 1 stop bit), no hardware handshake
Page 37 of 74
Feb. 2011
Magic Flow Rev. 3.0 – Software release 02.2011
5.5.8 Reports
Use the keys [1] to [32] to select the valve and component respectively where you
wish to read the consumption.
[TOTAL] displays the total consumption of the component since installation of the
system. It is not possible to reset this value.
[JOB] displays the consumption since the last reset of this value. It is possible to
record weekly consumption, for example. The operator can reset these values using
the key [RESET JOB].
The consumption of the component and its VOC content is listed both at the total
consumption meter and at the job meter. The relative VOC content in percent can be
set in the VOC Menu (see 5.5.9).
Press the key [PRINT ALL] in order to print the consumption values of all
components if the optional printer is connected.
Page 38 of 74
Feb. 2011
Magic Flow Rev. 3.0 – Software release 02.2011
5.5.9 V.O.C. values
Press the keys [1] to [32] to select the valve and component respectively for which
you wish to adjust the VOC value.
The VOC value (in %) will be displayed in the centre. Press the key [V.O.C.] to adjust
the value for each valve separately. The value is needed in order to calculate not
only the consumption but also the VOC emissions for the consumption reports.
Page 39 of 74
Feb. 2011
Magic Flow Rev. 3.0 – Software release 02.2011
5.5.10 Alarm memory
The mixing apparatus stores up to 100 alarm messages in order of appearance.
You can browse the alarm history with the keys [ ] and [ ]. If more than 100
errors were recorded, the last 100 messages are still available.
Each alarm message is listed with date and time as well as the reason for the alarm.
You will find the meaning of the alarm icons in the chapter "Alarm Messages".
Page 40 of 74
Feb. 2011
Magic Flow Rev. 3.0 – Software release 02.2011
5.5.11 Security codes
When delivered all menus are accessible without code input (input "0"). After
installation and commissioning, all security-related settings should be passwordprotected against unauthorised access.
Passwords are set in the same manner as any adjustment of the codes that may be
required later.
To set a code, first press the key icon shown above. You will be asked to enter the
“master code”, which for reasons of security is not part of this documentation. It will
be sent separately to you from ITW / Binks. After entering the code, press the field for
which you want to secure the menu with a new password. You will see the input
mask "new code". Enter your new secret number here. The code will be stored
automatically.
If you should forget or mislay your access code, you can also use this procedure to
find out the stored code. But keep the master code safe, because it is an
unchangeable part of the control software.
Page 41 of 74
Feb. 2011
Magic Flow Rev. 3.0 – Software release 02.2011
5.5.12 Administrator- settings
This menu contains settings that should only be changed by service technicians. You
will be given the access code if required on request.
ACCESS TIME: the time shown in seconds indicates that in apparatus with a robot
communications kit (for which it is assumed that these are operated via external
control), access via touchscreen must be confirmed once more within the time
indicated to prevent mistaken commands.
ALARM FLUSH: time after which a flushing process is triggered automatically in case
of an alarm. 0 sec. = no forced flushing
COL. Ch. FLUSH: indicates whether automatic interim flushing takes place. OFF =
no interim flushing, RECIPE = changing recipe, 1C-2C-3C only when changing paint
type (thus from 1C to 2C paint).
COM-1 BAUD RATE: speed of serial interface. The value must be set to 57,600 for
the optional Ethernet interface. For serial printers 19,200 Baud is normally used.
COM-1 FUNCTION: printer = data that are output on a printer are printed
automatically. Web server = data are only output on request (strictly according to
communications protocol). Screenshot = the receipt of any byte results in the return
Page 42 of 74
Feb. 2011
Magic Flow Rev. 3.0 – Software release 02.2011
of the screen contents in an internal format. The data must be received with a special
tool and converted into a bitmap (*.bmp).
COM-2 BAUD RATE: see above, only relevant if there is an optional second interface.
D/A-PORT FUNCTION: function of analogue output. 0-7bar = pressure adjustment kit.
0-1.0l/min = the current flow rate is output in the range up to 1.0 l/min (10V = 1.0
litre/min). 0 – 5.0l/min = same function, but 10V corresponds to a flow rate of 5
litre/min.
1st POT LIFE ALARM: pot life pre-alarm in minutes.
STOP AFTER FILLING: indicates whether the apparatus closes the valves once
again after filling, ready to be released once more.
POT LIFE FACTOR: safety factor for calculating the remaining pot life. 200% means
that double the filling quantity must be consumed to reset the pot life again to the
initial value. 150% means accordingly e.g. 1.5 times the filling quantity.
Page 43 of 74
Feb. 2011
Magic Flow Rev. 3.0 – Software release 02.2011
5.5.13 Optional software (only available for additional hardware options)
5.5.13.1
Control of flushing pockets
If the option for the control of up to four flushing pockets for handguns is connected
to the system, the following screen will appear after pressing the “Spray” key:
Guns 1 to 4 can be activated or deactivated individually (on = active / off = inactive).
The filling process will then be performed consecutively via the corresponding
flushing pocket for each activated gun.
When changing paints or flushing the system, only the guns that were active during
the last spraying process will be cleaned one after the other. The stored flushing
process will then run exactly once for each gun.
This mask will only be called up if the spraying process is started via the display. If
the mixing process is called up via a remote control or a robot communication module,
the last selected gun combination will be automatically applied again.
Page 44 of 74
Feb. 2011
Magic Flow Rev. 3.0 – Software release 02.2011
5.5.13.2
Control of agitators
If the option for control of up to sixteen agitators is connected to the system, these
can be programmed as follows:
The function of each agitator can be tested in the programming menu. All agitators
can be set individually and independently of one another to OFF / LOW / HIGH. LOW
and HIGH each describe just one digital output. Assigning these outputs to electric
motors or solenoid valves is down to the user. The outputs can also be used to
repump fluid in circulation etc.
The values of LOW OFF and LOW ON describe the cyclical turning on and off of the
relevant outputs, regardless of the operating mode of the apparatus.
The HIGH ON time shows the time taken to turn on the relevant output before the
start of the mixing procedure.
LOW OFF TIME: indicates how many seconds the output is turned off for.
LOW ON TIME: indicates how many seconds the output is turned on for.
All agitators are always turned on and off at the same time. Example: LOW OFF =
3000sec / LOW ON = 600sec
All agitators are turned on for 10 minutes and off for 50 minutes every hour.
Page 45 of 74
Feb. 2011
Magic Flow Rev. 3.0 – Software release 02.2011
HIGH ON: the mixing process is started with one component; this is first agitated for
the set time. Only then are the metering valves opened. This always applies only to
the agitators whose components are stored in the activated recipe.
Page 46 of 74
Feb. 2011
Magic Flow Rev. 3.0 – Software release 02.2011
6 Maintenance
6.1 Cleaning and maintenance of the fluid handling section
Protect the fluid handling section from spray mist. If it is necessary to clean the area
with thinners, the power to the apparatus must be turned off because the metering
sensors of the standard version are not EEx-proof.
Generally the apparatus must be cleaned by a complete flushing procedure after the
end of operations or during a prolonged spray interval to avoid hardening of the paint
in the apparatus.
See 5.2.3 Start flushing procedure
6.1.1 Cleaning of hoses and tubes
If the flushing procedures have been carried out properly, a special cleaning of hoses
and tubes is not necessary. However, if reactions occur inside the system,
replacement is advisable to avoid solid particles gradually coming off and entering
the system.
6.1.2 Maintenance of valves
If a colour change valve has not been used for a prolonged period, disassembly of
the colour supply unit and flushing of the valve are recommended, otherwise solid
particles might settle inside the valve.
If the valves no longer operate properly, or if air or fluid leaks occur, the seals must
be replaced. Since the hardener valves are activated more frequently, regular
checking of the valves is indispensable. Servicing of valves at regular intervals is
recommended once initial empirical values have been obtained.
You will find further details in Annex 10.5.
6.1.3 Maintenance of metering cells
In principle our metering cells are maintenance-free. If it should be necessary to
clean blocked metering cells, however, please note:
Metering cells have to be handled according to the manufacturer's instructions - see
annex (10.4).
The accuracy of the metering cells must be checked at regular intervals (calibration),
because the use of abrasive or pigmented media will cause wear, which affects the
accuracy of the gear wheels.
Page 47 of 74
Feb. 2011
Magic Flow Rev. 3.0 – Software release 02.2011
6.2 Cleaning of control module
The control module must only be cleaned with mild cleaning agents. There are no
internal components or assembly groups which need cleaning or maintenance.
Cleaning the touchscreen display with solvents is not allowed. If you are concerned
about extensive contamination of the display, slightly self-adhesive transparent
protective films are available, which can easily be replaced.
Page 48 of 74
Feb. 2011
Magic Flow Rev. 3.0 – Software release 02.2011
7 Alarm messages and troubleshooting
Fault
Alarm message:
Possible cause
Atomizing air is open
without spraying
Remedy
Set longer activating time
for metering cell
monitoring.
Do not open atomizing air
unnecessarily
Clean tip, replace if
necessary
Check allocation of colour
change valves to solenoid
valves
(no volume flow, A side)
Tip clogged (no fluid flow
with gun open)
Colour change valve
connected to wrong
solenoid valve (no trigger
air signal)
Colour change valve does Disassemble colour
not open although trigger change valve, clean,
air is applied
replace seals (see service
manual for valve)
Lack of fluid
Check fluid delivery
system on A side (empty
container?)
Defective feed pump
Check functioning of
pump (see service
manual of pump)
Blocked metering cell
Start flushing procedure,
disassemble metering cell
and clean if necessary
Defective sensor on
Contact service
metering cell
technician, replace
metering cell
Cable rupture or wrongly Test cable, replace if
connected
necessary
Page 49 of 74
Feb. 2011
Magic Flow Rev. 3.0 – Software release 02.2011
Fault
Alarm message:
Possible cause
Atomizing air is open
without spraying
Remedy
Set longer activating time
for metering cell
monitoring.
Do not open atomizing air
unnecessarily
(no volume flow, B or C
side)
Hardener pressure too
low
Set hardener pressure to
pressure of main colour +
approximately 10%
Clean tip, replace if
necessary
Check allocation of colour
change valves to solenoid
valves
Tip clogged (no fluid flow
with gun open)
Colour change valve
connected to wrong
solenoid valve (no trigger
air signal)
Colour change valve does Disassemble colour
not open although trigger change valve, clean,
air is applied
replace seals (see service
manual for valve)
Lack of fluid
Check fluid delivery
system on B side (empty
container?) (alternatively
C side)
Defective feed pump
Check functioning of
pump (see service
manual of pump)
Blocked metering cell
Start flushing procedure,
disassemble metering cell
and clean if necessary
Defective sensor on
Contact service
metering cell
technician, replace
metering cell
Cable rupture or wrongly Test cable, replace if
connected
necessary
Page 50 of 74
Feb. 2011
Magic Flow Rev. 3.0 – Software release 02.2011
Fault
Alarm message
Possible cause
Pressure differences too
small (added components
do not enter mixture)
Recognisable through
lack of injection noise
Remedy
Slowly increase hardener
pressure, increase needle
stroke at metering valve
Uneven operation of feed Check pumps, clean and
pumps
replace packings if
necessary
Increment size selected
Adjust increment size
too small
within the possibilities.
(Mixing tolerance A/B/C
exceeded, only for
components that are
added)
(Mixing tolerance A/B/C
exceeded, only for
components that are
added)
Fault
Alarm message
(Pot life expired)
Flow rate too high (for
example by filling without
spray tip)
Adjust increment size
within the possibilities.
Only fill with tip.
Pressure differences too
high (added components
enter mixture with too
great an injection)
Recognisable from
pulsing
Slowly reduce hardener
pressure, reduce needle
stroke at metering valve
Uneven operation of feed Check pumps, clean and
pumps
replace packings if
necessary
Increment size selected
Adjust increment size
too small
within the possibilities.
Flow rate too high (for
Adjust increment size
example by filling without within the possibilities.
spray tip)
Only fill with tip
Possible cause
Apparatus has not been
flushed in good time
Remedy
Start flushing procedure
Insufficient fluid removed Start flushing procedure
from apparatus within pot
life period
Page 51 of 74
Feb. 2011
Magic Flow Rev. 3.0 – Software release 02.2011
8 Spare Parts and Options
8.1 Spare parts and general options
Item No.:
Description
Merchandise Group Basic Installations Magic Flow
2K-2000
2K-2001
2K-2002
Magic Flow, electronic 2-component mixing and metering apparatus;
electronic control cabinet, 600 x 380 x 350 mm with touchscreen,
pneumatic / hydraulic control cabinet, 600 x 700 x 210 mm, equipped for
1 main colour, 1 hardener, 2 flushing agents, metering range: 50 - 2000
ml/min per component, pressure-resistant up to 10 bar (LP) or 250 bar
(HP), incl. 1 static mixer
Stand post, aluminium profile construction for 2-C apparatus,
height:1500 mm, depth: 400 mm; control cabinets can be mounted with
height adjustment
Wheels set, 2 x castors, 75 mm, antistatic, 2 x castors, antistatic, with
double lock-up brake, completely mounted
Merchandise Group Electronic Magic Flow
2K-3004-1
Expansion module for valves 9-16 for fitting on top hat rail
2K-3004-2
Expansion module for valves 17-24 for fitting on top hat rail
2K-3004-3
Expansion module for displaying filling levels of 8 containers
(Minimum value check)
2K-3004-5
Expansion module for control of up to 4 gun extractor units
2K-2049
Switching power supply 230VAC / 24VDC/3.2A, 75W, top hat mounted
2K-2073
Line safety switch, characteristics: B16
2K-3050
Motherboard, supplied without display or processor card
2K-2051
Processor for motherboard, chip set Siemens Infineon CI144 preprogrammed
2K-2052
Touchscreen, LCD display with analogue touch field, 240 x 128 pixels,
CFL lighting, blue / white; pre-programmed for "Magic Flow"
2K-2064
Air flow control, adjustable, air connections: 3/82 (F) 24 V power supply,
signal output 24V (PNP switching)
Page 52 of 74
Feb. 2011
Magic Flow Rev. 3.0 – Software release 02.2011
Merchandise Group Spare Parts Magic Flow
2K-3011
Solenoid valve terminal, 24 VDC with 8 x 3-way, 2-position valves
2K-3012
Solenoid valve, 5-way, 2-position with coil 24 VDC and cable
2K-2071
"Magic Flow" integrated gauge, 0-10 bar, 40 mm, front mounting
2K-2070
"Magic Flow” air regulator, "3/8" air regulator, range of adjustment 0-10
bar
Merchandise Group Fluid Part Magic Flow
2K-2015
2K-2016
"Magic Flow" volumeter
Volumeter, stainless steel 1/4" (F), P(max) 250 bar, metering range 502000ml/min, slide bearing
"Magic Flow" single pickup
Pickup for volumeter, not EEx-proof, connection M12, four conductor
2K-2017
"Magic Flow" single pickup, EEx
Pickup for volumeter, EEx-proof, connection M12, four conductor
2K-2018
Section switch amplifier
Section switch amplifier for volumeter, 1-channel design for top hat
2K-2019
Pair of "Magic Flow" gear wheels
Pair of gear wheels incl. slide bearing bush, ca. 8,800 pulses/litre
2K-2020
"Magic Flow" shaft volumeter
2K-2021
Volumeter connection cable with plug, 5m, yellow
2K-2084
Volumeter cable, (sold by metre), colour yellow
2K-2068
Volumeter cable, (sold by metre), colour blue
Merchandise Group Options Magic Flow
2K-2006
2K-2007
2K-2008-1
"Magic Flow" EEx-proof kit
Conversion kit for "Magic Flow", includes: 2 x EEx sensors for volumeter
(in exchange for standard sensors), 1 x EEx solenoid valve (5m cable), 2
x section switch amplifiers
Robot communication kit
8 x optoelectronic coupler inputs
8 x optoelectronic coupler outputs
In top hat housing, for connection to PLC bus, cable length max.:
approx. 1m
"Magic Flow" transceiver unit for PLC bus
- without cable
- for the connection of external PLC modules for a distance of more than
one metre
Recommended cable for connecting the units: CAT5 / CAT6 network
cable, twisted pair, shielded
Page 53 of 74
Feb. 2011
Magic Flow Rev. 3.0 – Software release 02.2011
2K-3008
Top hat rail transceiver
2K-3026
Remote control non-Ex with recipe display (also required:1 x Transceiver
Kit 2K-2008-1 and 1 x top hat rail transceiver 2K-3008
2K-3047
Remote control Ex (Category 2) with recipe display (also required:1 x
Transceiver Kit 2K-2008-1 and 1 x top hat rail transceiver).
2K-2010
Pneumatic remote control for Magic Flow
3 functions: Start / Stop / Flushing
3 x P/E converters and 3 x pneumatic buttons
2K-2072
Magic Flow isolated assembly (2 x metering cells)
Dual pick-up for metering cell with fibre optic output, fibre optic cable
(5m), fibre optic receiver and lithium battery. EEx-proof. Two sets each,
including an external solenoid valve, which will be installed as close as
possible to the fluid part, but outside the high voltage area.
8.2 Control components
Item
1
2
3
Name
Touchscreen
Processor card
Motherboard
Page 54 of 74
Part number
2K-2052
2K-2051
2K-3050
Feb. 2011
Magic Flow Rev. 3.0 – Software release 02.2011
8.3 Components of a typical low-pressure fluid handling section (1 main colour,
1 hardener, 2 cleaning agents)
Item
Name
1
2
3
4
5
6
7
Main colour valve
Cleaning agent valve
Cleaning agent valve
Hardener valve
Return valve
Mixing pipe
Pickup metering cell
8
Gear wheel metering cell
Page 55 of 74
Part number
CCV-403-SS
CCV-403-SS
2K-4002
2K-4002
2K-2027
2K-2080
2K-2016 (Non-EEx)
2K-2017-A (EEx)
2K-2015
Feb. 2011
Magic Flow Rev. 3.0 – Software release 02.2011
8.4 Assemblies with Spare Parts Lists
8.4.1
Fluid valve 2K-4002 (high pressure)
Materialventil
2K-4002
Lfd Nr
Stück
Benennung und Fertigmaße
Werkstoff
Zeichnungsnummer
Bemerkung
Änderung
Datum
Name
Gezeichn.
Gehört zur Zeichnung
Geprüft
Normeng.
Maße ohne Toleranzangabe nach DIN ISO…
Maßstab
Materialventil
Ersatz für
Diese Zeichnung wurde mit CAD erstellt und
muß mit CAD geändert werden.
Serial no.
Item
Name and finished dimensions
Material
Drawing number
Comment
Change
Date
Name
Drawn
Belongs to drawing
Checked
Standard compliant
Dimensions without tolerance info as per
DIN ISO …
Scale
Material valve
Replacement for
This drawing was produced using CAD and
must be amended using CAD.
Page 56 of 74
Feb. 2011
Magic Flow Rev. 3.0 – Software release 02.2011
Item
Quantity
Unit
Name
1
2
3
4
5
6
7
8
9
10
11
12
13
14
15
16/17
1
1
1
1
1
2
1
4
1
2
1
1
1
1
1
1
Piece
Piece
Piece
Piece
Piece
Piece
Piece
Piece
Piece
Piece
Piece
Piece
Piece
Piece
Piece
Piece
Valve body
Air cylinder
Cap
Piston
Nut
Spacer
Packing holder
Socket head cap screw
Sealing ring
Sealing ring
Fastening screw
Compression spring
Compression spring
O-ring
O-ring
Seal kit
18
21
27
28
1
1
1
1
Piece
Piece
Piece
Piece
Seal kit recommended for
hardener valve
Valve needle
Locking piece with valve seat
Screw plug
O-ring
29
4
Piece
Spring washer
Page 57 of 74
Standard code
designation
Comment
2K-4100
2K-4101
2K-4102
2K-4103
2K-4104
2K-4105
2K-4106
2K-4107
2K-4108
2K-4109
2K-4110
2K-4111
2K-4112
2K-4113
2K-4114
2K-4115
M4 x 40 DIN 912-8.8 vz
12 x 16 x 1.5
14 x 18 x 1.5
G¼
25.3 x 2.4
3.3 x 2.4
3xsleeve, graphite
coated/3xO-ring Viton
3xsleeve PTFE/
3xO-Ring Viton
11/16" x 1 6 UN
G¼
Ø 10 x 2 Viton
or Ø 10 x 2 Viton
FEP-sheathed
4A, DIN 7980 vz
2K-4115-1
2K-4116
2K-4117
2K-4118
2K-4119
2K-4119-FEP
Feb. 2011
2K-4120
Magic Flow Rev. 3.0 – Software release 02.2011
8.4.2 Fluid valve CCV-403-SS-E (low pressure)
Page 58 of 74
Feb. 2011
Magic Flow Rev. 3.0 – Software release 02.2011
Page 59 of 74
Feb. 2011
Magic Flow Rev. 3.0 – Software release 02.2011
8.4.3 Volumeter 2K-2015
Einzelaufnehmer
Single pickup
Page 60 of 74
Feb. 2011
Magic Flow Rev. 3.0 – Software release 02.2011
Volumensensor
Wahlweise Sitz des Einzelaufnehmers
Einlass
Auslass
Ansicht
Anschlussbild
Befestigungsschraube
Volume sensor
Optional seat of single pickup
Inlet
Outlet
View
Mounting face
Fastening screw
Spare parts for volumeter 2K-2015
The following spare parts and wear parts are available for the volumeter:
Pair of gear wheels
2K-2019
Shaft gear wheel
2K-2020
Disc washer (material PTFE) 2K-2057 or
Disc washer (material Viton, FEP-sheathed) 2K-2058
Other volumeters are available on request (higher or lower resolutions, various
bearings).
Page 61 of 74
Feb. 2011
Magic Flow Rev. 3.0 – Software release 02.2011
8.4.4 Airflow control for atomizing air LG 518 GSP – part no. 2K-2053
PNP Ausgang
Analog-Ausgang
LED Anzeige
Lufterfassungsbereich 0,5…15 m/s
Ausführung
Abmessungen
Erfassungsbereich
PNP output
Analog output
LED display
Air detection range 0.5…15 m/s
Design
Dimensions
Detection range
Page 62 of 74
Feb. 2011
Magic Flow Rev. 3.0 – Software release 02.2011
Ausgang
Best. Nr.
Typ
Schaltstrom
Last
Betriebsspannung
Stromaufnahme
Umgebungstemperatur
Temperaturgradient
Bereitschaftszeit
Reaktionszeit typ.
Gehäusewerkstoff
Anzeige Strömung
Schutzart
Anschluss
2 m PVC-Kabel, 3x0,5 mm2
Output
Order no.
Type
Switching current
Load
Operating voltage
Power consumption
Ambient temperature
Temperature gradient
Standby time
Typical reaction time
Casing material
Flow display
Protection type
Connection
2 m PVC cable, 3x0.5 mm2
Page 63 of 74
Feb. 2011
Magic Flow Rev. 3.0 – Software release 02.2011
8.4.5 Accessories, fluid valve
Hochdruckventil CCV300
High-pressure valve
CCV300
Serial
no.
1
2
3
4
Piece
1
1
1
5
6
7
8
4
9
4
10
4
11
4
12
13
4
Name and finished
dimensions
End plate push-fit fitting
Adapter
End plate G 1/4i
O-ring
Hex. socket screw M4 x
40
Blanking plug
Plug G 1/4i
Clamping screw M5 x 16
IP1+31
Clamping screw M5 x 60
IP1, 1x2+31
Clamping screw M5 x 100
IP1, 2x2+31
Clamping screw M5 x 140
IP1, 3x2+31
Spring washer A5
O-ring
Page 64 of 74
DIN
Material
14305
14305
14305
Ø 10 x 2 Viton
Farbwechselsystem
or
CCV300
Ø 10 x 2 Viton
FEP-sheathed
931
8.8-vz
Comment
2K-4121
2K-4122
2K-4123
2K-4119
2K-4119-FEP
2K-4125
912
14305
14305
8.8-vz
2K-4126
2K-4127
2K-4128
912
8.8-vz
2K-4129
912
8.8-vz
2K-4130
912
8.8-vz
2K-4131
7980
Ø 10 x 2 Viton
or
Ø 10 x 2 Viton
FEP-sheathed
2K-4132
2K-4119
2K-4119-FEP
Feb. 2011
Magic Flow Rev. 3.0 – Software release 02.2011
2K-2027
Return valve 1/4” BSP
M16x1.5
2K-2029
Colour change stack, 2 + 2.
(until 2007)
2K-2030
2K-2031
Colour change stack, 4 + 2.
Colour change stack, 6 + 2.
(until 2007)
2K-2032
Fitting 1/4” BSP M16x1.5
Page 65 of 74
Feb. 2011
Magic Flow Rev. 3.0 – Software release 02.2011
2K-2033
Screw plug 1/4” BSP, short
version for colour change
stack
2K-2034
Disc washer, stainless steel
for colour change stack
(until 2007)
2K-2035
Adapter for high-pressure
valve on colour change
stack
(until 2007)
2K-2036
Seal 1/4¼aluminium
Page 66 of 74
Feb. 2011
Magic Flow Rev. 3.0 – Software release 02.2011
51410L14
Adapter, adjustable, 1/4”
BSP M16x1.5
2K-2160
Adjustable T-screw
connection, M16x1.5
2K-2038
Adjustable L-screw
connection, M16x1.5
Page 67 of 74
Feb. 2011
Magic Flow Rev. 3.0 – Software release 02.2011
8.4.6
Touch panel
TOUCH PANEL ADJUSTMENT
The touch panel is adjusted on delivery and can be used immediately. Due to aging
and wear, it may be necessary to readjust the touch panel.
Adjustment procedure:
1. On switching on, touch panel and keep it depressed. When the following message
appears
"touch adjustment ?"
you can stop touching the panel.
2. Within one second, touch the panel again for at least one second.
3. Follow the instructions for the adjustment (touch the two points on the top left and
bottom right corner of the panel).
The touch panel can be obtained by quoting item number 2K-2052. Alternatively a
replacement display can be obtained by quoting item no. 2K-2052-REP in case of e.g.
glass breakage.
Page 68 of 74
Feb. 2011
Magic Flow Rev. 3.0 – Software release 02.2011
9 Decommissioning apparatus
If the apparatus is to be shut down for a prolonged period of time, the following steps
must be carried out:
1. Carry out at least one complete flushing procedure in order to remove mixed
fluid from the apparatus.
2. Depressurise all fluid supply systems.
3. Open all connected valves manually via the relevant menu, in order to relieve
residual pressure.
4. Remove all supply hoses from the colour change valves.
5. Connect the flushing agent supply system to each valve in succession, open
the valve manually and flush it via the gun or via a hose connected to the
outlet.
6. Remove the flushing agent supply system.
7. Fill each valve with a few millilitres of preservative agent and close it with a
screw plug.
8. Remove the electrical and pneumatic supply connections.
9. Store the apparatus in a dry place.
Page 69 of 74
Feb. 2011
Magic Flow Rev. 3.0 – Software release 02.2011
10 Annex
10.1 Flow chart
Kompenten = Components
Lösemittel - Solvent
Legend:
1
2
3
4
5
6
7
8
9
Paint delivery system (e.g. piston pump)
Filters
Control cabinet
Solenoid valves
Colour change valves
Flow metering cells
Return valves, spring-loaded
Static mixer
Spray applicator (e.g. manual gun)
Page 70 of 74
Feb. 2011
Magic Flow Rev. 3.0 – Software release 02.2011
10.2 Connecting fluid handling section and electrical cabinet
The fluid handling cabinet and control cabinet are delivered separately in the basic
version. Following mechanical assembly, air- and cable connections must be created
between the two separate units. Proceed as follows:
1. Connect the air outlet of the electrical control cabinet to the air inlet of the fluid
cabinet (10 mm air hose).
2. Connect the air hoses for activating the fluid valves (4 mm outer diameter).
3. Connect the metering cell cables according to the wiring diagram supplied.
Take care to ensure that channels A, B and, if present, C are correctly
assigned.
4. Earth both the control cabinet and the fluid handling cabinet according to the
relevant regulations.
Page 71 of 74
Feb. 2011
Magic Flow Rev. 3.0 – Software release 02.2011
10.3 Technical characteristics
General characteristics:
Type of protection of the control part:
IP 52
Type of protection of the fluid handling part:EEx-proof for operation in EEx- Class 2
optional:
EEx-proof for operation in EEx- Class 1
Materials for parts in contact with fluids:
Stainless steel, PTFE, polyamide
Special characteristics:
Software:
Freely adjustable recipes:
50
Triggerable components:
32
Storable parameters:
No. A & B & C, mix ratio,
pot life, optional fluid pressure
Adjustable flushing parameters:10 flushing sequences, 20 steps each with valve
number,
quantity or time, dump valve
Storage of details of consumption of all components
Mixture ratio:
(100%)
0 – 200% metering relative to main component
Hardware:
Mixing accuracy:
better than 1% (according to calibration)
Volume flow:
channel
according to design, standard 0.05- 2 l/min per
Maximum working pressure:
10 bar (standard version)
optionally up to 250 bar (versions with higher
pressure are available on request)
Measurements:
Height:
1750 mm (incl. castors and legs)
Width:
640 mm
Depth:
400 mm
Page 72 of 74
Feb. 2011
Magic Flow Rev. 3.0 – Software release 02.2011
Personal notes:
Page 73 of 74
Feb. 2011
Magic Flow Rev. 3.0 – Software release 02.2011
I T W Industrial Finishing
I T W Oberflächentechnik GmbH
I T W Surfaces et Finitions
Ringwood Road, Bournemouth,
BH11 9LH England
Tel: +44(0) 12 02 57 1 1 11
Fax: +44(0)12 02 57 34 88
E-mail: [email protected]
Justus-von-Liebig-Str. 31,
D-63128 Dietzenbach
Tel: +49 (0) 60 74/403-1
Fax: +49 (0) 60 74/403-300
E-mail: [email protected]
163-171 Av. des Auréats,
26014 Valence Cedex FRANCE
Tel: +33 4 75 75 27 00
Fax: +33 4 75 75 27 59
E-mail: [email protected]
www.itweuropeanfinishing.com
Page 74 of 74
Feb. 2011


