1
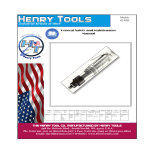
MODELS
511 HLS
511 HKS
511 HGS
General Safety and Maintenance Manual 511 BHL
CONE WHEELS
COMPATIBILITY
* All PARTS 100% COMPATIBLE WITH MODEL
511BHL except for handle that differs slightly.
CAPACITY
Any Type 16, 17, 17R, 18 or 18R Cone Wheels w/ 5/811 threadedMounting (2 inch maximum)
Model
Number
511HL
511H S
Exhaust
Direction
Side
Exhaust
511HK
See note
STEEL
Body
Diameter
Working Air
Consumption
5.9
Lb./2.9
Kg
7.2
Lb./3.3
Kg
17.1
Inch/
434mm
2.5 Inch
(63.5
mm)
35 cfm (16.5
L/s)
6.9
Lb./3.1
Kg
8.2
Lb./3.7
Kg
5/8-11
X 0.9
Inch
(5/8-11
X 23
mm)
See note
See
note
Power
Output
Case
Material
ALUM
(L) Lever
or (K)
Safety
Lever
12000
- 18000
R.P.M.
(18000RPM
is standard)
1.5 H.P
.1130 W
(S) Steel
or Aluminum
See note
See
note
Spindle
Length
&
Thread
Overall
Lenght
Rated
Speed
511HG
*511BHL
Weight
Throttle
Type
See note
The Henry Tool Co., Manufactured by Henry Tools
498 So. Belvoir Blvd., South Euclid, OH 44121 U.S.A.
Ph: (216) 291-1011 or (800) 826-5257 ● Fax: (216) 291-5949 or (800) 303-2800
Email: [email protected] ● Website: www.Henrytools.com
PART
300-G-29
500-G-5
500-G-5-S
DESCRIPTION
BEARING (2 REQ PER TOOL)
ALUMINUM BACKHEAD
STEEL BACKHEAD (STANDARD)
500-G-17-S EXHAUST DEFLECTOR
500-G-19
MUFFLER
500-G-24
LOCK RING
500-H-10
KEY
500-1-H
ALUMINUM CASE
500-1-HS
STEEL CASE (SPECIFY
SPEED)
500-2A
CYLINDER
500-3
REAR ENDPLATE
500-5A
ROTOR
500-6A
BLADE (4 REQ)
500-7
FRONT ENDPLATE
500-14-7A
5/8-11 CONE WHEEL
SPINDLE
500-15A
SPINDLE WHEEL FLANGE
500-16-C
CAP
500-23
O-RING
500-46
LOCK RING
500-47
O-RING
501-13
BEARING PAIR
700-37C
ROLL PIN (same as
832126)
592065
SNAP RING
832126
ROLL PIN
REPAIR KIT
510110
REPAIR KIT: INCLUDES ALL
BEARINGS, ROTOR BLADES,
SNAP RINGS AND O-RINGS
www.HenryTools.com | Page 305
For additional product information visit our website.
Revised 02/19/12
Ph:
MODELS
511 HLS
511 HKS
511 HGS
511 BHL
HENRY TOOLS, INC. (216) 291-1011 or (800) 826-5257
General Operators Instructions and Service Manual
Part Number
200-9
500-46
550-33-L
550-33-SW
550-33-SP
550-38
550-50
560-13
600-51
650-1-AL
650-1-ALS
AA-650-1-AL
Description
O-Ring
Snap Ring
Live Handle Adaptor bushing
Screen Filter
Spacer
Lever
Lever Pin
Throttle Valve Assembly
with 200-9 O-ring installed
Plunger Spring
Live Handle Body (Non-Lockout
type)
Safety Lock Valve Body(Bare)
Handle Assembly (Complete)
(Non-lockout handle)
www.HenryTools.com | Page 306
Part Number
Description
AA-650-1-ALS Safety Lock Handle Assembly
(Complete)
650-33
Screen Bushing(1/2x3/8)
650-54
Safety Lock Pin
650-55
Safety Lock Spring
650-56
Safety Lock Lever
650-57
Set Screw
700-30
O-Ring
700-48
Cap Screw
700-54
Lock Washer
700-S-26
Plug
700-G-26-GK Gasket
841555
Screen Bushing (1/2X1/2)
For additional product information visit our website.
Revised 02/19/12
Ph:
MODELS
511 HLS
511 HKS
511 HGS
511 BHL
HENRY TOOLS, INC. (216) 291-1011 or (800) 826-5257
General Operators Instructions and Service Manual
This tool is designed to operate on 90
psig(6.2 bar) maximum air pressure with
1/4”(8mm) hose. Do not use any wheel
having an operating speed lower than the
actual free speed on grinder.
SAFETY
PART NUMBER
DESCRIPTION
700-23
SCREW
832636
GASKET
200-9
O-RING
550-H-3
D HANDLE
560-19
THROTTLE VALVE (INCLUDES ORING 200-9)
600-52A
SPRING
650-55
TRIGGER PIN
700-30
GASKET
700-48
SCREW
700-54
LOCK WASHER
700-S-20
LEVER TRIGGER
700-S-26
THROTTLE VALVE CAP
841555
1/2 INCH NPT X 1/2 INCH NPT
SCREEN HANDLE BUSHING
AA-550-H-3
SPADE HANDLE ASSY.(COMPLETE)
www.HenryTools.com | Page 307
1. Check speed of tool with tachometer before
every wheel & burr change. If RPM excees rated
speed stamped on tool, servicing is required.
2. Inspect cone wheels for bends, chips, nicks,
cracks or severe wear. If the Cone wheel has any
of these, or has been soaked in liquids do not
use. Start new wheels under a steel bench. Run
at full throttle for one minute. Defective wheels
usually come apart immediately. When starting a
cold wheel apply to the work slowly, allow wheel
to warm up gradually.
3. Model 511H grinders are designed for use
with cone wheels only.
4. Before mounting or removing a cone wheel
disconnect grinder from air supply. The wheel
should fit properly on arbor; do not use bushings
or wheel flanges to adapt a wheel to any arbor
unless recommended by manufacturer. (Wheel
flanges should be at least 1/3 the diameter of
the wheel.)
5. Wear safety goggles and other protective
clothing. Continuous exposure to vibration may
cause injury to hands and arms.
6. Properly maintained air tools are less likely
to fail or cause accidents. If tool vibrates unusually or produces an unusual noise, repair immediately.
LUBRICATION
Check for wet or dirty air. Excessive moisture in
the air supply tends to wash lubricant away from
the working parts of the tool and rust or corrode
the interior. Grit will damage the interior by scoring closely fitted parts, and impede the action of
the tool.
If the above are found in order, disconnect tool
and pour a liberal amount of recommended oil
or an SAE #10 oil cut with an equal quantity of
kerosene into the air inlet. Operate the tool to
allow lubricant to flush accumulated gum and grit
out the exhaust.
If outside factors are not to blame, dissassemble
the tool, clean and inspect all parts and replace
those worn or broken. Coat parts with airtool oil
and reassemble. Pour about 1/2 oz. in air inlet
and run tool to allow oil to be carried to interior.
For additional product information visit our website.
Revised 02/19/12
Ph:
MODELS
511 HLS
511 HKS
511 HGS
511 BHL
HENRY TOOLS, INC. (216) 291-1011 or (800) 826-5257
General Operators Instructions and Service Manual
Disassembly
1. Disconnect air and remove all wheels and accessories.
2. Secure tool in vise vertically with spindle of tool oriented in upward
direction. Clamp onto the sides of the live handle.
3. Unscrew motor housing (500-H-1-S) (right hand thread) from backhead (500-G-5[S]) using flats on housing. Remove everything from vise.
4. Remove snap ring (500-46) from groove in rear endplate (500-3).
5. Rap sharply on the rear O.D. of the motor housing with a plastic
hammer. The rear end plate, cylinder (500-2A) and blades (500-6A) will
dislodge and can be removed.
6. Remove rotor (500-5A) and (500-H-10).
7. Remove the front endplate (500-7).
8. Re-install key and slide rotor (500-5A) PARTIALLY over the key.
Clamp protruding rotor in vise vertically and remove front flange (50015A) (right hand thread).
9. Remove from vise. Remove rotor and key.
10. Secure the housing assembly in vise vertically with spindle of tool
oriented toward downward direction. Clamp vise onto flats of bearing cap
(500-16C) in center of vise.
11. Loosen and unscrew housing (left hand thread). Remove from
vise.
12. Secure the housing assembly in vise vertically with spindle of tool
oriented toward the downward direction. Clamp vise on neck of housing
(500-1-HS) in center of vise.
13. Use a 3/16 inch punch to drive the spindle through the center bearing (300-G-29). Remove from vise.
14. Remove the center bearing from case by tapping the bearing toward
the back of the tool with long rod or suitable driver.
15. Remove snap ring (592065) from spindle with snap ring pliers.
16. Support the spindle assembly on a suitable drill block. Press the
spindle through the front bearings.
14. Install rear end plate (500-3). Align small
locating hole in end plate with cylinder pin.
15. Secure flange nut in vise and drive bearing
(300-G-29) into endplate (500-3).
16. Install snap ring (500-46).
17. Place a few drops of oil in the motor assembly. Screw on the back-head (500-G-5-S).
18. Place wrench on the housing flats (500-1HS).
19. Attach air supply and run tool in short
bursts. Tighten backhead (500-G-5-S) firmly.
20. Reinstall all safety devices and accessories
21. Check RPM with a reliable tachometer. Tool
must run at or below speed stamped on tool.
FAULT
REAssembly
1. All parts should be clean.
2. Install o-rings (500-47 and 500-23) on housing (500-1-H[S]). Oil
inside of exhaust deflector (500-G-17-S) and slide over case. Install snap
ring (500-G-24).
3. Support the front bearings (501-13) on a suitable drill block. Press
the spindle (500-14-7A) through the bearings up to shoulder with an
arbor press.
4. Install snap ring (592065) into groove on spindle.
5. Secure the housing assembly in a vise vertically with the spindle of
tool oriented toward the upward direction. (Clamp onto flats on the neck of
the housing).
6. Slide spindle into front of housing. Use a plastic hammer and
LIGHTLY tap the spindle on threaded end until seated.
7. Place rear bearing (300-G-29) on spindle. Press bearing until it bottoms on shoulder in housing with a suitable bearing driver .
8. Screw on front cap (500-16-C) (left hand thread) and clamp in center
of vise. Tighten down (500-16-C) onto housing with flats provided.
9. Slide front end plate (500-7) over the spindle and into the housing.
Remove from vise.
10. Place key (500-H-10) in key slot and slide on rotor. Slide rotor
PARTIALLY onto spindle. Clamp the exposed rotor in vise firmly. Tighten
flange (500-15A).
11. Slide rotor (500-5A) all the way down into housing over key.
12. Install cylinder (500-2A) with locating pin towards rear of tool.
13. Drop in 4 blades (500-6A).
www.HenryTools.com | Page 308
Insufficient
Power
Machine does
not start
CAUSE
SOLUTION
Air pressure too
low
Minimum air pressure
should be 90 PSI for
maximum performance
Restriction in air
hose
Remove bends or other
restrictions
Hose I.D. is too
small
Use required hose I.D.
Worn vanes and
worn cylinder
Exchange vanes
(500-6A) and cylinder
(500-2A).
Screen Support
clogged
Clean screen support
or exchange with new
one
No air, shut-off
valve is closed.
Open shut-off valve
Worn vanes due to Exchange vanes .
lack of oil or vanes (cylinder might also be
are jammed
worn out)
Grinder does
not want to
stop
Worn O-Ring
Replace o-ring in
handle (200-9) for
example.
Spindle
wobbles or
vibrates.
Bearings worn out
Disconnect tool from
the air supply. Immediate servicing is
required.
.
Danger!! or
spindle is bent.
For additional product information visit our website.
Revised 02/19/12
Ph:
MODELS
511 HLS
511 HKS
511 HGS
511 BHL
HENRY TOOLS, INC. (216) 291-1011 or (800) 826-5257
General Operators Instructions and Service Manual
MODELS
511 HLS
511 HKS
511 HGS
511 BHL
CONE WHEEL MOUNTING POSSIBILITIES
CAPACITY
Ph:
Any Type 16, 17, 17R, 18 or 18R Cone Wheels w/ 5/811 threadedMounting (2 inch maximum)
HENRY TOOLS, INC. (216) 291-1011 or (800) 826-5257
General Operators Instructions and Service Manual
www.HenryTools.com | Page 309
For additional product information visit our website.
Revised 02/19/12