1
741-813
INSTALL/REMOVAL INSTRUCTIONS: WINDOW REGULATOR
ATTENTION: Refer to the appropriate shop manual for your vehicle to obtain specific service procedures for this part. If you do not have
a service manual or lack the skill to install this part, it is recommended that you seek the services of a qualified technician. Pay special
attention to all cautions and warnings included in the shop manual. Read and follow all instructions carefully.
REMOVAL/INSTALL OF WINDOW REGULATOR (741-813)
Ford Explorer 4-Door Except Sport Trac, Mercury Mountaineer 2002–05
General Tech Tips:
•
Use painter’s tape rather than duct tape to secure window. It will not damage paint or leave sticky residue.
•
A plastic pry tool is useful. It will not easily damage delicate trim like a screwdriver or metal pry bar.
•
The replacement regulator should have a liberal amount of grease on slide area. If there is not much grease
present, white lithium grease works well to lubricate the slide area.
•
Aftermarket window tinting can cause the window to travel slower and put additional strain on the window
regulator assembly.
•
Window run channels should be cleaned and lubricated before installation of a new window regulator
assembly. Silicone spray works well.
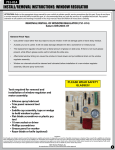
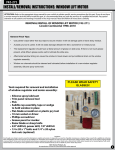
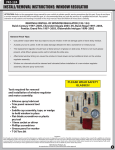
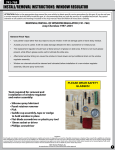
PLEASE WEAR SAFETY
GLASSES!
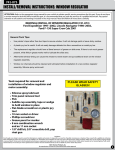
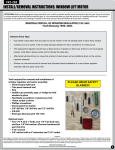
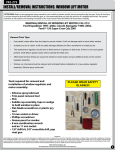
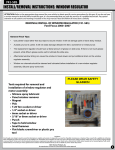
Tools required for removal
and installation of window regulator
and motor assembly:
•
•
•
•
•
•
•
•
•
Silicone spray lubricant
Trim panel removal tool
Pick
Saddle cup assembly, tape, or wedge
to hold window in place
Flat-blade screwdriver or plastic
pry tool
10mm socket or driver
Phillips screwdriver
Grease pencil or marker
6mm socket
Disclaimer:
Even though every attempt is made to ensure this information is complete and accurate, it is impossible to account for all possible circumstances or situations. Please consult with a qualified auto technician
before attempting to perform any work you are not qualified to do. Automobiles can be hazardous to work on; be sure to take all necessary safety precautions. Failure to do so may result in property damage
or personal injury. Certain motor vehicle standards and performance requirements may apply to your motor vehicle (such as Federal Motor Vehicle Safety Standards by the National Highway Traffic Safety
Administration). Be sure that your work is performed in accordance with such standards and that you do not disable any motor vehicle safety feature.
©2013 Dorman Products, Inc.
No reproductions in whole or in part without prior written approval.
1
741-813
INSTALL/REMOVAL INSTRUCTIONS: WINDOW REGULATOR
ATTENTION: Refer to the appropriate shop manual for your vehicle to obtain specific service procedures for this part. If you do not have
a service manual or lack the skill to install this part, it is recommended that you seek the services of a qualified technician. Pay special
attention to all cautions and warnings included in the shop manual. Read and follow all instructions carefully.
Removal Instructions
STEP 1: Using a 6mm socket and ratchet
assembly, remove the two (2) interior door
trim panel retaining screws. NOTE: Some
vehicles used a Phillips head screw.
STEP 2: Using a trim panel removal tool,
remove the power switch assembly.
STEP 3: Disconnect the power
switch assembly.
Disclaimer:
Even though every attempt is made to ensure this information is complete and accurate, it is impossible to account for all possible circumstances or situations. Please consult with a qualified auto technician
before attempting to perform any work you are not qualified to do. Automobiles can be hazardous to work on; be sure to take all necessary safety precautions. Failure to do so may result in property damage
or personal injury. Certain motor vehicle standards and performance requirements may apply to your motor vehicle (such as Federal Motor Vehicle Safety Standards by the National Highway Traffic Safety
Administration). Be sure that your work is performed in accordance with such standards and that you do not disable any motor vehicle safety feature.
©2013 Dorman Products, Inc.
No reproductions in whole or in part without prior written approval.
2
741-813
INSTALL/REMOVAL INSTRUCTIONS: WINDOW REGULATOR
ATTENTION: Refer to the appropriate shop manual for your vehicle to obtain specific service procedures for this part. If you do not have
a service manual or lack the skill to install this part, it is recommended that you seek the services of a qualified technician. Pay special
attention to all cautions and warnings included in the shop manual. Read and follow all instructions carefully.
STEP 4: Using a trim panel removal tool,
remove and disconnect the power mirror
switch assembly. NOTE: Not all vehicles were
equipped with this option.
STEP 5: To remove the interior door trim
panel, grab the interior door pull assembly
and lift in an upward motion to release the
interior door trim panel from the door.
STEP 6: Using a 6mm socket and ratchet
assembly, remove the four (4) speaker
retaining screws.
Disclaimer:
Even though every attempt is made to ensure this information is complete and accurate, it is impossible to account for all possible circumstances or situations. Please consult with a qualified auto technician
before attempting to perform any work you are not qualified to do. Automobiles can be hazardous to work on; be sure to take all necessary safety precautions. Failure to do so may result in property damage
or personal injury. Certain motor vehicle standards and performance requirements may apply to your motor vehicle (such as Federal Motor Vehicle Safety Standards by the National Highway Traffic Safety
Administration). Be sure that your work is performed in accordance with such standards and that you do not disable any motor vehicle safety feature.
©2013 Dorman Products, Inc.
No reproductions in whole or in part without prior written approval.
3
741-813
INSTALL/REMOVAL INSTRUCTIONS: WINDOW REGULATOR
ATTENTION: Refer to the appropriate shop manual for your vehicle to obtain specific service procedures for this part. If you do not have
a service manual or lack the skill to install this part, it is recommended that you seek the services of a qualified technician. Pay special
attention to all cautions and warnings included in the shop manual. Read and follow all instructions carefully.
STEP 7: Disconnect the door speaker.
STEP 8: Remove the water vapor barrier.
STEP 9: Temporarily install the power
switch assembly to lower the window glass,
exposing the screws attaching the window
glass to the window regulator.
Disclaimer:
Even though every attempt is made to ensure this information is complete and accurate, it is impossible to account for all possible circumstances or situations. Please consult with a qualified auto technician
before attempting to perform any work you are not qualified to do. Automobiles can be hazardous to work on; be sure to take all necessary safety precautions. Failure to do so may result in property damage
or personal injury. Certain motor vehicle standards and performance requirements may apply to your motor vehicle (such as Federal Motor Vehicle Safety Standards by the National Highway Traffic Safety
Administration). Be sure that your work is performed in accordance with such standards and that you do not disable any motor vehicle safety feature.
©2013 Dorman Products, Inc.
No reproductions in whole or in part without prior written approval.
4
741-813
INSTALL/REMOVAL INSTRUCTIONS: WINDOW REGULATOR
ATTENTION: Refer to the appropriate shop manual for your vehicle to obtain specific service procedures for this part. If you do not have
a service manual or lack the skill to install this part, it is recommended that you seek the services of a qualified technician. Pay special
attention to all cautions and warnings included in the shop manual. Read and follow all instructions carefully.
STEP 10: Using a 10mm socket and ratchet assembly, remove the two (2) screws
attaching the window glass to the window regulator. Once the window glass has been
disconnected, manually slide the window glass into the closed position and hold in place
with a saddle cup assembly, painter’s tape, or a wedge.
STEP 11: Disconnect the window lift
motor connector.
Disclaimer:
Even though every attempt is made to ensure this information is complete and accurate, it is impossible to account for all possible circumstances or situations. Please consult with a qualified auto technician
before attempting to perform any work you are not qualified to do. Automobiles can be hazardous to work on; be sure to take all necessary safety precautions. Failure to do so may result in property damage
or personal injury. Certain motor vehicle standards and performance requirements may apply to your motor vehicle (such as Federal Motor Vehicle Safety Standards by the National Highway Traffic Safety
Administration). Be sure that your work is performed in accordance with such standards and that you do not disable any motor vehicle safety feature.
©2013 Dorman Products, Inc.
No reproductions in whole or in part without prior written approval.
5
741-813
INSTALL/REMOVAL INSTRUCTIONS: WINDOW REGULATOR
ATTENTION: Refer to the appropriate shop manual for your vehicle to obtain specific service procedures for this part. If you do not have
a service manual or lack the skill to install this part, it is recommended that you seek the services of a qualified technician. Pay special
attention to all cautions and warnings included in the shop manual. Read and follow all instructions carefully.
STEP 12: Using a 10mm socket and ratchet
assembly, remove the five (5) window
regulator retaining screws.
STEP 13: Remove the window regulator
assembly through the main access hole.
Disclaimer:
Even though every attempt is made to ensure this information is complete and accurate, it is impossible to account for all possible circumstances or situations. Please consult with a qualified auto technician
before attempting to perform any work you are not qualified to do. Automobiles can be hazardous to work on; be sure to take all necessary safety precautions. Failure to do so may result in property damage
or personal injury. Certain motor vehicle standards and performance requirements may apply to your motor vehicle (such as Federal Motor Vehicle Safety Standards by the National Highway Traffic Safety
Administration). Be sure that your work is performed in accordance with such standards and that you do not disable any motor vehicle safety feature.
©2013 Dorman Products, Inc.
No reproductions in whole or in part without prior written approval.
6
741-813
INSTALL/REMOVAL INSTRUCTIONS: WINDOW REGULATOR
ATTENTION: Refer to the appropriate shop manual for your vehicle to obtain specific service procedures for this part. If you do not have
a service manual or lack the skill to install this part, it is recommended that you seek the services of a qualified technician. Pay special
attention to all cautions and warnings included in the shop manual. Read and follow all instructions carefully.
Installation Instructions
STEP 1: Place the window regulator
assembly through the main access hole.
STEP 2: Using a 10mm socket and ratchet
assembly, attach the five (5) window
regulator attaching screws.
STEP 3: Connect the window lift
motor connector.
Disclaimer:
Even though every attempt is made to ensure this information is complete and accurate, it is impossible to account for all possible circumstances or situations. Please consult with a qualified auto technician
before attempting to perform any work you are not qualified to do. Automobiles can be hazardous to work on; be sure to take all necessary safety precautions. Failure to do so may result in property damage
or personal injury. Certain motor vehicle standards and performance requirements may apply to your motor vehicle (such as Federal Motor Vehicle Safety Standards by the National Highway Traffic Safety
Administration). Be sure that your work is performed in accordance with such standards and that you do not disable any motor vehicle safety feature.
©2013 Dorman Products, Inc.
No reproductions in whole or in part without prior written approval.
7
741-813
INSTALL/REMOVAL INSTRUCTIONS: WINDOW REGULATOR
ATTENTION: Refer to the appropriate shop manual for your vehicle to obtain specific service procedures for this part. If you do not have
a service manual or lack the skill to install this part, it is recommended that you seek the services of a qualified technician. Pay special
attention to all cautions and warnings included in the shop manual. Read and follow all instructions carefully.
STEP 4: Temporarily connect the power
switch assembly to raise or lower the mounts
attaching the window regulator to the
window glass. Attach the mounting screws
using a 10mm socket and ratchet assembly.
CAUTION: Do not over tighten the screws.
Over-tightening the screws
could cause glass breakage.
STEP 5: Once the door glass mounts are
secure, attach the water vapor barrier.
STEP 6: Connect the door speaker.
Disclaimer:
Even though every attempt is made to ensure this information is complete and accurate, it is impossible to account for all possible circumstances or situations. Please consult with a qualified auto technician
before attempting to perform any work you are not qualified to do. Automobiles can be hazardous to work on; be sure to take all necessary safety precautions. Failure to do so may result in property damage
or personal injury. Certain motor vehicle standards and performance requirements may apply to your motor vehicle (such as Federal Motor Vehicle Safety Standards by the National Highway Traffic Safety
Administration). Be sure that your work is performed in accordance with such standards and that you do not disable any motor vehicle safety feature.
©2013 Dorman Products, Inc.
No reproductions in whole or in part without prior written approval.
8
741-813
INSTALL/REMOVAL INSTRUCTIONS: WINDOW REGULATOR
ATTENTION: Refer to the appropriate shop manual for your vehicle to obtain specific service procedures for this part. If you do not have
a service manual or lack the skill to install this part, it is recommended that you seek the services of a qualified technician. Pay special
attention to all cautions and warnings included in the shop manual. Read and follow all instructions carefully.
STEP 7: Attach the four (4) door speaker
attaching screws.
STEP 8: To attach the interior door trim
panel, align the interior door trim panel
retainers (which are part of the interior door
trim panel) with the corresponding holes in
the door and slide the interior trim panel in a
downward motion. NOTE: Once the interior
door trim panel is set in place, slide the
interior door trim panel to align the interior
door trim panel retaining screws into their
original position.
STEP 9: Using a 6mm socket and ratchet
assembly, attach the two (2) interior door
trim panel retaining screws.
Disclaimer:
Even though every attempt is made to ensure this information is complete and accurate, it is impossible to account for all possible circumstances or situations. Please consult with a qualified auto technician
before attempting to perform any work you are not qualified to do. Automobiles can be hazardous to work on; be sure to take all necessary safety precautions. Failure to do so may result in property damage
or personal injury. Certain motor vehicle standards and performance requirements may apply to your motor vehicle (such as Federal Motor Vehicle Safety Standards by the National Highway Traffic Safety
Administration). Be sure that your work is performed in accordance with such standards and that you do not disable any motor vehicle safety feature.
©2013 Dorman Products, Inc.
No reproductions in whole or in part without prior written approval.
9
741-813
INSTALL/REMOVAL INSTRUCTIONS: WINDOW REGULATOR
ATTENTION: Refer to the appropriate shop manual for your vehicle to obtain specific service procedures for this part. If you do not have
a service manual or lack the skill to install this part, it is recommended that you seek the services of a qualified technician. Pay special
attention to all cautions and warnings included in the shop manual. Read and follow all instructions carefully.
STEP 10: Connect the power
switch assembly.
STEP 11: Attach the power switch assembly.
Disclaimer:
Even though every attempt is made to ensure this information is complete and accurate, it is impossible to account for all possible circumstances or situations. Please consult with a qualified auto technician
before attempting to perform any work you are not qualified to do. Automobiles can be hazardous to work on; be sure to take all necessary safety precautions. Failure to do so may result in property damage
or personal injury. Certain motor vehicle standards and performance requirements may apply to your motor vehicle (such as Federal Motor Vehicle Safety Standards by the National Highway Traffic Safety
Administration). Be sure that your work is performed in accordance with such standards and that you do not disable any motor vehicle safety feature.
©2013 Dorman Products, Inc.
No reproductions in whole or in part without prior written approval.
10
741-813
INSTALL/REMOVAL INSTRUCTIONS: WINDOW REGULATOR
ATTENTION: Refer to the appropriate shop manual for your vehicle to obtain specific service procedures for this part. If you do not have
a service manual or lack the skill to install this part, it is recommended that you seek the services of a qualified technician. Pay special
attention to all cautions and warnings included in the shop manual. Read and follow all instructions carefully.
STEP 12: Connect the power mirror switch
and push into place. NOTE: Not all vehicles
were equipped with this option.
STEP 13: Verify that the interior door trim panel is secured and that the window regulator
assembly is operating properly.
We appreciate your opinions regarding this product!
Please call our Technical Assistant with any challenges or suggestions
regarding the installation or operation of this product.
1-800-523-2492
Disclaimer:
Even though every attempt is made to ensure this information is complete and accurate, it is impossible to account for all possible circumstances or situations. Please consult with a qualified auto technician
before attempting to perform any work you are not qualified to do. Automobiles can be hazardous to work on; be sure to take all necessary safety precautions. Failure to do so may result in property damage
or personal injury. Certain motor vehicle standards and performance requirements may apply to your motor vehicle (such as Federal Motor Vehicle Safety Standards by the National Highway Traffic Safety
Administration). Be sure that your work is performed in accordance with such standards and that you do not disable any motor vehicle safety feature.
©2013 Dorman Products, Inc.
No reproductions in whole or in part without prior written approval.
11