1
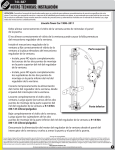
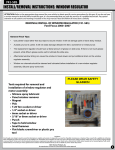
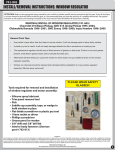
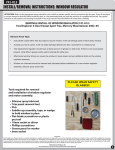
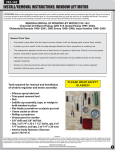
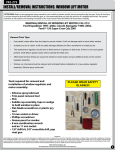
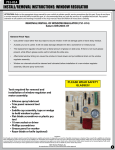
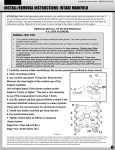
INSTALL/REMOVAL INSTRUCTIONS: WINDOW REGULATOR
ATTENTION: Refer to the appropriate shop manual for your vehicle to obtain specific service procedures for this part. If you do not have
a service manual or lack the skill to install this part, it is recommended that you seek the services of a qualified technician. Pay special
attention to all cautions and warnings included in the shop manual. Read and follow all instructions carefully.
General Tech Tips:
•
Use painter’s tape rather than duct tape to secure window. It will not damage paint or leave sticky residue.
•
A plastic pry tool is useful. It will not easily damage delicate trim like a screwdriver or metal pry bar.
•
The replacement regulator should have a liberal amount of grease on slide area. If there is not much grease
present, white lithium grease works well to lubricate the slide area.
•
Aftermarket window tinting can cause the window to travel slower and put additional strain on the window
regulator assembly.
•
Window run channels should be cleaned and lubricated before installation of a new window regulator
assembly. Silicone spray works well.
NOTE:
Disconnecting the negative battery cable is always recommended for safety reasons. Be
certain that you know the implications of disconnecting the battery before doing so. For
example: radio code information, clock and radio settings, PCM relearn, OBD II readiness
monitor reset.
Window Regulator Removal:
STEP 1: Gain access to the window regulator
by removing the interior trim panel.
STEP 1a: The interior trim panel is typically
held to the door using a variety of screws
an/or hidden panel retainers (Photo A).
Metal screws are usually used to secure the
handle area to the door (Photo B). Look
for screws under reflectors and trim pieces.
Remove all screws. Disconnect any electrical
connections and if necessary remove switch
from panel.
Photo A
Disclaimer:
Even though every attempt is made to ensure this information is complete and accurate, it is impossible to account for all possible circumstances or situations. Please consult with a qualified auto technician
before attempting to perform any work you are not qualified to do. Automobiles can be hazardous to work on; be sure to take all necessary safety precautions. Failure to do so may result in property damage
or personal injury. Certain motor vehicle standards and performance requirements may apply to your motor vehicle (such as Federal Motor Vehicle Safety Standards by the National Highway Traffic Safety
Administration). Be sure that your work is performed in accordance with such standards and that you do not disable any motor vehicle safety feature.
©2011 Dorman Products, Inc.
No reproductions in whole or in part without prior written approval.
1
INSTALL/REMOVAL INSTRUCTIONS: WINDOW REGULATOR
ATTENTION: Refer to the appropriate shop manual for your vehicle to obtain specific service procedures for this part. If you do not have
a service manual or lack the skill to install this part, it is recommended that you seek the services of a qualified technician. Pay special
attention to all cautions and warnings included in the shop manual. Read and follow all instructions carefully.
STEP 1b: Once all of the screws are removed
and electrical plugs are disconnected,
unsnap the panel retainers from the bottom
of the door using a suitable tool (Photo
C). Remove the trim panel by pulling the
bottom away from the door while lifting the
top of the panel off of the door.
STEP 1c: Peel back the plastic water barrier
sheeting enough to be able to remove the
regulator.
Photo B
STEP 2: Remove window regulator from
door.
STEP 2a: The window regulator will be
fixed to the door using bolts or rivets. The
regulator will usually be attached to the
window glass sashes with bolts. Before
removing any bolts or rivets, be sure to have
method to secure glass from dropping.
STEP 2b: Remove bolts or rivets. Rivets can
be removed by drilling the center of each
out or by knocking the heads off with a
chisel and pushing the rivet out (Photo D). It
may be necessary to maneuver the glass up
or down to gain access to the bolts that hold
the regulator to the glass. If the glass cannot
be moved, it may be necessary to unbolt the
regulator from the door first. Make sure that
the glass is properly supported.
Photo C
STEP 2c: Disconnect plug from motor and
remove regulator from door.
Photo D
Disclaimer:
Even though every attempt is made to ensure this information is complete and accurate, it is impossible to account for all possible circumstances or situations. Please consult with a qualified auto technician
before attempting to perform any work you are not qualified to do. Automobiles can be hazardous to work on; be sure to take all necessary safety precautions. Failure to do so may result in property damage
or personal injury. Certain motor vehicle standards and performance requirements may apply to your motor vehicle (such as Federal Motor Vehicle Safety Standards by the National Highway Traffic Safety
Administration). Be sure that your work is performed in accordance with such standards and that you do not disable any motor vehicle safety feature.
©2011 Dorman Products, Inc.
No reproductions in whole or in part without prior written approval.
2
INSTALL/REMOVAL INSTRUCTIONS: WINDOW REGULATOR
ATTENTION: Refer to the appropriate shop manual for your vehicle to obtain specific service procedures for this part. If you do not have
a service manual or lack the skill to install this part, it is recommended that you seek the services of a qualified technician. Pay special
attention to all cautions and warnings included in the shop manual. Read and follow all instructions carefully.
Prior to Installing New Window
Regulator:
STEP 1: Make sure that glass sashes are in
good condition and are properly affixed to
the window glass.
STEP 1a: It may be necessary to replace
the sashes if they are damaged or old glue
buildup is excessive (Photo E). If re-gluing
is necessary, make sure to use appropriate
adhesive.
Photo E
STEP 2: Check window run channels for
bends or weather-stripping that is in poor
condition. Replace as necessary.
STEP 3: Lube rubber run channels with spray
silicone lubricant.
STEP 4: Make sure door drain holes are clear
so that moisture does not buildup in door.
If Original Motor is Being Reused:
Removing/Installing Motor From/To Regulator:
Cable Style Regulator:
STEP 1: Remove screws, boils or rivets and detach motor from spool.
STEP 2: Check motor for obvious signs of wear.
STEP 3: Replace if necessary with new motor.
STEP 4: Reattach motor to regulator.
Disclaimer:
Even though every attempt is made to ensure this information is complete and accurate, it is impossible to account for all possible circumstances or situations. Please consult with a qualified auto technician
before attempting to perform any work you are not qualified to do. Automobiles can be hazardous to work on; be sure to take all necessary safety precautions. Failure to do so may result in property damage
or personal injury. Certain motor vehicle standards and performance requirements may apply to your motor vehicle (such as Federal Motor Vehicle Safety Standards by the National Highway Traffic Safety
Administration). Be sure that your work is performed in accordance with such standards and that you do not disable any motor vehicle safety feature.
©2011 Dorman Products, Inc.
No reproductions in whole or in part without prior written approval.
3
INSTALL/REMOVAL INSTRUCTIONS: WINDOW REGULATOR
ATTENTION: Refer to the appropriate shop manual for your vehicle to obtain specific service procedures for this part. If you do not have
a service manual or lack the skill to install this part, it is recommended that you seek the services of a qualified technician. Pay special
attention to all cautions and warnings included in the shop manual. Read and follow all instructions carefully.
Sector Gear/Scissor Style Regulator:
NOTE: This regulator style typically contains
a highly tensioned spring that can become
a dangerous projectile if not removed with
care. The sector gear must be secured prior
to removing the motor.
STEP 1: Secure gear plate to mounting
bracket by drilling a hole through the center
of the gear and gear plate and installing a
bolt and nut to hold them together (Photo
F)
Photo F
STEP 2: Remove screws, bolts or rivets and
detach motor from bracket and gear.
STEP 3: Check motor for obvious signs of
wear.
STEP 4: Reattach motor to regulator.
Window Regulator Installation:
STEP 1: Set regulator into door and attach with proper hardware.
STEP 2: Maneuver glass and regulator together to match up mounting points.
STEP 3: Attach glass to regulator.
STEP 4: Plug in switch temporarily and run window up and down to ensure that it moves
freely.
STEP 5: Replace plastic water barrier sheeting.
STEP 6: Check trim panel retainers for brittleness and replace as necessary.
STEP 7: Replace trim panel, switch and anything else removed.
Disclaimer:
Even though every attempt is made to ensure this information is complete and accurate, it is impossible to account for all possible circumstances or situations. Please consult with a qualified auto technician
before attempting to perform any work you are not qualified to do. Automobiles can be hazardous to work on; be sure to take all necessary safety precautions. Failure to do so may result in property damage
or personal injury. Certain motor vehicle standards and performance requirements may apply to your motor vehicle (such as Federal Motor Vehicle Safety Standards by the National Highway Traffic Safety
Administration). Be sure that your work is performed in accordance with such standards and that you do not disable any motor vehicle safety feature.
©2011 Dorman Products, Inc.
No reproductions in whole or in part without prior written approval.
4