1
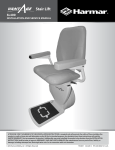
IL500 SIERRA INCLINED PLATFORM LIFT
Installation and Service Manual
WARNING! STRICT ADHERENCE TO THESE INSTALLATION INSTRUCTIONS IS REQUIRED and will promote the safety of those
installing this product, as well as those who will ultimately use the lift for its intended purpose. Any deviation from these
instructions will void the LIMITED WARRANTY that accompanies the product. Additionally, any party installing the product who
deviates from the INSTALLATION INSTRUCTIONS shall be taken to agree to indemnify, save and hold harmless the manufacturer
from any and all loss, liability or damage, including attorneys fees, that might arise out of or in connection with such deviation.
Table of Contents
This manual provides clear instructions for proper installation of Sierra Inclined Platform Lifts. Please refer to
the Owner’s Manual for operating instructions. Be sure to give the Owner’s Manual to the owner of the lift before
it is put into service. Any alterations to the equipment without written authorization by the manufacturer may void
the warranty. Harmar lifts are designed to install with as little assembly by the installer as possible. If you have
questions, concerns or comments, please contact Harmar’s Technical Service Department at 1-866-378-6848 or
[email protected].
‘
CONTENTS:
I. Lift Specifications.......... ....................................................................2
II. Preliminary Checks...........................................................................3
A. Headroom...... ..................................................................3
B. Tools required...................................................................3
C. Included parts...................................................................3
III. Installation Procedures...............................................................4-9
IV. Remote Call/Send Controls.........................................................10
V. Completion Procedures.................................................................11
2
IL500 Sierra Inclined Platform Lift |
| www.Harmar.com | 866-351-2776
Table of Contents
Preliminary
Checks
I. PRELIMINARY CHECKS
A. HEADROOM
Before beginning installation, ensure that there is an 85-inch
vertical clearance for installation of the lift.
85”
B. TOOLS REQUIRED
Basic tools to have on hand during installation:
Cordless drill
Phillips screwdriver (#3)
6-10” driver extension
Level (3’ and 4’)
SAE socket set
Allen wrench (5/64”, 5/32”, 3/16”, 5/16”)
Nut driver (3/8” and 5/16”)
T30 Torx bit (included)
Hack saw or chop saw
Tape Measure
C. INCLUDED PARTS
Before beginning installation, inspect and check the box contents. Report any damage to your dealer. Parts are
packed on a long skid. Skid will contain the following:
Chassis Box:
•
Chassis
•
Call/send parts
•
2 Call/send hand controls
•
Battery charger
•
Manual hand crank
•
Installation manual
•
Owner’s manual
Rail Bracket Box:
•
Rail brackets (2, 3, 4, or 6 per set)
•
Wood screws (#14 X 2” (4 per rail bracket)
Upper Guide Rail
Platform
Unit Box
Rail Box:
• Bottom rail pre-installed with:
• Bottom end plate
• Charge strip wire harness
• Bottom limit cam
• Joint pins and joint brackets (two-piece rail only)
• Plastic gear rack
• Top rail pre-installed with:
• Charge strip wire harness
•
•
•
IL500 Sierra Inclined Platform Lift |
Rail accessories (plastic bag):
• Top end plate
• Compression bolts (3 sizes)
Self-cutting screws (1/4”-20 X 1”
• Torx T30 driver bit
Rail parts (plastic bag):
• Extra plastic racks (2 or 3)
• Top limit cam
| www.Harmar.com | 866-351-2776
3
Table of Contents
Installation
Procedures
II. INSTALLATION PROCEDURES
Step 1: Position rail mounting legs on steps. The number of legs and spacing will
be determined by the overall length and number of pieces of rail. If your lift was
ordered with the rail pre-cut to length, a drawing for your specific installation
will detail the leg locations.
Step 2: Set the lower section of rail into the mounting legs. The clamps fit into
a small channel on the bottom of the rail. Do not fully tighten the clamps at this
time.
Step 3: If your lift has multiple rail sections, splice them together using the
supplied splice bars and screws. The alignment pins will come pre-installed in
one of the rail sections. Before sliding rail sections together be sure to plug
together the charge wires running inside the rail. After tightening the splice bar
screws slide down the sections of gear rack so there are no gaps.
Step 4: Position the rail and mounting legs on the stairs until you obtain the
desired dimension from the nose of the steps to the underside of the rail.
This dimension is noted on your specific installation drawing. The bottom
end of the rail should be no more than ½” off the floor; a short leg secures
the bottom. After ensuring the rail is in the proper location, anchor the legs
with the four #14 wood lags provided with each leg.
The top end of the rail will typically stop short of the top landing and never
needs to extend beyond.
4
IL500 Sierra Inclined Platform Lift |
| www.Harmar.com | 866-351-2776
Installation
Table of
Procedures
Contents
Step 5: To mark the location for the upper guide rail, measure from the leg
base plate up the wall 36.25” (as indicated by the red vertical line). Be sure to
measure in the center of the leg and use a 3 or 4’ level to help ensure that the
measurement is plumb vertically.
36.25”
Step 6: Repeat this measurement at one more leg at a minimum. Then
mark a straight line between these measurements. If needed, a chalk line
can be filled with talcum powder so there is no risk of discoloring the wall
with standard chalk or pencil line. This line is where the upper guide rail
mounting brackets will be anchored.
Step 7: The upper guide rail brackets do not need to be directly above the
track mounting legs. They need to be lagged into a wall stud and spaced
out evenly. Put one as close to each end of the rail as possible. The guide
rail will be longer than needed to allow placing the joint splice directly on
one of the mounting brackets. The joint will have one alignment pin and a
splice bar. The bracket attachment bolt will tighten into the splice bar and
the remaining three set screws are tightened into the splice bar.
Step 8: Secure the remaining guide rail mounting brackets to the rail
with the threaded bars inside the rail channel. The bottom end of
the guide rail should extend at least as far as the bottom end of the
rail. The upper end may be extended farther so the guide rail can be
used as a handrail for people traversing the stairs on foot.
IL500 Sierra Inclined Platform Lift |
| www.Harmar.com | 866-351-2776
5
Table of Contents
Installation
Procedures
Step 9: Slide the chassis onto the top of the rail until it
engages the gear rack. Turn the main power breaker on;
the lift will emit a long beep. Run the lift down near the
bottom of the rail using the install switch (black rocker) on
top of the chassis. When you have the lift in the location
you want it turn off the main power breaker.
Step 10: Install the platform mount onto the chassis by aligning
the two large holes on the end of the slots with the two large
Allen headed cap bolts protruding from the side of the chassis.
For the bottom slot, use the one on the downhill side of the
mount. Ensure that the bolt heads are fully seated in the top of
the slots, level the mount and tighten securely. Tighten the two
more cap bolts on the back side of the chassis as well.
Step 11: Install the Upper Guide Roller on the back side of
the platform mount. Align the two wheels with the guide rail
and secure with a washered bolt through the vertical slot in
the platform mount. Plug in the three wire harnesses from the
platform mount to the top of the chassis. All three plugs are
different so they cannot be plugged into the wrong connector.
6
IL500 Sierra Inclined Platform Lift |
| www.Harmar.com | 866-351-2776
Table of
Contents
Installation
Procedures
Step 12: Mount the platform onto the lift using the shoulder bolts
and nuts. Plug in the safety pan wire harness from the platform to the
two pin plug on the bottom of the platform mount.
Step 13: Fold the platform up and attach the ends of the assist struts
using the clevis and cotter pins.
Step 14: The back side of the platform has two leveling bolts. Loosen the
jam nut on each and turn the bolts in or out to position the platform.
When empty, the edge furthest away from the chassis should be slightly
(1/2” – 3/4”) higher to compensate for the deflection when fully loaded
with a passenger and chair.
Step 15: The ramp control board has two sets of terminals for the ramp
motors, UP and DOWN. The UP terminals are for the uphill ramp and
the DOWN terminals are for the downhill ramp. Depending on the hand
of your lift, it may be necessary to switch the ramp motor wires on these
terminals.
IL500 Sierra Inclined Platform Lift |
| www.Harmar.com | 866-351-2776
7
Installation Procedures
Step 16: Plug the harness on the shroud into the harness at the
top of the platform mount. Route the two ramp cables through the
two slots on either side of the shroud then secure the shroud with
the four screws on the sides.
Step 17: Attach the ends of the ramp cables to each ramp by
inserting the shoulder bolts through the loop on the end of the cable.
Step 18: Insert the upper limit cam into the slot in the rail at the top
and tighten the set screw, this will need to be adjusted later to stop the
lift in the proper location. Insert the rest of the gear rack into the top
of the rail. The gear rack should be even with the end of the rail and
the last piece may need to be cut off. Install the end plate using the
four Torx head screws and Torx driver (provided).
Step 19: Install the rack compression screw into the end plate to pre-load the
gear rack. Install the Hand Rail end plates into each end of the Hand Rail.
8
IL500 Sierra Inclined Platform Lift |
| www.Harmar.com | 866-351-2776
Table of
Contents
Installation
Procedures
Step 20: The top and bottom of the rail each have a short wire and
plug coming from the rail end. Plug the charger into one of these
plugs and plug the other end of the charger into a wall outlet. You
may use whichever end is a more convenient location to a wall outlet.
Step 21: Turn on the main power breaker on the chassis. The status LED indicator will cycle from RED to AMBER
to GREEN to OFF, and then the lift will emit a beep. The indicator should then return to GREEN, indicating the lift
is now ready to run.
If the indicator does not return to GREEN, check the following:
AMBER: Indicates an obstruction is triggered. There are five obstruction sensors; uphill chassis, downhill
chassis, uphill ramp, downhill ramp, and platform safety pan. Check all of these to ensure that one of
these is not triggered and check all these wiring connections.
RED: Indicates a fault or double obstruction. If two or more obstruction sensors are triggered at the same
time the lift will disable itself. Turn the main power breaker off, wait a couple of seconds and then turn the
breaker back on. If the lift is on the final limit it is also treated as a fault and the lift will have to be hand
cranked off the limit. To do this, run the lift up to the top landing until the lifts stops. When the lift comes
to a stop, the ramp motor will turn on to lower the ramp. If you let go of the rocker switch the ramp will
stop; continue holding the rocker until the ramp stops on its own. It may be necessary to slide the upper
limit cam down to get the lift to stop at the proper place in relation to the landing.
IL500 Sierra Inclined Platform Lift |
| www.Harmar.com | 866-351-2776
9
Remote Call/Send Control Operation
IV. REMOTE CALL/SEND CONTROL OPERATION
A. REMOTE CONTROL OPERATION
STEP 1: Press and hold the appropriate directional button on the front of the hand control.
The LED indicator light turns green when a signal is being sent.
The platform will operate with or without a rider. All safety sensors are designed to continue
operating in their normal mode. The LED light indicator will also display the appropriate color.
STEP 2: If the platform lift fails to respond, the batteries may be discharged and need to be replaced. Remove the
back cover of the control and replace with commonly available AAA batteries, ensuring that the polarity is correct.
B. REMOTE CONTROL RE-PROGRAMMING
All call/send controls are factory programmed. Re-programming is not normally necessary during installation.
In the event that the remote call/send control needs to be re-programmed, it is essential to program BOTH
controls in one programming cycle. Do so by completing the following:
1.
2.
3.
4.
5.
6.
7.
8.
9.
10.
11.
10
Start with the red “ON/OFF” switch in the “OFF” position (0).
Disconnect the 6-pin and 8-pin wire harnesses from the chassis.
Press and hold the install switch (located on the top of the chassis) in either direction.
Turn the red “ON/OFF” switch to the “ON” position (I), and then release the install switch.
The lift will begin to beep rapidly (this means the first remote control is ready to program).
Press and release the “UP” or “DOWN” button of the first remote control (the first remote control is now
programmed).
Press and release the “UP” or “DOWN” button of the second remote control (the second remote control is
now programmed).
Upon completion, two beeps will indicate that both remote controls have been programmed.
Turn the “ON/OFF” switch to the “OFF” position (0).
Connect the 6-pin and 8-pin wire harnesses to the chassis and then turn the red “ON/OFF”
switch to the “ON” position (I).
Test each remote control in both the up and down directions.
IL500 Sierra Inclined Platform Lift |
| www.Harmar.com | 866-351-2776
Completion Procedures
V. COMPLETION PROCEDURES
A. TEST CONTROL SWITCH
STEP 1: Ensure that the unit travels correctly by operating the control switch while standing in front of the unit.
STEP 2: Depress the switch in the upstairs direction to move up. The lift will beep. Wait three (3) seconds and begin
to smoothly accelerate upwards. The lift will continue to move upwards as long as the switch is depressed.
STEP 3: Release the switch and the lift will come to an immediate stop.
STEP 4: Depress the switch in the downstairs direction to move down. The lift will beep, wait three (3) seconds and
begin to smoothly accelerate downwards.
STEP 5: Release the switch and the lift will come to an immediate stop.
STEP 6: Run the lift all the way up and down the rail to ensure there is at least a 1/2” clearance from the wall and any
obstructions.
CAUTION! Do not ride on the lift until the install is complete.
B. TIGHTEN BRACKETS
STEP 1: Install and fully tighten the rail bracket mounting screws (four (4) screws per bracket). For hardwood stairs,
drill a pilot hole first. For plywood or particle board stairs, take care to prevent stripping.
C. SET UPPER AND LOWER TRAVEL LIMITS
STEP 1: Test the lower travel limit by operating the lift downward, keeping the switch depressed. The lift should begin
to decelerate about 3” from its final resting position and stop clear of the floor.
STEP 2: The final stopped position can be adjusted to accommodate the height of the ramp to the floor by
repositioning the limit cam located in a slot in the rail.
STEP 3: Use a 5/64” Allen wrench to loosen the set screw in the limit cam. Adjust the limit cam up or down and
retighten the set screws. Repeat the above steps until the lift stops in the desired position.
YOUR LIFT IS NOW READY TO OPERATE.
IL500 Sierra Inclined Platform Lift |
| www.Harmar.com | 866-351-2776
11
IL500 Sierra Inclined Platform Lift |
| www.Harmar.com | 866-351-2776