1
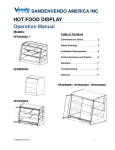
SANDENVENDO AMERICA INC
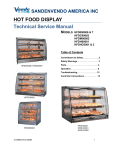
MINI HOT FOOD DISPLAY
Technical Service Manual
MODEL
HFDM00001
Table of Contents
Commitment to Safety…….….…..….…2
Safety Warnings…….……..……............3
Parts..…….…………………………….....4
Operation……………………..……….....5
Troubleshooting……………..…….…...8
Schematic…………………..…..….……9
1189085b ECN 52161
1
SANDENVENDO AMERICA INC
A COMMITMENT TO SAFETY
The SandenVendo is committed to safety in every aspect of our product design.
SandenVendo is committed to alerting every user to the possible dangers involved in
improper handling or maintenance of our equipment. The servicing of any electrical or
mechanical device involves potential hazards, both to those servicing the equipment
and to users of the equipment. These hazards can arise because of improper
maintenance techniques. The purpose of this manual is to alert everyone servicing
SandenVendo equipment of potentially hazardous areas, and to provide basic safety
guidelines for proper maintenance.
This manual contains various warnings that should be carefully read to minimize the risk
of personal injury to service personnel. This manual also contains service information
to insure that proper methods are followed to avoid damaging the Hot Food Display
(HFD) or making it unsafe. It is also important to understand these warnings are not
exhaustive. SandenVendo could not possibly know, evaluate, or advise of all of the
conceivable ways in which service might be done, nor can SandenVendo predict all of
the possible hazardous results. The safety precautions outlined in this manual provide
the basis for an effective safety program. Use these precautions, along with the service
manual, when installing or servicing the HFD.
We strongly recommend a similar commitment to safety by every servicing organization.
Only properly trained personnel should have access to the interior of the machine. This
will minimize the potential hazards that are inherent in electrical and mechanical
devices. SandenVendo has no control over the machine once it leaves the premises. It
is the owner or lessor’s responsibility to maintain the Hot Food Display in a safe
condition. Follow all Safety Rules and Safety Warnings in this manual. If you have any
questions, please contact the Technical Services Department of SandenVendo at
800-344-7216.
SAFETY RULES
•
•
•
•
•
•
•
•
Read the Safety Warnings before installation or service.
Test for proper grounding before installing to reduce the risk of electrical shock and
fire.
Turn off power switch and disconnect power cord from wall outlet before servicing.
Use only fully-trained service technicians for Power-On servicing.
Use adequate equipment when moving the HFD.
Use only authorized replacement parts.
Be aware of inherent dangers in rocking or tipping the HFD.
Always turn power off before plugging or unplugging HFD to wall outlet.
1189085b ECN 52161
2
SANDENVENDO AMERICA INC
SAFETY WARNINGS
The HFD is for indoor use only. Do not use near water or in condensing humidity.
To prevent electric shock or fire, do not kink, pull, or pinch the power cord, and insure no
equipment is resting on the power cord. If the power cord is damaged, unplug and replace.
Do not connect with other plugs. Do not use an extension cord.
When unplugging, first turn off the power switch. Then pull the plug at the end of the power
cord, not by pulling the power cord, since the cord can be damaged, overheat, and cause a fire.
Do not spray water on the HFD. It may cause an electric shock or fire.
Do not touch the power plug, switches, or other electrical parts with wet hands. It can cause an
electric shock.
Periodically check that the plug is pushed in all the way.
To prevent injuries due to falling objects, liquid spills, electric shock or fire, do not place heavy
objects or liquid-filled objects on top of the HFD.
To prevent electric shock or fire, do not use volatile or flammable products in or near the HFD.
When moving the HFD: turn the HFD off, unplug, and allow the unit to cool. To prevent glass
breakage and injury, do not push on the glass. Also, use proper equipment and lifting
techniques. Insure the product doesn’t tip while it is being moved.
If a lamp or any glass cracks or breaks, turn off the power and discard all food in the HFD.
Replace lamp and / or glass. Remove all glass fragments. Carefully inspect all surfaces,
corners, and gaskets to insure all glass fragments have been removed before returning HFD to
service.
Keep HFD out of direct sunlight and away from heat sources.
Do not hang from the door – this may cause injury or electric shock.
Turn off and unplug HFD before servicing, and let HFD cool before cleaning or servicing.
Use proper tools while servicing.
Use only authorized replacement parts.
The HFD temperatures are factory set to meet NSF food safety requirements. Changing
temperature settings may adversely impact food safety.
The lamps are an integral part of the food heating system. If a lamp is not illuminated, the
temperatures may not be maintained for food safety.
1189085b ECN 52161
3
SANDENVENDO AMERICA INC
PARTS
1178854 Lamp Guard
1178877 Lamp
1159513 Lamp Socket
1166955 Side Glass (no decal)
1165355 Left Decal
1180393 Shelf
Assembly
1177198
Front Door
1180812 Fan
(not shown)
1182055 Middle
& Upper Shelf
Rack, Black
1178798 Shelf Guard
1154538 Caution
Hot Label
1178038 Vertical Rear
Gasket (not shown)
1158685
Side Gasket
1178052 Horizontal
Rear Gasket
1182066 Bottom
Rack, Black
1165366 Right Decal
1177435 Front
Gasket (not shown)
1177836 Bottom
Shelf Assembly
1153225-31 Controller
1153213 Controller Membrane Pad
1189085b ECN 52161
On back of unit (not shown):
1161921 Breaker, 15A
1162225 Power Cord
Other item not shown:
1178117 Heater
4
SANDENVENDO AMERICA INC
OPERATION
Display and Keypad
Timers
Timers
LED Display
Time Button
Lower Left Shelf Heater
Temperature Adjustment and Timers
Middle and Upper Shelf Heater
Temperature Adjustment and Timers
Power Button
SD card slot
Lower Right Shelf Heater
Temperature Adjustment and Timers
Timer Setting and Operation
Note: to help prevent keypad damage, push keypad buttons only with finger or thumb; do not
use fingernail, utensil, tool, pen, or other object.
Normal Operation
Pressing the power button turns the HFD on or off. When controller is off, all lamps, heaters,
displays and indicators are off.
Timers
When a timer is off, pressing the timer button once sets the countdown timer to the value
preprogrammed into the controller.
Pressing the timer button again within three seconds activates the timer adjustment mode and
sets the timer to one hour.
Each successive press (within three seconds) adds one hour to the time, up to four hours.
At four hours, the next button press cycles the timer back to one hour again.
Once the timer is activated, the LED next to the shelf timer button becomes green.
The display then reverts to HFD internal ambient temperature display.
While a timer is on, pressing a timer button once displays the remaining time for 4 seconds,
then shelf temperature for 4 seconds, and then the display reverts to the internal ambient
temperature display.
At 14 minutes remaining time, the LED blinks yellow.
When no time remains, the LED blinks red, plus a brief audible alarm sounds.
Pressing the timer button next to the blinking red LED clears the alarm and restarts the timer.
Holding down the Time button, then pressing a timer key, turns off the timer.
1189085b ECN 52161
5
SANDENVENDO AMERICA INC
Converting Temperature from °F to °C (or °C to °F)
1. Controller must be off.
2. While holding down the TIME button, press the On/Off button. Software revision will be
displayed.
3. Press and release the TIME button.
4. Wait 5 seconds.
5. Press any timer key once to change from °F to °C (or °C to °F).
6. Press the On/Off button to turn the unit on.
7. Verify the display indicates the desired temperature units (°F or °C).
Heater Temperature Adjustment
With controller power off, hold down the Time button, then press & release the Power button.
The left timer button for a shelf decreases the temperature setpoint.
The right timer button for a shelf increases the temperature setpoint.
To exit heater temperature adjustment mode, press the power button.
Buttons labeled as timers allow a temperature to be set, but have no effect on Mini HFD
temperatures.
E30
E67
E60
E63
E66
E90
Error Codes
Inside ambient thermistor error (open circuit)
Lower left shelf thermistor error (open circuit)
Upper shelf thermistor error (open circuit)
Middle shelf thermistor error (open circuit)
Lower right shelf thermistor error (open circuit)
Unable to read SD card
Clear error codes by pressing any key (except for E90 error).
Clearing an error code turns that shelf's heater off.
Clear the E90 error by pressing the power button, then press again to turn HFD on again.
Loading the SD Card Program in the HFD controller
With the HFD on:
1. Insert the SD card in the controller’s SD card slot until it clicks in place
2. The HFD display with show dashes while the program is loading
3. Loading will take up to 30 seconds
4. Once loaded, the display will revert to internal ambient temperature
5. Press (don’t pull) the card to remove it from the slot
SD Card Programming
The SD card must be formatted in FAT32, preferably by Windows XP instead of Vista. It must
contain a single file, and the file name does not matter. 512MB or 1GB cards only. The
contents must be ASCII text as follows, in exactly the format shown:
1189085b ECN 52161
6
SANDENVENDO AMERICA INC
Temperature and Timer Programming Format
SV01
(must be SV01)
087A
(this is the date code: month 08 year 7 product b,L,d A
UL:000,2:00,1:00
(Upper Left shelf, set to 0ºF, left timer value, right timer value)
ML:000,2:00,2:00
LL:220,1:00,2:00
UR:235,2:00,1:00
MR:235,2:00,2:00
LR:220,1:00,2:00
There can be no spaces or blank lines. A line is terminated with a CR LF (carriage return,
linefeed). The controller will read the file and parse the information. It expects to see this
format and order of the file. The only variables that are allowed to change are the filename,
menu code, the temperature and timer values, and the comment at the end of the file. The
controller shall be shipped from the factory with the default values above.
Temperatures must be 3 digits, timer hour value one digit, and timer minute value two digits.
Any heater circuit(s) and associated timers may be disabled by entering the following in the
programming file (example): UL:x
Controller Connectors
Modular three-prong receptacle: 115 VAC power.
(Left and right below are viewed from the front or controller side of the Mini HFD.)
J1 connector: Heater and light power
J1 – 1 Lower Right Shelf Heater
J1 – 2 Lower Right Shelf Heater
J1 – 3 Middle Right Shelf Heater
J1 – 4 Middle Right Shelf Heater
J1 – 5 Upper Right Shelf Heater
J1 – 6 Upper Right Shelf Heater
J1 – 7 Lower Left Shelf Heater
J1 – 8 Lower Left Shelf Heater
J1 – 9 Not used
J1 –10 Not used
J1 –11 Not used
J1 –12 Not used
J1 –13 Lights and fans
J1 –14 Lights and fans
1189085b ECN 52161
J2 connector: Sensor signals
J2 – 1 Jumpered to J2-2
J2 – 2 Jumpered to J2-1
J2 – 3 Inside Case Ambient Thermistor
J2 – 4 Inside Case Ambient Thermistor
J2 – 5 Lower Right Shelf Thermistor
J2 – 6 Lower Right Shelf Thermistor
J2 – 7 Middle Right Shelf Thermistor
J2 – 8 Middle Right Shelf Thermistor
J2 – 9 Upper Right Shelf Thermistor
J2 –10 Upper Right Shelf Thermistor
J2 –11 Lower Left Shelf Thermistor
J2 –12 Lower Left Shelf Thermistor
J2 –13 Jumpered to J2-14
J2 –14 Jumpered to J2-13
J2 –15 Jumpered to J2-16
J2 –16 Jumpered to J2-15
7
SANDENVENDO AMERICA INC
TROUBLESHOOTING
Power cord unplugged
No power at outlet
HFD circuit breaker off
Unit does not turn on
Power cord wire
disconnected
One or more Xenon
lamps off
HFD internal ambient
does not reach +150°F
Heater plate not heating
1189085b ECN 52161
Plug HFD cord in outlet
Check power output at outlet
(115VAC)
Remove lower stainless steel
panel and check breaker.
Check resistance across plug,
ensure the breaker is on,
measure resistance across plug
terminal, line and neutral (160
ohms +/- 2)
Check at terminal for resistance of
44 ohms +/-2.
Bulb blown
Check to ensure bulb is securely
installed.
Replace blown bulb(s).
HFD needs approx. 40 minutes to
reach temperature at default
One or more heater
setting.
plates not reaching
Check plate temperature at
temperature
controller (see controller
operation).
Check at terminal for resistance of
44 ohms +/-2.
One or more Xenon
Check to ensure bulb is securely
lamp not functioning
installed.
Replace blown bulb(s).
Fuse blown on
Remove controller and check
controller
fuses.
Remove controller and check all
Wires disconnected
connections at controller.
Check all terminal connections.
Check resistance on terminals
from heater plates. Resistance
Failed heating element
should be approximately 94
ohms.
8
SANDENVENDO AMERICA INC
SCHEMATIC
Left / Right as viewed from the front
side or controller side of the Mini HFD
1181245
1189085b ECN 52161
9